|
|
 Rank: Super-Elite        Groups: Registered
Joined: 30/01/2013 Posts: 4,604 Points: 13,607 Location: Monmouthshire UK
|
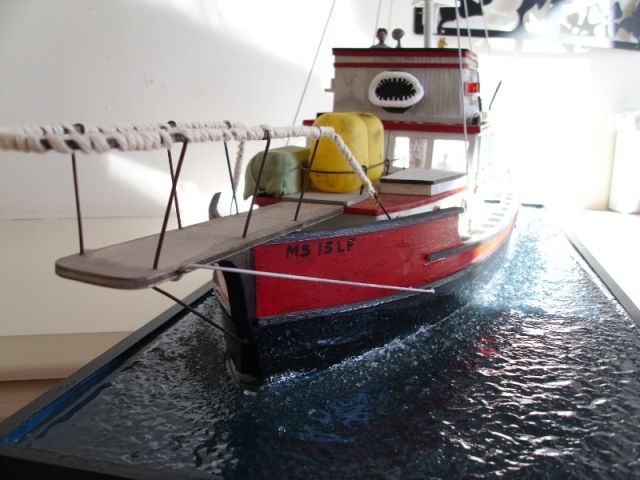
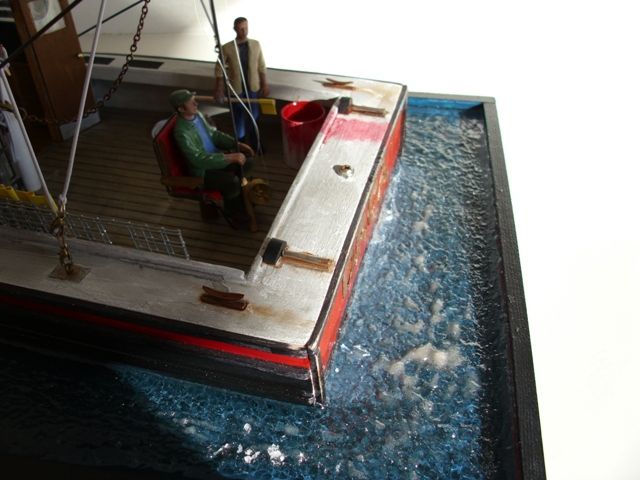
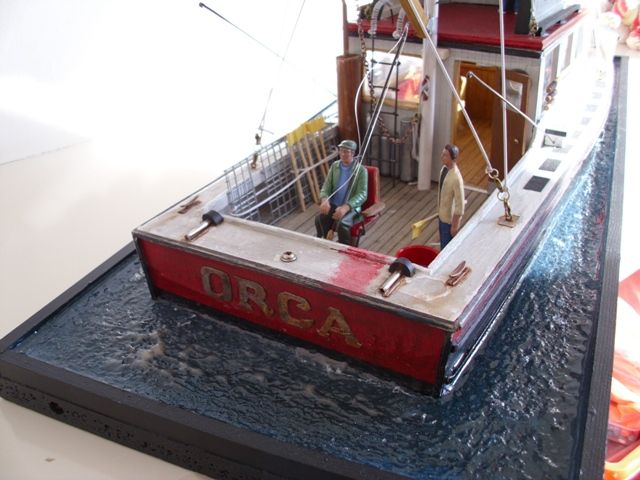
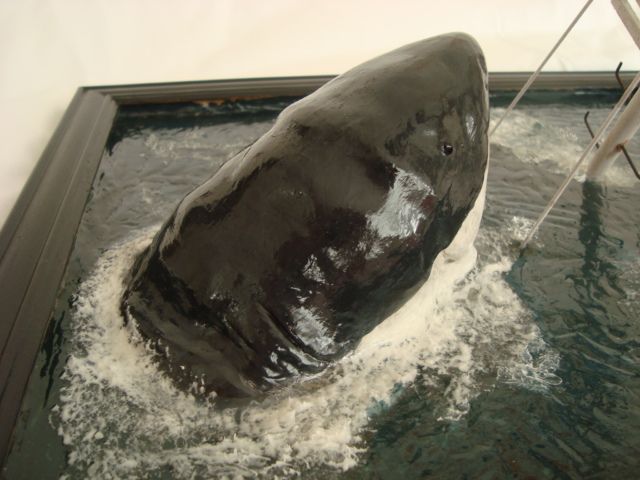
This is a tutorial for creating realistic water effects on a model ship diorama. The pictures below show two slightly different effects of water that can be achieved.

Firstly, you will need -
Your model (prepared for the diorama)
A baseboard (or picture frame)
Framing wood (balsa, wooden strip etc)
Paint
Polymer Resin + Catalyst
Disposable clean mixing containers
Silicone sealer (White)
Model Preparation
The first step is to get the model ready for display. The best models to use are waterline model kits but if you are planning to use a full hull model then you will need to reduce the hull down to just below the normal waterline. Cutting the hull down is always best done during a new kit build, if you are converting an existing model then more care needs to be taken.
Full hull models can be used without modification if the hull is fairly flat bottomed - basically you don't want the "water" too deep as this will become expensive with regard to the amount of resin required to fill the base to the model's waterline.
Making the baseboard
The baseboard needs to be thick enough to avoid warping after the resin is added (9mm plywood or 1/2 inch chipboard are fine) and big enough to hold your model but also with plenty of extra space to show off you water effects, there's no point in having great looking water if hardly any is visible!
When you have decided on the best size you need to frame this board to keep the resin in - I normally use 1/2 square balsa strips or framing wood. You will need a wall height of around 10mm or more as you want to see some depth in the resin for the full effect.
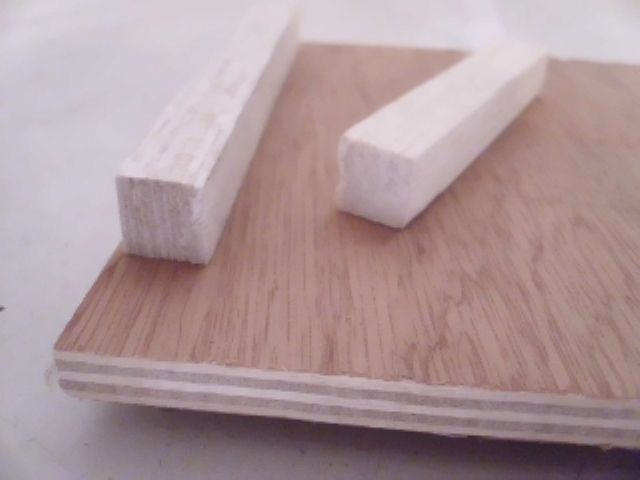
Once framed all round you will need to seal the frame and baseboard with sanding sealer or pva glue, just paint all over and let dry.
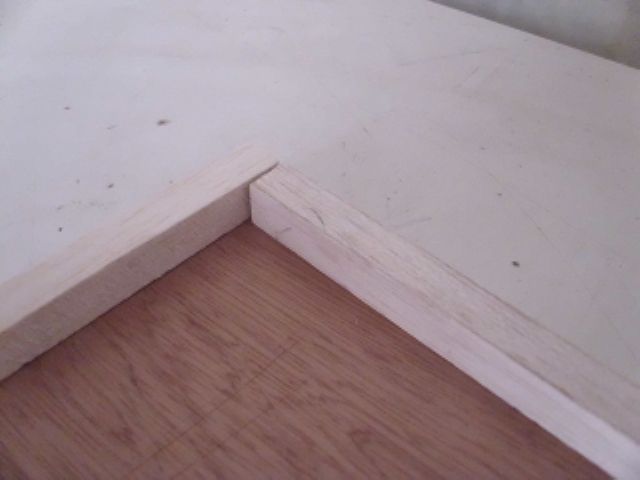
You can also use a picture frame with plywood backing for this as used in the "Jaws" diorama above.
Painting
Paint all the base and inside the frame walls with the colour of your required water. Ocean water can vary greatly so its best to mix a variety of paint colour to get the shade you need - Most ocean colours can be achieved with a mix of four paints - blue, green, grey and black. I used very cheap "tester" pots of emulsion.
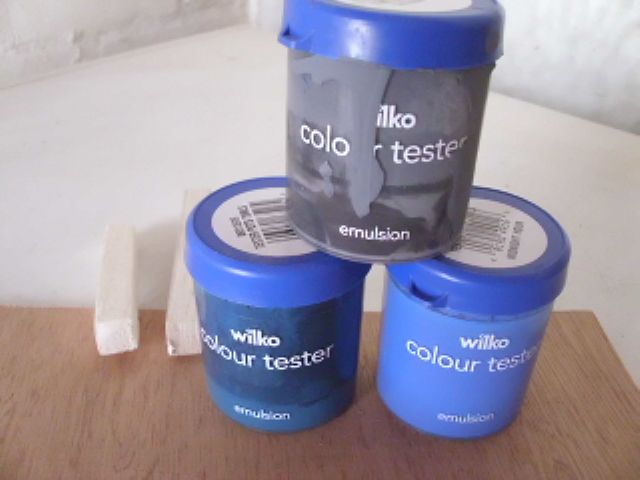
The Jaws shark scene is mostly light grey with some black and blue added, the Orca boat scene is mostly blue with green and grey. You will find the right mix to suit the environment of the model used.
Don't forget - when painted on it will look well.....just like paint and not like water but don't worry, this is only used for the base colour, the effects come with the resin.
Preparing & Mixing the resin
Firstly, your work area must be dust free and well ventilated, follow all safety guidelines on the manufacturers label.
The resin used is called "Polymer Casting Resin" it is available in sizes of 500ml, 1L, 2L & 5L and will cost around £10.00 per litre, and a litre may well be enough
for you project.
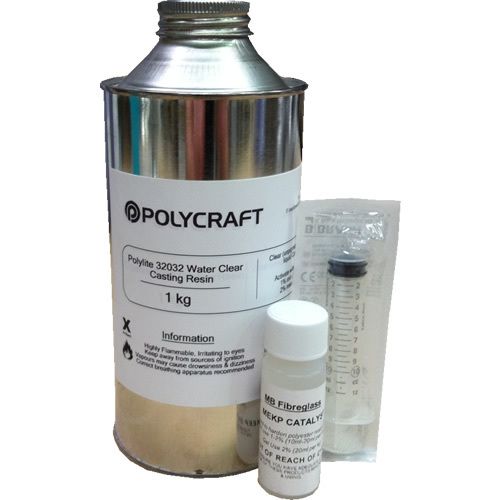
You need to make sure you have the water clear type used for making jewellery, scientific sample preserving etc. It comes with a catalyst to cure it and a syringe for measurement.
You must follow the mixing ratio of whatever directions came with your resin, normally 1-2% of catalyst is used, never use more catalyst than the directions say to use in an effort to increase setting time, this will cause the resin to set too quickly, increasing heat (exothermic reaction) and will cause almost instantaneous cracking and dis-colouration. If you only use the amount/ratio recommended then there will be no problems.
You next need to know the amount of resin needed for your project. This can be done in a couple of ways -
You can work out the amount in litres with a simple volumetric calculation depth x width x length in cm divided by 1000- example: 1cm height x 30cm width x 30cm length = 900 divided by 1000 equals 0.9 litres. Don't forget that your model will also have a volume and displace a certain amount of resin but this is not important as it just means you will have too much resin rather than too little.
Another way to do it is to fix your model in place and then add water to the base and around the model from a measured amount in a jug, when you have filled the base you will see by the remaining amount how much liquid your base needs. Be careful to ensure the entire base and model is dry before proceeding.
Pouring the resin
Mix half the amount required and pour into the base - leave to set without any disturbance, this will take from 20 minutes to two hours depending on conditions. The resin is not added all at once as too much heat can be created, so best added in shallow layers of around 5mm per layer.
Mix the remaining resin required and pour on top - if your calculations were correct this should fill the base to the top with some leftover.
Creating the effect
This is the fun part, you need to wait until the resin starts to set, you can tilt the board from side to side and you will see the consistency as it thickens. When the resin is thicker you can push it around with an off cut of wood to stop the surface drying flat (unless you want a flat surface) you can start this well before it starts to thicken and you will then get a feeling of how quickly it is curing, there will come a point where you will not be able to move the resin any longer and you will hopefully have the desired undulations on the surface. You will also need to decide on if your vessel is moving at speed and push resin up against the bow, and create ripples at the stern.
Adding foam can be done in a number of ways, you can paint any resin peaks white but this is difficult to get the right effect. White Silicone sealer is best, apply with a small stiff brush, dabbing all around the bow wave and brushing it on around the stern and wave crests etc (the shark model above shows this effect).
A third way to do it has to be done before the resin is cured and this is to vigorously stab the resin with a very stiff bristle brush to create a froth of resin, this will then dry a whitish colour as in the stern wash of the Orca model pictured above.
It really doesn't matter what you do to the resin while it is curing as the surface shape may not be exactly what you were after but you will be sure to like it anyway, Good luck!
|
|
|
 Rank: Pro Groups: Joined: 24/08/2009 Posts: 48,827 Points: -13,348
|
Superb tutorial Steve 
|
|
|
 Rank: Super-Elite        Groups: Registered, Forum Support Team, Administrators, Global Forum Support Team, Moderator, Official Builds Joined: 09/11/2012 Posts: 8,520 Points: 24,651 Location: East midlands
|
Hi Steve,        Great Know-How WTG Regards delboy271155 (Derek) COME BACK GUY FAWKES "YOUR COUNTRY NEEDS YOU"
|
|
|
 Rank: Super-Elite        Groups: Registered
Joined: 30/01/2013 Posts: 4,604 Points: 13,607 Location: Monmouthshire UK
|
Thankyou Tomick & Del, much appreciated  Steve
|
|
|
|
|
Fantastic, very helpful for many of us
Thanks for sharing
Jase“Whenever you find yourself on the side of the majority, it is time to pause and reflect.”
-Mark Twain
|
|
|
|
|
Brilliant Stevie, thanks for sharing.....   Regards Alan
|
|
|
|
Guest
|