|
|
 Rank: Pro    Groups: Registered
Joined: 23/03/2014 Posts: 185 Points: 545 Location: Essex
|
Hi all, having some time on my hands due to the fact that my Surprise is still awaiting the first installment and I'll probably need a few more installments before I can get started with it (the deck would be a mere minimum), I decided to have a look in my old shoebox and see what I had collected in the past. And there it was, a lovely and rare model of a Dutch light cruiser from WW II, the Hr.Ms. De Ruyter, which was laid down in 1933, commissioned in October 1936 and sunk in February 1942 during the first Battle of the Java Sea whilst being the flagship of the ABDA-fleet (ABDA stands for the countries that had contributed ships to the fleet, namely America, Britain, the Netherlands (Dutch) and Australia). About 90% of this fleet was sunk during this battle or in the immediate aftermath of the battle. The De Ruyter was a lightly built light cruiser of about 6500 long tons, whose size and weight was kept down during design to make it as cheap as possible. The ship carried 7 5.9" guns (3x2 + 1x1) with 10 40 mm Bofros anti-aircraft guns plus a number of machine guns as armament. She did not caryy any torpedo tubes to keep the weight down. She did, however, carry an excellent fire control system. But what reduced her effectiveness even further was the fact that the fleet had had little chance to train and work together before the battle started. The De Ruyter sank after being hit by a single Type 93 torpedo fired by the Japanese heavy cruiser Haguro and she sank three hours later with the loss of 345 men out of 435, the fleet admiral Karel Doorman included. The model I will be building is a 1:250 cardboard scale model with some additions to improve the overall look of her. The model is supplied (as most cardboard models) in book form, which contains 10 A4 sheet of cardboard with the parts printed on it and 4 A4 paper sheets with instructions and drawings. Below are some sample pictures of the starting point. 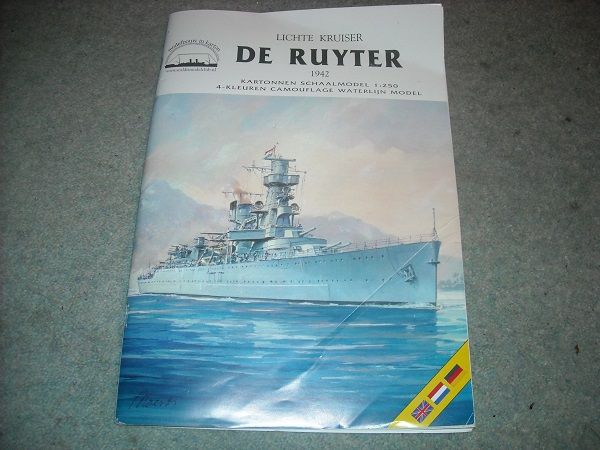 Book front Book front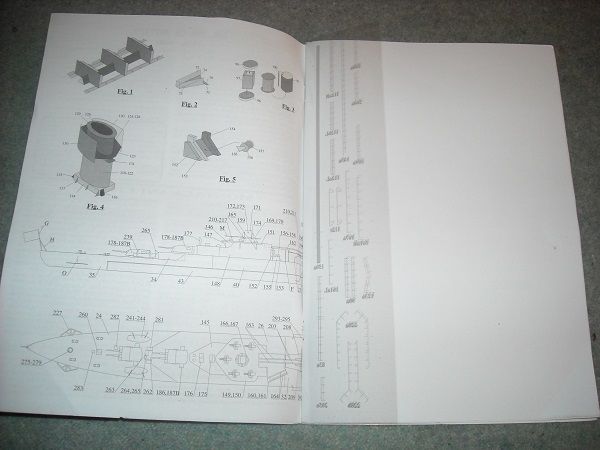 Assembly drawings and railing templates Assembly drawings and railing templates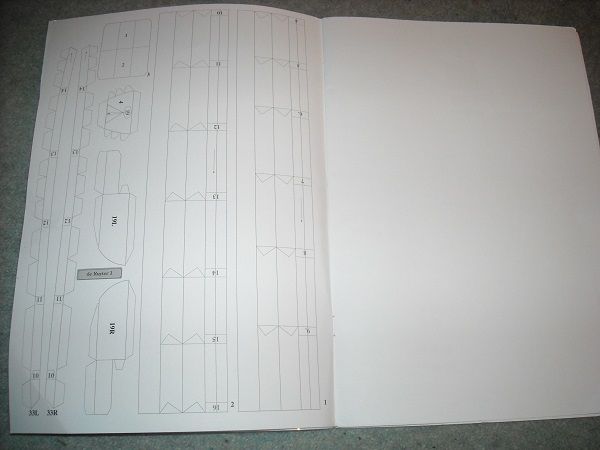 Hull formers Hull formers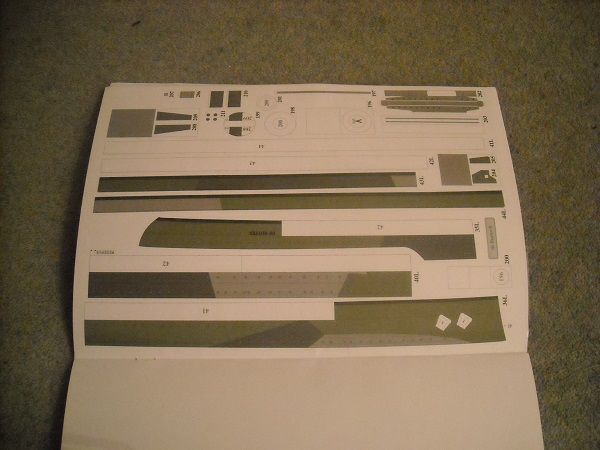 Hull Panels Hull Panels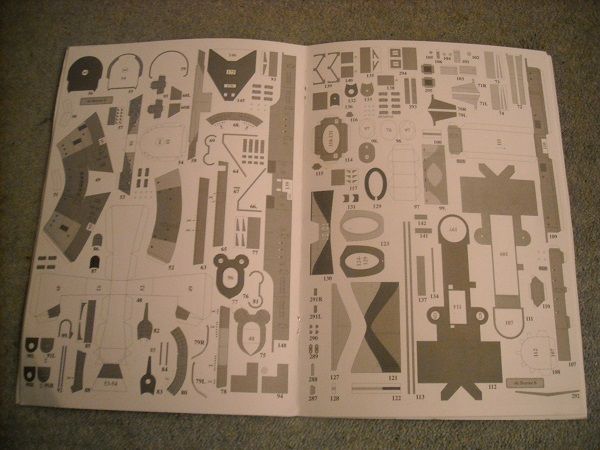 Superstructure parts Superstructure parts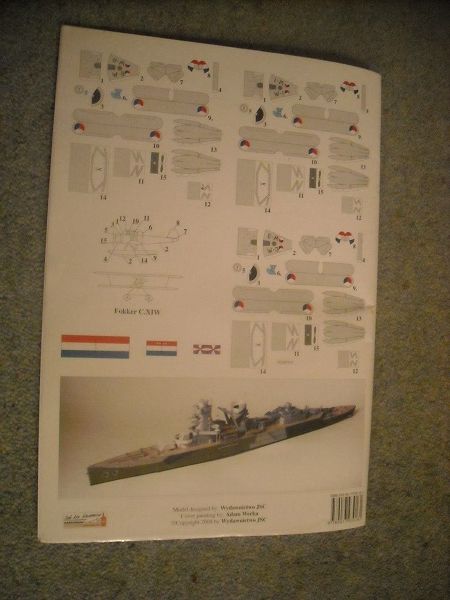 Book back with aircraft and flags Book back with aircraft and flagsI kept the pictures deliberately vague and incomplete to reduce the chance of illegal copying. During building the photo's will be of much better quality. (well, that is the intention  ). I will do a build report of her on here, as long as people understand that this is a secundary model and as soon as I can get cracking with the Surprise, that ship will take precedence. Hope y'all gonna like it. Adrie. 'Where to glue or where not to glue, that is the question'
Building: Hr. Ms. de Ruyter (card), Retourschip Batavia (Revell), HMS Surprise (De Agostini)
Built (and sunk): Too many to list
|
|
|
|
|
Hi Adrie, I will look forward to seeing any work you do on here as and when you get the chance.....  Regards Alan
|
|
|
|
|
Hi Adrie Card models are at times challenging good luck with her and keep the updates coming regards Andy Current builds:-C57,Zero, Lamborghini Countach, Caldercraft HMS Agamemnon,Robi,R2-D2, MFH Cobra .
|
|
|
Rank: Pro  Groups: Registered, Official Builds Joined: 10/02/2012 Posts: 475 Points: 1,237
|
You guys that build card models have my respect. There is no way I have the patience or delicate touch to do them! Tired, Old, and Cranky!
|
|
|
Rank: Pro Groups: Registered
Joined: 23/03/2014 Posts: 185 Points: 545 Location: Essex
|
Many thanks for looking in and dropping a line, Alan, Andy and Mark. It's going to be a fun build, I'm sure.  But, as with all modelling, it won't be too much of a hassle as long as you remember to take plenty of time and not rush it. Of course, there will be small bits which will be taxing, but as long as you score and bend the parts carefully, nothing is un-doable. Of course you do need the right tools, a sturdy modelling knife with plenty of spare blades (NOT the one shown in the picture, that one is to help me score the parts), tweezers, a sturdy ruler to assist with scoring and bending and a small awl as well as the right glues. I tend to use UHU for large sections, tacky PVA for the smaller sections and parts and CA glue for the metal bits. Anyway, time to get cracking again. I started with the hull formers and the 'backbone'. This model uses a triangular section to act as the back bone.   The triangular centre is built up from two parts and a connector. Once constructed and set aside to dry, 13 hull formers were cut out, scored and bent and slid over the backbone but not yet glued. This will be done later when the waterline formers have been added. 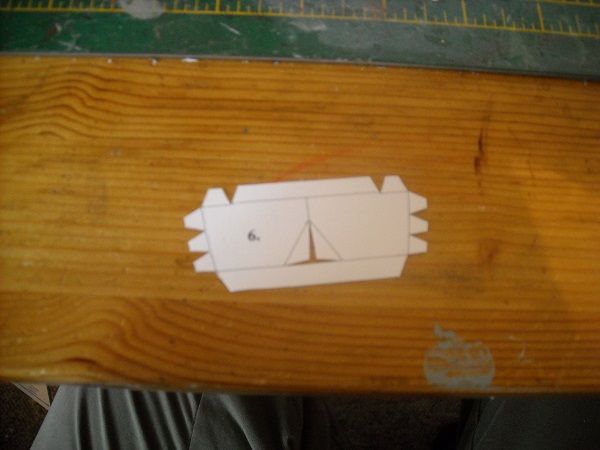 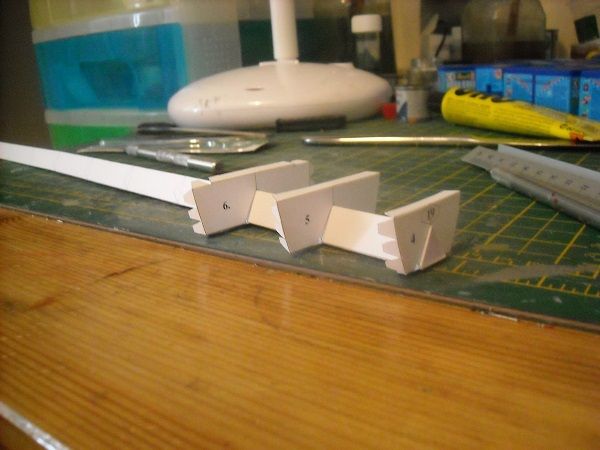 This was followed by cutting the bow formers, which were scored, bent and glued together. 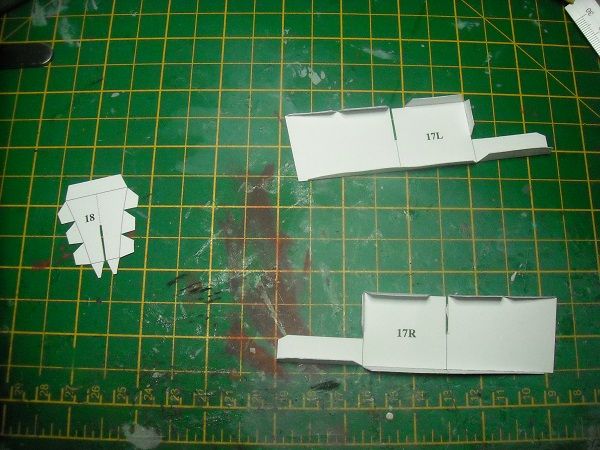 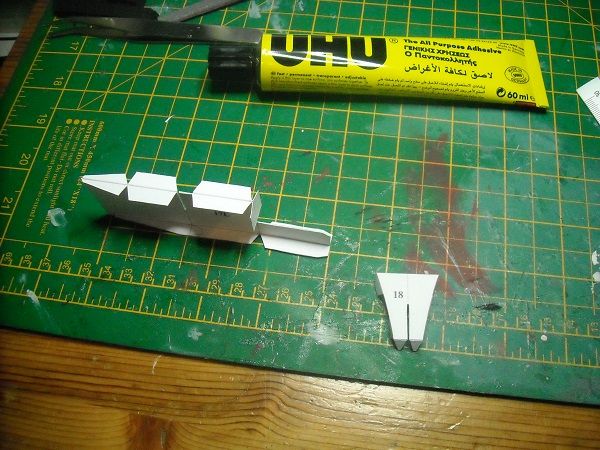 And that's where I got to so far. Next one up is the stern former section and the waterline formers. Which will mean more cutting, scoring and bending.  See you all till next time! Adrie P.S. Oh and Mark? What'ya mean, patience??? Consider the two hours it will take me to get the hull in place compared to the two to three months to plank a wooden hull? This is the easy way, m8!  'Where to glue or where not to glue, that is the question'
Building: Hr. Ms. de Ruyter (card), Retourschip Batavia (Revell), HMS Surprise (De Agostini)
Built (and sunk): Too many to list
|
|
|
|
|
Nice start you have made Current builds:-C57,Zero, Lamborghini Countach, Caldercraft HMS Agamemnon,Robi,R2-D2, MFH Cobra .
|
|
|
Rank: Pro Groups: Registered
Joined: 23/03/2014 Posts: 185 Points: 545 Location: Essex
|
Thanks for your kind words, Andy. And having done my chores, I was allowed another couple of hours of building. So here goes ..... I continued with the stern formers, which were cut out, scored, bent and glued together. 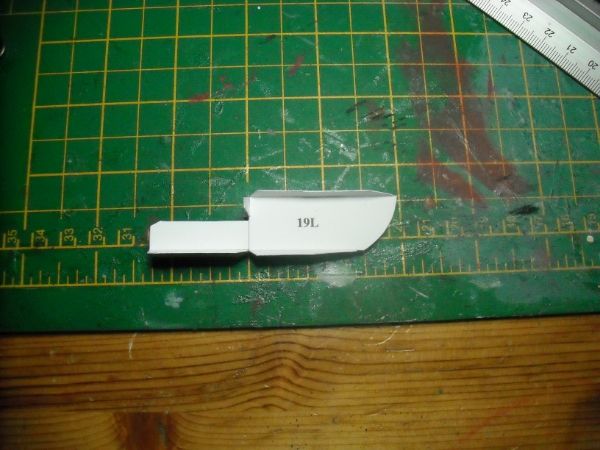 I put that aside and started on the waterline formers, cutting them out then scoring and bending them. 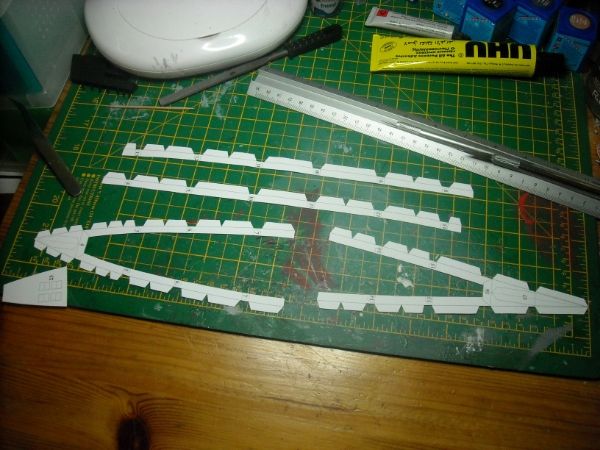  Then with the four tabs the formers were glued together. The Bow former section was then placed on the front of the waterline former and checked that the tabs fell withing the tabs of the waterline former. A little extra cutting was needed to make it fit snugly, after which the bow former was glued into its place and pressed down to make good contact. The triangular backbone was slid over the bow former backtab and glued in place.  This was followed by sliding the backtab of the stern former into the back end of the triangular backbone and glueing it in place after which the stern former was glued down on the waterline former. 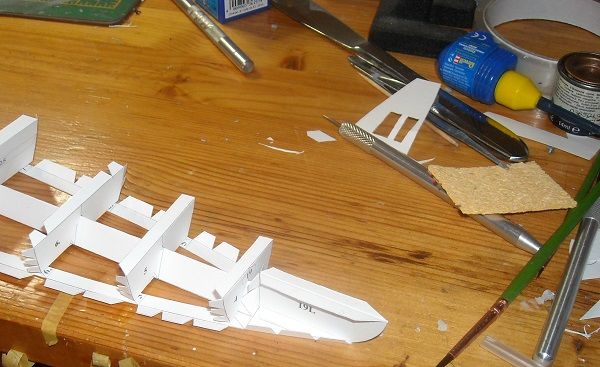 All the hull formers are still unglued. Once the above former set has dried under weight to keep it flat, they will be glued as well. But that will be tomorrow. That is, if "'Ur 'oo shall be oobeyed at all times" allows it. Wish me luck....  Adrie. 'Where to glue or where not to glue, that is the question'
Building: Hr. Ms. de Ruyter (card), Retourschip Batavia (Revell), HMS Surprise (De Agostini)
Built (and sunk): Too many to list
|
|
|
|
|
Nice start Adrie, never thought of building using card but have to say you have perked my interest..... Will be following..... Regards Alan
|
|
|
 Rank: Super-Elite     Groups: Registered
Joined: 30/01/2013 Posts: 4,604 Points: 13,607 Location: Monmouthshire UK
|
Very nice Adrie, never even considered a card model but may have a go one day. Steve
|
|
|
Rank: Pro Groups: Joined: 24/08/2009 Posts: 48,827 Points: -13,348
|
Good start Fingers, and congrat's on your first medal
|
|
|
Rank: Pro Groups: Registered
Joined: 23/03/2014 Posts: 185 Points: 545 Location: Essex
|
I'm honoured, Mr. T. Just wish I knew what it was for. . But I promise I won't let it go to my head! Alan, Steve, I must admit that the choice for this build was partly because I hoped I could introduce others to this type of modelling. So, PLEASE, stay with me and I hope it will stay interesting enough for you all. There are so many different cardboard models to chose from that there is definitely a model that suits your wishes. There are even a load of free models that you can download for a bit of a taster. But I will not digress any longer for fear of overselling it.  So let's get cracking again. It's time to glue the hull formers to the waterline formers which is done by placing a drop of UHU glue onto the marked positions and pushing the hull former down. 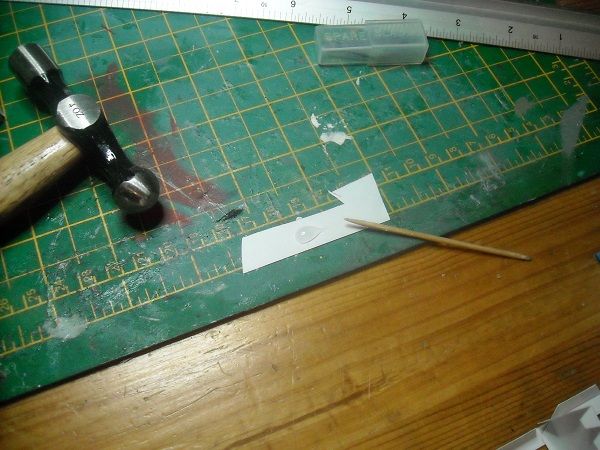 It is important to make sure that the bottom tab of the hull former lies in line with the tabs of the waterline fomers. Both will be used to glue the sides against so they should be flush to one another. Since I used a drop of UHU I have about a minute to get the position spot on because it will allow some movement during that time. Once the former is in the right position I use a tweezer to push the bottom tab of the hull former squarely down onto the waterline former. I started doing this with hull former 10, the one in the middle of the model because if there is a misallignment it is likely to be the worst in the middle. So middle former first, then take the next one to the front, the next one to the back, front, back, front, back etcetera untill all hull formers have been glued to to bottom. Leave it to dry for about ten minutes with weights on the triangular centre to keep it flat. 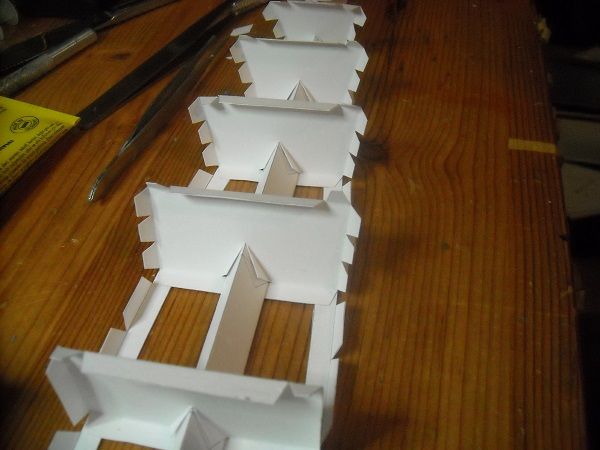 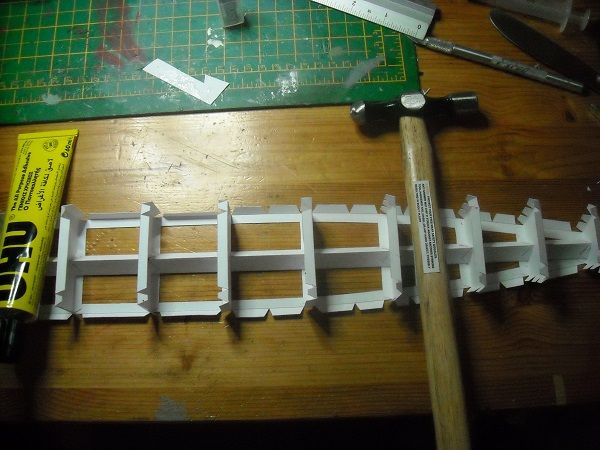 Note that the hull formers are still free from the triangular centre. You take it one step at a time and make sure that is all done correctly before moving on to the next step. I was pleased with the result, so I put another blob of UHU glue onto the card and transferred a drop to the small triangular tabs at the back of the hull formers. I started with No 10 again. With the glue in place I used two paint containers to ensure the former is upright. (One reason I am happy with the Revell acrylic paints is the square bottle it come in. Mind you its also my favourite brushing paint.) Anyway, with the former lined up correctly, I pressed down the two triangular tabs with my fingers, re-checked the position and a final pinch before going on to the next former. 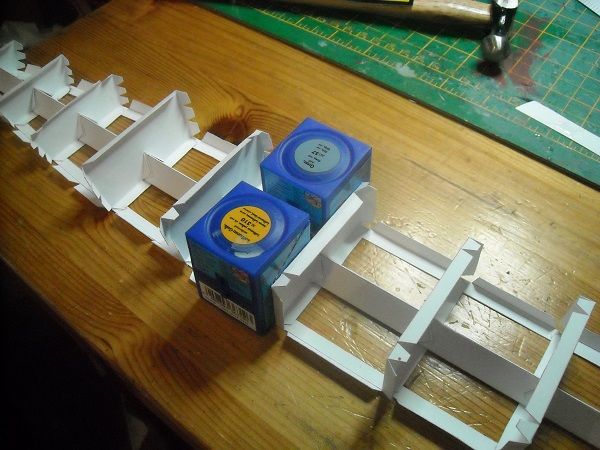 If there is insufficient space for a paint bottle, go for something else that is smaller and still square ...... like ..... 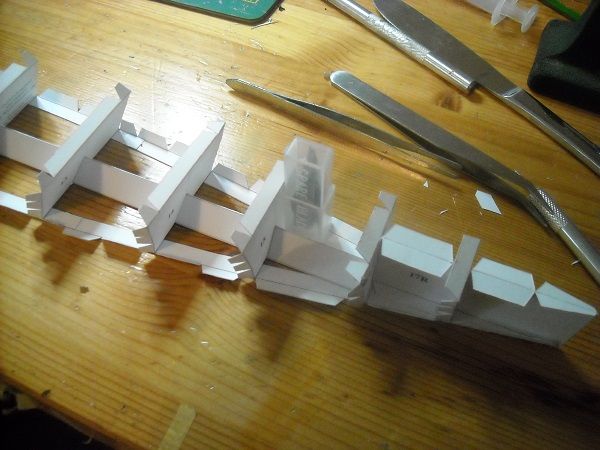 I've even used CD cases before, whatever is available. Once the hull formers were glued in place, I placed the 'weights' back on and left it alone for final drying. Note that although the formers are glued in place now, there is still quite a bit of give in the formers as can be seen in the next picture.  But if there is no bend in the material, it will spring back nicely. 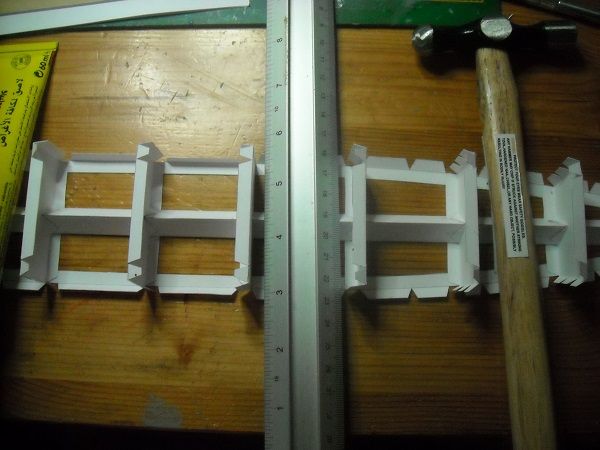 Try doing that with a wooden model!!!! But put an unwanted bend in there and it will cause a lot of grief so make sure that when handling parts to do it softly but resolute. Which incidentely is my take on married life! (I wish ). Anyway, next step is working the decks so it starts resembling an actual ship. More about that later! Adrie. 'Where to glue or where not to glue, that is the question'
Building: Hr. Ms. de Ruyter (card), Retourschip Batavia (Revell), HMS Surprise (De Agostini)
Built (and sunk): Too many to list
|
|
|
|
|
Coming along very nicely Adrie, finding your build very interesting..... Regards Alan
|
|
|
|
|
Looking good Current builds:-C57,Zero, Lamborghini Countach, Caldercraft HMS Agamemnon,Robi,R2-D2, MFH Cobra .
|
|
|
Rank: Pro Groups: Registered
Joined: 23/03/2014 Posts: 185 Points: 545 Location: Essex
|
I'm glad that you're still with me, Andy and Alan  and thanks for the kind comments . I can only hope that I can maintain the interesting-ness (is that a word? Probably not. ) of the build. But things are gonna change around here. It's now getting slightly more ..... uhhhhm ..... involved, for want of a better word. So let's get cracking and you can tell me if there is a better word for it. As I said last time, I'll be working on the decks now. 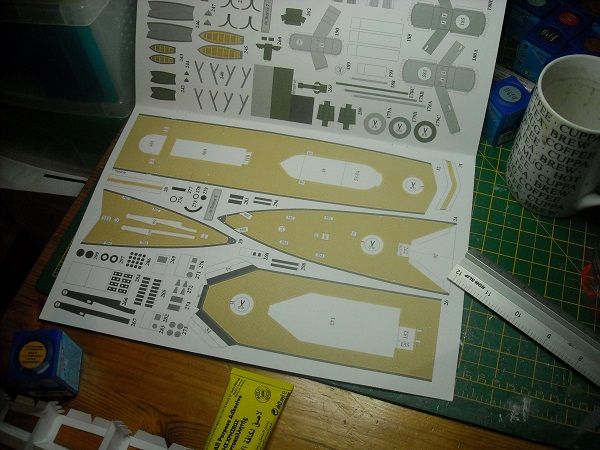 Please note the circles on the decks marked with a scissor symbol. I'll get back to them later. The problem is that the deck is on standard card so is as 'floppy' as the formers from yesterday. All the superstructure will be put on the deck and for it to look right you would want a slightly sturdier base. The best way to do that is to strengthen the card with another layer of card. In this case I opted for a 0.5 mm thick card of which I had some sheets lying around. I could have gone for a thicker board but the model was not designed with a strengthened deck so any increase in thickness will not be covered by the size of the sides. But an extra thickness of only 0.5 mm should not create too many problems with the sides not reaching the bottom of the model anymore. And I was going to put a blackened strip of paper around the bottom anyway to simulate the ship's waterline. Famous last words? Could be, but I don't think so. But only the future will tell. I'll get back to this later in the build. Anyway, a quick spray of display mount on the back of the cut out decks was enough to be able to glue it to the piece of strengthening cardboard. 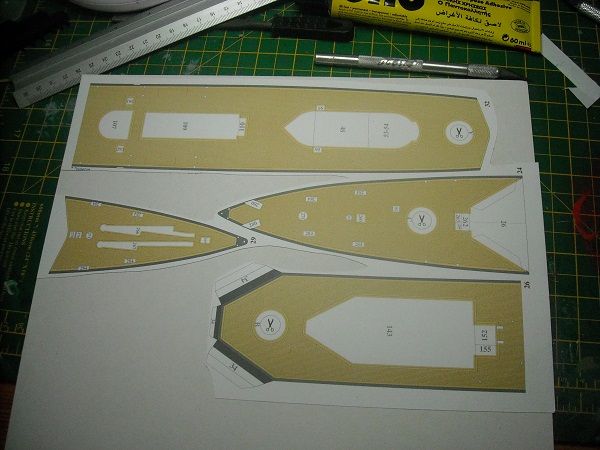 I then kept it under heavy books for the night to dry up straight and today I started to cut out the deck pieces. This I did in two steps. Because the card is now thicker, it will be more difficult to get a decent cut with a modelling knife. So its big (and yellow) brother was called out and used to cut out the pieces a minimum of 1 mm away from the edge. Thick knives are not that good at producing a straight and good looking cut but strangely enough the thinner modelling knife has little problem with cutting a rim of a couple of mm even in thicker card. So here's the result of the rough cuts.  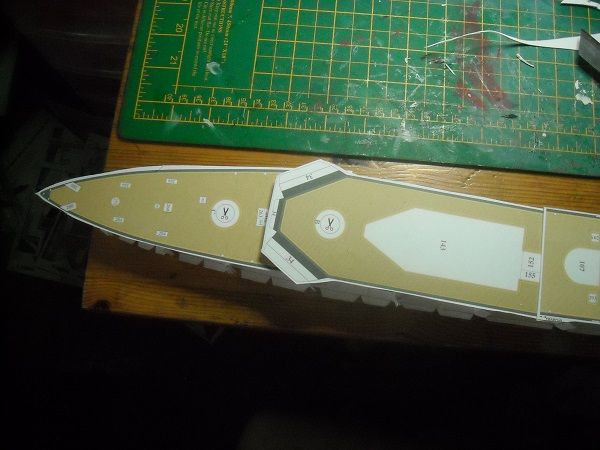 Not too shabby. Oh, and remember the scissor circles? Scissor symbols mean that that section needs to be cut out and you do that before you cut out the decks. But since I strengthened the deck I could do it later. I cut out the circle by using the small knife and stab the circle vertically around the circle diameter. 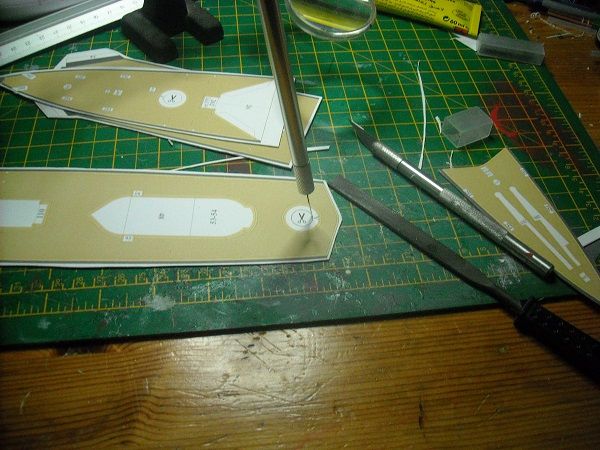 Once I had come full circle ( ) I turned round the deck piece and following the stab patterns at the back I did the stabbing again until the circle came out. 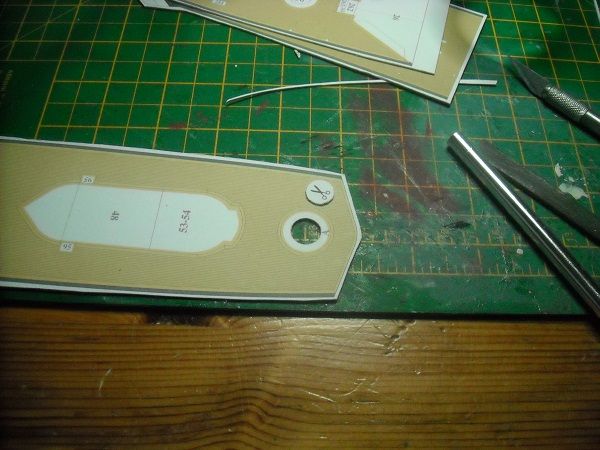 Easy, eh? Anyway, once the pieces were cut out rougly I then put in a new blade for the small knife and started cutting the edge VERY carefully using optically assisted eyes . 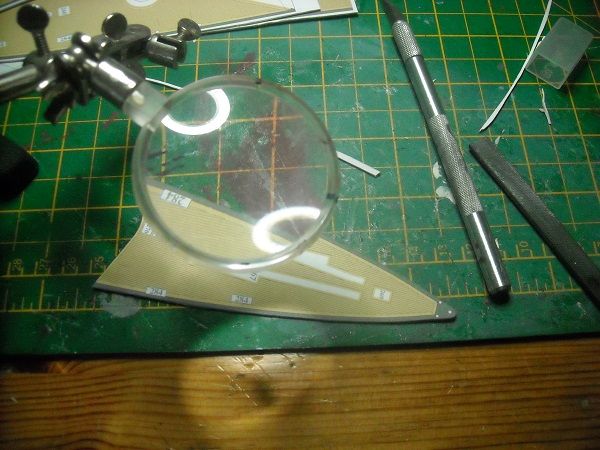 I then used a modelling file to smoothen the cut area and get rid of the ridge that cutting the board created at the bottom. 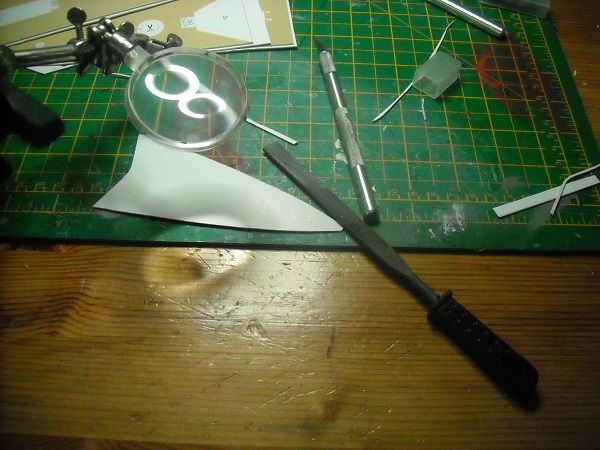 After all that there was one thing that needed to be done. Let's see if you can see what that is. 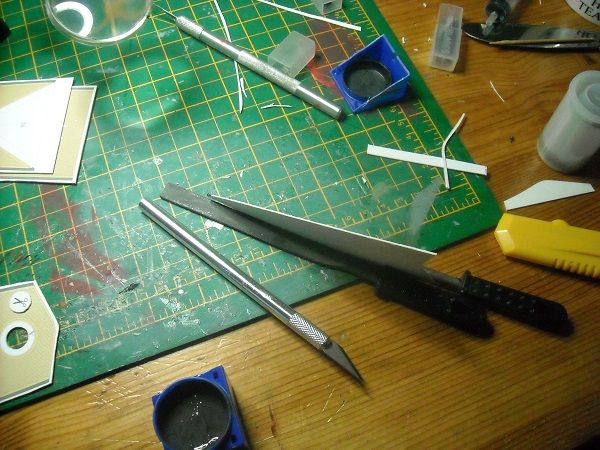 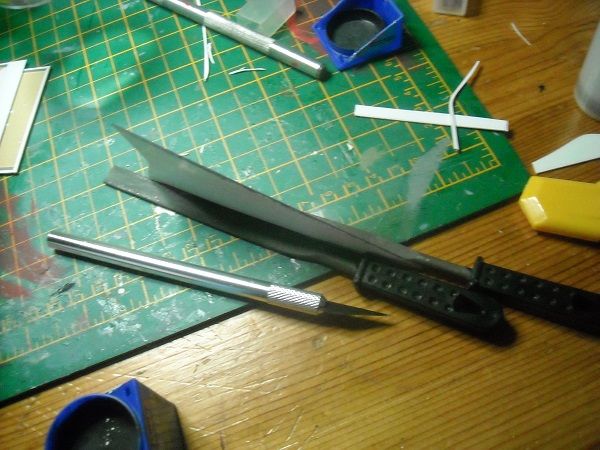 Can you spot the difference? (There is a big hint at the bottom of the picture). Anyway, that was the first of the deck parts finished off. Three more to do so until the next time! Adrie 'Where to glue or where not to glue, that is the question'
Building: Hr. Ms. de Ruyter (card), Retourschip Batavia (Revell), HMS Surprise (De Agostini)
Built (and sunk): Too many to list
|
|
|
|
|
Hi Adrie Nice work on the deck and have a peek at my L 48 card Zeppelin build here http://forum.model-space...aspx?g=posts&t=9276
If you havent already spotted it that is regards Andy Current builds:-C57,Zero, Lamborghini Countach, Caldercraft HMS Agamemnon,Robi,R2-D2, MFH Cobra .
|
|
|
 Rank: Master Groups: Registered
Joined: 15/04/2010 Posts: 1,266 Points: 3,841 Location: The Quantock Hills,Somerset
|
Just found this.You guys that build card models have my utmost respect,will be following with interest. Rob Nolli Illigitimi Carborundum!!!Current Builds: HMS Victory, SV Thermopylae
|
|
|
Rank: Pro Groups: Registered
Joined: 23/03/2014 Posts: 185 Points: 545 Location: Essex
|
Hey Andy!  Wow, wow and double wow! To be honest I did see the listing of a zeppelin but I thought it was a plastic model  so I didn't look at it any closer . Thanks for alerting me to this and well done!!!!! A great model! Adrie. 'Where to glue or where not to glue, that is the question'
Building: Hr. Ms. de Ruyter (card), Retourschip Batavia (Revell), HMS Surprise (De Agostini)
Built (and sunk): Too many to list
|
|
|
Rank: Pro Groups: Registered
Joined: 23/03/2014 Posts: 185 Points: 545 Location: Essex
|
Thanks, Rob. The more, the merrier!!! Welcome to the show and thanks for your comments. Adrie. 'Where to glue or where not to glue, that is the question'
Building: Hr. Ms. de Ruyter (card), Retourschip Batavia (Revell), HMS Surprise (De Agostini)
Built (and sunk): Too many to list
|
|
|
|
|
Looking great Adrie, she is certainly growing at a pace.... .. You still got my interest and am sure that will continue.... .. Keep the pics coming... Regards Alan
|
|
|
|
|
A lovely looking model coming together Adrie, there's something really 'clean' looking about a card kit, especially your early pics of the formers - not a speck of sawdust anywhere! I've never done a 'proper' cardie although many years ago I did a set of sci-fi models from a card book, I can remember a hovertank and some kind of articulated armoured land-train! I picked up a 99p card kit Dr Who Sontaran in town last week - he'll be fun to try (and very simple too!) Loving this diary, keep 'em coming! Robin First wooden ship: The Grimsby 12 Gun 'Frigate' by Constructo Second: Bounty DelPrado Part Works Third: HMS Victory DelPrado Part Works 1/100 scale Diorama of the Battle of the Brandywine from the American Revolutionary War Diorama of the Battle of New Falkland (unfinished sci-fi), Great War Centenary Diorama of the Messines Ridge Assault Index for the Victory diary is on page 1
|
|
|
|
Guest
|
 US
US

