|
|
 Rank: Pro    Groups: Registered
Joined: 23/03/2014 Posts: 185 Points: 545 Location: Essex
|
Good to know, Alan, and much appreciated.  Thanks, Robin, for the nice words. Just out of curiosity, where did you find the Sontaran card kit?? I might be interested, sounds like a fun build.  Anyway, let's get cracking again. Oh yeah, the spot the difference question. It is called edge-painting and is a required part of cardboard modelling. The intention is to get rid of the white edges on cardmodels to make them look better. In the build before it didn't matter because the parts were all white and won't be visible. But every coloured piece will have to be touched up. This can be done with paint or marker. It will be near impossible to get an exact match of the card colour but that doesn't matter as long as the colour used is near enough as it will only be shown on the card edge. Here I use a dark grey paint for the deck edges and an ochre paint for the edge of wood sections. If you look close enough you might spot the colour difference but then only because you know it is there! Others won't notice it. Anyway, it took quite a bit of time to get the edges painted and to make sure no paint got on top of the card which WOULD be visible. It was only after I finished the edge-painting that I suddenly started swearing when checking the deck parts. Remember that I chose to strengthen the deck pieces? Strengthened parts are a lot stiffer (which is the reason to add card to them, after all) BUT it makes bending them impossible. As soon as you try it the toplayer of the card (which has the colouring on it) WILL crack and look horrendous. And the back of deck piece 3 HAS sections that need to be bent! OOPS.  I had to think for a while until it struck me. I don't need to bend the sections if I cut those sections off and glue them to the deck at the correct angle. So.... 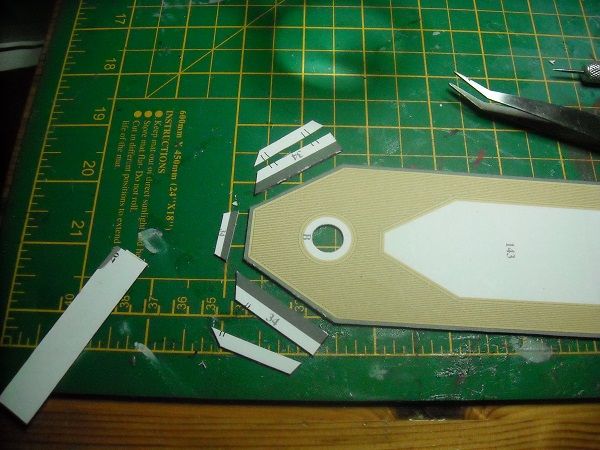 I know, the cutting edges look bad but we just learned how to edge-paint, right?  Now all we need is a way to make sure that the sides are glued at the correct angle. For that we use a piece of the 0.5 mm cardboard. 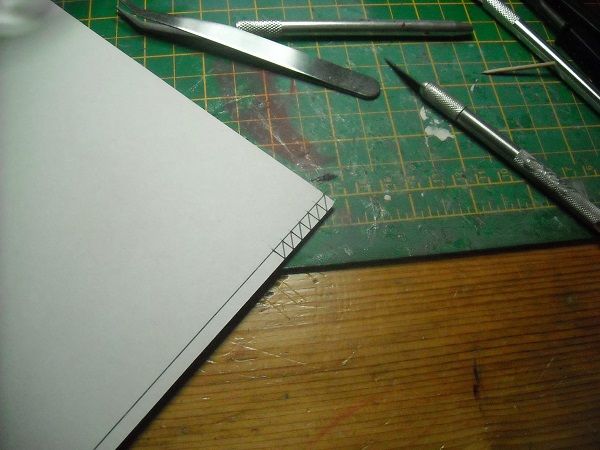 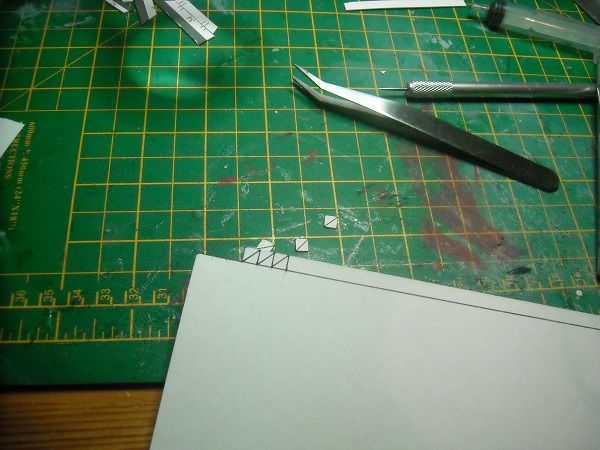 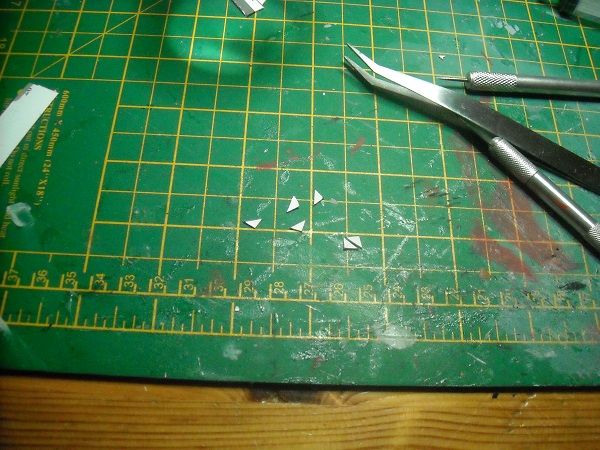 I used the triangles to get the correct angles. 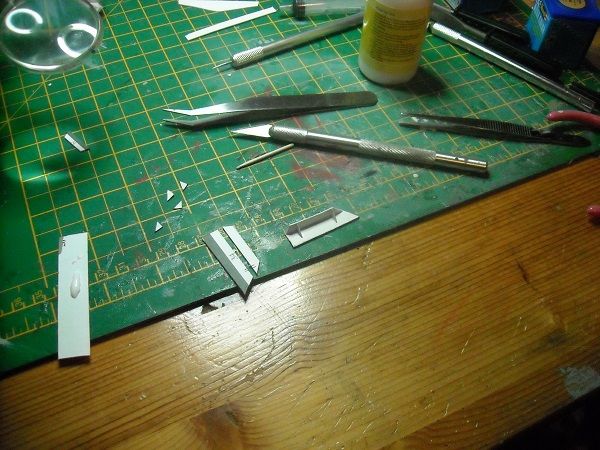 Once I did both sides I put them aside to be glued onto the deck because another problem showed itself. 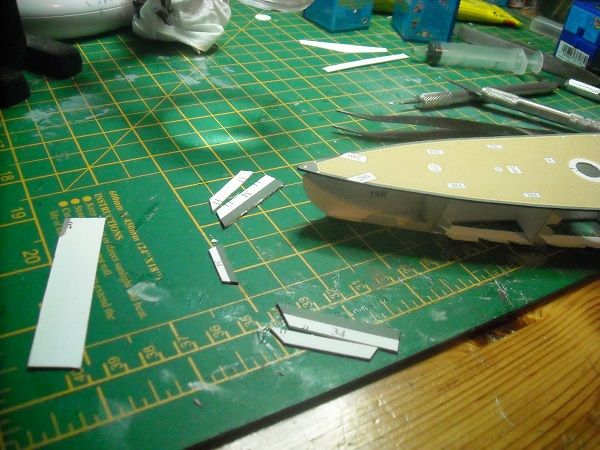 I noticed that when I put the aft deck onto the formers and butted it against the raised former (7), the end stuck out like a sore thumb, showing a overhang of 1 to 2 mm. That needs to be sorted before I continue. The question is, is there an overhang because the deck is too long or because former 7 is in the wrong place? Luckily there is a piece that needs to be placed between the aft formers and the aft deck. I'll check that out and see if I can find out whether I can get away with shortening the deck, which would be the easiest solution. So that is the homework for tomorrow. Until then the status sofar shown below. 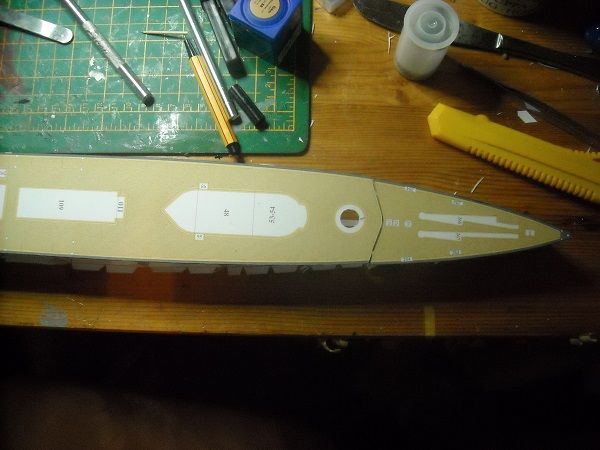 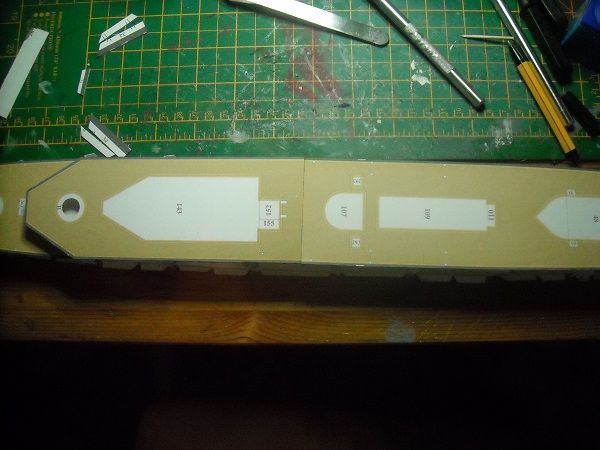 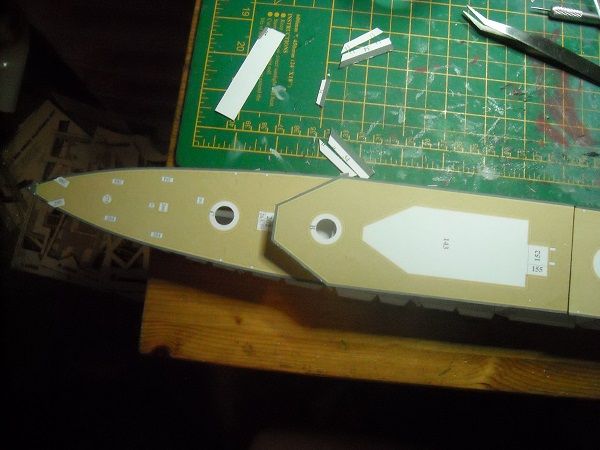 Did you spot the colour differences between the deck parts? I hope that after the decking and addition of the superstructure the difference will not be that visible because I would not known how to sort that one out (yet). Anayway, thanks for following and see you all the next time! Adrie 'Where to glue or where not to glue, that is the question'
Building: Hr. Ms. de Ruyter (card), Retourschip Batavia (Revell), HMS Surprise (De Agostini)
Built (and sunk): Too many to list
|
|
|
|
|
Hi Adrie, the more I see this and read your diary the more I am tempted to go on the hunt for something different...... Loving it.....  .. If I were to choose one right now I think I would probably see if I could get hold of the Bismark, 1/200 to go with my Hood which I have stored away for later.....  .. Will be watching closely and trying to pick up your tips..... Regards Alan
|
|
|
|
|
Hi Adrie. Coming along brilliantly! I might have to try one of these like Alan! The Sontaran 'model' was found in my local The Works shop. It's really very simple (age 5+) but I got one just to see what it's like. It's a simple silhouette with added bits to make the arms and legs semi 3D but it looks fun though! I'll try and do a quickie build for the sci-fi thread in a few days. There are 6 altogether; Sontaran, Weeping Angel, Ghost in spacesuit, Cyberman and two types of Silurians (collect all 6 it says!) Great work. Robin. First wooden ship: The Grimsby 12 Gun 'Frigate' by Constructo Second: Bounty DelPrado Part Works Third: HMS Victory DelPrado Part Works 1/100 scale Diorama of the Battle of the Brandywine from the American Revolutionary War Diorama of the Battle of New Falkland (unfinished sci-fi), Great War Centenary Diorama of the Messines Ridge Assault Index for the Victory diary is on page 1
|
|
|
Rank: Pro Groups: Registered
Joined: 23/03/2014 Posts: 185 Points: 545 Location: Essex
|
It's so nice to know that I am wetting people's appetites.  I know that GPM does a very decent Bismarck in 1:200 but getting it tends to be the problem. I believe that the model itself costs something like 20 quid if bought straight from the GPM website, but then you add about the same amount for P&P and hope that it doesn't get lost somewhere in between. Still a bargain though. But my advice would be: Look before you leap because it is going to be a big model with lots of micro-parts. I'll show you a bit later on what I mean with micro-parts. So far this build has just been a blast with nothing too taxing. But that will change. As will my camera but again, more about that later. Oh, and Robin? I am definitely going to have a prowl inside the Works. It just sounds like a great thing to have, even if it is 'simple'. And I remember picking up a wonderful train cardboard model from there a long time ago. Anyway, thanks guys, for sticking around. Let's see if we can do the previous sections justice. Now let's get cracking! As I said yesterday, there was a connecting piece that should tell me where the problem lies. 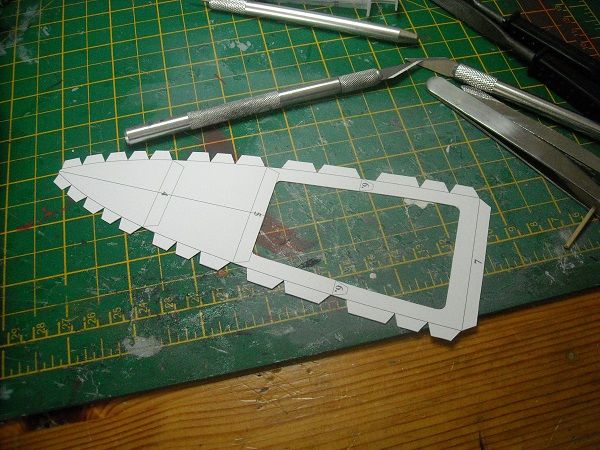 The back tab of that part is supposed to be flat against former 7 and the end to just reach the stern end. A quick comparison of the deck and the connecting piece already told me what I needed to know. 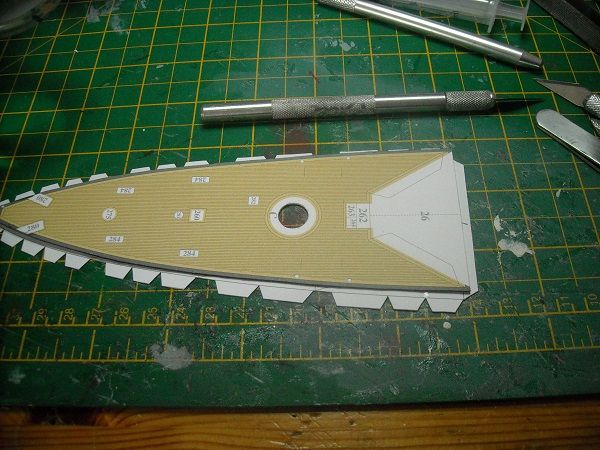 The deck is too long. That should keep things easy for the moment. I scorend and bent the connector then used it to mark the end on the underside of the deck. A quick check to make sure the line was in the right place and with the ruler and the large knife in action ..... 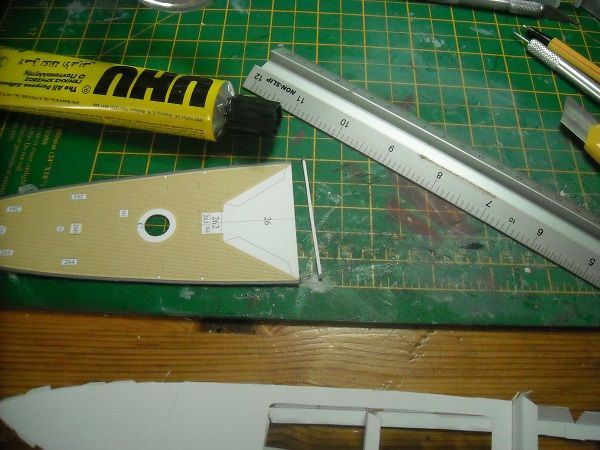 Hey presto! I put the deck away for the moment and glued the connecting piece to the aft section, staring with the tab onto former 7, then the end of it to the stern former and then the other formers to the connector. 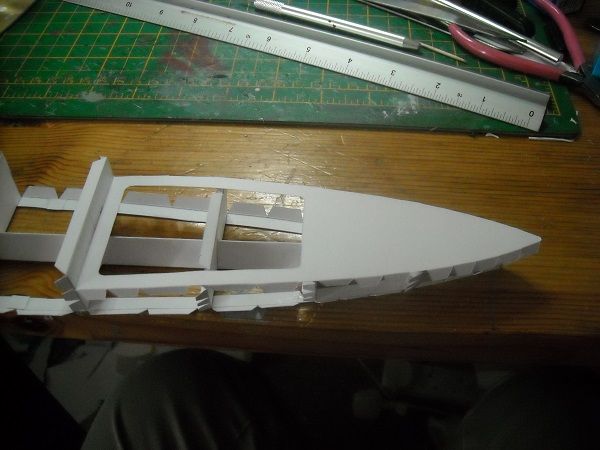 Another quick check and a load of glue onto the top of the connecting piece and down the deck went, making sure that it lay down nicely centered. 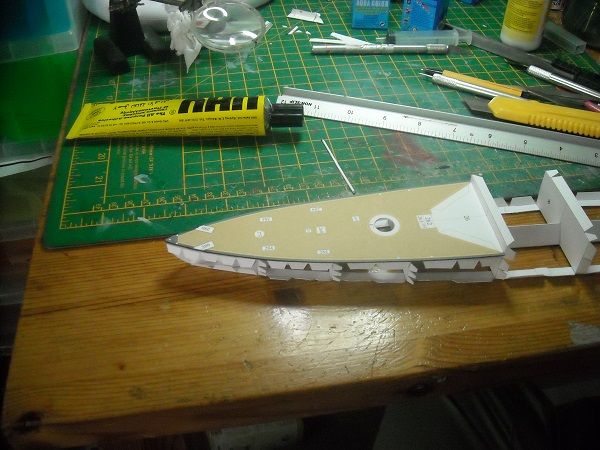 Job done! Just some weight onto the top of the deck and onto the triangular spine to let it dry nice and flat and onto the next step we go.  Next stop: Deck No 3. I added the deckline formers to the vertical formers where indicated and another connecting piece to the front of the deck. This will allow deck 2 to lay flush with this deck section. 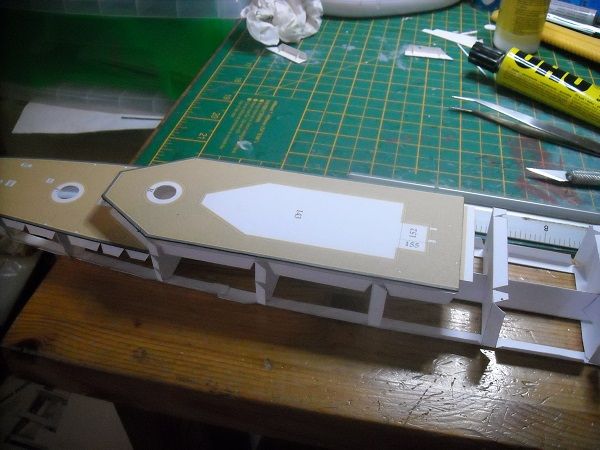 Note that I haven't glued the deck down yet. I will do that later when I have added the bits that I had to cut off and glue at an angle. But before I can glue those, I need to work on the aft wall since that is going to connect both deck pieces.  Basically this section is a rectangle with bits that needs to be scored and bent and then put in place to see if the decks line up nicely. The bits that I mentioned are the first 'micro-parts' for this build. They are two doors and 8 porthold storm covers. Although you don't have to use these parts because they are already printed on the card, when you do use them and glue them on top of the card, they will give depth to the otherwise flat wall and the model will look so much better. So I'm gonna use them. Here are the bits: 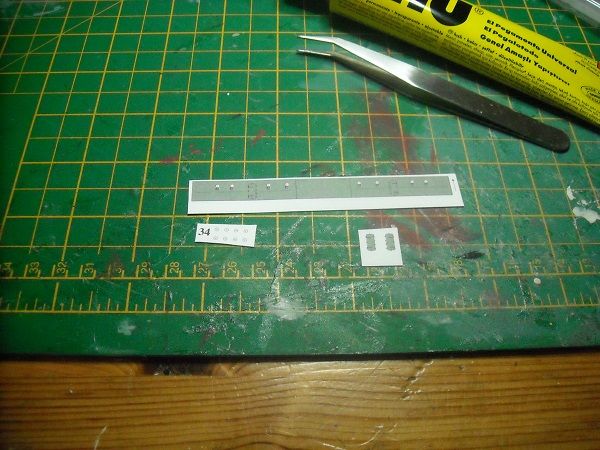 And here is a door that I already cut out. Mind you, cutting out is the wrong term. You stab them out, just like I did with the deck circles. 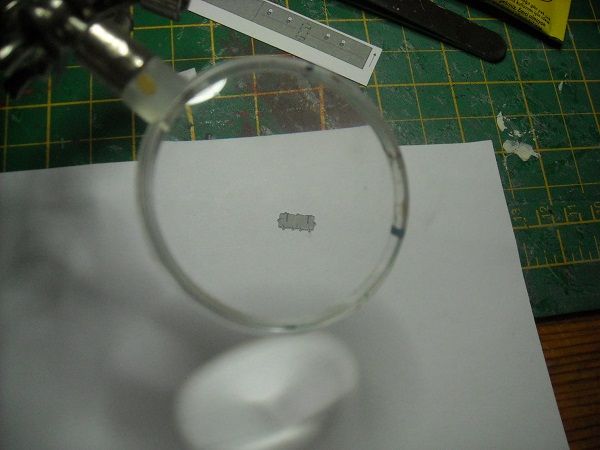 Note that the parts are so small that I couldn't get the camera to pick them up so I had to cheat using the magnifying glass to show them. I'm gonna need a new camera! 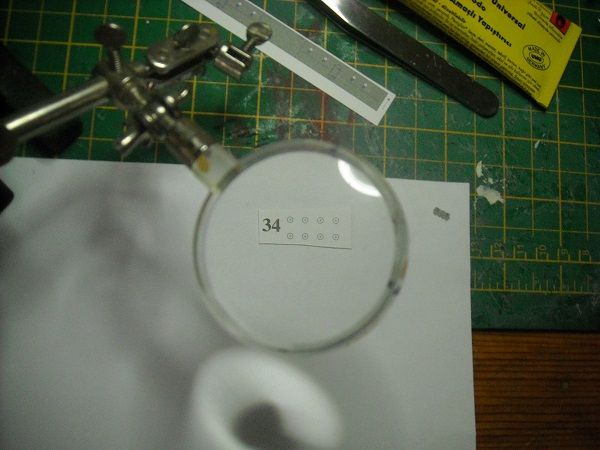 The doors are 7 mm high, the porthole storm covers 1.5 mm in diameter. AND they are gonna need edge-painting! Wish me luck, I'm gonna need it. Well, that's it for the moment whilst I huff and puff onwards. I will be busy tomorrow and Sunday with family stuff so I might not be able to do too much work but I'll be thinking of this all the time, I can promise you that!  Adrie 'Where to glue or where not to glue, that is the question'
Building: Hr. Ms. de Ruyter (card), Retourschip Batavia (Revell), HMS Surprise (De Agostini)
Built (and sunk): Too many to list
|
|
|
 Rank: Super-Elite      Groups: Registered
Joined: 30/01/2013 Posts: 4,604 Points: 13,607 Location: Monmouthshire UK
|
Very nice build Adrie, I think you are making a few people re-consider starting a card kit
|
|
|
Rank: Pro Groups: Registered
Joined: 23/03/2014 Posts: 185 Points: 545 Location: Essex
|
Thanks very much for your kind words, Steve. I can't take all the credit for it, though. It's a good model that almost builds itself. And that keeps the frustration factor very low and keeps the build extremely enjoyable. So much so that I might just wait and keep collecting the Surprise installments and keep cracking on with this one. It's that much fun. (Mind you, it's the followers that really add a lot to the enjoyment factor so my sincerest thanks and  to you all!) Adrie 'Where to glue or where not to glue, that is the question'
Building: Hr. Ms. de Ruyter (card), Retourschip Batavia (Revell), HMS Surprise (De Agostini)
Built (and sunk): Too many to list
|
|
|
Rank: Super-Elite   Groups: Registered, Forum Support Team, Administrators, Global Forum Support Team, Moderator, Official Builds Joined: 09/11/2012 Posts: 8,520 Points: 24,651 Location: East midlands
|
Hi Adrie, Looking good I`ve got a paper/card kit in the stash (HMS Hood 1:300) but a little put off as the instructions are in Polish  and some of the pics are, shall we say obscure. One day maybe, when nothing better to do . By the way, don`t huff and puff to much or the tiny bits will be lost for ever. Will watch with interest. Happy building Regards delboy271155 (Derek) COME BACK GUY FAWKES "YOUR COUNTRY NEEDS YOU"
|
|
|
Rank: Pro Groups: Registered
Joined: 23/03/2014 Posts: 185 Points: 545 Location: Essex
|
delboy271155 wrote:
By the way, don`t huff and puff to much or the tiny bits will be lost for ever.
Will watch with interest.
Happy building
Regards
delboy271155
(Derek)
Oh... I don't know, Derek. I'm an oldschool modeller and spending an hour on hands and knees looking for that 2 mm large piece in the shagpile carpet is just par for the course. Have you ever tried http://translate.google.com/? Just type in the sentence with English alfabet and it will do a decent translation. Should be enough to understand the general meaning of it. This is a common problem with card modelling because the majority of models come from Poland. Unfortunately the best ones around come from there too. What are the chances of that, eh? . Having said that, Germany still have a number of publishers who bring out cracking models. Anyway, imagine my surprise when I showed my mizzes my labour of love (well, other labour of love, I'm happily married, of course.) She then basically forced me to use her camera. So I asked where it was. Guess what her answer was......... "Did you move it?"  Anyway, she then kindly used her phone to take the following picture. 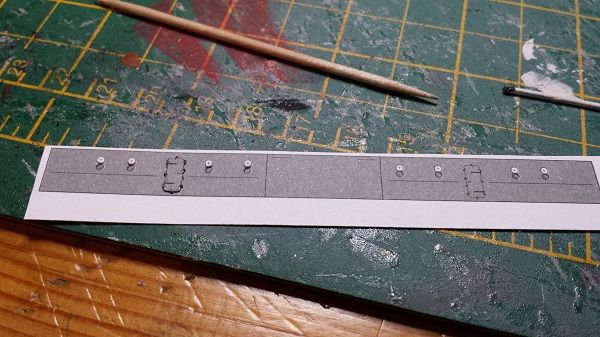 The left side has been done, the right side is as supplied. Wasn't that a nice thing for her to do? Mind you, I still need a new camera. I can't keep nicking her mobile. Adrie. 'Where to glue or where not to glue, that is the question'
Building: Hr. Ms. de Ruyter (card), Retourschip Batavia (Revell), HMS Surprise (De Agostini)
Built (and sunk): Too many to list
|
|
|
Rank: Super-Elite Groups: Registered, Forum Support Team, Administrators, Global Forum Support Team, Moderator, Official Builds Joined: 09/11/2012 Posts: 8,520 Points: 24,651 Location: East midlands
|
Hi Adrie, Thanks for the link for the translation. Add to that a good laugh from your comments/ antics. WTG Matey Regards delboy271155 (Derek) COME BACK GUY FAWKES "YOUR COUNTRY NEEDS YOU"
|
|
|
Rank: Super-Elite Groups: Registered, Forum Support Team, Administrators, Global Forum Support Team, Moderator, Official Builds Joined: 09/11/2012 Posts: 8,520 Points: 24,651 Location: East midlands
|
Hi Again, Just had a play with that translation site. That`s one for the records. Thanks again, BRILL Regards delboy271155 (Derek) COME BACK GUY FAWKES "YOUR COUNTRY NEEDS YOU"
|
|
|
Rank: Pro Groups: Registered
Joined: 23/03/2014 Posts: 185 Points: 545 Location: Essex
|
Glad to have been of service, Derek. It's a pain in the royal behind for most card-builders . Sounds like we both had good days. Talking about good days, here's how mine ended. Having finished the wall, which didn't take me nearly as much time as I expected I'm guessing I'm getting quite good at this stabbing business. Anyway, I scored and bent the wall and checked the placement on the aft deck.  Fits quite good, only a little strip to be removed from both sides to make it fit snugly. And more importantly, the height is just right to accept the back of deck 3! After cutting the wall to the right size I glued the two angled steps that I cut off earlier onto the aft deck and the little tab onto deck 3. And finally the wall was glued in its place on the aft deck around the angled steps. 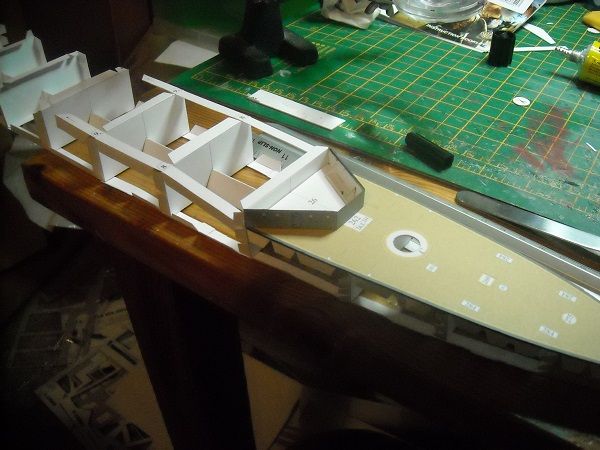 I left that to dry for a couple of minutes then glued deck three to the deck formers and the tip against the wall. 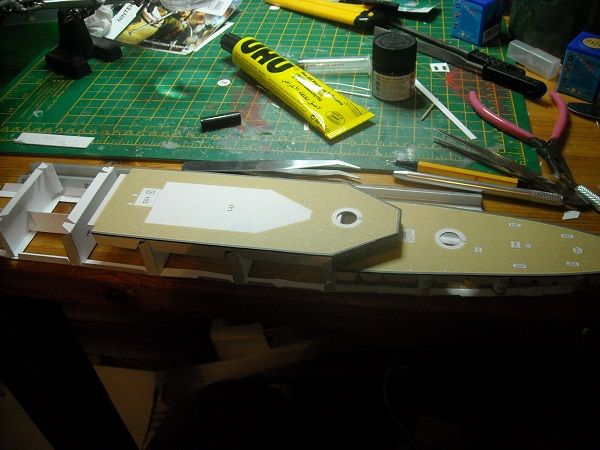 Job done! 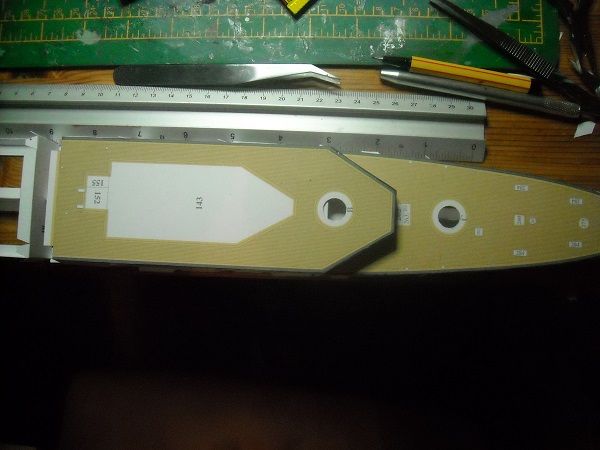 Hmmmm, the former tab is showing through the cut out circle. This might be a problem later on but for now I won't let it bother me. We can alway cut it out if it interferes. But the next item on the agenda is the bow deck. That shouldn't be too difficult after which deck 2 will be placed between the first and third deck and cut to size before glueing in. Deck three had a strip of reserve material so should be too long to fit properly. Hmmm, where did I hear that one before? But all in all we are still on track, all systems go! (famous last words, remember? ) Adrie 'Where to glue or where not to glue, that is the question'
Building: Hr. Ms. de Ruyter (card), Retourschip Batavia (Revell), HMS Surprise (De Agostini)
Built (and sunk): Too many to list
|
|
|
|
|
Lovely work Adrie and loving your diary..... Definitely going to have a go at a card model, you have most certainly pricked my interest..... .. Looking forward to the next instalment.... Regards Alan
|
|
|
|
|
Looking good Current builds:-C57,Zero, Lamborghini Countach, Caldercraft HMS Agamemnon,Robi,R2-D2, MFH Cobra .
|
|
|
Rank: Super-Elite Groups: Registered
Joined: 30/01/2013 Posts: 4,604 Points: 13,607 Location: Monmouthshire UK
|
Fantastic Adrie, watching this one all the way (which wont be long the way you are going) Steve
|
|
|
Rank: Pro Groups: Registered
Joined: 23/03/2014 Posts: 185 Points: 545 Location: Essex
|
Hi guys, thanks for the comments and looking in (still). I must admit this build is progressing faster than I expected. It's not the most taxing model to build, the manufacturer gave it a difficulty of 3 out of 5 but I think I'd rather do a 3 and have fun than do a 5 and get frustrated all the time. Besides where's the fun in watching that, eh? So I might have to come up with a plan B in case I finish this one before I can start the Surprise.  Oh, well, that won't be for at least another two days ( ), so let's get cracking, eh? Like the aft deck there is a connecting piece for the foredeck.  Of course the tabs needed scoring and bending (I know, I know, it gets boring to hear the same spiel time and time again, but well .... that's cardboard modelling. ) Anyway, there's also a connecting piece for the neighbouring deck. 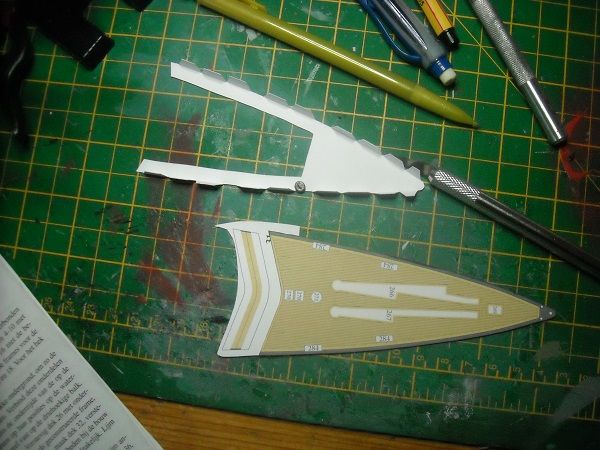 Both were glued to the foredeck, making sure that the side tabs were in line with the sides of the deck. 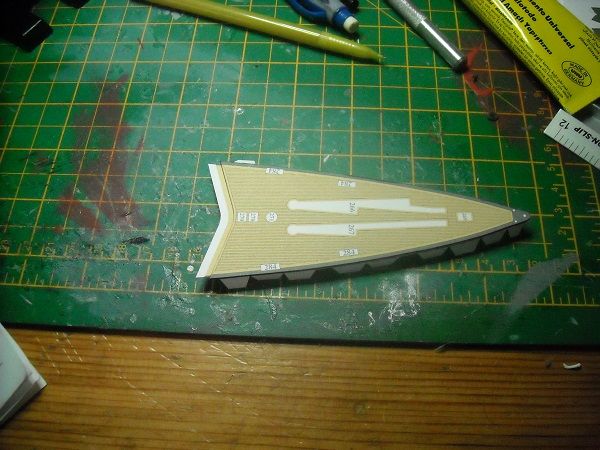 Once all was ok, it was time to glue it down.  And with decks 1 and 3 glued down I can finally determine what the overlap is of deck 2, cut it to size and nail it down. 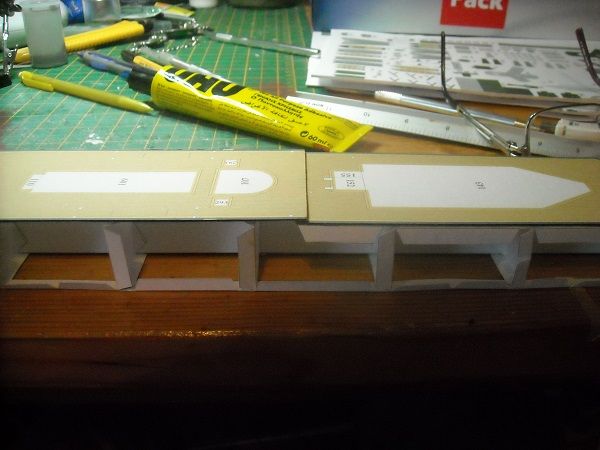 Quite a big overlap. As expected really so no worries, just turn deck 2 over keeping it tight against deck 1 and mark where we need to cut it. Then I took the deck off, put the sideformers on and finally with a big blob of glue and a silent prayer on the lips, the last deck piece was finally put in its place. 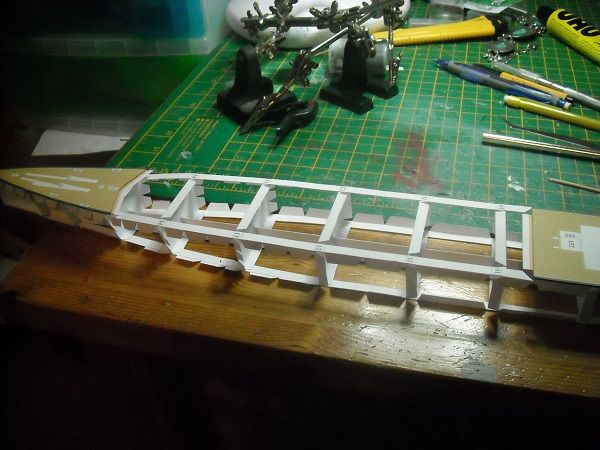 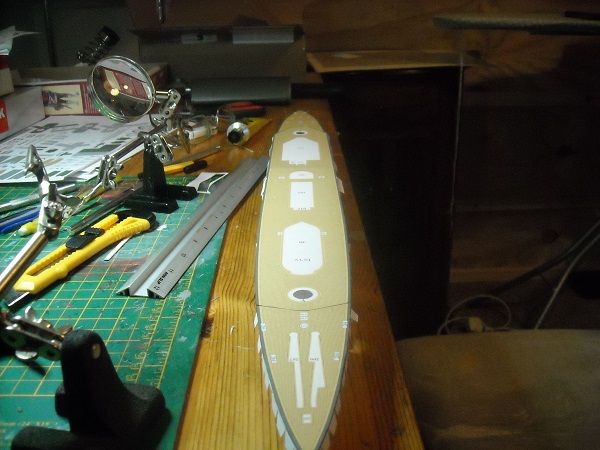 What can I say. It fits. 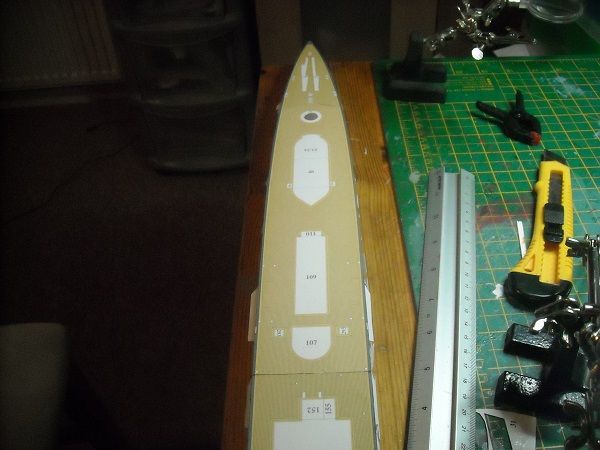 Not brilliantly, mind you, when looking at the change over from deck 2 to deck 3. I'll have to see later on whether is stands out too much. It might looks worse because of the colour difference between those two deck pieces but I'll keep an eye on that and see if we need to do some trench-crossing followed by a nice session of paint the deck with the tip of a toothpick. Come on, admit it, you know you want to join me doing that! But for the moment it is looking all ok and with the decks in place it is time for the next step, planking! (Well, the cardboard equivalent of that). But more of that later! Until we meet again! Adrie. 'Where to glue or where not to glue, that is the question'
Building: Hr. Ms. de Ruyter (card), Retourschip Batavia (Revell), HMS Surprise (De Agostini)
Built (and sunk): Too many to list
|
|
|
Rank: Super-Elite  Groups: Registered
Joined: 04/04/2010 Posts: 3,955 Points: 11,809 Location: uk
|
hi adrie, great job you are doing, a little tip, I use a kids felt tip pen set for the edges and mistakes,not that you have made any mind.but its your build, hope you don't mind me saying. Current builds: SotS, USS Consitution, San Felipe, D51 loco, HMS Surprise, RB7, Arab Dhow, Jotika HMS Victory Completed builds: HMS Pickel, Thermopylae, Mississipi river boat, Mary Rose, Cutty Sark, San Francisco II, HMS Victory x5, Titanic Lifeboat, Panart HMS Victory Launch, Hachette Titanic, Virginia Schooner, Endeavour Longboat. http://www.model-space.com/gb/
|
|
|
Rank: Pro Groups: Registered
Joined: 23/03/2014 Posts: 185 Points: 545 Location: Essex
|
Now why would I mind, Karl? Isn't is always nice to have someone at your back who takes the effort to assist with your problems? Thanks, mate, I really appreciate it. As it turns out I used to have a large felt tip pen set (about 100 different coloured pens, bought from the Works if I remember correctly) and used it on my earlier models but I found them difficult to control (to just get the colour where you want it and not somewhere else) and the colour matching was more complicated. So I made the switch to paints. But that doesn't mean that it isn't a great tip. Which is appreciated, to be sure! Adrie. 'Where to glue or where not to glue, that is the question'
Building: Hr. Ms. de Ruyter (card), Retourschip Batavia (Revell), HMS Surprise (De Agostini)
Built (and sunk): Too many to list
|
|
|
Rank: Pro Groups: Registered
Joined: 23/03/2014 Posts: 185 Points: 545 Location: Essex
|
Ever heard of the expression that less is more? The opposite is also true at times. As with me, because the MORE I look at the model, the LESS I like the two areas where the decks meet up. With a newly (borrowed) camera I was finally able to take some sharp close up snapshots. Look (if you don't have a weak heart).  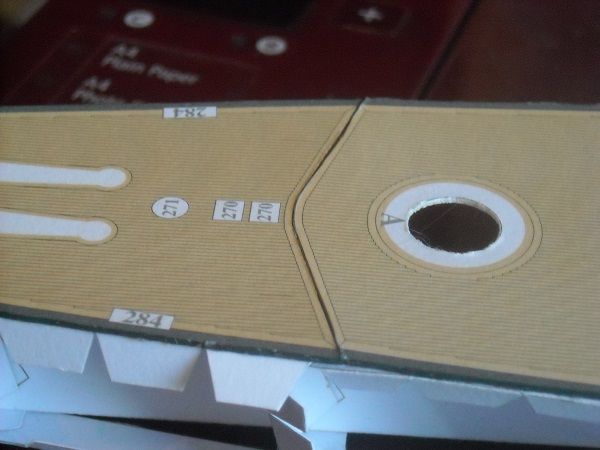 and  Mind you, things ALWAYS look extremely bad when you take a close up snapshot but still ..... I am not too concerned about the bow link, because there is still a breakwater to be built on top of the gorge but the aft section is in plain sight between two superstructure sets. Luckily that section is not as bad but the fact that nothing will cover it makes it actually worse. So what to do. I know of four methods to sort something similar out. And they are: A - do nothing, hope to get away with it and claim the 'fifth'. It wasn't me, guv, it was my twin brother.  B - Find your copy of the scan of the bits in question that you made before you started the build and print it out on paper then use a cut out strip of that to cover the offending area. Great idea!!! Lot's of seasoned cardboard modellers scan their sheets prior to building. A great idea with one little snag. They might have done it, I didn't. OOPS C Find a way to repair it. This could be done by placing little drops of glue in the gap, wait until it is nearly set then flatten it with your finger, making sure you don't smear it and once completely dry using a colour that is extremely close to the main colour of the section in question and use a small brush or toothpick to paint over the dried glue. The snag with this is that it is hard to find (or mix) a colour that is (near enough) indistinguishable from the main colour but also that if you don't get the glueing just right and the painting just right the repair job might very well look worse than the original problem. and D - Hide it. I'm now considering options A and C for the aft section and D for the bow section and might try out option C with some spare card before attempting it for real but I'll give it plenty of thought and testing first. Luckily it shouldn't stop the progress for now until I get closer to building the aft superstructures, which will be well away from the next few steps. So, onwards, my friends, and let's see if we can get the most feared step cleanly out of the way! Until laterzzzzzzzzzzzzzzzzz! PS, that camera is so good I can finally show the benefit of 3D-ing the build. 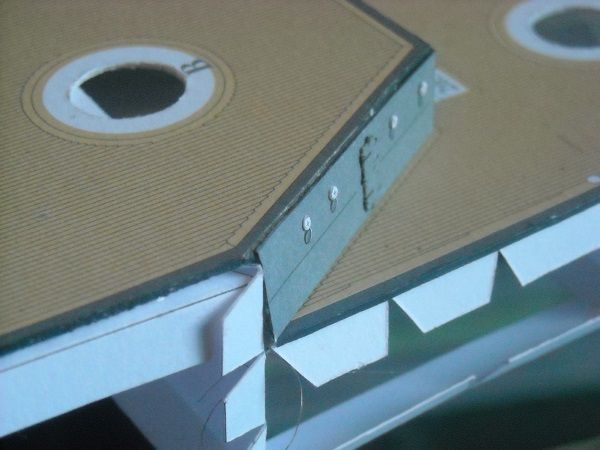 I'm quite chuffed with that. Toodlepips!! Adrie 'Where to glue or where not to glue, that is the question'
Building: Hr. Ms. de Ruyter (card), Retourschip Batavia (Revell), HMS Surprise (De Agostini)
Built (and sunk): Too many to list
|
|
|
|
|
Hi Adrie. Those macro cameras are a real pain sometimes! I was just thinking, although you didn't scan the kit before you started, would it still be possible to simply hold the hull upside down on the scanner glass and scan it that way? (The same way I sometimes have to scan heavy books if they won't behave themselves!) It might still give you a section of deck to cut out. It's still looking really good though and a great diary too! By the way, I got a Weeping Angel from that Dr Who set in the Works on Sat Maybe the Silurian Warrior next week! I noticed also that the same company also has a 99p series of Star Wars characters too! Same sort of simple construction but quite nice looking all the same! Keep them coming M8! Robin First wooden ship: The Grimsby 12 Gun 'Frigate' by Constructo Second: Bounty DelPrado Part Works Third: HMS Victory DelPrado Part Works 1/100 scale Diorama of the Battle of the Brandywine from the American Revolutionary War Diorama of the Battle of New Falkland (unfinished sci-fi), Great War Centenary Diorama of the Messines Ridge Assault Index for the Victory diary is on page 1
|
|
|
Rank: Super-Elite Groups: Registered, Forum Support Team, Administrators, Global Forum Support Team, Moderator, Official Builds Joined: 09/11/2012 Posts: 8,520 Points: 24,651 Location: East midlands
|
Hi Adrie, This is Making my fingers itch to start the 1:300 HMS Hood, but too much on the go at the moment. Will still keep watching the great build you`ve got going here. Regards delboy271155 (Derek) COME BACK GUY FAWKES "YOUR COUNTRY NEEDS YOU"
|
|
|
|
Guest (2)
|
 US
US

