|
|
 Rank: Pro    Groups: Registered
Joined: 23/03/2014 Posts: 185 Points: 545 Location: Essex
|
Many thanks, Robin, for your suggestions and response. I checked the Works in my town but they didn't have any of them.  I might have to persuade the mizzes that we need to go to Lakeside for something or other  because the Works there is quite large and has more stock that the one in town. As for your suggestion, I just tried it out on the 1 in 3 printer. Unfortunately the glass plate has a rim around it which took the deck away from the glass plate and the scan went out of focus and blurred.  It was a good idea, though and thanks for that!!! And I'm glad that you are still keen, Derek. I must admit I am wondering about a battleship in big scale too but I still have a 1/33 aircraft in my old shoebox and I had to promise the mizzes that i would reduce the stock in there first before buying a new one. And let's not forget, I am still (eagerly) awaiting the arrival of the Surprise, so I think that one will have to wait a while longer. But it's time to pick up the reigns properly again and the next topic is the hull. This is a step that many modellers are not looking forward to, because a badly fitted hull will break the looks of a model. So care and attention are definitely needed here. This model has the hull in three parts, fore, middle and aft and we start with the aft section. After that the fore section and the middle will be added last because we will need to cut that to size again. I will do the port side first, which you can do because unlike with a wooden model, the planking won't warp the hull if you do one side only.  I cut out the side, and used my fingers to bend the back slightly so it will more easily 'roll' around the rounded stern former. I then used a pair of tweezers to slightly curve the back edge to het a smooth flowing line from the stern former forwards.   The whole idea of this bending is to 'loosen' the fibres in the cardboard so that it can be more easily formed in the right shape, not to give it a pre-shape. Then I painted the edges with mid grey paint as well as a section on the back where it will be visible from the inside when glued. 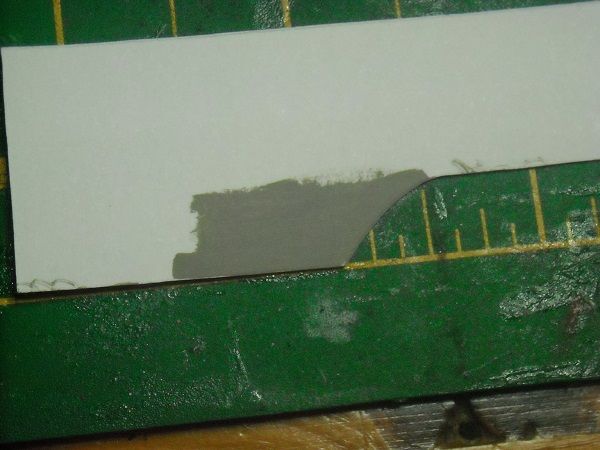 After letting it dry, which doesn't take that long with this acrylic paint, I UHU-ed the sternformer and the first section until the hull former 4 and on the bottom and top tabs. After letting it dry for half a minute I put the side in place, starting from the stern, making sure that the top of the side was flush with the deck. I thin pushed down the bottom of the strip against the waterline former tabs and the former tabs. Because of the UHU I was able to make small adjustments whilst the glue dried further. When I was happy with the position I used a toothpick to put glue on the next section (from hull former 5 to hull former 4, including the bottom and top tabs) and keeping flush with the deck I glued the side to that section. I continued to do the same for each section (from hull former to hull former until it nearly reached former 8. And the result? Not bad.     But my eyes are hurting now, so the bow section will have to wait till tomorrow. I hope you will be able to do that too.  Until the next time!!! Adrie. 'Where to glue or where not to glue, that is the question'
Building: Hr. Ms. de Ruyter (card), Retourschip Batavia (Revell), HMS Surprise (De Agostini)
Built (and sunk): Too many to list
|
|
|
 Rank: Super-Elite      Groups: Registered
Joined: 30/01/2013 Posts: 4,604 Points: 13,607 Location: Monmouthshire UK
|
Love this diary Adrie, very detailed explanation and you are doing a great job on this build. Steve
|
|
|
|
|
Lovely work Adrie, your diary I'm sure will be of great benefit to all and any would be card builders out there.....  Regards Alan
|
|
|
Rank: Pro Groups: Registered
Joined: 23/03/2014 Posts: 185 Points: 545 Location: Essex
|
Thank you, Alan and Steve. I can only hope that I can continue to do your praise justice. Which I fully intend to do, of course.  So let's get cracking, eh? The bow hull side. Just like the aft side you need to carefully bend the front to curve round the bow former but there is a little extra requirement. Or two, as it turns out, namely the hawse pipes of which two will be required at port side. These are constructed out of two pieces each. Hole for the hawse pipe, 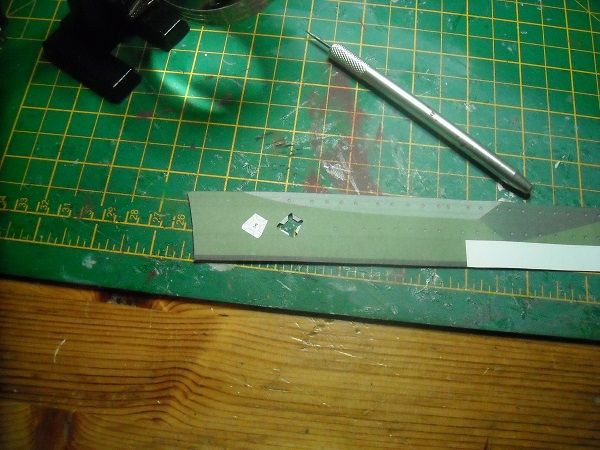 the components, 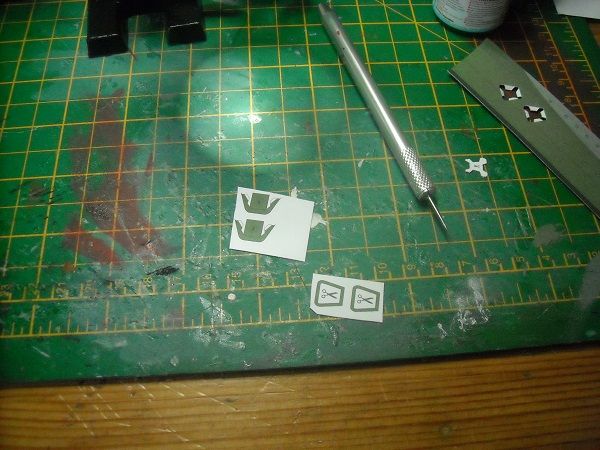 and intermediate step (the collar has been edge-painted), 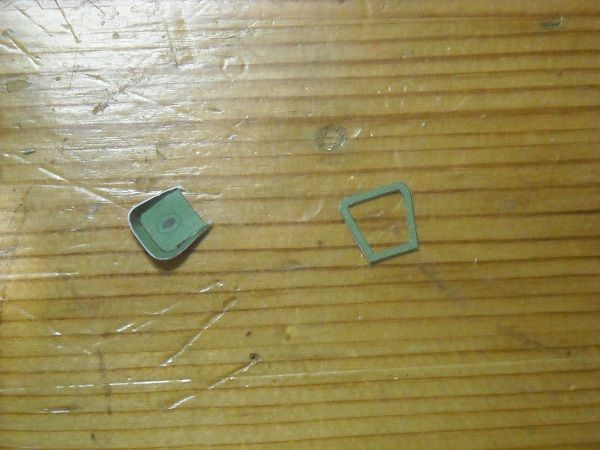 the two combined,  and finally glued in place .  Since most likely I'll have to hole it and put an anchor near it, I thought it best to secure the position of the hawse pipe by putting four big drops of glue at the back to keep them in place no matter what. 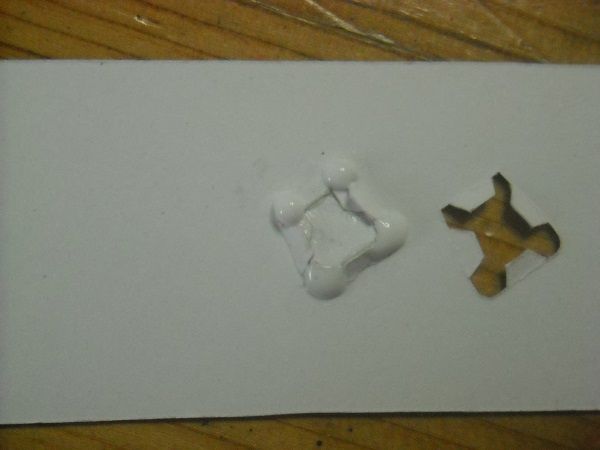 You would not want it to come loose with no way of retrieving it.  Whilst the two hawse pipes were drying, I decided to take the first step in the investigation in the problem resolution from yesterday. So I constructed a colour sheet (basically a piece of paper with several available paints painted on it to compare with the deck colour to find a match or a nearest fit.  And whilst that was drying, I continued with the bow. Just like yesterday, I started at the bow former and added glue to the former, bottom and top tabs and first former tabs. Then with the tip of the hull side formed I lay the side against the bow former and once happy with the shape and the position pushed it down then working from former to former until I reached the end of the side.   I'll need some black paint to cover the section in the first picture that can be seen at the bottom. This discrepency was probably due to the fact that the sides were meant for unstrengthened deck so are slightly too small for my model. But not a big problem.   Not bad. I put it aside to dry thoroughly and went back to the colour chart. Using a cut off piece of the deck, I think we have a match!!  I'll try the repair job on the bow joint, most likely, if for no other reason that that will be hidden so if it went wrong it wouldn't matter too much. But first I wanted to finish the sides. So, we are left with a rectangular bit 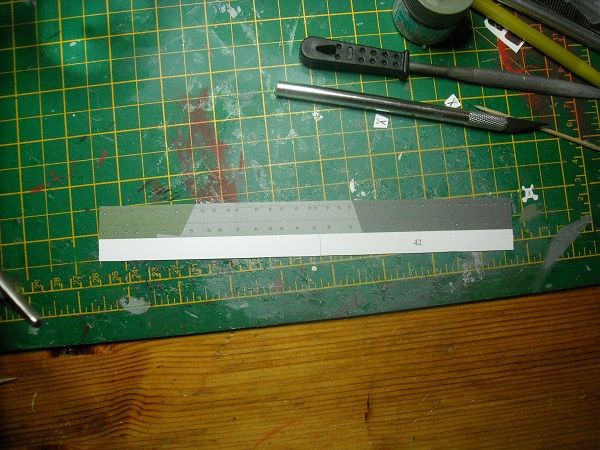 and a rectangular hole.  Should be a piece of cake, rectangle on rectangle without any bending. Simples, no? Uhhh, no. Following the instructions which directed me to first glue down the aft side and then the bow section, which I duly did, I then read the following instruction to glue connecting pieces to bow and stern sides. Uhhhhhh, how? 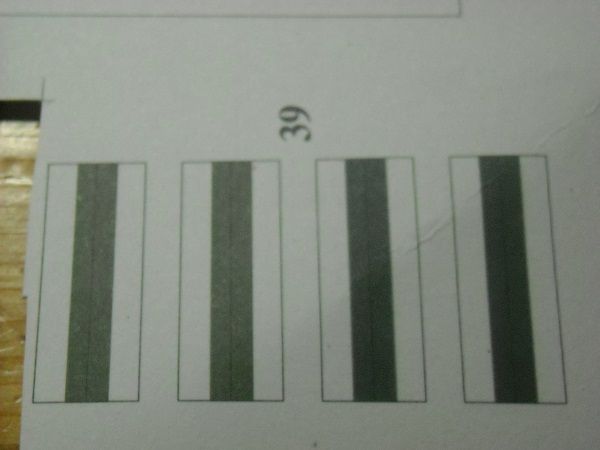 These are the connecting pieces.  This is one of the connecting pieces in the place where it should be glued. Guess what, it doesn't fit. In fact it would never fit because you were SUPPOSED to do it BEFORE glueing down the sides. They just forgot to mention this.  Pfffff, you know what, I think I won't use them. A - I don't really need them and B - I don't really want them anymore either. So WITHOUT the safety net that is the connecting piece (ooooh, scary, eh? ), I placed the rectangular bit (after edge painting, of course) against the bow side and checked the fit. It fits squarely, really. Just a bit too long. So marking it at the back and cutting off the extra, it fits just right. So more UHU against all the tabs in one go and down it went. The end-result?  Not bad. Who needs connecting bits, anyhow!!! Not me, mate!!! Anyways, tomorrow I'll be starting on the starboard side and I still won't use those pesky connecting bits!!! Adrie. 'Where to glue or where not to glue, that is the question'
Building: Hr. Ms. de Ruyter (card), Retourschip Batavia (Revell), HMS Surprise (De Agostini)
Built (and sunk): Too many to list
|
|
|
Rank: Super-Elite Groups: Registered
Joined: 30/01/2013 Posts: 4,604 Points: 13,607 Location: Monmouthshire UK
|
Looking good, you're really cracking on with this now Steve
|
|
|
Rank: Pro Groups: Registered
Joined: 23/03/2014 Posts: 185 Points: 545 Location: Essex
|
Thank you, Steve. Your comments are appreciated. And true I guess. So true that I had another look at the next build.  As I said earlier, I still had this 1/33 cardboard aircraft model in the shoebox. And since we seem to enjoy a quiz on this forum quite a bit, anyone wants to take a stab at what this birdie is? I'm afraid that I didn't do much differently today than the days before. So I'll keep the number of snapshots down, otherwise it's going to be a lot of ... and like yesterday I .... and like the day before I .... blah ... blah ..... blah .... So without further ado .... The bits .....  First success  Second success  And overall bow and stern 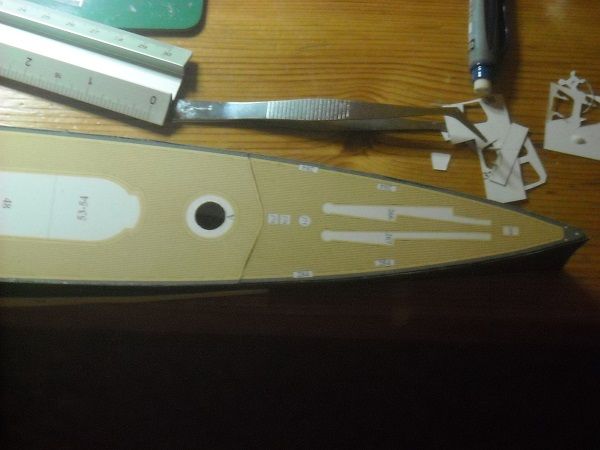  Still looking good so far but will need to blacken the bottom. but not nearly as much as I feared it to need.. Oh, one thing I thought I better mention as a bit of a tip. If you have to cut, score and bend small bits, why not score the small bits whilst uncut, then cut the section free and use a knife to push out the scored section. Like ....  It makes it so much easier. But that's where I got to. Tomorrow I'll start filling in the white sections on the sides, which is where the armourbelts go. Until laters! Adrie 'Where to glue or where not to glue, that is the question'
Building: Hr. Ms. de Ruyter (card), Retourschip Batavia (Revell), HMS Surprise (De Agostini)
Built (and sunk): Too many to list
|
|
|
|
|
Hi Adrie, more wornderful work I see and yes, I am still hooked and loving this build...  .. Eagerly awaiting the next instalment..... Regards Alan
|
|
|
Rank: Pro Groups: Registered
Joined: 23/03/2014 Posts: 185 Points: 545 Location: Essex
|
 1000 views!!!!! Now that's icing on an already delicious cake! Many thanks to you all for your continued endurance!!!  But let's not keep Alan waiting any longer!! So, the armour belt. The first task will be to cut the first layers of armour. Don't get your hopes up, mind you. It's just white pieces of cardboard for no other reason than to make up the thickness. So, a simple cut out 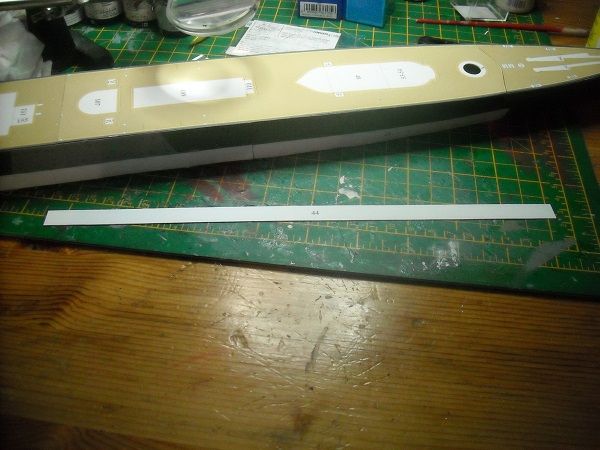 and glueing it in place after making sure I didn't glue it upside down and then did the second base armour layer for the starboard size. And, as per usual it was too long so needed to be cut to size. But once that was done ...  (Did you see the already attached piece? No? White on white is hard to spot. But luckily the next layer will be coloured. ) But it helps that you can get in from the inside, so to speak, when attaching parts on the outside, especially if you, like me, have a little bit of a strop and not use parts that the designer has decided that they need to be used, like the connecting strips that I did not use after being told too late to use them. The connecting strip has a function to keep the sides together and not having them did make this step a little trickier than it needed to be. Anyway, the designer made sure that the inside would still be accessible 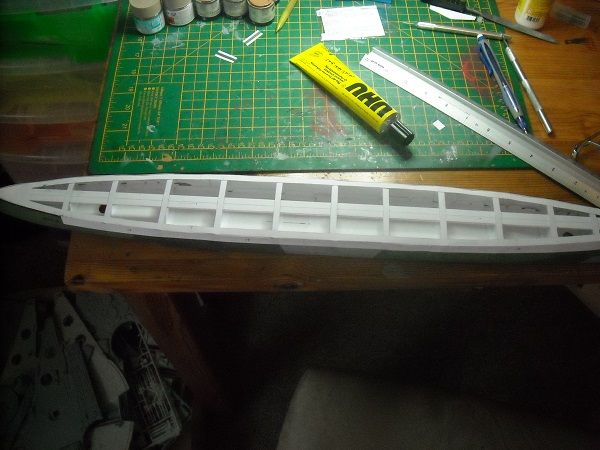 . so you could say that he knows his trade where as I am ...... well, shall we keep it civil? An amateur, at best. So you ARE better off if you follow the designer of your model rather than me. But my jokes are better, so it's really a toss-up.  AND it turned out that those base armour pieces work just like the connecting strip but from the outside. That was nice, wasn't it? Unless this was another design-feature that the designer came up with to make sure that the model would still look good even if made by a .... what did we say?.... oh, yes, an amateur at best. Now that would be , wouldn't it? You know, my problem is that I sometimes think too much. . Anywayzzzzz, here is the next step, namely the outer armour belt pieces, this time coloured. Which means that they will need edge-painting. But not only that, the top of the armour belt has to be angled back and the angled top is about half a mm to a mm. The best thing to do is like before to score the part before cutting out and then after cutting to use your fingernail to push down the scoreline, whilst keeping the belt at approximately 45° and to continue doing this along the whole length of the belt. It won't look perfect  but very effective never the less.  Too bad that the good looks will be spoilt by the fact that the colour fields on the armour belt won't match up with the colour fields on the hull side in the back.   That is design, unfortunately and very little (well, nothing really) can be done about it. The front part fits pretty well  and overall the effect is just wonderful as could be seen in the picture before. Too bad that this ship is so long that it is impossible to get everything in the shot and at the same time show all that wonderful detail. Mind you, that could very well be me and my cameratic skills (is that a word? Probably not.) But you get the drift.  Anyway I need to be off now to get the port side done and then it's only the placing of a thingamabob and the anchors and the hull will be done. More about that laters! Have a wonderful Easter weekend!! Adrie. 'Where to glue or where not to glue, that is the question'
Building: Hr. Ms. de Ruyter (card), Retourschip Batavia (Revell), HMS Surprise (De Agostini)
Built (and sunk): Too many to list
|
|
|
Rank: Super-Elite Groups: Registered
Joined: 30/01/2013 Posts: 4,604 Points: 13,607 Location: Monmouthshire UK
|
Love this diary Adrie, great subject and well described too , the great thing about card and plastic kit diaries is that we get to see results quickly, that's why I always like a plastic kit on the go at the same time as a wooden kit Looking forward to more pics. Steve
|
|
|
Rank: Pro Groups: Registered
Joined: 23/03/2014 Posts: 185 Points: 545 Location: Essex
|
Thanks, Steve, for your lovely comments. Much appreciated. Personally I am moving away from plastic kits. What I like in both cardboard and wood modelling is that you basically start with 2D material and turn it into a 3D object. It's modelling on a different level! And I am probably too old fashioned but for me that includes cutting out the frames with a fret saw as well. We seem to live in a world where everything seems to have to be pre-worked. Of course, it is quicker, easier, etc, etc, but I remember the smell of the sawdust as I cut the frames out of a board of ply, the constant need to blow away the dust as it started obscuring the printed on frame shape. And the curses as another fret saw blade snapped because I was trying to saw (inadvertently) at an angle. Or the quick run to the woodshop for another board of ply when you had totally messed up the cut, drawing on the shape from the construction plans and giving it another go. But like I said, it's probably my age talking here. Is 'live' easier nowadays? Yes, I think so. Is it better? Hmmm, not sure. Anyway, rant over, , time to go back to the workspace to take some more pictures. All to: "Try to keep my customers satisfied, satisfieieieied. Wo-o-o-oh, Wo-o-o-h" (Simon and Garfunkle, 1970, but unlike Simon, I don't think I'll ever get tired of it. ) Adrie 'Where to glue or where not to glue, that is the question'
Building: Hr. Ms. de Ruyter (card), Retourschip Batavia (Revell), HMS Surprise (De Agostini)
Built (and sunk): Too many to list
|
|
|
Rank: Pro Groups: Registered
Joined: 23/03/2014 Posts: 185 Points: 545 Location: Essex
|
Hi all, time to gettin-rockin-an-a-rollin! Witha-lotsa-pictas!!! First off the state of play after having added the port armourbelt. 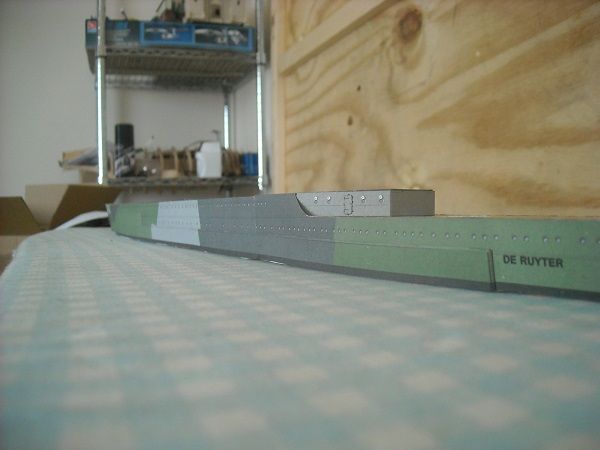   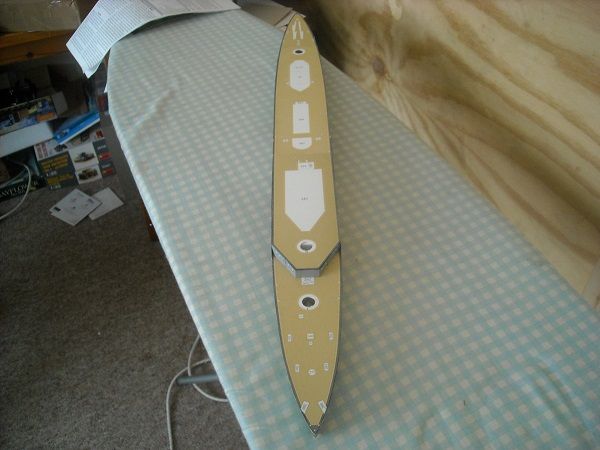 So far, so good. Oh, and the port side aft belt also didn't line up with the hull camouflage . 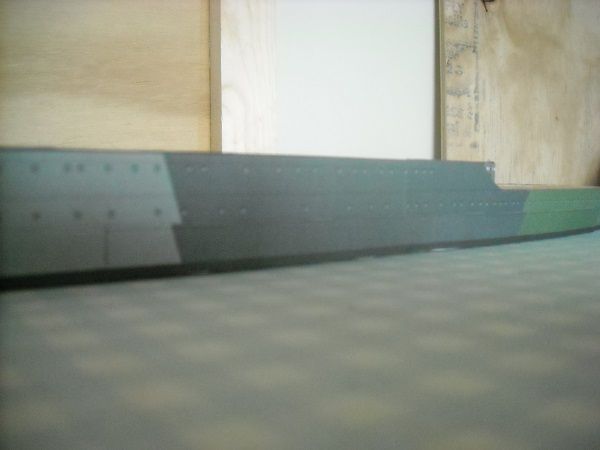 Oh well, nothing to be done about it (apart from informing the publisher about it so that he can make sure following customers won't face the same). So now we have two more things to do in this hull-build, the previously mentioned 'thigamabob' and the anchors. (Apart from some repair steps to cover previous ... mishaps) Anyway, I give you the 'thingamabob'  According to the instructions it is a half-ring, which I am sure is not a nautical term, so I will keep calling it the 'thingamabob' and because it is going to end up at the bow, it will be (for me) the 'bow-thingamabob' from now on. Notice that the part consists of a half ring (with holes for whatever function) and a square of coloured cardboard. This means that the squares have to be cut out and glued back to back to thicken the part. But because the part will be double thickness and the curvature it will be best to 'stab' out the part after glueing and drying. So, I took my best knife and started stabbing away. 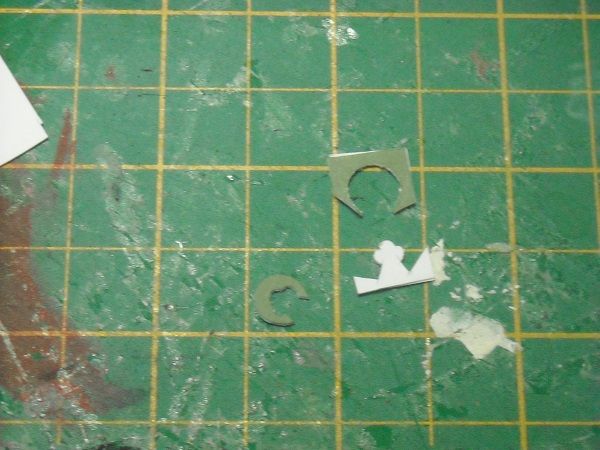 The part was then edge-painted on the in- and outside and put aside to dry. Which leaves us with the anchors, of which there are three, even though I have seen a number of pictures online where the aft port anchor was missing. I wonder if someone managed to nab it to sell for scrap when the Captain wasn't looking for a moment. But I will follow the instructions for once. So, there be anchor parts. 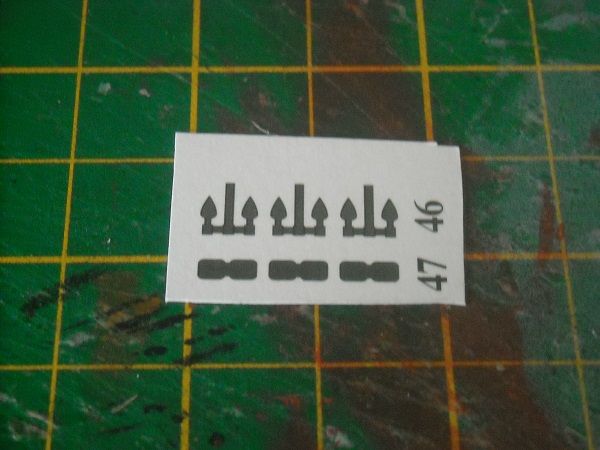 Having decided to follow the instructions, I immediately had to scratch my head.  The instructions said: Glue anchors 46,47 to the hawsepipes. Ok, but how? Where does 47 go with respect to 46? It looks like a 'standard' stockless anchor, so I assume that 47 is the baseplate for the anchorblades. Having checked this on the internet I found that in all cases the baseplate is kept away from the 'ground' so I can't simple glue the base to the anchor. Instead I'll have to cut the base in two and glue the pieces to either side of the anchors. And because I am 'lifting' the base it would be best to make sure that the back of the anchor and baseplate is painted. I did that with a thick, acrylic grey paint. Not black because that would look all wrong even if the anchor was printed with black ink. If you look closely at the print under a good magnifying glass then you will see that instead of a continuous field of colour, the printer actually put down a large number of dots. And even if the dot is black, because of the area around the dots, it will look less dark. So dark grey should fit better than a black paint. 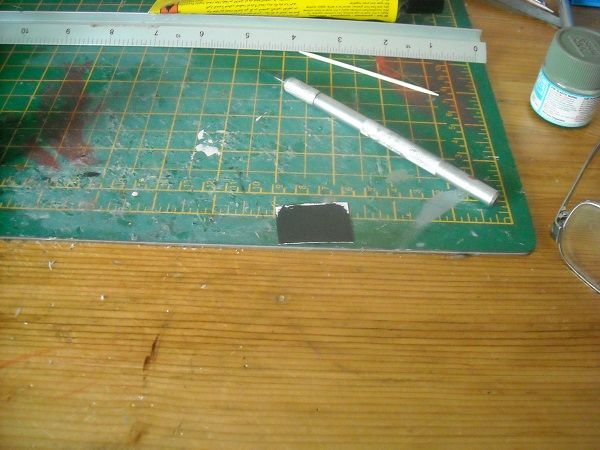 But as I used a waterbaased paint the following occurred.  The cardboard started bowing whilst drying because the back got wet from the paint and the front stayed dry. So a weight placed on it should keep the bow in check. 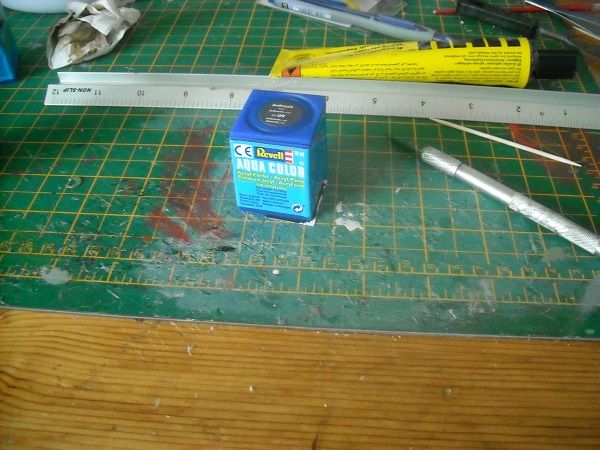 After drying I cut out the 'back'base and the anchor by stabbing again. It would be impossible to actually cut out those parts correctly. 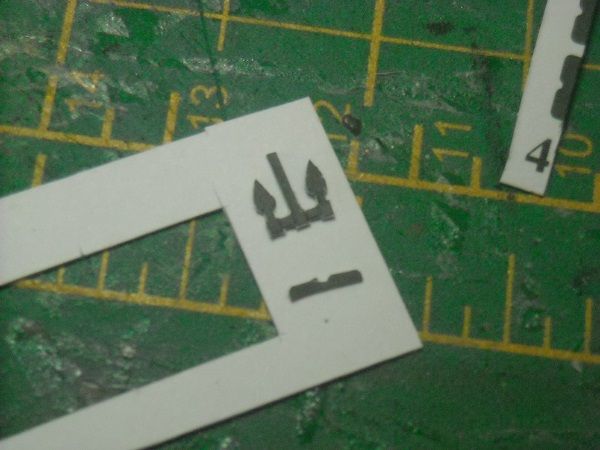 I glued the base to the back of the anchor and stabbed the front out.  Note that I did not edgepaint the pieces because I was afraid that that would weaken the glue bond. As it turned out, when I tried to glue the front that the back came off anyway. Which was a blessing in disguise because I had glued it skewered so I could rectify that at the same time. The end result 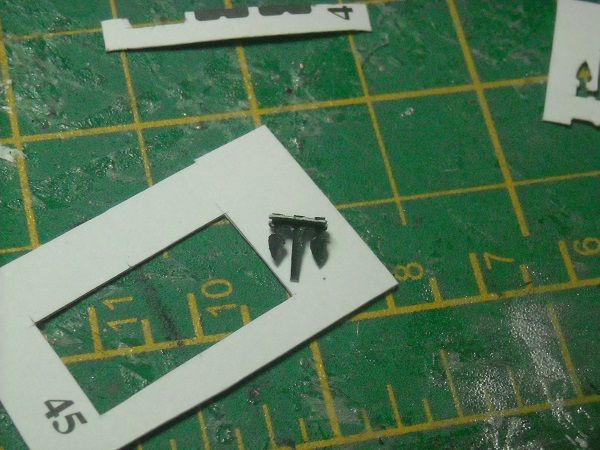 What difference edgepainting makes, eh? 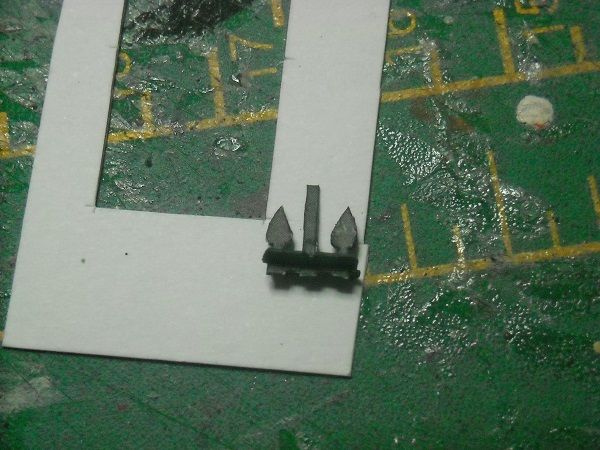 So that was then placed aside for prolonged drying. In the meantime I attached the 'bow-thingamabob'  And finally after 45 minutes sweating over it, the anchor could finally be placed. 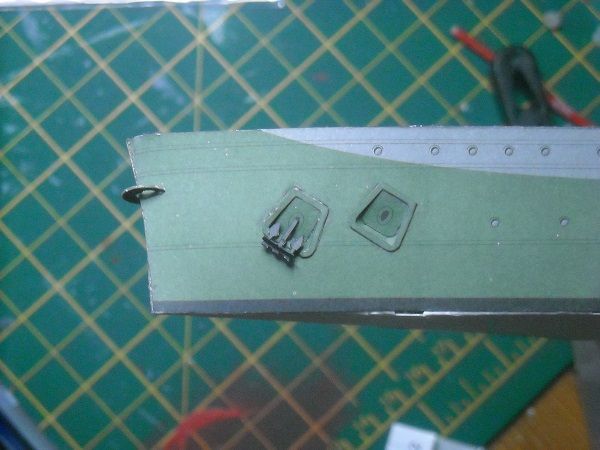 Now 'only' two more anchors to do! Wish me luck, I might need it this time!! Till the next time!!! Adrie. 'Where to glue or where not to glue, that is the question'
Building: Hr. Ms. de Ruyter (card), Retourschip Batavia (Revell), HMS Surprise (De Agostini)
Built (and sunk): Too many to list
|
|
|
|
|
Well I certainly didn't have to wait too long for the next wonderful instalment..... fab work Adrie and superbly described, the pointing out of the errors and how you resolve them will be very helpful to newcomers to card builds..... ... Once again will be waiting for the next episode so keep up the great work..... Regards Alan
|
|
|
Rank: Pro Groups: Registered
Joined: 23/03/2014 Posts: 185 Points: 545 Location: Essex
|
Many thanks for your kind words, Alan. I must admit I do like this build and she's coming along very nicely. And as Steve pointed out, she gives almost instant gratification. I always have enjoyed cardboard models, but whereas when I was a little nipper (many, many, MANY moons ago) the models were easily obtainable, nowadays they are harder to find. And I think that is a shame. Where else can you find a detailed kit of a 1:250 model of a WWII battleship for $36? So when I get the opportunity, I tend to plug the benefits of card modelling where-ever I can. Which is one of the reasons why I write the diary the way I do it. Making cardboard models is not that hard and I hope by taking a step-by-step approach this will show. Of course, the next step would be for the people, who might be interested, to go out and get their own model and start it. {Plugging mode ON} Which is where the internet community comes into play. It is mindboggling how many free cardboard models there are out there and in a most diverse range of subjects. These free builds are not as detailed as the ones that you pay for but they still will produce a good model that you can be proud to show off whilst at the same time not being too taxing for a beginning cardboard modeller. And who wouldn't want to have something like this portrayed on their coffee table.  And yes, it's a model (1/50 scale), and yes, it's free (well, you have to print out the sheets and get strengthening cardboard and the likes), and yes, it's not that hard to build (2 out 0f 5 for difficulty). Enterprise Bridge WebsiteOr what about this simple, but still stunning little galleon model (1:100 scale) 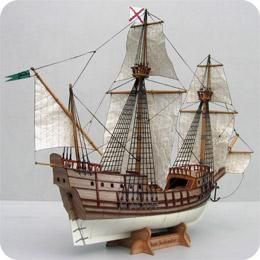 Free, a good starter and available for beginners (3 out of 5 difficulty) or advanced (4 out of 5). But more importantly still a good looker. Galleon San Salvador WebsiteThere are so many models out there for a modeller to wet his teeth on, and with the great benefit that if you make a big mistake, all you have to do is print the sheet out again and start again! What is there not to like??????? {plugging mode OFF} Thanks for allowing me to get my soapbox out, Alan. Adrie. 'Where to glue or where not to glue, that is the question'
Building: Hr. Ms. de Ruyter (card), Retourschip Batavia (Revell), HMS Surprise (De Agostini)
Built (and sunk): Too many to list
|
|
|
|
|
Hi Adrie, think they are some wonderful examples of what can be achieved with card kits and I love the Enterprise bridge... .. brings back some memories where I used to be glued to the box watching every episode.... Am sure these will prick the interest of a few members on here... .. Thanks for sharing.... Regards Alan
|
|
|
Rank: Pro Groups: Registered
Joined: 23/03/2014 Posts: 185 Points: 545 Location: Essex
|
Thanks, Alan. I hope so. But it's time to show a bit more. As I said yesterday, this is the last work to be done on the hull barring a bit of repair work. But with all this effort that I put into the little lady, I decided I needed to hire some guards to keep her safe. Here's guard No 1, standing guard over the ship with both port anchors attached.  And here's the pair after the second came back from her tea break. 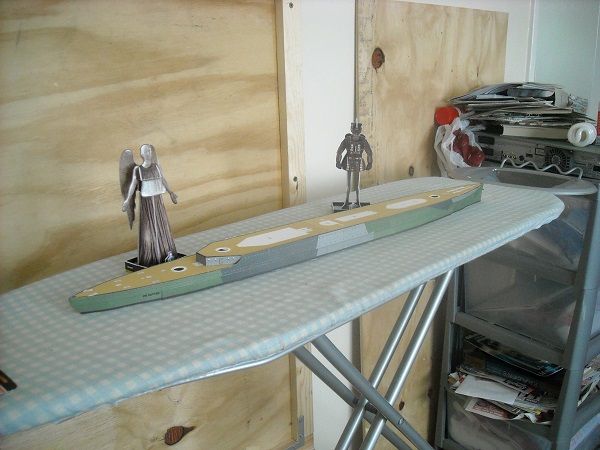 Yes, Robin, I finally managed to get my hands on a couple!!!!! I absolutely  them!!!!!! Thank you so very much for bringing them to my attention! What can I do to repay you?? I know!!! Have this on me!!  You want it? Click here. With my sincerest thanksI hope you will enjoy it. BUT there is more to share today! Remember the gaping .... uhhhh ..... gap that was visible when I put the decks together? Now, at the end of the hull section I decided that it was time to try and tackle it. As I said I would attemp to rectify it in the front first. 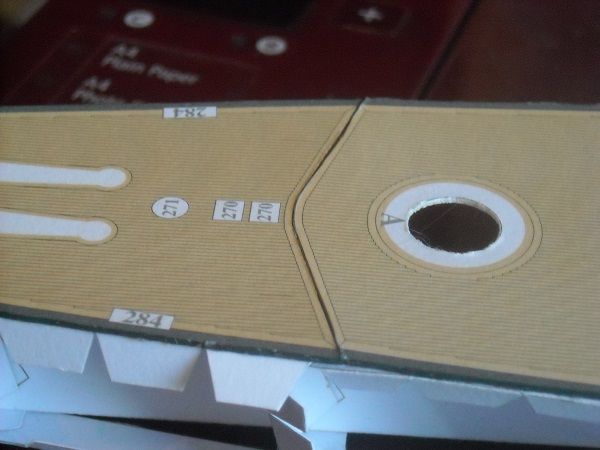 This was the before situation.  Here I started filling in the gap with PVA glue, of which I put a drop onto a piece of scrap card and using a cocktail stick I added little drips of glue, pushing them down them with my finger when they had dried a bit. Then, using the paint I found previously (Games Workshop Bleached Bone), I touched up the glue. 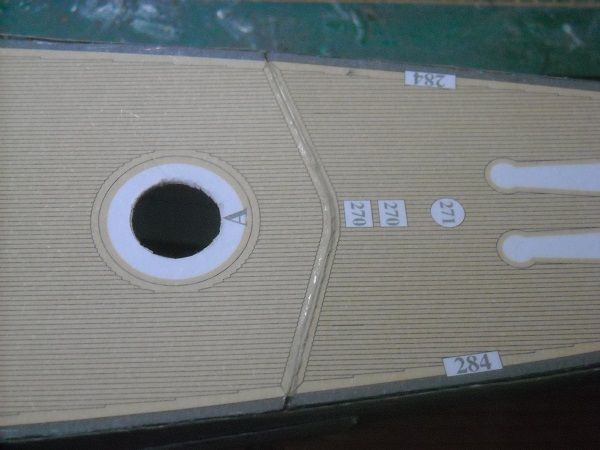 The white spots are just a trick of the light, where the dried up glue reflects it. But this is looking so much better that I will use it one the other gap as well. Then, all that remains before I go on with the superstructure, is to lower the skirts of the lady to cover the frame structure a bit better. I am thinking of using printer paper, paint it dark grey (with enamel, acrylic would ruin the paper almost immediately) and cut strips a mm wider than the current waterline stripe and glue that on top of the waterline. That should lift the ship 1 mm up, covering the bottom and the still visible frame structure. So that will be the next tasks. Until the next time!! Adrie. 'Where to glue or where not to glue, that is the question'
Building: Hr. Ms. de Ruyter (card), Retourschip Batavia (Revell), HMS Surprise (De Agostini)
Built (and sunk): Too many to list
|
|
|
Rank: Pro Groups: Registered
Joined: 23/03/2014 Posts: 185 Points: 545 Location: Essex
|
Good evening, all! Hope you all had a great Easter Sunday and plenty of eggs (chocolate or not) to get through! As the weather wasn't great, I got to spend a bit more time on the lady. And the time spent on her definitely doesn't seem wasted!! But I'll let you be the judge of that. So, let's get cracking! As I said yesterday, I needed some dark paper to lift her up. Here's the paper (90 g printer paper) that I painted on one side  I then cut 6 4 mm strips off the sheet and put UHU on the back of one strip and put in on the waterline stripe of the ship.  The next picture showed the last strip in place and also shows the extend of the 'lift' which was less than one mm.  The strip was cut off and job done! And here is a view of how it is supposed to work. 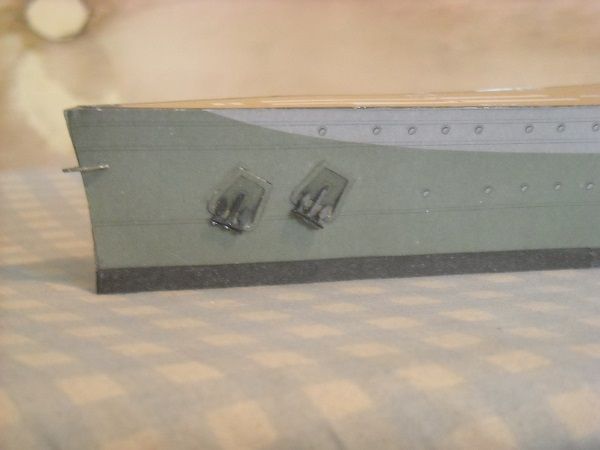 And just like yesterday I repaired the aft connection between the two decks. Here's the before, 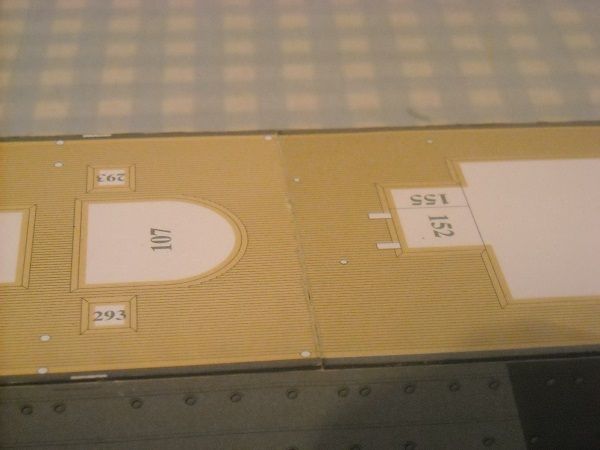 and here's the after ..  Looks good so another job done! And that finished the hull build! I have been careful with the anchors but in a future build I will definitely only attach them at the end of the build. They are too fidgety and fragile to add them to the build when indicated in the instructions. Otherwise I think everything went quite well. So onwards then! To the next stage: the Superstructure. That we start with the frame for the bridge/conning tower. 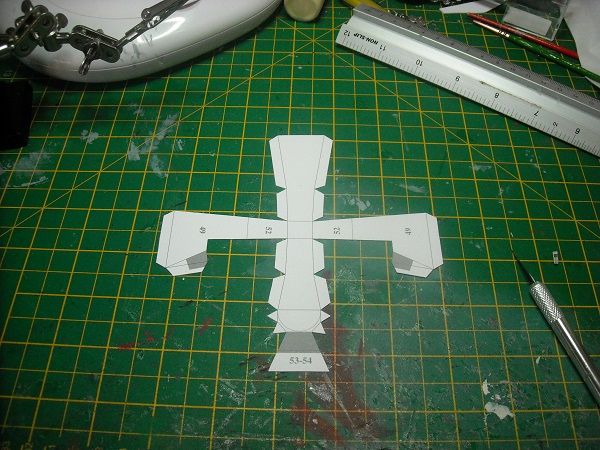 After cutting it out, the part was scored and bent.  When glueing a box-structure like that it is best to work downwards from the top and to finish one side before goint to the next. I also decided to cut some more triangles as before to use on the first side to keep it at right angles and true. I did this because the frame is the beginning part of the fore superstructure so any failures in it will make progress later on a lot harder.  I then put glue on the back tabs and used a pen to push down the tabs against the side. Again I am using UHU here because if gives me a longer time to rectify any misplacements. But once the first tabs were done I went to the tabs below them and with a toothpick I put the glue on them and used my fingers to push down the tabs and when I was happy with the shape I finished with the last tabs. It was a biot of an awkward sahpe but nothing too difficult if you glue it step by step. 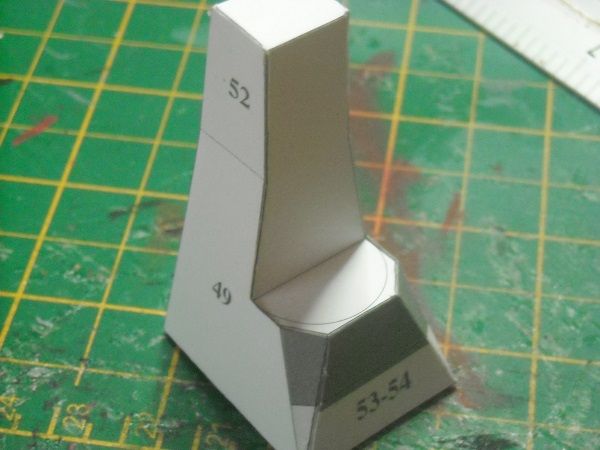 The next part is a part-covering for the frame and the back part of the fore superstructure. I curved the front of the part with my fingers and then the sides of the part.  It was to fit on the position as drawn on the deck. But it also needed some doors!  So there's going to be a fair bit of stabbing involved as well As I said before, you pre-form the card to loosen the fibres so that when you glue the part in place, it will form a nice and smooth curve.   But after glueing the covering over the frame I realised that to get the shape right for the deck drawing I would need 'some' head-scratching.  It is easy to curve a piece of card. It's almost impossible to curve it to an exact shape. So, I'm sorry, I'm going to cheat! I cut a strip off the 0.5 mm cardboard and used it to mark out the aft position. 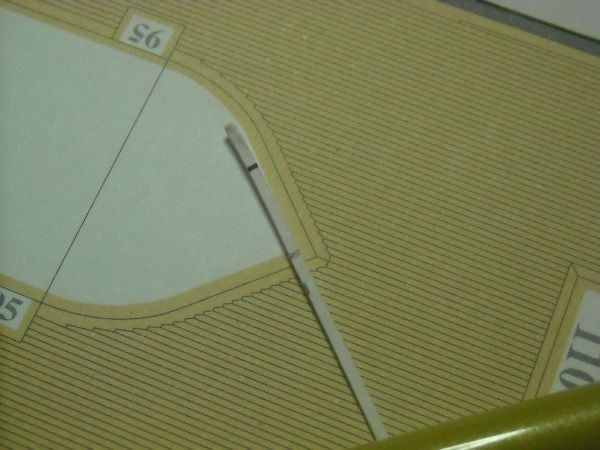 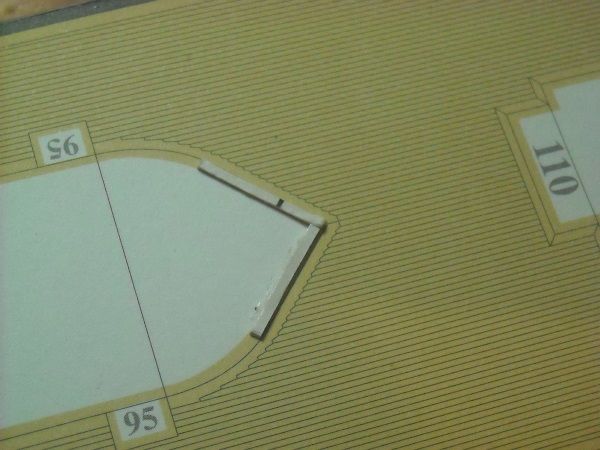 After drying I then glued the lower bottow to the formers and put it aside to let it dry. 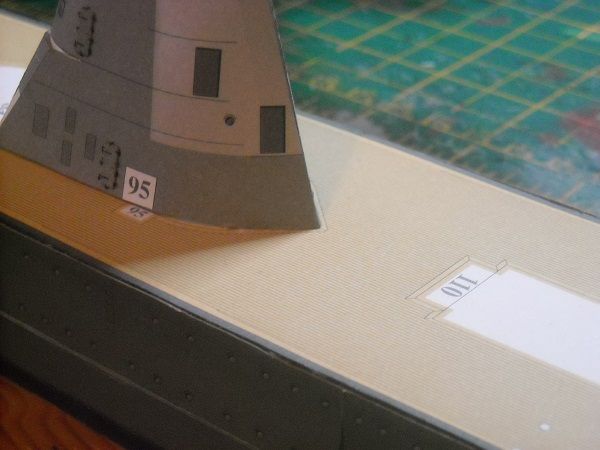 The loose front was slightly out of sync.  But it was close enough to be able to glue it in its proper place without too much effort. And with the back glued in place a small amount of pressure against the front would curve the section in the middle until it fit inside the drawn position. A few drops of glue under the front side and pressing down until the glue set and presto!   Job done! Well, the first part, anyway. A second level was to be placed on top of the first, using two collars for connection.  The front of the structure was curved again with fingers and the tab in the back glued shut. 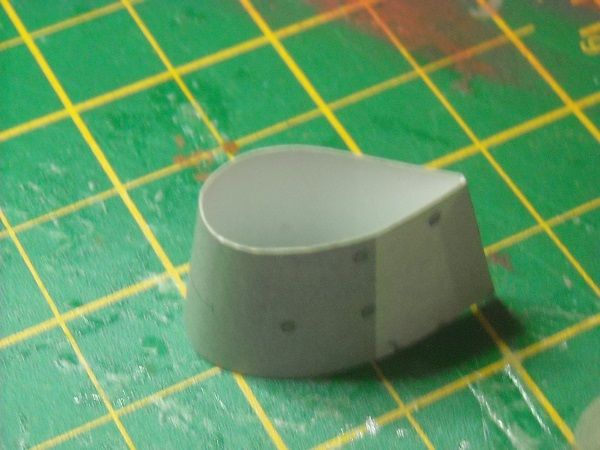 With the collars in place ....  ... the second 'ring' slid in place without any trouble. The top of the frame was covered with glue and a small line of glue was deposited on the bottom edge of the part and it was glued in place.  And that was, basically, that. I'm quite chuffed with the progress so far. The next piece will the the piece in front of the just created tower. I hope it will go as well! But more of that later!!!!! Adrie. 'Where to glue or where not to glue, that is the question'
Building: Hr. Ms. de Ruyter (card), Retourschip Batavia (Revell), HMS Surprise (De Agostini)
Built (and sunk): Too many to list
|
|
|
|
|
Fantastic Adrie! Loads of great tips for us wanabees too! I'm glad you found those figures at last and many thanks indeed for your brilliant 'free gift!'  I haven't made a start on mine yet, I've got the Sontaran, the Angel and Madam Vashta and hopefully next Sat the Silurian too. Trying to get all six if they get them in, then look out!! That superstructure is quite modern looking for a ww2 battlewagon, just a step down from a stealth ship! Keep them coming M8, enjoying this greatly! Robin First wooden ship: The Grimsby 12 Gun 'Frigate' by Constructo Second: Bounty DelPrado Part Works Third: HMS Victory DelPrado Part Works 1/100 scale Diorama of the Battle of the Brandywine from the American Revolutionary War Diorama of the Battle of New Falkland (unfinished sci-fi), Great War Centenary Diorama of the Messines Ridge Assault Index for the Victory diary is on page 1
|
|
|
|
|
Hi Adrie, quite Chuffed  .. so you should be, another excellent build session and very inspirational..... .. Love the tips and loving the build..... .. Regards Alan
|
|
|
Rank: Pro Groups: Registered
Joined: 23/03/2014 Posts: 185 Points: 545 Location: Essex
|
Hi all! Robin, thanks for your kind words, it's greatly appreciated. I'm going back tomorrow to a different store to see if I can get the other 4, or at least some of them. It's like the Pokemon craze all over again ... gotta have them all! An interesting observation you made there and she does seem to have a graceful superstructure. Which is weird because most reports described her views as crude and lumbering. But I guess we'll have to wait and see as the building continues what our impression of her looks is. Alan, what can I say. You keep making me blush! High praise indeed for something that I can't take all the credit for. It is a brilliant kit and makes it easy for a builder just to go the extra mile. But it is appreciated with loadsa thanks! Now then, enough mushy stuff. Let's get cracking again! This session we are starting with the assembly of the platform of the 'B'-position. This platform is placed in front of the superstructure and sports a turret with a single 5.9" (150 mm) gun. The turrets will be made later but here are the bits for this section.  The wall, a former and, oh yeah ... doors and portholes. Oh goodie!  The wall was curved with the fingers as we did before to loosen the fibres so that when forming it around a shape it will get a nice curve. I edge-painted the wall and then it was scored and bent. Note that I didn't put the doors down yet because that would create problems when curving the wall so they will be put in after the forming and glueing of former and wall is complete. I checked the fit of the wall around the former, grabbed the glue and with a toothpick I put glue on the former tabs and glued the wall in place.  Lovely! Uhhhhhhhhhhhhhhhhhhhhhhhhhhhhhhhhhhhhhhhhhhhhhhhhhhhhhhhhhhhhhhhh Not lovely! I THEN saw that the top of the former sported a scissor ...........  which means to cut this out BEFORE cutting out the part. Which I didn't and now the part was glued ...... OOPS!!!! (Note to any ADMIN people reading this, I REALLY need a OOPS smiley, please. I am going to require it plenty of times!)  I'll use the above for the moment but it doesn't really express the depths of despair and feeling of utter 'dorkdom' I was suddenly experiencing. The problem is that you can't just take a knife to it because by the time you make an incision into the top you will have bent it. And the only way to not get a bend is to support the wall from the bottom whilst cutting. Which needs fingers. My fingers! If you are not EXTREMELY careful there is every chance of embedding the knife into my flesh or worse slicing off a tip of a finger. (It happened to me before, a LONG time ago.) Not only will that be extremely painful, the blood that will be spurting out will leave a very nasty stain on the model!!! And we can't have that, now can we?? No, and thrice no! So, with a silent prayer on my lips I inserted the blade, then gigngerly felt below the platform to feel where the blade was pushing down the card and positioned the finger where it would counteract the bend but also should be out of harm's way. I will not describe events any further for there might be people reading this with a nervous disposition. I'll just show the picture.  A crude cut but more importantly NO BLOOD!!!! Phew. So with renewed vigour (nothing makes you feel as much alive as having faced certain impending death or disfigurement!) I started on the next parts, namely the doors and portholes. You know, I have a love and hate-relationship with these doors. I hate to do them but I love it when the work is done and they are snugly glued against the wall. Why do I hate them? Well, apart from the fact that it takes me 10 minutes to stab one out with extreme caution, which tires my eyes no end, no real reason I guess. But take a look for yourself.  And yes, that is a penny it is lying on! But you HAVE to agree with me, that is one BLEEPer to stab out. Sorry, no option here, you either do or you do. But with a little edge-painting is DOES look better.  And once in place .....  I'm loving it! Strangely enough, doing the minute portholes?  No problem whatsoever. Go figure! And like I said, I'm the endlook. 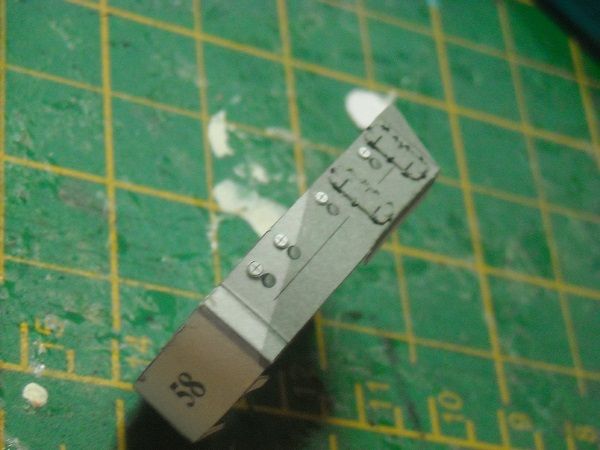 And you can't believe how satisfying the below is to see!  Anway, having finished the small stuff for today I continued with the next two parts which are the platform floor parts. They are coloured differently and need to be glued back to back. (Pssst, just so you know, I DID remember to cut out the holes first this time) The bottom ... 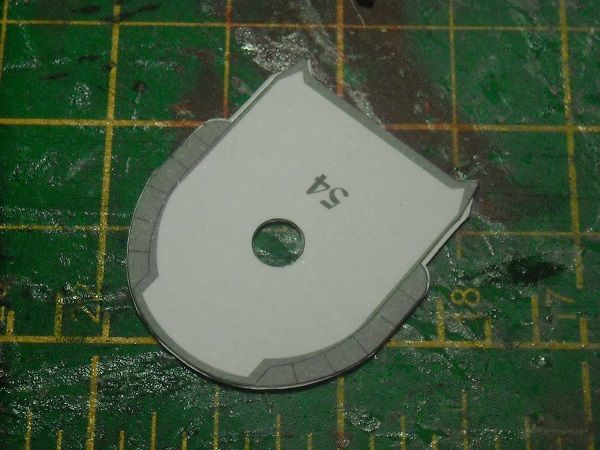 And the top ...  You can see in both pictures that there is some white showing around the edges. This is where one part is sticking out. Once the glue is properly dry, I will take my trusty knife and remove the white bits. But with all that has been going on, I'll leave that until tomorrow. I need a stiff drink now! So, till the (HIPS) next time! Adrie. 'Where to glue or where not to glue, that is the question'
Building: Hr. Ms. de Ruyter (card), Retourschip Batavia (Revell), HMS Surprise (De Agostini)
Built (and sunk): Too many to list
|
|
|
|
|
Hi Adrie, no mushy stuff will simply just say fab work..... oh, and so pleased to hear you fingers are still intact..... .. would hate to think the build would be spoilt with all the red staining.... your finger would heal itself but not the build..... .. Seriously, great work and well done..... Regards Alan
|
|
|
|
Guest (2)
|
 US
US

