|
|
|
|
WTG Adrie, love your skills with card..... a pleasure to follow....  Regards Alan
|
|
|
 Rank: Super-Elite       Groups: Registered
Joined: 27/01/2014 Posts: 5,060 Points: 14,980
|
I really am amazed at the quality of models that can be produced from card. This is such a fantastic build. Its even putting ideas into my head of adding a card model to my stash to try and get my teeth into 
|
|
|
 Rank: Pro   Groups: Registered
Joined: 23/03/2014 Posts: 185 Points: 545 Location: Essex
|
Many thanks, Alan.  It's a pleasure having you follow this build! Many thanks, Dave. I believe you could do worse. I am going to put a doc up with hints and do's and don't's on this forum as a starting point for others to experience the pleasure of cardmodelling themselves. I strongly believe that to better your skills, what you need is experience, and the more the better. The tight tubes I am rolling now are so much better than the first ones I did for this build. The more you do them, the better you get at it. And card models have the advantage that they grow and build quickly. Of course it helps if the learning at the same time creates a good looking model! Is it perfect? Naaah. Does that matter? Not for me. I am having oodles of fun building it and I know that the next model that I build will be just that little step closer to perfection. And to be brutally honest, I hope I NEVER build the perfect model. Because as soon as I do, I am afraid that I would never build another one. And that I would NOT like.  But I guess I'm funny that way.  Happy building all! Adrie. 'Where to glue or where not to glue, that is the question'
Building: Hr. Ms. de Ruyter (card), Retourschip Batavia (Revell), HMS Surprise (De Agostini)
Built (and sunk): Too many to list
|
|
|
Rank: Pro Groups: Registered
Joined: 23/03/2014 Posts: 185 Points: 545 Location: Essex
|
I guess it's time to post another update. I am pleased to say that I have battled my inner demons and have come out triumphant!  I think the craze got to me because I am nearing the end of the build and you tend to be a bit more eager to finish it. From the 10 sheets with parts I am now down to just two filled sheets(or thereabouts). So about 80% done of a build totalling 740 parts! (I checked the number of parts on the publisher's website). And you know what? I can't believe that I used that many pieces already!!! 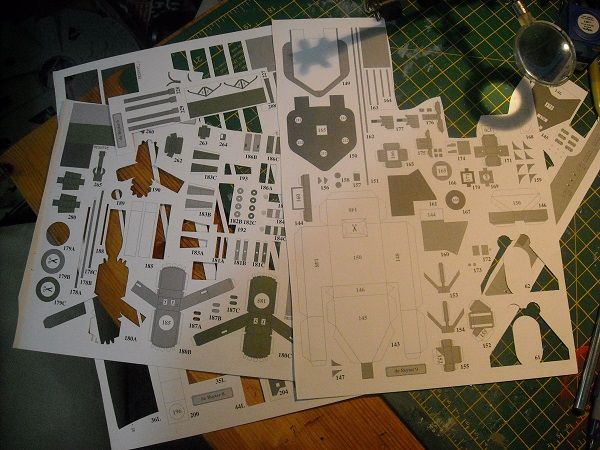 But like I said, cool heads have prevailed and I have slowed myself back down from a gallop to a trot. After all, it is utterly important when modelling to take your time and not rush things. So I went back to the plan, i.e. the superstructure. As said before, the last remaining one is the one above the engine room. 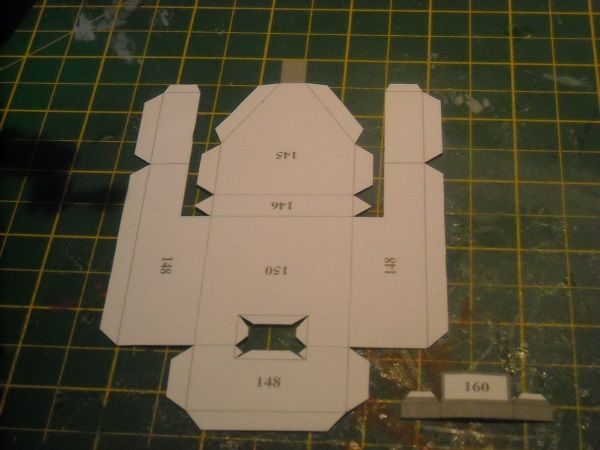 A nice big, white piece of card that needed scoring and bending. 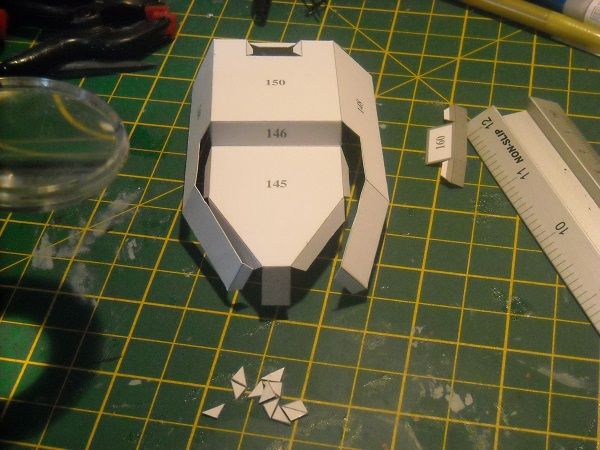 But because it is such a large section, I decided to cut a few more triangles to use during this build section to keep everything nice and straight. 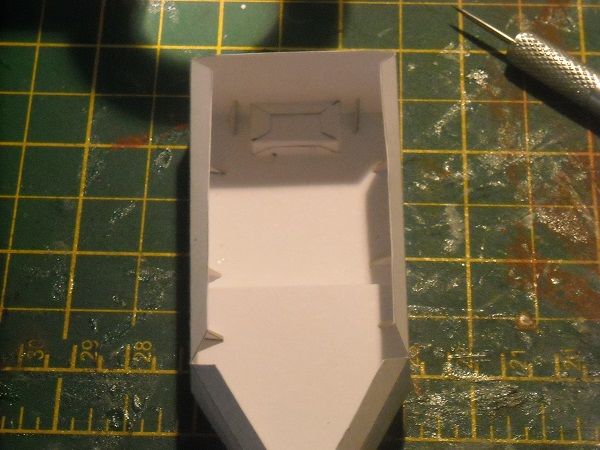 And to make sure it stayed that way I used some 'weights'.  A small cutout section was assembled ...  ... and glued in place ... 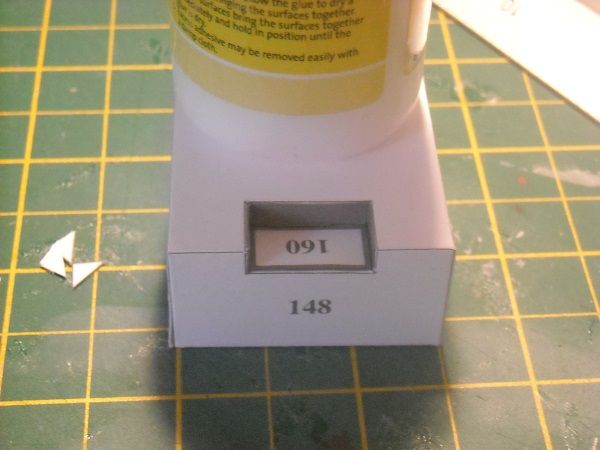 ... followed by the lower platform and wall section, which needed a support ...  ... for the anti-aircraft platform to be placed later. 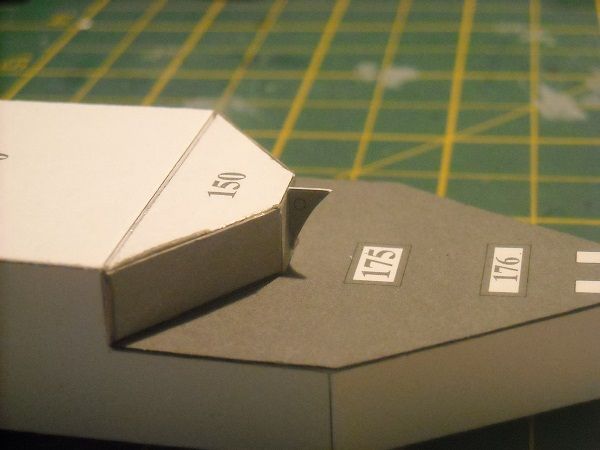 The next bit will be the wall for this section ...  ... which needs not one, not two but SIX doors!   This is going to be fun!!!! But time-consuming so I will do this tomorrow! I just put the structure in its place (not yet glued) ...  This is gonna look REAL good! (I hope).  Anyway, tomorrow will bring the answers! See you then!!!!! Adrie. 'Where to glue or where not to glue, that is the question'
Building: Hr. Ms. de Ruyter (card), Retourschip Batavia (Revell), HMS Surprise (De Agostini)
Built (and sunk): Too many to list
|
|
|
Rank: Pro Groups: Registered
Joined: 23/03/2014 Posts: 185 Points: 545 Location: Essex
|
Hi all! Got a bit more to share with you today! Not only did I finish the last of the doors today (Yay! ... uhhh ... Boo hisss!  ) but I also ..... no! One thing at a time! Sooooo, I cut out the wall section and scored and bent it.  Which I checked for size around the framework. 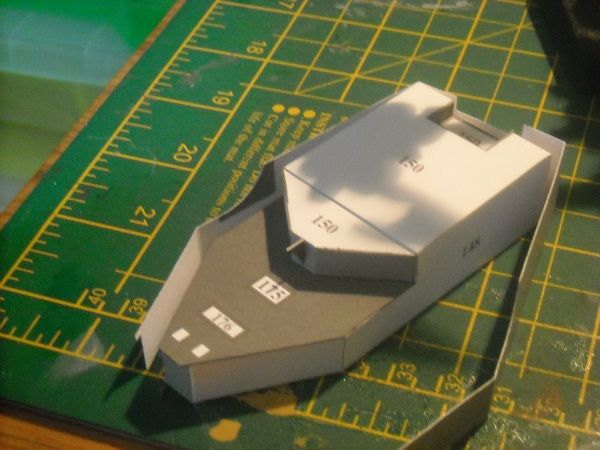 The fit was good apart from the small extension in the back which is a bit too big to fit around the overhanging deck. This will have to be cut back a bit. But apart from the doors there are also some porthole covers and a few further detail parts. Not sure what they are supposed to be but they will give extra depth! 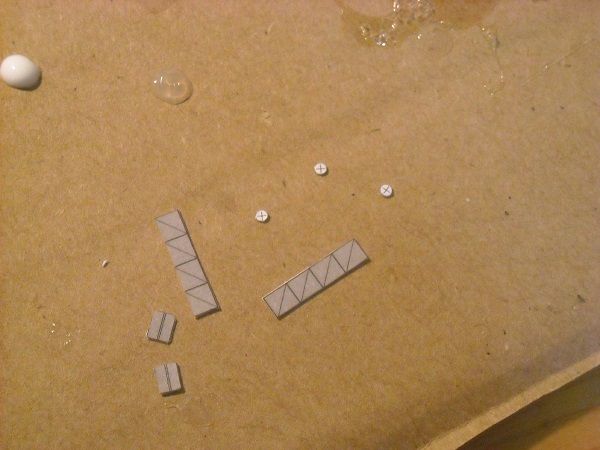 They DO make things look better, don't they? The wall was glued around the framework.  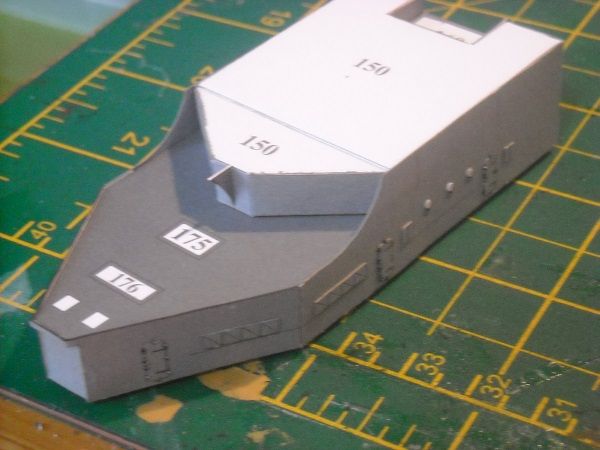 The next section is the anti-aircraft platform/deck, which consists of a top and bottom part and a rim to go partly around the deck. 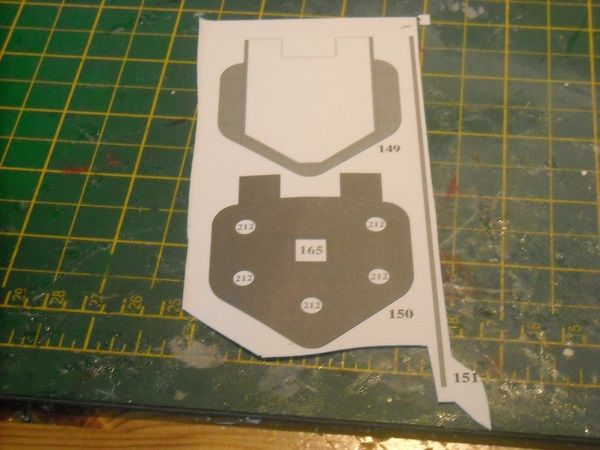 The parts were cut out and the rim was shaped with the fingers before edge-painting, then after the paint had dried it was shaped with the fingers again. This second shaping was needed because painting straightens the ridge again. Oh, and even if you have sections of straight and curved bits to cover, it is best to shape the whole rim. A curved rim can be glued straight a lot easier than a straight rim can be glued around a bend. 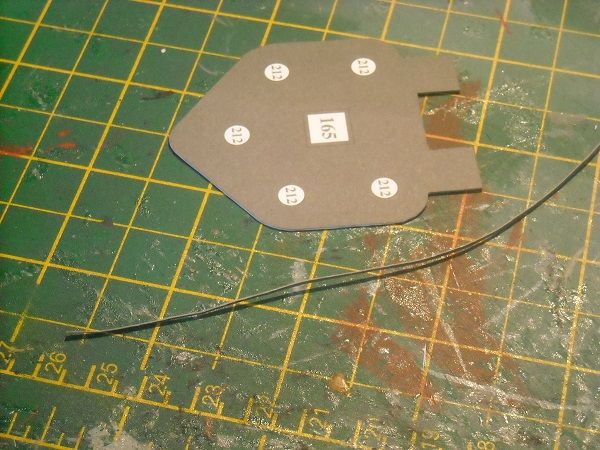 The assembly drawing showed that this time the top of the rim had to be flush with the top of the platform so the platform was turned around and a little dot of glue was placed in the corner and the rim was glued against it. 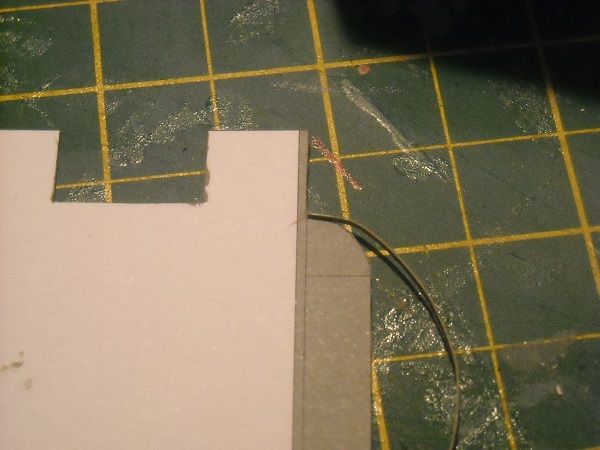 When that had dried sufficiently to not come loose again, another bead of glue was placed along the edge and the rim glued against it ... 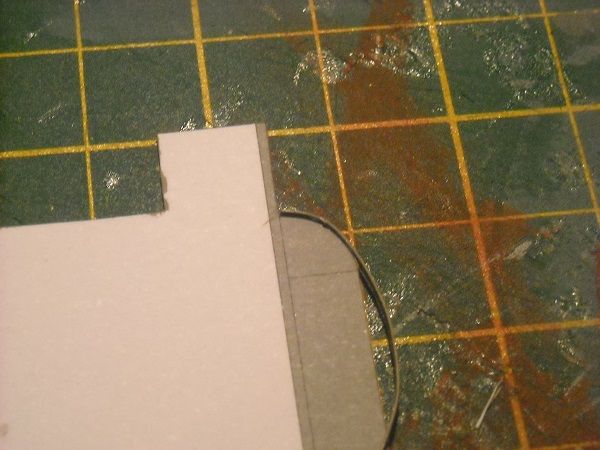 ... which continued until the whole rim was glued in place.  The platform was then turned round again and glued on top of the superstructure. 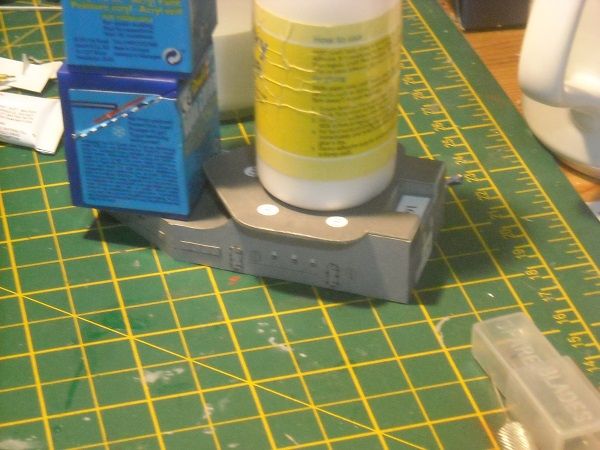 While that was drying under weight, I continued with the next section, a winch for the catapult. 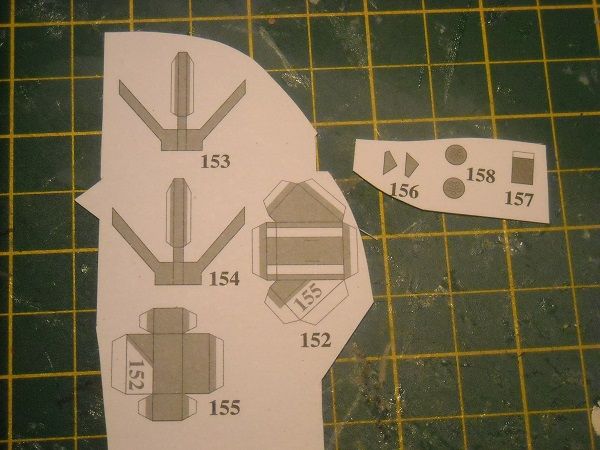 The first section for it was just scored and bent and will get its final shape by glueing it against the deck, superstructure and the two guides that are to be placed on top of it. The first of the guides can be seen behind the first section. 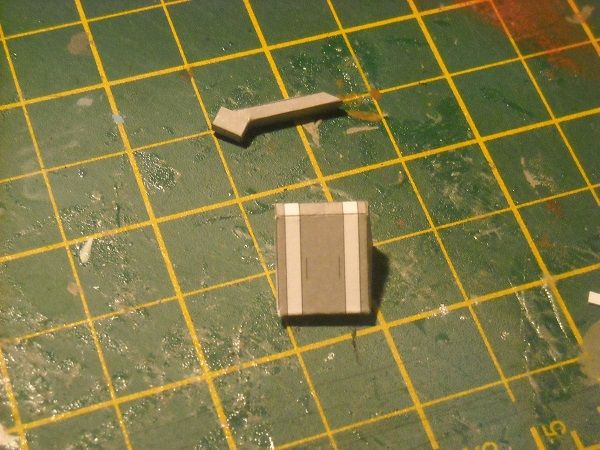 And the guide in place ... 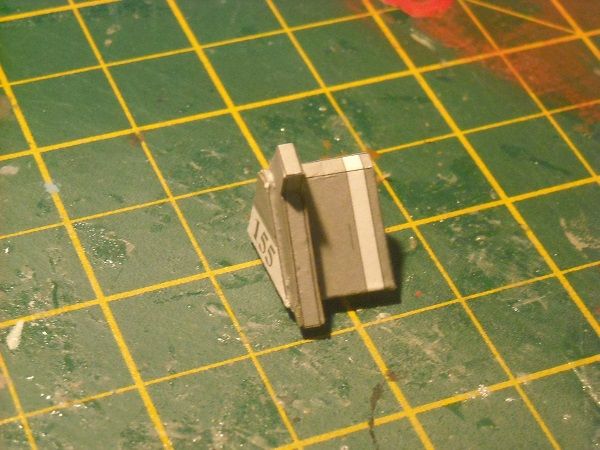 The structure will be left aside to dry and the superstructure was placed on the deck for the moment but won;t be glued until the deck supports have been glued in place. 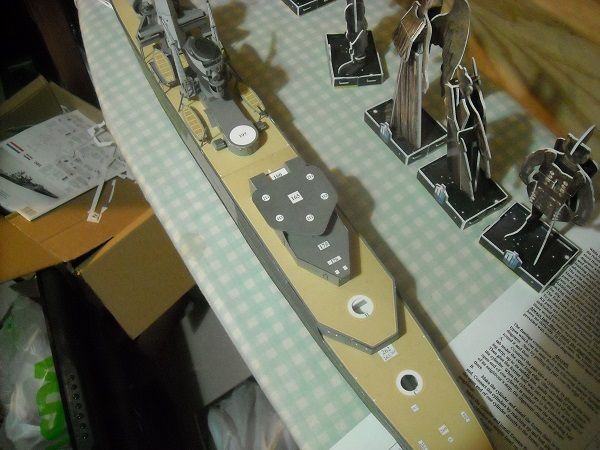 So that's where we are. Good progress so far, I would say and it won't be long before the last superstructure can be glued in place. But more about that later!!! Happy building, all! Adrie. 'Where to glue or where not to glue, that is the question'
Building: Hr. Ms. de Ruyter (card), Retourschip Batavia (Revell), HMS Surprise (De Agostini)
Built (and sunk): Too many to list
|
|
|
Rank: Pro Groups: Registered
Joined: 23/03/2014 Posts: 185 Points: 545 Location: Essex
|
Hi all! Time for another update, I guess. I started on the secong guide. From the experience from yesterday, I decided to bend the long tabs while the rest was still attached to the card. I found it a bit fiddly yesterday to get straight bends on that section. 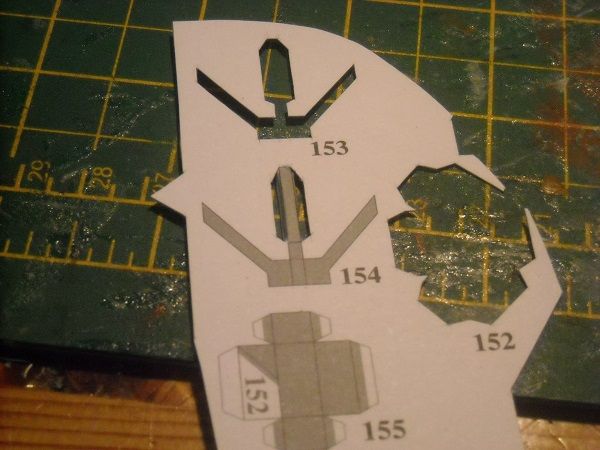 It was a lot easier to bend this way and took several minutes off the build time. The part was then completely cut out and glued toegther. While it was drying I started work on the smaller companion of the triangular base. It was a simple cut, sore and bend-job and it went together without too much fuss. 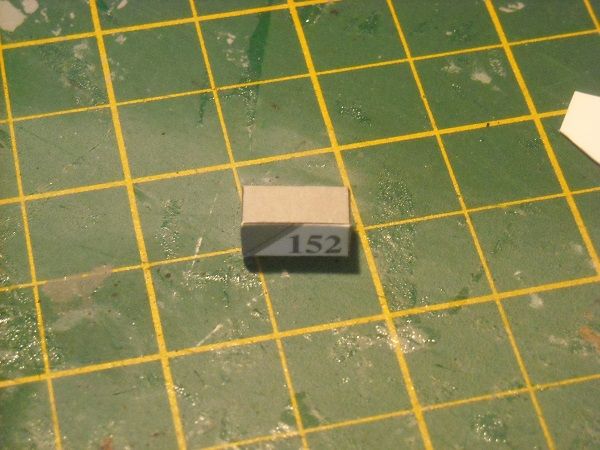 The second guide was then glued to the base ... 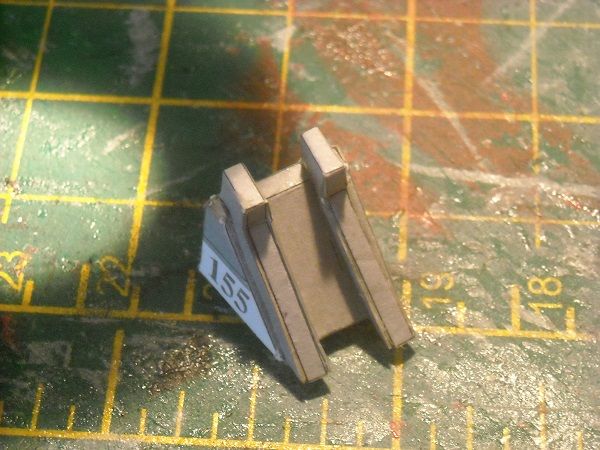 ... and while that was drying I started on the winch that was to go between the two guides. These are them parts ... 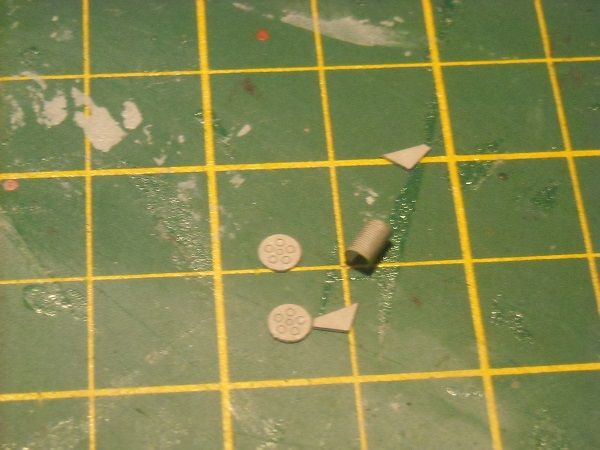 ... a cable drum as before with holders. I trued to find out where the cable from the drum was supposed to go but alas, as before, there was little information about that to be found. So no simulated cable there, I'm afraid. The two base parts were glued together and glued against the wall of the superstructure.  Here is the cable drum ...  ... and the brackets ...  ... which were glued in place. 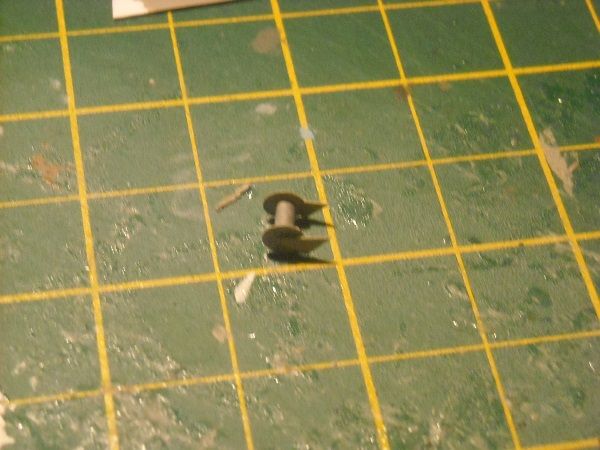 And the drum was finally glued in place.  Then the supports for the deck were cut out ... 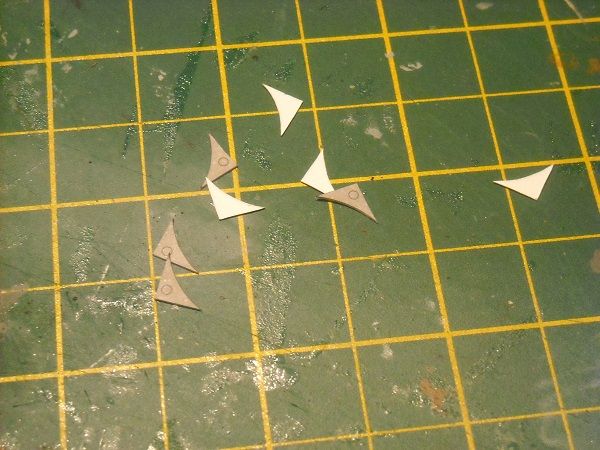 ... glued together, edge-painted and then glued in place underneath the deck. 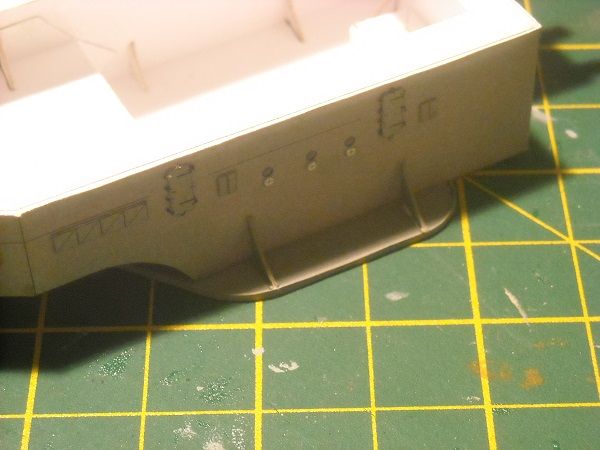 Now nothing stood in the way to glue the superstructure onto the deck ... apart from .... Ok, I guess now is the time to come completely clean. Rememeber the setup that I created for the railings? Well, that whole procedure was .... less than succesful, shall we say? What went wrong, you may ask? What went right, would be the answer. First there were the pins that were supposed to guide the thread across the template. Unfortunately the cardboard they were stuck in got wet by the PVA-water mixture that I used to glue the threads together. And wet cardboards gets soft so the pins loosened themselves under the strain of the tensioned threads. So the threads didn't dry up straight. Then I tried again on a different piece of thick card and I found that the placing of the 100 plus pins needed to be so accurate that even the smallest deviation made the angles of the threads all wrong. So I tried again, this time taking a lot of time to make sure the placement was as precise as I could get it amd when I cut the dried thread, several threads just went ping and pulled themselves loose from the other threads. The idea was good, but not good enough to allow me with mu skills to do it properly. I spent several weeks on just one section of railing and had no result to show for afterwards. BUT, I really did want to get the lady her railings, so I am ashamed to say that I cheated again.  After getting the go-ahead from the mizzes I ordered a set of lasercut railings from Scaldis and today they arrived. 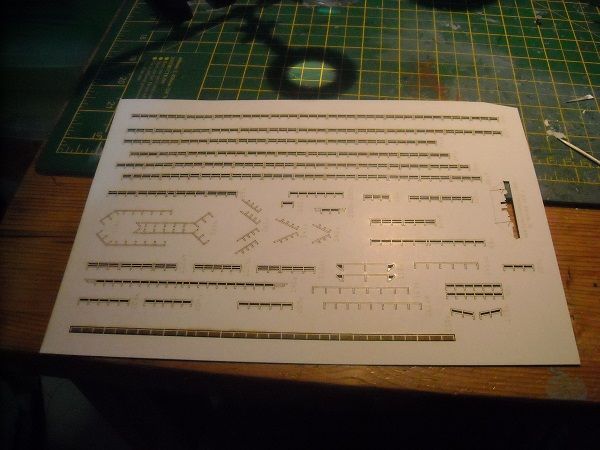 The railings were made from 0.4 mm cardboard which had a plastic coating on either side. Each piece of railing is identified by a code which links the part to the deck, platform or stairs that the part is supposed to go on to.  The material can be curved but should not have sharp angles. Where these are required, the set identifies those sections with thin lines to denote where the part is to be cut and then glued together at an angle. 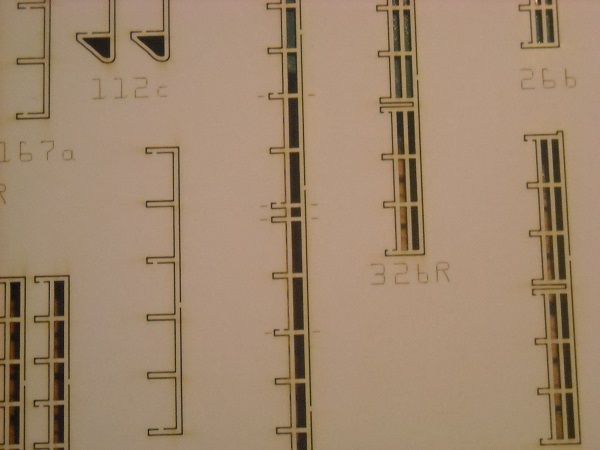 The set even has a fence work section that is to go around the anti-aircraft deck. 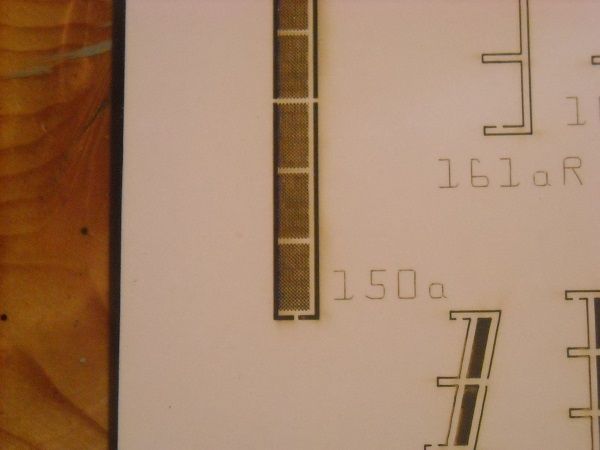 That's going to be fun to paint!!!!! But as it is thin card I was afraid that the parts would warp when painting so I tried to paint a section while it was still attached to the card. 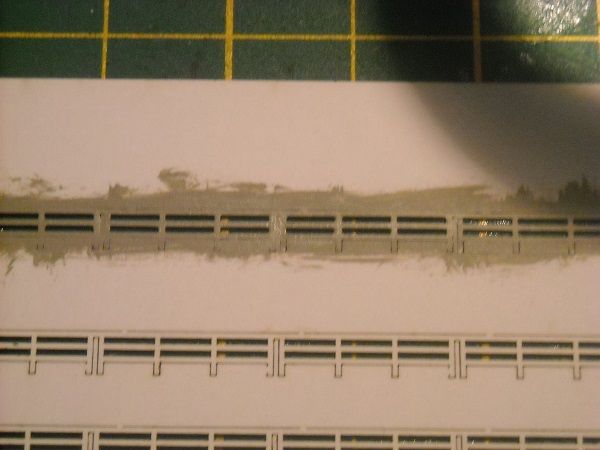 Because of the plastic coating, each part will need two coats of paint. But then it looks surprisingly good! 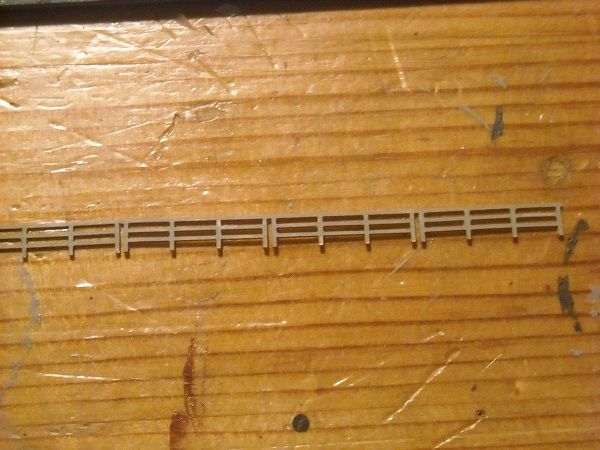 Mind you, they should as they cost more than the actual model! Now all I have to do is find out where exactly to place them! I wanted to start at the bow because I finished all the work there but without precise drawings it's all a case of fitting and trying. So that is going to take a while but I'll get them in place! And I am also waiting to place the last superstructure onto the deck until I have the railings and fences in place there. So that will be the next task! And more about that next time we meet! Happy building! Adrie. 'Where to glue or where not to glue, that is the question'
Building: Hr. Ms. de Ruyter (card), Retourschip Batavia (Revell), HMS Surprise (De Agostini)
Built (and sunk): Too many to list
|
|
|
Rank: Pro Groups: Registered
Joined: 23/03/2014 Posts: 185 Points: 545 Location: Essex
|
Evenin, all! Time for yet another update, I would think. So here we go ....... The work on the aft superstructure continued with a platform for the stored aircraft. The kit comes with three aircraft on the back but from what I could find out, no more than two were carried at any one time, the third being kept in the hangar. When I finish the catapult, one of the aircraft will be placed there and a second will be placed on this platform. The platform consists of two layers (one top and one bottom) and a rim. The platform will be supported by three beams and will sport the first of the railings that I received yesterday. 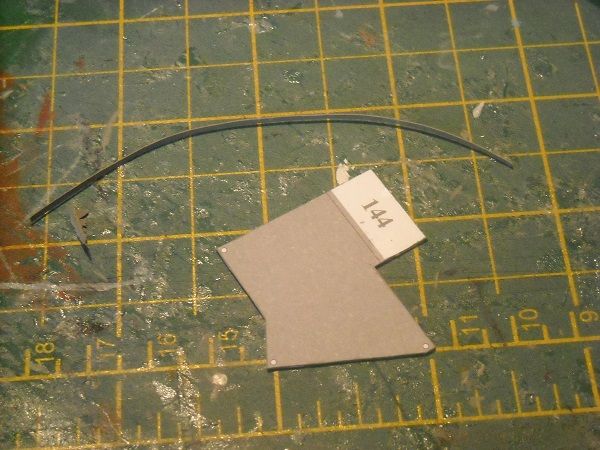 As before the rim was glued around the platform. 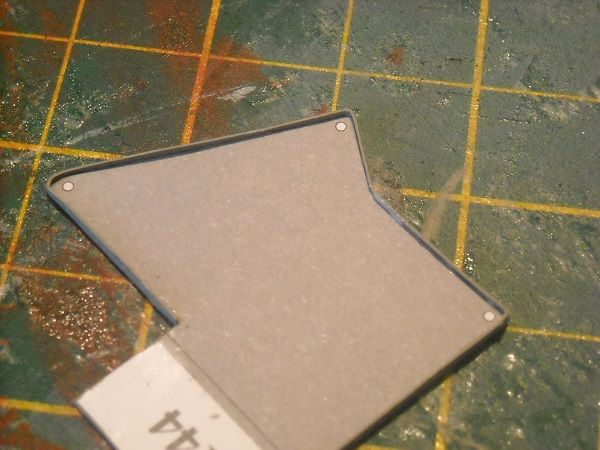 The supports were then cut from 1.2 mm brass rod. Since I still had full access to the underside of the platform and it showed where the supports were to go I thought it best to put the supports in now rather afterwards when the whole superstructure was glued to the deck. 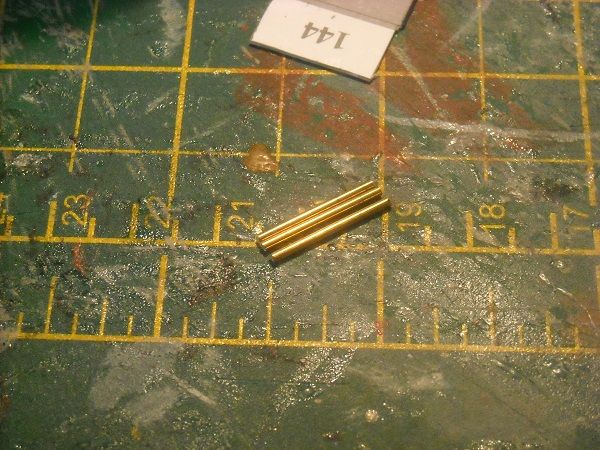 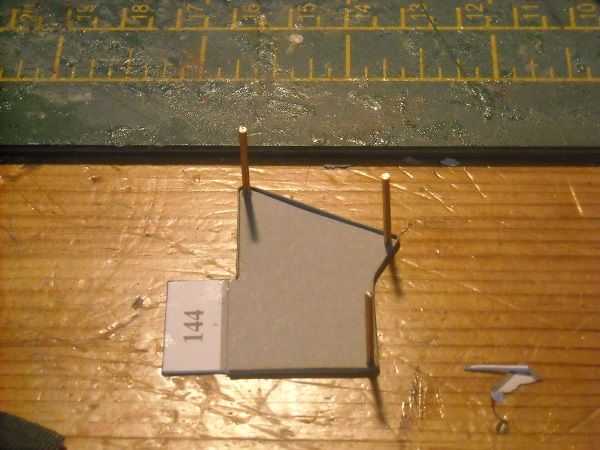 Having glued the 'legs' into place I put the platform aside and started painting the two railing pieces. 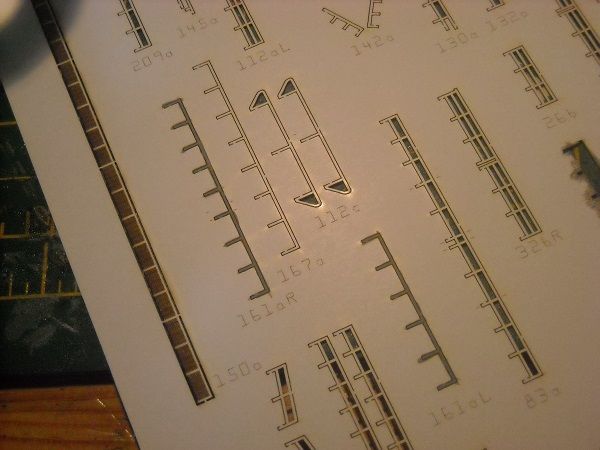 While that was drying I cut out the aircraft guides for the top of the platform. 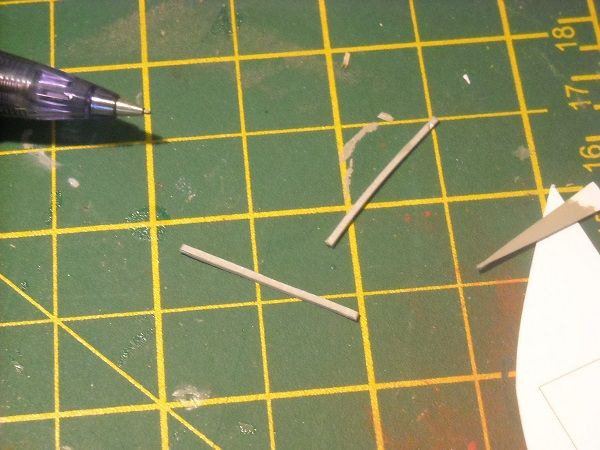  And when the last rails were in place, the railings were glued in place. The left railing was a simple cut out, put a drip of glue on the legs with a cocktail stick and put it in place. The right side, though, needed a bit more work. As this material does not bend too well, I cut the piece in three pieces where indicated and then I glued the outer pieces in place. The miniscule middle bit was then glued in place between the two outer pieces. 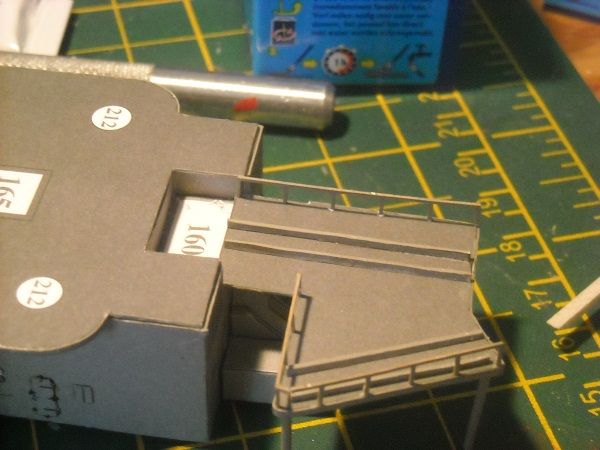 Remember when I said yesterday that the idea of making my own railing was good? I was wrong. Badly wrong, in fact. I would never have produced anything that was coming close to this! The top needed another coat of paint but other than that? 'Bleepin' purrfet!' as my mizzes would say! I decided to do a bit of extra work for the anti-aircraft deck which is going to get a crowning as well. The crowning being s number of supports holding sections of mesh. I thought that it would look best if the supports were painted as the other railings but that the mesh should be dark metallic. I used Gunze Sangyu Dark Iron for this, because it has the added benefit that bit is very fluid, almost ink-like and dries almost instantly.  And because it is so fluid, I hoped it would not clog up the small holes in the mesh. 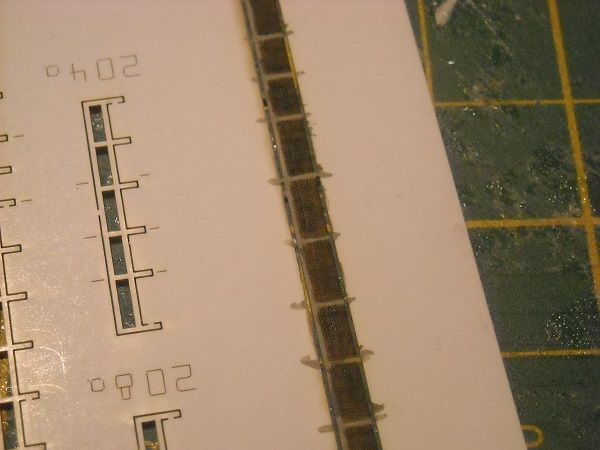 You know? That's as good as I could have ever hoped for. Quite chuffed here! I left that to get another coat later and continued with the bits and bobs that were to go onto the platform, like the fire control position with range-finders, skylights and ventilators.  This is as far as I have come with the base and platform of the range-finder. 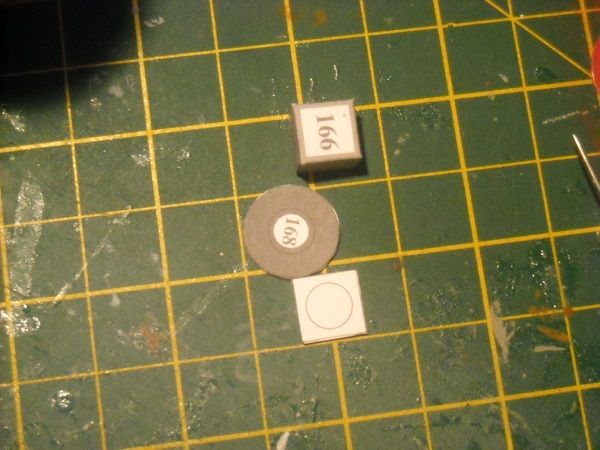 Of course the platform will get its own piece of railing, a rounded one this time! But more about that laterzzzzz!! Happy building, all! Adrie. 'Where to glue or where not to glue, that is the question'
Building: Hr. Ms. de Ruyter (card), Retourschip Batavia (Revell), HMS Surprise (De Agostini)
Built (and sunk): Too many to list
|
|
|
 Rank: Master Groups: Registered
Joined: 20/03/2010 Posts: 1,199 Points: 3,473 Location: Glenrothes
|
Great stuff Adrie really coming along a treat..me likes it a lot  Am not ignoring your request about my progress with lower hull  Just afraid that if i post photos off progress so far i might get banned from the forum  Nearly there tho ...taking me a bit off time ....due only to the lack off time i have actually spent on her Hope to post pics soon cock ups n all
|
|
|
Rank: Super-Elite  Groups: Registered
Joined: 30/01/2013 Posts: 4,604 Points: 13,607 Location: Monmouthshire UK
|
Lovely work Adrie, wont be long now Steve
|
|
|
Rank: Super-Elite  Groups: Registered, Forum Support Team, Administrators, Global Forum Support Team, Moderator, Official Builds Joined: 09/11/2012 Posts: 8,520 Points: 24,651 Location: East midlands
|
Hi Adrie, Coming along very nicely. Those railings look wonderful, If I hadn`t seen it for myself I wouldn`t have thought they were made of card. Keep up the good work. Regards delboy271155 (Derek) COME BACK GUY FAWKES "YOUR COUNTRY NEEDS YOU"
|
|
|
Rank: Pro Groups: Registered
Joined: 23/03/2014 Posts: 185 Points: 545 Location: Essex
|
Hi all! Guys, thanks for the nice comments, much appreciated! @Budgie. Don't worry, mate, and take your time. Just glad that you're still with us and the building! @Steve. Yeah, I definitely am now in the second half of the build.  . Mind you, with these railings it is going to take a wee bit more time! But we'll get there in the end. @Derek. How did you say it? Oh yeah, you ain't seen nothin' yet! But see for yourself below and you'll see what I mean! So without further ado let's get cracking!!!!!!!!!! I finished yesterday with the fire contraol platform and base. I tidied up the platform and edge-painted the edge. 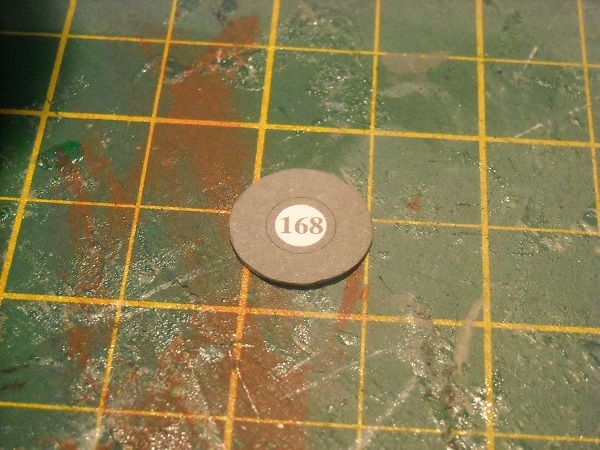 I then started with the connecting circle. As it was built up out of three layers, I couldn't stab it so I slithered off the card around the circle. 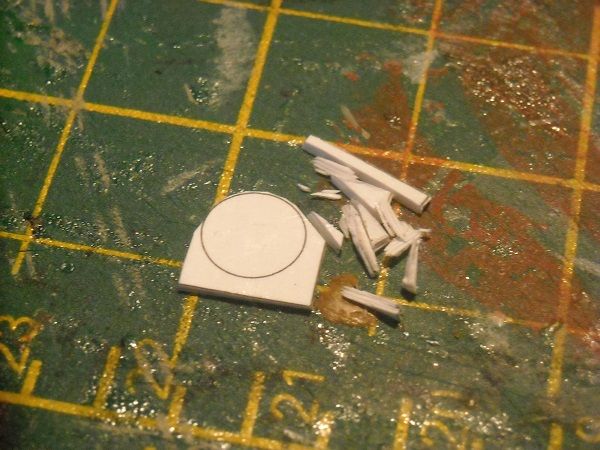 This was the first 'cut' leaving a little bit behind around the circle. When I had cleared away the surplus card, I cut the remainder off. I then glued the three pieces together. 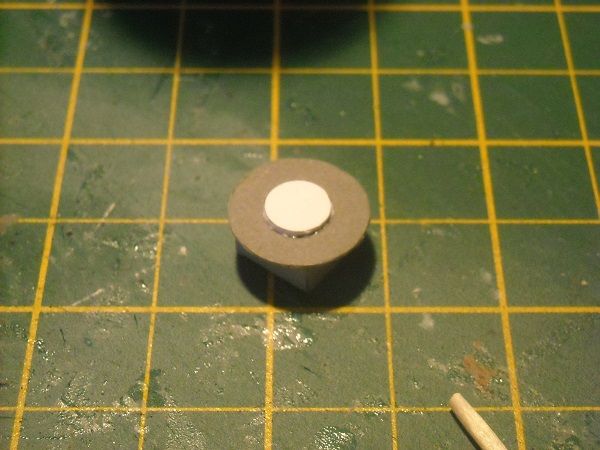 I didn't edge-paint the top circle because it was left white which means that you wouldn't be able to see it anyway. But now that the base was completed, I worked on the next layer. 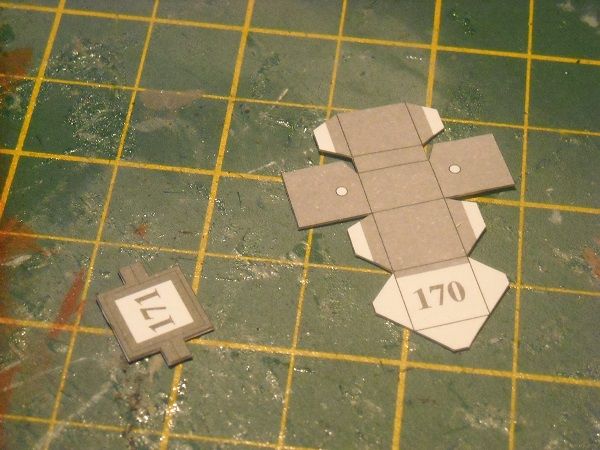 Another platform and the actual control centre. This centre housed the 'Hazemeyer' Fire Control system, which was quite ahead of its time and indeed taken over by the Royal Navy when a Dutch destoyer, which carried it, the HNLMS Isaac Sweers, was towed to England, having escaped from the Netherlands. I also painted the railing for the circular platform ... 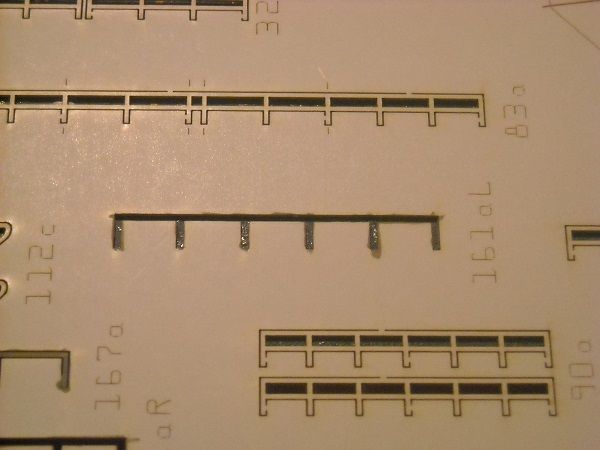 ... as well as give the fences that were to go around the anti-aircraft deck a final coat. 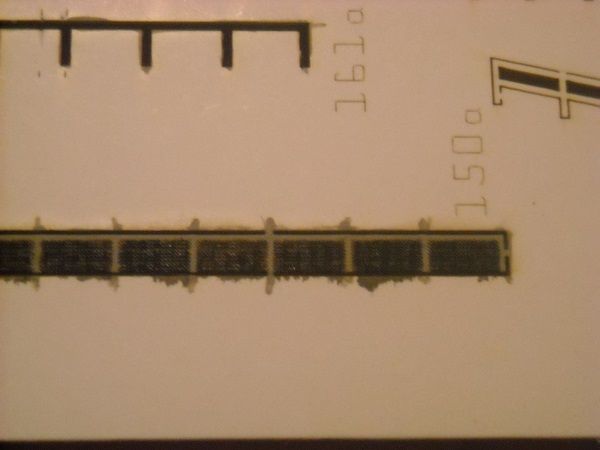 But back to the control centre, this was scored and bent ... 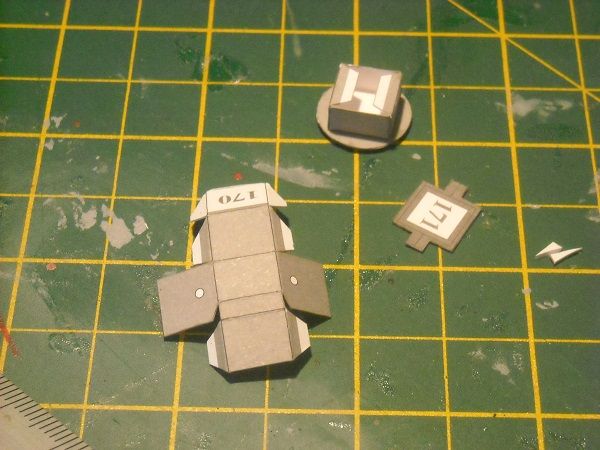 ... and glued together. 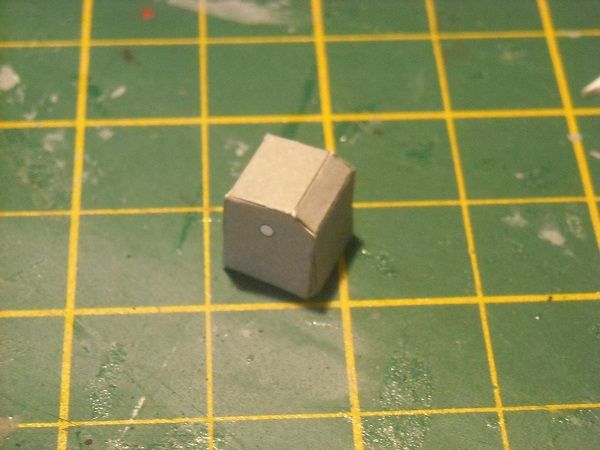 Then the support brackets were next.  They were cut out after doubling and edge-painted ... 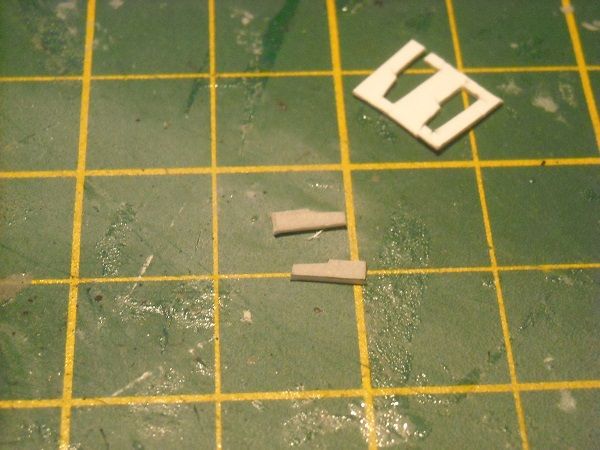 ... and glued in place. 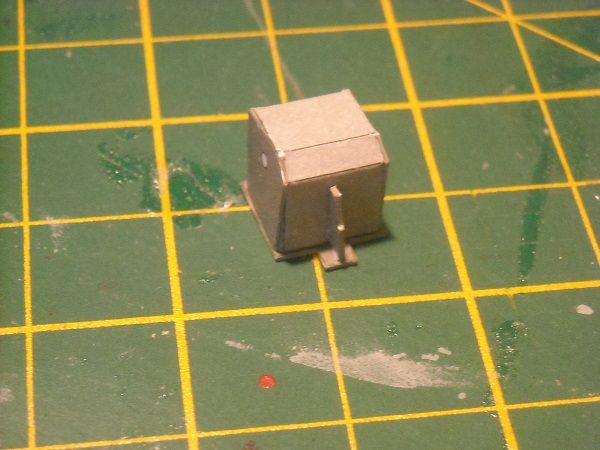 The railing was then cut free ... 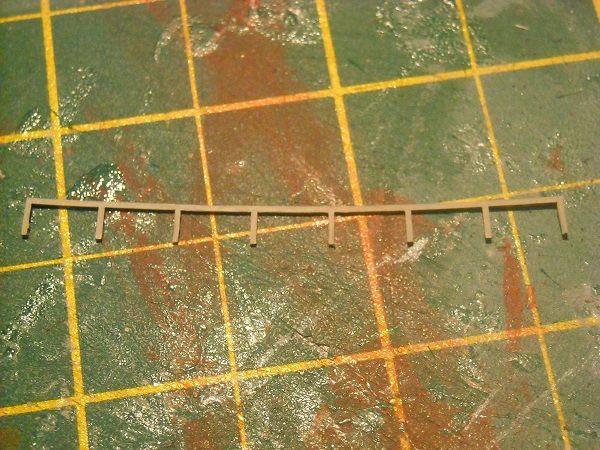 ... and gave me a headache. They had to be shaped round and with their fragile shape, I was fearful that the shaping would break off the legs! But with three assistants ... 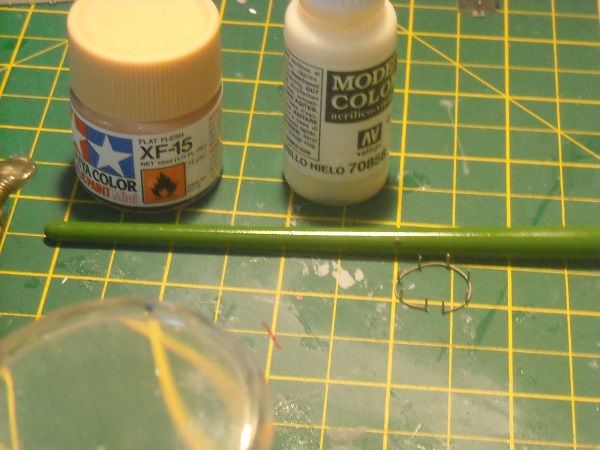 ... going from the largest diameter to the smallest, using it to roll the railing around, I got the shape down to this. 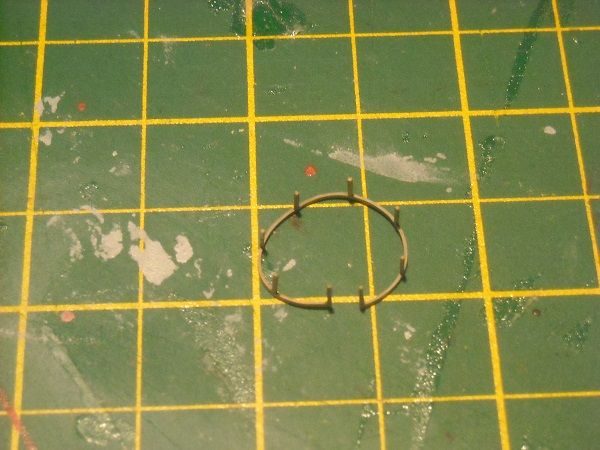 Not very circular, I hear you say? And you'd be right! That's why I finished with my secret weapon after I glued the ring closed! 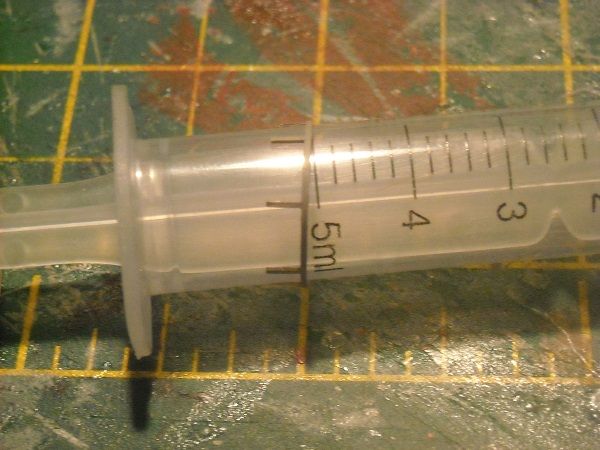 I used the syringe as end-shape and rolled it with the railing over the table, straightening the circle and keeping the legs in line. I then put this aside and went back to the fire control centre, which still needed the range-finder 'horns'. These were tightly rolled and topped with a cap ... 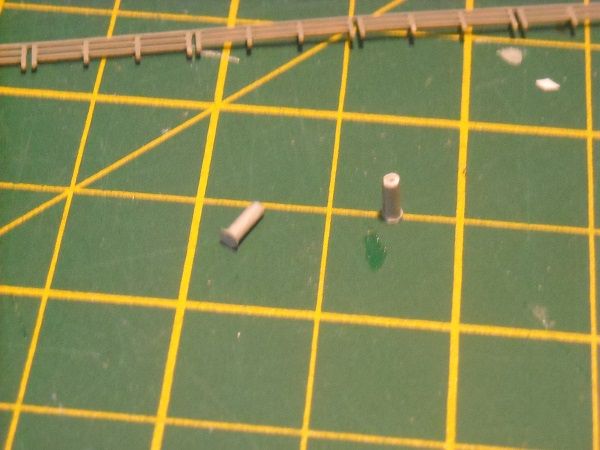 ... before glueing them into place. 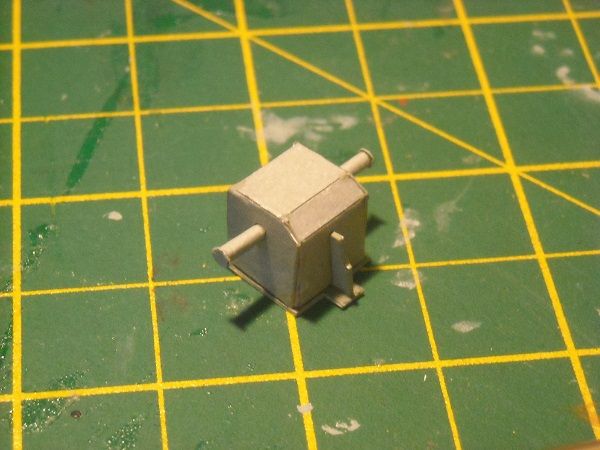 I then inserted the centre inside the railing ring (I was afraid that I couldn't get the centre fit inside it once the railing was glued in place) and glued then both to the base. 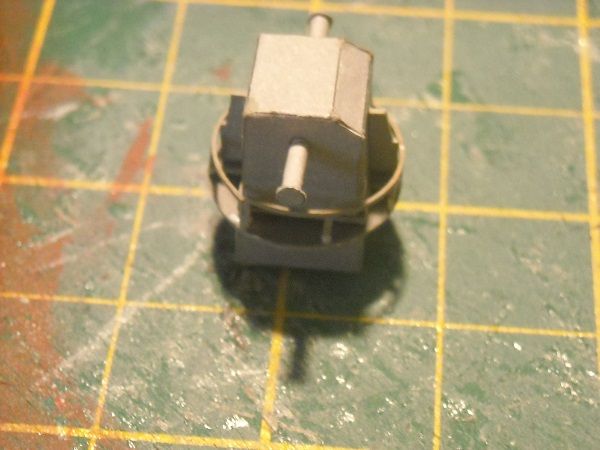 I had to add a few drips of glue to some of the legs because it was quite fiddly work and by the tme I had the parts in place, some of the glue on the legs had already dried up! But here it is, glued to the deck. 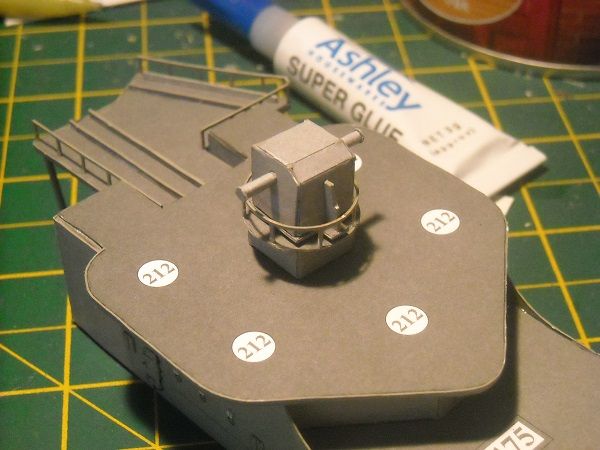 Looks pretty good, I'm pleased to say. As the fences needed another coat, I continued with the first skylight for the deck under the anti-aircraft deck. 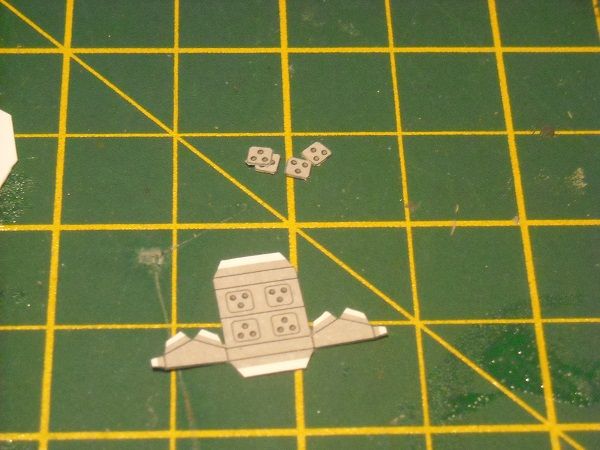 It's made of a single piece of card with four detail parts added to give it depth. The piece itself if, due to its size, fragile so I needed to use care when scoring, bending and glueing it. 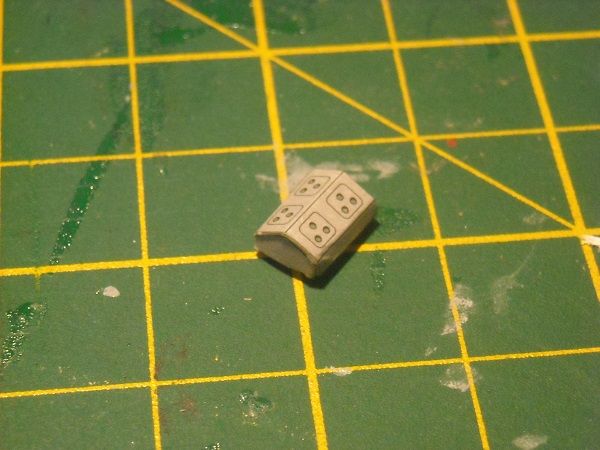 Then the detail parts were glued on and the whole was glued to the deck. 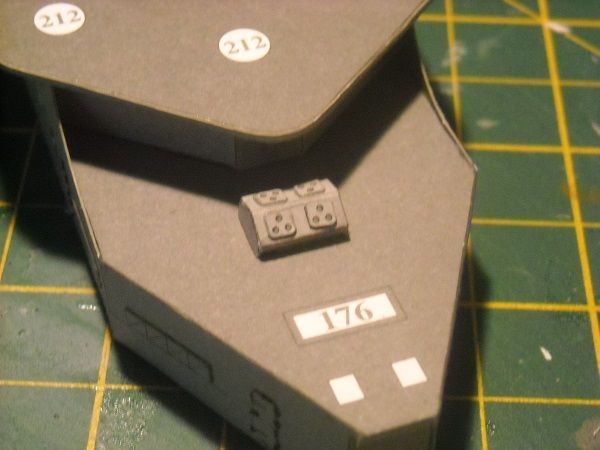 I then glued the fencework to the top deck, starting at one side, clipping it off when a 90° bend was required and re-glueing it to the bit that was already in place. The curves were formed around the knife holder where needed. I must admit, the clipper made the work VERY easy! It cut through it square and quickly without disturbing the rest of the already glued on work. But Derek? is this better, or better???? How about this being cardboard, eh??  I absolutely  that look! 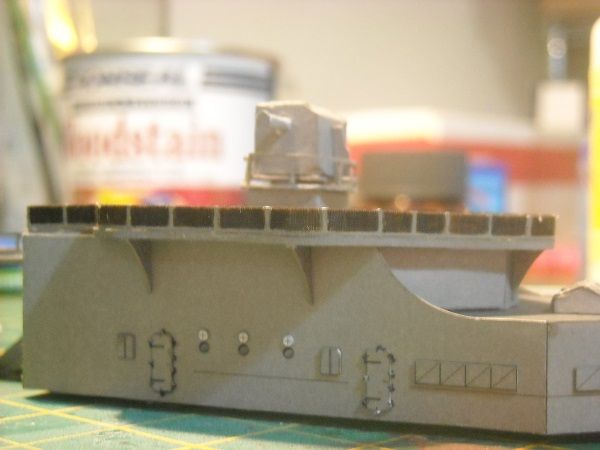 I temporarily put the superstructure on the deck even though I was aching to glue it down! 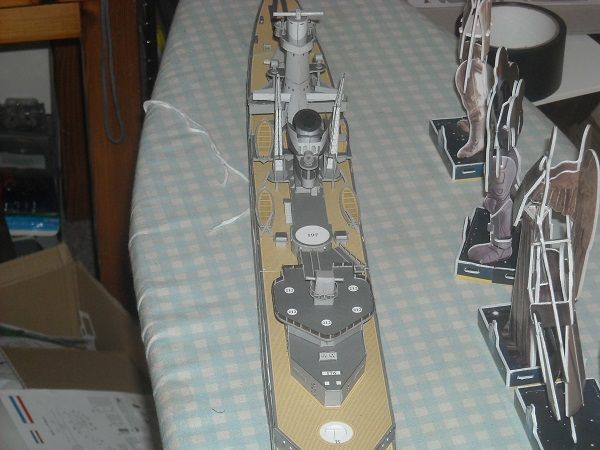 Why didn't I glue it? There is another piece of railing to go around the lower deck and I want to do that when I have full access. So one more skylight, two ventilation structures and another railing to go! But that will have to be tomorrow! Hope to see you then! Happy building! Adrie. 'Where to glue or where not to glue, that is the question'
Building: Hr. Ms. de Ruyter (card), Retourschip Batavia (Revell), HMS Surprise (De Agostini)
Built (and sunk): Too many to list
|
|
|
|
|
She's certainly coming together now Adrie, credit to your skills on this one..... Regards Alan
|
|
|
Rank: Pro Groups: Registered
Joined: 23/03/2014 Posts: 185 Points: 545 Location: Essex
|
Many thanks, Alan for your nice comments. And yes, the majority had been done! She won't keep me busy for much longer! BUT not just yet!!! So without further ... yada ... yada ... yada. Oh, speaking of which, I thought it best to explain how I gave myself the name GluedFingers. It was after my wife accused me of having more glue on my hands than on the model!! She had a reason for this exclamation, to be sure. I was working on a model, glueing a number of posts to a deck and I tend to wipe off excess glue with my fingers if I can reach it as well as using my fingers to keep my cocktail sticks clean(-er). Anyway, she suddenly called me out to help her fold the bedding sheets, which I promptly did. Perhaps a bit tooo promptly. Perhaps I should have taken the time to wipe my hands clean first. Perhaps. But then again, it was only PVA! And that would come out eaasily during the wash! Okay, so she had to wash the sheets again, but still .... Anyway, that was when I took the name GluedFingers. And giuess what, she now giggles whenever I regale the tale of the name. Go figure!!! Anyway, I started on the second skylight and because of the shape ... 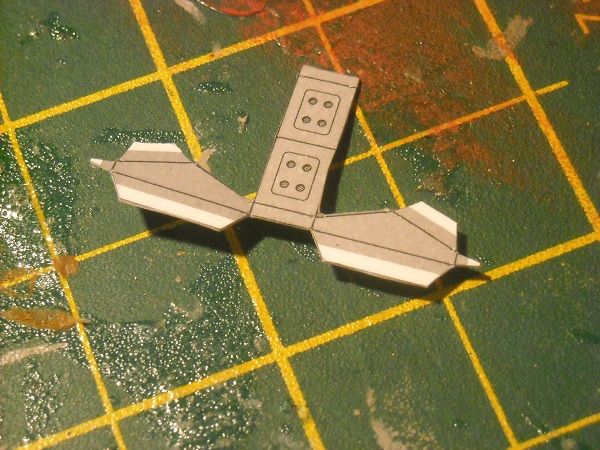 ... there was a good chance that the part could split on the small edges as they were scored and bent. So I scored all the lines on the back and bent only the nearest connecting tabs of the 'front' first, as can be seen in the photo. I then glued those tabs first on both sides then with the next nearest tabs and so on until I bent the back down over the small triangular tabs and glued them in place. 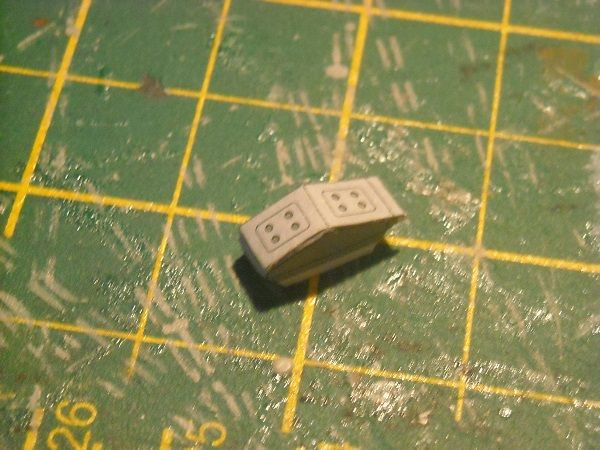 I left the bottom tabs straight for the moment and started cutting the railings. I cut it at one side of the marked spot and removed that section ... 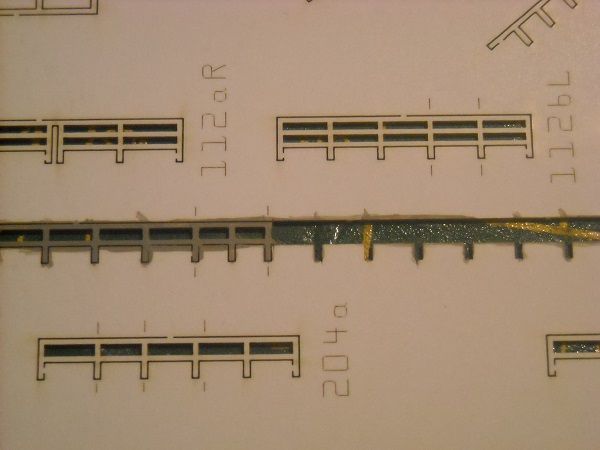 ... then the other side and finally I cut the middle bit loose. 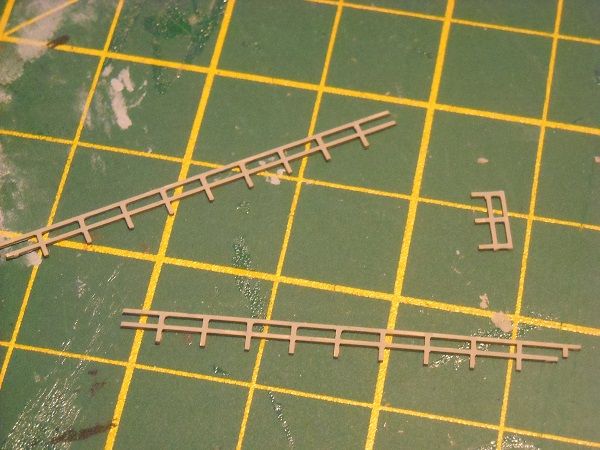 They are really nice to work with, if only the card hadn't had that crummy coating! Painting the parts was a royal pain in the behind with several coating needed because the first one didn't 'lay' properly. But I painted the sides of the cut areas then started work on the ventilator structures while the railing was drying. 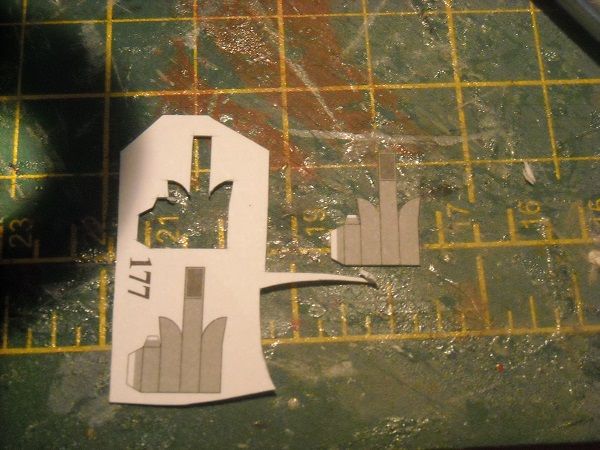 Two were required and it was a relatively simple, if slightly fidgety, job to score and edge-paint. I then took a cocktail stick to the back of the part to roll the round section around it. 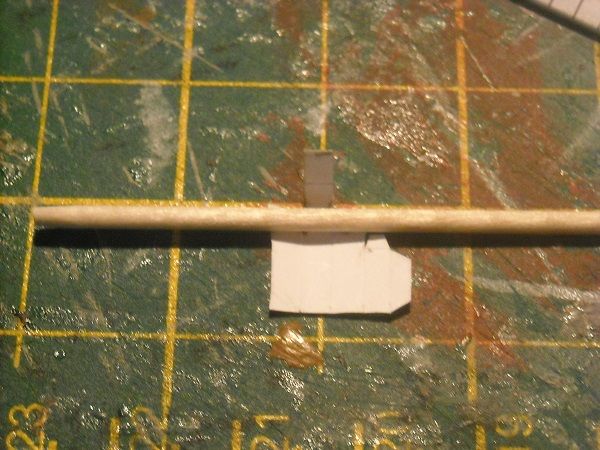 I then bent the first score line, put a line of glue on the edge of the side and glued the rounded back to the side. I then bent the next score line and glued the other side to the back with another thin line of glue. Finally the front was bent and the tab glued to the inside of the first side and the 'hole' was glued in place. 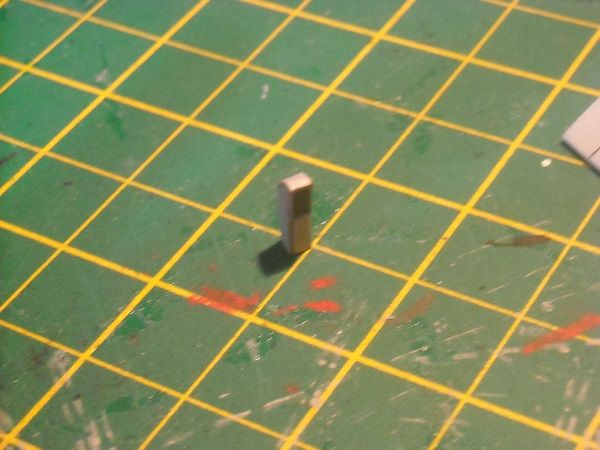 I did the second part the same way, then glued the skylight with the added details and the two columns to the platform. 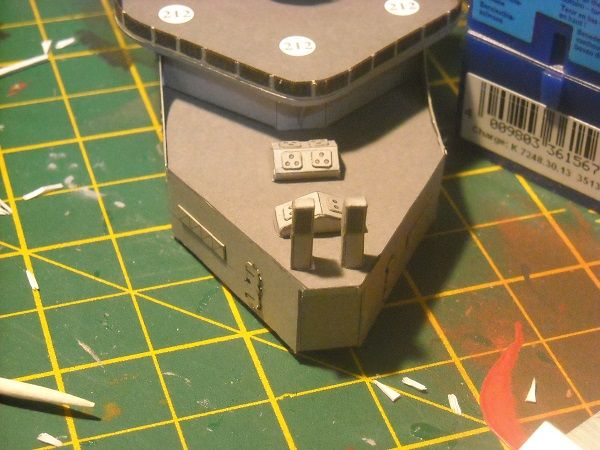 With that in place, nothing could stop me to start on the railing so I glued the middle bit first to act as a guide for the other sections. 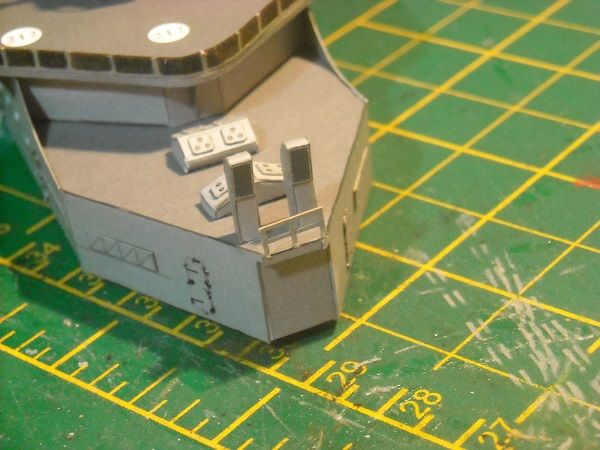 I then clipped the left side of the railing where it required a bend and glued those two pieces to the middle section and repeated the same procedure for the left side. And the result? .... 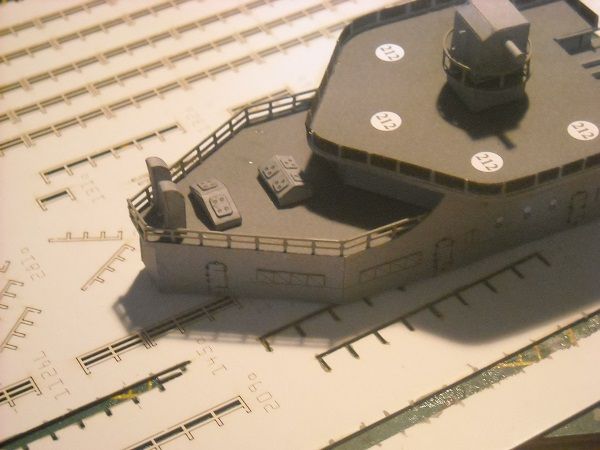 ... can definitely be called a RESULT! The top needed another lick of paint which was quite easy to do now that they railing was glued down. 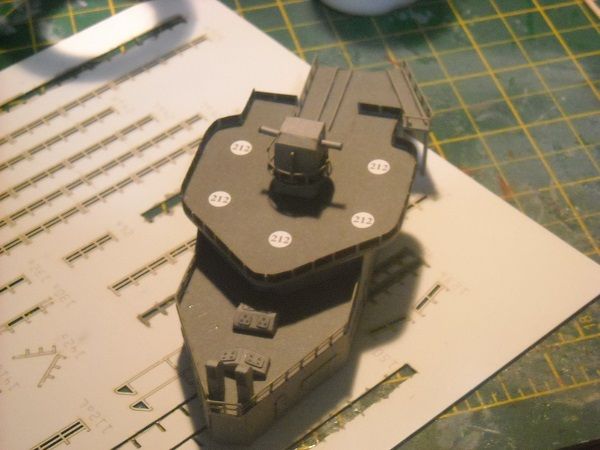 Then I could FINALLY glue the last superstructure-structure onto the deck! 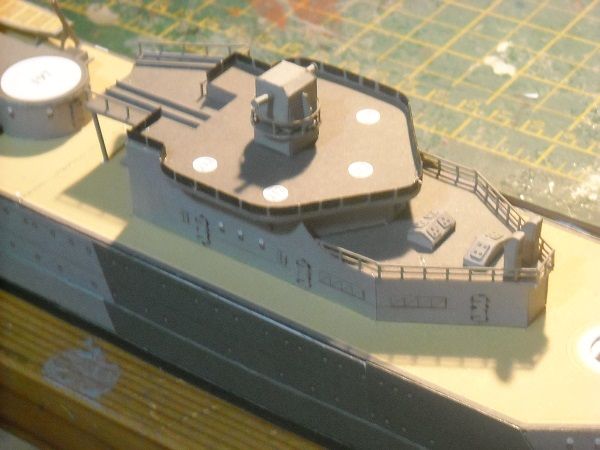 I then checked the position of the three legs and found them to be slightly off.  This wasn't too unexpected and a drop of superglue and keeping the pole in position for a few seconds and they straightened up nicely. 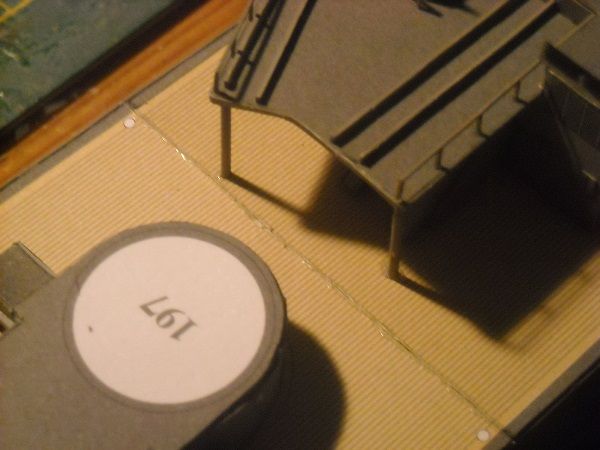 With the final part down onto the deck, I could start on the catapult, or can I? The deck on which the catapult is to be placed needs railings as well. Which are linked to the railings for the left set of stairs. And when I do the railing on that set of stairs the other set of stairs will look rather naked. So I am going to work on getting the railing onto the previously assembled parts first. In the meantime I am also going to work on the double 40mm Bofors AA-guns. There will be ten in total, five per position. 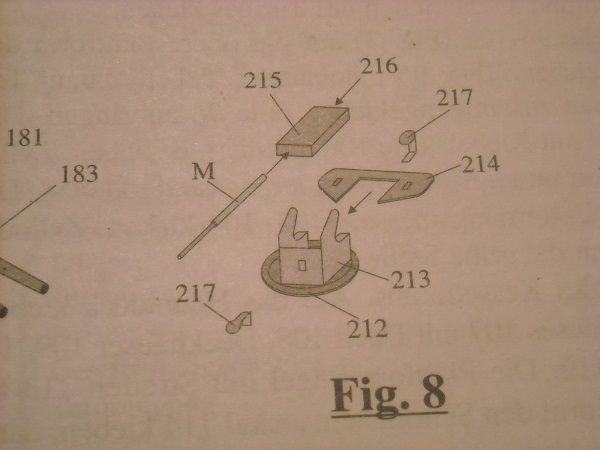 Part M is the interesting one here as you are required to glue together pieces of rod with different diameters and make sure that the rods are accurately centred. I don't think that would work too well, so I am thinking of doing it differently. How? Not sure yet but I am thinking of something which I need to try out first. So for now?  More painting on more railings ..... 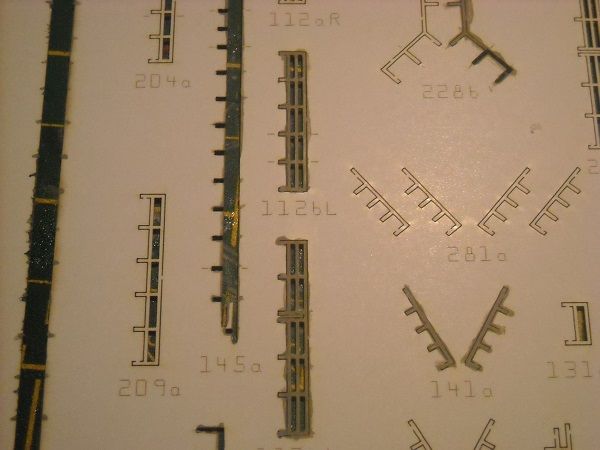 But they are making the model a lot better so for my next ship model I WILL get the railing set straight away, and if possible get them made from card!!! They are quite easy to use and glue down! But you can be the judge of that when I send my next update! Until laterzzzzzz. And keep happy and building!!! Adrie. 'Where to glue or where not to glue, that is the question'
Building: Hr. Ms. de Ruyter (card), Retourschip Batavia (Revell), HMS Surprise (De Agostini)
Built (and sunk): Too many to list
|
|
|
Rank: Pro  Groups: Registered
Joined: 24/05/2014 Posts: 236 Points: 627 Location: North Wales
|
You done a fantastic job and all from card as well.Looks really well a soggy mess. Built and building
All things Airfix & Revell.
|
|
|
Rank: Pro Groups: Registered
Joined: 23/03/2014 Posts: 185 Points: 545 Location: Essex
|
Hi Kevin, thanks for watching and the nice comments! . BUT, soggy mess???? Wait until she is finished and I can take her with me when I am having a bath to play with in the tub. THAT will be a soggy mess! I'm afraid there's not that much to show. Things have slowed down on the railings front. Mostly because the areas I now need to cover have been filled up with pesky parts so placing them is a bit awkward and time consuming. But here is where I started with the simplest of jobs, or so I thought. Stair railings. One flight of stair, two railings. Can't go wrong with them, right? 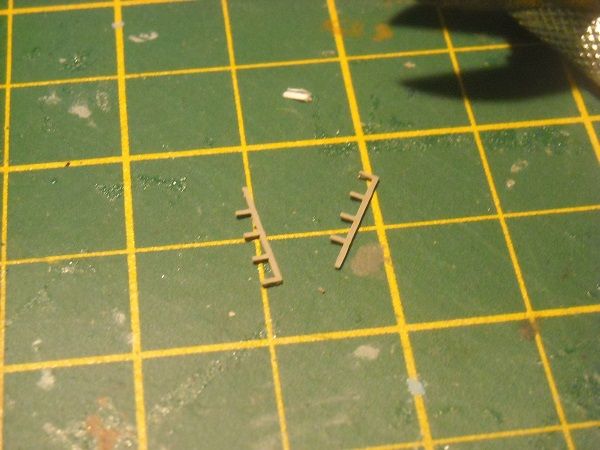 In principle no, in reality it would be nice if you could attach the handrails to something. Unfortunately that something turned out to be the railing of the deck above. So that needed to be done first. These are them bits. 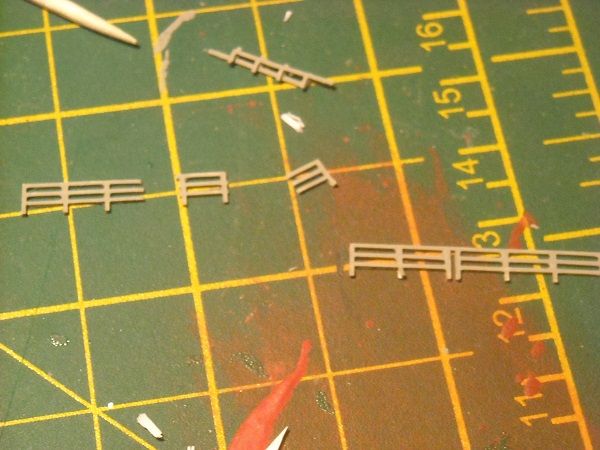 They needed cutting first and then working from front to back each section was glued in place until they were all down. I then glued the stair rails. 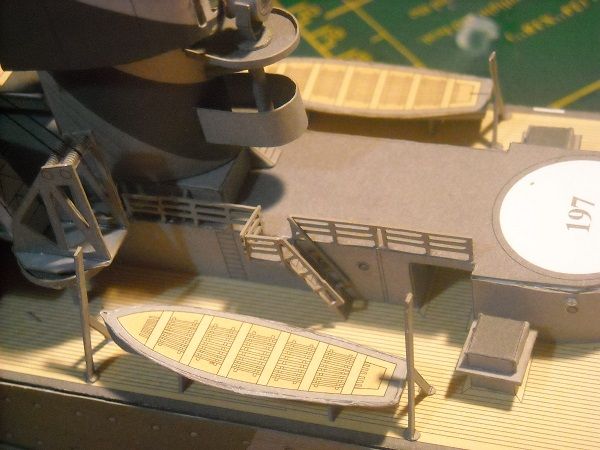 Not too bad, considering I had to twist my hands in peculiar positions the get the railings in their place. It really would have been a lot easier and given a much better result if I had done it when working on that section without all those nasty structures in the way. The railings on the other side were a lot easier to deal with as it didn't need to be cut. 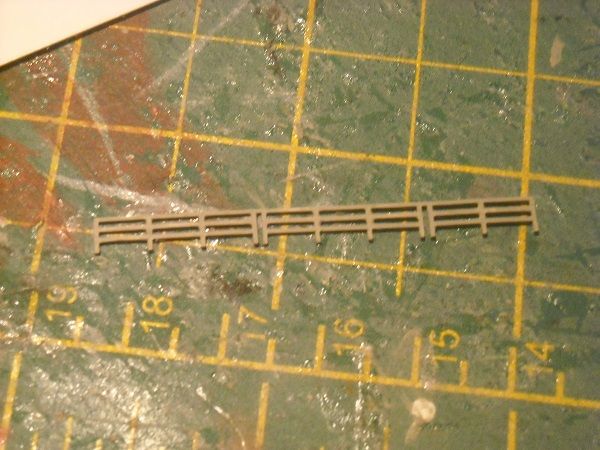 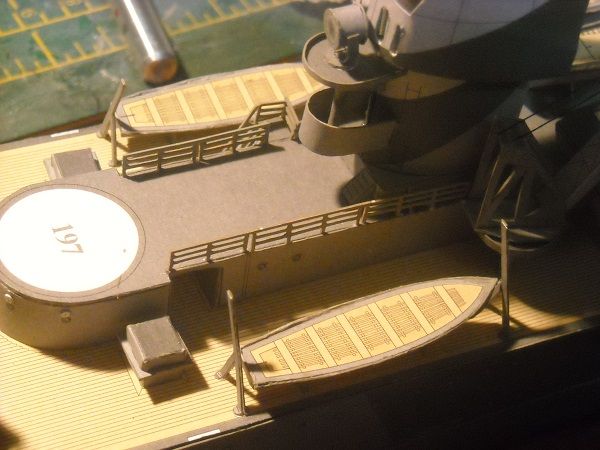 I then started on my take of the bofors 40 mm guns. The idea was to start with a thin piece of rod and paper wrapped around it to get it to the right thicknesses. I checked a twin mount of these guns online and saw that in fact the barrel is made of three diameters getting thinner from back to front. The aft two sections were a lot thicker than the first, which was the actual gun barrel with the characteristic 'trumpet' ending. The instructions only showed two diameters, so I decided to use the 'three-step' instead. This was the starting position, having noted down what sizes I used for the paper-shape. 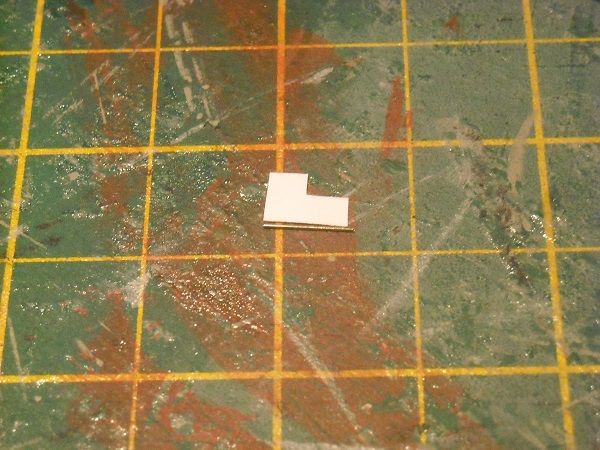 Note that the barrel is a bit longer than the piece of paper. The paper was rolled in three stages with the help of three rod thicknesses, first 1.2 mm , then 0.8 and then 0.3 mm. Affter this the paper was uncurled and a bit of PVA was deposited ion the inside after which the paper was rolled around the 'barrel'. Since it is a metal rod, PVA will have no hold on it so I put a drop of superglue on the end and let it all dry thoroughly. In the meantime I started on the railing of the side search lights which were relatively simple to do as they only needed shaping.  I then started with drops of PVA on the left side, putting it in its place and left to dry. Once it was secured in place, more drops of PVA on the legs and the whole reached its correct shape when I held the end of it in its position. 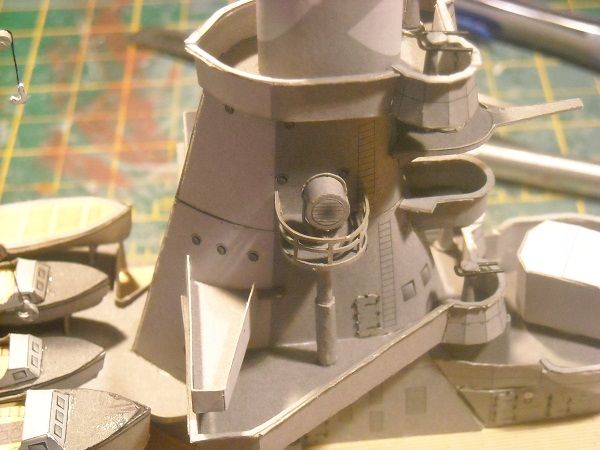 I then created a second gun barrel and glued the box for them together. the barrels were painted with one end barrel painted black to see what effect it would have and then inserted the barrels into the box. 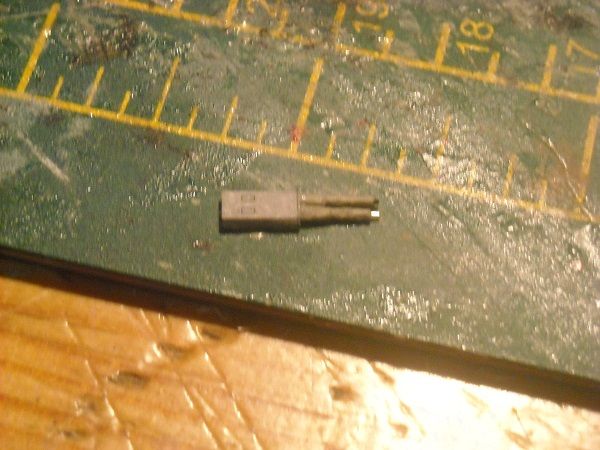 Not too bad, I guess but defintely could do with an improvement. Back to the drawing board! I then did the second searchlight railing ... 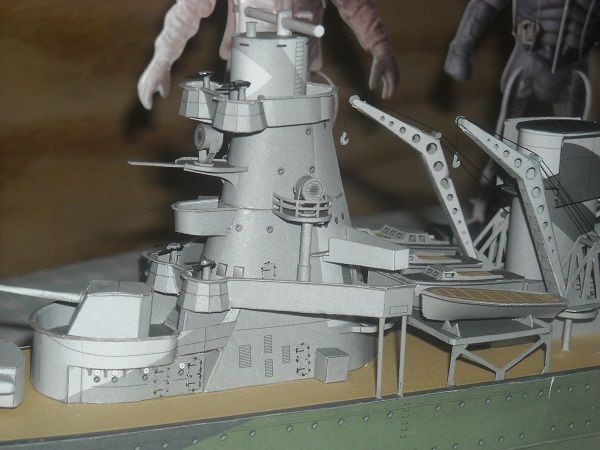 ... and started on the railing parts for the front searchlight platform. 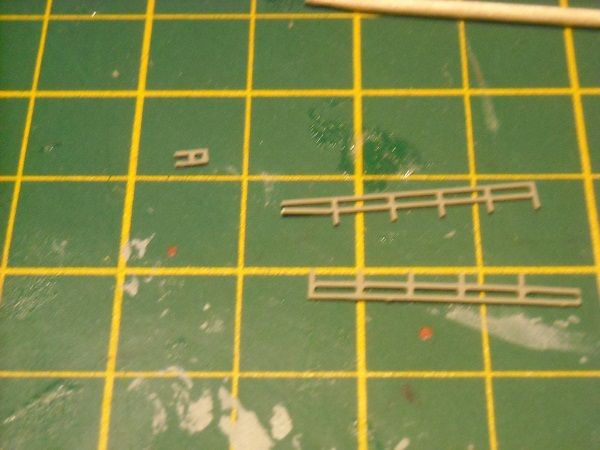 But that will continue tomorrow. I do need to spend some more time on the barrels. Until laterzzzzzzzzzz! Adrie. 'Where to glue or where not to glue, that is the question'
Building: Hr. Ms. de Ruyter (card), Retourschip Batavia (Revell), HMS Surprise (De Agostini)
Built (and sunk): Too many to list
|
|
|
Rank: Master Groups: Registered
Joined: 20/03/2010 Posts: 1,199 Points: 3,473 Location: Glenrothes
|
Hi Adrie hope every thing is well with you  You have not posted for a while unlike u Been following your posts with great enthuaism can only think that a post by a "dickhead" has upset you, and you are thinking "why bother" Well i bother i want to follow your build  I agree with dickhead....card builds are sh*t i have hsve seen builds on front cover of mags......look good on first glance...closer look all joins are visible...and bendy You have surpassed that sir iwould like to see more of your build as it surpassses more than what i have seen in mags
|
|
|
Rank: Pro Groups: Registered
Joined: 23/03/2014 Posts: 185 Points: 545 Location: Essex
|
Good evening, all! First off, my apologies for the long delay. As well as my thanks for the great comments that I received from Daffy and Budgie. Mush appreciated, guys!! It was not any negative feedback or something similar that kept me from this place but a severe case of hayfever. I've had hayfever before but never this bad, with a migraine attack five times a day due to an increased light sensitivity of the eyes. But anti-histamines have helped me to the point that I can do some work on the model again even though that the time I can spend has been greatly reduced before I have to stop due to eye strain. But don't fear, I have remembered to keep taking pictures so there will be progress to show still!!! But it will be slowere than before. Once I have done some work my eyes can't stand the sight of a monitor so reporting on it will be a bit delayed. Anywayzzzz, let's see what has happened before, shall we? I started on the railings for the forward searchlight. This was done in two steps, the front 'sneb' and the sides of the platform. The front parts were cut in three, with the middle bit then glued against one of the sides. Note that I have left a little of the bars attached to the front section to help me glue them properly aligned later on. 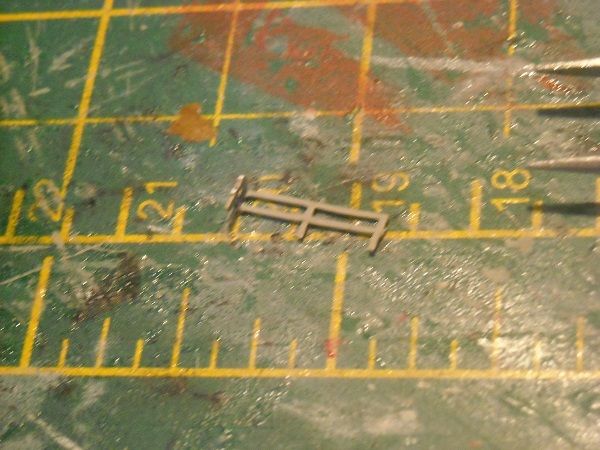 That was put aside and the platform side parts were then shaped with the fingers. 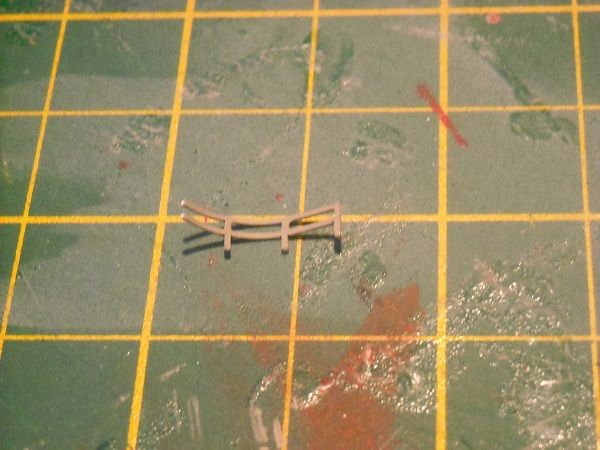 The side bit was then glued in place... 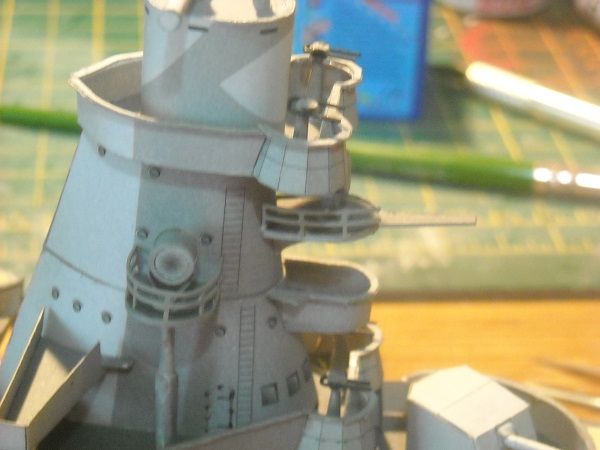 ... and once that was dried the partly constructed front was glued against the side part as well on the platform. 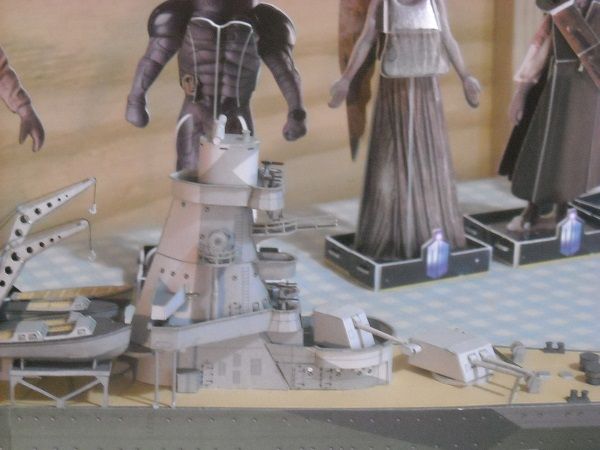 Then the second side part was glued in place, followed by the last of the front parts. 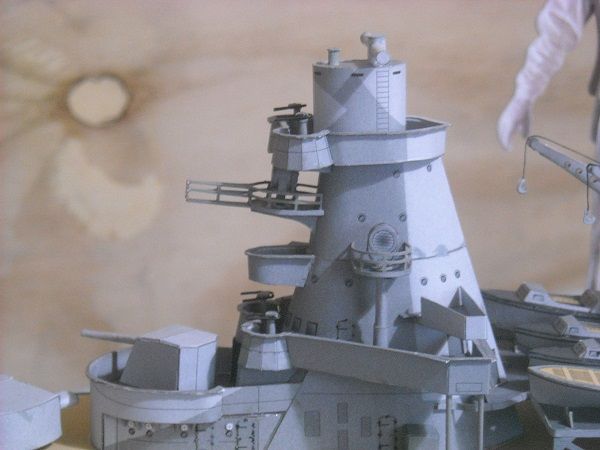 As this was drying, I spent some time of the anti-aircraft set up. I didn't like the original trials because I felt the barrels to be too 'fat' and also badly shaped. The last problem was due because I used PVA glue when glueing the barrels, which softened the cardboard and thus allowed the cardboard to lose its shape. So that will be easily rectified by using the rubber glue. The first problem should be easily solved by reducing the size of the piece of paper. So that is what I tried first and the result is this. 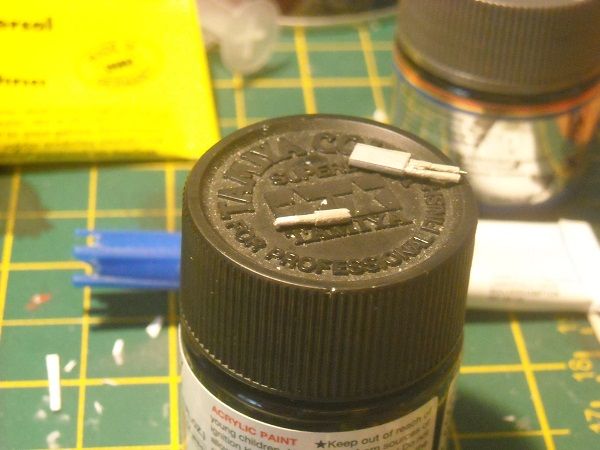 It's straighter and smaller but still not thin enough for me. As a side issue I have found out that the barrels that I had insertyed into the body must have still been wet with glue as I could not dislodge them again! So I'm going to need a replacement body as well, which is easily constructed from a scanned copy of the original parts which can be thickened with another layer of paper. I can't reallu reduce the size of the barrel paper further, though, because it would not lap round the barrel completely. So I am now thinking of replacing the tightly rolled part with two cylinders, one slid inside the other. I will keep you updated on the progress there. I continued on the ship with the last large construction, the catapult. These are the parts. 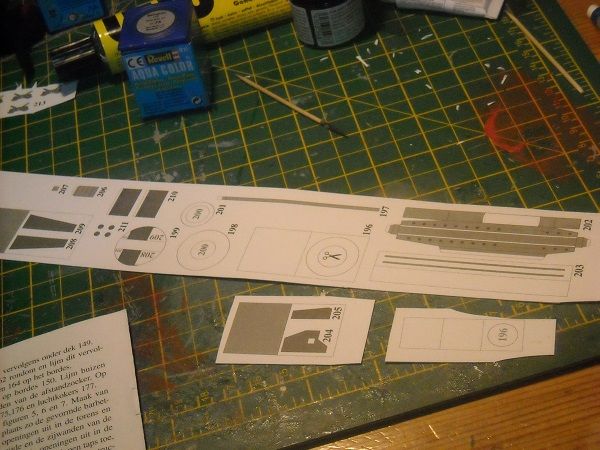 I started with the base, of which the bottom consists of a simple circle with rim ... 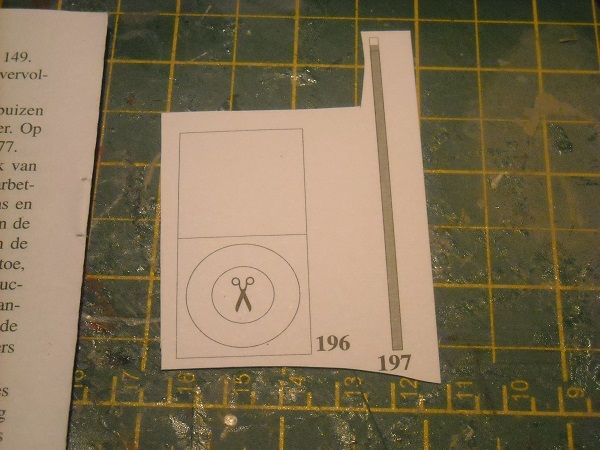 ... and here it is glued together.  The upper base parts. 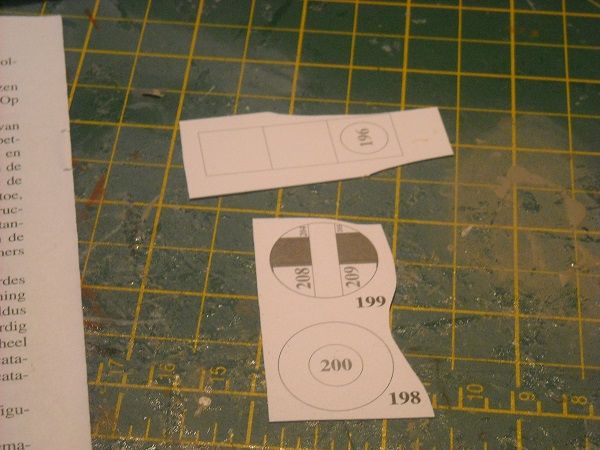 and constructed ... 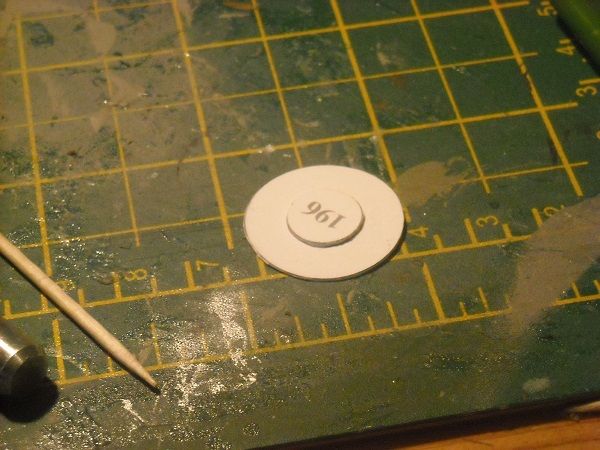 A drop of glue was placed on top of the smaller circle and the bottom base was placed over it and a end late was glued over it so that both base parts can rotate over one another. 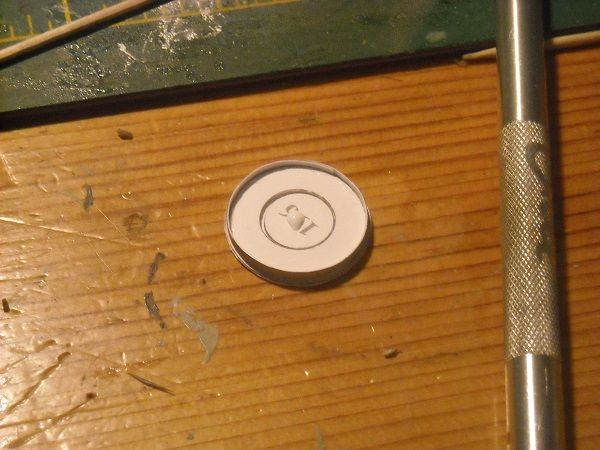 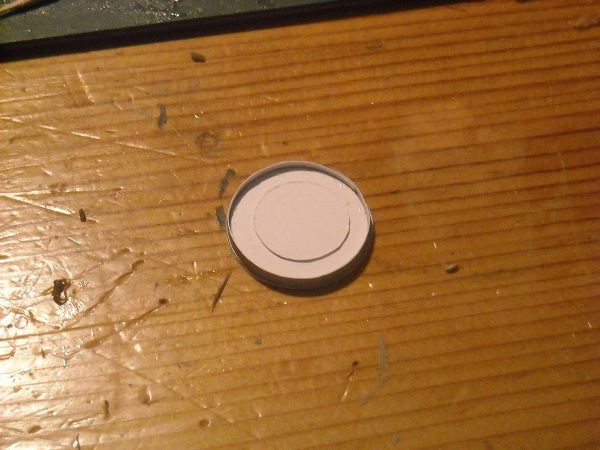 I'm afraid that my eyes are starting to give me grief now so I have to stop now but be certain that there will be more progress to show next time! Until then!!!! Thanks for watching and happy building! Adrie 'Where to glue or where not to glue, that is the question'
Building: Hr. Ms. de Ruyter (card), Retourschip Batavia (Revell), HMS Surprise (De Agostini)
Built (and sunk): Too many to list
|
|
|
|
|
Fanstastic work as ever Adrie, I'm really impressed with just how good a card model can get! Best of luck with your anti-histi things, I've never suffered much from hayfever (thank God!) but I used to suffer with migraines a lot before I went on blood pressure pills. Since a massive attack a couple of years ago I've had problems with monitor-nausea at times so I know what you're going through! I was thinking back to those first AA emplacements you fitted on the superstructure (with the bent wire barrels). I assume they are a kind of Oerlikon cannon (if that's how you spell it) I wondered if a couple more bent wires to simulate the shoulder braces at the back would give them a more 3D look? Keep it up M8, (when you can that is!) Robin First wooden ship: The Grimsby 12 Gun 'Frigate' by Constructo Second: Bounty DelPrado Part Works Third: HMS Victory DelPrado Part Works 1/100 scale Diorama of the Battle of the Brandywine from the American Revolutionary War Diorama of the Battle of New Falkland (unfinished sci-fi), Great War Centenary Diorama of the Messines Ridge Assault Index for the Victory diary is on page 1
|
|
|
|
|
Hi Adrie, great to see you back doing the wonderful work you do and so sorry to hear you are suffering... Hope you get relief soon and will be back to giving us the detailed accounts of your build methods... Wonderful work and no matter how often or not you post I will be watching how it all progresses..... Good luck with her and wishing you a speedy recovery..... Regards Alan
|
|
|
|
Guest (2)
|
 US
US

