|
|
 Rank: Super-Elite       Groups: Registered
Joined: 27/01/2014 Posts: 5,060 Points: 14,980
|
arpurchase wrote: Nicely done Dave are you adding the gun stops for the secondary armaments  Thanks Andy I am not 100% sure what the gun stops are lol, there are some metal bits that have been added between the barrels which I think are the gun stops
|
|
|
|
|
Hi Dave If you look at post #308 [ link below ] in my Yamato build you will see the gun stops in brass wire which I scratch built, I thought these stops were included in your kit. One other thing to point out that Yaturo Honma [ our japanese member] told me was that it was normal practice in time of war for the IJN to paint out ship names so it was harder to trace them. You probably already know that the Mushashi was the Yamato's sister ship but what became of the third ship. http://forum.model-space...sts&t=2756&p=16
Regards Andy Current builds:-C57,Zero, Lamborghini Countach, Caldercraft HMS Agamemnon,Robi,R2-D2, MFH Cobra .
|
|
|
Rank: Super-Elite Groups: Registered
Joined: 27/01/2014 Posts: 5,060 Points: 14,980
|
arpurchase wrote: Hi Dave If you look at post #308 [ link below ] in my Yamato build you will see the gun stops in brass wire which I scratch built, I thought these stops were included in your kit. One other thing to point out that Yaturo Honma [ our japanese member] told me was that it was normal practice in time of war for the IJN to paint out ship names so it was harder to trace them. You probably already know that the Mushashi was the Yamato's sister ship but what became of the third ship. http://forum.model-space...sts&t=2756&p=16
Regards Andy I was just stood at the cooker and then realised what the gun stops were They were included with the kit but they are still on the sprues at the moment, I will get round to adding them though
|
|
|
Rank: Super-Elite   Groups: Registered
Joined: 08/03/2014 Posts: 2,979 Points: 8,529 Location: united kingdom
|
It looks amazing already can't think how it will look when done. Ken's the name modeling's the game.
|
|
|
|
|
Great job David, can now see all that effort coming together and all credit to you.... Very well done.... Regards Alan
|
|
|
 Rank: Newbie Groups: Registered
Joined: 10/12/2014 Posts: 1 Points: 3 Location: Barre, VT
|
Greetings from across the pond! I've been following your build as a lurker and finally decided to join. Incredible work! I too am returning to modeling after a 20 year hiatus and taking the plunge into photo etch work. I had 2 questions I hope you could answer: What glue have you settled on that works best? You have been using multiple sets of etching during this project. If you had to settle for one or two, which would you choose and why? I must admit, the kit with the chain effect is quite impressive, and really like that set, whichever one it is. Thank you for your assistance and thoughts, looking forward to seeing more of your work. Marc Built: 1:350 Tamiya Bismarck, KG V, Yamato (old tooling), New Jersey, Missouri, Enterprise (CVN 65)
Building: 1:350 Trumpeter Massachusetts
In the box: 1:350 Tamiya Yamato (new tooling), Hasegawa Akagi, Trumpeter Nimitz (present day)
My wife says I'm crazy to play with such small parts...
|
|
|
 Rank: Pro Groups: Joined: 24/08/2009 Posts: 48,827 Points: -13,348
|
Welcome to ModelSpace Marc, hope you enjoy your stay with us
Cracking build by the way Dave 
|
|
|
Rank: Super-Elite Groups: Registered
Joined: 27/01/2014 Posts: 5,060 Points: 14,980
|
Mppoulin wrote:Greetings from across the pond!
I've been following your build as a lurker and finally decided to join. Incredible work!
I too am returning to modeling after a 20 year hiatus and taking the plunge into photo etch work.
I had 2 questions I hope you could answer:
What glue have you settled on that works best?
You have been using multiple sets of etching during this project. If you had to settle for one or two, which would you choose and why? I must admit, the kit with the chain effect is quite impressive, and really like that set, whichever one it is.
Thank you for your assistance and thoughts, looking forward to seeing more of your work.
Marc Hi Marc, Thanks for stopping by and saying Hi and your nice comment. I am using Loctite Power Flex CA glue for my photo etch, it is a thick glue. I use a pin to pick up a little bit of glue and then rub this along where I want. So far this has worked well for me. With regards to which Photo Etch sets, if I had to settle for one it would have to be the MK1 set by KA Models. The reason for this is I personally think they look better than the rest, the ladders are nicer, the railings with the drooping chain effect look nicer too. Overal I have used more of the MK1 Photo Etch set than any of the others. I have used hardly any of the Lion Roar set as just didnt get with it, it is very thin compared to the others. The best advice I can give with doing photo etch is to take your time, be prepared to drop bits several times and if you feel yourself getting annoyed walk away. Hope this helps, oh and welcome to the forum
|
|
|
Rank: Super-Elite Groups: Registered
Joined: 27/01/2014 Posts: 5,060 Points: 14,980
|
|
|
|
Rank: Super-Elite Groups: Registered
Joined: 27/01/2014 Posts: 5,060 Points: 14,980
|
A small update of todays work. I started assembling the parts for the aircraft catapults, I have left the parts unfolded as I have decided it would be easier to prime and paint these prior to the folding process to get a better covering of paint on the inner parts. The eagle eyed amony you will notice that one of the pulley parts is missing from one the catapults, this is due to it pinging into the deepest darkest depths of the garage somewhere. Close ups have shown me I missed a bit of clean up of glue on a part 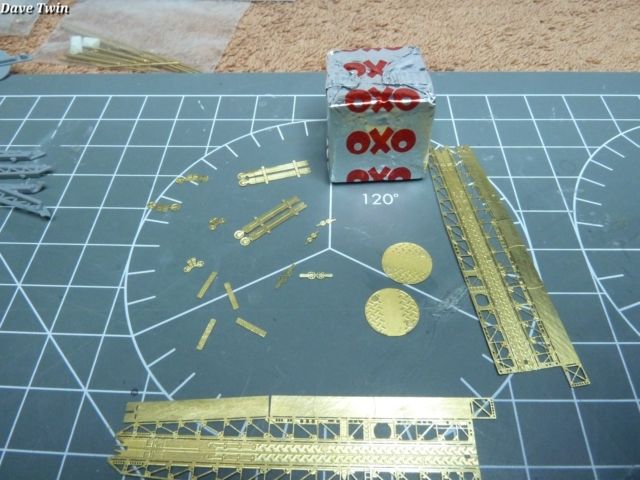  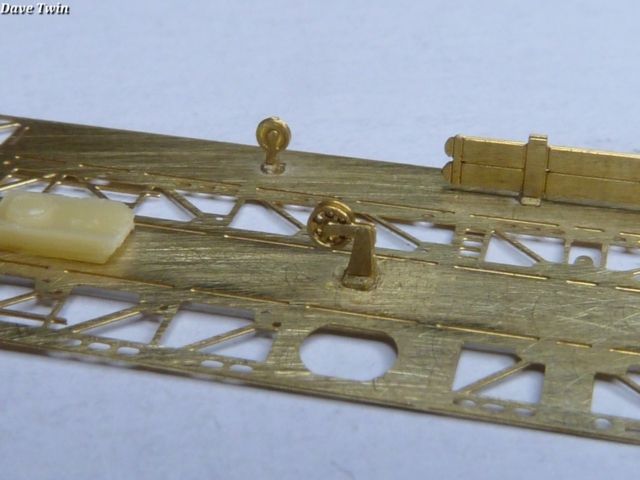 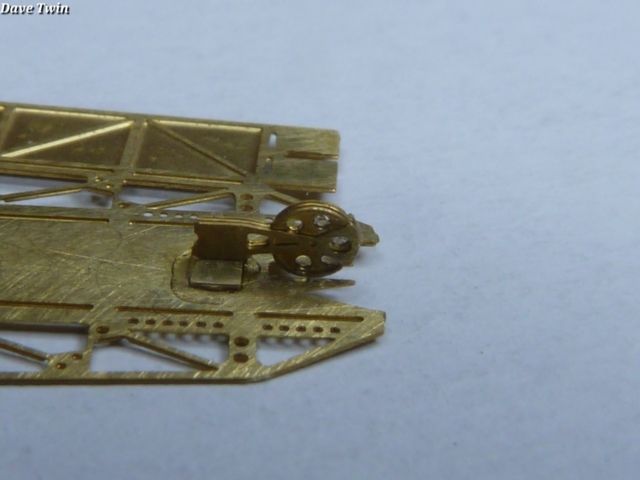 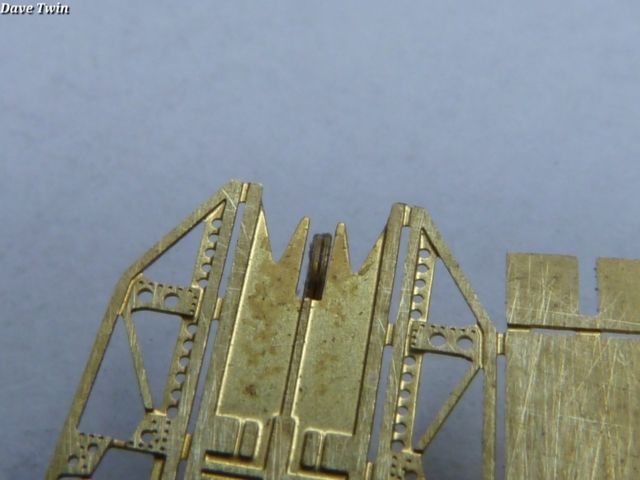 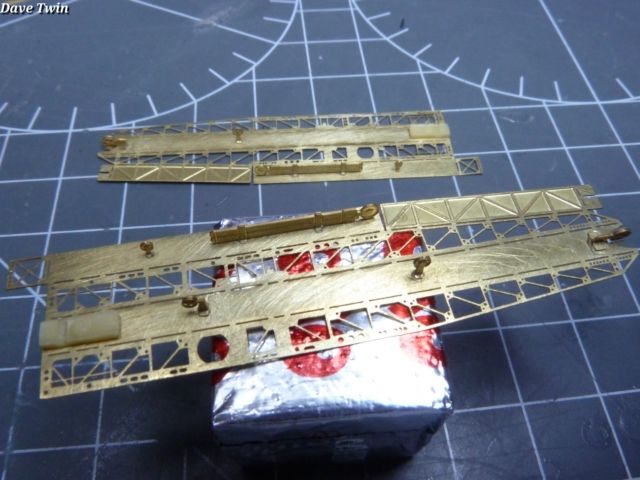
|
|
|
|
|
Lovely work Dave, looking great.... Regards Alan
|
|
|
Rank: Super-Elite  Groups: Registered, Forum Support Team, Administrators, Global Forum Support Team, Moderator, Official Builds Joined: 09/11/2012 Posts: 8,520 Points: 24,651 Location: East midlands
|
Hi Dave, Some great work going on with the etch enhancements. This will be a better build for all the extra work involved at the end. Your right about working with etch: Lost some bits for ages to the carpet gremlins myself and Have walked away on several occasions to preserve my sanity and eyesight.  Keep up the good work, as I`m enjoying watching someone else getting to grips with a large amount of etch. Regards delboy271155 (Derek) COME BACK GUY FAWKES "YOUR COUNTRY NEEDS YOU"
|
|
|
Rank: Super-Elite Groups: Registered
Joined: 27/01/2014 Posts: 5,060 Points: 14,980
|
Thanks Alan & Derek. Another small update for you all Starting to assemble the crane 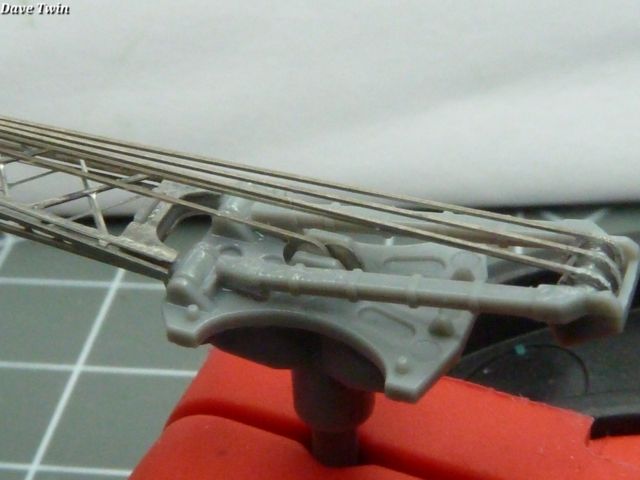 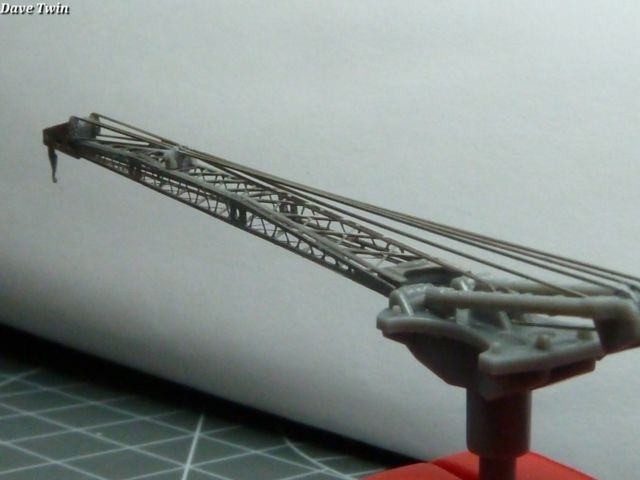 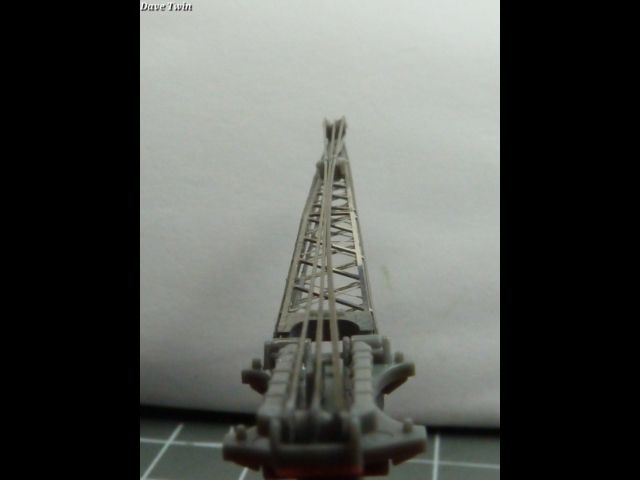 Primed ready for final colour 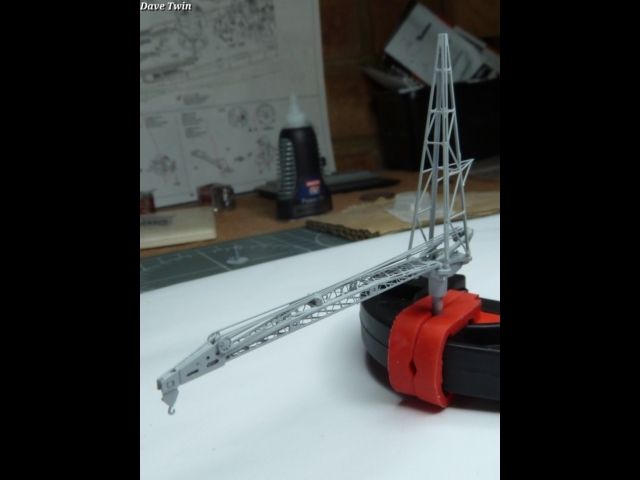 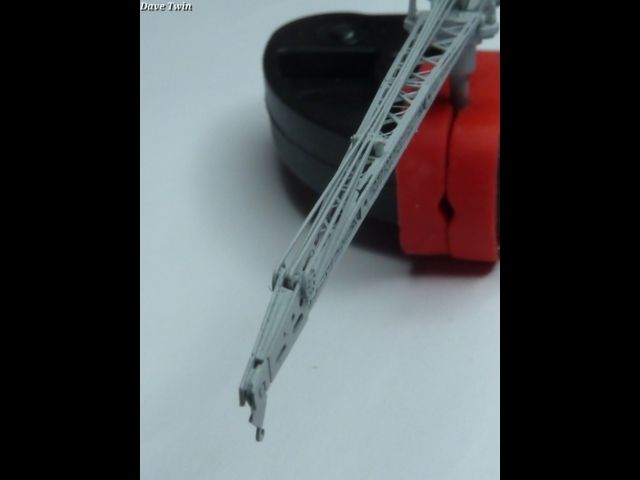 Catapults finished and primed  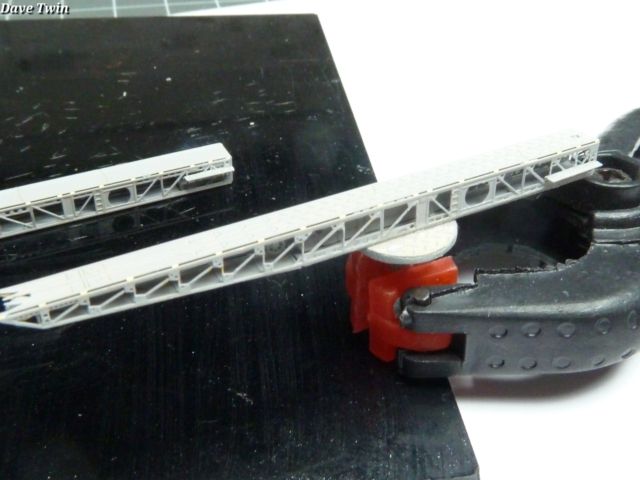 Made a start on possbiy the most difficult part of this build, a bit of clean up needed once the clue has had plenty of time to set. Still a lot to add to it. I am using an old kitchen chopping board as a jig 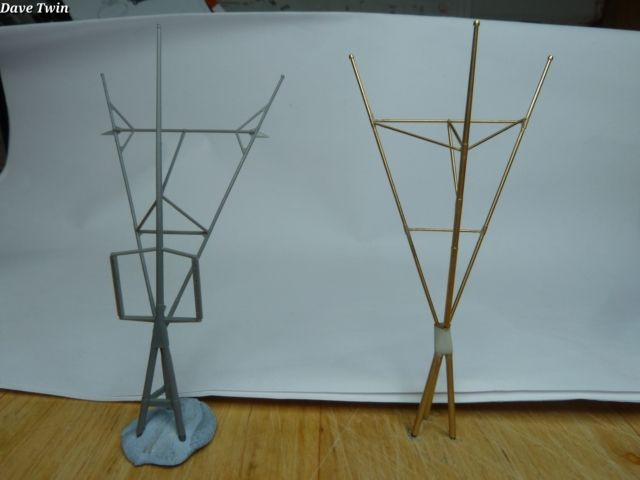 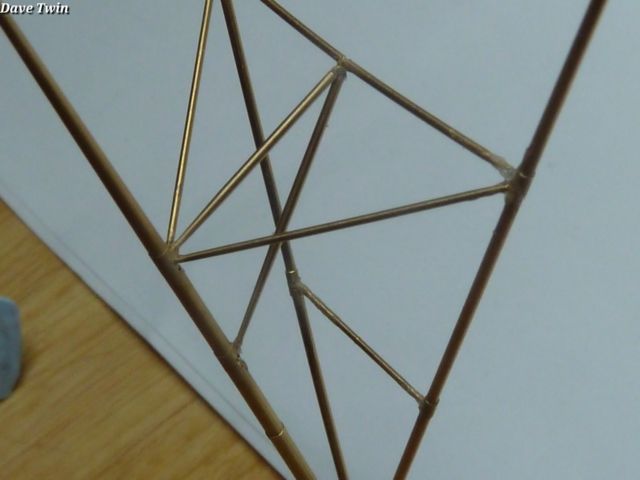
|
|
|
|
|
That work look very delicate and fiddly Dave and you've done a cracking job of it.... Very nice indeed.... Regards Alan
|
|
|
Rank: Pro  Groups: Registered
Joined: 15/07/2014 Posts: 204 Points: 578 Location: Alabama, USA
|
Outstanding progress Dave  you etch work is just top notch Building - DeAgostini HMS Victory, McLaren MP4-23, Suzuki GSX1300R Hayabusa, Harley Davidson Fat Boy, Lamborghini Countach
|
|
|
Rank: Super-Elite Groups: Registered
Joined: 08/03/2014 Posts: 2,979 Points: 8,529 Location: united kingdom
|
Simply amazing work you are a very brave, patient man Dave. Ken's the name modeling's the game.
|
|
|
Rank: Super-Elite Groups: Registered
Joined: 27/01/2014 Posts: 5,060 Points: 14,980
|
Thanks Guys, I have had to walk away from the mast assembly several times so far, it really is an awkward one to build, hopefully the rest of it will go together nicely now
|
|
|
Rank: Super-Elite  Groups: Registered
Joined: 30/01/2013 Posts: 4,604 Points: 13,607 Location: Monmouthshire UK
|
Superb work Dave, you certainly have some patience Steve
|
|
|
Rank: Super-Elite Groups: Registered
Joined: 27/01/2014 Posts: 5,060 Points: 14,980
|
stevie_o wrote:Superb work Dave, you certainly have some patience Steve Thanks Steve I must admit that I very nearly threw the towel in on this mast assembly to go with the plasitc version. I am so pleased that I kept going at it as it is starting to look fantastic, still need to do a bit of clean up of the joins but dont think this will be very noticeable anyway without the macro zoom on
|
|
|
Rank: Super-Elite Groups: Registered
Joined: 27/01/2014 Posts: 5,060 Points: 14,980
|
A couple more bits added to the mast, I have spent about 5 hours on these so far  I thought I would test fit it to make sure it is all aligned properly. 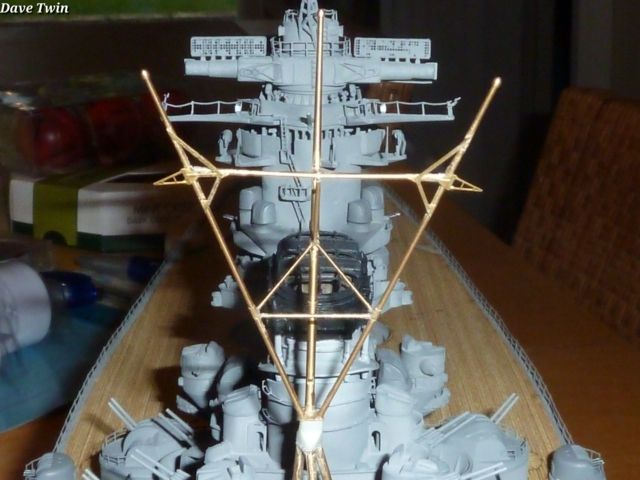 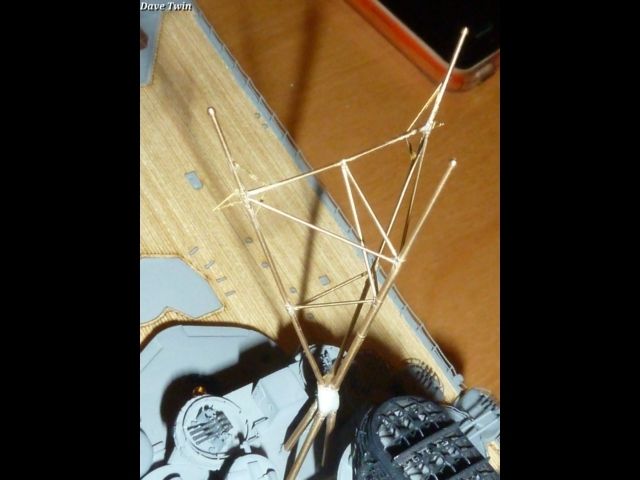 This is just me test fitting the catapults and crane tower, they are still only primed I just wanted to see what it look liked, kind of good I think. 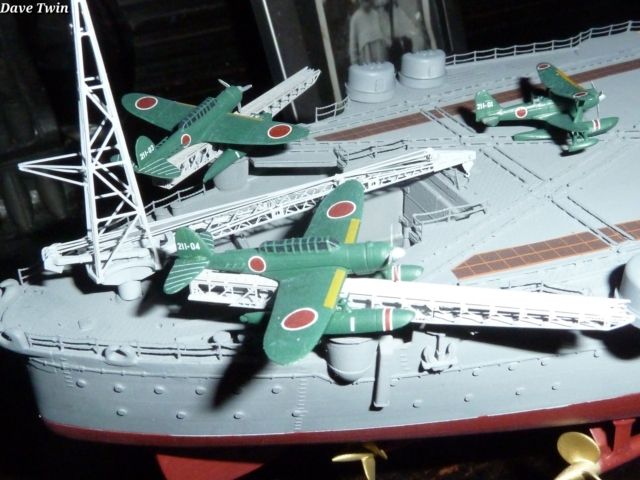
|
|
|
|
Guest (2)
|
 US
US

