|
|
 Rank: Super-Elite        Groups: Registered
Joined: 30/01/2013 Posts: 4,604 Points: 13,607 Location: Monmouthshire UK
|
This is my Build of the year 2015 entry. I will be taking my time with this as it will be fitted around everything else, plus the fact that I have the whole year to complete. The build is going to be a Red Arrows presentation rather than a dio. Contents of the build so far - Revell 1/32 Read Arrows Hawk T1 3 Packs of Eduard etch for cockpit and External Mastercasters resin pilot figure Tirydium models lighting kit Airfix double pack of Red Arrows Hawks (1/72) To follow at a later stage - Metal pitot tube Metal landing gear Possible wing flaps conversion kit Flightpath Hawk access ladder / work platform Basically what I want to achieve is this - A 1/32 scale hawk on the ground with pilot and steps, fully lit with nose light, strobes and wing lights. The 1/72 scale Hawks will be overhead in the crossover maneuver mounted on lit acrylic tubes, possibly in red and blue. Like I said, not a dio but a presentation - I will also be incorporating the Red Arrows Insignia into the base too. The difference with this build and what I am used is the paintwork, this one has to be perfect as it's gloss so a lot of time to get the surface prepared plus a bit of research into gloss airbrushing and top coats will be done at a later stage. I want a beautiful finish with no imperfections. Weathering as you might imagine will be very subtle, just panel lines, gear bays, cockpit grime and slight chipping etc, I have plenty of reference pics for the job anyway. So, you get the idea - more info with each post. The build will start with the 1/32 Hawk cockpit in the next post. stevie_o attached the following image(s):
|
|
|
|
|
Now that is one cool idea. I love the Red arrows, I have a 1/48 Airfix to build with Twobobs decals but haven't got round to it yet. Am looking forward to see this one progress. idea. I love the Red arrows, I have a 1/48 Airfix to build with Twobobs decals but haven't got round to it yet. Am looking forward to see this one progress.
ChrisOn the bench 1/350 Revell Tirpitz Platinum Edition (Pontos PE and Wooden deck) plus extra Eduard PE set and extra MK1 door sets.
|
|
|
 Rank: Pro Groups: Joined: 24/08/2009 Posts: 48,827 Points: -13,348
|
I like it Stevie, I like it a lot!! If you can pull that off it will look amazing and definitely a contender in my view?
Great entry!!  
Kev 
|
|
|
|
|
I am a big Red Arrows fan so really looking forward to this build!!!!
|
|
|
|
|
You've certainly picked a good one Stevie, nicely thought out display and should look fab when complete.... .. Will be watching as usual... Regards Alan
|
|
|
|
|
Looks a nice kit and the extra's should make it something special, best of luck with her Current builds:-C57,Zero, Lamborghini Countach, Caldercraft HMS Agamemnon,Robi,R2-D2, MFH Cobra .
|
|
|
Rank: Super-Elite   Groups: Registered, Forum Support Team, Administrators, Global Forum Support Team, Moderator, Official Builds Joined: 09/11/2012 Posts: 8,520 Points: 24,651 Location: East midlands
|
Hi Steve, Looking forward to this one, no doubt. These may help. 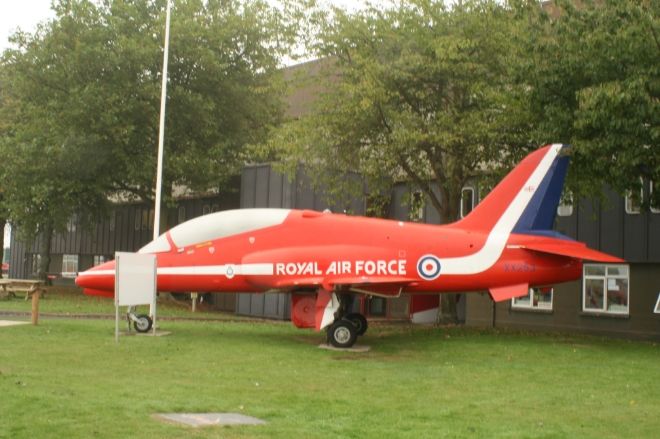 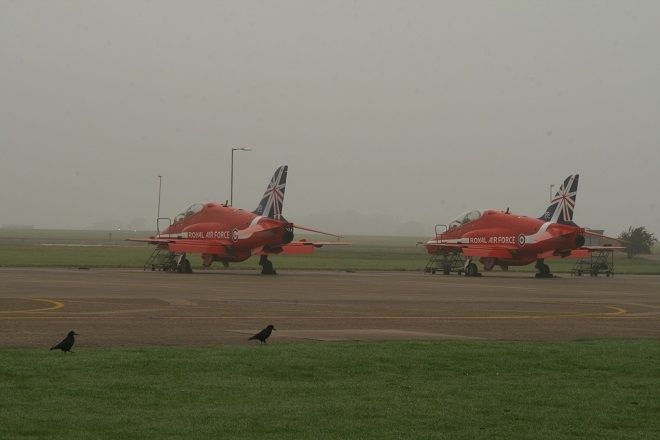 Hope they are of some use. Regards delboy271155 (Derek) COME BACK GUY FAWKES "YOUR COUNTRY NEEDS YOU"
|
|
|
Rank: Super-Elite Groups: Registered
Joined: 30/01/2013 Posts: 4,604 Points: 13,607 Location: Monmouthshire UK
|
Thanks for the interest everyone, will be cracking on with this one tomorrow hopefully Thanks for the pics Del, the first pic XX253 was involved in a mid air crash in crete about 5 years ago, it landed safely but was written off. I'm a real red arrows fan but never been to RAF Scampton unfortunately. The second pic of yours is how mine is to be displayed, I have ordered the resin lowered landing flaps and even the entry steps! Cheers
|
|
|
Rank: Super-Elite Groups: Registered
Joined: 30/01/2013 Posts: 4,604 Points: 13,607 Location: Monmouthshire UK
|
OK, and we're off! As usual the cockpit is first and in this case is going to take a fair bit of time as there is stacks of etch to go in when you include the seats. The red plastic is horrible to cover up but the fit of parts so far is very good. The pics below show the parts to make up the main cockpit base. The instrument panels needed sanding off to allow the etch panels to go on instead, as did the side consoles too. Primed it all using Vallejo grey primer and then a coat or two of Tamiya Ocean grey followed by a wash made from AK's grime streaks mixed with white spirit. Loads to go yet, this cockpit will be around for a while  Steve stevie_o attached the following image(s):
|
|
|
|
|
Superb start to your build, the photo etch certainly makes a difference.
|
|
|
Rank: Super-Elite Groups: Registered
Joined: 27/01/2014 Posts: 5,060 Points: 14,980
|
I missed this when you first posted it.
From your description of what you are planning it sounds like his will be an amazing build. I hope you achieve your desired look I really look forward to seeing it.
Looking like you have gotten off to a great start with the cockpit
|
|
|
Rank: Pro Groups: Joined: 24/08/2009 Posts: 48,827 Points: -13,348
|
Great start to your build Steve, the etch parts certainly lift the cockpit to a whole new level of detail and it looks good - well done!!
Kev
|
|
|
|
|
Missed this with being off line for a few days looking forward to your build jase “Whenever you find yourself on the side of the majority, it is time to pause and reflect.”
-Mark Twain
|
|
|
Rank: Super-Elite Groups: Registered, Forum Support Team, Administrators, Global Forum Support Team, Moderator, Official Builds Joined: 09/11/2012 Posts: 8,520 Points: 24,651 Location: East midlands
|
Hi Steve, Good cockpit detail there, keep it coming. Regards delboy271155 (Derek) COME BACK GUY FAWKES "YOUR COUNTRY NEEDS YOU"
|
|
|
 Rank: Vice-Master  Groups: Registered
Joined: 13/02/2012 Posts: 651 Points: 1,903 Location: croydon
|
Hi Steve . This looks fantastic and I wait with bated breath for your next instalment  . Best regards. Mark
|
|
|
 Rank: Elite  Groups: registriert, Registered Joined: 20/03/2011 Posts: 2,356 Points: 7,122 Location: UK
|
A great start Steve and with your attention to detail I can see this is going to be another fantastic build.. Spence
|
|
|
|
|
Lovely start Steve and the etch certainly makes the difference..... Regards Alan
|
|
|
Rank: Super-Elite Groups: Registered
Joined: 30/01/2013 Posts: 4,604 Points: 13,607 Location: Monmouthshire UK
|
Thanks for looking guys
Firstly, a couple more packs of add-ons came today - the pitot tube (much needed on this kit as you will see later).
Also, the resin lowered flaps kit from CMK - Revell dont have any option to lower the landing flaps, only the ailerons so this kit is a must for an aircraft on the ground. I also have the etch and metal kit for the entry steps and nozzle and intake covers from Flightpath which looks very good.
On to the build, I have done most of the work on the ejection seats and belts.
The cockpit base has also been chipped slightly, having seen inside one of these and I also have a few pics too, they are certainly not pristine cosmetically, very worn internally with loads of scratches and chips etc so I am trying to replicate a very well used cockpit area.
Revell did not include the drogue chutes on top of the seats or the doc folder on the bulkhead, I had to make these from clay.
Havent glued the seats in as I may still have to add a satin coat to the metal parts, not sure yet - also I think I may need to add some hoses on the seats too
Some progress pics anyway.
Steve
stevie_o attached the following image(s):
|
|
|
|
|
Stunning work. The detail on the seats is fantastic!
|
|
|
 Rank: Beginner Level 3  Groups: Junior member, Registered Joined: 06/01/2014 Posts: 26 Points: 28 Location: Moore
|
wow that looks very real
|
|
|
|
Guest
|
 US
US

