|
|
 Rank: Beginner Level 1 Groups: Registered
Joined: 31/05/2013 Posts: 7 Points: 21 Location: Hudson Valley
|
Hello,
I'm trying to test fit the exhaust headers to make sure the manifold fits before gluing. How did everyone do this? I can't get them to stay in place, they just fall out. I know I won't be able to get them all in and adjusted properly before the glue sets.
Is there some trick? They don't even seem to be sitting to the block evenly. How are these supposed to go in? Does anyone have a picture?
Thanks in advance!
|
|
|
 Rank: Elite        Groups: registriert, Registered Joined: 20/03/2011 Posts: 2,356 Points: 7,122 Location: UK
|
Hi Scottymack and welcome to MS First of all a test fit is exactly that so until you glue the parts together then the part will not hold. You could try blue tac but even then you will have to take the parts apart to glue them and your back to square one. Once the exhaust parts are assembled then any adjusting can be done once you fit them to the block. Spencer
|
|
|
|
|
Hi Scottymack.
I also had a problem with the pipes as I wanted to do a bit of a paint finish and needed to complete the assembly before fitting to the manifold.
have a look at my build diary : South African forum, Malcs Build, at the bottom of page 6 is post #118 where I show what I did. It worked for me so I hope it can help you.
Cheers
Malc.
|
|
|
Rank: Beginner Level 1 Groups: Registered
Joined: 31/05/2013 Posts: 7 Points: 21 Location: Hudson Valley
|
Thanks for the responses! My problem was that the test fit of each pipe individually, they didn't seem to fit 'right' and I knew I wasn't going to get all four mounted in the correct position before the glue set. I came up with a similar fix before I saw your post Malc. I individually taped the pipes to the mating part keeping the posts as straight and evenly spaced as possible. It was then easy to glue and install all four parts at once. 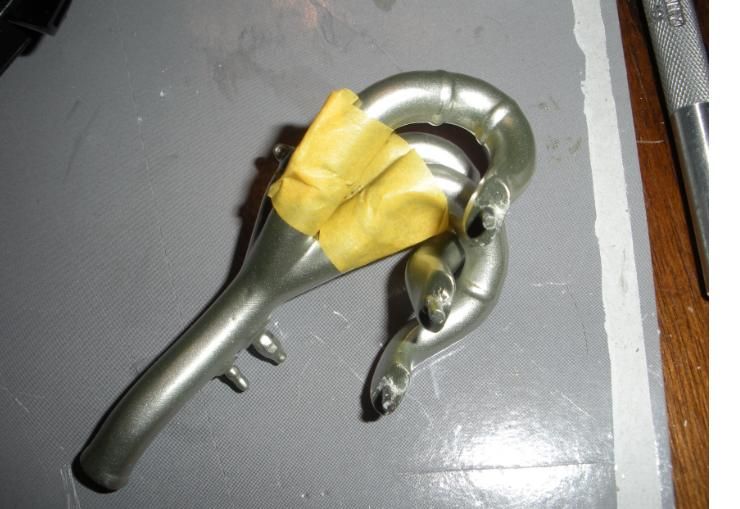 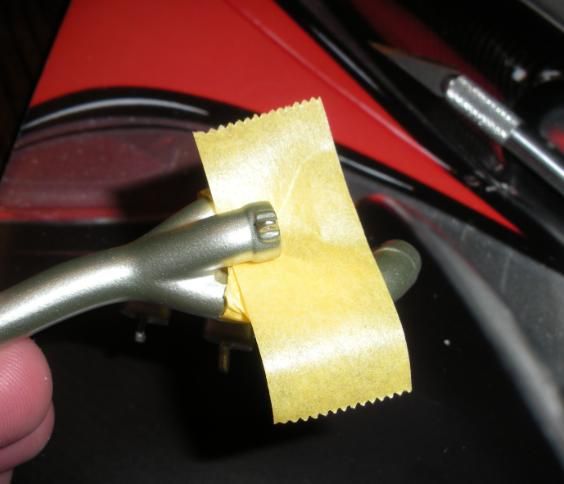 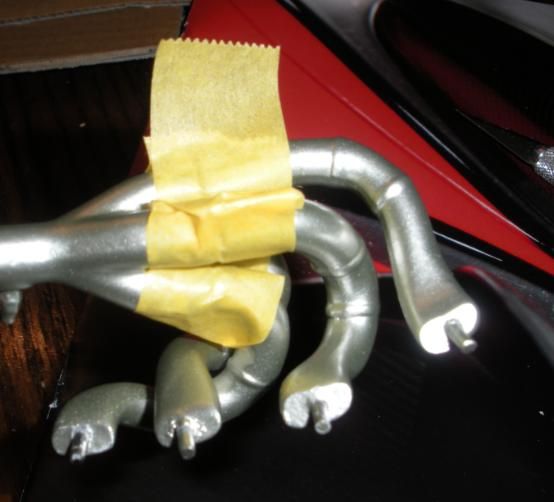
|
|
|
|
|
Neat solution
Malc.
|
|
|
Rank: Beginner Level 1 Groups: Registered
Joined: 31/05/2013 Posts: 7 Points: 21 Location: Hudson Valley
|
Thanks, not quite as slick as your fix though. Unfortunately, my left side exhaust 'sagged' a bit, which I'm sure is going to cause fitment problems with the body panels. EDIT: I've gotten them apart, but it's not pretty (wish I could get a spare.) I'm guessing the right side is what it's supposed to look like, but can't get the left in the same position. How close is the clearance once the body panels go on? Is close good enough? 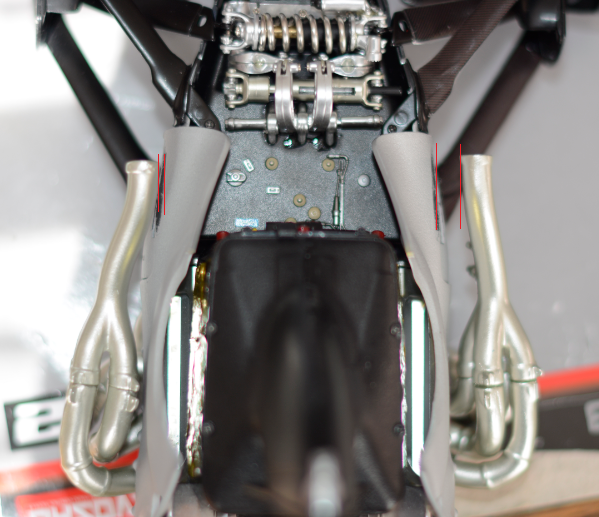 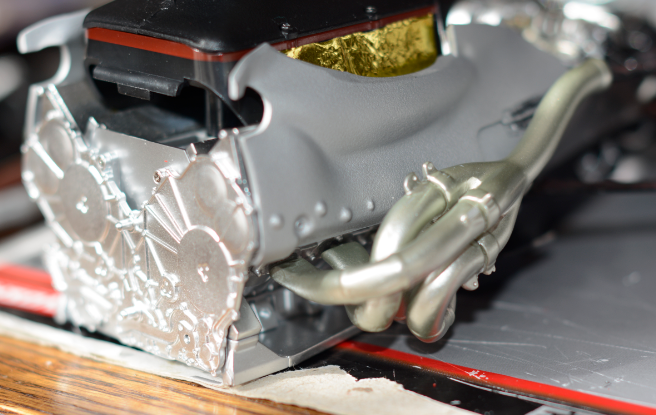
|
|
|
Rank: Elite Groups: registriert, Registered Joined: 20/03/2011 Posts: 2,356 Points: 7,122 Location: UK
|
Hi Scottymack I would'nt worry too much about the gap at the moment, if I remember correctly, even mine had a slight difference in gap and the cowling fitted ok with minimal adjustment. Spencer
|
|
|
Rank: Beginner Level 1 Groups: Registered
Joined: 31/05/2013 Posts: 7 Points: 21 Location: Hudson Valley
|
Thanks! I'll just keep going. I'm 1/2 way through month 11 of 12, so I should know soon enough if there's any adjustment needed.
I probably shouldn't have worried about it at all. I should have figured they would have left some play for something that could move so much with very little difference in mounting.
|
|
|
 Rank: Pro Groups: Registered
Joined: 25/09/2013 Posts: 112 Points: 308 Location: UK
|
I've been struggling with these as well, so I'm glad I'm not the only one! I got the right hand ones on OK, with the help of Blu-Tac to hold them in position, but for some reason I'm finding the left hand set a complete pain in the ****, if you'll excuse the un-parliamentary language!!  Try as I might I can't get them to fit or line up properly, and trying to hold them in position is a nightmare. This is the first stage of the model where I have really had difficulty. I will try the tape solution, scottymack, and see if that does the trick. Looks like a neat idea.  I have to say, I don't really understand why this stage of the model has been produced with such vague fitments for the exhausts into the engine block. Surely there could have been a way of manufacturing both parts so that the exhausts slot in and stay in position, rather than wobbling about all over the place? 
|
|
|
|
|
Hi Scottymack.
It's very difficult to know just where the pipes should sit at this stage. It would help if a reference dimension could have been given to the sides of the engine. I think that the pipes on the (actual)left side of the motor are a little too far out but the right side should be ok.
I lightly glued mine so that they could be repositioned in the final assembly stages with the bodywork.
Have a look at some of the finished builds. There's a couple of pics that show the relative position of the pipes and heatshields.
Hope that helps.
Malc.
|
|
|
|
Guest
|
 US
US

