|
|
 Rank: Pro   Groups: Registered
Joined: 27/06/2014 Posts: 393 Points: 1,104 Location: st austell
|
Hi Jim can tell me were you got the stand from thinking about not covering up the mp4/4 it looks to good thanks ian Facebook-model maker
|
|
|
 Rank: Pro   Groups: Registered
Joined: 01/12/2014 Posts: 102 Points: 312 Location: Chicago, IL
|
ian2014 wrote:Hi Jim can tell me were you got the stand from thinking about not covering up the mp4/4 it looks to good thanks ian http://hobbycom.jp/items/48553
I used a Japanese proxy service to order it through...
|
|
|
 Rank: Pro   Groups: Registered
Joined: 27/06/2014 Posts: 393 Points: 1,104 Location: st austell
|
Thanks Jim playing with the idea. Facebook-model maker
|
|
|
 Rank: Pro   Groups: Registered
Joined: 01/12/2014 Posts: 102 Points: 312 Location: Chicago, IL
|
I drilled out all the holes on the disc with a pin vise for added depth: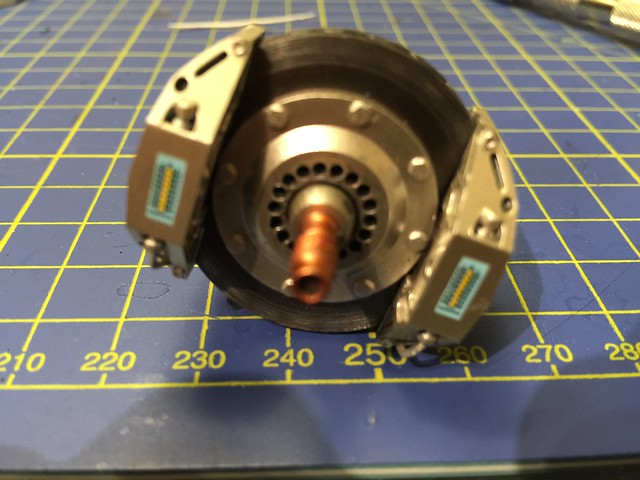
|
|
|
 Rank: Super-Elite        Groups: Registered, Forum Support Team, Administrators, Global Forum Support Team, Moderator, Official Builds Joined: 09/11/2012 Posts: 8,520 Points: 24,651 Location: East midlands
|
Hi Jim,  Lovely start and diary.  Hope you continue to enjoy your build as we all enjoy your diary. Keep it up. Regards delboy271155 (Derek) COME BACK GUY FAWKES "YOUR COUNTRY NEEDS YOU"
|
|
|
 Rank: Semi-Pro Level 2  Groups: Registered
Joined: 02/03/2015 Posts: 84 Points: 245 Location: England
|
Hi Jim, your wheels look fantastic... Quick question, what decals if any have you used on the inside of the wheels if you see what I mean? The side of the wheels that the driver would see. Building the MP4/4!
|
|
|
|
|
Great work Jim, excellent work on drilling out those holes.....   .. Remember, it's your build so you build it as you see fit, I'm enjoying following your progress so keep up the great work.....   Regards Alan
|
|
|
 Rank: Pro   Groups: Registered
Joined: 01/12/2014 Posts: 102 Points: 312 Location: Chicago, IL
|
Phil wrote:Hi Jim, your wheels look fantastic... Quick question, what decals if any have you used on the inside of the wheels if you see what I mean? The side of the wheels that the driver would see. I don't have any decals on the insides of the tires. I did however, have to also remove the printed Good Year logos on them and spray back the logos to match the outer tire.
|
|
|
 Rank: Semi-Pro Level 2  Groups: Registered
Joined: 02/03/2015 Posts: 84 Points: 245 Location: England
|
Ok thanks for the reply, I did paint the L and R on a 1/20 F1 car but I reckon it wouldn't look as good at this size so will probably have a look at getting the decal sheet. Building the MP4/4!
|
|
|
|
|
 Very nice start  Current builds:-C57,Zero, Lamborghini Countach, Caldercraft HMS Agamemnon,Robi,R2-D2, MFH Cobra .
|
|
|
 Rank: Semi-Pro Level 1  Groups: Registered
Joined: 10/02/2014 Posts: 63 Points: 189 Location: uk
|
hi NSXKid
i managed to purchase the body stand thanks to your suggestion, i use jap proxy's for auctions but never thought about purchasing from other web shops so thanks for the heads up. after remortgaging they have ordered one for me.
cool.
|
|
|
 Rank: Pro   Groups: Registered
Joined: 01/12/2014 Posts: 102 Points: 312 Location: Chicago, IL
|
So I accidently glued the steering pinion gear backwards onto the steering column. I tried freezing as well as putting it in very hot water to undo the super glue but no luck. I had to get replacement parts from Customer Service which took 6 weeks to receive. I am still very thankful for the Customer Service.
I'm up to Pack 11 now.
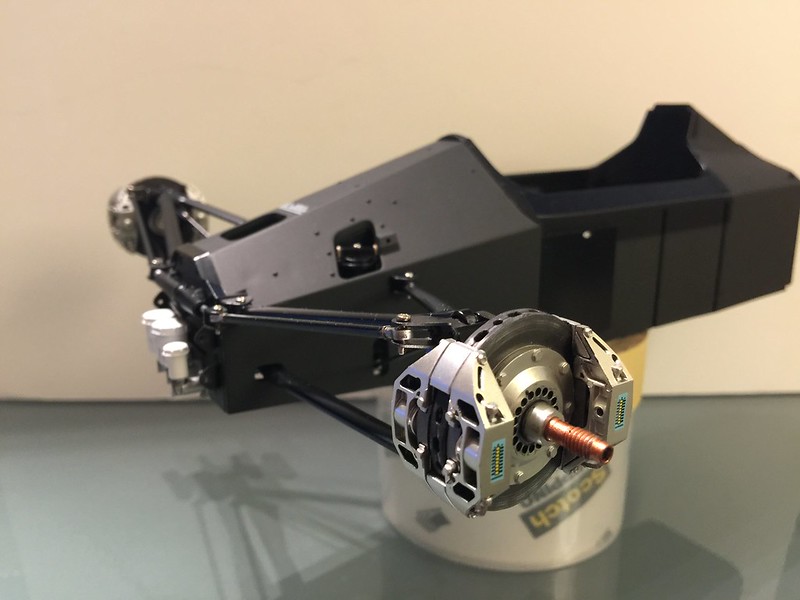
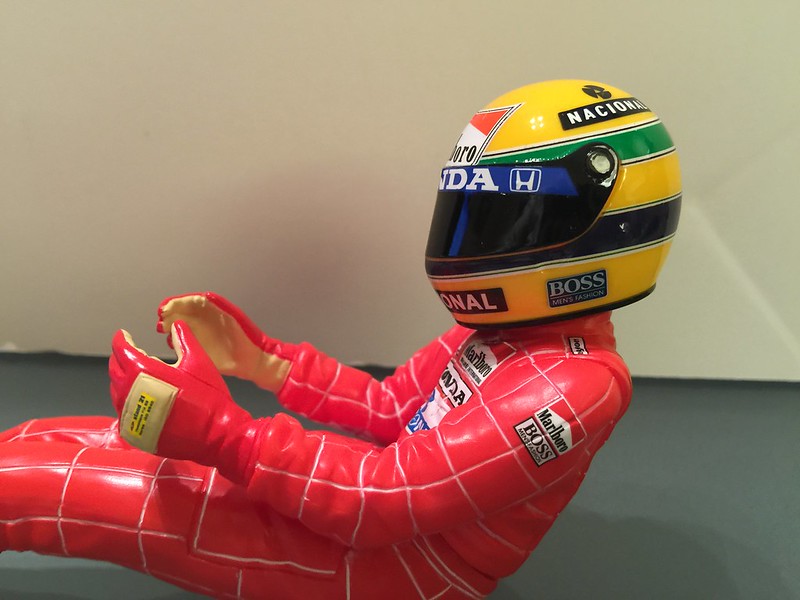
I've put on all the tobacco decals on as well as replacing the Honda visor and Nacional decals. Also added the 'Ayrton' decal that belongs on his racing suit waist.
|
|
|
|
|
 Hi NSXKid Im pretty sure you can get this or similar in the USA it's called Locktite superglue remover gel, simple to use just cover the area and leave overnight then just wash in warm water. The gel turns the super glue into a white substance that comes away from the part. Link below. http://www.ebay.co.uk/sc...ghostText=&_sacat=0
Regards Andy  Current builds:-C57,Zero, Lamborghini Countach, Caldercraft HMS Agamemnon,Robi,R2-D2, MFH Cobra .
|
|
|
 Rank: Beginner Level 1 Groups: Registered
Joined: 15/03/2015 Posts: 8 Points: 14 Location: Melbourne, Australia
|
Hi NSXKid, I'm newbie to the forum but have begun constructing the kit a few months ago with plans to add as much detail as my experience/skill level will allow. I'm really enjoying following your diary and was wondering if you could tell me where you got the temperature sensor decals for the brakes, they look fantastic. Keep up the great work! 
|
|
|
 Rank: Pro   Groups: Registered
Joined: 01/12/2014 Posts: 102 Points: 312 Location: Chicago, IL
|
arpurchase wrote: Hi NSXKid Im pretty sure you can get this or similar in the USA it's called Locktite superglue remover gel, simple to use just cover the area and leave overnight then just wash in warm water. The gel turns the super glue into a white substance that comes away from the part. Link below. http://www.ebay.co.uk/sc...ghostText=&_sacat=0
Regards Andy 
Thanks for the tip!
|
|
|
 Rank: Pro   Groups: Registered
Joined: 01/12/2014 Posts: 102 Points: 312 Location: Chicago, IL
|
Wheeler wrote:Hi NSXKid, I'm newbie to the forum but have begun constructing the kit a few months ago with plans to add as much detail as my experience/skill level will allow. I'm really enjoying following your diary and was wondering if you could tell me where you got the temperature sensor decals for the brakes, they look fantastic. Keep up the great work!  I got them from eBay. They are made by MSM Creation. The sheet also has the Dymag decals for the wheels.
Here is a link (I also bought it from this Seller):
http://www.ebay.com/itm/...amp;hash=item4ae2060003
|
|
|
 Rank: Beginner Level 1 Groups: Registered
Joined: 15/03/2015 Posts: 8 Points: 14 Location: Melbourne, Australia
|
Thanks for the advice and link! It actually prompted me to look harder at the Museum Collection Body decal sheet I had purchased and lo and behold, there are also temperature sensor decals which I had not seen initially: ( HobbyLink Japan) They are, however, in a much darker shade of blue in comparison to the MSM ones and unfortunately do not have the Dymag decals.
|
|
|
 Rank: Pro   Groups: Registered
Joined: 01/12/2014 Posts: 102 Points: 312 Location: Chicago, IL
|
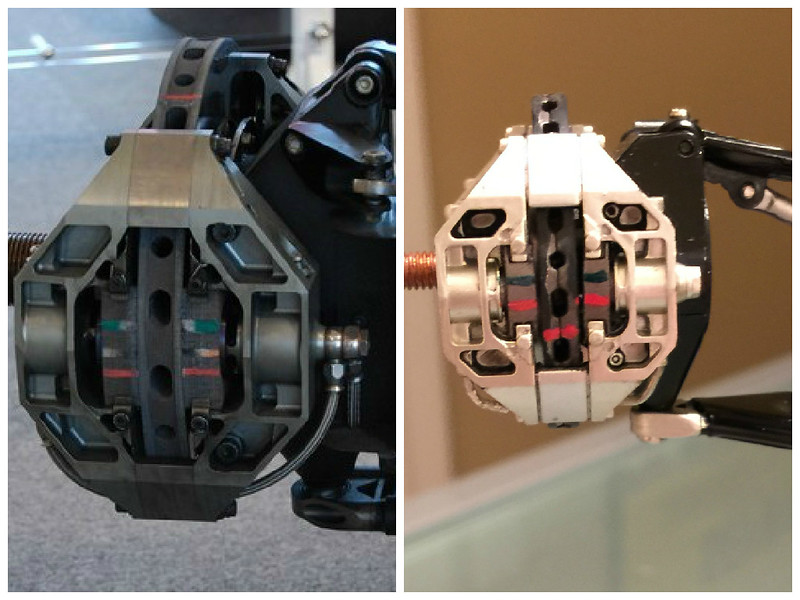
I painted on markings on the pads and rotor to simulate what I see on reference pics. I mixed colors to get it close to what I see -- the pic I took is misleading as the color does not look like what it does in person:
|
|
|
 Rank: Pro   Groups: Registered
Joined: 01/12/2014 Posts: 102 Points: 312 Location: Chicago, IL
|
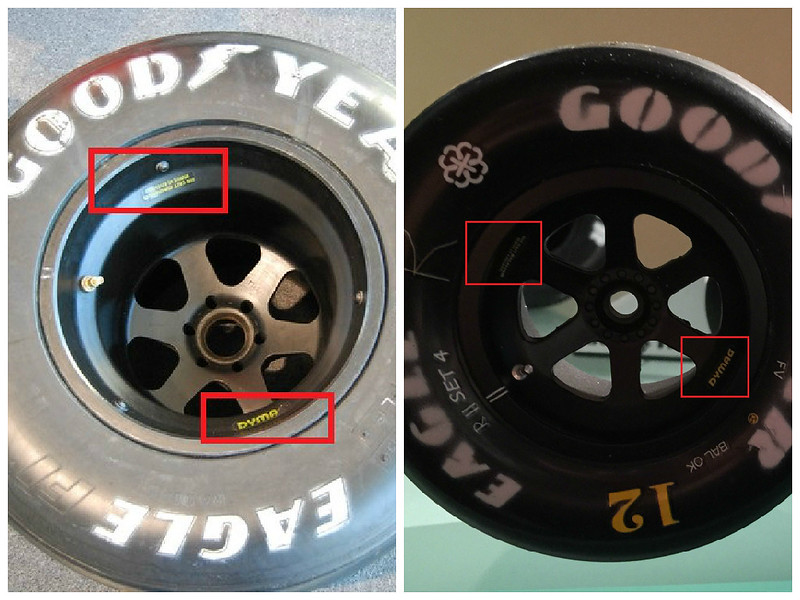
Dymag stickers on the rims.
|
|
|
 Rank: Beginner Level 2  Groups: Registered
Joined: 15/03/2015 Posts: 19 Points: 57 Location: Chester, UK
|
Hi Jim, Enjoyed looking through your diary  Some lovely details and touches. Can I ask where you got the stencil for spraying the Goodyear logo on the tyres? It looks just like back-in-the-day, very realistic. I was considering using china pencils or white permanent pen to mark up the mechanics scribbles on the tyres, but the decals look very realistic so may have to invest in them... Also, did you use actual (miniature) braided hose for the brake lines? I'm gonna have a mooch on ebay now to look for those brake temperature indicators  Si Senna fan since I was tiny. F1 geek. Modelling noob... 😊
Currently attempting:
McLaren MP4/4
Bentley 4.5 litre
|
|
|
|
Guest (3)
|