|
|
 Rank: Elite      Groups: Registered
Joined: 13/02/2011 Posts: 2,243 Points: 6,849 Location: Sussex
|
Spencer, I can see what you saying regarding the shaft spinning, I guess to tight and the Prop would not move. Thank you for your comments and help. Regards Trev. Work in progress: Tombstone (Scratch) - San Francisco 2. -The Mayflower ( scratch by plan).
OcCre- Santa-Maria (Kit).
|
|
|
 Rank: Pro Groups: Joined: 24/08/2009 Posts: 48,827 Points: -13,348
|
The prop shaft should not be loose at all, should be tight against the back plate, which should leave the crown loose, having rotational movement and approx 1mm back and forth movement.
When the screw and shaft are screwed together, the gap between the two inner faces should be approx 6.55mm as per the photo below.
It appears the screw you have maybe slightly too long, you could try reducing its length by the length of the gap you have, otherwise request replacement.
Once you have installed the prop's in the next stage you'll be able to check the gear movement and that the prop shaft should not have any movement upon the backplate (no washer needed).Tomick attached the following image(s):
|
|
|
Rank: Elite Groups: Registered
Joined: 13/02/2011 Posts: 2,243 Points: 6,849 Location: Sussex
|
Tom, Thanks for the information a great help, I have measured the gap with the screw tight and it measured 6.73 so I need to reduce the thread by 0.8 to obtain the correct gap. (cannot open pictures on your build) 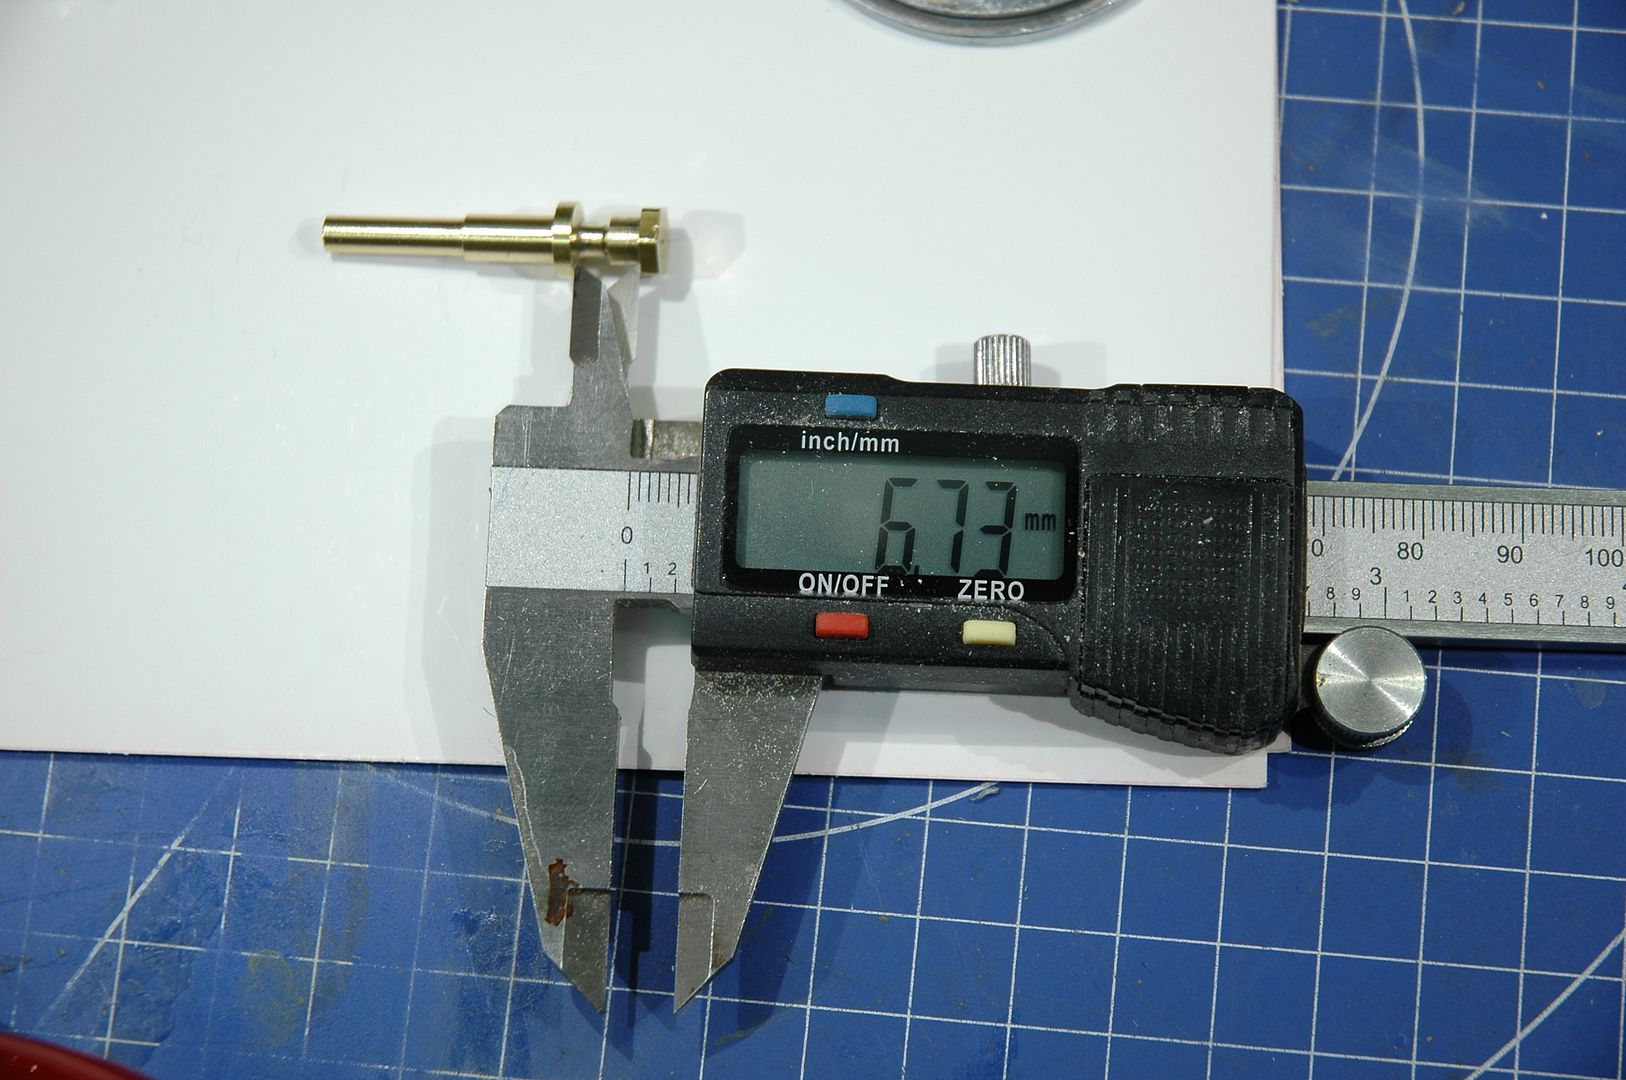 Regards Trev. Work in progress: Tombstone (Scratch) - San Francisco 2. -The Mayflower ( scratch by plan).
OcCre- Santa-Maria (Kit).
|
|
|
Rank: Pro Groups: Joined: 24/08/2009 Posts: 48,827 Points: -13,348
|
As mentioned elsewhere on the forum, the site is experiencing problems with images being instantly visible.
If they are not instantly visible, simply refresh the page and they should appear. The problem is currently being worked on.
|
|
|
Rank: Elite Groups: Registered
Joined: 13/02/2011 Posts: 2,243 Points: 6,849 Location: Sussex
|
UPDATE:SPITFIRE 250415. PROPELLER ASSEMBLY. On assembly of the Propeller Shaft to the back plate I found it impossible to get a tight fit as per instruction's, with the help of Mr T, it was pointed out that the gap between the two inner faces should be approx. 6.55mm mine was 6.73 which meant I had to reduce the thread by 0.18. So my next task was to remove brass from the screw, which I did, but I could see that the thread was disappearing fast and unfortunately not resolving the problem, so I then decided to remove brass from the end of the Propeller shaft and this allowed the back plate to fit tight against the shaft, which has left the crown loose with movement as it should be.  Gap between two inner faces should be 6.55mm 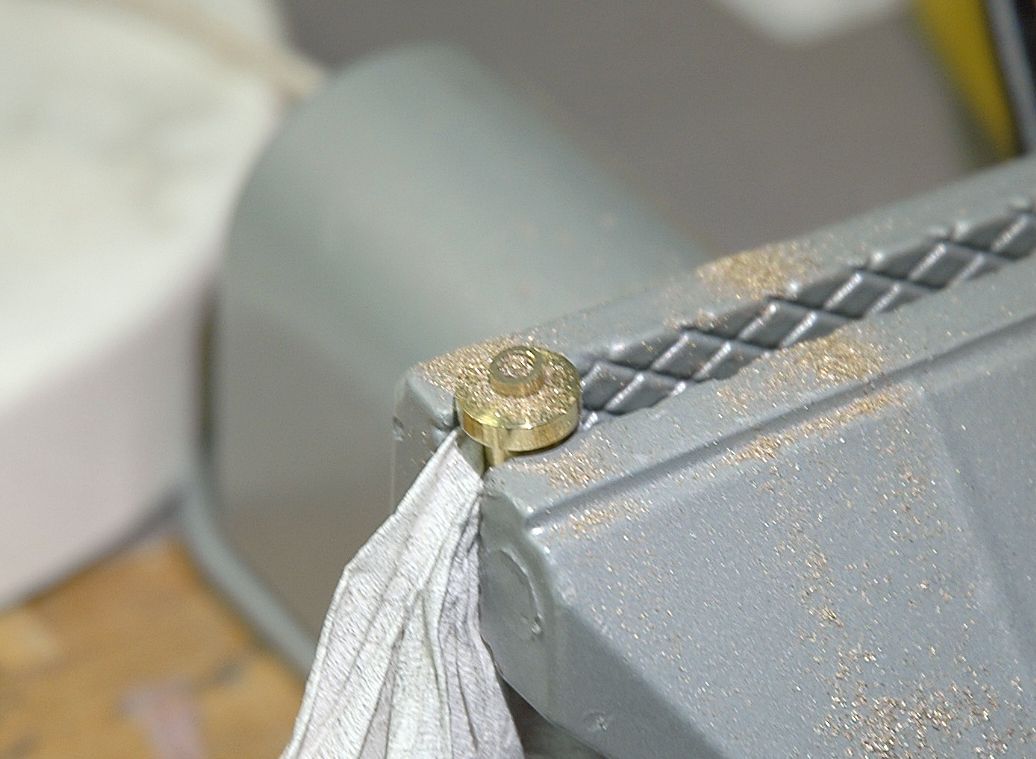 Removing Brass from Prop-Shaft. 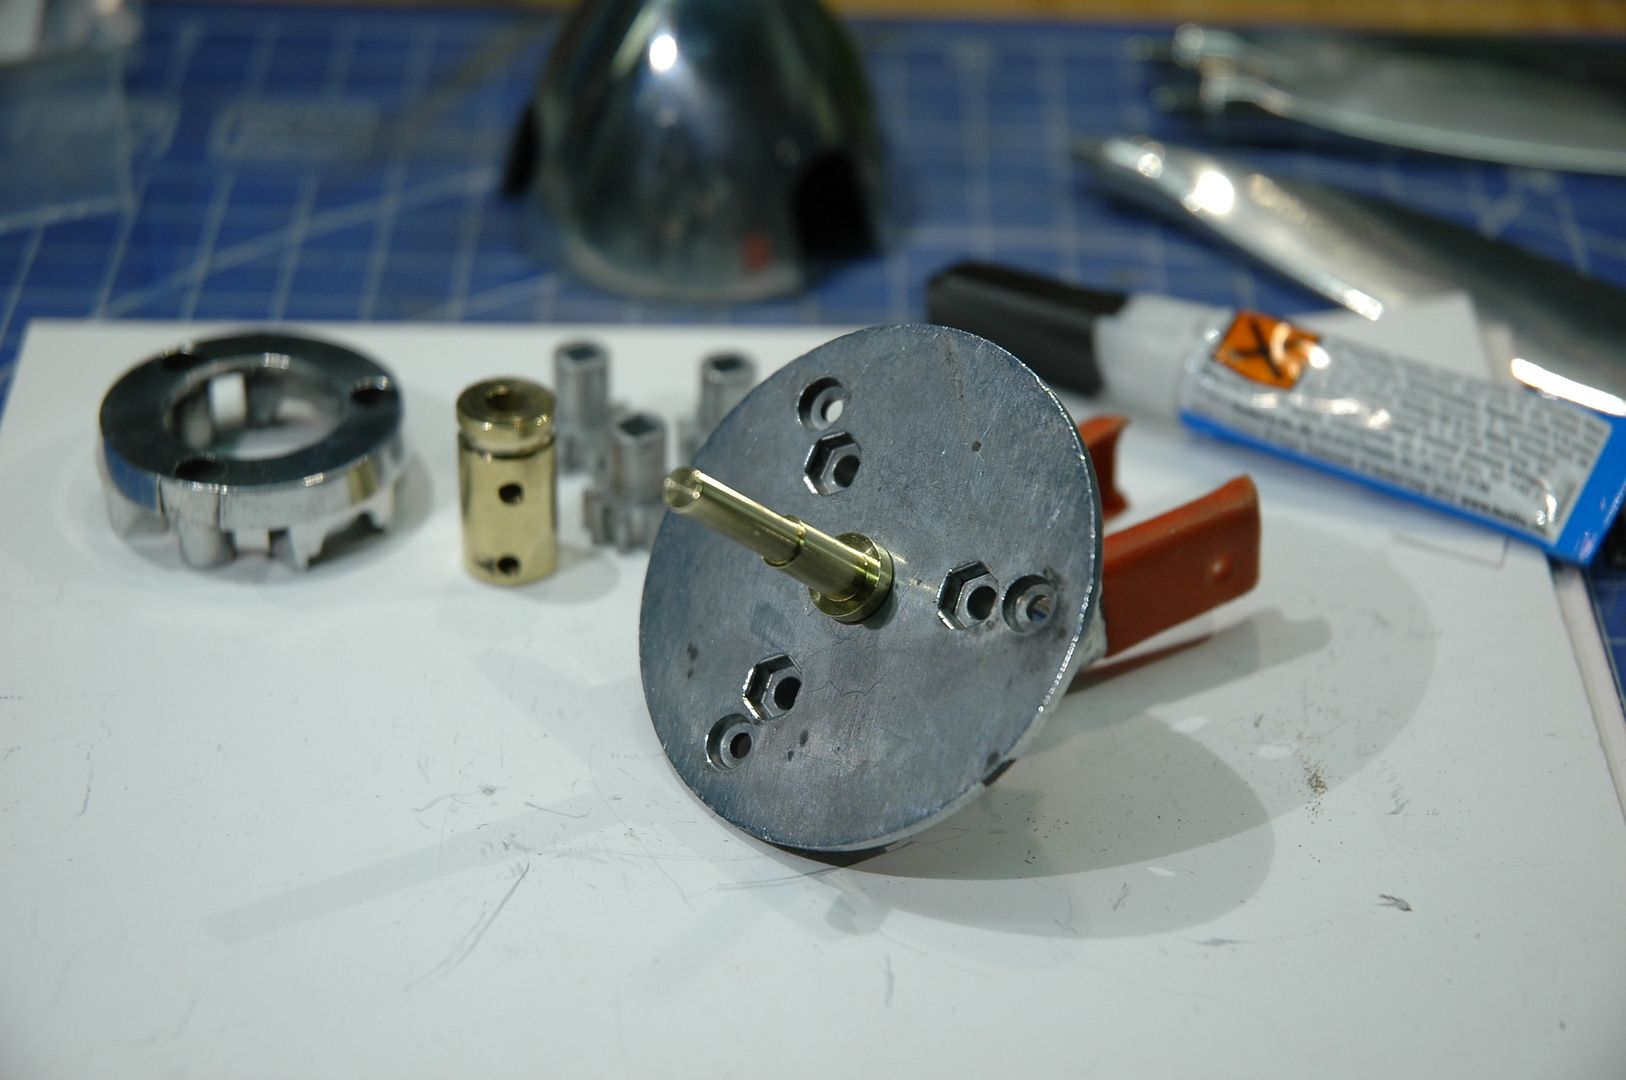 Prop-Shaft tight against back plate as instructions. Next, to complete the Prop assembly. More soon. Regards Trev. Work in progress: Tombstone (Scratch) - San Francisco 2. -The Mayflower ( scratch by plan).
OcCre- Santa-Maria (Kit).
|
|
|
Rank: Pro  Groups: Registered
Joined: 27/06/2011 Posts: 437 Points: 1,321 Location: milton keynes
|
Super Job Trev Those skins look great to me and a credit to your "on the job" skills Regards Dan Built - Deagostini MP4/23, deagostini Zero, Deagostini Falcon, Deagostini R2D2, Model Airways 1903 Wright Flyer, Deagostini Senna Mp4/4.
Entex Mclaren M23 1/8th scale to complement the Deagostini MP4/23 & Mp4/4, deagostini Ferrari 312T4, Pocher lotus 72D, Pocher porche, Deagostini Lotus 97T
on the bench, Model Airways Sopwith Camel, HK Models B-17F flying fortress, Galactica Viper, Stap droid
|
|
|
Rank: Elite Groups: Registered
Joined: 13/02/2011 Posts: 2,243 Points: 6,849 Location: Sussex
|
Dan, Thanks for looking and your comments, it was a bit of a test for me as my experience was only Balsa 1/32 sheet on light aircraft wings, but I have a long way to go with this build and a few more curves to master. Today I will complete the Propeller assembly. Regards Trev. Work in progress: Tombstone (Scratch) - San Francisco 2. -The Mayflower ( scratch by plan).
OcCre- Santa-Maria (Kit).
|
|
|
 Rank: Super-Elite   Groups: Registered, Forum Support Team, Administrators, Global Forum Support Team, Moderator, Official Builds Joined: 09/11/2012 Posts: 8,520 Points: 24,651 Location: East midlands
|
Hi Trev,  Good to see the minor issue has been sorted. Nice pics to show the resolution. Keep up the good work. Regards delboy271155 (Derek) COME BACK GUY FAWKES "YOUR COUNTRY NEEDS YOU"
|
|
|
Rank: Pro Groups: Joined: 24/08/2009 Posts: 48,827 Points: -13,348
|
Nice work Trev and a nice save on the propshaft, a proper piece of engineering - well done.  
R.J. Mitchell would be proud of you!!
Kev
|
|
|
Rank: Super-Elite  Groups: Registered
Joined: 31/05/2010 Posts: 5,679 Points: 17,011 Location: Wiltshire
|
Trev You resolved that slight issue with the prop shaft very well. A very lovely build indeed. Happy Modelling
BUILDING: Hachette Spitfire Mk 1A, Constructo Mayflower
SUBSCRIPTION COMPLETE (Awaiting building): USS Constitution, Sovereign of the Seas, 1:200 Bismarck (Hachette)
COMPLETED: Porsche 911, E-Type Jaguar, Lam Countach
|
|
|
Rank: Elite Groups: Registered
Joined: 13/02/2011 Posts: 2,243 Points: 6,849 Location: Sussex
|
Thanks for looking in, Derek, Kev, Tony. Regards Trev. Work in progress: Tombstone (Scratch) - San Francisco 2. -The Mayflower ( scratch by plan).
OcCre- Santa-Maria (Kit).
|
|
|
Rank: Elite Groups: Registered
Joined: 13/02/2011 Posts: 2,243 Points: 6,849 Location: Sussex
|
UPDATE:SPITFIRE. 270415. PROPELLER ASSEMBLY. In this update I intend to show how the Propeller assemble fits together this I found straight forward following the official build diary.  First to locate three gear wheels and fix the propellers in place. 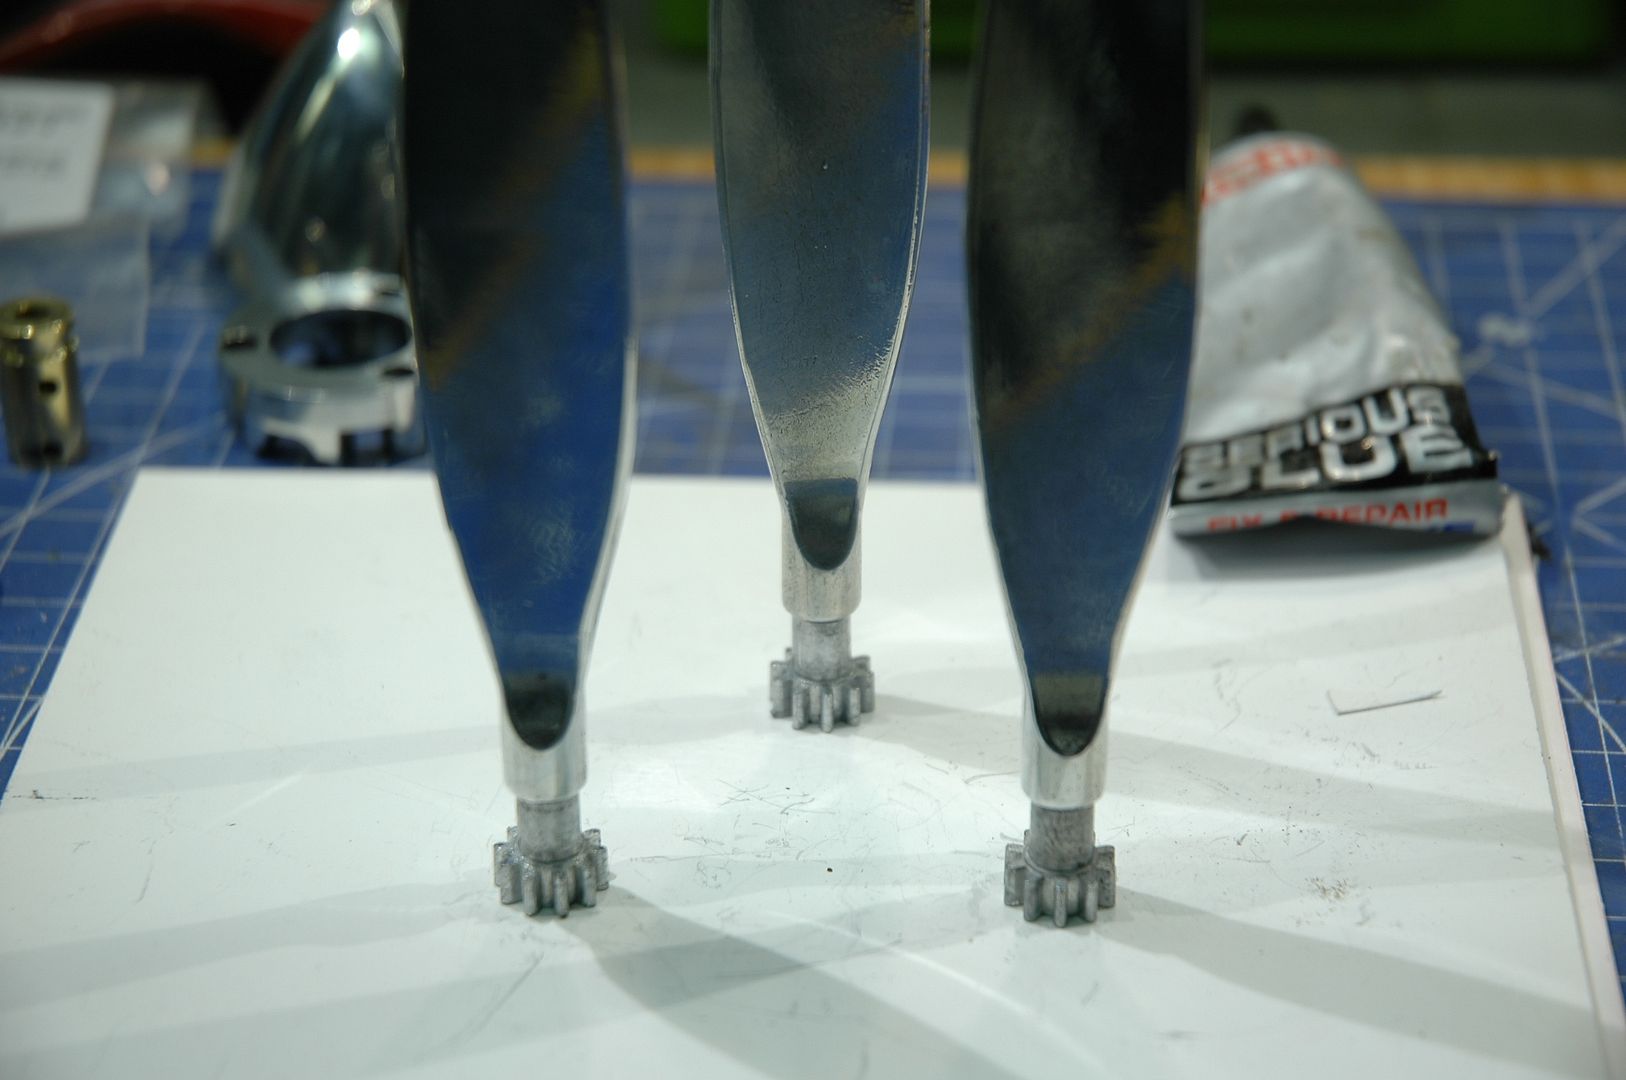 Stand on end to be sure they are seated and leave over night to set. 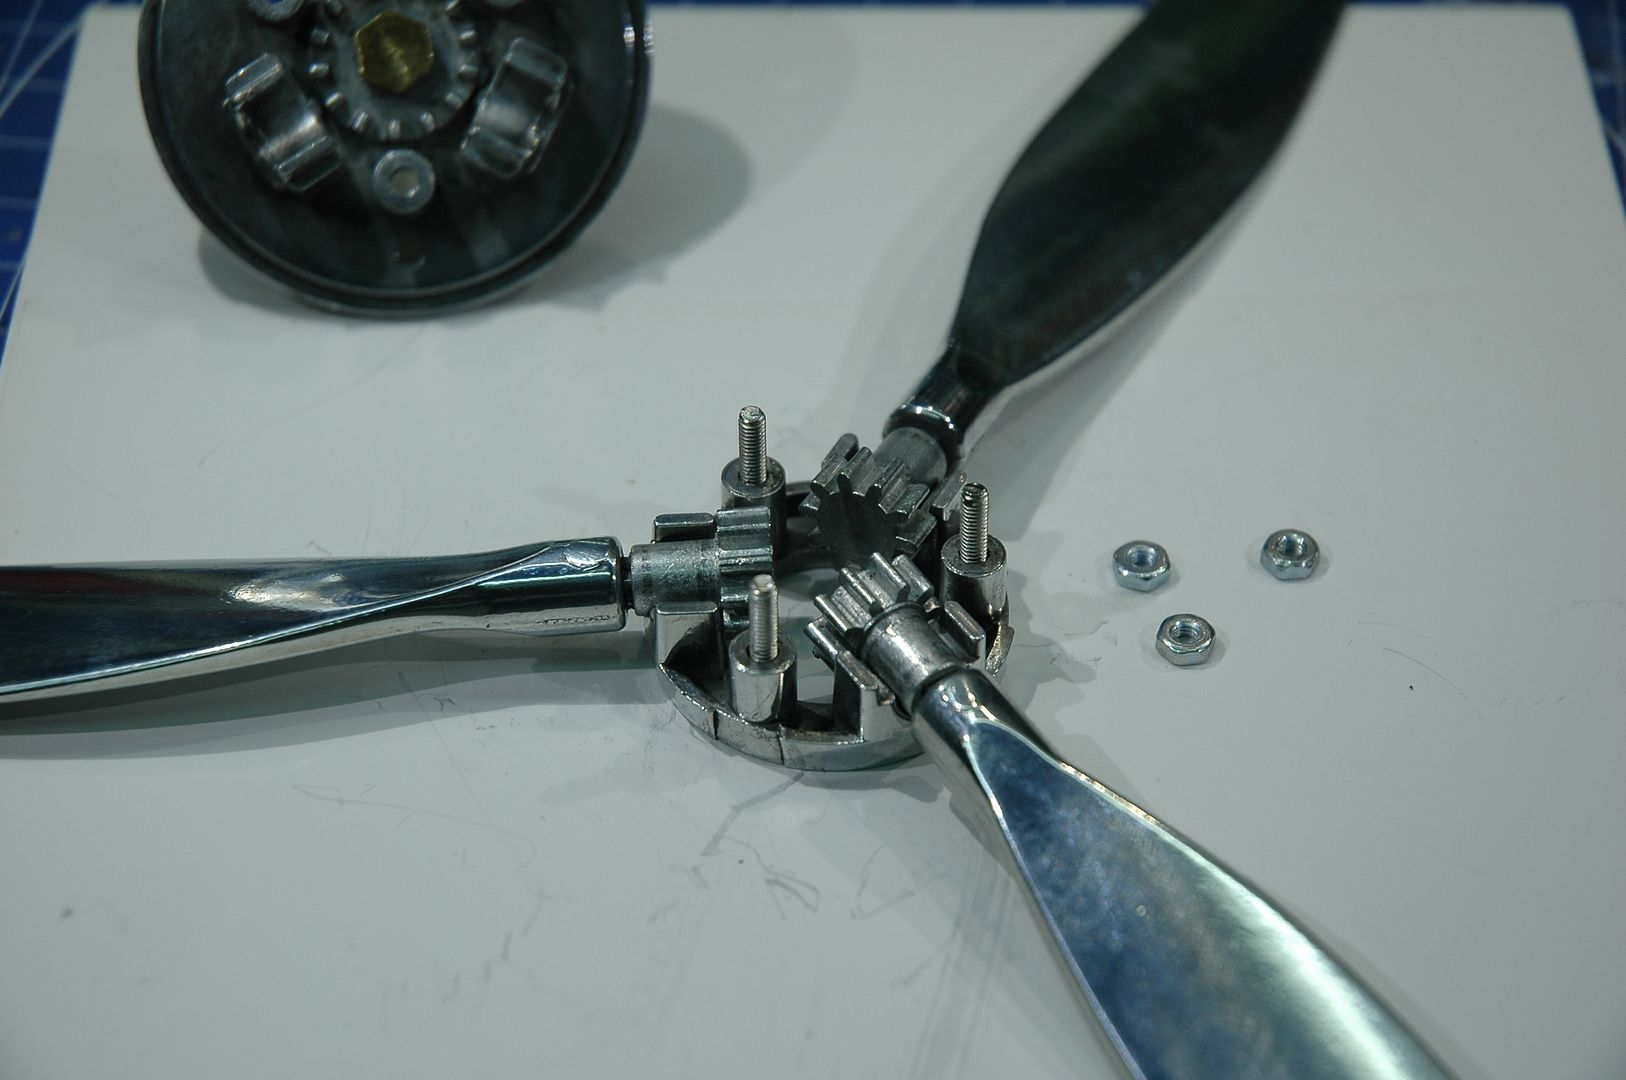 Check to see all fits ok. 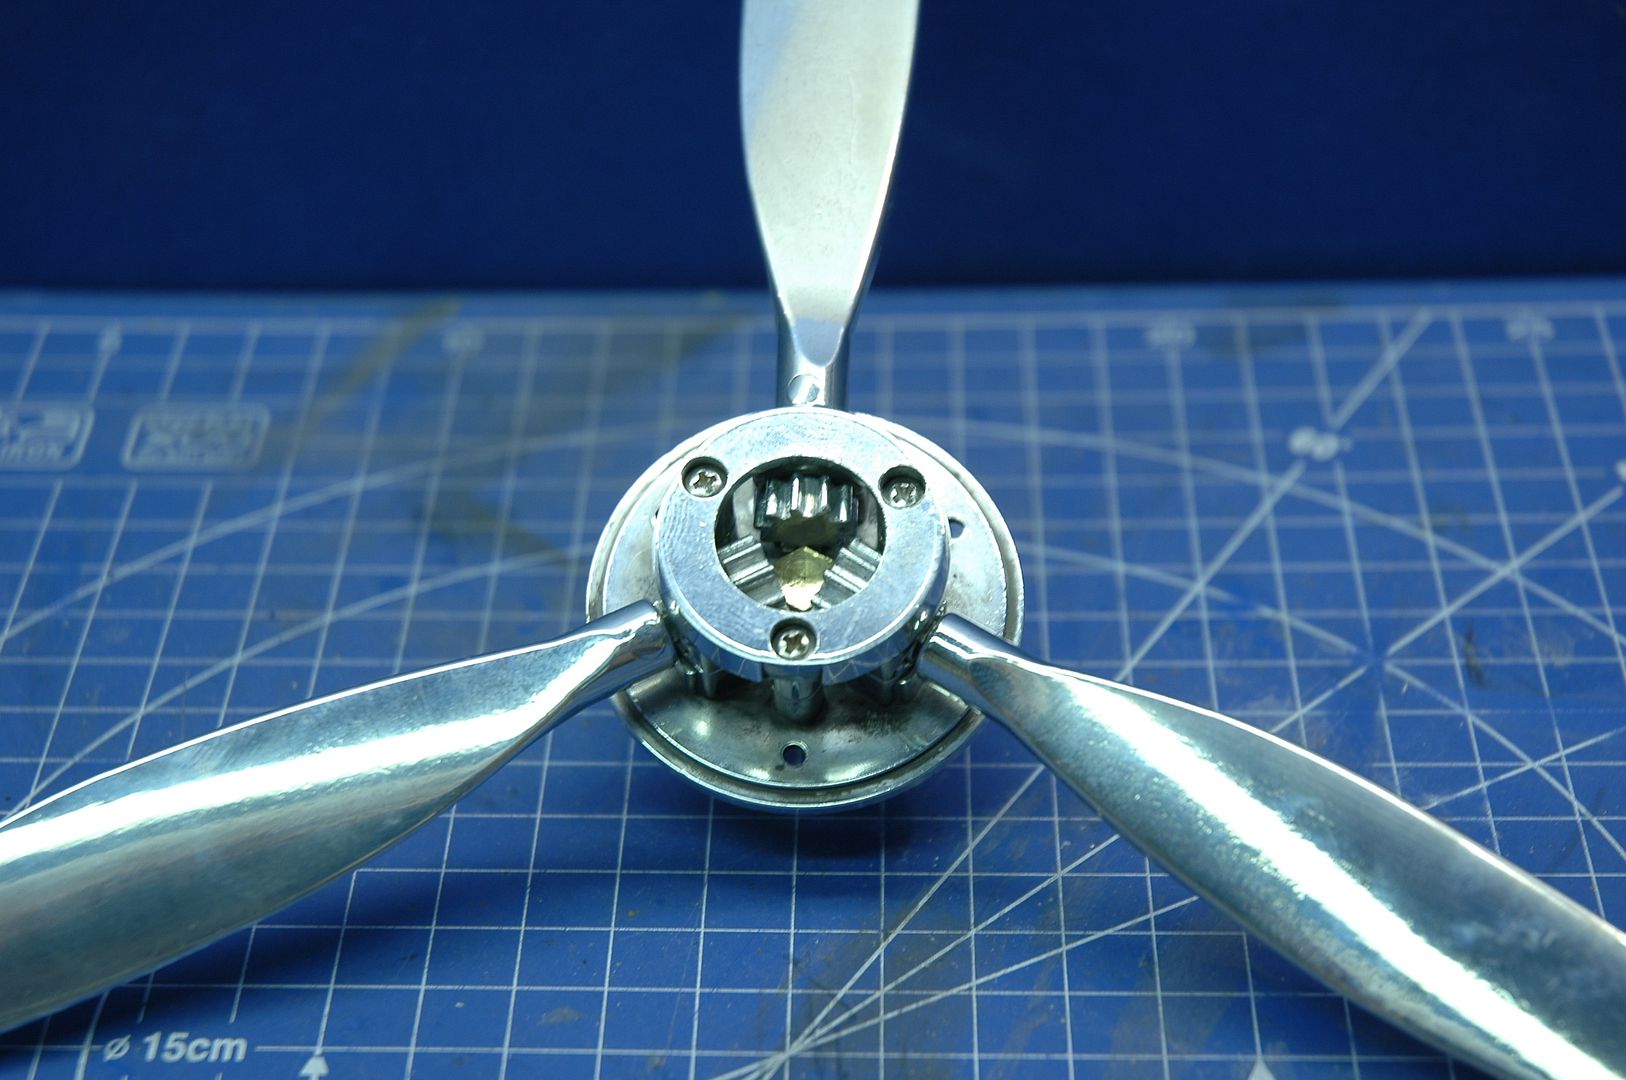 Next check to see that the top cover fits with three screws in place. 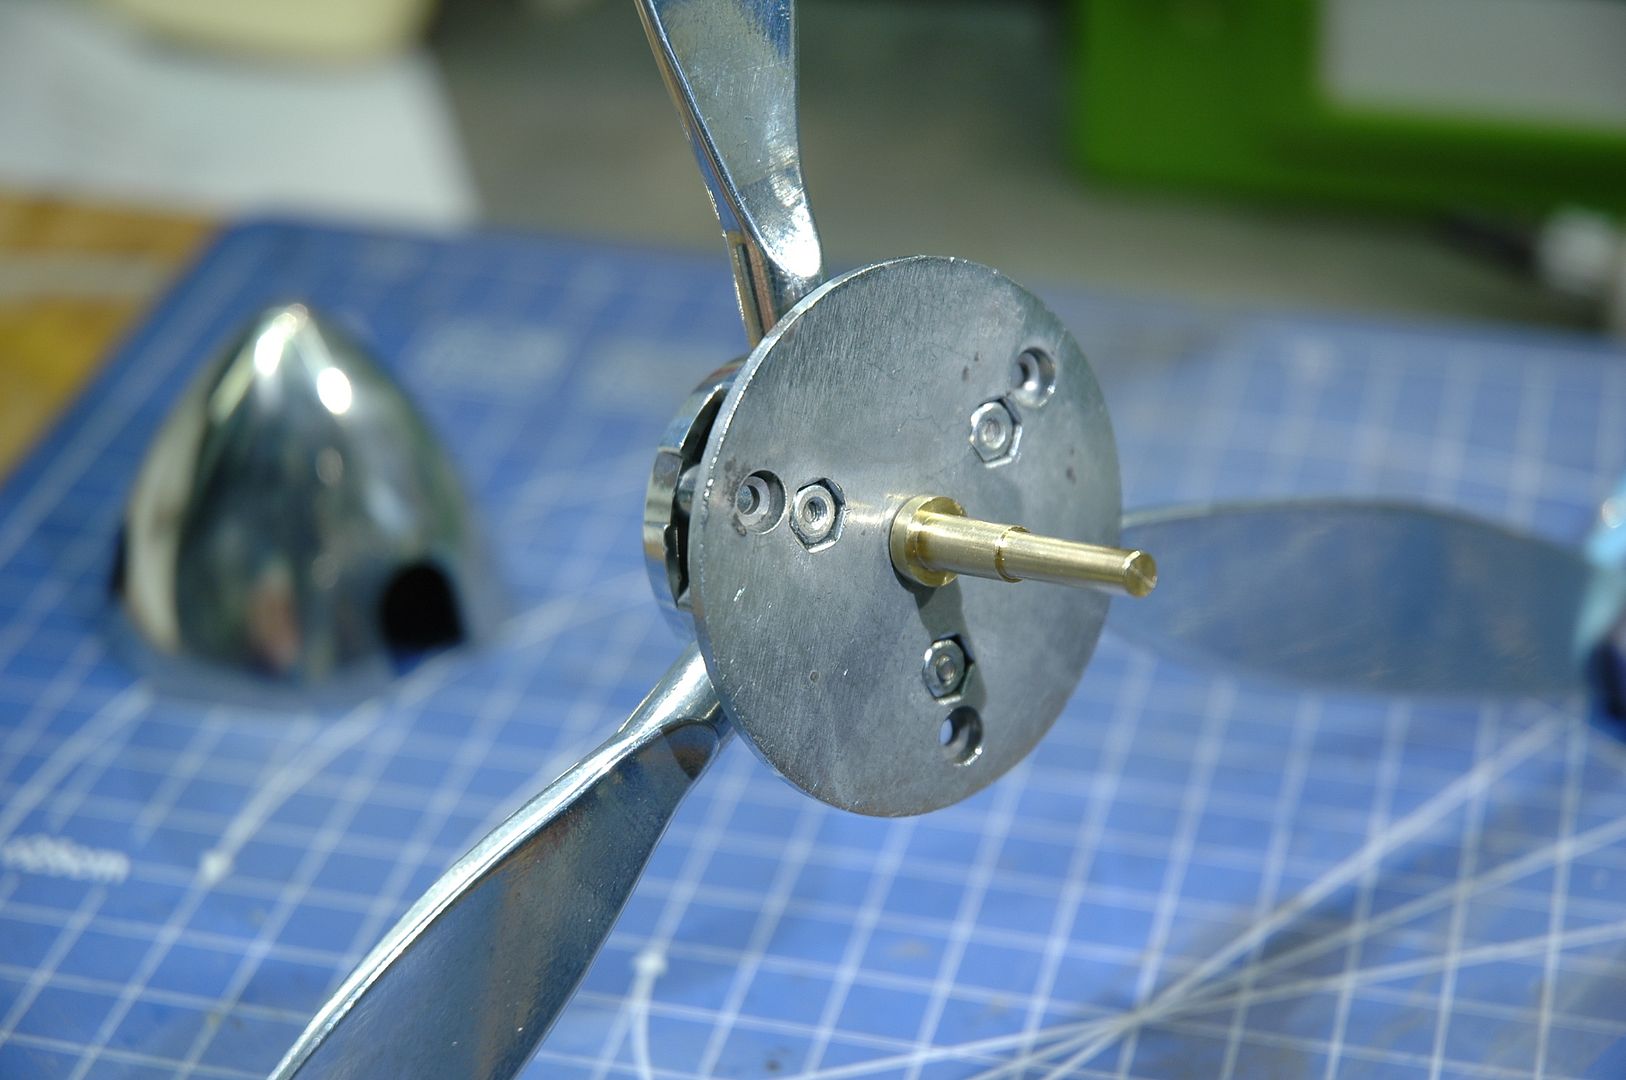 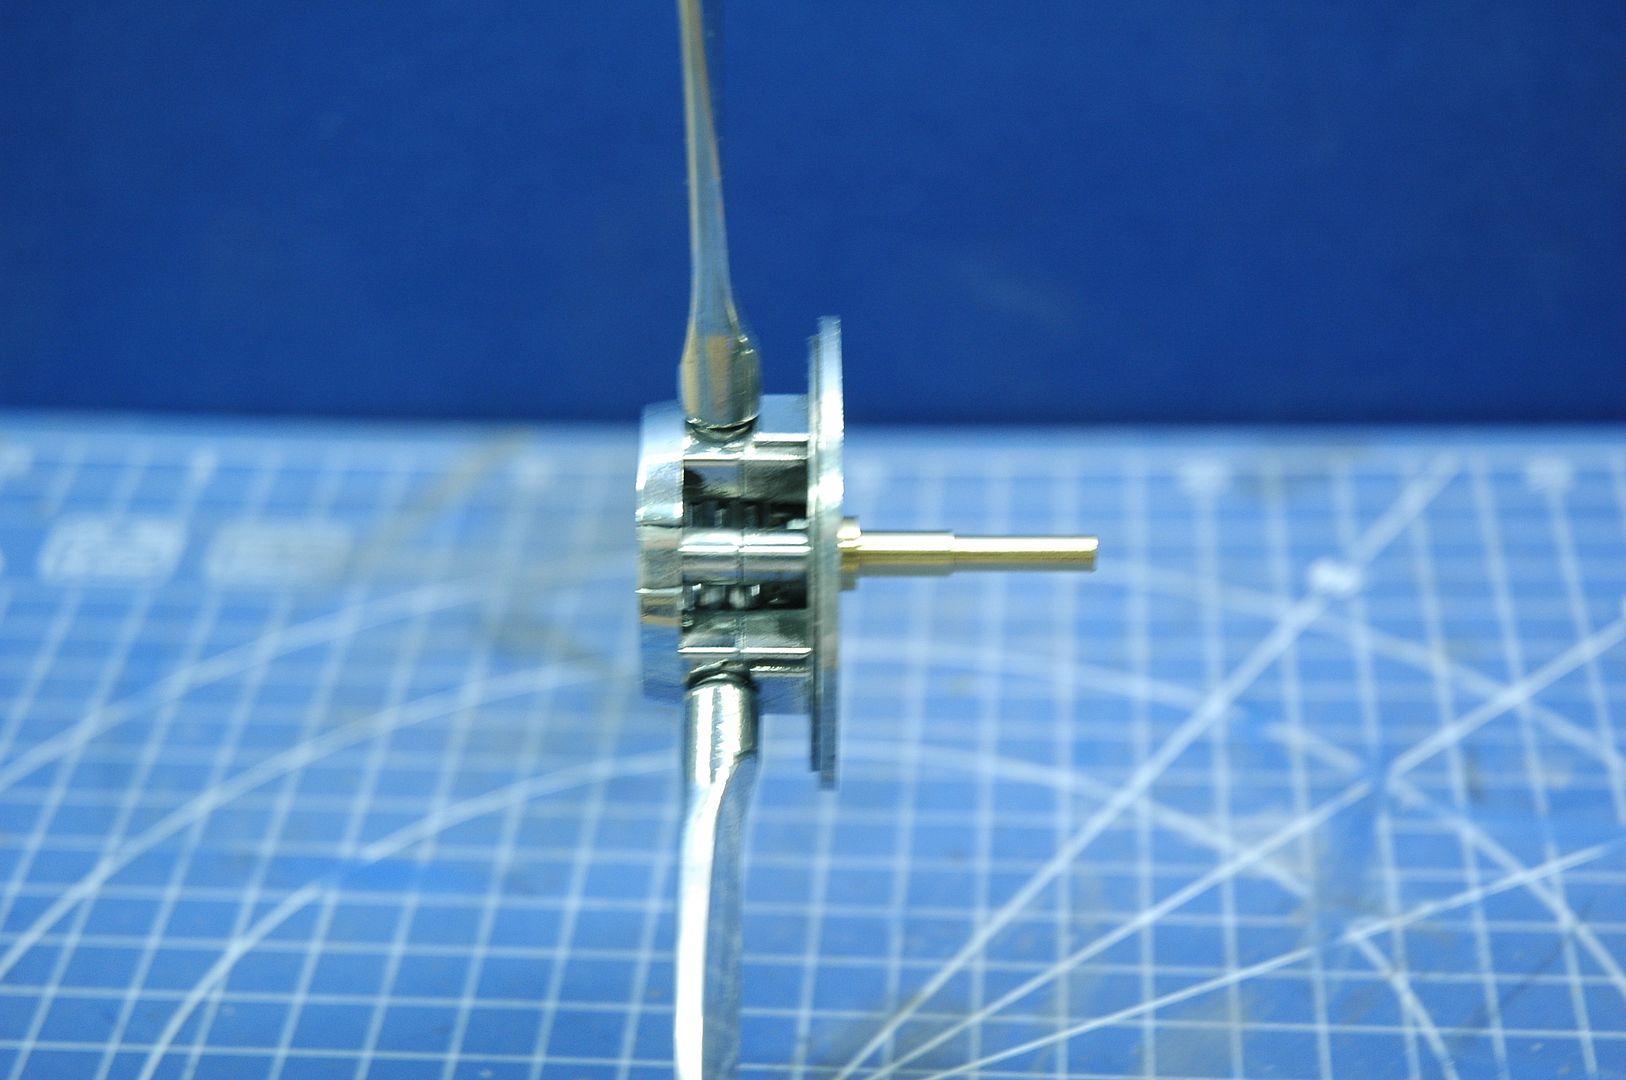 Then I turned the assembly over and checked all three screws and nut's were in place. 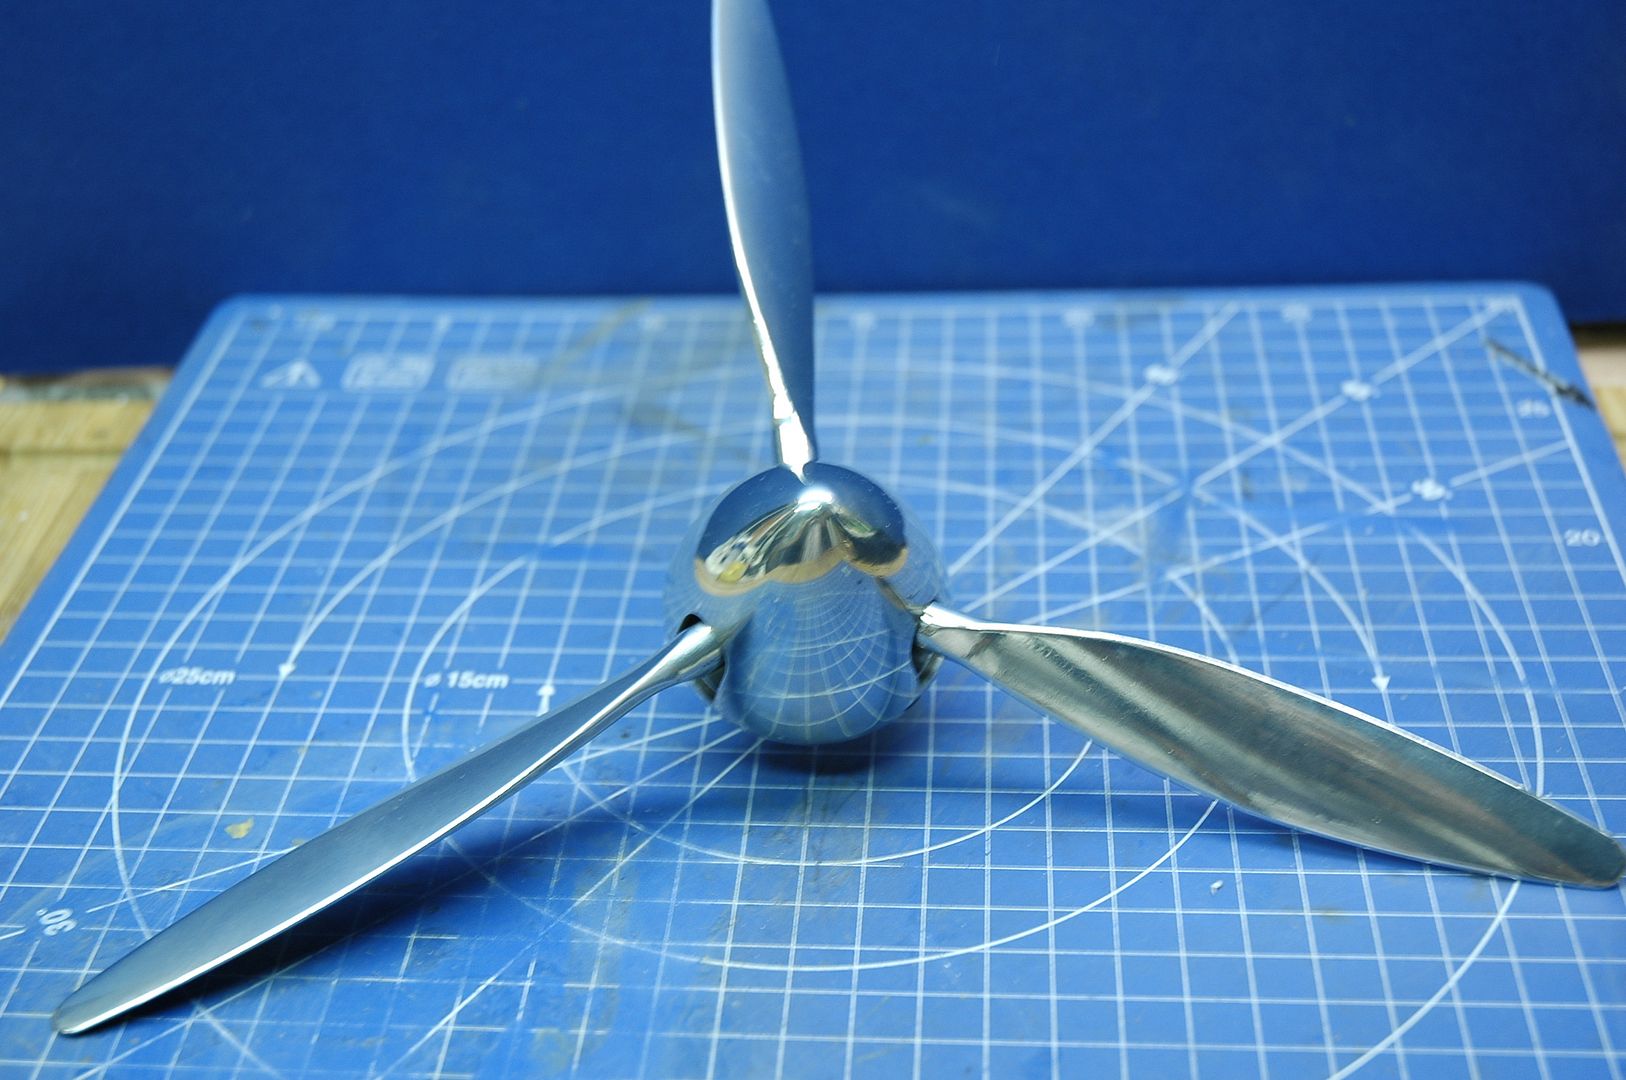 This is how my Prop assembly looks now. More soon thanks for looking. Regards Trev. Work in progress: Tombstone (Scratch) - San Francisco 2. -The Mayflower ( scratch by plan).
OcCre- Santa-Maria (Kit).
|
|
|
Rank: Super-Elite Groups: Registered
Joined: 27/01/2014 Posts: 5,060 Points: 14,980
|
Wow, I love that propeller  Looks like some serious polishing has gone on
|
|
|
|
|
Fab work Trev and a great fix on the prop shaft... .. Very impressed with the polished finish you have achieved on the prop... .. Keep the pics coming, will be following... Regards Alan
|
|
|
Rank: Elite Groups: Registered
Joined: 13/02/2011 Posts: 2,243 Points: 6,849 Location: Sussex
|
Hi, Dave, pleased with the finish myself, thanks for looking more soon. Alan, took some time to achieve even with a small buffing mop, the funny thing is I am looking to spray it. Regards to you both Trev Work in progress: Tombstone (Scratch) - San Francisco 2. -The Mayflower ( scratch by plan).
OcCre- Santa-Maria (Kit).
|
|
|
Rank: Elite Groups: Registered
Joined: 13/02/2011 Posts: 2,243 Points: 6,849 Location: Sussex
|
UPDATE:SPITFIRE. 160515. (Sat) PACK 21. Pack 21 has arrived today looks a lively pack with plenty of metal plates to fit plus more work on the nose cover with reinforcement wooden fret should be interesting. 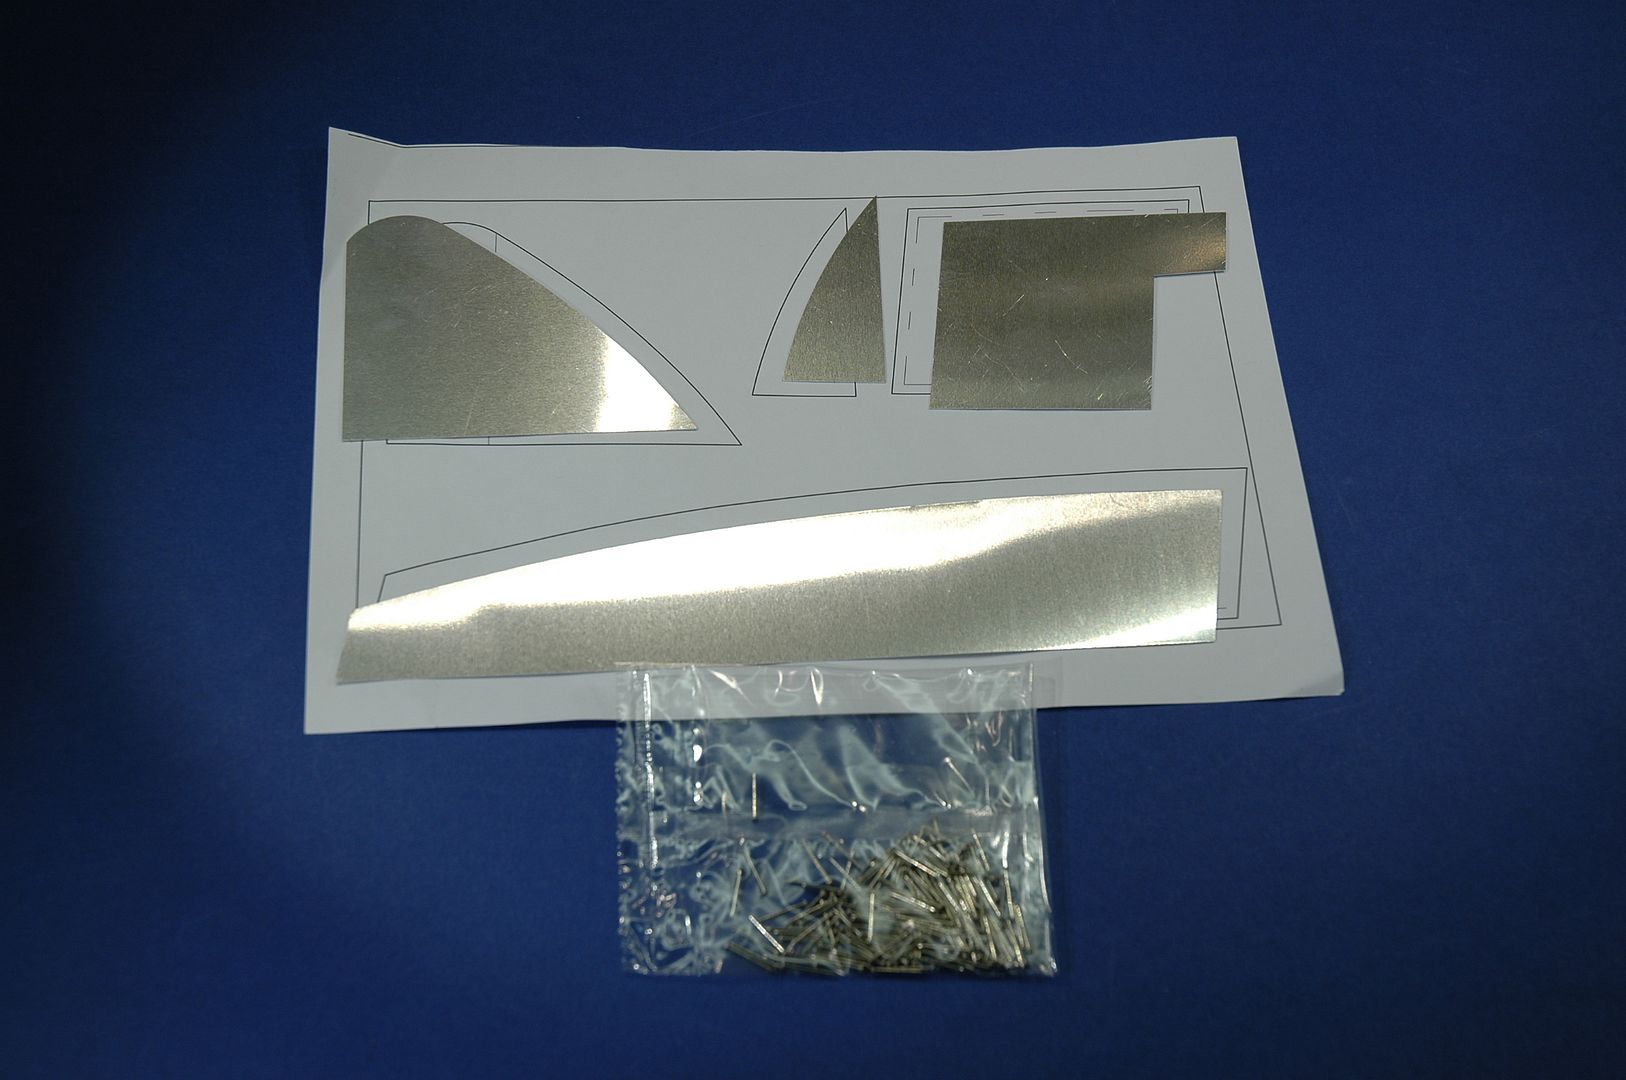 STAGE 80 Upper Wing Plate: 6/14/15/16. Template. Nails. 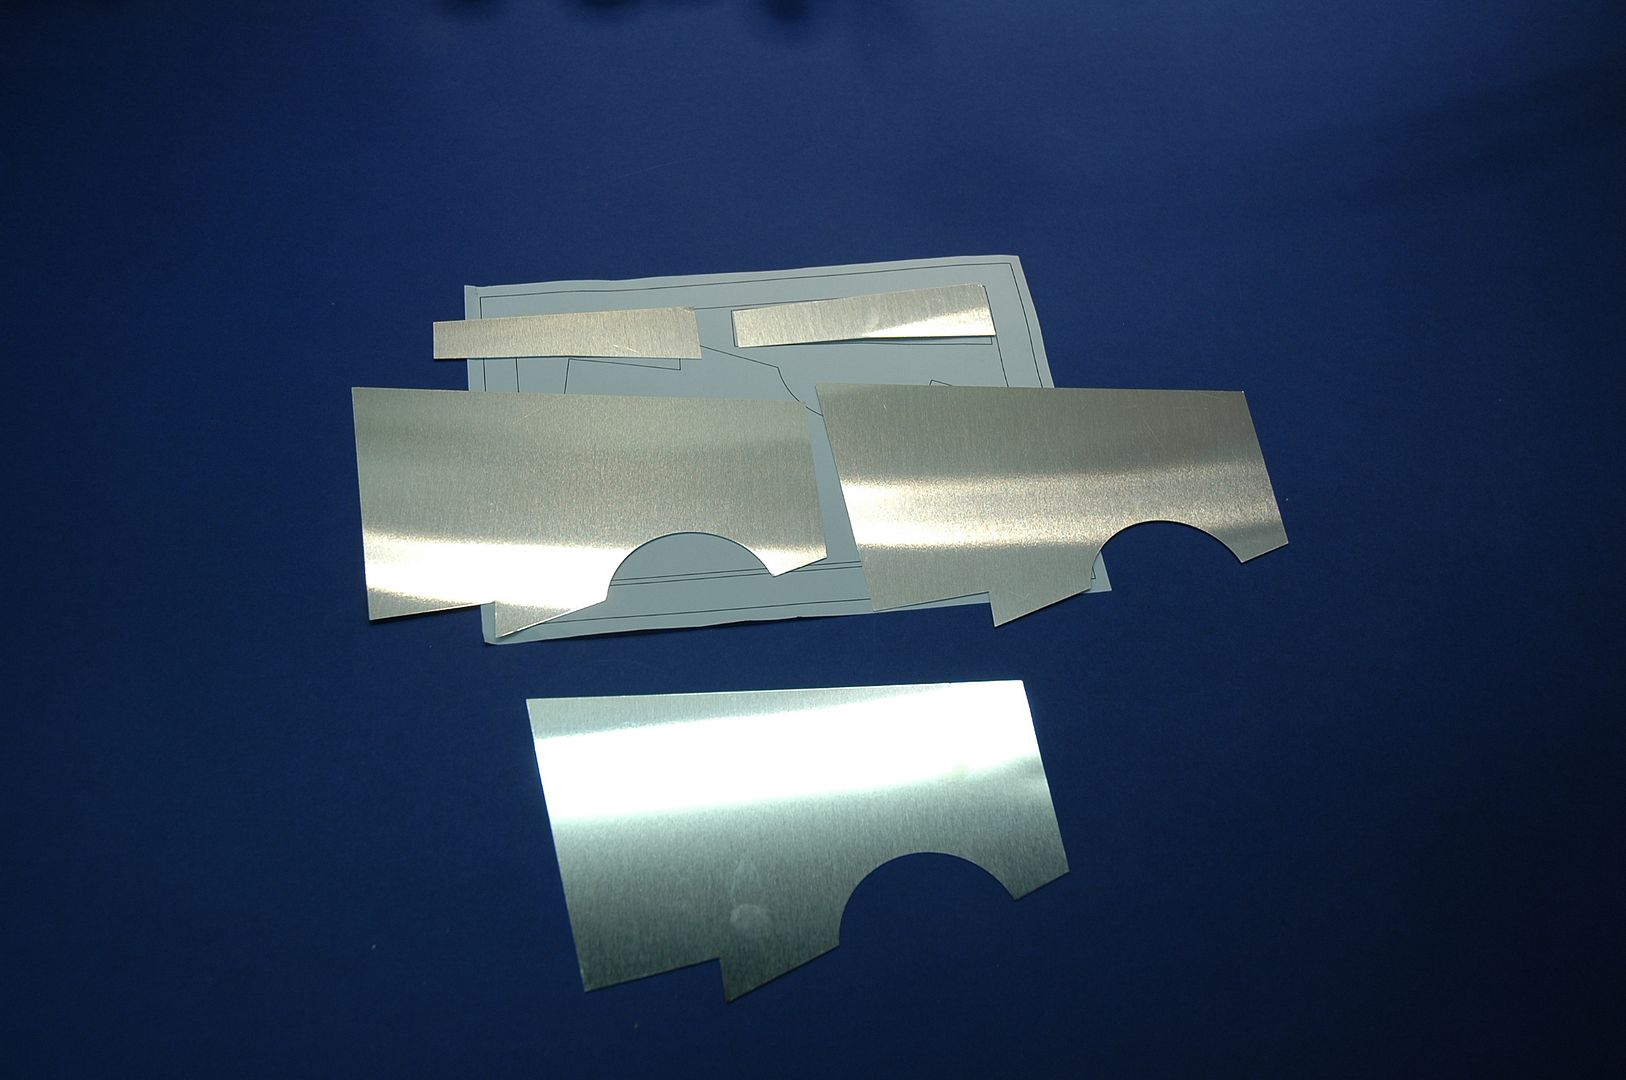 STAGE 81. Lower wing Plates 21 Lower Wing Plate 27 Template. 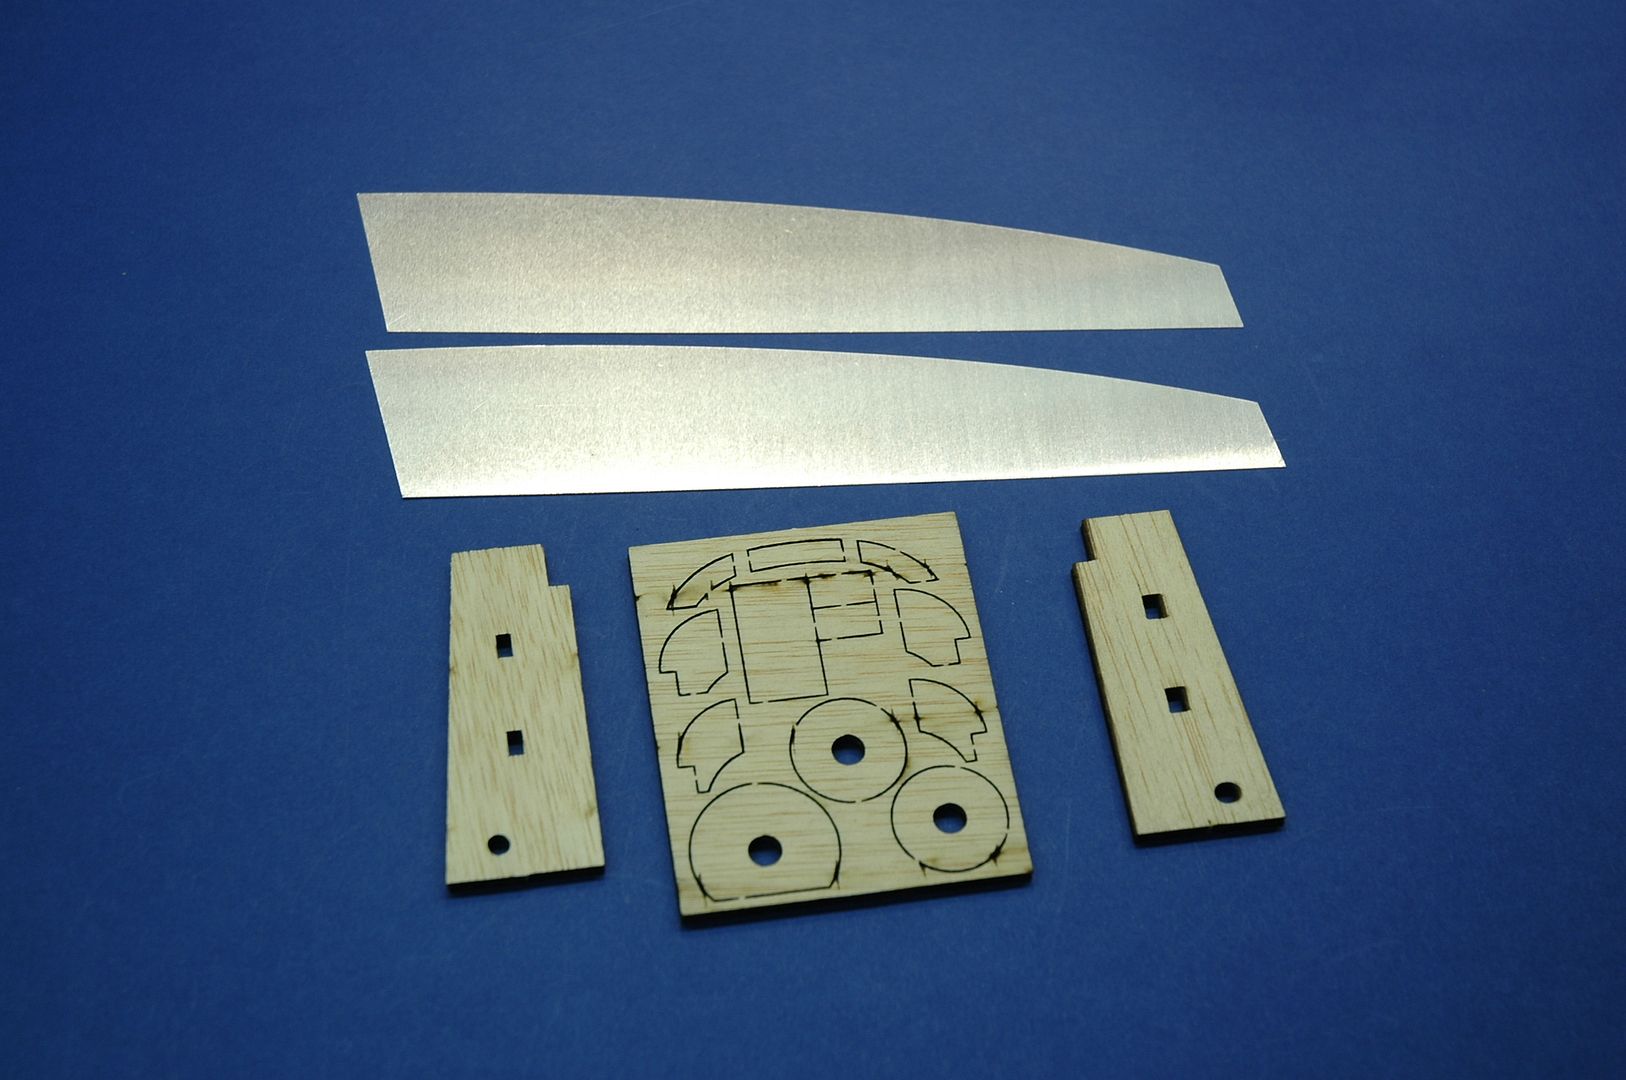 STAGE 82. Reinforcement Parts Fret. Base Fixing Structure. Lower Wing Plate 31. 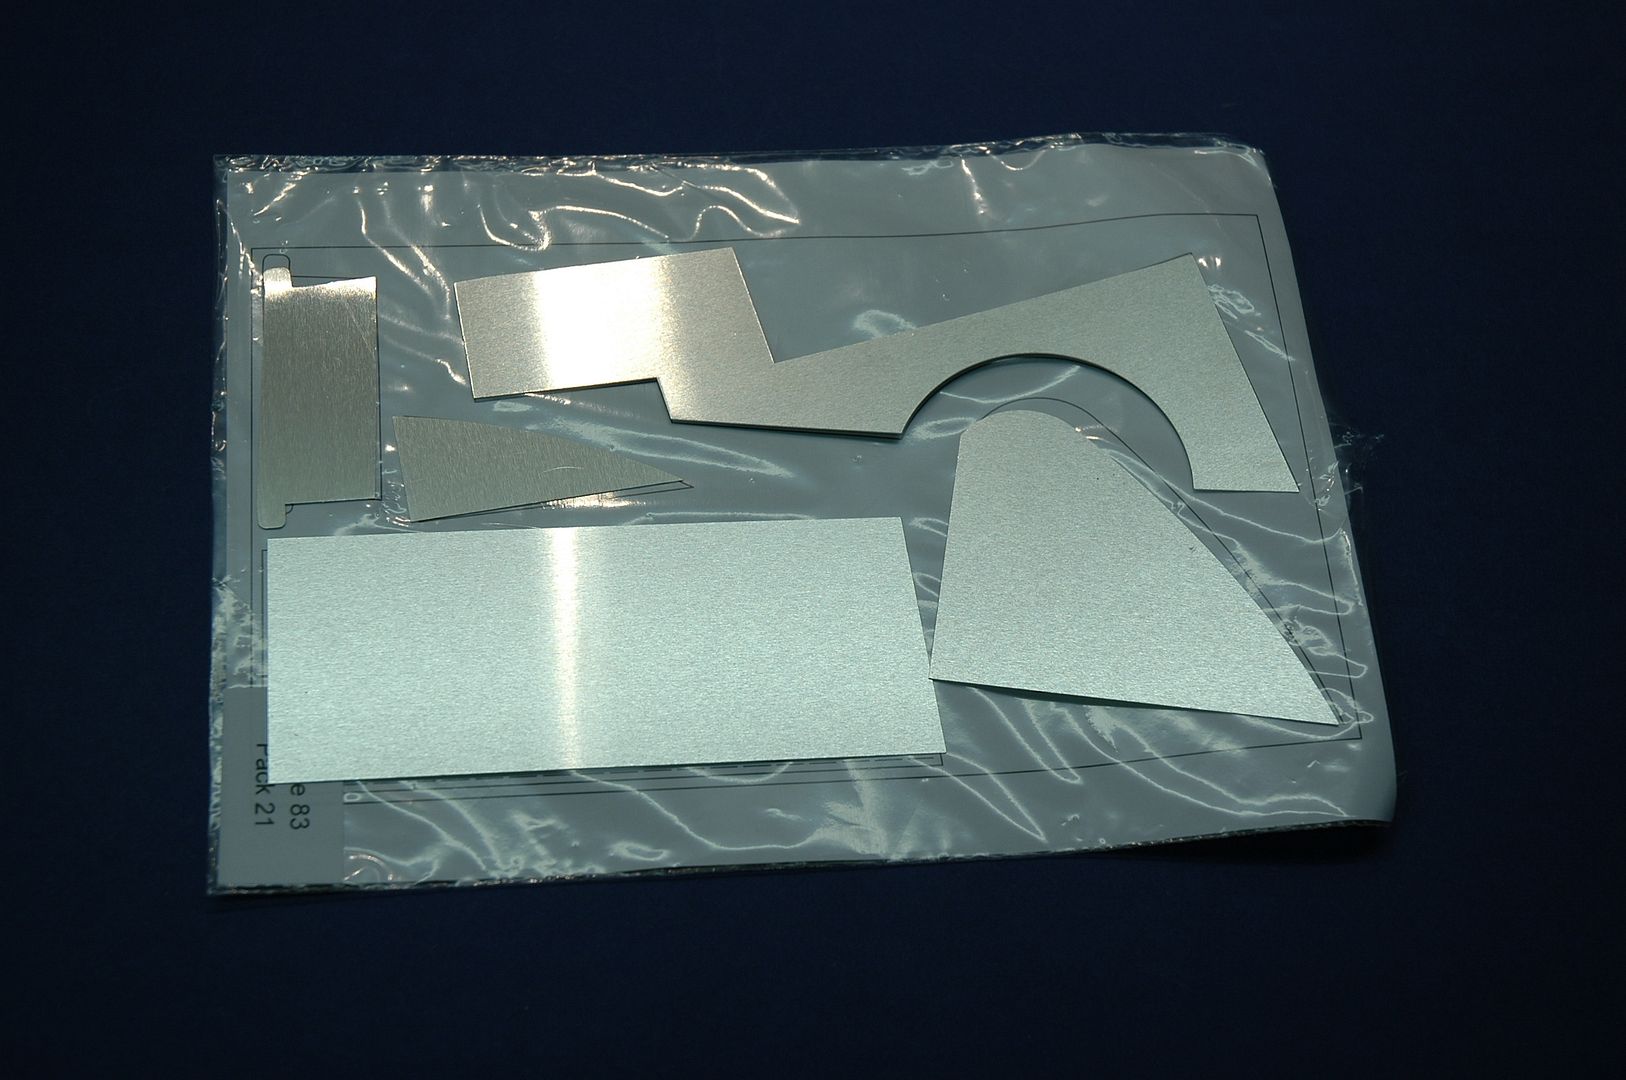 STAGE 83. Lower Wing Plate: 22/24/29/32/33. Template. More Soon. Regards Trev. Work in progress: Tombstone (Scratch) - San Francisco 2. -The Mayflower ( scratch by plan).
OcCre- Santa-Maria (Kit).
|
|
|
|
|
Hi Trev, once again will look forward to seeing the latest parts fitted.... .. Good luck with it... Regards Alan
|
|
|
Rank: Elite Groups: Registered
Joined: 13/02/2011 Posts: 2,243 Points: 6,849 Location: Sussex
|
Hi Alan, adding the wing plates at stage 21 will make the top part of the wings look near complete, glad M/S started us of with flat surfaces first to give us some practice at fitting them. Regards Trev. Work in progress: Tombstone (Scratch) - San Francisco 2. -The Mayflower ( scratch by plan).
OcCre- Santa-Maria (Kit).
|
|
|
Rank: Elite Groups: Registered
Joined: 13/02/2011 Posts: 2,243 Points: 6,849 Location: Sussex
|
SPITFIRE UPDATE: 250515. STAGE 21. This stage covers metal wing panels and wood reinforcements, all went together ok just a few minor adjustments to make fit. 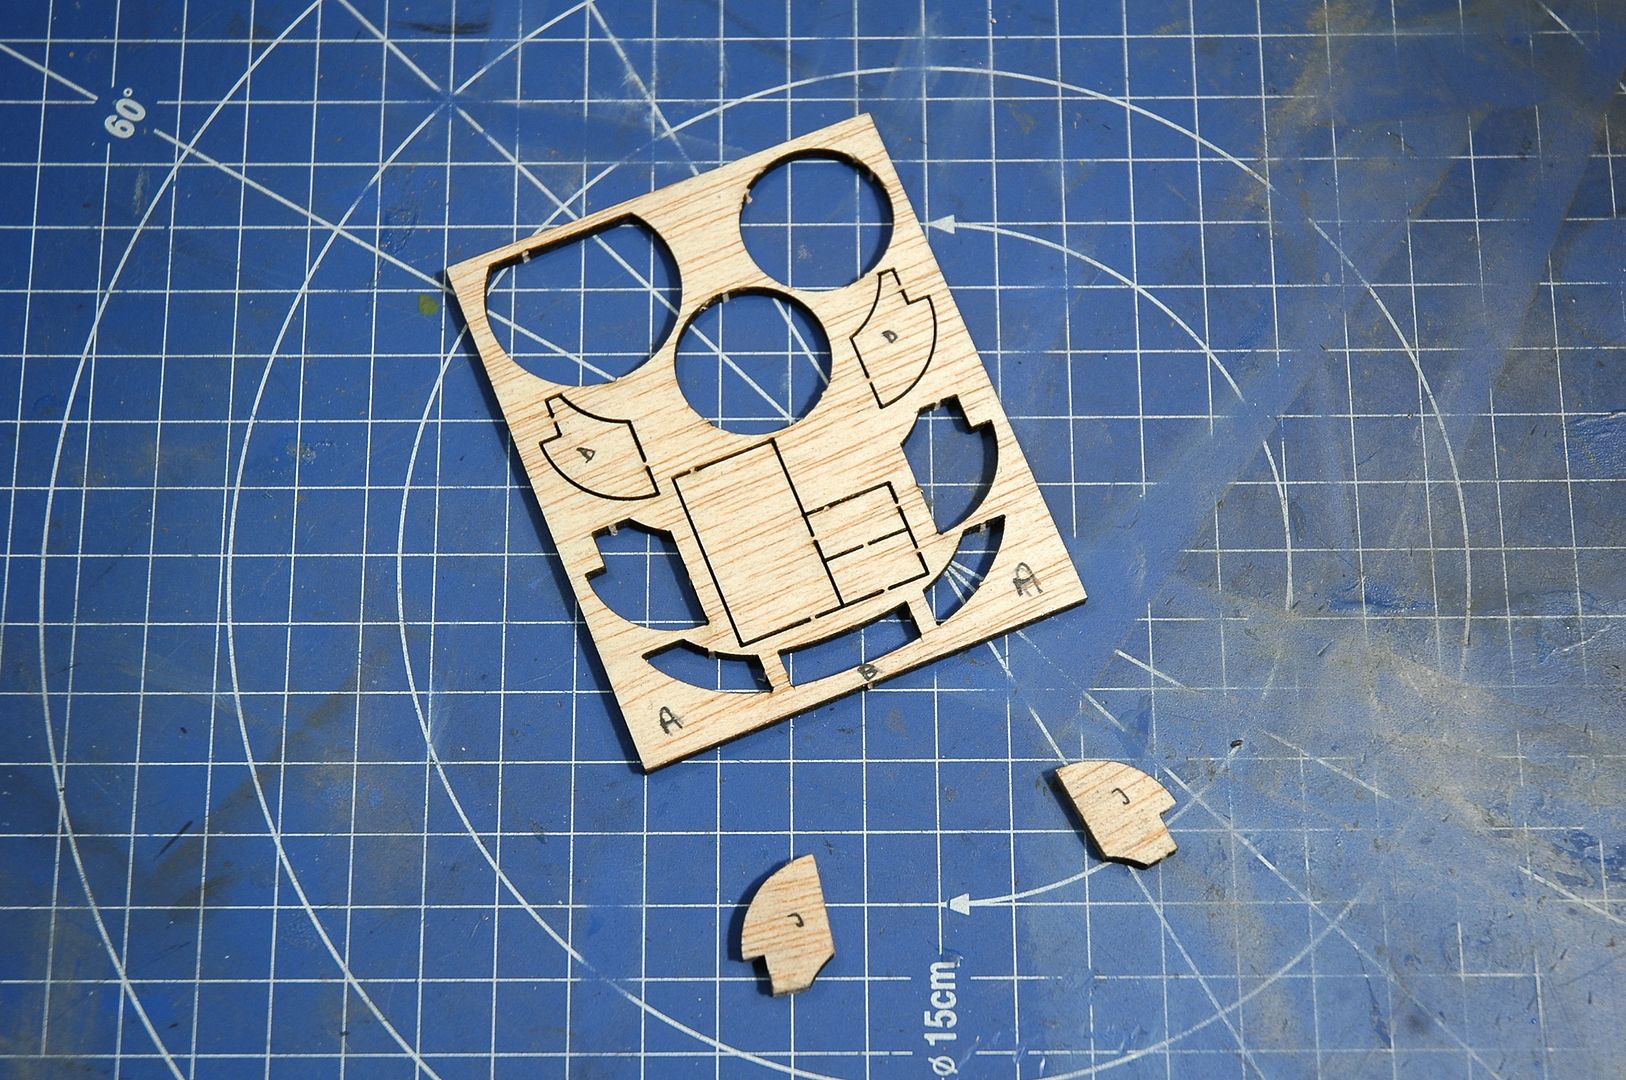 First was to remove fret parts A.B.A and sand smooth, sometimes it is easier to sand small parts before removing, these are reinforcing parts that fit in the top part of the nose cover.  This is before fitting fret parts A.B.A. 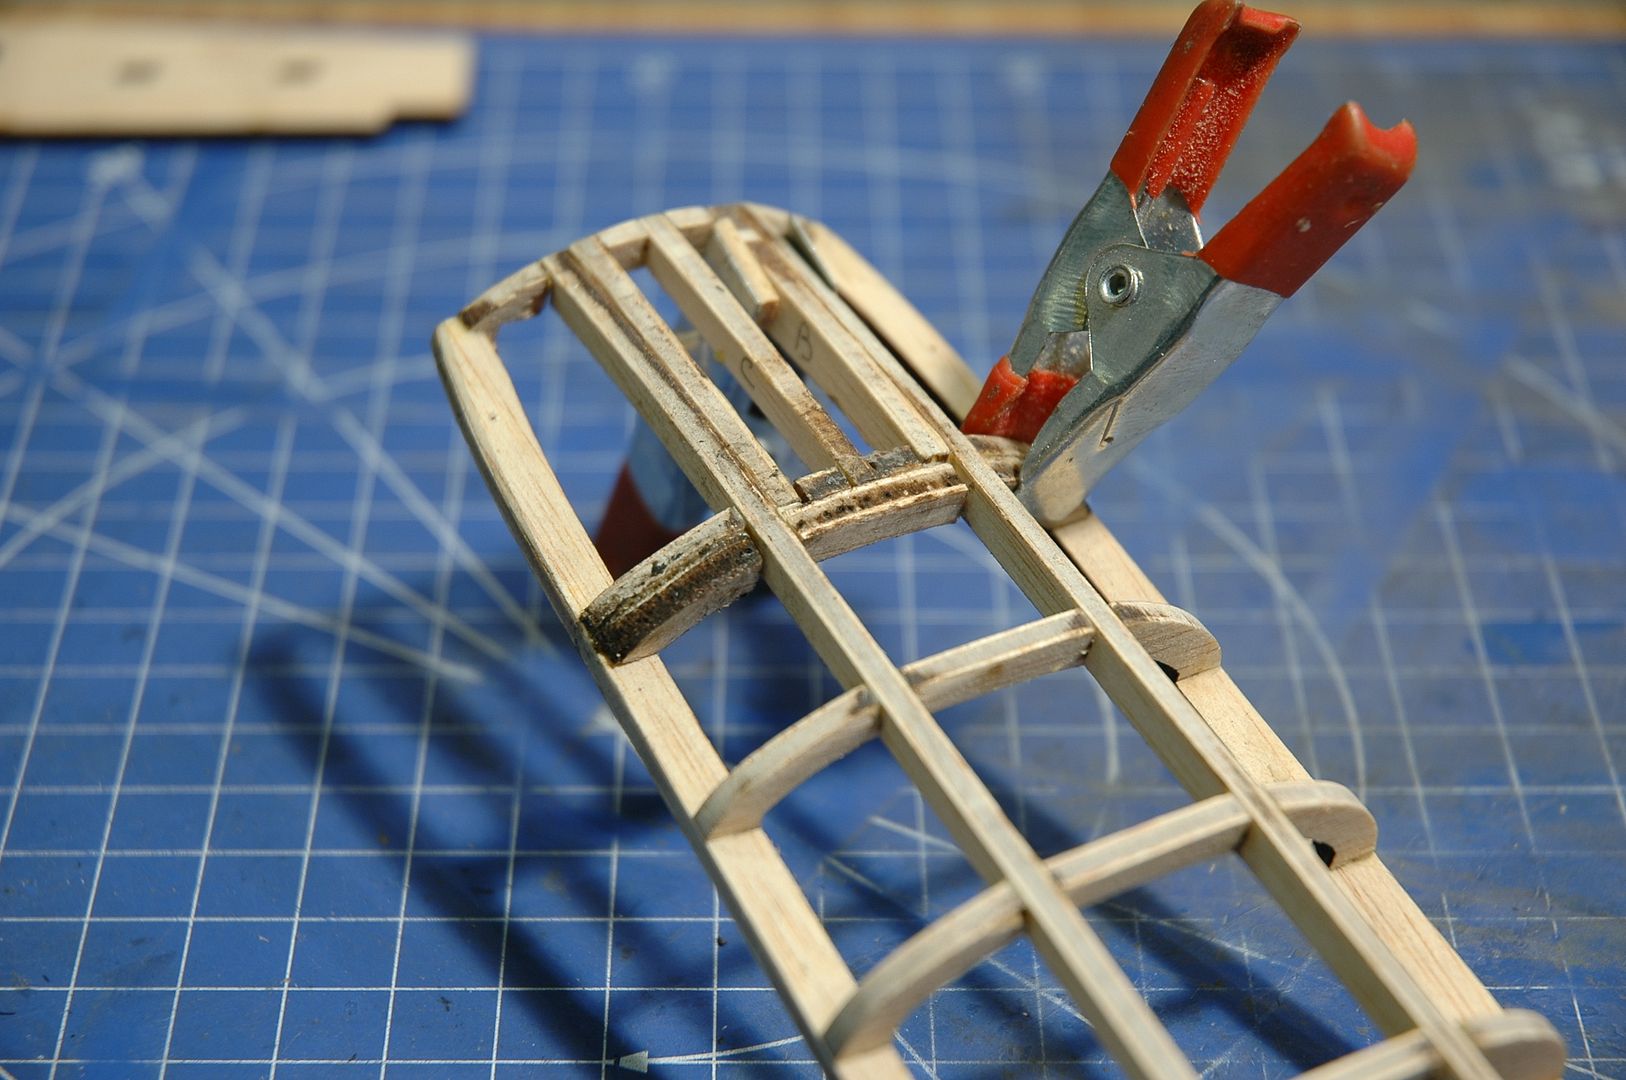 This shows fret parts A.B.A in location glued and clamped, all parts have to be flush with the to of the frame otherwise it could show a bump on the metal plate. 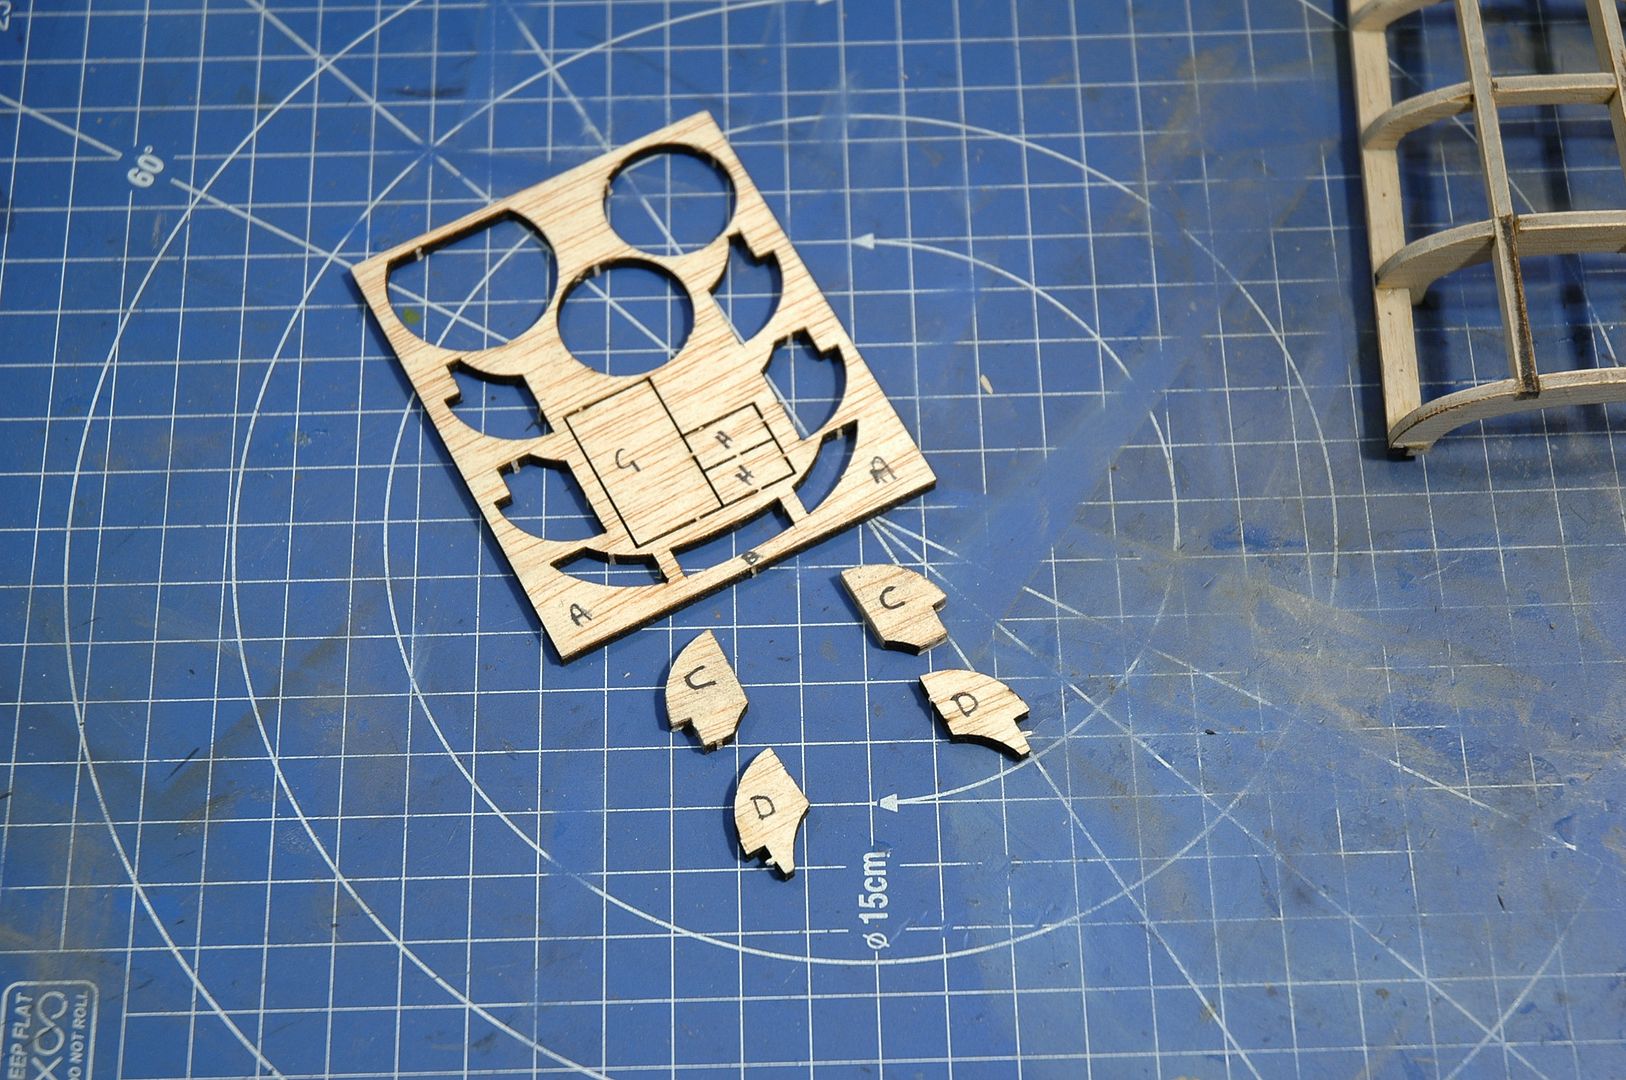 Next I removed fret parts C and D. 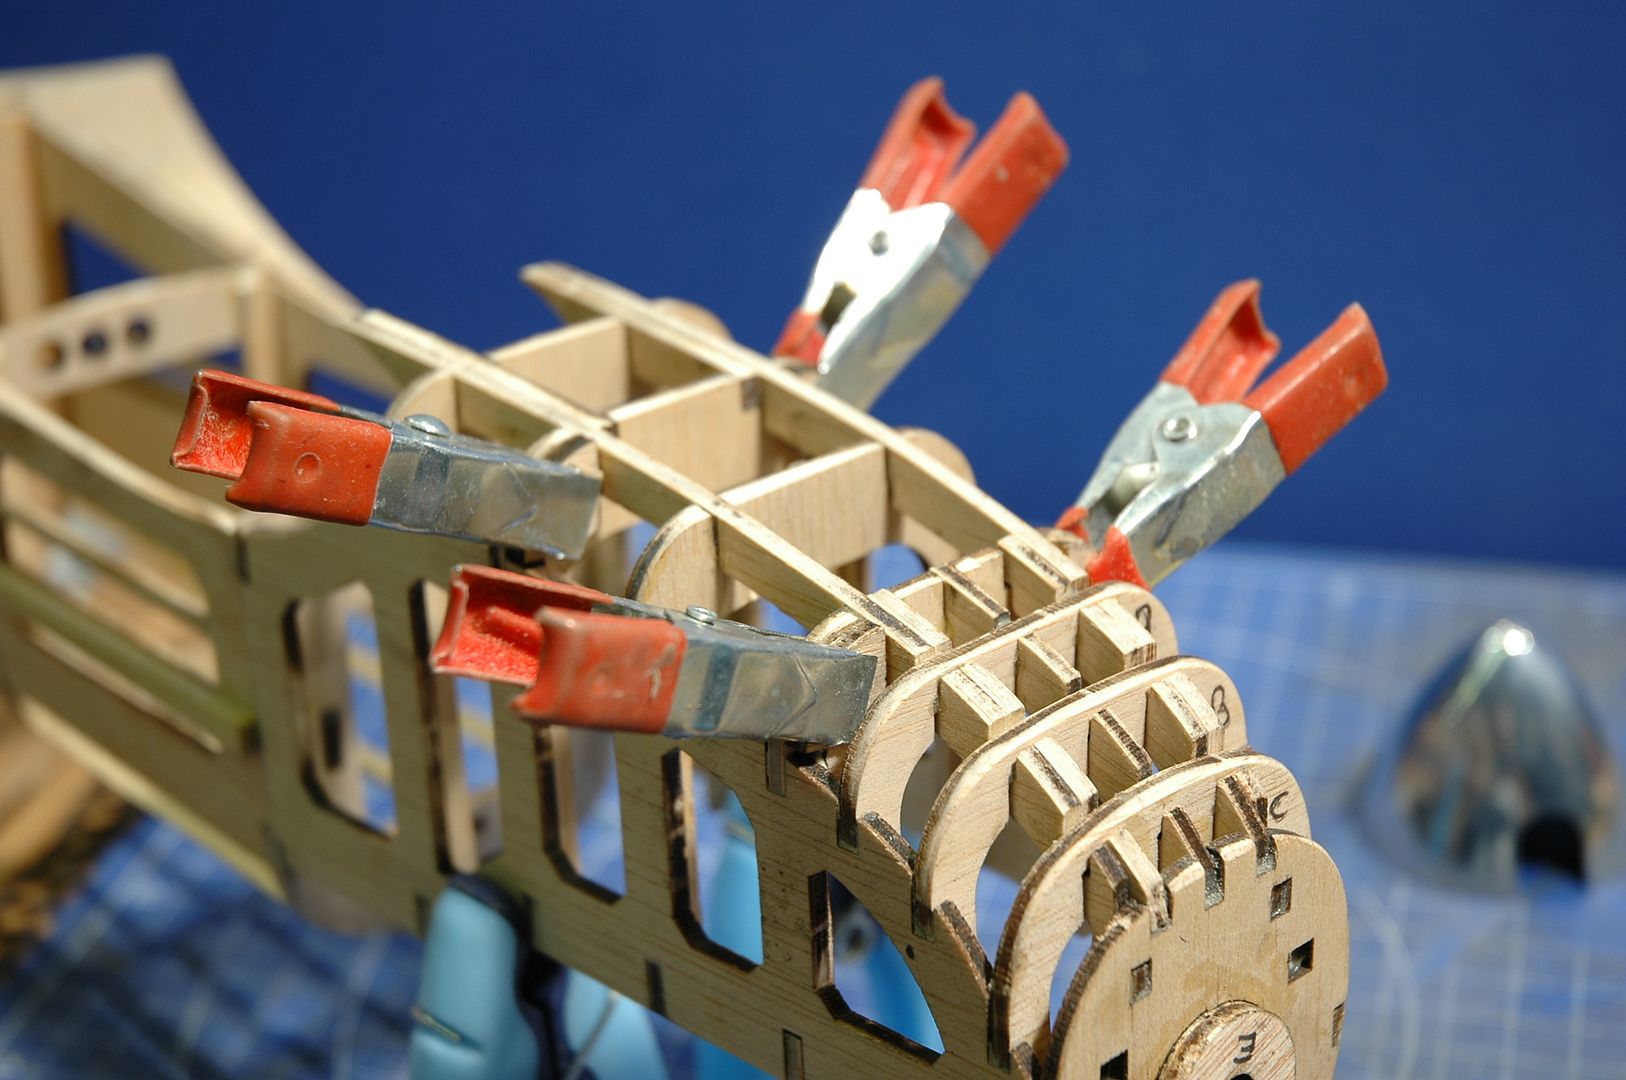 This shows parts C. D. glued and clamped in position ready for sanding down flush with the frame. 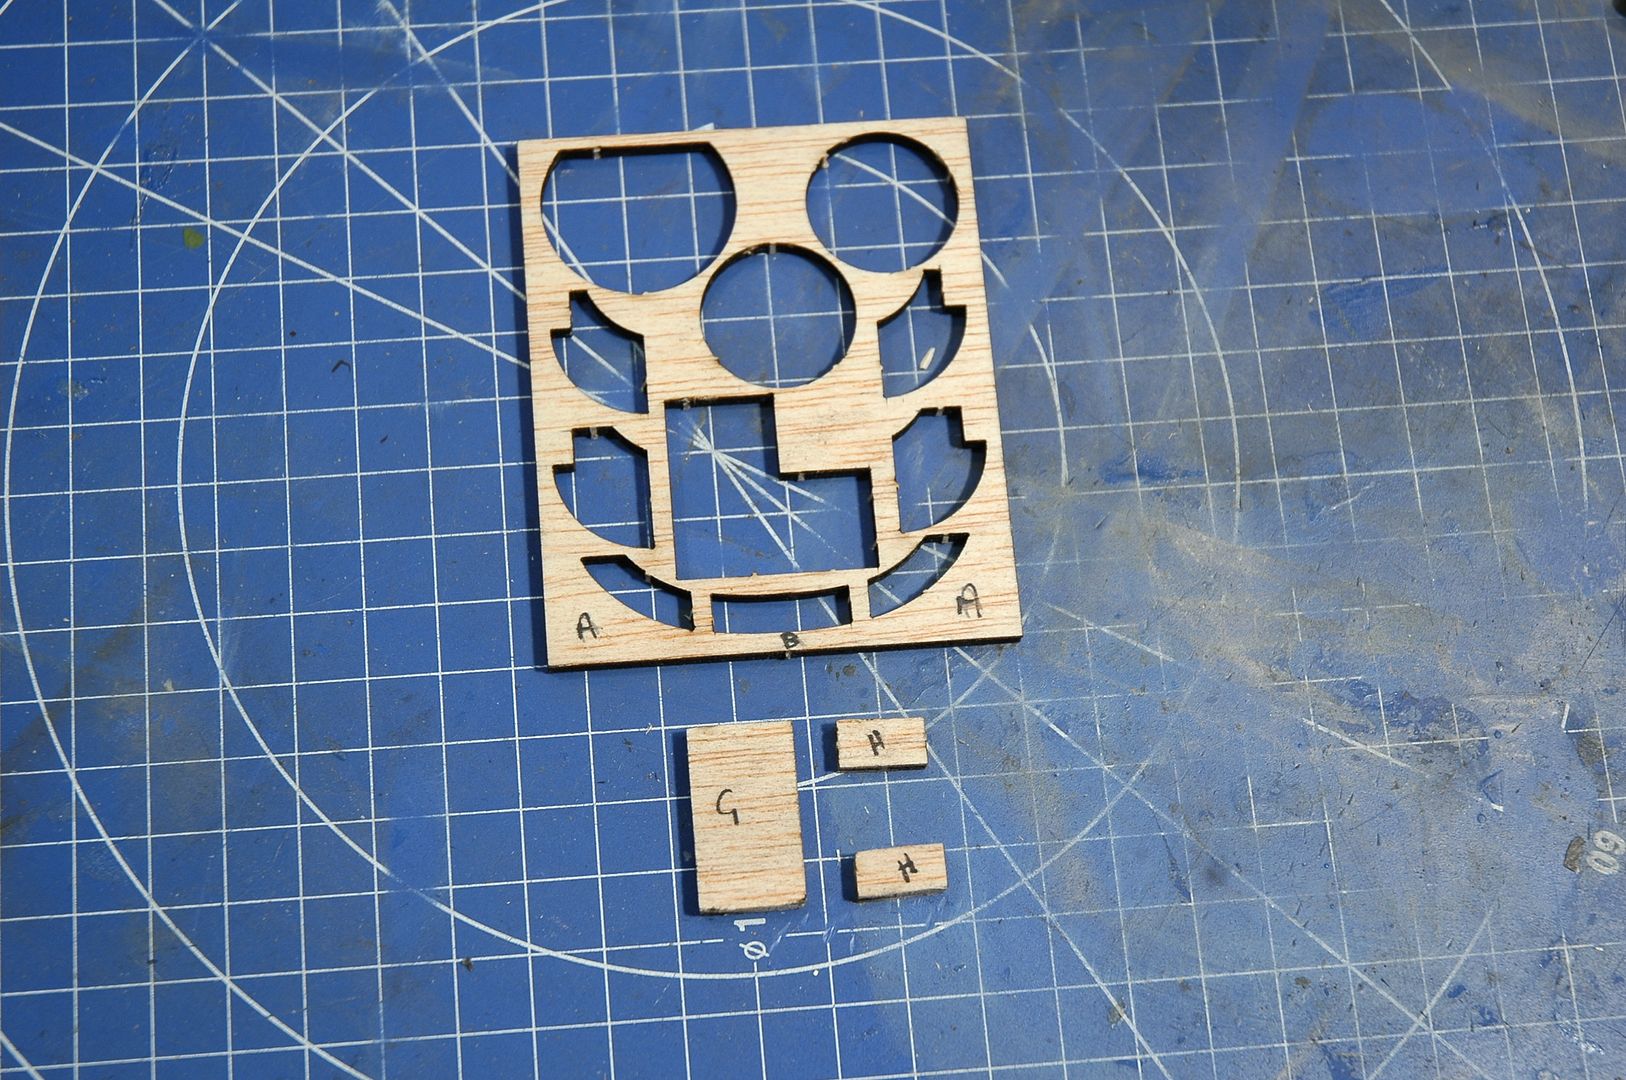 With C.D. parts fitted the last reinforcements to fit are G.H. these fit in the middle between parts C and parts D. 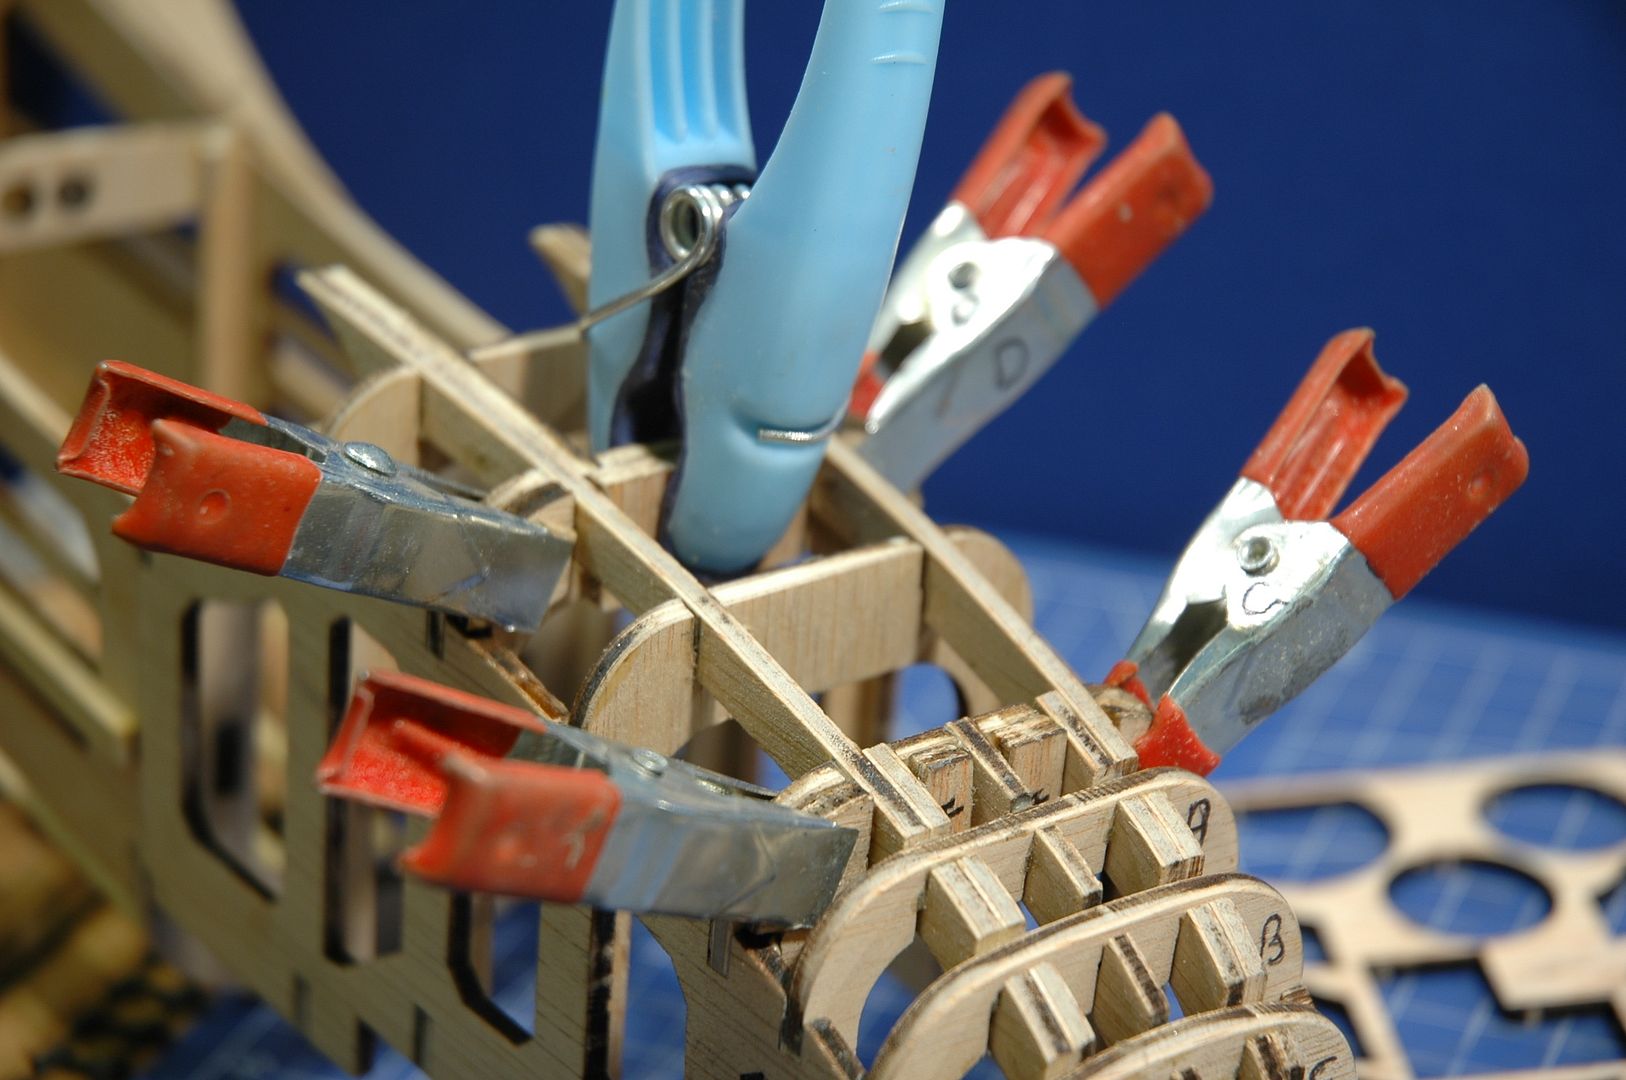 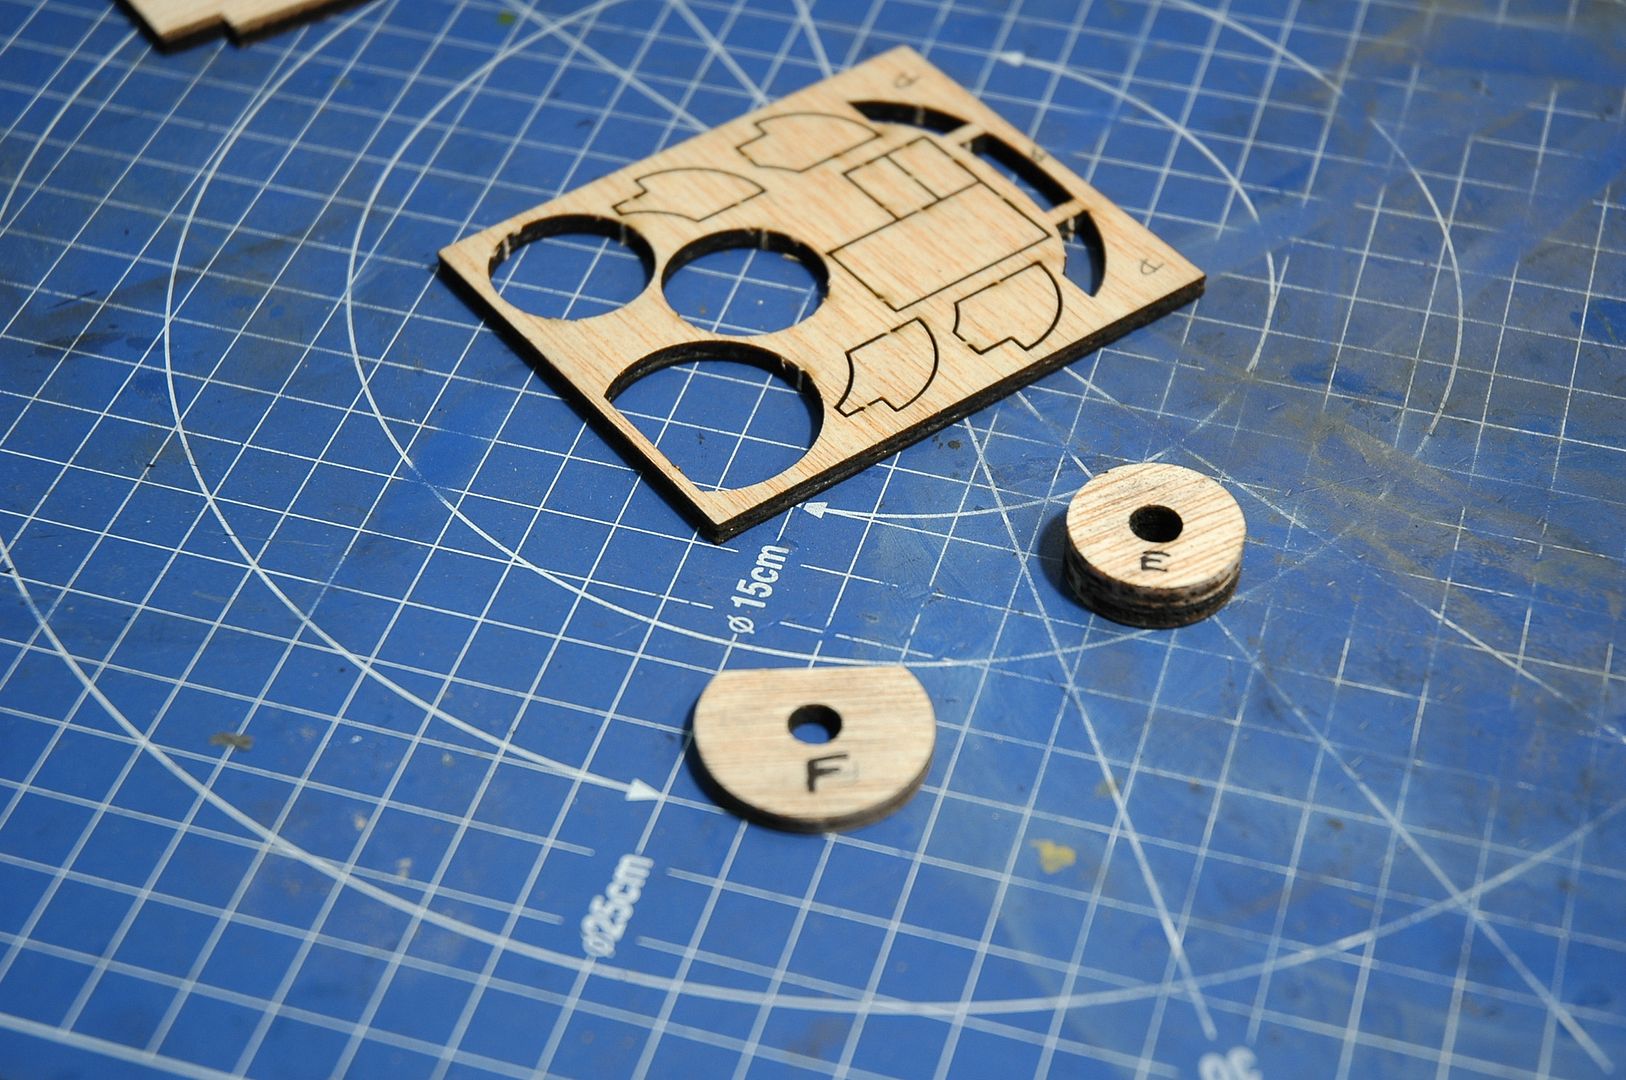 Next was to remove fret parts E and making sure that when placed together the centre holes align before gluing I used a paint brush to check all was ok. 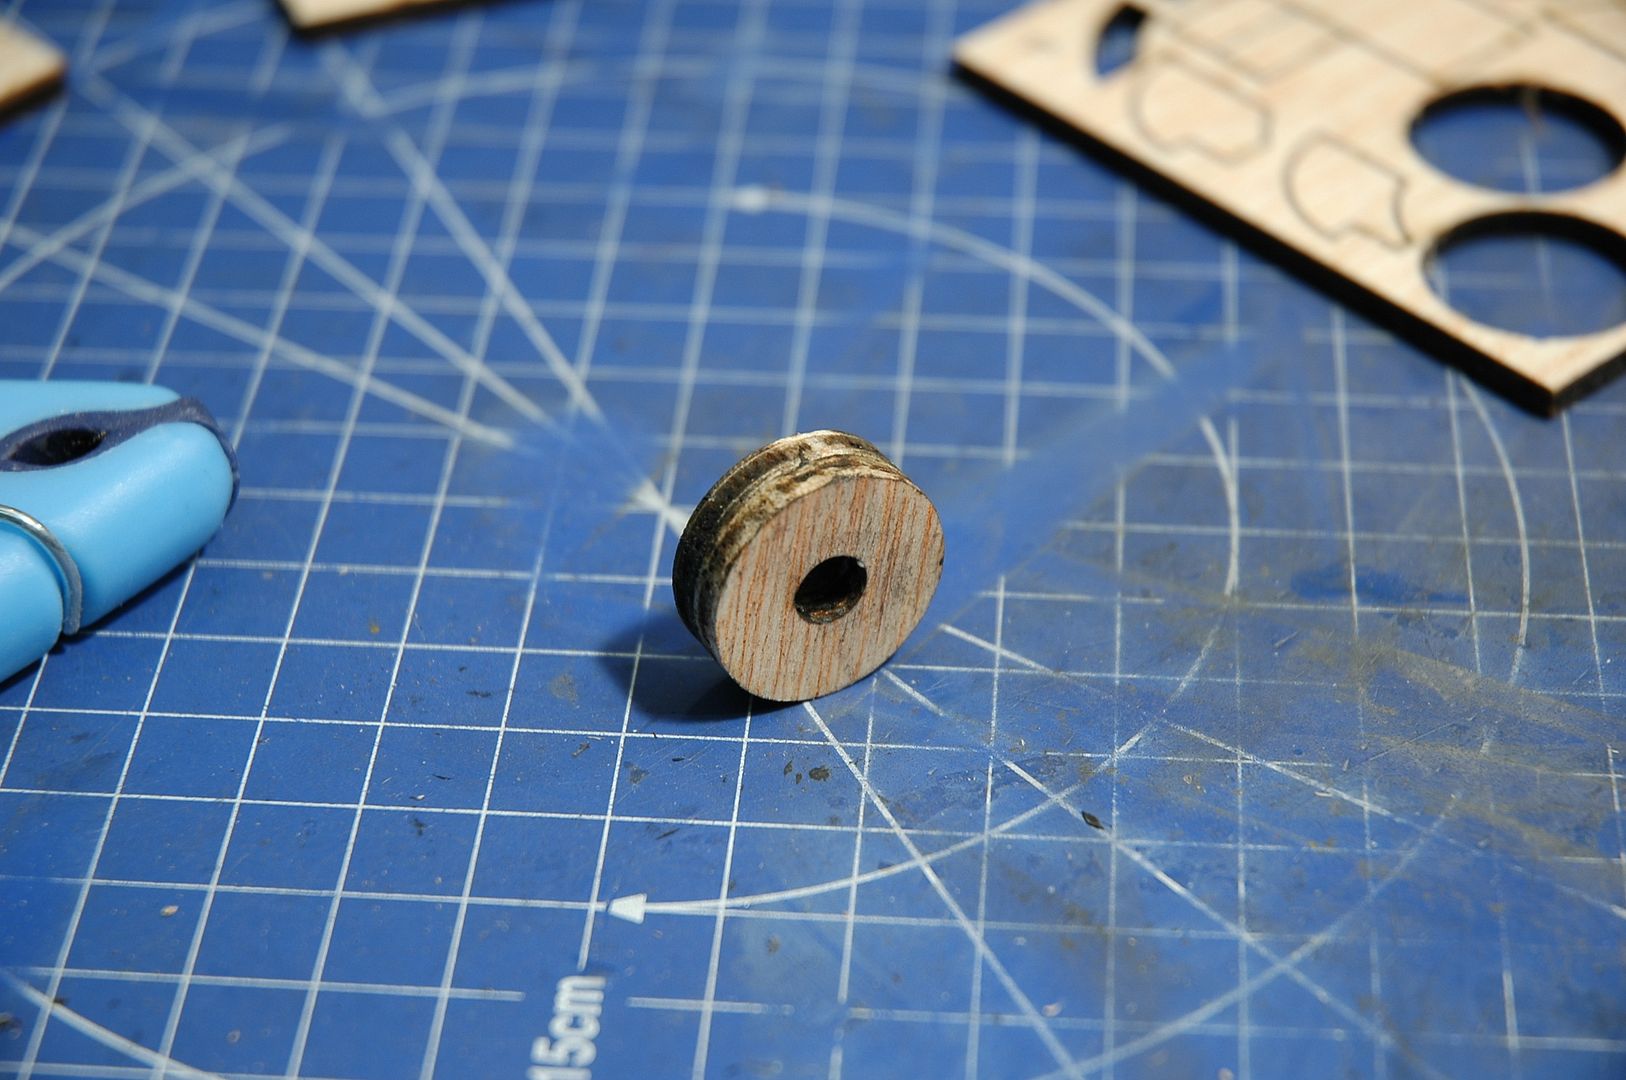 This shows two parts E. glued together this will form as part of the nose reinforcements. 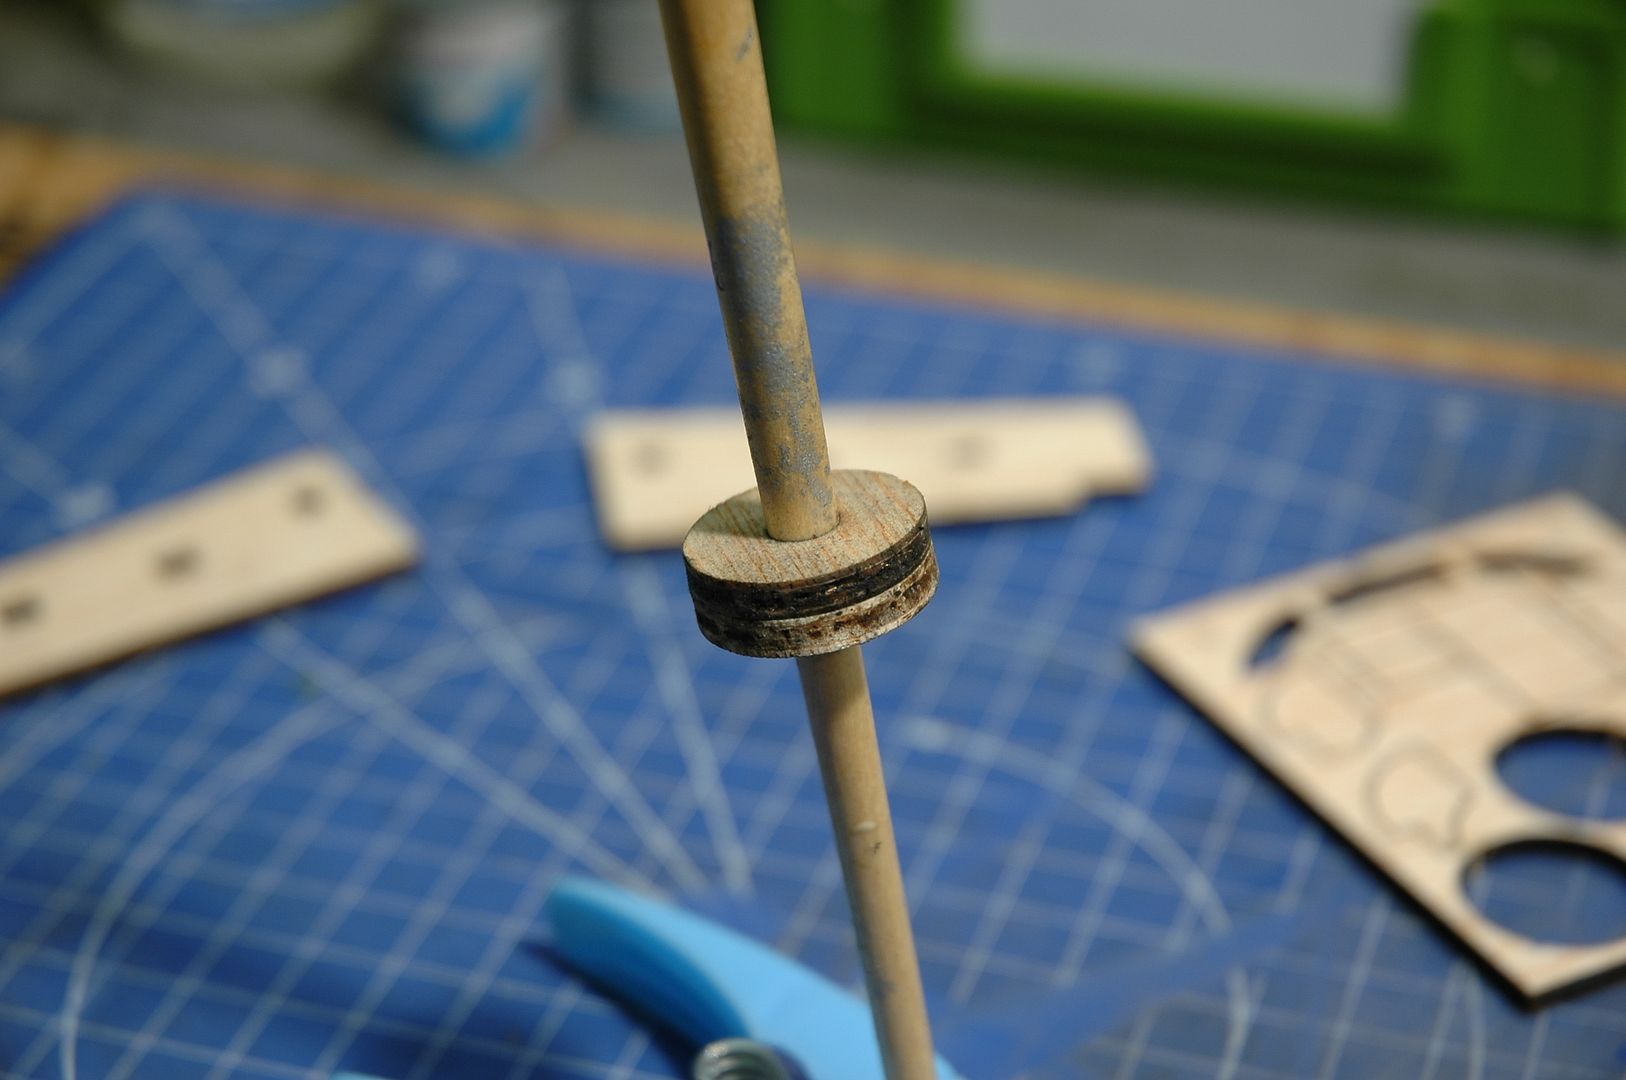  To check the alignment I used a paint brush handle. 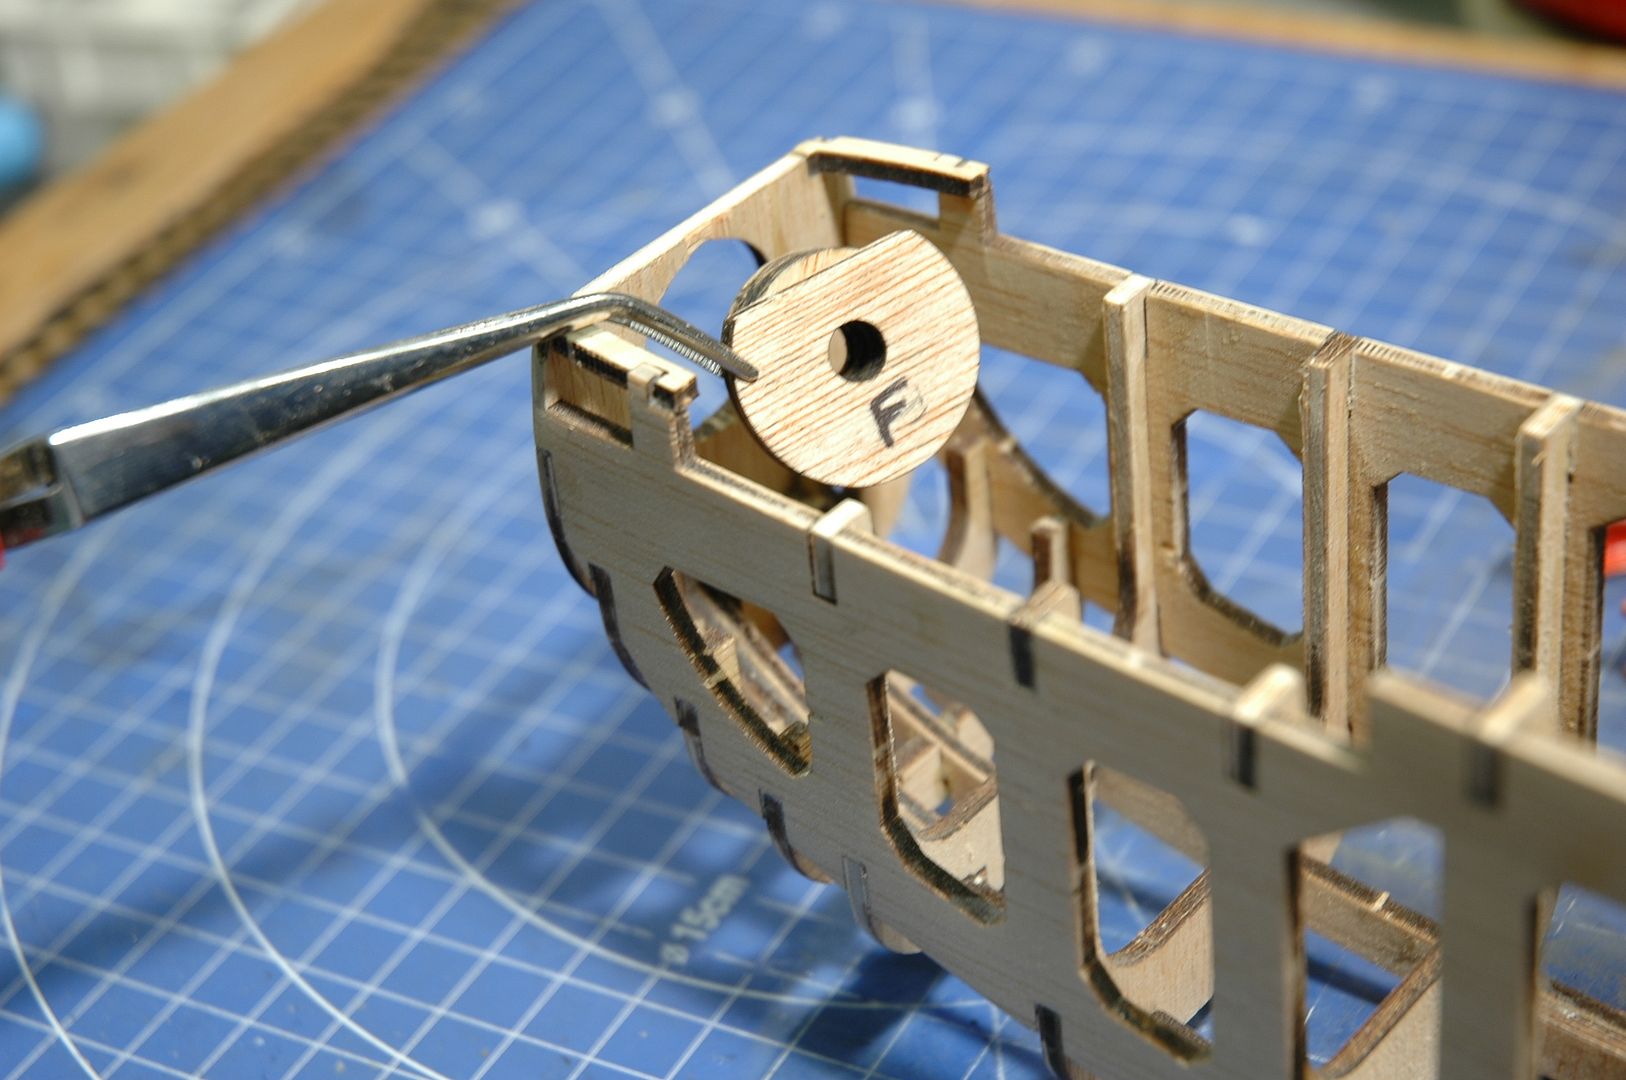 With parts E. and F. now dry I need to glue it to the back of the front former the important part is to make sure that the flat edge to the top must be in line with the top edge of the front former. 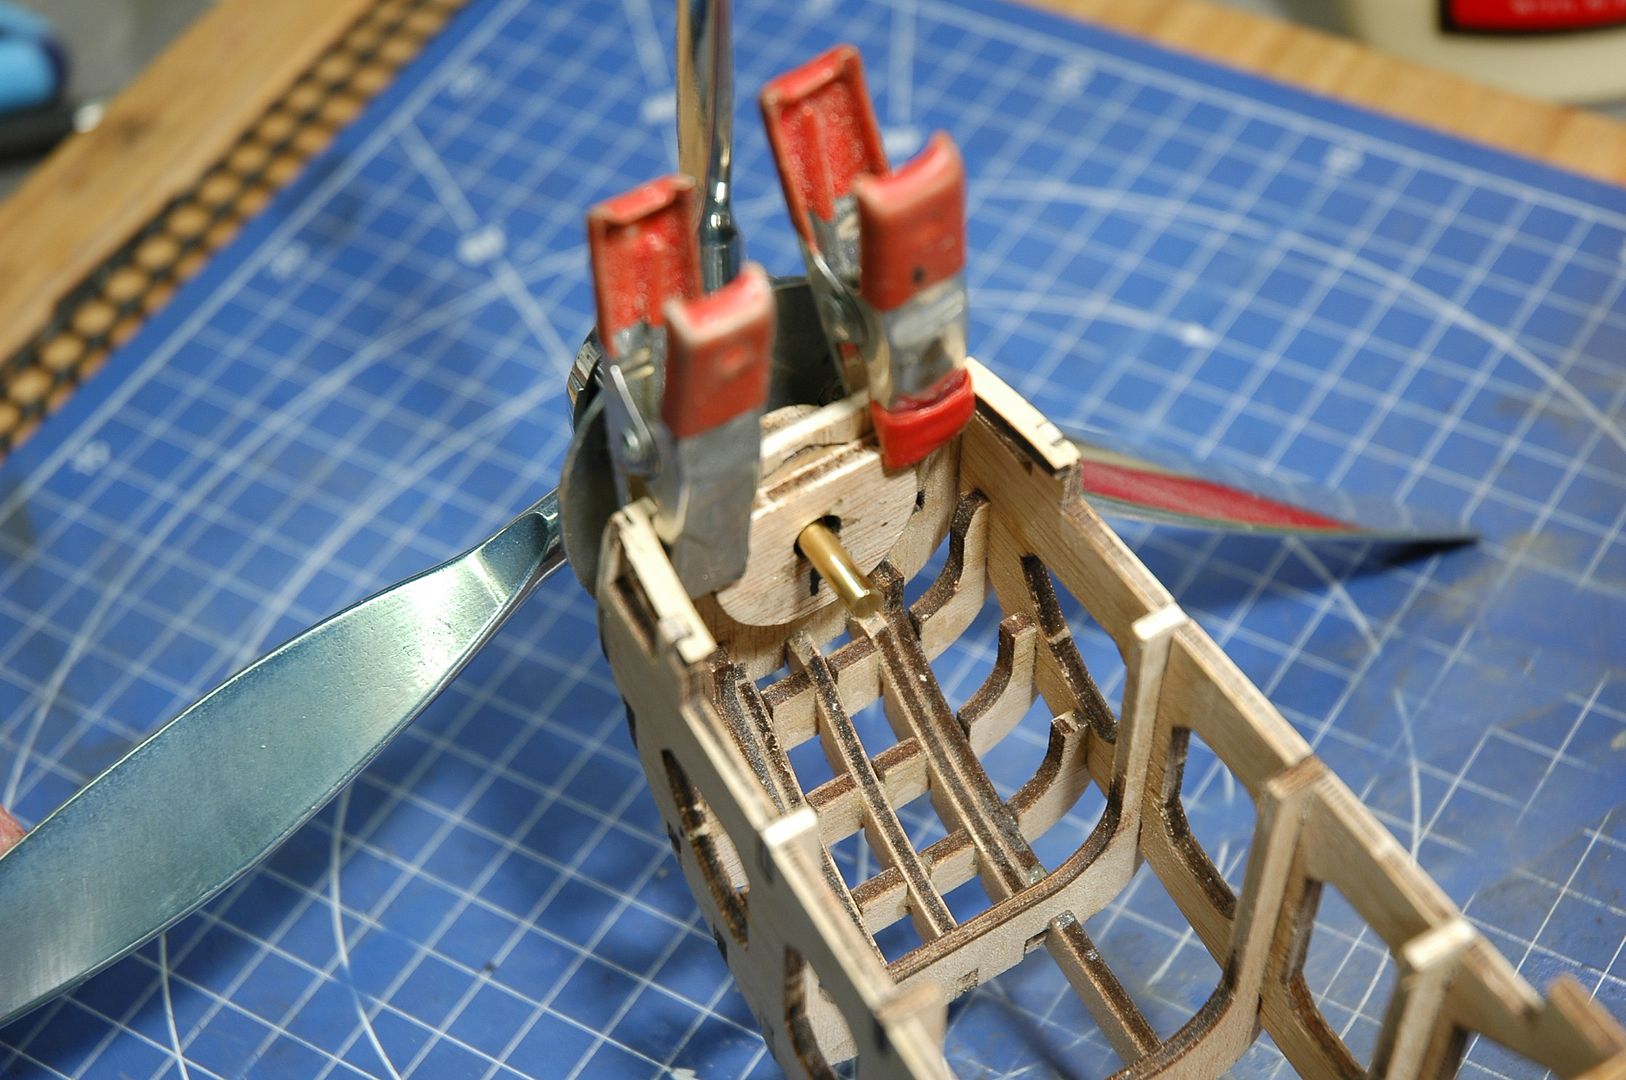 When dry I test fitted the propeller assembly just to re-check the alignment. 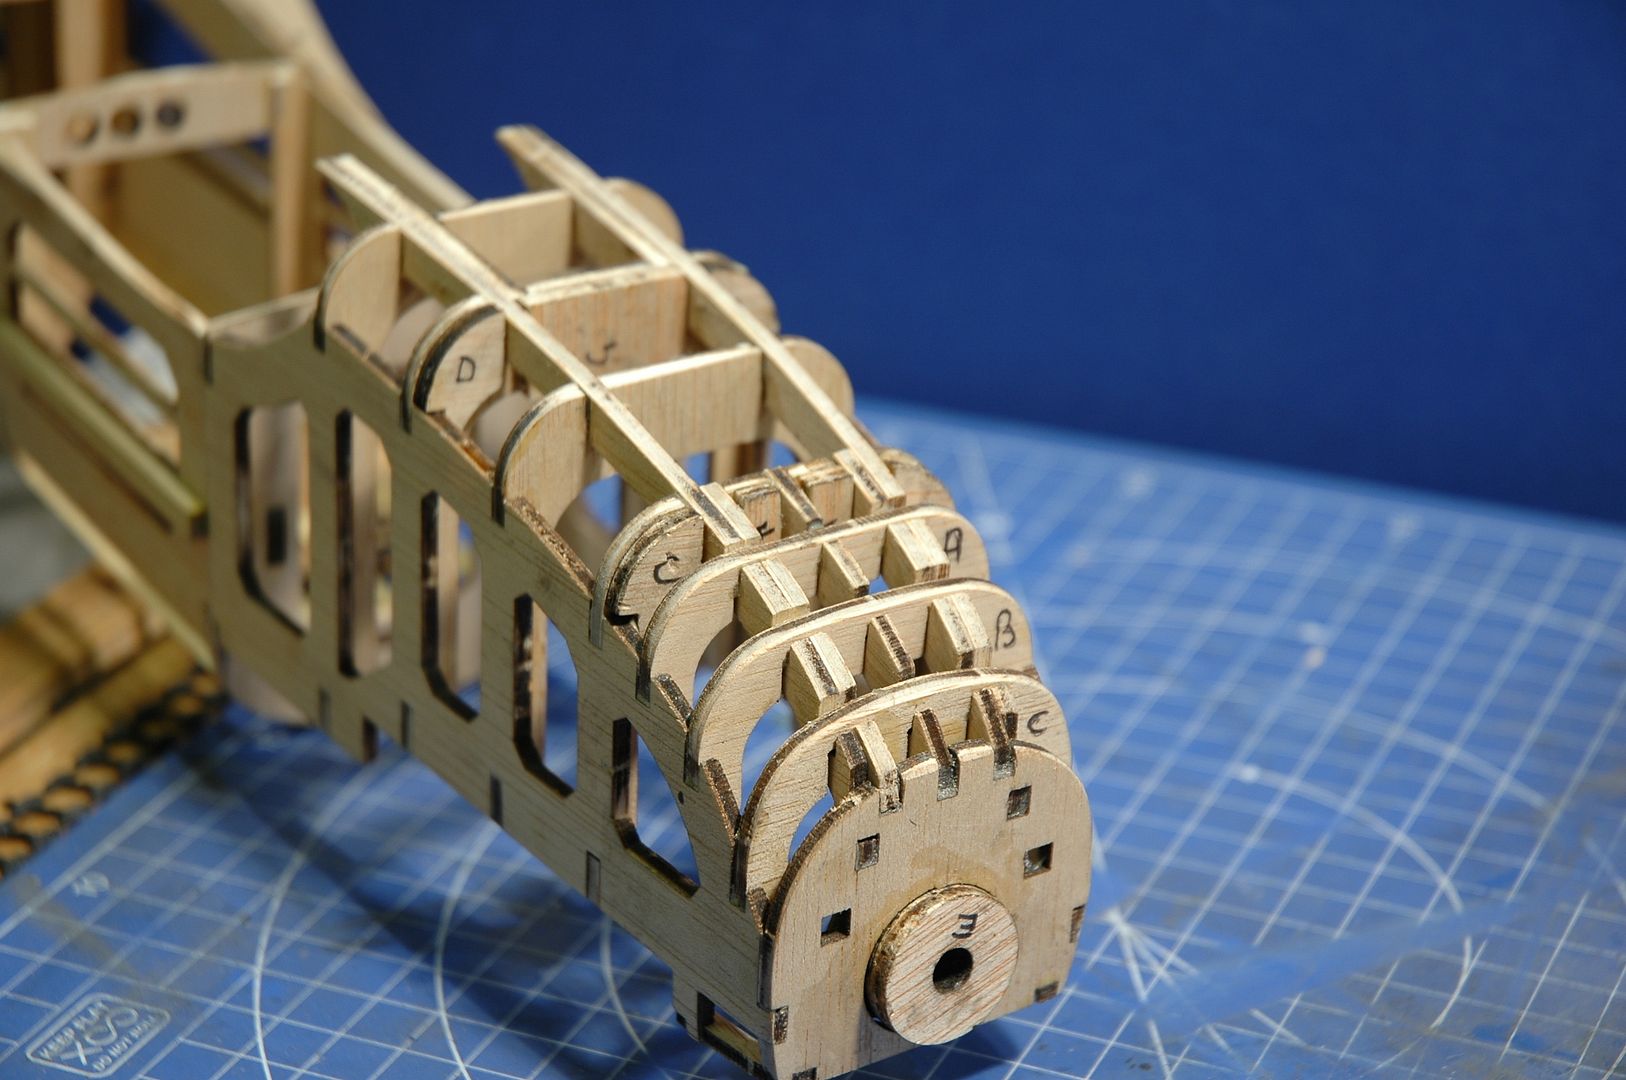 This is how it looked when I had finished. Thank you for looking. Regards Trev. Work in progress: Tombstone (Scratch) - San Francisco 2. -The Mayflower ( scratch by plan).
OcCre- Santa-Maria (Kit).
|
|
|
|
|
Looking good Trev Current builds:-C57,Zero, Lamborghini Countach, Caldercraft HMS Agamemnon,Robi,R2-D2, MFH Cobra .
|
|
|
|
Guest (21)
|
 US
US

