|
|
 Rank: Pro  Groups: Registered
Joined: 24/09/2013 Posts: 180 Points: 550 Location: East Sussex
|
Using micromesh I have buffed up the plastic cockpit glass I am waiting for some rivets to turn up to detail it. Friday I will clear coat and post the finished results when it's all done :) 
|
|
|
 Rank: Pro  Groups: Registered
Joined: 24/09/2013 Posts: 180 Points: 550 Location: East Sussex
|
Got a cool bit of hardware today from bestbalsakits 
|
|
|
 Rank: Elite        Groups: registriert, Registered Joined: 20/03/2011 Posts: 2,356 Points: 7,122 Location: UK
|
Hope your eyesight is good Mark! They look painfully small but will add that extra added detail to what is already a stunning model kit. Looking forward to your next update! Spencer
|
|
|
 Rank: Pro  Groups: Registered
Joined: 24/09/2013 Posts: 180 Points: 550 Location: East Sussex
|
All sanded and polished and waxed 
|
|
|
|
|
Great stuff Mark.
Keep up the good work. 
Where on the car are you going to use those screws?
Malc.
|
|
|
 Rank: Pro  Groups: Registered
Joined: 24/09/2013 Posts: 180 Points: 550 Location: East Sussex
|
Thanks malc, they are for the cockpit around to fasten the glass :)
|
|
|
 Rank: Pro  Groups: Registered
Joined: 24/09/2013 Posts: 180 Points: 550 Location: East Sussex
|
Very proud of myself!! 
|
|
|
|
|
That's really great Mark. Fantastic start to the model. Fantastic start to the model.
Feeling quite envious.
Malc.
|
|
|
 Rank: Elite        Groups: registriert, Registered Joined: 20/03/2011 Posts: 2,356 Points: 7,122 Location: UK
|
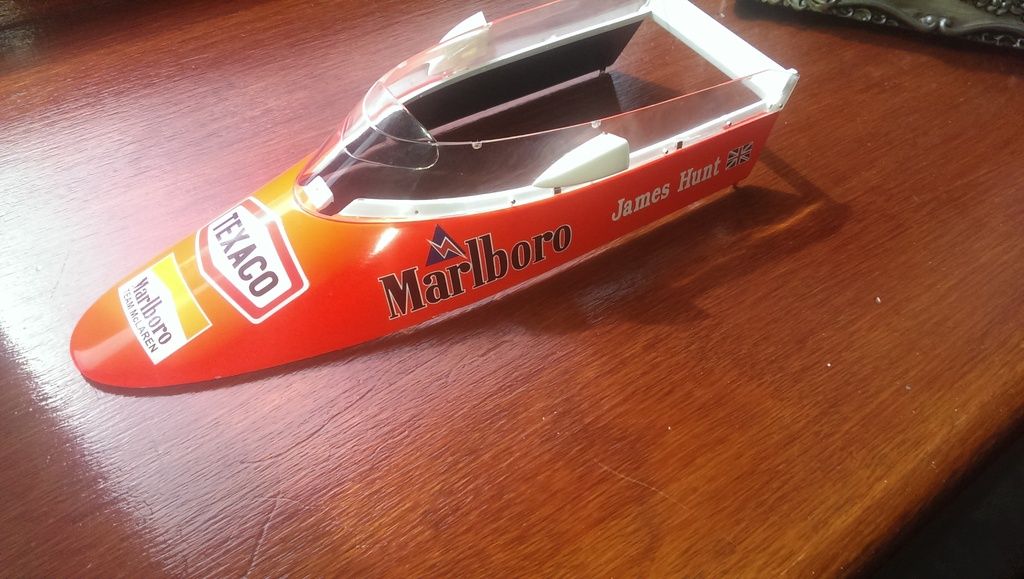
A great job there Mark but a small observation about the Marly Decals you have used, These where not used on James Hunts M23 as he had the plain black Font. The ones you've used belong to Nelson Piquet's 78 M23 although James Hunts M26 had them in later years. Spencer
|
|
|
 Rank: Pro  Groups: Registered
Joined: 24/09/2013 Posts: 180 Points: 550 Location: East Sussex
|
Thanks malc :)
Hahaha Spence, very keen eye! I will review this and may change them, :)
|
|
|
 Rank: Pro Groups: Joined: 24/08/2009 Posts: 48,827 Points: -13,348
|
If your striving for "the most detailed buid possible", then the only way to go is to put it right.
All the same it looks great, well done!
|
|
|
 Rank: Pro  Groups: Registered
Joined: 24/09/2013 Posts: 180 Points: 550 Location: East Sussex
|
In my defence I used ref pictures with that decal, ahh well easy to put right :)
Thanks again guys :)
|
|
|
 Rank: Pro  Groups: Registered
Joined: 24/09/2013 Posts: 180 Points: 550 Location: East Sussex
|
Not as flat as I wanted plus I had an accident and dropped it and it picked up a few tiny contaminants 
|
|
|
|
|
HI Mark. On the 1/20 model that I'm building there is a fine moulded ridge that defines the edge of the red painted area. Is it the same on this kit or you having to draw it out yourself?
Malc.
|
|
|
 Rank: Pro  Groups: Registered
Joined: 24/09/2013 Posts: 180 Points: 550 Location: East Sussex
|
Heyyy malc, nope had to draw it on, used the edai grip decal as a stencil after cutting it out I marked it with the tape, came out pretty well :)
|
|
|
|
|
mark8454 wrote:Heyyy malc, nope had to draw it on, used the edai grip decal as a stencil after cutting it out I marked it with the tape, came out pretty well :) Came out really good.  . I'm going to have to do something similar on the red "stripe" on top of the airbox.
|
|
|
 Rank: Pro  Groups: Registered
Joined: 24/09/2013 Posts: 180 Points: 550 Location: East Sussex
|
Luckily I have a decal for that which I plan to use :)
Call me cheating :)
|
|
|
|
|
Me to, but I think the colour match won't be great.
|
|
|
 Rank: Pro  Groups: Registered
Joined: 24/09/2013 Posts: 180 Points: 550 Location: East Sussex
|
Yeah I think your right although it's the same colour as the number decals, I will let you know the outcome
|
|
|
 Rank: Pro    Groups: Registered
Joined: 27/06/2011 Posts: 437 Points: 1,321 Location: milton keynes
|
Malc you are doing a fantastic job its really looking great regards Dan Built - Deagostini MP4/23, deagostini Zero, Deagostini Falcon, Deagostini R2D2, Model Airways 1903 Wright Flyer, Deagostini Senna Mp4/4.
Entex Mclaren M23 1/8th scale to complement the Deagostini MP4/23 & Mp4/4, deagostini Ferrari 312T4, Pocher lotus 72D, Pocher porche, Deagostini Lotus 97T
on the bench, Model Airways Sopwith Camel, HK Models B-17F flying fortress, Galactica Viper, Stap droid
|
|
|
|
Guest (4)
|