|
|
 Rank: Pro  Groups: Registered
Joined: 30/04/2015 Posts: 263 Points: 795 Location: Los Angeles
|
So I took some of my small shrink tube for covering soldered wire and shrank it down to it's smallest form. About the exact size needed for the binocular portion of the console. 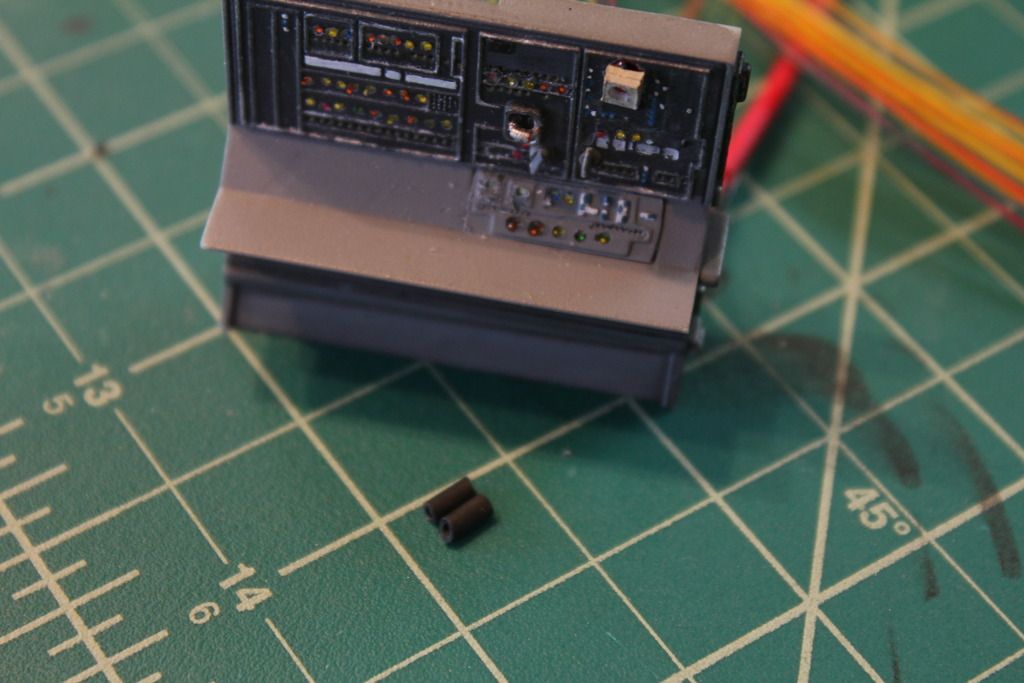 If you notice in this photo, the binocular portion has more of a glow of blue light due to the light source being down inside.  The inner diameter of my tubing is enough to actually house 3 fibers. 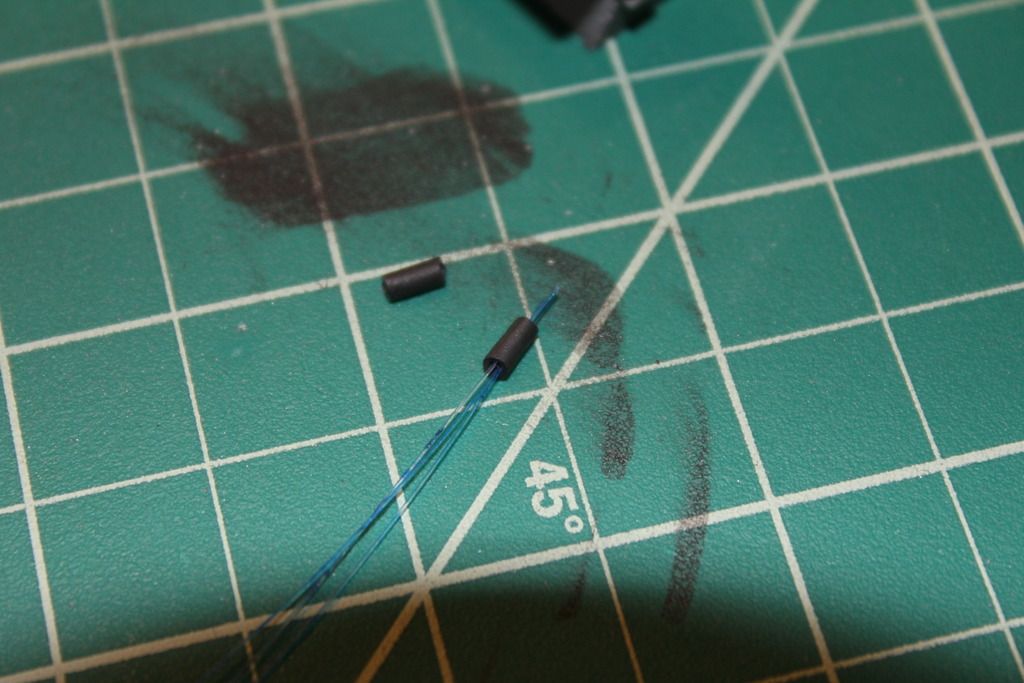 So because 3 fibers can fit inside, creating more light, I pulled them back a bit inside the tubing so you don't actually see the fibers themselves, but a glow of light emitting from the tubes, pretty much like the film. 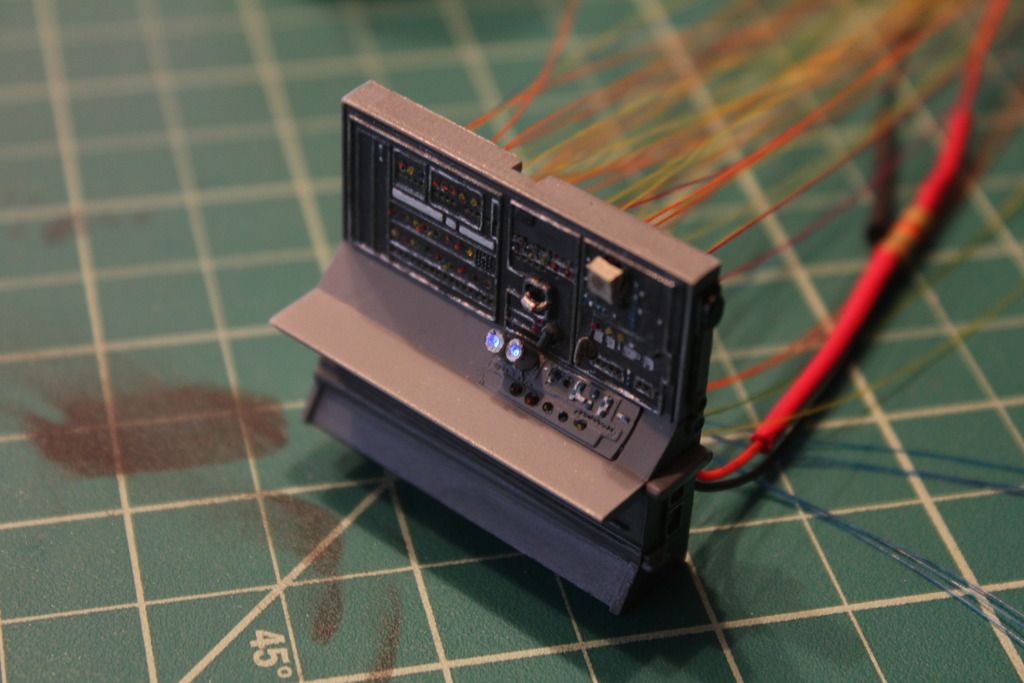 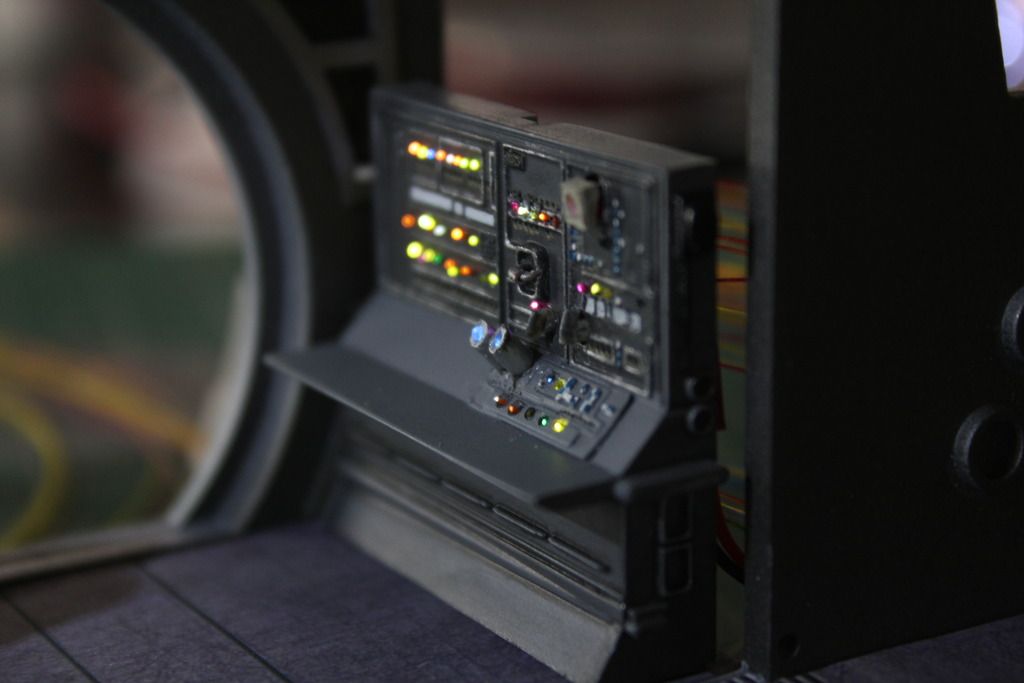 I think they turned out pretty well. Much better than using that tape I originally did. And I was just notified of my next shipment on Monday, so hopefully today or tomorrow I'll get parts 9-12. Woohoo!!
|
|
|
 Rank: Beginner Level 3  Groups: Registered
Joined: 28/05/2015 Posts: 26 Points: 78 Location: Oklahoma
|
Well done... that looks incredible!
|
|
|
 Rank: Amateur level 2  Groups: Registered
Joined: 01/05/2015 Posts: 43 Points: 132 Location: Clearwater, Florida USA
|
Very nice Son-of-Cole. I'm going to add that to my own bag of tricks. I feel it will come in handy.
Thanks for sharing.
|
|
|
 Rank: Pro Groups: Registered
Joined: 08/05/2015 Posts: 239 Points: 693 Location: Wisconsin
|
Just have to say this is fantastic...keep the updates coming!
|
|
|
 Rank: Semi-Pro Level 1   Groups: Registered
Joined: 17/05/2015 Posts: 61 Points: 189 Location: PIckerington, Ohio USA
|
its looking great, Cant wait to see more and to see how everything looks put together and with all the lights going!!!
Adam
|
|
|
 Rank: Super-Elite       Groups: Registered
Joined: 27/01/2014 Posts: 5,060 Points: 14,980
|
Great work! I might have to steal the idea with the shrink wrap 
|
|
|
 Rank: Pro   Groups: Registered
Joined: 22/04/2015 Posts: 134 Points: 378 Location: San Diego, CA
|
The lighting of the console is simply amazing. I can't even imagine how much time it took to drill out and run each of those fibers. A lot of patience going on there!!! Excellent work my friend! Current Build: Millennium FalconWish List: Lamborghini Countach LP 500S, Red Bull Racing RB7
|
|
|
 Rank: Pro  Groups: Registered
Joined: 30/04/2015 Posts: 263 Points: 795 Location: Los Angeles
|
|
|
|
 Rank: Amateur level 2  Groups: Registered
Joined: 01/05/2015 Posts: 43 Points: 132 Location: Clearwater, Florida USA
|
Faaaaaantastic Colson.
I'm really enjoying your attention to detail. Many of your mods and observations are making their way into my build. Thanks for posting.
The pipe work is looking really "Falcon like". It's amazing how reshaping some kit parts and adding a few of your own really creates the overall feel of the movie set. Great eye for detail on your part.
BTW, I also want to compliment you on the quality of your photos. You are are taking the time to set up some very clear and aesthetic angles of your build process.
|
|
|
 Rank: Pro  Groups: Registered
Joined: 30/04/2015 Posts: 263 Points: 795 Location: Los Angeles
|
CRphoto wrote:Faaaaaantastic Colson.
I'm really enjoying your attention to detail. Many of your mods and observations are making their way into my build. Thanks for posting.
The pipe work is looking really "Falcon like". It's amazing how reshaping some kit parts and adding a few of your own really creates the overall feel of the movie set. Great eye for detail on your part.
BTW, I also want to compliment you on the quality of your photos. You are are taking the time to set up some very clear and aesthetic angles of your build process. Thanks CRphoto. I also forgot to add some photos of the wall cutouts, which I just went back and re-inserted into my post of what I did.
|
|
|
 Rank: Pro Groups: Joined: 24/08/2009 Posts: 48,827 Points: -13,348
|
Stunning lighting, well done 
|
|
|
 Rank: Super-Elite       Groups: Registered
Joined: 27/01/2014 Posts: 5,060 Points: 14,980
|
Awesome work Colson 
|
|
|
|
|
 Awsomme  Current builds:-C57,Zero, Lamborghini Countach, Caldercraft HMS Agamemnon,Robi,R2-D2, MFH Cobra .
|
|
|
 Rank: Pro  Groups: Registered
Joined: 30/04/2015 Posts: 263 Points: 795 Location: Los Angeles
|
Now that I finally got me LED panel to light the back of the cockpit, I drilled some holes and added some blinking fibers in the back as well to break it up. Sorry the video won't embed. But here's a link. https://youtu.be/IswIf_cCWmw
|
|
|
 Rank: Pro  Groups: Registered
Joined: 30/04/2015 Posts: 263 Points: 795 Location: Los Angeles
|
|
|
|
 Rank: Semi-Pro Level 2  Groups: Registered
Joined: 09/06/2015 Posts: 76 Points: 228 Location: Lancaster, CA
|
That looks really good.   Tamiya 1/32 P-51D, Revell 1/32 Bf 109G-6 x2 1/32 P-51B, 1/32 Trumpeter Bf109K-4, 1/32 Hasegawa Bf 109E, Testors 1/32 F-117, RMF 1/35 Tiger 1
|
|
|
 Rank: Elite        Groups: registriert, Registered Joined: 20/03/2011 Posts: 2,356 Points: 7,122 Location: UK
|
Brilliant work Colson  Don't worry, you will have plenty more to do in future issues if your going to be adding your own touch. Spencer
|
|
|
 Rank: Semi-Pro Level 1   Groups: Registered
Joined: 17/05/2015 Posts: 61 Points: 189 Location: PIckerington, Ohio USA
|
|
|
|
 Rank: Semi-Pro Level 1   Groups: Registered
Joined: 20/05/2015 Posts: 51 Points: 156 Location: Cary, NC
|
Hey Colson, any chance you could list for us all of the paints (brand and color) you have been using? You listed a few in the build so far but not all. I am specifically interested in what colors you are using in your interiors! The seats, couch, flooring, etc. BTW, I am so impressed with your work so far I have basically decided to copy what your doing as much as possible! AMAZING WORK! I just ordered my fiber optics tonight. Between you and Warthog there are going to be some amazing looking falcon builds on here. Charles R.
Building: DeAgostini Millennium Falcon...hasn't built a model since 1996...this is gonna be interesting!!
|
|
|
 Rank: Pro  Groups: Registered
Joined: 30/04/2015 Posts: 263 Points: 795 Location: Los Angeles
|
CharlesRAnderson wrote:Hey Colson, any chance you could list for us all of the paints (brand and color) you have been using? You listed a few in the build so far but not all.
I am specifically interested in what colors you are using in your interiors! The seats, couch, flooring, etc. I've been using all Tamiya paints. The cockpit seats and game bench were khaki (XF-72), with some black wash and some deck tan (XF-55) dry brush. On the rear cockpit seats,the cushions are deck tan with some brown (XF-49) wash. I also painted the back seats Flat Aluminum (XF-16), then seasled with hairspray. Once dry, I painted with flat black. Then added a bit of water on the paint to soften and began scraping away the black to expose the aluminum underneath. The cockpit interior is German Grey (XF-63) with black wash. Highlights done with either dry brushing Flat Aluminum (XF-16) or using silver from the Tamiya pastels. To dirty stuff up I use the Mud and Oil Stain pastels. I also use the Rust and Sand pastels for some highlights. My wall interiors for the hall I'm using Tamiya Metallic Grey (XF-56). And again dirtying up with the pastels. Oh, and as of right now, my floor is actually a print from my computer. I'm still trying to figure out how I'm going to deal with the floor. It actually doesn't look to bad with the print on it. I've created a floor for photo etch, but have yet to find a reasonable place to get it done for me.
|
|
|
|
Guest
|