Welcome Guest Search | Active Topics | Log In | Register

7 Pages 123>»
San Francisco II build by Arek (first wooden ship build) Options
arek
#1 Posted : 01 July 2015 22:04:08

Rank: Pro
Turquoise Medal: Turquoise Medal for model making know-how contributionBuild-Diary Medal: Build-Diary Medal of HonourRed Medal: Red Medal
Groups: Registered

Joined: 26/05/2015
Posts: 121
Points: 366
Location: Wexford, Ireland
Ok, lets start this build. Have my kit for couple of weeks and I was studying the plans and looking on other members dairies for really long time.

As this is my first wooden ship build I want to test my skills and patience before I move in to some bigger builds. From what I can see following other members diaries the biggest problem could be hull planking and rigging but we will se as ship will start coming along together.

For the moment my plan is to add some flickering lights, dummy cannons on lower decks and some additional details on decks.
This is definitely not going to be quick build as my time and working space are limited but will try update my progress regularly.
At the end I want to say sorry for my bad English.

So here we go
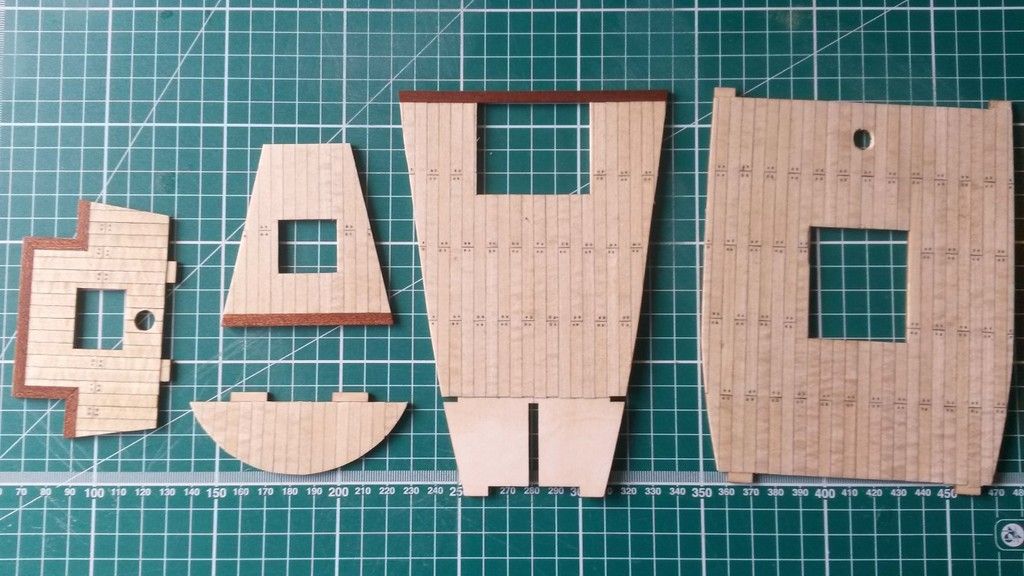
I'm putting together "electric installation" for my SF so in meantime I was working on decks.
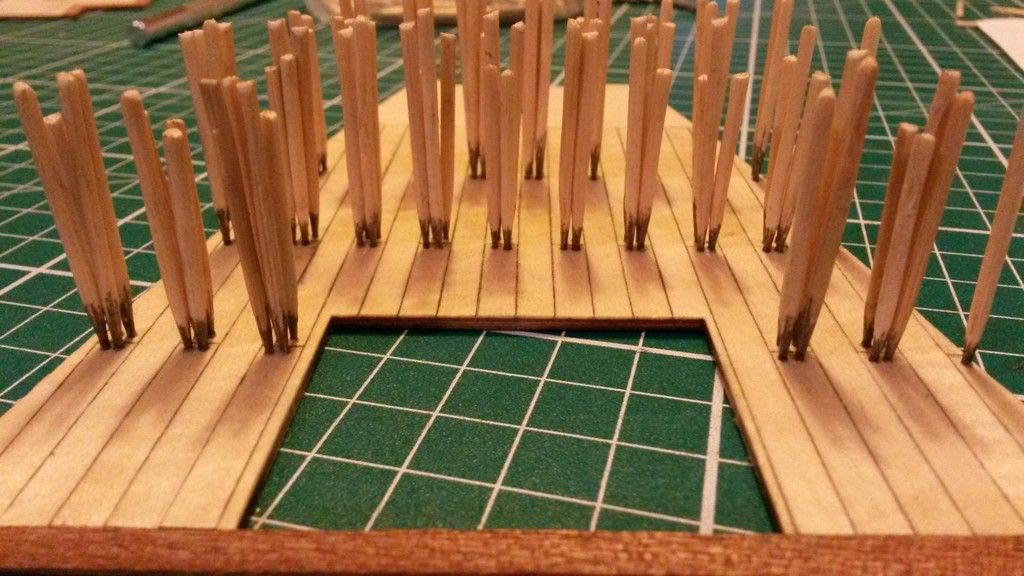
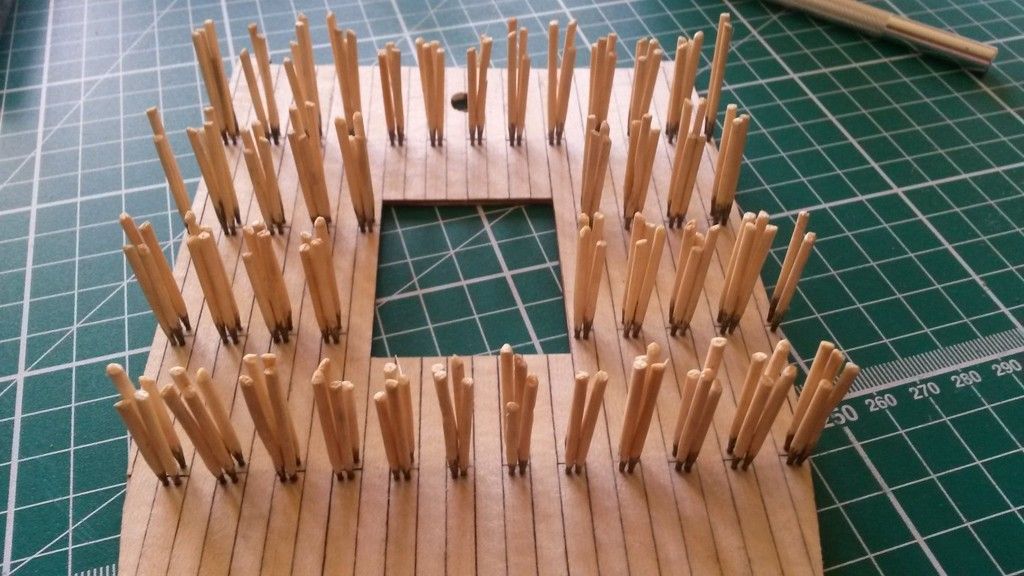
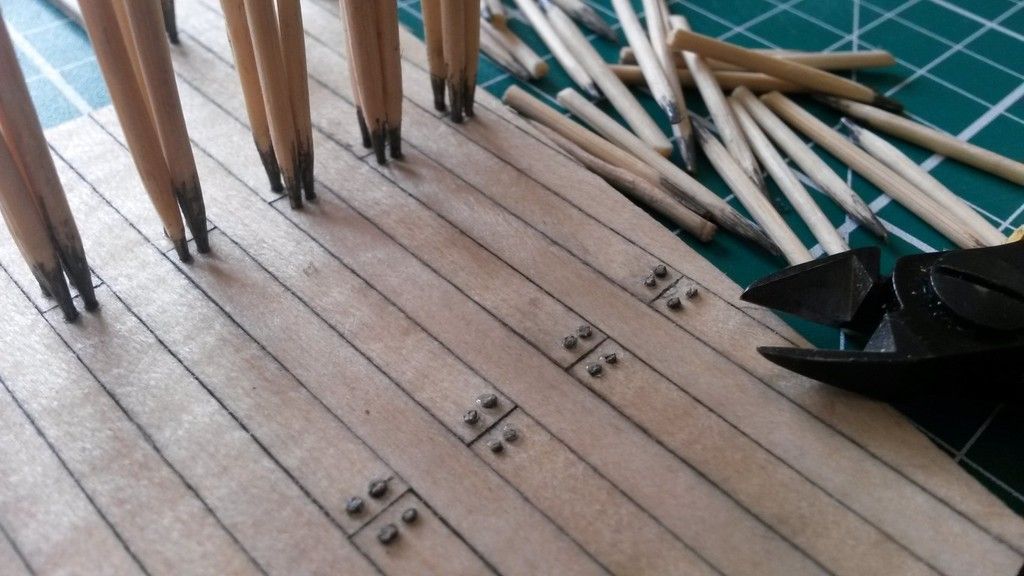
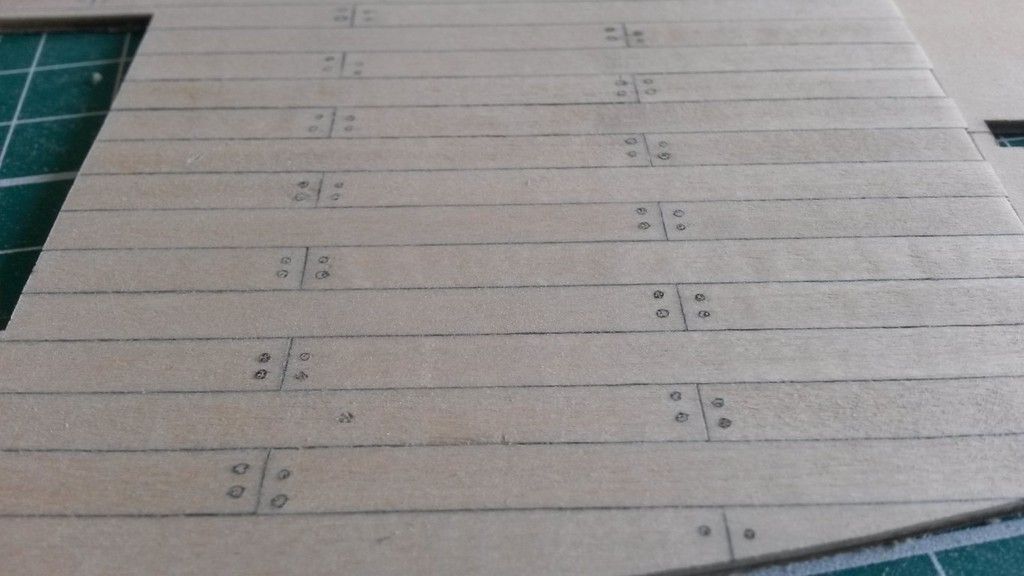
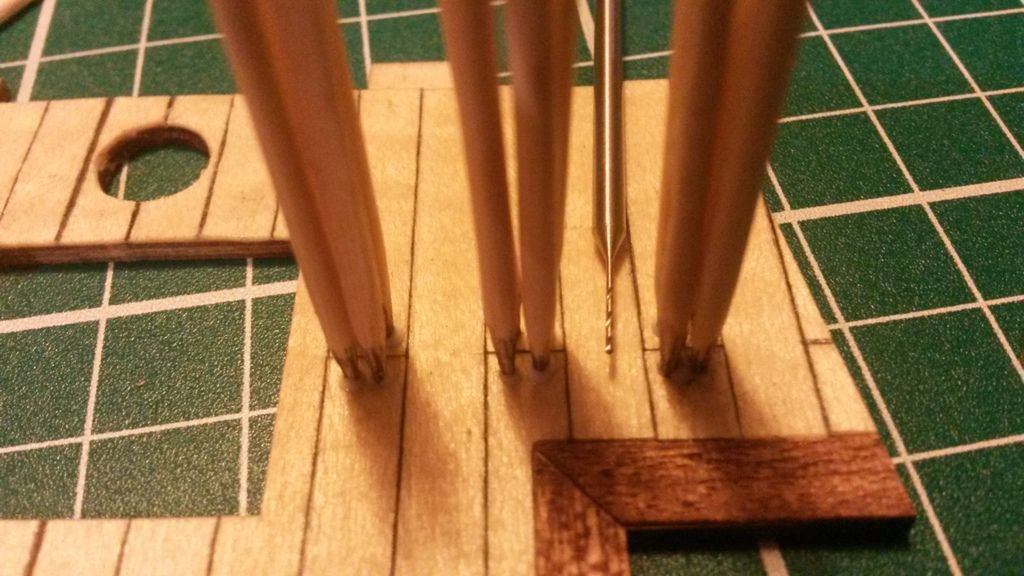
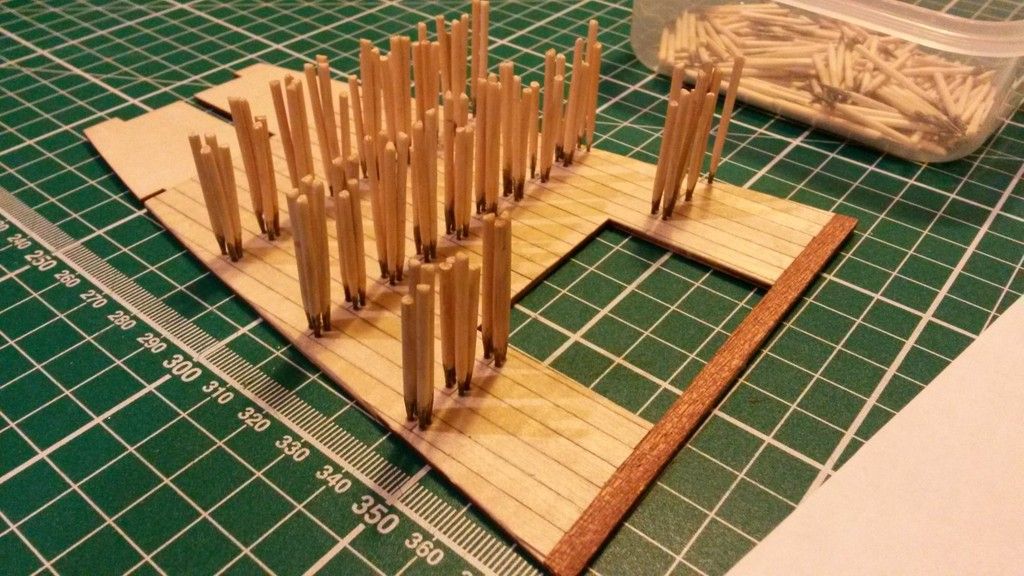
Decide to use cocktail sticks for tree nails imitation. So the decks are ready just need some varnish, have to say that I really enjoyed that part.

All comments and suggestions are more than welcome!!!


jase
#2 Posted : 01 July 2015 22:09:28

Rank: Super-Elite

Publisher Medal: Featured Build of the MonthActive Service Medal: 500 post active service MedalPurple Medal: Super active service medal for 1000 postsTurquoise Medal: Turquoise Medal for model making know-how contributionOutstanding Build: An award for an outstanding buildBuild-Diary Medal: Build-Diary Medal of HonourRed Medal: Red Medal
Groups: Registered

Joined: 21/03/2010
Posts: 7,582
Points: 21,739
Deck looks great, will be following this with much interest

great start
“Whenever you find yourself on the side of the majority, it is time to pause and reflect.”
-Mark Twain
arpurchase
#3 Posted : 01 July 2015 22:43:52

Rank: Super-Elite

Publisher Medal: Featured Build of the MonthActive Service Medal: 500 post active service MedalPurple Medal: Super active service medal for 1000 postsTurquoise Medal: Turquoise Medal for model making know-how contributionOutstanding Build: An award for an outstanding buildBuild-Diary Medal: Build-Diary Medal of HonourRed Medal: Red Medal
Groups: Registered

Joined: 27/09/2011
Posts: 15,196
Points: 45,687
Location: Dudley
BigGrin Hi Arek

Nice job on the decks and the trenailing, just be careful when you sand the cocktail stumps as they are grain end on and harder than the planking.

Regards

AndyCool
Current builds:-C57,Zero, Lamborghini Countach, Caldercraft HMS Agamemnon,Robi,R2-D2, MFH Cobra .

davetwin
#4 Posted : 01 July 2015 23:37:41

Rank: Super-Elite
Publisher Medal: Featured Build of the MonthActive Service Medal: 500 post active service MedalPurple Medal: Super active service medal for 1000 postsOutstanding Build: An award for an outstanding buildBuild-Diary Medal: Build-Diary Medal of HonourRed Medal: Red Medal
Groups: Registered

Joined: 27/01/2014
Posts: 5,060
Points: 14,980
Decks are looking very nice indeed, great work Cool
magpie1832
#5 Posted : 01 July 2015 23:51:04

Rank: Super-Elite

Publisher Medal: Featured Build of the MonthActive Service Medal: 500 post active service MedalPurple Medal: Super active service medal for 1000 postsTurquoise Medal: Turquoise Medal for model making know-how contributionBuild-Diary Medal: Build-Diary Medal of HonourRed Medal: Red Medal
Groups:

Joined: 11/11/2009
Posts: 3,432
Points: 10,280
You've done a great job on the planking. Your tree nails look good too. Look forward to your next update.
Chris.
On the bench

1/350 Revell Tirpitz Platinum Edition (Pontos PE and Wooden deck) plus extra Eduard PE set and extra MK1 door sets.


Gandale
#6 Posted : 02 July 2015 00:10:30

Rank: Super-Elite

Publisher Medal: Featured Build of the MonthActive Service Medal: 500 post active service MedalPurple Medal: Super active service medal for 1000 postsTurquoise Medal: Turquoise Medal for model making know-how contributionOutstanding Build: An award for an outstanding buildBuild-Diary Medal: Build-Diary Medal of HonourRed Medal: Red Medal
Groups: Registered, Global Forum Support, Moderator, Official Builds, Administrators

Joined: 08/09/2012
Posts: 15,172
Points: 46,151
Location: Aberdeen
Off to a great start Arek, decking looks fab. Great to see someone else using cocktail sticks, I used them to treenail the hull planking on my SOTS. Long job but think the results really paid off.... Cool Cool .. Will be following your progress on this one....

Regards

Alan
arek
#7 Posted : 02 July 2015 08:36:32

Rank: Pro
Turquoise Medal: Turquoise Medal for model making know-how contributionBuild-Diary Medal: Build-Diary Medal of HonourRed Medal: Red Medal
Groups: Registered

Joined: 26/05/2015
Posts: 121
Points: 366
Location: Wexford, Ireland
Thank all for stopping by and kind comments.

The tree nails were really time consuming but the final effect is really rewarding. As I mentioned I'm about to modify my kit in some points just to test my skills.
arek
#8 Posted : 02 July 2015 21:33:52

Rank: Pro
Turquoise Medal: Turquoise Medal for model making know-how contributionBuild-Diary Medal: Build-Diary Medal of HonourRed Medal: Red Medal
Groups: Registered

Joined: 26/05/2015
Posts: 121
Points: 366
Location: Wexford, Ireland
I forgot to mention about pleasant surprise that happened to me when i opened my kit.Drool

Browsing other members diaries I noticed that all San Francisco II kits have cast iron cannon carriages. They are in my kit but additionally I have wooden cannon carriages which I never seen before.Blink

Of course couldn't resist to assemble one of them,LOL just have to add wheels as they not included in my kit.
arek attached the following image(s):
20150701_213131 (Medium).jpg
20150701_213254 (Medium).jpg
arpurchase
#9 Posted : 02 July 2015 21:39:01

Rank: Super-Elite

Publisher Medal: Featured Build of the MonthActive Service Medal: 500 post active service MedalPurple Medal: Super active service medal for 1000 postsTurquoise Medal: Turquoise Medal for model making know-how contributionOutstanding Build: An award for an outstanding buildBuild-Diary Medal: Build-Diary Medal of HonourRed Medal: Red Medal
Groups: Registered

Joined: 27/09/2011
Posts: 15,196
Points: 45,687
Location: Dudley
BigGrin Nice find an they will look much better than the metal carriagesCool
Current builds:-C57,Zero, Lamborghini Countach, Caldercraft HMS Agamemnon,Robi,R2-D2, MFH Cobra .

mogwai
#10 Posted : 03 July 2015 00:05:19

Rank: Elite
Active Service Medal: 500 post active service MedalPurple Medal: Super active service medal for 1000 postsCompetition Winner of Model Builds: Competition Winner of Model BuildsBuild-Diary Medal: Build-Diary Medal of HonourRed Medal: Red Medal
Groups: Registered

Joined: 14/10/2014
Posts: 1,715
Points: 5,087
Location: Leicester england uk
Hi off to very good start there.decks look great.cheers mick. BigGrin BigGrin
Builds hms victory, suzuki gsx 1300 R hayabusa, honda C B 750, lamborghini countach L P 500 S, tamiya 1/16 rc full option tiger 1 tank,
built, Mclaren M P 4 - 23. Occre london tram,
Stash.airfix 1/24 mosquito. Diag Virginia schooner, tamiya 1/6 honda 750, tamiya 1/35 famo, tamiya 1/35 flak 88.
stevie_o
#11 Posted : 03 July 2015 00:09:20

Rank: Super-Elite

Active Service Medal: 500 post active service MedalPurple Medal: Super active service medal for 1000 postsTurquoise Medal: Turquoise Medal for model making know-how contributionOutstanding Build: An award for an outstanding buildBuild-Diary Medal: Build-Diary Medal of HonourRed Medal: Red Medal
Groups: Registered

Joined: 30/01/2013
Posts: 4,604
Points: 13,607
Location: Monmouthshire UK
arek
#12 Posted : 04 July 2015 01:29:11

Rank: Pro
Turquoise Medal: Turquoise Medal for model making know-how contributionBuild-Diary Medal: Build-Diary Medal of HonourRed Medal: Red Medal
Groups: Registered

Joined: 26/05/2015
Posts: 121
Points: 366
Location: Wexford, Ireland

Today I started work on "electric installation " of my SF.
This is only a try without any mounting. As you will see on pictures light from LED need to be diffused I decide so I use simple white card as a diffuser. Card will match grating colour so is barely visible in daylight. Have to say I'm quite pleased with the results.Cool Cool

My plan is to use LED lights under every grating, in captain's cabin, deck house and lantern. Also I'm considering to add a window beside the dor on the front of the main deck.

I think I should have about 9 LED lights so I will connect them in three separate circuits just to have chance turn off some of them in case ship will look like a Christmas tree.LOL

Comments and suggestions as always more than welcome!


LED without diffusing


With white card under grating


view from "inside"


and some of the plans....


magpie1832
#13 Posted : 04 July 2015 09:29:02

Rank: Super-Elite

Publisher Medal: Featured Build of the MonthActive Service Medal: 500 post active service MedalPurple Medal: Super active service medal for 1000 postsTurquoise Medal: Turquoise Medal for model making know-how contributionBuild-Diary Medal: Build-Diary Medal of HonourRed Medal: Red Medal
Groups:

Joined: 11/11/2009
Posts: 3,432
Points: 10,280
It will look good lit up. But be careful on how bright the led's are. The lighting on ships was very dull.
The defused light you show is good although a little bright. You might also consider having the light slightly to the side of the gratings, so as to not see the source of light.
Chris
On the bench

1/350 Revell Tirpitz Platinum Edition (Pontos PE and Wooden deck) plus extra Eduard PE set and extra MK1 door sets.


arek
#14 Posted : 04 July 2015 09:55:24

Rank: Pro
Turquoise Medal: Turquoise Medal for model making know-how contributionBuild-Diary Medal: Build-Diary Medal of HonourRed Medal: Red Medal
Groups: Registered

Joined: 26/05/2015
Posts: 121
Points: 366
Location: Wexford, Ireland
magpie1832 wrote:
It will look good lit up. But be careful on how bright the led's are. The lighting on ships was very dull.
The defused light you show is good although a little bright. You might also consider having the light slightly to the side of the gratings, so as to not see the source of light.
Chris


Hi Chris,
Thanks for taking your time for the comments.

Picture abowe show light brighter than it is when you actually looking at it but you are right anyway. This are the smallest LED lights I could find, later this evening i will try double diffusers or reposition LED. Other option probably is to change resistor but my knowledge about that is really close to zeroConfusedBlushing . To create my lights I just simply followed tutorial.
WildRover
#15 Posted : 04 July 2015 12:07:15

Rank: Pro


Groups: Registered

Joined: 19/09/2012
Posts: 101
Points: 245
Location: Wirral
arek wrote:


Picture abowe show light brighter than it is when you actually looking at it but you are right anyway. This are the smallest LED lights I could find, later this evening i will try double diffusers or reposition LED. Other option probably is to change resistor but my knowledge about that is really close to zeroConfusedBlushing . To create my lights I just simply followed tutorial.


If you increase the resistor size, then the LED brightness will reduce (higher resistance, lower current). What resistor have you got in there currently, and what power source?
Completed: Earth, Moon, Sun Orbiter
Build a Model Solar System

Under Constuction: HMB Endeavour
HMS Victory
Mitsubishi Zero
Tiger Tank
D51


arek
#16 Posted : 04 July 2015 14:09:49

Rank: Pro
Turquoise Medal: Turquoise Medal for model making know-how contributionBuild-Diary Medal: Build-Diary Medal of HonourRed Medal: Red Medal
Groups: Registered

Joined: 26/05/2015
Posts: 121
Points: 366
Location: Wexford, Ireland
WildRover wrote:
arek wrote:


Picture abowe show light brighter than it is when you actually looking at it but you are right anyway. This are the smallest LED lights I could find, later this evening i will try double diffusers or reposition LED. Other option probably is to change resistor but my knowledge about that is really close to zeroConfusedBlushing . To create my lights I just simply followed tutorial.


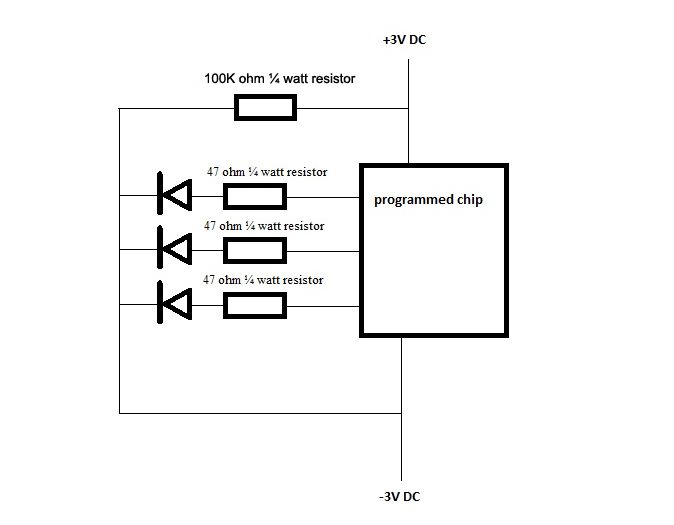
If you increase the resistor size, then the LED brightness will reduce (higher resistance, lower current). What resistor have you got in there currently, and what power source?


Hi WildRover,

Thanks for offering your help

This is a schematic I followed
Hope this is helpful.
WildRover
#17 Posted : 04 July 2015 21:27:00

Rank: Pro


Groups: Registered

Joined: 19/09/2012
Posts: 101
Points: 245
Location: Wirral
The 100k resistor is the key here, the 47 ohm ones will make naff all difference because of the huge one in there(The 47 ohm ones are there to help with voltage regulation to stop the leds going pop). If I were doing it, I'd replace the 100k resistor with a variable resistor, then you have control over the brightness, get say a 500k ohm one.
Completed: Earth, Moon, Sun Orbiter
Build a Model Solar System

Under Constuction: HMB Endeavour
HMS Victory
Mitsubishi Zero
Tiger Tank
D51


arek
#18 Posted : 04 July 2015 23:24:21

Rank: Pro
Turquoise Medal: Turquoise Medal for model making know-how contributionBuild-Diary Medal: Build-Diary Medal of HonourRed Medal: Red Medal
Groups: Registered

Joined: 26/05/2015
Posts: 121
Points: 366
Location: Wexford, Ireland
Hi WildRover,

Thank you so much for helping me with that. Will try this as soon as I get one!
arek
#19 Posted : 08 August 2015 13:48:09

Rank: Pro
Turquoise Medal: Turquoise Medal for model making know-how contributionBuild-Diary Medal: Build-Diary Medal of HonourRed Medal: Red Medal
Groups: Registered

Joined: 26/05/2015
Posts: 121
Points: 366
Location: Wexford, Ireland
It took me some time but wiring of my SF is almost over!BigGrin

I used a variable resistor for the entire system and now I have a complete control over LED brightness (again thanks to WildRover for advice). When resistor is set at a minimum my camera was not able to catch the light so I'm happy. When I was looking for resistor I came across a remote control switch and I decided to use it as well . The problem is that to many elements have to be installed in the hull and yet I have to make room for dummy canons so the battery holder, variable resistor and sensor for remote switch I will to install in ship stand.

I have to admit, the building becomes more complicated than I thought.Cursing It looks like I'll have to build the boxes around some of the LED lights that the light is not leaked by some parts of the ship and plan carefully placement of the dummy cannons.

It will be a long way before I even start planking the hull .....but seeing all this adds-on working is very rewarding.Cool Cool
arek attached the following image(s):
20150803_133343 (Small).jpg
20150803_133404 (Small).jpg
20150807_213808 (Small).jpg
20150808_122342 (Small).jpg
jase
#20 Posted : 08 August 2015 22:23:12

Rank: Super-Elite

Publisher Medal: Featured Build of the MonthActive Service Medal: 500 post active service MedalPurple Medal: Super active service medal for 1000 postsTurquoise Medal: Turquoise Medal for model making know-how contributionOutstanding Build: An award for an outstanding buildBuild-Diary Medal: Build-Diary Medal of HonourRed Medal: Red Medal
Groups: Registered

Joined: 21/03/2010
Posts: 7,582
Points: 21,739
You certainly have a good end result. is the intention to see the light from the gratings?

If you are adding dumb cannons you will have to build boxes for each one, so as long as you carefully seal them that should stop any light leaking through.

Following with great interest

Jase
“Whenever you find yourself on the side of the majority, it is time to pause and reflect.”
-Mark Twain
Users browsing this topic
Guest
7 Pages 123>»
Forum Jump  
You cannot post new topics in this forum.
You cannot reply to topics in this forum.
You cannot delete your posts in this forum.
You cannot edit your posts in this forum.
You cannot create polls in this forum.
You cannot vote in polls in this forum.

Powered by YAF | YAF © 2003-2009, Yet Another Forum.NET
This page was generated in 0.703 seconds.
DeAgostini