|
|
 Rank: Pro  Groups: Registered
Joined: 30/04/2015 Posts: 263 Points: 795 Location: Los Angeles
|
Thanks for the comments. I just got notification that my photo etch flooring has shipped. So hopefully this week, I'll get to put in the real floor. Until now, it's just been a print out I did in photoshop. So this should also be a game changer, since I plan on having one service hatch open, and plan on lighting it as well.
|
|
|
 Rank: Semi-Pro Level 2  Groups: Registered
Joined: 04/09/2015 Posts: 92 Points: 256 Location: Atlantis
|
Can I ask you where you purchased your flooring? I tried purchasing it and it has been on backorder. My cockpit detail set arrived last week. Send me a PM if you would like. Thanks!
|
|
|
 Rank: Pro  Groups: Registered
Joined: 30/04/2015 Posts: 263 Points: 795 Location: Los Angeles
|
Moonman wrote:Can I ask you where you purchased your flooring? I tried purchasing it and it has been on backorder. My cockpit detail set arrived last week. Send me a PM if you would like. Thanks! I pre-ordered directly from Paragrafix. I just saw on his Facebook page that he fulfilled the pre-orders and most wholesale orders, so he may not have gotten enough in stock on the first run. Paul is pretty cool though. I've never dealt with Paragrafix until this order, but if you email him he'll respond and let you know what's up pretty quick.
|
|
|
 Rank: Semi-Pro Level 2  Groups: Registered
Joined: 04/09/2015 Posts: 92 Points: 256 Location: Atlantis
|
Sounds good. I like his product and the detail on his parts and instructions is pretty awesome. Thanks for the update.
|
|
|
 Rank: Beginner Level 3   Groups: Registered
Joined: 29/07/2015 Posts: 28 Points: 87 Location: San Antonio, TX
|
[quote=colson]Thanks guys. The fiber optics are actually very cheap. I got them on Ebay. 175 ft of various colored .25mm fiber optics WITH and LED illuminator for $10.99. Here's a link. If this auction is done, just look at the seller. He's got tons of fiber optics. For me I got them in 2 days since I'm local. But anywhere in the states should be really quick. http://www.ebay.com/itm/...3D2%26sd%3D371303479438[/quote] AM also endorsing this guy for the fiber optics good deals and very quick to ship. On the Bench DeAgostini Millennium Falcon, Moebius 1/32 Cylon Raider, Moebius 1/32 Colonial Viper, Bandai 1/12 R2D2&R5D4, Bandai 1/12 Scout trooper & Speeder Bike
On their way Bandai 1/48 AT-ST, Bandai 1/48 Snow Speeder
|
|
|
 Rank: Pro  Groups: Registered
Joined: 30/04/2015 Posts: 263 Points: 795 Location: Los Angeles
|
YES! Got my photo etch flooring in yesterday. Hopefully I'll be able to get it done this coming weekend. But it looks just great. Very nice and clean. 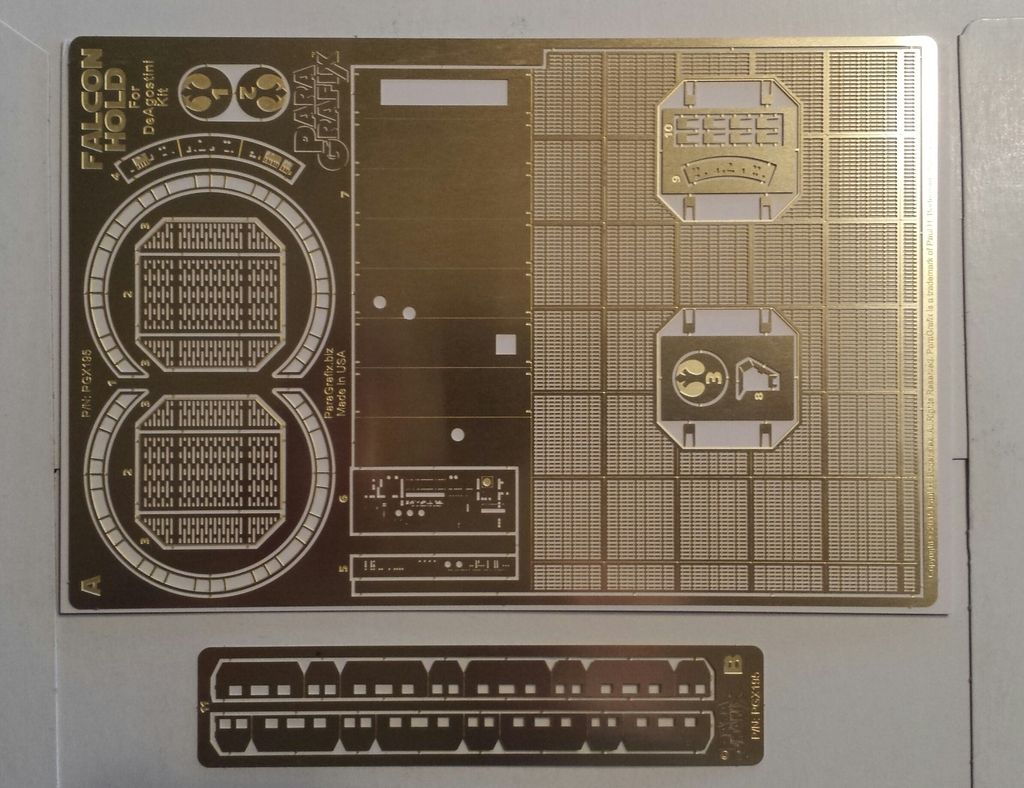 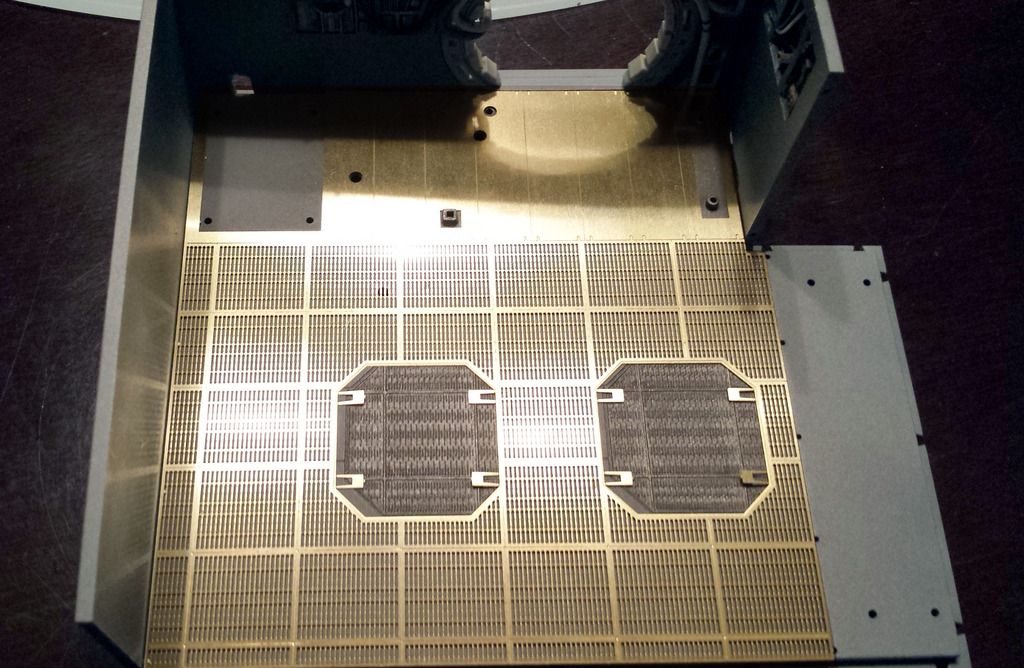
|
|
|
 Rank: Semi-Pro Level 1  Groups: Registered
Joined: 13/06/2015 Posts: 66 Points: 198 Location: South Dakota, USA
|
That looks amazing. I'm so doing this with mine. 
|
|
|
 Rank: Semi-Pro Level 2  Groups: Registered
Joined: 04/09/2015 Posts: 92 Points: 256 Location: Atlantis
|
I agree with racersims...I purchased fiber optics from this fellow and was very pleased with the product and service. His instruction sheet was really helpful as well. I just purchased more of the .50mm.
|
|
|
 Rank: Pro  Groups: Registered
Joined: 30/04/2015 Posts: 263 Points: 795 Location: Los Angeles
|
Minor update on my photo etch hold flooring. So I just primed and painted the floor. 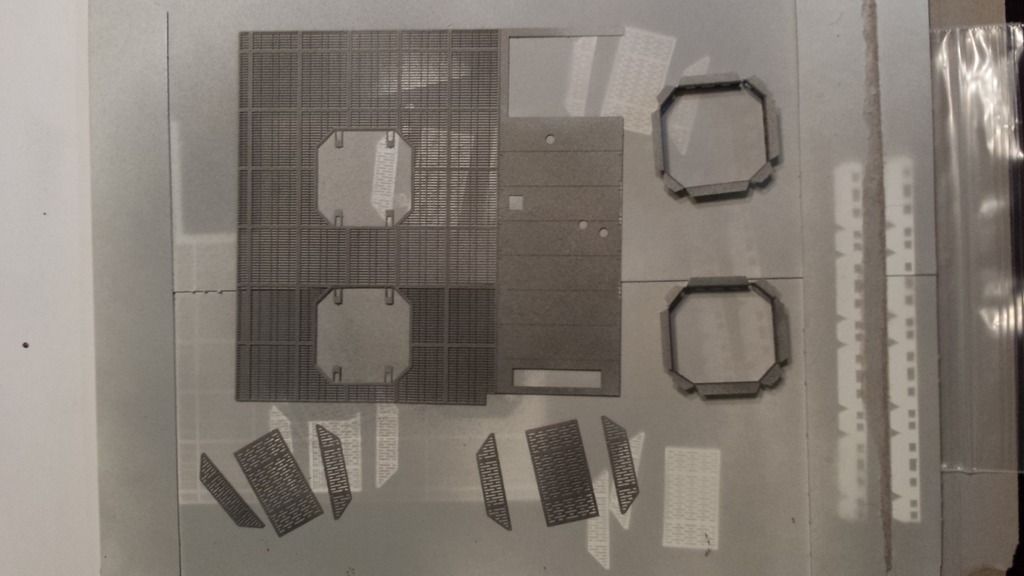 Then did some weathering on it, cut out some i-beams and put it in place to check it out. 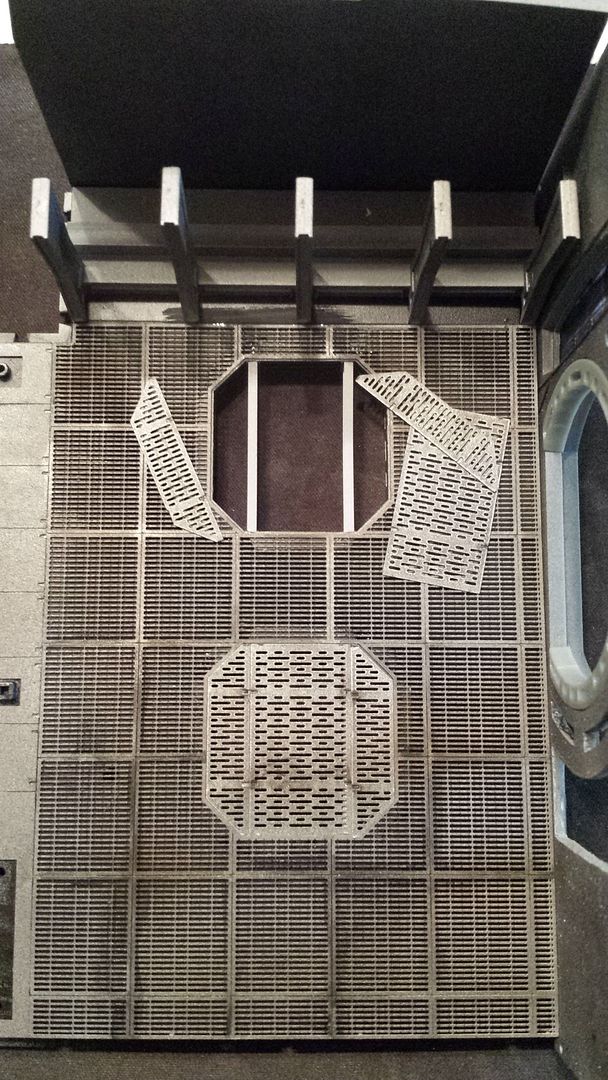 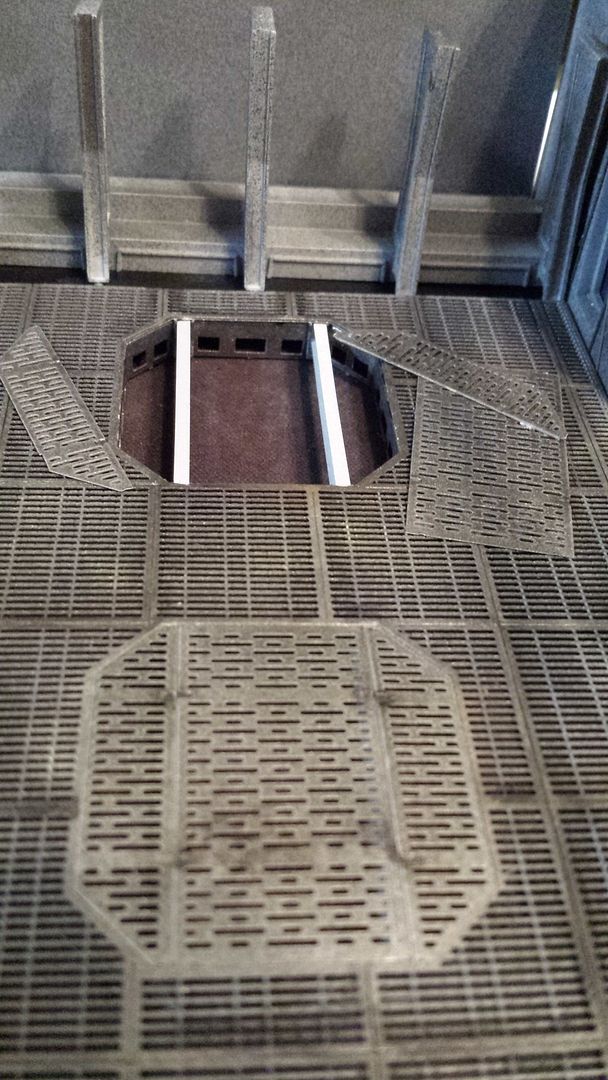 I also did a little test with some EL Wire to light up below. While the grate is on the lower hatch, it is cut out below and has light as well which can be slightly seen through the grate. 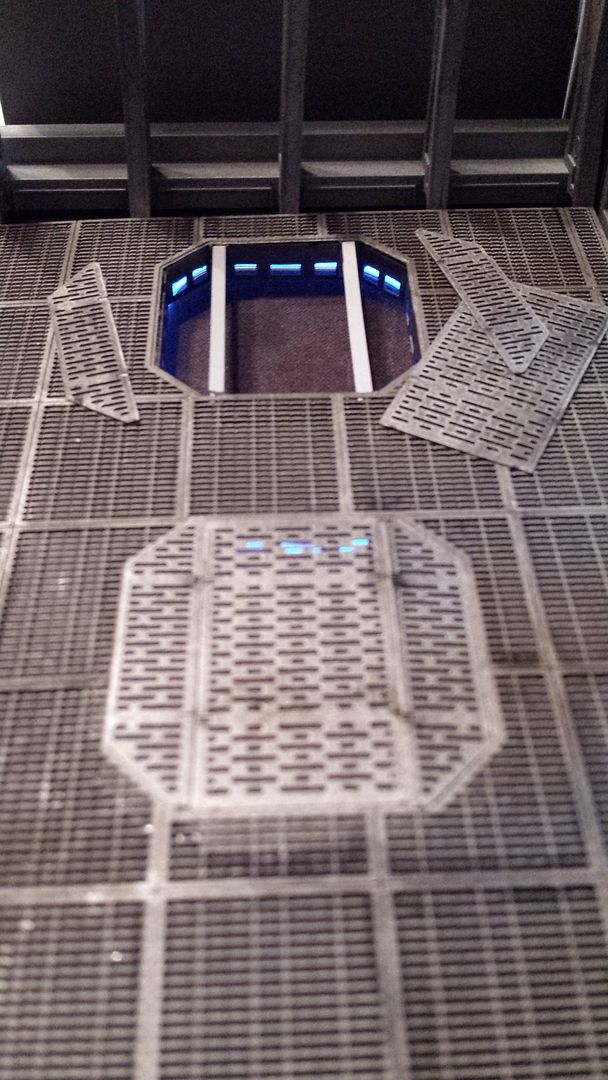 Again, this is all just a test fitting at this point and a test of lighting. I'm really liking the way the photo etch floor looks.
|
|
|
 Rank: Semi-Pro Level 1  Groups: Registered
Joined: 13/06/2015 Posts: 66 Points: 198 Location: South Dakota, USA
|
That's just beautiful. May I ask what colors you used on the floor? You really nailed it.
EL wire is what I was thinking of too. I'm glad to see it works how I was guessing.
|
|
|
 Rank: Pro  Groups: Registered
Joined: 30/04/2015 Posts: 263 Points: 795 Location: Los Angeles
|
I've been painting my entire hold with a light airbrush coat of Metallic Gray from Tamiya over gray Tamiya primer. Then black wash and Tamiya pastels for weathering. Mostly rust, sand and a little soot from the pastels. I'm hoping to put the entire hold together this weekend for another test fit. I'm still working on other details in the hold, so it'll still be a while before it's truly complete.
|
|
|
 Rank: Amateur Level 1  Groups: Registered
Joined: 20/07/2015 Posts: 35 Points: 108 Location: Marietta, GA, USA
|
Looking great as always. I'm very interested in the EL wire so if you have any more details to share about working with that I'm thinking going that route myself.
You've probably seen Paul mention that he'll be doing a corridor set that has grills for lighting along the edges of the floors. I was really thinking of the EL wire for that but seeing the way it looks in the maintenance pits I suspect I'll want it there also.
I continue to get lots of ideas and inspiration from your build, thanks for sharing.
|
|
|
 Rank: Semi-Pro Level 1  Groups: Registered
Joined: 13/06/2015 Posts: 66 Points: 198 Location: South Dakota, USA
|
With the floor etch, did you prime both sides before gluing it to the hold floor, or did you only do the top? I haven't worked with PE really, so I'm not sure of the optimal order of operations.
I was thinking of gluing it down, then priming the whole floor at once.
Thoughts?
|
|
|
 Rank: Pro  Groups: Registered
Joined: 30/04/2015 Posts: 263 Points: 795 Location: Los Angeles
|
myawn wrote:Looking great as always. I'm very interested in the EL wire so if you have any more details to share about working with that I'm thinking going that route myself.
You've probably seen Paul mention that he'll be doing a corridor set that has grills for lighting along the edges of the floors. I was really thinking of the EL wire for that but seeing the way it looks in the maintenance pits I suspect I'll want it there also. The EL wire is pretty simple. I used a 2.3mm EL wire around the grill under the floor. Though it looks blue, that's actually white. Just a cool white. Haven't found a warm white, only yellow. Originally I was thinking of drilling holes along the edges of the corridor floors and running wire underneath, but I saw about Paul making the corridor floors as well, so I'm going to wait and use those. The rectangular shape should look much nicer than just a drilled hole. I don't know if the 2.3mm wire will work for that size. May need to go with the 1.3mm. Oh, I got my wire from elwirepros.com. Prices are pretty reasonable. Dan Kramer wrote:With the floor etch, did you prime both sides before gluing it to the hold floor, or did you only do the top? I haven't worked with PE really, so I'm not sure of the optimal order of operations.
I was thinking of gluing it down, then priming the whole floor at once.
Haven't glued my floor down yet. Waiting till I have everything done the way I want it. But I did only prime and paint the top side of the floor. The model floor I painted flat black. I'm planning on just using super glue as with the rest of the model to glue it down.
|
|
|
 Rank: Pro  Groups: Registered
Joined: 30/04/2015 Posts: 263 Points: 795 Location: Los Angeles
|
I got sidetracked by working on a wall of the hold (photos later), but I did glue in the EL wire for my hold floor and painted the i-beams. I also decided to try something. There's nothing beneath the hatch but empty space, or I assume black when assembled. So I grabbed a still shot of when Solo is in the hatch during the asteroid field chase. I erased Solo and shrank it down to scale with the model. Then printed it out on presentation paper and put underneath. I think it adds some nice depth. 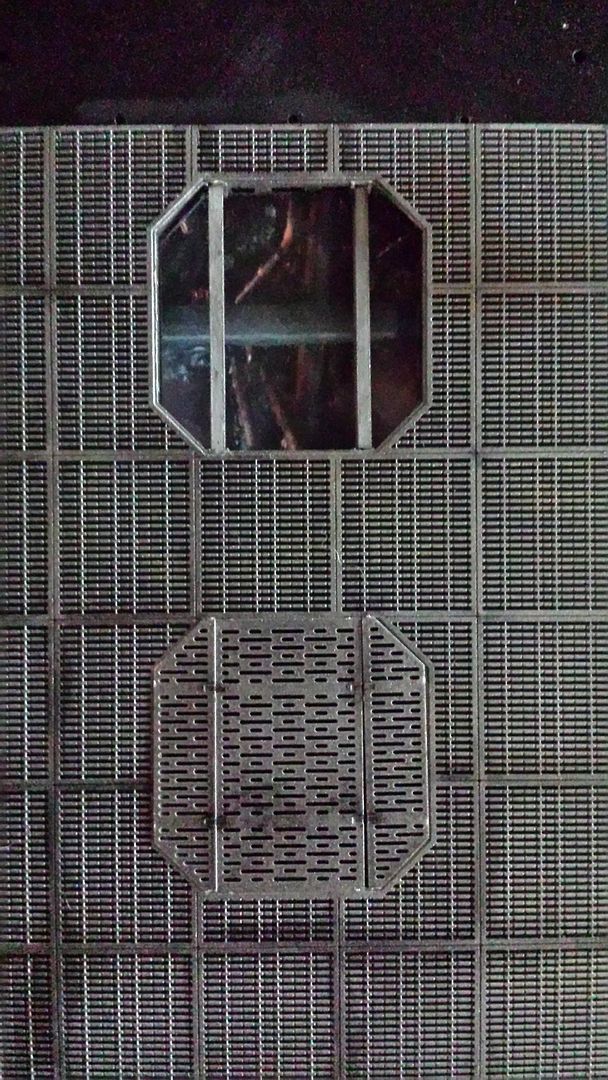 Anyway, back to the EL wire. I decided to hot glue the wire in place, which worked out pretty well. 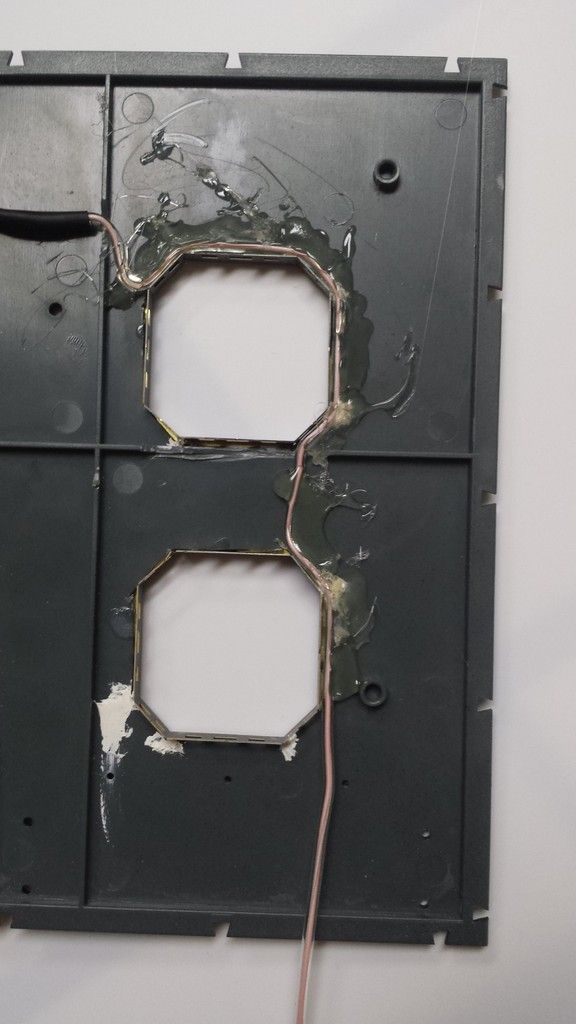 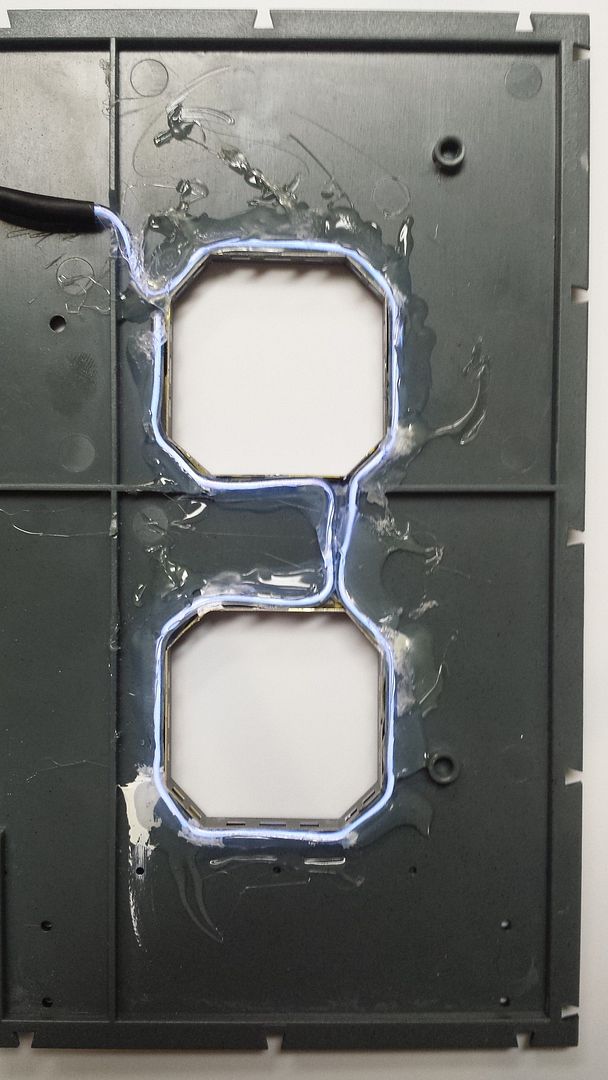 And the final result... 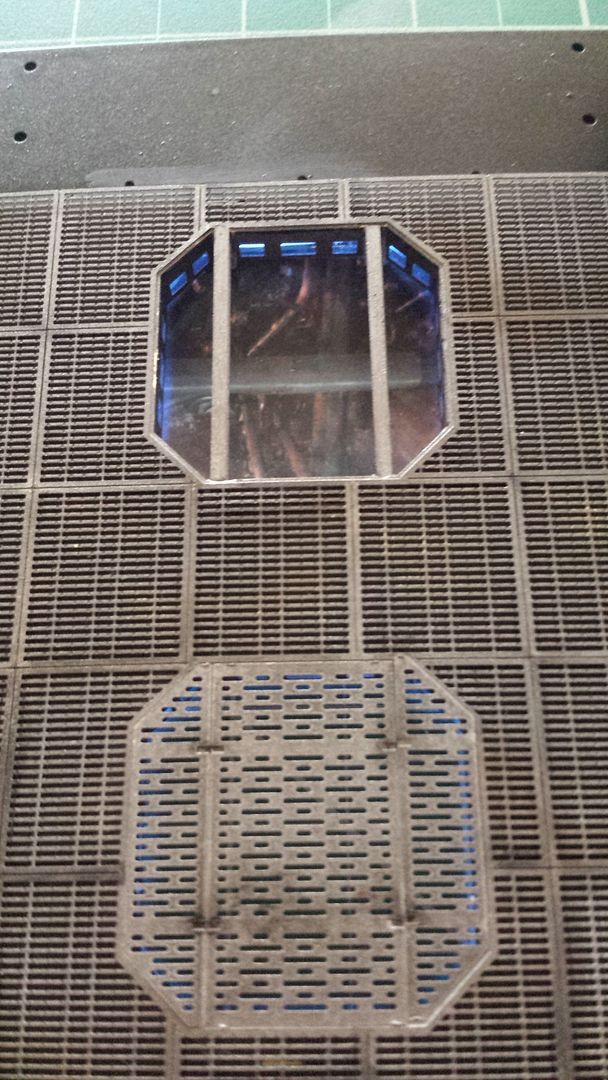 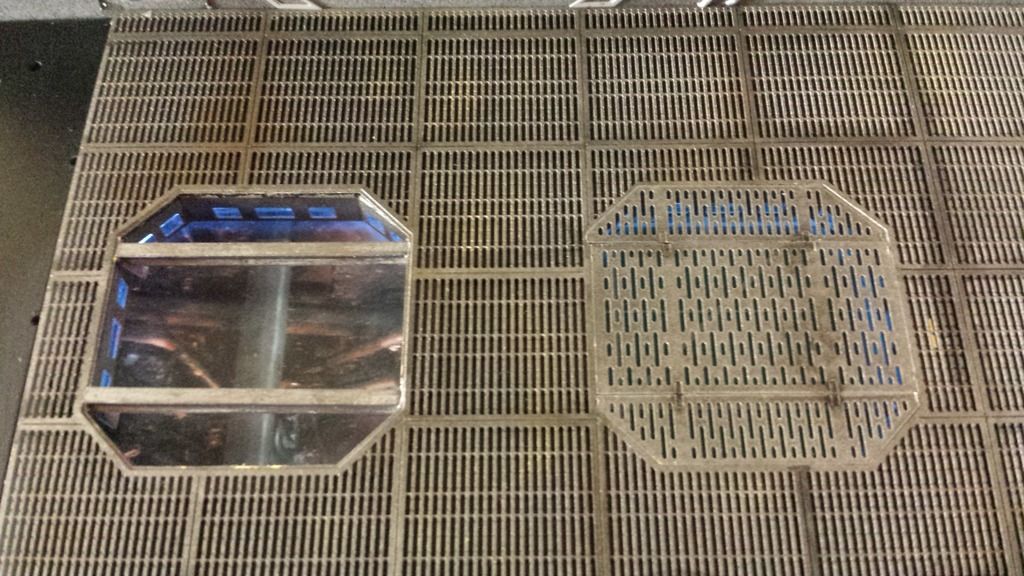 Looking at the film, the light in the hatch is slightly colored, though more towards a green tint. But I think it looks pretty nice. And you can see it illuminate beneath the closed hatch as well.
|
|
|
 Rank: Vice-Master    Groups: Registered
Joined: 11/05/2011 Posts: 766 Points: 2,128 Location: Dagenham
|
This build looks brilliant. The upgrades really set the model off. Keep it up mate CURRENT BUILDS
Mclaren MP4-23
Ford 1/12 Shelby Mustang GT500 2010
HMS Pandora
|
|
|
 Rank: Pro  Groups: Registered
Joined: 30/04/2015 Posts: 263 Points: 795 Location: Los Angeles
|
|
|
|
 Rank: Super-Elite       Groups: Registered
Joined: 27/01/2014 Posts: 5,060 Points: 14,980
|
It looks fantastic Colson, great work. What colour did you finish the wall in?
|
|
|
 Rank: Pro  Groups: Registered
Joined: 30/04/2015 Posts: 263 Points: 795 Location: Los Angeles
|
davetwin wrote:It looks fantastic Colson, great work. What colour did you finish the wall in? I'm using Tamiya gray primer, then doing a light airbrush coating of Tamiya Metallic Gray.
|
|
|
 Rank: Pro    Groups: Registered
Joined: 06/08/2015 Posts: 276 Points: 817 Location: Monrovia, Ca
|
Looks great as always, Colson. You are definitely setting the bar very high for this build. Current Builds: HMS Sovereign of the Seas /// Lamborghini Countach /// Eaglemoss BTTF DeLorean
Finished Builds: Millennium Falcon
|
|
|
|
Guest
|