|
|
 Rank: Amateur level 2  Groups: Registered
Joined: 01/05/2015 Posts: 43 Points: 132 Location: Clearwater, Florida USA
|
Dave, Wow. I just found this build thread and am blown away. Awesome choices for add on parts, PE, lighting etc. Yours skills are creating something that is greater than the sum of its parts. And that kit has a lot of parts 
|
|
|
 Rank: Super-Elite      Groups: Registered
Joined: 27/01/2014 Posts: 5,060 Points: 14,980
|
CRphoto wrote:Dave, Wow. I just found this build thread and am blown away. Awesome choices for add on parts, PE, lighting etc. Yours skills are creating something that is greater than the sum of its parts. And that kit has a lot of parts Thanks for the nice comments. I must admit though that all this electronics had me terrified and still does to an extent, I am still learning as I go 
|
|
|
Rank: Super-Elite Groups: Registered
Joined: 27/01/2014 Posts: 5,060 Points: 14,980
|
Unfortunately this kind of got pushed aside for a while, mainly because I was terrified of all the extra lighting I had decided to put into this and how to go about wiring it all up. They year end is fast approaching and I still have so much to do with this so I just needed to knuckle down and get over my fears. I started by spending a lot of time soldering small lenghts of wire together until I was happy I got a nice finish, took some time I can tell you. once I was happy I assembled an LED and resistor to put what I had learnt into practive on a real live part so to speak. Turned out decent enough that it would hold for a very long time I didnt bother taking pictures of the numerous short lenghts of wire with large lumps of solder on. The next job was to solder the engine wires on to the control board. This is from the lighting kit I purchased, it was you using a wire wrap tool to secure the wires but I thought soldering them would be much more secure. Next job was to work out the wiring up of the first bunch of LEDs, in this case the 3mm landing lights, and then start wiring them to the circuit board I had, this is for the additional lighting on top of the lighting kit. 10 resistors that will each be connected to a pair of 3mm LEDs Once all resistors were on a quick test was in order before I got too far. with the +'ve and -'ve wire I poked them through the hole, added a lump of solder and then trimmed of the excess wire to try and make it look neat. A short bit of shirnk wrap attached over the ends near the circuit boart to further tidy it up and then a test fit in situ. Its going to get rather busy inside, there is actually plenty of room for it all though. Overall Im quite pleased with how the soldering turned out, practive really does make perfect, or close enough  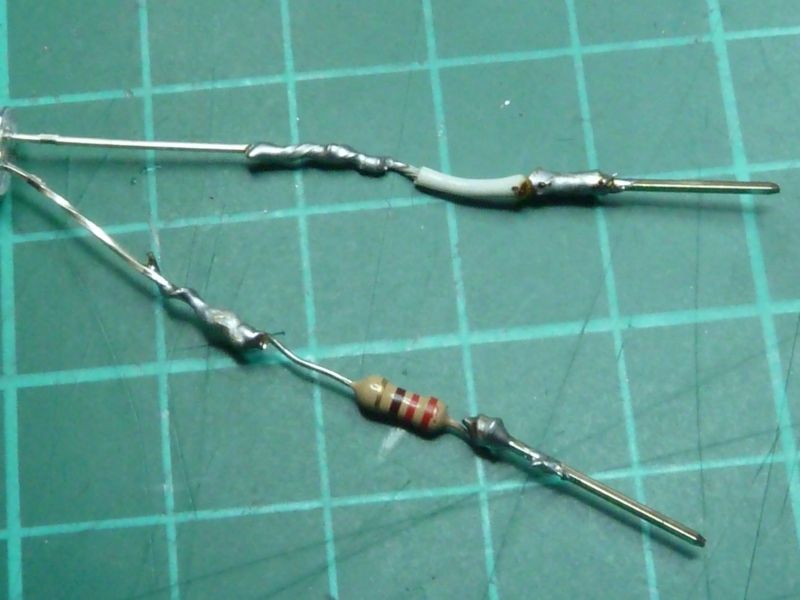 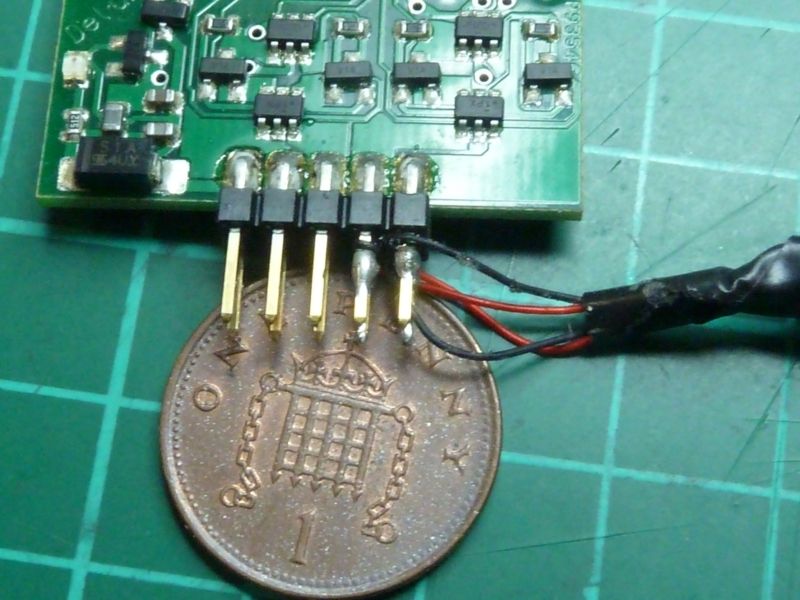 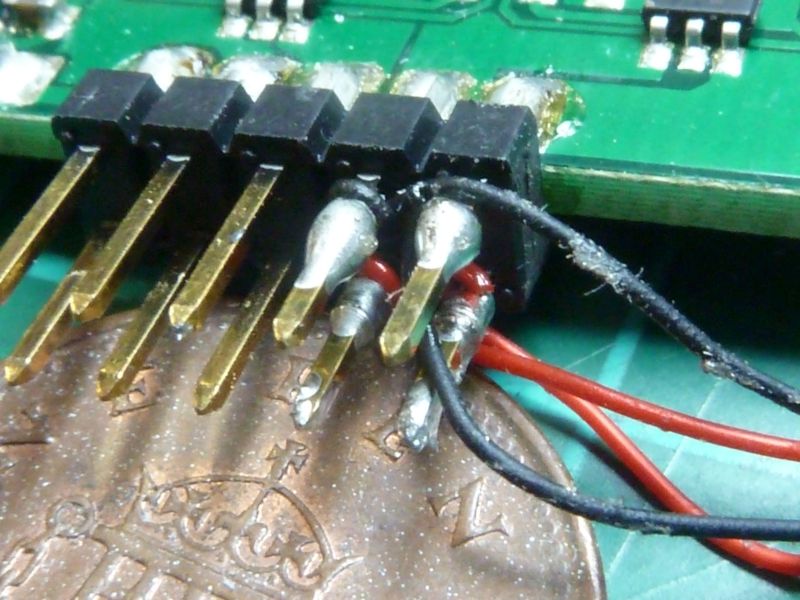 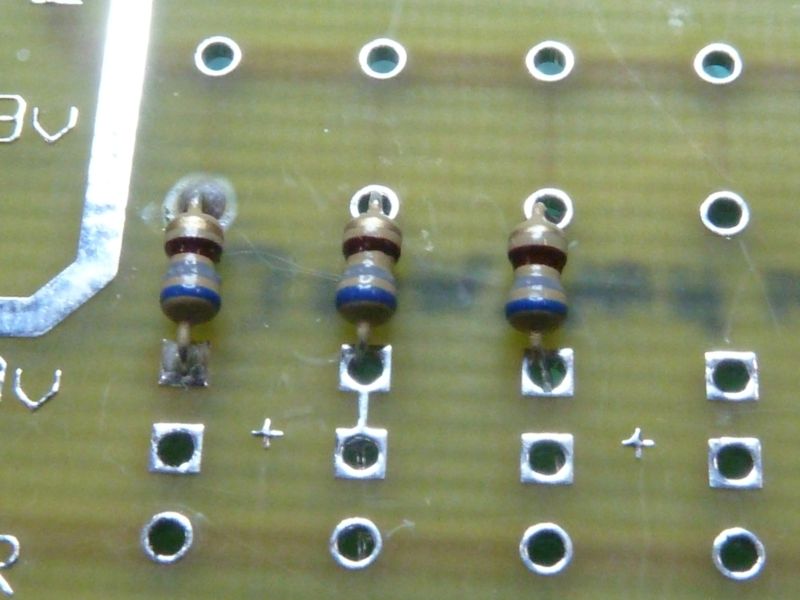 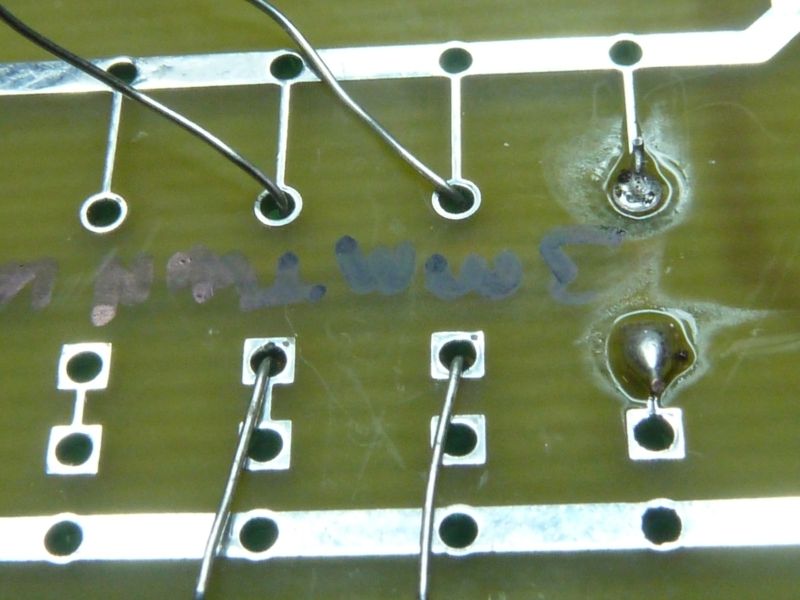 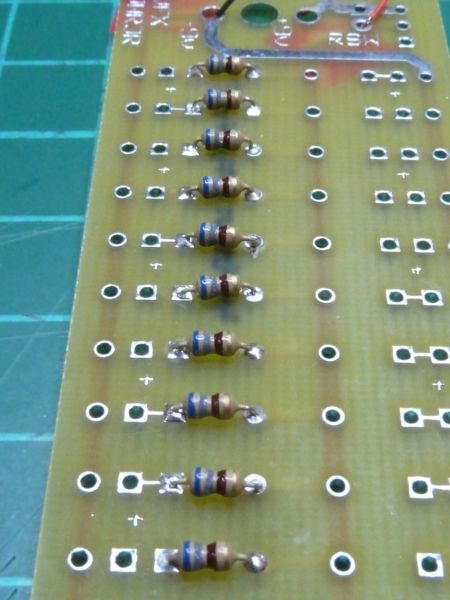  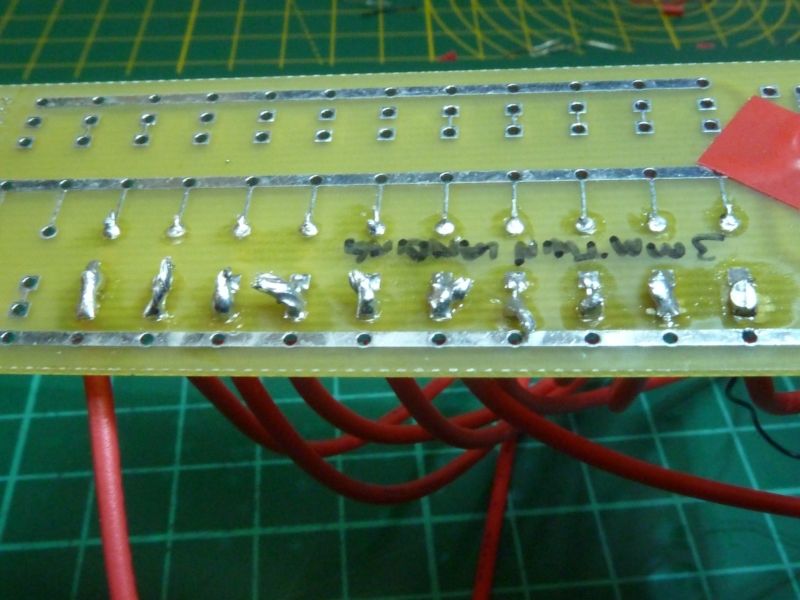 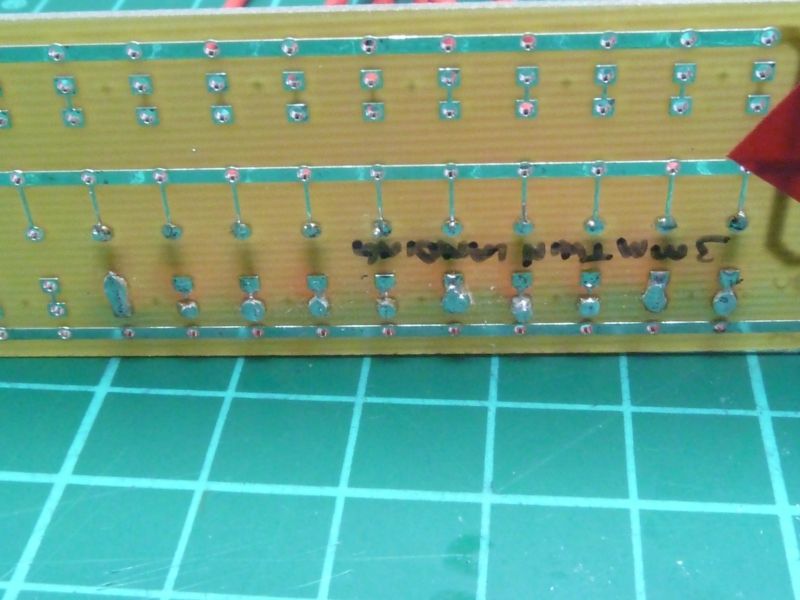 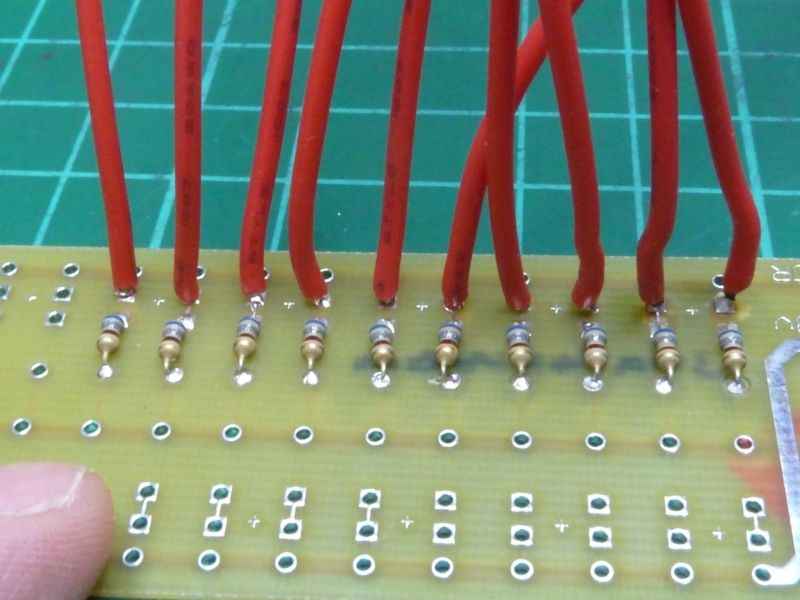 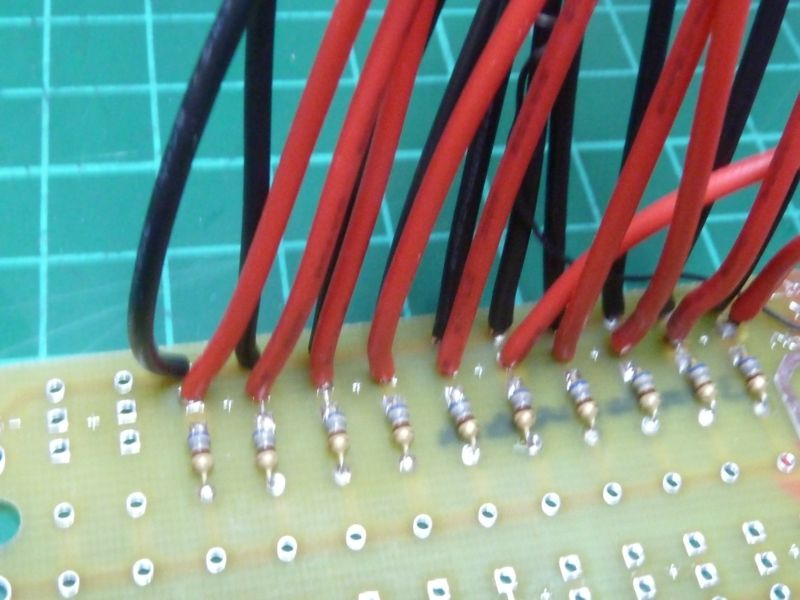 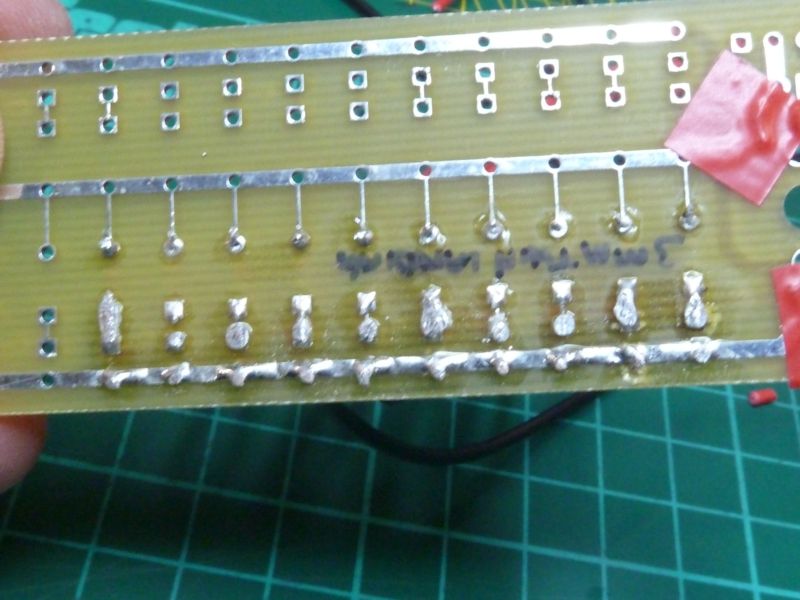 
|
|
|
|
|
Looks more complicated than spagetti junction buy great work done there. Not sure if you know but because its low voltage you can just twist the wires together and use heat shrink to hold them together as another way rather than soldering  Current builds:-C57,Zero, Lamborghini Countach, Caldercraft HMS Agamemnon,Robi,R2-D2, MFH Cobra .
|
|
|
Rank: Super-Elite Groups: Registered
Joined: 27/01/2014 Posts: 5,060 Points: 14,980
|
Thanks Andy, I didn't actually realise a simple twist join would be sufficient for lower voltages. I think I will still sold all the joins as I will just keep worrying that something would come loose over time, that and I've spent so long learning to solder now
|
|
|
Rank: Super-Elite Groups: Registered
Joined: 27/01/2014 Posts: 5,060 Points: 14,980
|
|
|
|
 Rank: Pro Groups: Joined: 24/08/2009 Posts: 48,827 Points: -13,348
|
Just caught up with this build, heck it looks amazing, well done
|
|
|
Rank: Super-Elite Groups: Registered
Joined: 27/01/2014 Posts: 5,060 Points: 14,980
|
Tomick wrote:Just caught up with this build, heck it looks amazing, well done Thanks Tom, although I have just realised I've forgotten the landing lights at the end of the mandibles, doh
|
|
|
Rank: Pro   Groups: Registered
Joined: 11/11/2015 Posts: 278 Points: 807 Location: Minneapolis, Minnesota USA
|
Great build Dave. Wondering if you figured out your space issue with the LED's. You can file the LED plastic dome down any way you want as long as you don't expose the metal inside the dome. this might give you the space you need to install the tight fitting LED's. And you can get a 90 degree bend in fiber optic without losing any intensity of the light. I have bought the Revell Master Kit 1/72 Millennium Falcon as well as the Deago kit. Shhhh don't tell my wife. Anyways, I was looking for a decently priced FM kit when I read a rumor that Revell had bought the FM molds so that they could continue making the model. Same molds but a fraction of the cost of a FM one online. Anyways, looking forward to seeing your progress. Revell Master Series Millennium FalconBest Regards,
Ron
On the bench: DeAgostini '67 Ford Shelby Mustang, Hachette Space Battleship Yamato 2202, Agora Models T-800 Terminator
Finished builds: DeAgostini Toyota 2000GT
In the Stash: Losing count...
|
|
|
Rank: Pro Groups: Registered
Joined: 08/05/2015 Posts: 239 Points: 693 Location: Wisconsin
|
Simply amazing work. WOW, I think it looks fantastic. It really does add to the model IMHO. Keep up the great work and keep the pics coming.
|
|
|
|
|
Stunning work Dave looking brilliant Reg Martyn Building ?
Completed. Soliei Royal . Sovereign of the Seas . Virginia . Scotland . San Felipe . Corel vasa , Santisima Trinadad X section , Vasa
Next Build ?
When sailors have good wine, They think themselves in heaven for the time. John Baltharpe
|
|
|
Rank: Super-Elite Groups: Registered
Joined: 27/01/2014 Posts: 5,060 Points: 14,980
|
Thanks all for stopping by and your nice comments Sadly most of my Moddelling is on hold at the moment due to lack of enthusiasm and also down to the fact that me and my fiancé have decided to go our separate ways, this means I am now trying to sort out if I am able to buy her,out of the house or go down the selling route. All this coupled with working every extra shift I can at the moment to help bolster my funds for which ever situation arise. One positive is we are doing everything amicably and I will then be able to move my model room from outside in a cold garage to indoors
|
|
|
Rank: Pro Groups: Joined: 24/08/2009 Posts: 48,827 Points: -13,348
|
Hello Dave,
I've just decided to look in on a subject I wouldn't normally look at and I didn't realise what a fantastic diary I was missing! Please excuse the pun mate, this being a space subject and all, but your model is simply 'out of this world!!  
Love the lighting and boy does it bring something extra to the show - very well done on a great effort and I'll certainly be following your progress when you get chance to continue.
Sorry to hear about the problems in your private life Dave and I hope they are resolved quickly for you without too much heartache?
All the best,
Kev 
|
|
|
Rank: Super-Elite  Groups: Registered
Joined: 30/01/2013 Posts: 4,604 Points: 13,607 Location: Monmouthshire UK
|
Awesome work Dave, the lighting effect is amazing Steve
|
|
|
|
Guest
|
 US
US

