|
|
 Rank: Pro  Groups: Registered
Joined: 30/04/2015 Posts: 263 Points: 795 Location: Los Angeles
|
davetwin wrote:surely you could have the hold set to the side of the Falcon in the table? I had thought of that also, but it would require the table being quite a bit larger. And my plan, at this point, is to have black mirror plexi as the surface and to paint the white arrows and the elevator to the side to have the Falcon sitting on the Death Star. But that's not certain yet. Still have a year to think about it.
|
|
|
 Rank: Newbie Groups: Registered
Joined: 17/07/2015 Posts: 3 Points: 9
|
First time commenter, here (in fact, I just received my first four issues today!). LOVE what you're doing, Colson. Take this for what it's worth, but have you considered making your glass box with a sliding top instead of a drawer? It would be somewhat less bulky and reduce how much the finished model would have to be moved around.
|
|
|
 Rank: Pro  Groups: Registered
Joined: 30/04/2015 Posts: 263 Points: 795 Location: Los Angeles
|
voodoodad wrote:Have you considered making your glass box with a sliding top instead of a drawer? It would be somewhat less bulky and reduce how much the finished model would have to be moved around. There have been other ideas I've thought about, such as what you mentioned and even a glass door in the case to reach inside and lift the Falcon top off.
|
|
|
 Rank: Pro  Groups: Registered
Joined: 30/04/2015 Posts: 263 Points: 795 Location: Los Angeles
|
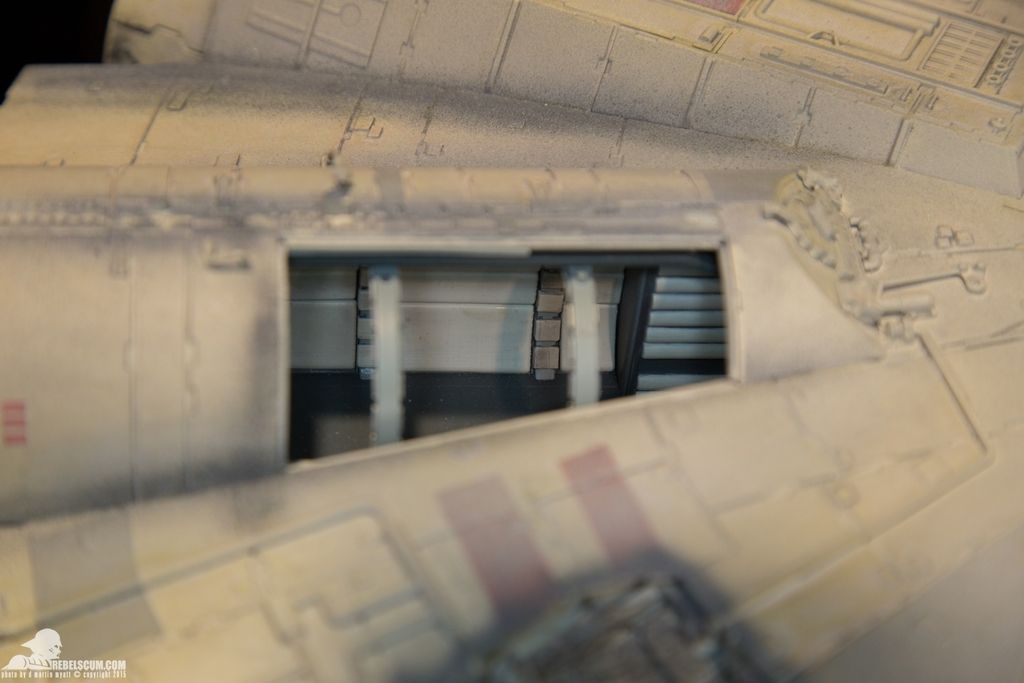
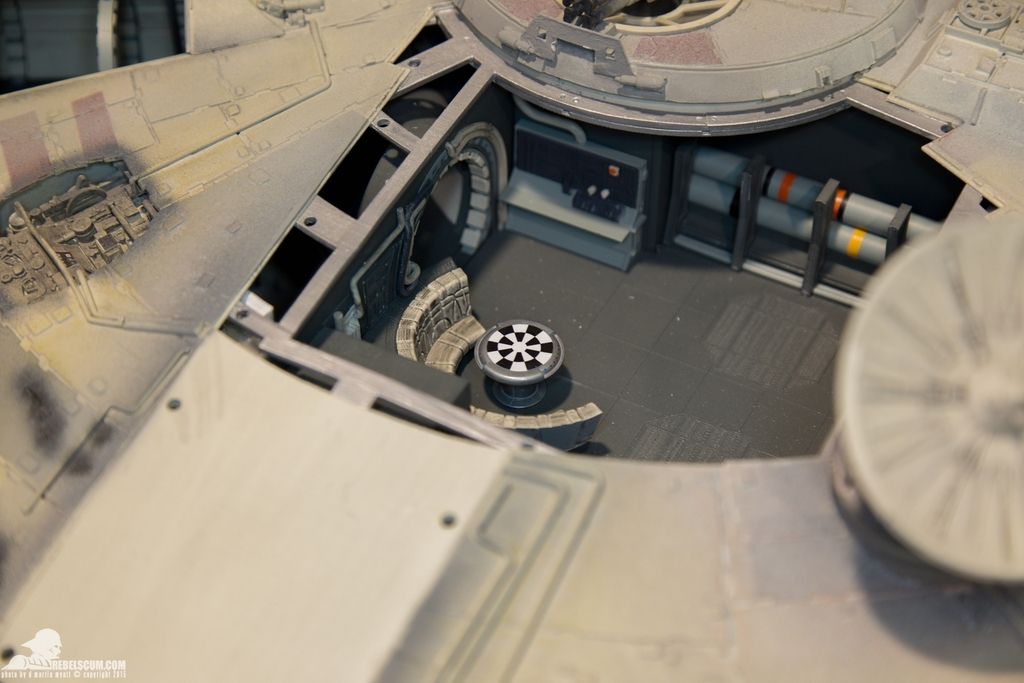
So here's my other issue with the interior being in the model itself. Looking at photos of the finished model, it's going to be very difficult to see in the corridors, especially, because of the small panels you have to look through. I want people to really be able to see all the work put into the hold and corridors. Here are a couple of photos (courtesy rebelscum.com) from the reveal at the Anaheim Star Wars convention. You can see what I mean.  
|
|
|
 Rank: Pro   Groups: Registered
Joined: 16/04/2011 Posts: 328 Points: 998 Location: Anglesey
|
The hold area is just a bonus. The great work you have put into your hold you would have to display your Falcon with the covers off all the time which isn't practical. So i think you would be best displaying it separately, as you have mentioned before. Also the frame work on the prototype has changed slightly looking at mine. Darren
Have an AWSOME day and may the Force be with you always 😉 Building: Millennium Falcon https://forum.model-spac...sts&t=14381&p=7 - Building: BTTF Delorean - Building: Dom's Dodge Charger - Building : X-Wing https://forum.model-spac...aspx?g=posts&t=34899
|
|
|
 Rank: Super-Elite       Groups: Registered
Joined: 27/01/2014 Posts: 5,060 Points: 14,980
|
Don't forget that these photos are only a representation of our finished models ad NOT the actual finished model, these are just the prototype.
|
|
|
 Rank: Pro  Groups: Registered
Joined: 30/04/2015 Posts: 263 Points: 795 Location: Los Angeles
|
|
|
|
|
|
Looking sweet, very nice work indeed.....   Regards Alan
|
|
|
 Rank: Super-Elite        Groups: Registered
Joined: 31/05/2010 Posts: 5,679 Points: 17,011 Location: Wiltshire
|
Great looking model. If that last picture shows your knees in shot then it really brings home just how big this model is. Its certainly sonething unique as far as available kits of this ship are concerned. Hope the rest of your build goes well. Happy Modelling
BUILDING: Hachette Spitfire Mk 1A, Constructo Mayflower
SUBSCRIPTION COMPLETE (Awaiting building): USS Constitution, Sovereign of the Seas, 1:200 Bismarck (Hachette)
COMPLETED: Porsche 911, E-Type Jaguar, Lam Countach
|
|
|
 Rank: Pro  Groups: Registered
Joined: 08/03/2015 Posts: 154 Points: 435 Location: New Jersey
|
Looks great. Good luck with the double shipment.I was billed over 2 weeks ago for shipment 11 which still is not in the States.Shipment 12 probably wont go out until the beginning of February at this pace. My current builds: The Millennium Falcon, Suzuki GSX 1300R Hayabusa, Ford Mustang Shelby
|
|
|
 Rank: Pro  Groups: Registered
Joined: 30/04/2015 Posts: 263 Points: 795 Location: Los Angeles
|
|
|
|
 Rank: Beginner Level 2   Groups: Registered
Joined: 26/12/2015 Posts: 14 Points: 38 Location: Philadelphia
|
Amazing work Colson... I hope mine is just as good as yours. I just received my first box the other day and very much looking forward to building mine. I may use your photos to guide me through. Hope that's okay.
Regards,
Pablo
|
|
|
 Rank: Amateur level 2  Groups: Registered
Joined: 07/12/2015 Posts: 40 Points: 120 Location: South Dakota
|
Really amazing work!! Looking forward to see what you do for the exterior lighting.
|
|
|
 Rank: Super-Elite       Groups: Registered
Joined: 27/01/2014 Posts: 5,060 Points: 14,980
|
That looks really nice Colson, awesome job 
|
|
|
 Rank: Pro  Groups: Registered
Joined: 30/04/2015 Posts: 263 Points: 795 Location: Los Angeles
|
Vex wrote:Really amazing work!! Looking forward to see what you do for the exterior lighting. Yea. That's something else I've been thinking about a little. Lots of little red lights all around the exterior of the Falcon. Some solid, some blinking. I don't think I'll do the flood lights that you see when they're in the cave, but I haven't really decided yet.
|
|
|
 Rank: Amateur level 2  Groups: Registered
Joined: 07/12/2015 Posts: 40 Points: 120 Location: South Dakota
|
colson wrote:Vex wrote:Really amazing work!! Looking forward to see what you do for the exterior lighting. Yea. That's something else I've been thinking about a little. Lots of little red lights all around the exterior of the Falcon. Some solid, some blinking. I don't think I'll do the flood lights that you see when they're in the cave, but I haven't really decided yet. Curious if you mean the flood lights on the forward mandibles? The kit comes with the lighting for those so not sure why you wouldn't do those.
|
|
|
 Rank: Pro  Groups: Registered
Joined: 30/04/2015 Posts: 263 Points: 795 Location: Los Angeles
|
Vex wrote:Curious if you mean the flood lights on the forward mandibles? The kit comes with the lighting for those so not sure why you wouldn't do those.
No. There are also flood lights on the underside of the belly that light up.
|
|
|
 Rank: Super-Elite        Groups: Registered
Joined: 31/05/2010 Posts: 5,679 Points: 17,011 Location: Wiltshire
|
Very nice update indeed. I have nowhere to display something of this size (to many other kits will use the available space) or i would have been very tempted by this one. Enjoy the rest of your build Happy Modelling
BUILDING: Hachette Spitfire Mk 1A, Constructo Mayflower
SUBSCRIPTION COMPLETE (Awaiting building): USS Constitution, Sovereign of the Seas, 1:200 Bismarck (Hachette)
COMPLETED: Porsche 911, E-Type Jaguar, Lam Countach
|
|
|
 Rank: Amateur level 2  Groups: Registered
Joined: 07/12/2015 Posts: 40 Points: 120 Location: South Dakota
|
colson wrote:No. There are also flood lights on the underside of the belly that light up. I see what you mean. I guess if your not planning to display it with landing gear really no need for them. I look forward to following your progress.
|
|
|
 Rank: Beginner Level 1 Groups: Registered
Joined: 04/09/2015 Posts: 7 Points: 27
|
I have been going back and forward between using Tony RR (Shapeway's) sconces or the Paragrafix sconces, but after seeing just how good yours looks I have decided to go with the paragrafix sconces. Thanks for helping me decide. I love your work, and check up regularly to see how it is progressing.
|
|
|
|
Guest (7)
|