|
|
 Rank: Amateur level 2  Groups: Registered
Joined: 07/12/2015 Posts: 40 Points: 120 Location: South Dakota
|
Just doesn't make sense to me, why attach to the hull. Wouldn't it make more sense for metal frame to attach to the metal frame instead of a plastic hull? I'm really hoping those are for lighting.
|
|
|
 Rank: Master      Groups: Registered
Joined: 07/07/2015 Posts: 1,292 Points: 3,928 Location: Allentown PA
|
[quote=colsonAnd if you look at screen caps from the actual film, there are no domes on the floods. They are recessed lighting. You can see inside of them.[/quote] Gotcha, was just going by the look of the photo you had there. I wasn't planning on doing any extra exterior lighting so I never really researched it.
DeAgostini kit builds:
Millennium Falcon: 18% Complete
Shelby GT-500: 28% Complete
Thunderbird 2: 13.75% Complete
|
|
|
 Rank: Pro  Groups: Registered
Joined: 30/04/2015 Posts: 263 Points: 795 Location: Los Angeles
|
Vex wrote:Just doesn't make sense to me, why attach to the hull. Wouldn't it make more sense for metal frame to attach to the metal frame instead of a plastic hull? I'm really hoping those are for lighting. I am curious as to how they'll have us attach the 2 halves together. To attach the metal frames (which would make sense for strength) how could you do so with the hull on the frames. Hmmmm. I'm sure it'll all make sense once we get to that point.
|
|
|
 Rank: Pro   Groups: Registered
Joined: 16/04/2011 Posts: 328 Points: 998 Location: Anglesey
|
colson wrote:I am curious as to how they'll have us attach the 2 halves together. To attach the metal frames (which would make sense for strength) how could you do so with the hull on the frames. Hmmmm. I'm sure it'll all make sense once we get to that point. That has been my thoughts for quite a while Darren
Have an AWSOME day and may the Force be with you always 😉 Building: Millennium Falcon https://forum.model-spac...sts&t=14381&p=7 - Building: BTTF Delorean - Building: Dom's Dodge Charger - Building : X-Wing https://forum.model-spac...aspx?g=posts&t=34899
|
|
|
 Rank: Master      Groups: Registered
Joined: 07/07/2015 Posts: 1,292 Points: 3,928 Location: Allentown PA
|
I think I may have already figured that out. If you look at your lower frame there are tabs on the outter edge that have threaded holes. My guess is that there will be side frames that we screw to the top and bottom frame to hold them together
DeAgostini kit builds:
Millennium Falcon: 18% Complete
Shelby GT-500: 28% Complete
Thunderbird 2: 13.75% Complete
|
|
|
 Rank: Amateur Level 1  Groups: Registered
Joined: 13/10/2015 Posts: 28 Points: 76 Location: Las Vegas
|
Based on the size of the dish, someone really familiar with the MR could easily calculate the scale height of the side areas, you could make little plastic tabs and start mocking up the top half directly above the bottom.
|
|
|
 Rank: Pro  Groups: Registered
Joined: 30/04/2015 Posts: 263 Points: 795 Location: Los Angeles
|
Metal Mech wrote:I think I may have already figured that out. If you look at your lower frame there are tabs on the outter edge that have threaded holes. My guess is that there will be side frames that we screw to the top and bottom frame to hold them together Hmm. That's true. That may be it.
|
|
|
 Rank: Pro  Groups: Registered
Joined: 30/04/2015 Posts: 263 Points: 795 Location: Los Angeles
|
|
|
|
 Rank: Pro   Groups: Registered
Joined: 16/04/2011 Posts: 328 Points: 998 Location: Anglesey
|
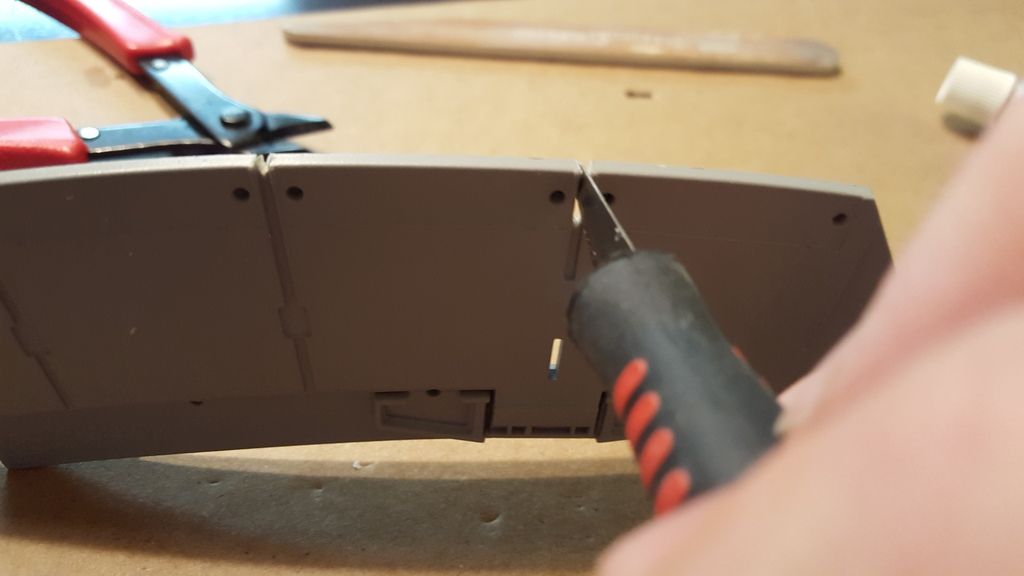
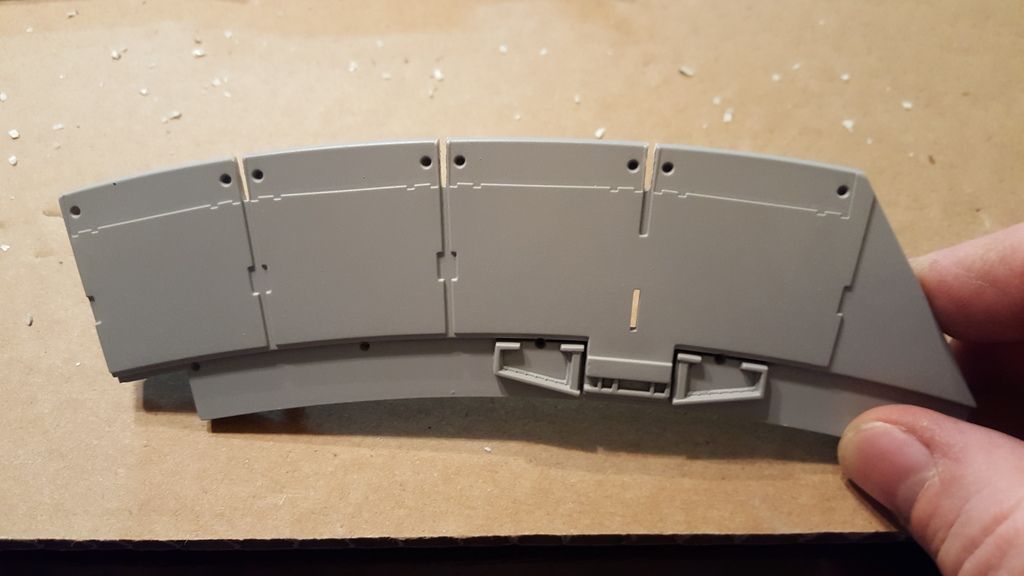
colson wrote:I then decided to cut between the vector plates to make it appear more realistic and functional. Obviously, in order for the actuators to move the plates, they'd have to be independent of each other.   I do really like that modification. Might have to use that  Darren
Have an AWSOME day and may the Force be with you always 😉 Building: Millennium Falcon https://forum.model-spac...sts&t=14381&p=7 - Building: BTTF Delorean - Building: Dom's Dodge Charger - Building : X-Wing https://forum.model-spac...aspx?g=posts&t=34899
|
|
|
 Rank: Master      Groups: Registered
Joined: 07/07/2015 Posts: 1,292 Points: 3,928 Location: Allentown PA
|
Planning on coping that mod as well. Its a nice simple mod that makes a world of difference.
DeAgostini kit builds:
Millennium Falcon: 18% Complete
Shelby GT-500: 28% Complete
Thunderbird 2: 13.75% Complete
|
|
|
 Rank: Amateur Level 1  Groups: Registered
Joined: 09/01/2016 Posts: 31 Points: 93 Location: UK
|
Nice mod on the Vector Plates, added to my build notebook for mods to add , or should I say cutaway :) On the WorkBench : DeAg Millennium Falcon , Deag R2-D2
To Build : various 1/72 , 1/32 WW II Military Planes
|
|
|
 Rank: Pro  Groups: Registered
Joined: 30/04/2015 Posts: 263 Points: 795 Location: Los Angeles
|
|
|
|
 Rank: Master      Groups: Registered
Joined: 07/07/2015 Posts: 1,292 Points: 3,928 Location: Allentown PA
|
Are you using EL tape or LEDs under the floor panels? If so do you have photos of how you have them mounted. Totally debating on the whole LED vs EL tape thing. Also, did you go with the photo etch floors or the shapeways floors? I would guess shapeways because you have the screws in the bottom. Your interior looks so amazing. Personally not gonna do that much detail because I just don't have the patience for it.
DeAgostini kit builds:
Millennium Falcon: 18% Complete
Shelby GT-500: 28% Complete
Thunderbird 2: 13.75% Complete
|
|
|
 Rank: Pro  Groups: Registered
Joined: 30/04/2015 Posts: 263 Points: 795 Location: Los Angeles
|
I'm using the photo etch floors from Paragrafix. The screws on the bottom are attaching the DeAgostini floors. The photo etch just glues on top. I also went with LED tape under the floors. You can see photos of how I did the LEDs on my post # 186 on page 10.
|
|
|
 Rank: Pro     Groups: Registered
Joined: 11/11/2015 Posts: 278 Points: 807 Location: Minneapolis, Minnesota USA
|
Did you use the warm colored leds? I bought the cool light they seemed to give off a brighter light then the warm ones. Ron Best Regards,
Ron
On the bench: DeAgostini '67 Ford Shelby Mustang, Hachette Space Battleship Yamato 2202, Agora Models T-800 Terminator
Finished builds: DeAgostini Toyota 2000GT
In the Stash: Losing count...
|
|
|
 Rank: Beginner Level 1 Groups: Registered
Joined: 12/11/2015 Posts: 7 Points: 21
|
Your interior looks really great! I just started my build and I was thinking of using a bunch of Shapeways pieces, but I may rethink that and go with the photo etched parts. Tough decision.
Thanks for sharing your build. You have some mad modeling skills! How long have you been making models?
|
|
|
 Rank: Pro  Groups: Registered
Joined: 30/04/2015 Posts: 263 Points: 795 Location: Los Angeles
|
Nytetrain wrote:Did you use the warm colored leds? I bought the cool light they seemed to give off a brighter light then the warm ones.
Ron Yes, I used warm white LEDs. I was debating between the 2. I use cool white in some areas. paintgregg wrote:You have some mad modeling skills! How long have you been making models? I've done models my whole life, but this is the first model I've done in about 18 years. After getting married and having kids, all of that was kinda put to the side. Now my boys are teenagers and it's a lot easier. When I saw this kit coming out, I had to get it. Even if it were the last kit I ever did, it would be well worth it and the kit of a lifetime in my opinion.
|
|
|
Rank: Administration         Groups: Registered, Administrators, Global Forum Support, Moderator, Forum Support Team, Official Builds Joined: 04/01/2016 Posts: 7,062 Points: 21,493 Location: Northamptonshire, England
|
Wow, that interior looks amazing. Thought I was looking at the real thing. Well done Regards
Markwarren
(Mark) Admin
|
|
|
 Rank: Amateur Level 1  Groups: Registered
Joined: 20/07/2015 Posts: 35 Points: 108 Location: Marietta, GA, USA
|
This seems to definitively show there will be landing lights ... myawn attached the following image(s):
|
|
|
 Rank: Beginner Level 1 Groups: Registered
Joined: 12/11/2015 Posts: 7 Points: 21
|
That's great! I'm glad to see that the landing lights are on the Falcon. Did this diagram come in the current issue?
|
|
|
|
Guest (3)
|