|
|
 Rank: Pro   Groups: Registered
Joined: 03/06/2016 Posts: 101 Points: 279 Location: New Hope, MN
|
Seven boxes arrived today, haven’t opened them yet. But I’m sure it is my D51 kit that I ordered a couple weeks ago. Will open them up tomorrow and this time I am going to do an inventory and make sure every stage is there. Bad experience with my Hummer build, two stages missing when it became time to install them.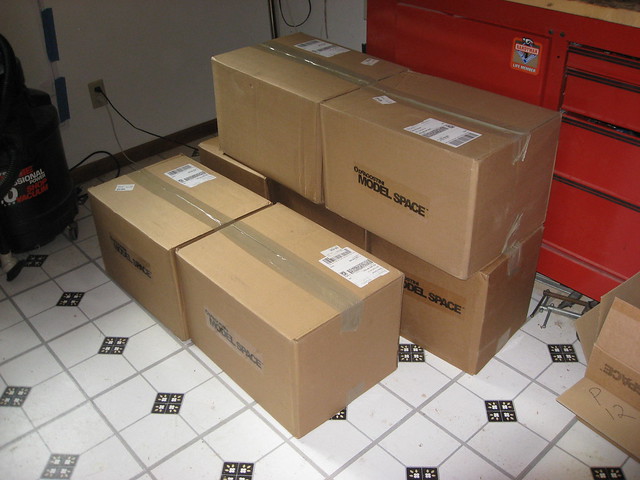 Seven Boxes Arrived today Seven Boxes Arrived today
|
|
|
 Rank: Pro   Groups: Registered
Joined: 03/06/2016 Posts: 101 Points: 279 Location: New Hope, MN
|
I have been reading all of the Members D51 diaries and am most impressed with ARPurchases Build, especially focusing in on the painting. I have been torn between building the D51 shiny or painting it like he did. So I dived in and ordered some Railmatch #2412 Paint from Gaugemaster in England. Don't know how long it will take to get here but I will have it when the time comes I'm sure. I also ordered some Vallejo Grey Primer and some Simple Green from Amazon. And I also ordered a supply of Alclad ALC-115 Stainless Steel Lacquer from Horizon Hobby. Hate to be a copy cat but if I can make mine turn out anything like ARPurchases buildI will be extremely happy.
|
|
|
 Rank: Pro     Groups: Registered
Joined: 11/11/2015 Posts: 278 Points: 807 Location: Minneapolis, Minnesota USA
|
Copying people is the best form of flattery. I think its cool how we get the same kits and how different the builds can turn out. I am sure you will put your own personal touches on it as the build progresses. Good luck with your build. I wanted this train myself but... working on the Falcon, Toyota 2000 and I just ordered the Mustang plus my side builds so I have filled my alloted free time for the summer. Ron Best Regards,
Ron
On the bench: DeAgostini '67 Ford Shelby Mustang, Hachette Space Battleship Yamato 2202, Agora Models T-800 Terminator
Finished builds: DeAgostini Toyota 2000GT
In the Stash: Losing count...
|
|
|
 Rank: Super-Elite       Groups: Registered
Joined: 27/01/2014 Posts: 5,060 Points: 14,980
|
Going enjoy watching you build this when you get started
|
|
|
|
|
Now that is a lot of boxes!
|
|
|
 Rank: Pro   Groups: Registered
Joined: 11/03/2010 Posts: 234 Points: 734 Location: Whelpley Hill, Chesham
|
I'm sure you will enjoy building the D51 I know I did. If you decide to paint, consider painting as you go and not waiting until the end, it worked well for me but be careful of scratching as you assemble. Good luck! and enjoy. Alec Built: Bluenose, Arab Dhow, HMS Bounty, Hummer H1, D51, Spitfire,E type Jaguar.
In Progress: HMS Victory, , Yamaha YZR-M1
Adapt, improvise, overcome.
|
|
|
|
|
Hi Sid You will just love this kit and thanks for saying my build was an inspiration for you. Im sure you will a far better job than I did and look forward to your diary. One tip for the railmatch paint is to make sure its mixed well and thin to around 40 % thinner to 60 % paint for your airbrush. Have fun with your build. Andy Current builds:-C57,Zero, Lamborghini Countach, Caldercraft HMS Agamemnon,Robi,R2-D2, MFH Cobra .
|
|
|
 Rank: Pro   Groups: Registered
Joined: 03/06/2016 Posts: 101 Points: 279 Location: New Hope, MN
|
Thanks Andy. I built Stage 1 today and it went well. Thanks for your airbrush tip. I have never used an airbrush so will have to practice a bit before I dig in and actually do it for keeps.
|
|
|
 Rank: Pro   Groups: Registered
Joined: 03/06/2016 Posts: 101 Points: 279 Location: New Hope, MN
|
Started D51 Build today. Wish me luck. Number Plate and wires stored away for future use. Glued the Boiler Ring and Smokebox Front Plate together with 15 min epoxy. Mixed way too much epoxy, little goes a long way. Glued the hinges to the Front Plate and Smoke Box door.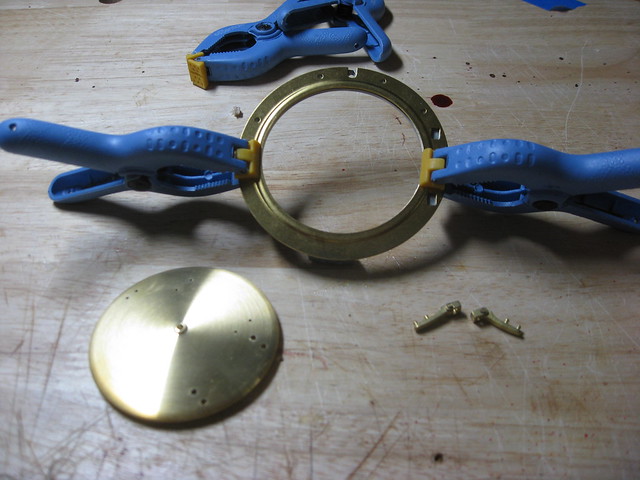 Boiler Ring and Smokebox Front Plate Boiler Ring and Smokebox Front Plate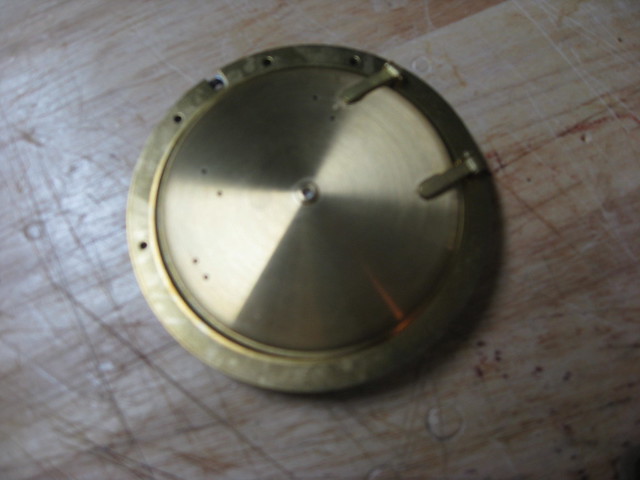 Smoke Box Door w/Hinges installed Smoke Box Door w/Hinges installed
|
|
|
|
|
Nice start Sid, am sure you'll love this one.... Will be following...
Regards
Alan
|
|
|
 Rank: Super-Elite      Groups: Registered
Joined: 17/12/2013 Posts: 3,982 Points: 11,974 Location: NY, USA
|
This is a great kit to build.Lots of stuff to do each month and a very impressive display piece once finished.
Carl
|
|
|
 Rank: Pro     Groups: Registered
Joined: 11/11/2015 Posts: 278 Points: 807 Location: Minneapolis, Minnesota USA
|
Great start on your build. I hope you enjoy it as much as I have enjoyed my own builds from Deagostini. Good quality stuff from this company. Look forward to watching your progress. Ron Best Regards,
Ron
On the bench: DeAgostini '67 Ford Shelby Mustang, Hachette Space Battleship Yamato 2202, Agora Models T-800 Terminator
Finished builds: DeAgostini Toyota 2000GT
In the Stash: Losing count...
|
|
|
 Rank: Super-Elite       Groups: Registered
Joined: 19/06/2013 Posts: 4,588 Points: 13,553 Location: West Yorkshire
|
Good luck with the build Sid i'm sure you will enjoy it.
Al
|
|
|
 Rank: Pro   Groups: Registered
Joined: 03/06/2016 Posts: 101 Points: 279 Location: New Hope, MN
|
July 16 Update. Installed the Smoke House Door. Chimney and Feedwater system installed. Deburred the coupling rods for the first set of Driving Wheels. Waiting on paint (Alsteel ALC 115 and Base)from Horizon Hobby. Spark Arrestor and Blast pipe installed in Smokehouse. Not exactly straight but Chimney was already glued so have to live with that. Unless someone is nosy and opens the door, no one will ever know it except me. Prepared the front deck with Maintenance Hatch and Lamp hooks. Installed the Release lever, front end beam and guard irons. Installed Inspection lids and steps to front deck and air hose to front end beam Attached front under frame to the main under frame. Installed smokebox support stand and lower support stand and front and rear cylinder plates to under frame. Lastly after dropping a tiny 3/16 bushing and spending all of three hours looking for it, a major change to my workspace. I now have a white padded blanket under my chair and workbench so hopefully if I drop another small part it will at least stay in the vicinity. (That last was the suggestion of my lovely wife who helped me find the tiny bushing.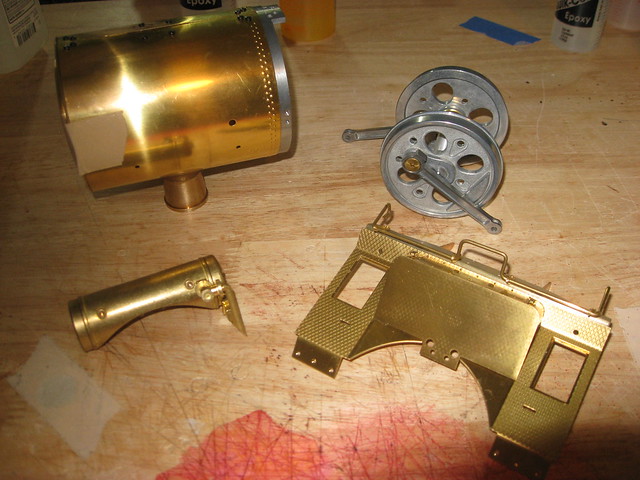 Parts Stages 2 through 9 Parts Stages 2 through 9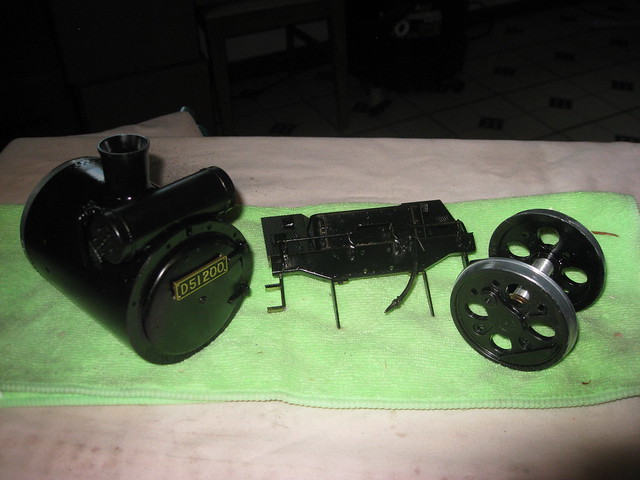 Painted Parts Painted Parts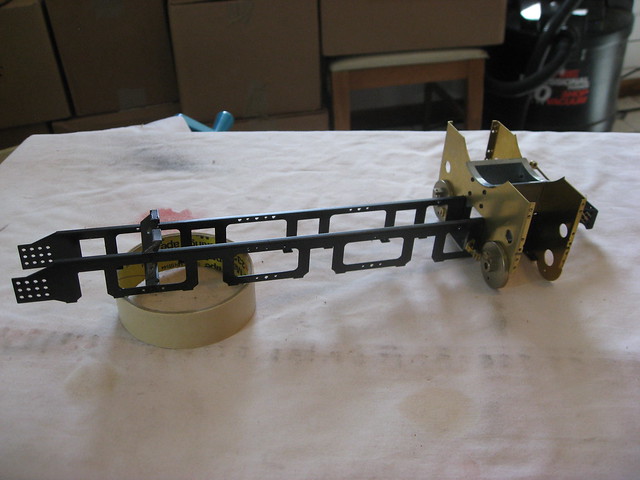 Under Frame w/Front and Rear Cylinder Plates Under Frame w/Front and Rear Cylinder Plates
|
|
|
 Rank: Super-Elite       Groups: Registered
Joined: 19/06/2013 Posts: 4,588 Points: 13,553 Location: West Yorkshire
|
Great start Sid, nice paintwork.
Al
|
|
|
 Rank: Pro   Groups: Registered
Joined: 11/03/2010 Posts: 234 Points: 734 Location: Whelpley Hill, Chesham
|
Looking very good Sid, good idea from your wife, have fun when you get to the rivets! Alec Built: Bluenose, Arab Dhow, HMS Bounty, Hummer H1, D51, Spitfire,E type Jaguar.
In Progress: HMS Victory, , Yamaha YZR-M1
Adapt, improvise, overcome.
|
|
|
|
|
Very nice progress Sid, keep those pics coming...
Regards
Alan
|
|
|
 Rank: Pro   Groups: Registered
Joined: 03/06/2016 Posts: 101 Points: 279 Location: New Hope, MN
|
Completed Stages 14 thru 16, which involved Steam Chest Covers, Safety valves and Valve Tail Guides. Installed both Cylinder Side Plates with 28 tiny tiny screws. Hard to believe but none dropped, guess the white blanket was good insurance.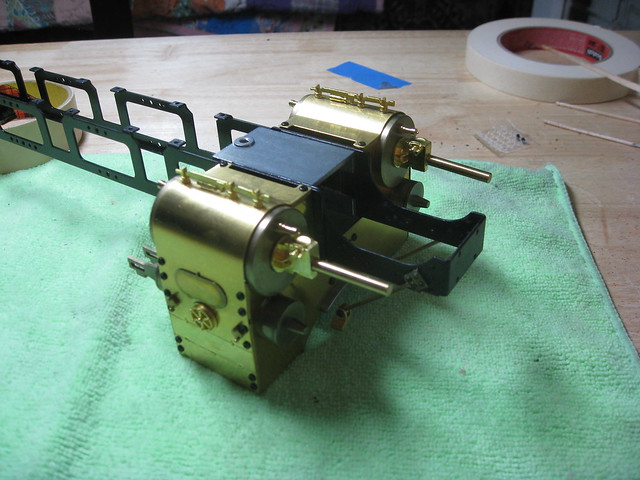 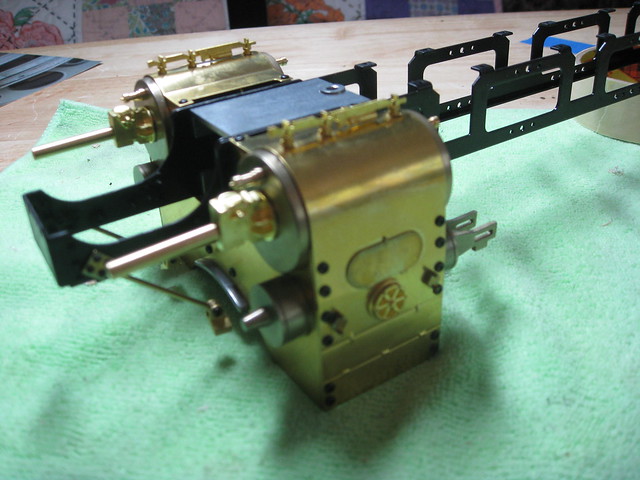 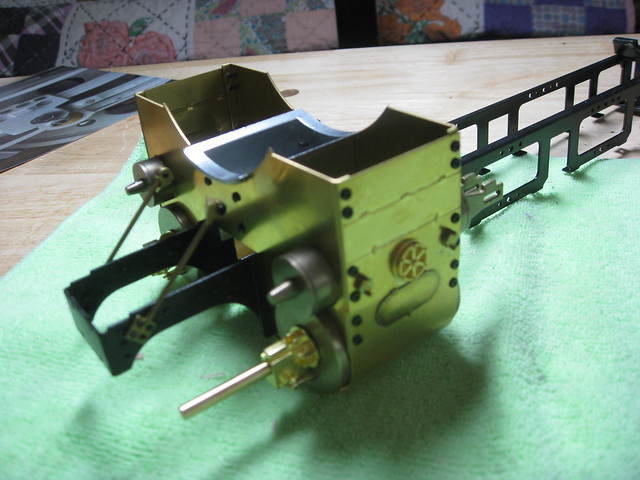 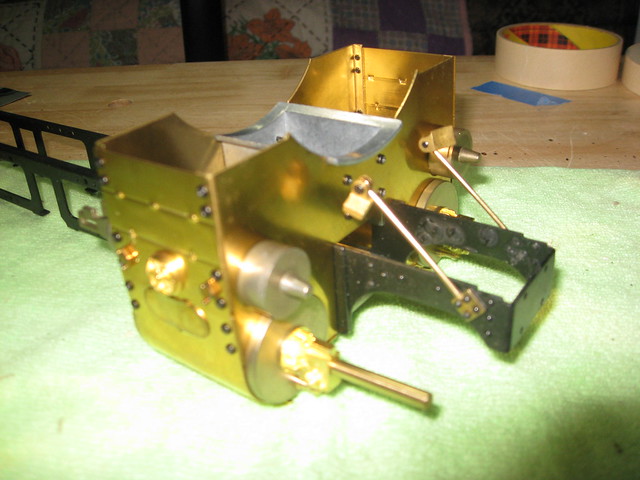
|
|
|
 Rank: Super-Elite        Groups: Registered, Forum Support Team, Administrators, Global Forum Support Team, Moderator, Official Builds Joined: 09/11/2012 Posts: 8,520 Points: 24,651 Location: East midlands
|
Looking very tidy. Well done so far and waiting next update. Regards delboy271155 (Derek) COME BACK GUY FAWKES "YOUR COUNTRY NEEDS YOU"
|
|
|
 Rank: Pro   Groups: Registered
Joined: 03/06/2016 Posts: 101 Points: 279 Location: New Hope, MN
|
Installed 38 tiny tiny rivets to Rear Underframe and attached Rear Underframe to UnderCarriage. Only lost one rivet, even with the white blanket on the floor. Lucky for Me DeAgostini always include one or two spares. Attached Expansion support, rear support and rear plates to rear under frame.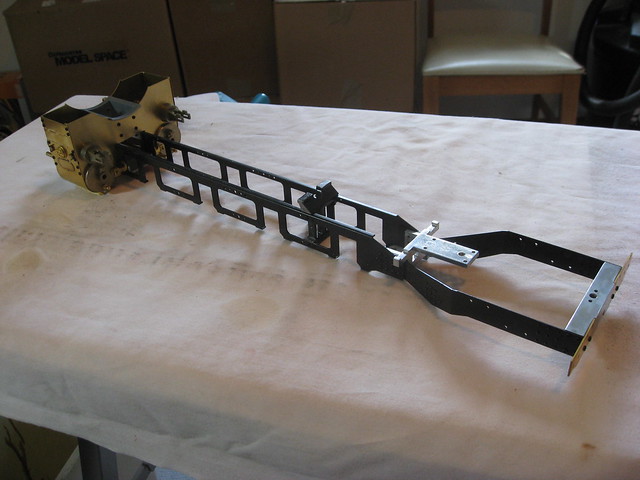 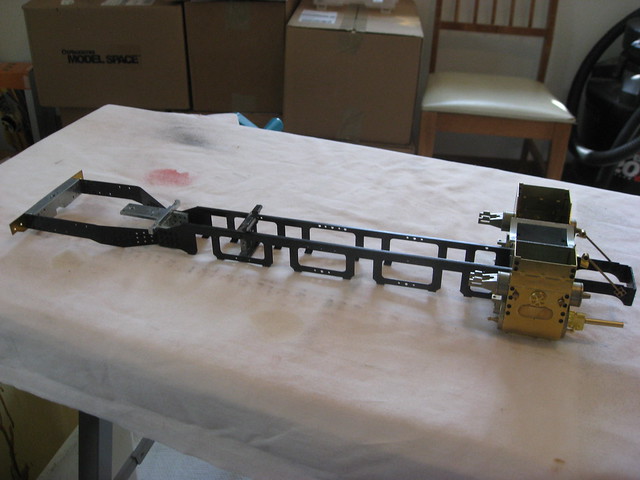
|
|
|
|
Guest
|