|
|
 Rank: Pro    Groups: Registered
Joined: 03/02/2015 Posts: 457 Points: 1,389 Location: Crawley, W.Sx, UK
|
Hello all Looking at the attached image it can be seen there is a distance of 4mm from the rear of the aileron to the wing? Do the ailerons not follow the profile of the wing? In the photo you will see a gap between the rear of the wing and front of the aileron this is because I took the photo without first pushing the aileron fully home. There still remains this distance of 4mm? Any suggestions welcome. Thank you Alan ALW attached the following image(s):
|
|
|
 Rank: Elite    Groups: Registered
Joined: 13/02/2011 Posts: 2,243 Points: 6,849 Location: Sussex
|
Hi Alan, On my model I have built the Ailerons more or less to the wing tip, I can remember adjusting the size and shape to a better fit, as all builds are different.It look's like you will need to remove the metal plate and shape the Aileron to fit. This is a picture of my Starboard wing with Aileron. 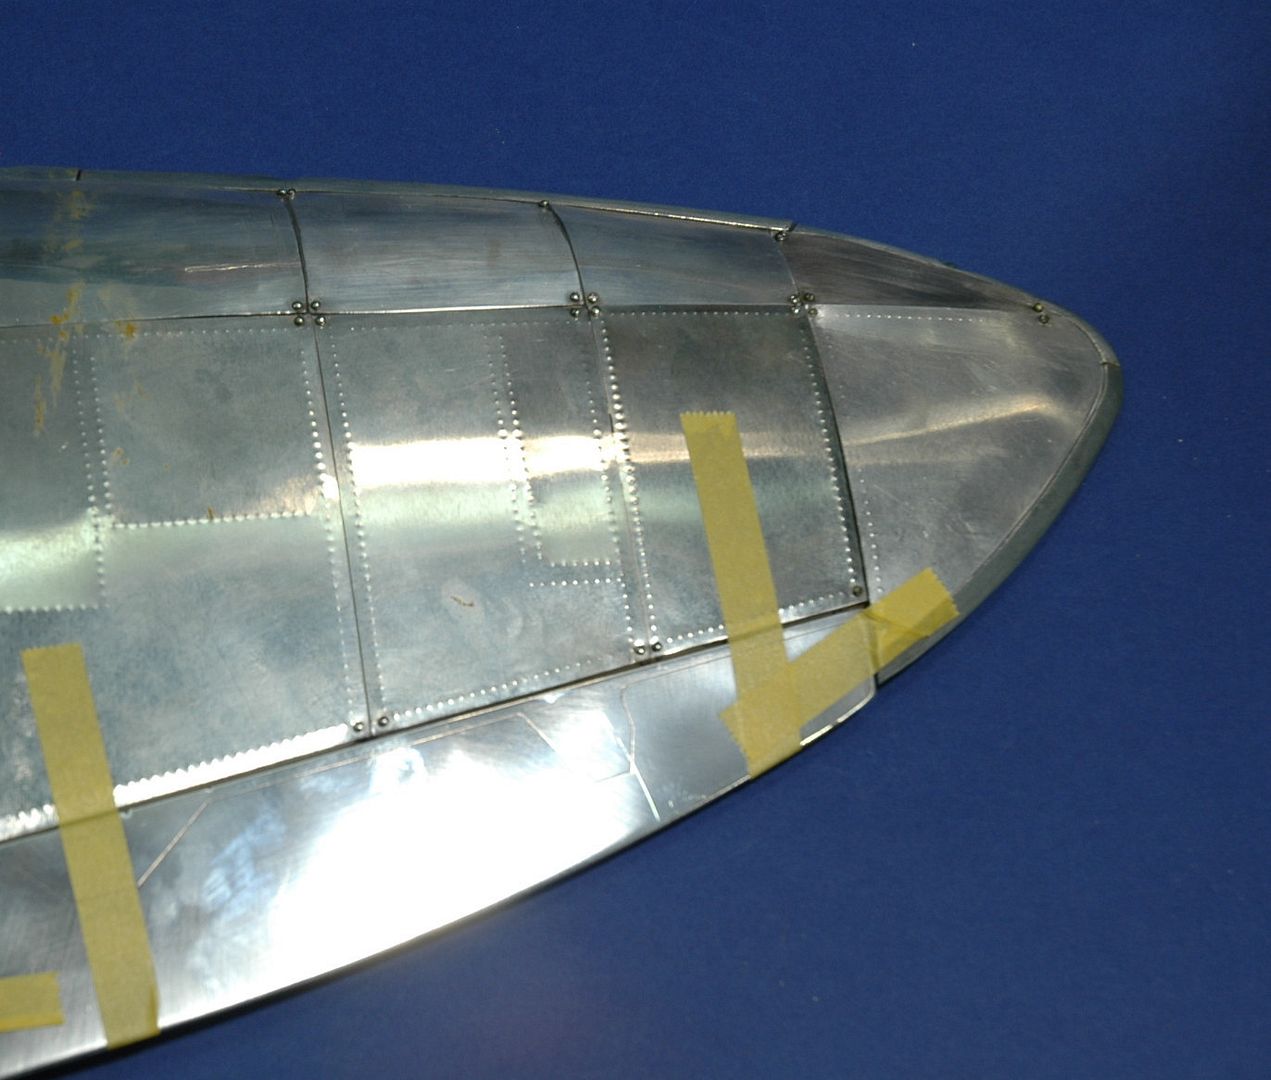 Regards Trev. Work in progress: Tombstone (Scratch) - San Francisco 2. -The Mayflower ( scratch by plan).
OcCre- Santa-Maria (Kit).
|
|
|
Rank: Pro Groups: Joined: 24/08/2009 Posts: 48,827 Points: -13,348
|
The aileron frames were test fitted at Stage 50 prior to plates being added and test fitted again at Stage 86 after adding the aileron plates.
Your 4mm problem appears to have come about because of the aileron spar in the wing not being correctly set or that the aileron frames were not adjusted prior to plate fitting, which in effect has forced the aileron out at its narrow end. Does the wide end fit ok?
The best route forward seems to be as trev has mentioned. Remove both plates from the aileron/s, put the aileron frame into the wing, then sand the tails of the ribs at the narrow end of the aileron to meet the wing tip, then taper sand taper the rib tail ends of the aileron ribs sanded to give them the same taper slope as before. Then refit the aileron plates onto the ailleron then sand/file the trailing edge of the plates to meet the new profile shape of the aileron at the narrow end when fitted in the wing, constantly checking for shape/size as you go along. It would be a lot easier to get hold of two new sets of aileron parts and skins, as depending on what type of glue you have secured the plates with, you may find the plates are not reusable once removed or that the aileron frames break up.
Be aware that if you opt instead to sand taper the leading edge of the aileron from the narrow end, the removal of 4mm of material is way too much for the aileron to cope with. The thickness of the aileron leading edge spar is only 2.5mm, you will end up with half the aileron leading edge spar vanished into dust.
|
|
|
Rank: Pro Groups: Registered
Joined: 03/02/2015 Posts: 457 Points: 1,389 Location: Crawley, W.Sx, UK
|
Good morning to you both
Thank you for the advice. I was contemplating cutting the plates to fit
which I don't think will be a problem. I'm a dab hand at cutting these plates now!!
Thanks again.
Regards.
Alan.
|
|
|
Rank: Pro Groups: Registered
Joined: 03/02/2015 Posts: 457 Points: 1,389 Location: Crawley, W.Sx, UK
|
An update
Thanks again for the suggestions,I have now rectified the problem with a small amount
of trimming and filing and it looks acceptable.
Thank you for your continued support.
Regards.
Alan
|
|
|
|
Guest (2)
|
 US
US

