Welcome Guest Search | Active Topics | Log In | Register

5 Pages «<345
The Royal Sun build diary by Jase Options
jase
#81 Posted : 06 September 2016 23:46:51

Rank: Super-Elite

Publisher Medal: Featured Build of the MonthActive Service Medal: 500 post active service MedalPurple Medal: Super active service medal for 1000 postsTurquoise Medal: Turquoise Medal for model making know-how contributionOutstanding Build: An award for an outstanding buildBuild-Diary Medal: Build-Diary Medal of HonourRed Medal: Red Medal
Groups: Registered

Joined: 21/03/2010
Posts: 7,582
Points: 21,739
Another update,

I am still working through the last of the deck planking, but to break up the monotony i am jumping around a bit doing other bits and pieces now i have my latest delivery.

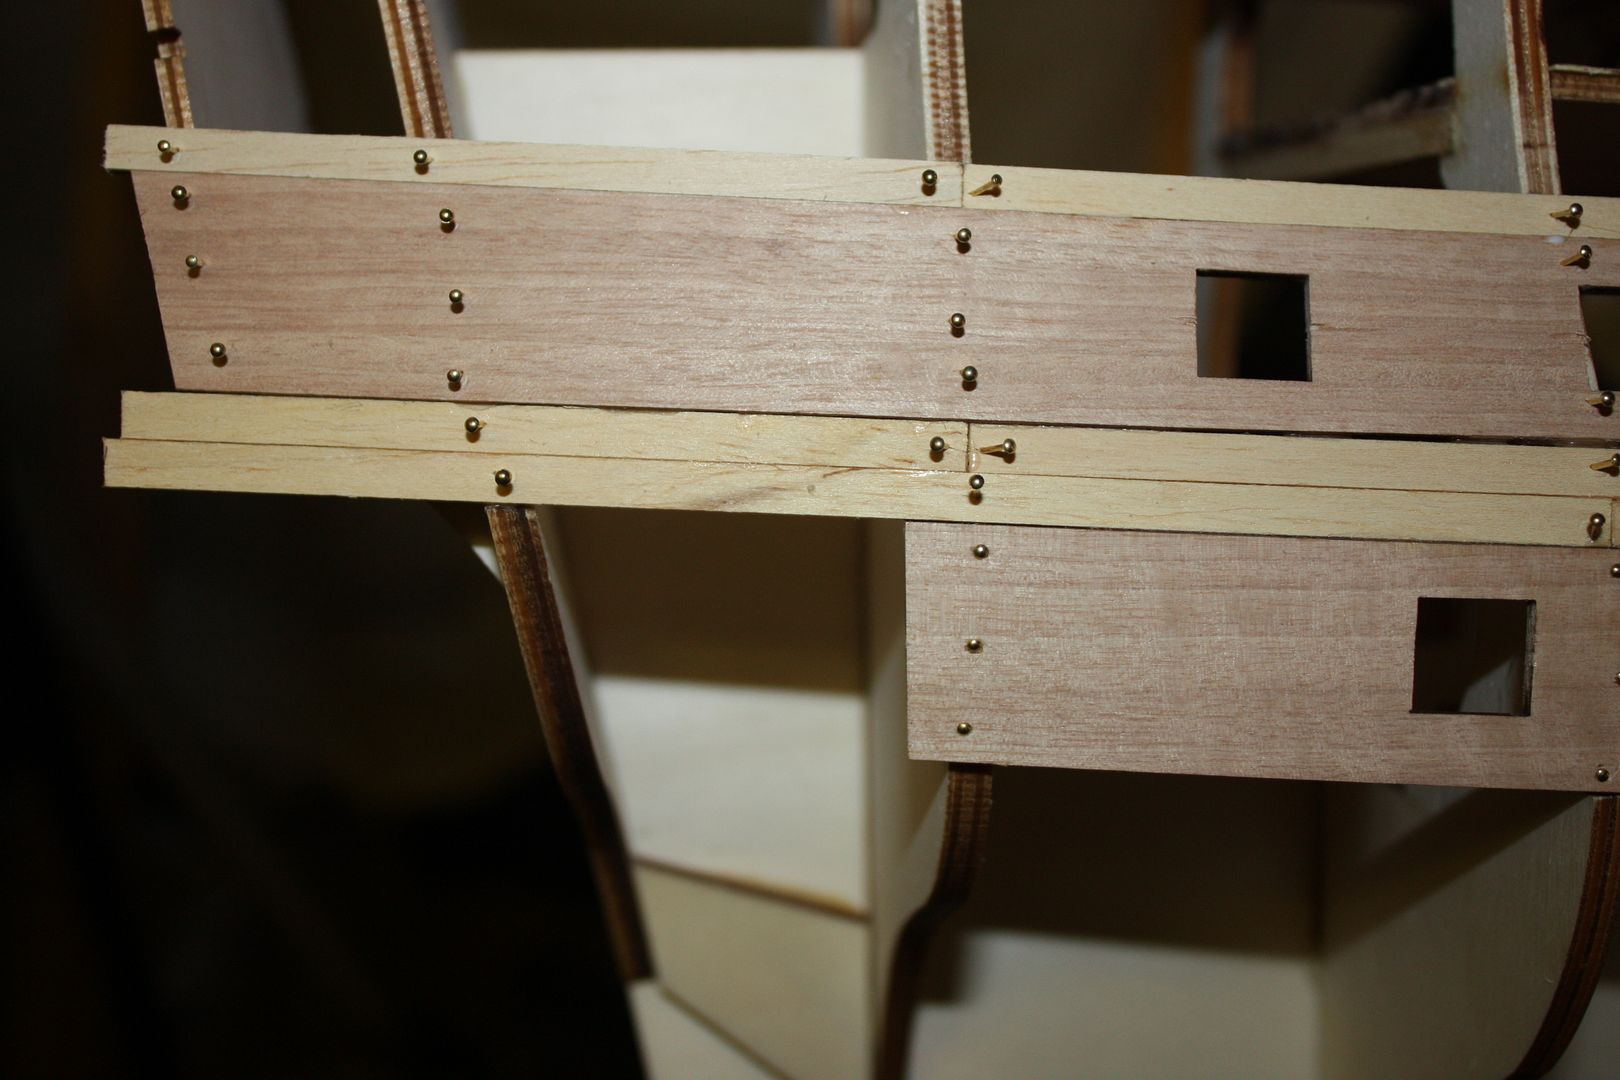
some pointers from me, be careful with frame 12 it is easy to get it back to front which will effect the snug fit of your first row of planking strips. If like me you are painting the inner bulkhead lining planks painting the transom before fitting is the best approach.

otherwise the kit instructions are very good.


" alt=""/>http://i1160.photobucket.com/albums/q488/jasonport70/Royal%20Sun/IMG_1653_zpswftsnezq.jpg" alt=""/>
“Whenever you find yourself on the side of the majority, it is time to pause and reflect.”
-Mark Twain
Martyn Ingram
#82 Posted : 07 September 2016 06:56:39

Rank: Super-Elite

Publisher Medal: Featured Build of the MonthActive Service Medal: 500 post active service MedalPurple Medal: Super active service medal for 1000 postsTurquoise Medal: Turquoise Medal for model making know-how contributionOutstanding Build: An award for an outstanding buildBuild-Diary Medal: Build-Diary Medal of HonourRed Medal: Red Medal
Groups: Registered

Joined: 17/02/2013
Posts: 3,256
Points: 9,844
Location: Kent
Looking good Jase and I love the blue (:-)

Rgd Martyn
Building ?
Completed. Soliei Royal . Sovereign of the Seas . Virginia . Scotland . San Felipe . Corel vasa , Santisima Trinadad X section , Vasa
Next Build ?
When sailors have good wine, They think themselves in heaven for the time. John Baltharpe
greyhawk
#83 Posted : 07 September 2016 09:16:42

Rank: Master

Active Service Medal: 500 post active service MedalPurple Medal: Super active service medal for 1000 postsBuild-Diary Medal: Build-Diary Medal of HonourRed Medal: Red Medal
Groups: Registered

Joined: 19/05/2015
Posts: 1,419
Points: 4,272
Location: Darmstadt, Germany
RobT
#84 Posted : 07 September 2016 11:21:32

Rank: Pro
Build-Diary Medal: Build-Diary Medal of Honour
Groups: Registered

Joined: 30/08/2012
Posts: 336
Points: 857
Location: London
greyhawk wrote:
Nice progress. That's a very nice blue. Is that Royal Blue?


Looks like Caldercraft French Blue to me mate.

Nice build Jase, really tidy.
jase
#85 Posted : 07 September 2016 19:26:10

Rank: Super-Elite

Publisher Medal: Featured Build of the MonthActive Service Medal: 500 post active service MedalPurple Medal: Super active service medal for 1000 postsTurquoise Medal: Turquoise Medal for model making know-how contributionOutstanding Build: An award for an outstanding buildBuild-Diary Medal: Build-Diary Medal of HonourRed Medal: Red Medal
Groups: Registered

Joined: 21/03/2010
Posts: 7,582
Points: 21,739
It is Admiralty French Blue
“Whenever you find yourself on the side of the majority, it is time to pause and reflect.”
-Mark Twain
RobT
#86 Posted : 08 September 2016 09:38:23

Rank: Pro
Build-Diary Medal: Build-Diary Medal of Honour
Groups: Registered

Joined: 30/08/2012
Posts: 336
Points: 857
Location: London
jase wrote:
It is Admiralty French Blue


Yes, it's the same. Admiralty paints are made by Caldercraft.

You can get them at shipwrightshop.com.
magpie1832
#87 Posted : 08 September 2016 13:10:29

Rank: Super-Elite

Publisher Medal: Featured Build of the MonthActive Service Medal: 500 post active service MedalPurple Medal: Super active service medal for 1000 postsTurquoise Medal: Turquoise Medal for model making know-how contributionBuild-Diary Medal: Build-Diary Medal of HonourRed Medal: Red Medal
Groups:

Joined: 11/11/2009
Posts: 3,432
Points: 10,280
Jase wrote:
some pointers from me, be careful with frame 12 it is easy to get it back to front which will effect the snug fit of your first row of planking strips. If like me you are painting the inner bulkhead lining planks painting the transom before fitting is the best approach.


Hi Jase, how is one side of 12 different to the other. Mine fitted either way with no problems.
Chris
On the bench

1/350 Revell Tirpitz Platinum Edition (Pontos PE and Wooden deck) plus extra Eduard PE set and extra MK1 door sets.


jase
#88 Posted : 18 September 2016 09:37:56

Rank: Super-Elite

Publisher Medal: Featured Build of the MonthActive Service Medal: 500 post active service MedalPurple Medal: Super active service medal for 1000 postsTurquoise Medal: Turquoise Medal for model making know-how contributionOutstanding Build: An award for an outstanding buildBuild-Diary Medal: Build-Diary Medal of HonourRed Medal: Red Medal
Groups: Registered

Joined: 21/03/2010
Posts: 7,582
Points: 21,739
magpie1832 wrote:
Jase wrote:
some pointers from me, be careful with frame 12 it is easy to get it back to front which will effect the snug fit of your first row of planking strips. If like me you are painting the inner bulkhead lining planks painting the transom before fitting is the best approach.


Hi Jase, how is one side of 12 different to the other. Mine fitted either way with no problems.
Chris


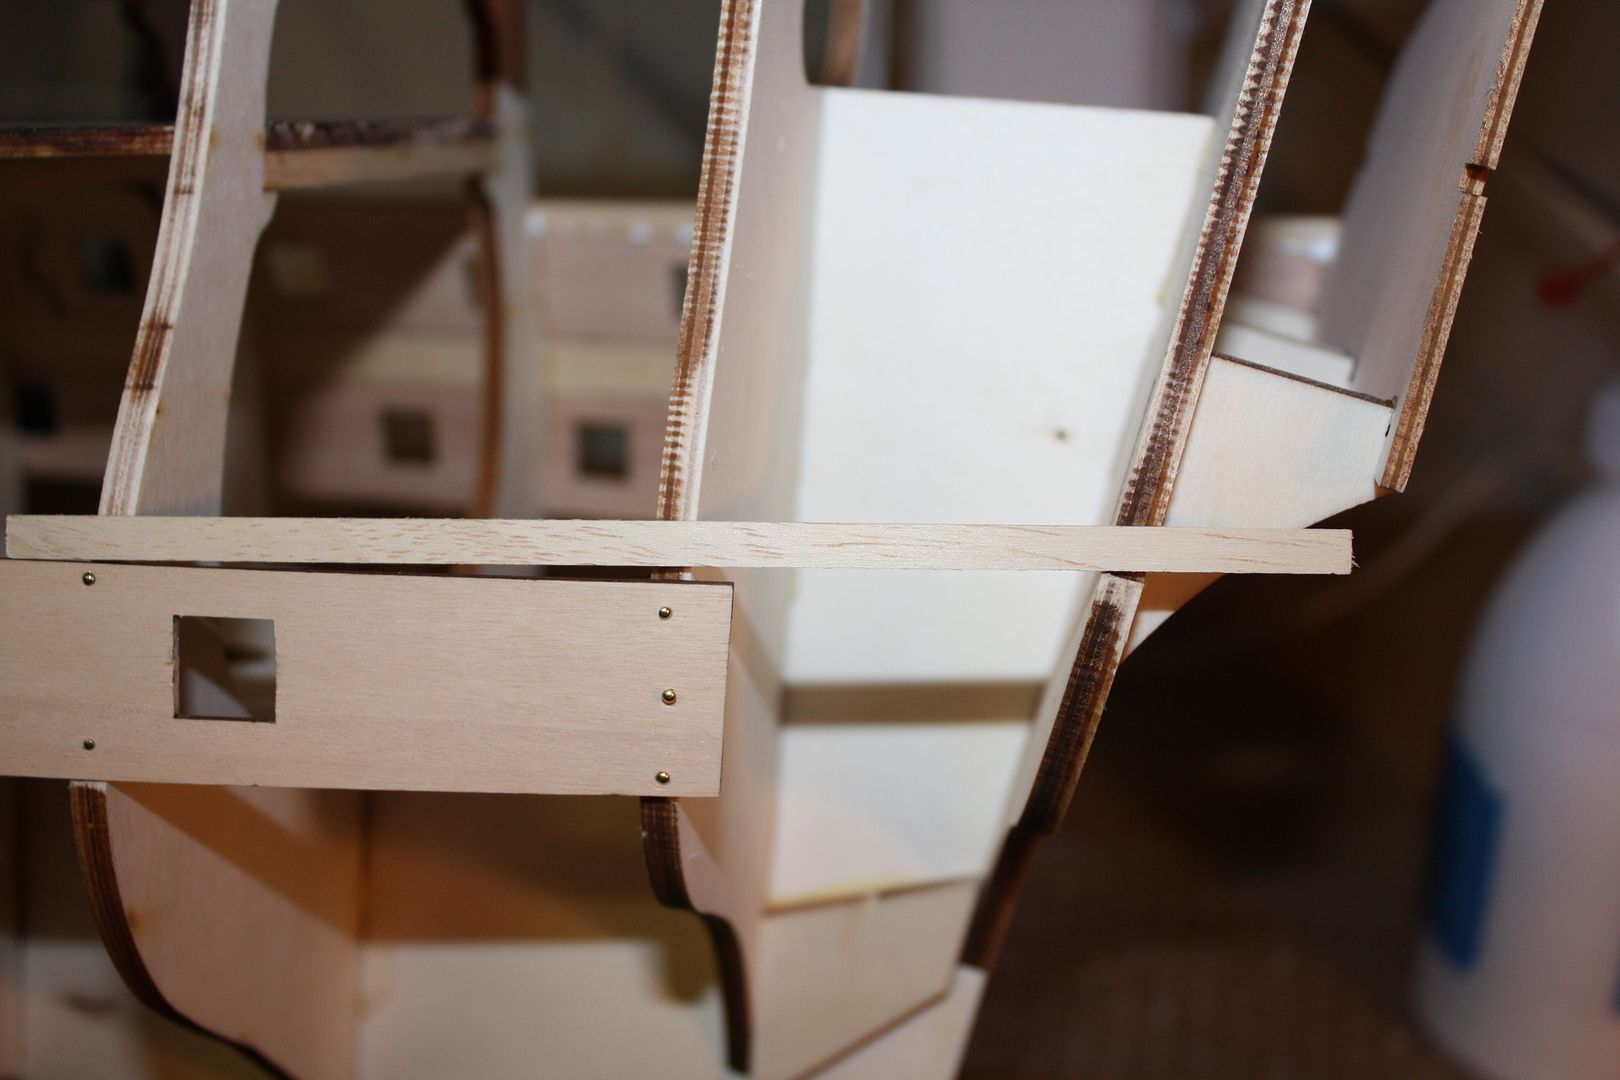
Hi Chris, the difference is the step that the first plank sits on, it is angled to allow the plank to sit correctly. if you fit rib 12 back to front you will have to modify the step to get the plank to sit correctly.

Jase
“Whenever you find yourself on the side of the majority, it is time to pause and reflect.”
-Mark Twain
jase
#89 Posted : 18 September 2016 09:57:07

Rank: Super-Elite

Publisher Medal: Featured Build of the MonthActive Service Medal: 500 post active service MedalPurple Medal: Super active service medal for 1000 postsTurquoise Medal: Turquoise Medal for model making know-how contributionOutstanding Build: An award for an outstanding buildBuild-Diary Medal: Build-Diary Medal of HonourRed Medal: Red Medal
Groups: Registered

Joined: 21/03/2010
Posts: 7,582
Points: 21,739
Next update,

The planking has been completed. It has been stained with Ronseal Dark Oak and then given a coat of umbrol matt varnish.

The first two grill pieces have been complete as per the instructions. I have continued to instal the gun port strips too. getting close to the end of this pack.


I have fond my Proxxon mini belt sander invaluable during this build so far, cannot recommend this tool enough.


Jase
“Whenever you find yourself on the side of the majority, it is time to pause and reflect.”
-Mark Twain
tigerace
#90 Posted : 18 September 2016 09:59:56

Rank: Super-Elite

Publisher Medal: Featured Build of the MonthActive Service Medal: 500 post active service MedalPurple Medal: Super active service medal for 1000 postsBuild-Diary Medal: Build-Diary Medal of HonourRed Medal: Red Medal
Groups: Registered

Joined: 28/07/2014
Posts: 4,269
Points: 12,713
Location: Scotland
Great work Jase like the contrast between the blue and the natural wood Cool Phil
COMING SOON =1/72 Italeri diorama`s Battle for the Reichstag and Stalingrad battle at the tractor factory 1/16 Trumpeter King Tiger with loads of extras ON THE GO= refurbishment of 1/25 Tamiya tiger 1 , amt Star trek kits and space 1999 models

So Much to Build,But What a Hobby!


magpie1832
#91 Posted : 24 September 2016 10:06:55

Rank: Super-Elite

Publisher Medal: Featured Build of the MonthActive Service Medal: 500 post active service MedalPurple Medal: Super active service medal for 1000 postsTurquoise Medal: Turquoise Medal for model making know-how contributionBuild-Diary Medal: Build-Diary Medal of HonourRed Medal: Red Medal
Groups:

Joined: 11/11/2009
Posts: 3,432
Points: 10,280
Morning

Firstly. The instructions don't say to sand at an angle on the top of frame 12 as the supports sit slightly higher to accommodate the high point. If you sand it to an angle you would therefore have to do the same to all the deck beams and lower the transom. If you didn't you would gain a dip in the deck where it is lower due to sanding. Also look at Jases build he hasn't sanded the top of frame 12 either.

The official build has had no problems with any fit. Therefore no sanding is necessary.


Secondly.
Jase says in reply
"Hi Chris, the difference is the step that the first plank sits on, it is angled to allow the plank to sit correctly. if you fit rib 12 back to front you will have to modify the step to get the plank to sit correctly"
He means the notch on the side of frame 12 where the first row of planks sit. As shown in my previous pic. It is not needed to be angled. But its builder choice if they wish to.

It would be nice for Jase to clarify this.
Chris

Jases build pics.
magpie1832 attached the following image(s):
IMG_1643_zpsfynptr4c.jpg
IMG_1660_zpsylgcdmea.jpg
On the bench

1/350 Revell Tirpitz Platinum Edition (Pontos PE and Wooden deck) plus extra Eduard PE set and extra MK1 door sets.


RobT
#92 Posted : 24 September 2016 12:20:45

Rank: Pro
Build-Diary Medal: Build-Diary Medal of Honour
Groups: Registered

Joined: 30/08/2012
Posts: 336
Points: 857
Location: London
Stage 19 step G clearly shows how the poop deck sits on frame 12 and it is exactly how Chris has it. I see no reason to sand anything. Even if there is a smaller contact area between deck and frame, it is not a piece under stress and there will still be a strong bond with PVA.
Tomick
#93 Posted : 25 September 2016 08:13:58

Rank: Pro

Groups:

Joined: 24/08/2009
Posts: 48,827
Points: -13,348
Frame #12 discussion moved here.. http://forum.model-space...spx?g=posts&t=21021
jase
#94 Posted : 26 September 2016 21:19:34

Rank: Super-Elite

Publisher Medal: Featured Build of the MonthActive Service Medal: 500 post active service MedalPurple Medal: Super active service medal for 1000 postsTurquoise Medal: Turquoise Medal for model making know-how contributionOutstanding Build: An award for an outstanding buildBuild-Diary Medal: Build-Diary Medal of HonourRed Medal: Red Medal
Groups: Registered

Joined: 21/03/2010
Posts: 7,582
Points: 21,739
what a kerfuffle!!!

this is what I mean, see pics below. i made a mistake thinking I had put mine on back to front but as correctly pointed out it will fit either way then you need to modify the rib.


I am up to date on my latest deliverys

Now i have some bad news i am afraid. I have picked up a job that will probably take me most of the next 12 months but will impact on this build. sorry all but will be back on it soon as i can and i will continue to contribute to this build thread

jase
“Whenever you find yourself on the side of the majority, it is time to pause and reflect.”
-Mark Twain
magpie1832
#95 Posted : 26 September 2016 21:24:15

Rank: Super-Elite

Publisher Medal: Featured Build of the MonthActive Service Medal: 500 post active service MedalPurple Medal: Super active service medal for 1000 postsTurquoise Medal: Turquoise Medal for model making know-how contributionBuild-Diary Medal: Build-Diary Medal of HonourRed Medal: Red Medal
Groups:

Joined: 11/11/2009
Posts: 3,432
Points: 10,280
Thanks for the clarification on this.
I thought you were going to finish this one as the GF wanted it done.Blushing
On the bench

1/350 Revell Tirpitz Platinum Edition (Pontos PE and Wooden deck) plus extra Eduard PE set and extra MK1 door sets.


Users browsing this topic
Guest (2)
5 Pages «<345
Forum Jump  
You cannot post new topics in this forum.
You cannot reply to topics in this forum.
You cannot delete your posts in this forum.
You cannot edit your posts in this forum.
You cannot create polls in this forum.
You cannot vote in polls in this forum.

Powered by YAF | YAF © 2003-2009, Yet Another Forum.NET
This page was generated in 0.445 seconds.
DeAgostini