Welcome Guest Search | Active Topics | Log In | Register

Bandai AT-ST 1/48 build Options
Dan Kramer
#1 Posted : 11 February 2016 02:47:51

Rank: Semi-Pro Level 1
Build-Diary Medal: Build-Diary Medal of Honour
Groups: Registered

Joined: 13/06/2015
Posts: 66
Points: 198
Location: South Dakota, USA
While parts continue to come inf for my Falcon, I have a stash of other kits to get my skills improved with.
One of them is the 1/48 Baidai AT-St, which is very close to scale with the Falcon. I also have the 1/48 Snowspeeder, TIE and X-Wing for later.

Last night I finished the painting of the interior. I plan to make this a Hoth campaign AT-ST, not an Endor one.
This way I can pair it with the Snowspeeder later.

Here is the Chewie that came with the kit-


What I'm doing is adding sound and lights to the walker, inspired by this guy.
I got the same blaster he did, but I didn't want to compromise on the interior. So, I gutted the section behind the back wall to house it.
Then I used styrene to make a framework that holds the electronics.


I replaced the stock batteries with a coin cell holder, and added a larger speaker under the floor.


The led on the blaster is routed behind the chin guns, and I'll route some fiber optic to light the guns.
I added some brass to the light box for light blocking.


I still need to solder a plug to the led so I can hook it up to the main board.

Here's the finished and weathered control cabin parts.


I'm still working on the exterior and legs. That will come a little later. I'm using this build as my start point for the colors and weathering.
birdaj2
#2 Posted : 11 February 2016 10:49:00

Rank: Super-Elite

Publisher Medal: Featured Build of the MonthActive Service Medal: 500 post active service MedalPurple Medal: Super active service medal for 1000 postsTurquoise Medal: Turquoise Medal for model making know-how contributionBuild-Diary Medal: Build-Diary Medal of HonourRed Medal: Red Medal
Groups: Registered

Joined: 31/05/2010
Posts: 5,679
Points: 17,011
Location: Wiltshire
Very nice model and interesting to see just how well that light package fitted considering its not intended for the model.

Very well done.
Happy Modelling

BUILDING: Hachette Spitfire Mk 1A, Constructo Mayflower
SUBSCRIPTION COMPLETE (Awaiting building): USS Constitution, Sovereign of the Seas, 1:200 Bismarck (Hachette)
COMPLETED: Porsche 911, E-Type Jaguar, Lam Countach
Dan Kramer
#3 Posted : 29 February 2016 05:21:28

Rank: Semi-Pro Level 1
Build-Diary Medal: Build-Diary Medal of Honour
Groups: Registered

Joined: 13/06/2015
Posts: 66
Points: 198
Location: South Dakota, USA
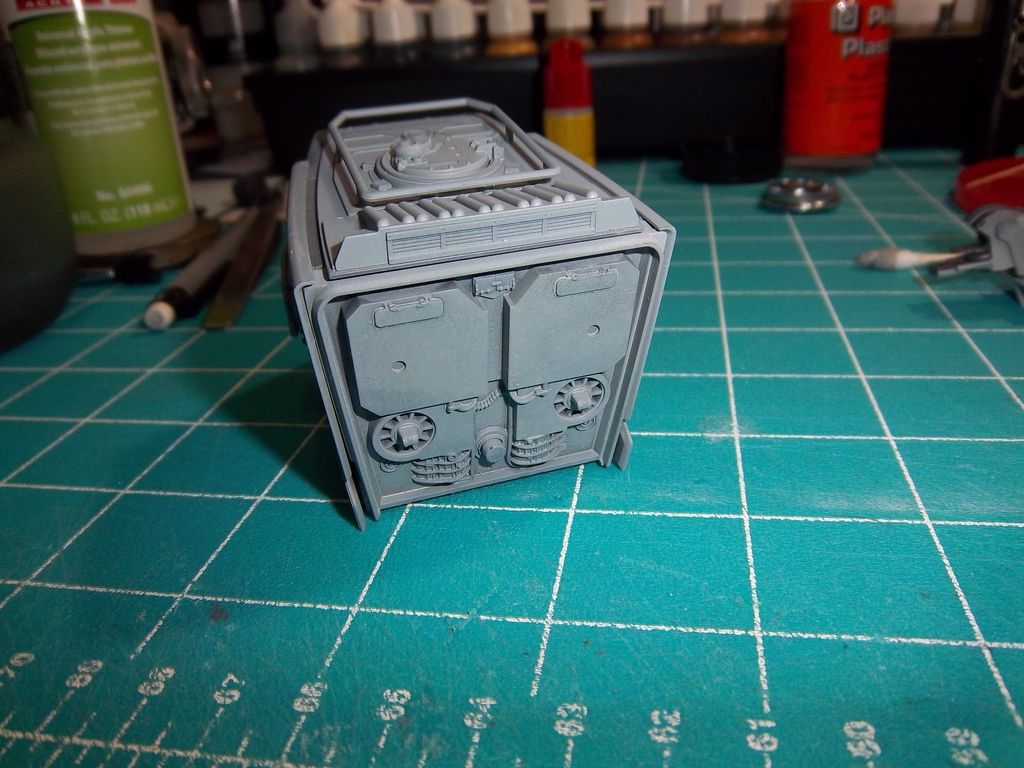
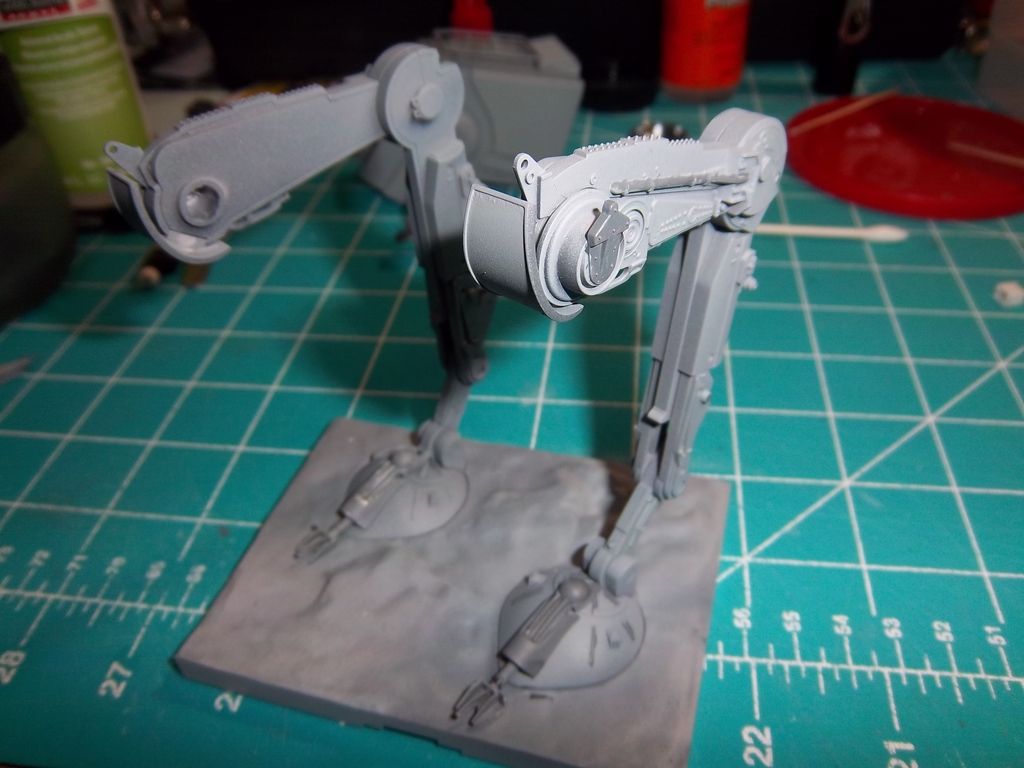
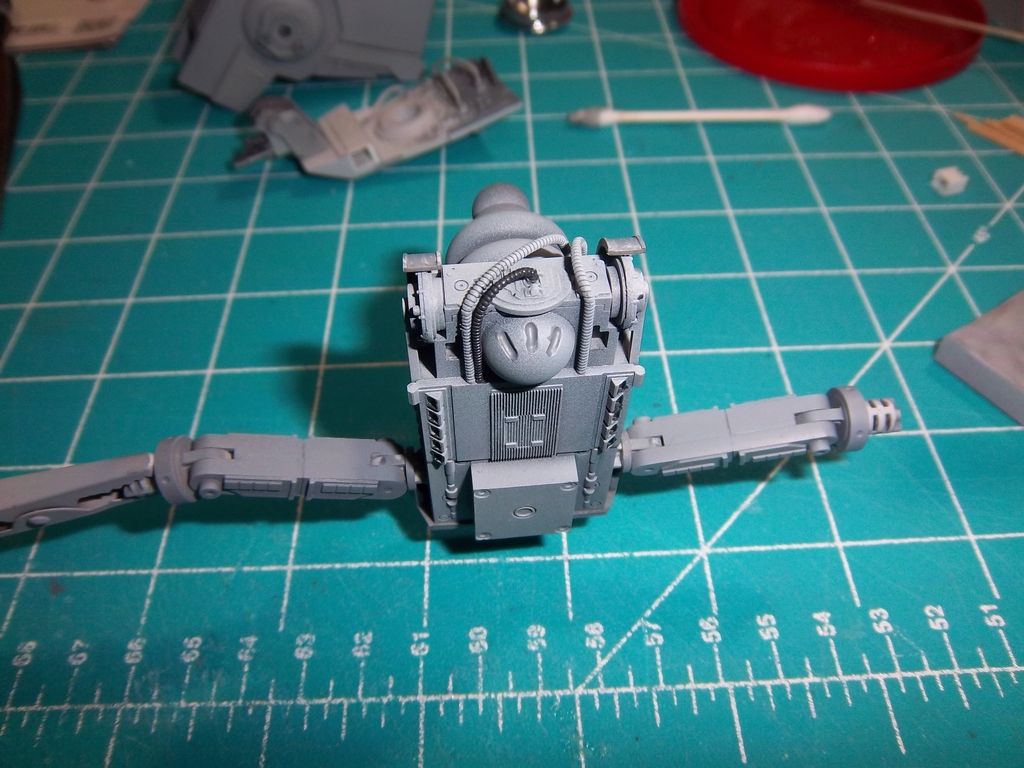
I've made some good progress on the kit.
Here is the bottom plate connected up to the main board so the LED has power.


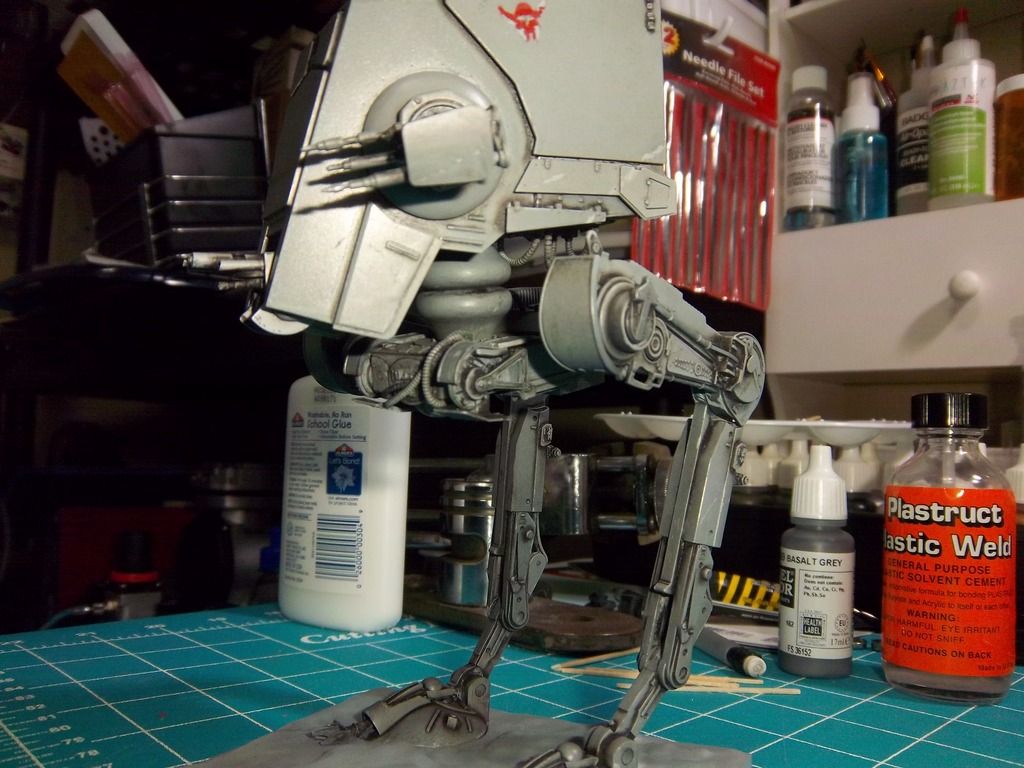
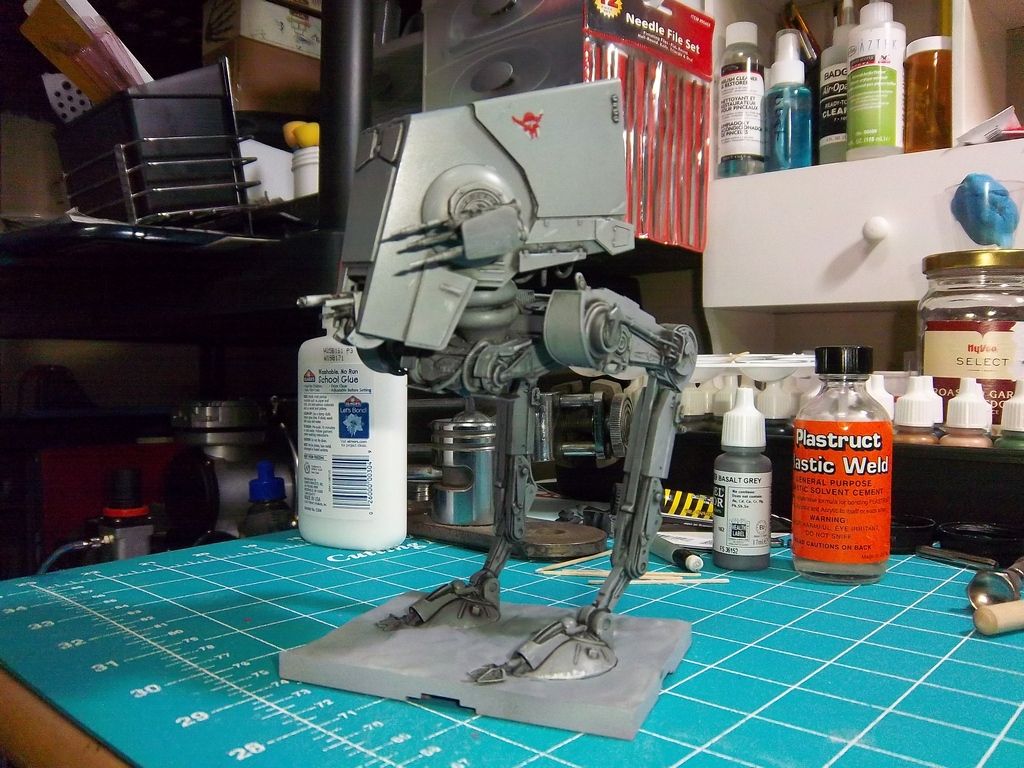
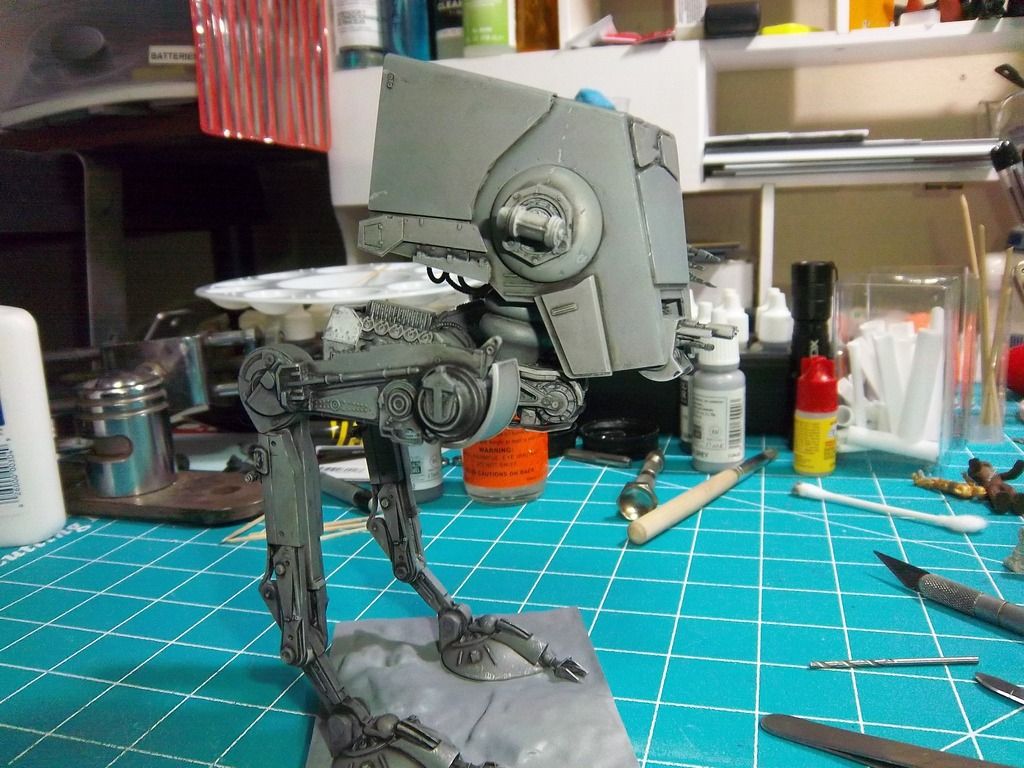
Then it was on to painting up the outside of the model. I went with a plain gray base, and I used a darker gray on some details here and there. Wherever it appealed to me to do it.


Since I decided that this was a Hoth campaign AT-ST, I added the cool little logo to the side that was on the screen model.
For an example of the logo, look at the bottom of this page in the Behind the scenes section.


At that point, I put a gloss coat on the parts for the next stage.

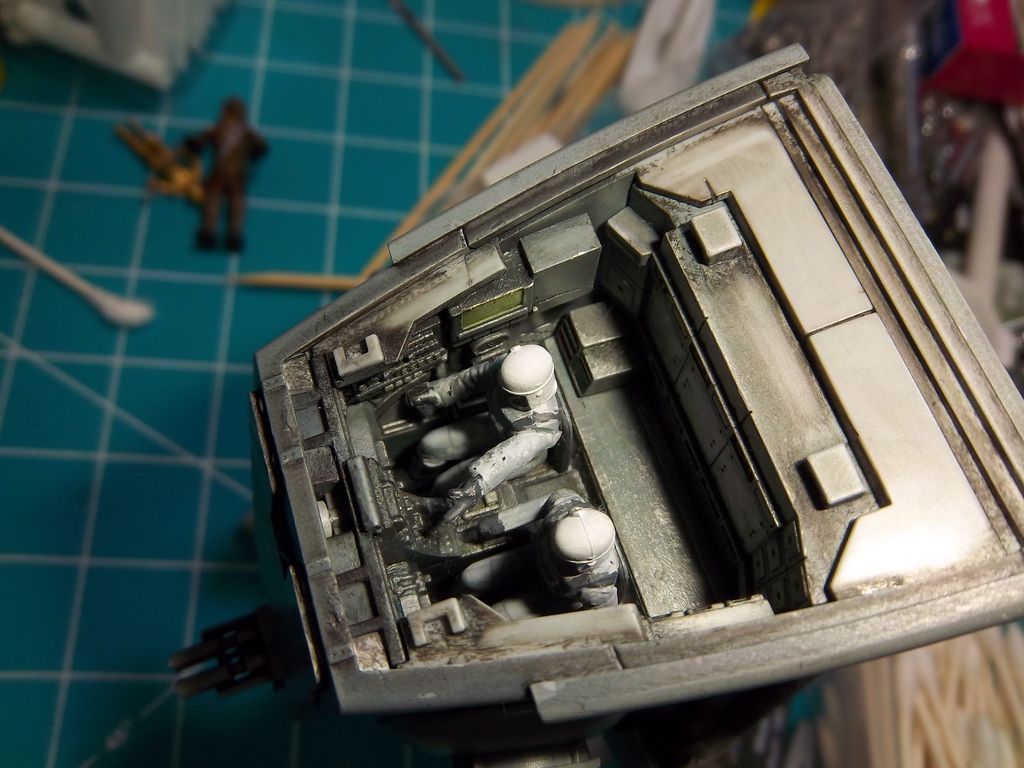
This is when I painted up the two pilots.
I made some changes to them as they had really poorly defined arms. I kept the arms for one of them, and just cut them off and repositioned them a little. The other one I cut off his arms and head. Then I replaced the head a little bit turned. The arms were from the WizKids Star Wars Minis Hologram General Veers. I cut off the gun in the right hand, and now it's a control stick.
I decided on my own color scheme for the pilots, as I figured that the arctic environment may have had a different AT-ST commander uniform color scheme. I wanted something a little different than the green helmet.


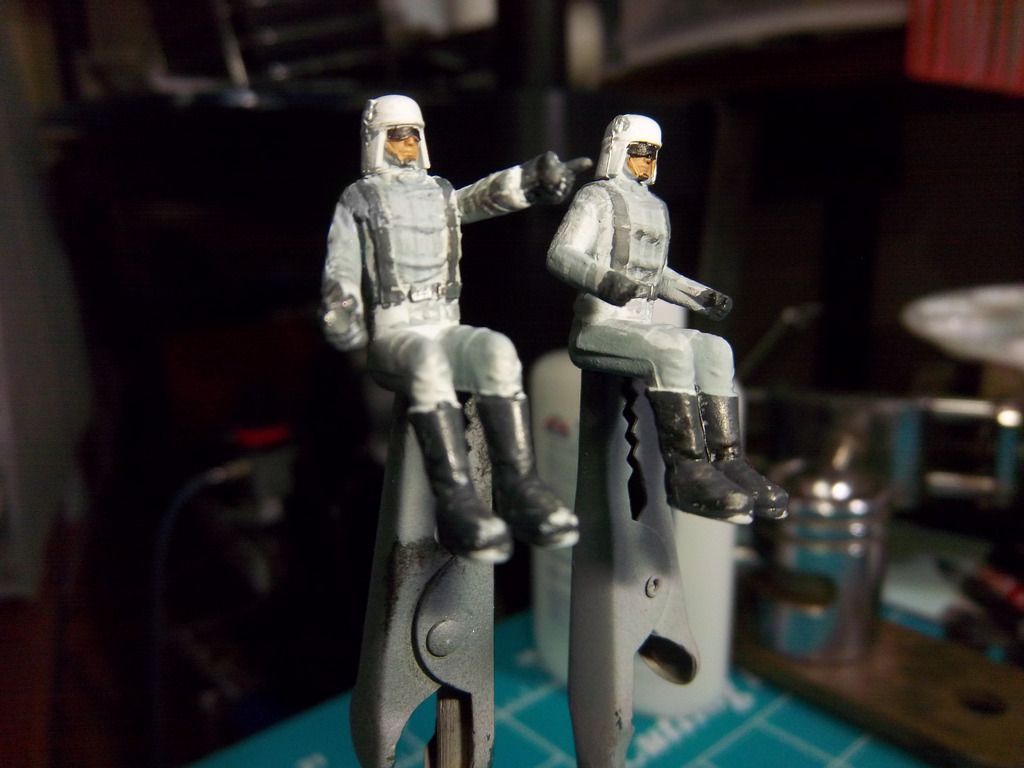
The pointing hand works well to either reach for a switch on the console, or he's pointing to the screen.


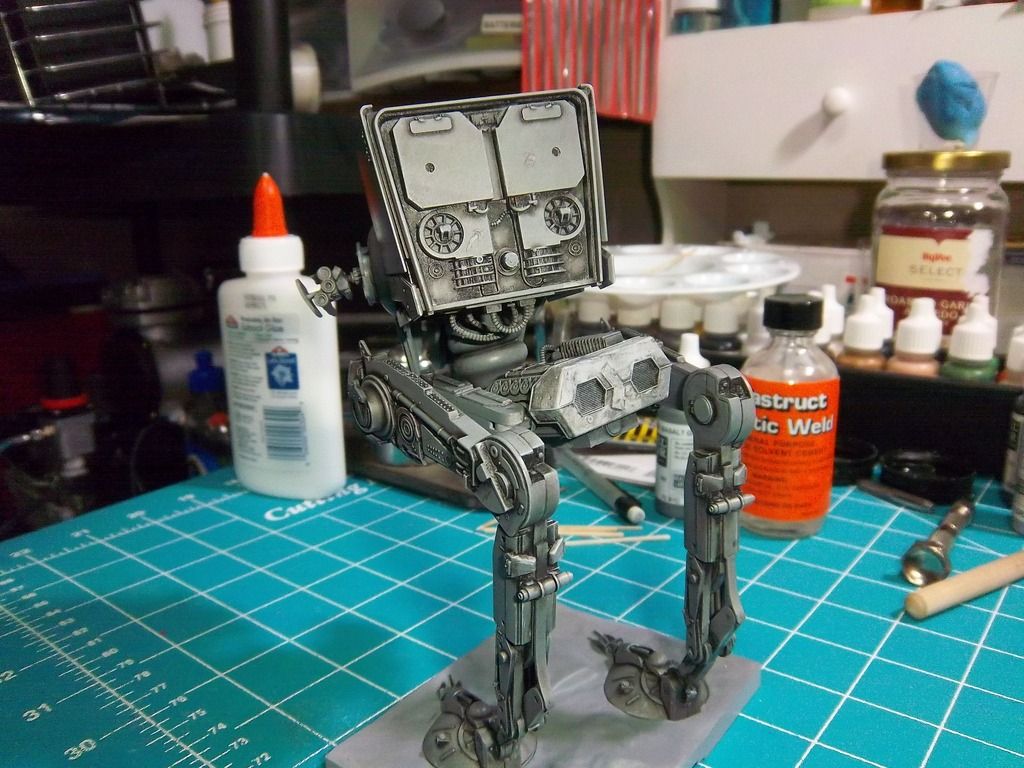
After the gloss coat had a chance to dry, now it's time for the gunk wash. This is a term I picked up here for doing a wash using unthinned oil paints. I managed to find an eBay seller that had MIG 502 Abteilung Starship Filth in stock, so I got two tubes of it (They're out now).

The basic idea is it's like a wash. Smear it on, and wipe it off. It'll get into all the little crevices, and it also tints the paint just a little bit. I really like how it came out. I did an initial wipe down, and then waited a week or so and did another.


The toughest part of it was the fiber optics in the chin guns. I haven't done much with fiber yet, so I'm still learning. I originally wanted to have a flexible tube that leads from the gun to the light box with the LED. This didn't work out like I hoped.
My first idea was to strip a wire, and then use the insulation to go around the fiber. Getting the fiber into the sleeve ended up to not be possible. Then I tried to use some decorative line with the center filling pulled out, and that just frayed out too much.
So, I ended up with using some styrene tubing that I melted with a lighter into a 180degree bend. Then cut it into pieces to give a pipe for the fiber to run through. I used white school glue to affix these parts as I didn't want to risk the fiber being effected by the glue chemicals.
Then I just hand painted these bits by hand.

The lights in the guns work, but they're not great. I may come back to it later on. For now I'm satisfied.
Here's a short vid I made of it. My camera isn't too great at videos, that's why I mainly stick to still images.
https://youtu.be/HJNBt1UfZE8

And that's where we're at. I'm ready to do some final dry brushing and damage effects. Then put a satin coat down and start on the base. I need to now research how to make good looking snow for it.
birdaj2
#4 Posted : 29 February 2016 09:02:16

Rank: Super-Elite

Publisher Medal: Featured Build of the MonthActive Service Medal: 500 post active service MedalPurple Medal: Super active service medal for 1000 postsTurquoise Medal: Turquoise Medal for model making know-how contributionBuild-Diary Medal: Build-Diary Medal of HonourRed Medal: Red Medal
Groups: Registered

Joined: 31/05/2010
Posts: 5,679
Points: 17,011
Location: Wiltshire
A very nice model and in fact one of my all time favourites from the range of land based star wars vehicles..
Happy Modelling

BUILDING: Hachette Spitfire Mk 1A, Constructo Mayflower
SUBSCRIPTION COMPLETE (Awaiting building): USS Constitution, Sovereign of the Seas, 1:200 Bismarck (Hachette)
COMPLETED: Porsche 911, E-Type Jaguar, Lam Countach
kenjara
#5 Posted : 29 February 2016 09:05:49

Rank: Vice-Master
Active Service Medal: 500 post active service MedalBuild-Diary Medal: Build-Diary Medal of HonourRed Medal: Red Medal
Groups: Registered

Joined: 05/04/2013
Posts: 540
Points: 1,630
Location: England
Nice work! I love to cockpit detail!
Finished 3D Printer, RB7, Hummer, Skyrider drone & Combat tank collection

http://www.model-space.com/gb/
ModelMania
#6 Posted : 29 February 2016 11:57:20

Rank: Pro

Groups:

Joined: 24/08/2009
Posts: 48,051
Points: -13,308
Nice work Kenjara and well done on the weathering, you've done an excellent job of it - very realistic!! Cool ThumpUp


Kev Smile
bwize
#7 Posted : 06 October 2016 22:48:47

Rank: Amateur level 2
Build-Diary Medal: Build-Diary Medal of Honour
Groups: Registered

Joined: 29/09/2015
Posts: 41
Points: 123
Location: USA
That's a beautifully weathered model. What will the lights be used for, the interior?
Nemesis
#8 Posted : 06 October 2016 22:55:45

Rank: Super-Elite

Publisher Medal: Featured Build of the MonthActive Service Medal: 500 post active service MedalPurple Medal: Super active service medal for 1000 postsTurquoise Medal: Turquoise Medal for model making know-how contributionOutstanding Build: An award for an outstanding buildBuild-Diary Medal: Build-Diary Medal of HonourRed Medal: Red Medal
Groups: Registered

Joined: 16/01/2013
Posts: 3,884
Points: 11,653
Location: Stevenage
Very well done! The weathering has certainly bought it to life and the interior looks fantastic!Drool BigGrin
GoofyFoot
#9 Posted : 07 October 2016 00:46:11

Rank: Pro

Build-Diary Medal: Build-Diary Medal of Honour
Groups: Registered

Joined: 16/03/2016
Posts: 122
Points: 381
Location: Layton, Utah
You did a marvelous job on that! Congrats!
If at first you don't succeed,

maybe you should skip the chainsaw juggling...
davetwin
#10 Posted : 08 October 2016 00:26:06

Rank: Super-Elite
Publisher Medal: Featured Build of the MonthActive Service Medal: 500 post active service MedalPurple Medal: Super active service medal for 1000 postsOutstanding Build: An award for an outstanding buildBuild-Diary Medal: Build-Diary Medal of HonourRed Medal: Red Medal
Groups: Registered

Joined: 27/01/2014
Posts: 5,060
Points: 14,980
Awesome job on this ThumpUp the gunk wash came out really well and really gives that impression of being dirty and well used. Cool
Users browsing this topic
Guest
Forum Jump  
You cannot post new topics in this forum.
You cannot reply to topics in this forum.
You cannot delete your posts in this forum.
You cannot edit your posts in this forum.
You cannot create polls in this forum.
You cannot vote in polls in this forum.

Powered by YAF | YAF © 2003-2009, Yet Another Forum.NET
This page was generated in 0.170 seconds.
DeAgostini