|
|
 Rank: Pro   Groups: Registered
Joined: 29/03/2010 Posts: 202 Points: 569 Location: sunderland
|
I know it's not an official part of the build, but as most seem to be doing it,I was wondering when the best time is to vineer the hull, I've got 1/2 mm strip at the ready, and have just finished the planking {or assume I have), I would have thought now would be a good time, but it may be best to wait till the stern galleries are finished. I'm thinking of just putting the vineer down to the waterline then 'coppering' below that or I may vineer all the hull then copper bottom! Any sugestions would be welcome.
Jeff
|
|
|
Rank: Pro Groups: Joined: 24/08/2009 Posts: 48,827 Points: -13,348
|
Hi jeff!  1:- You have completed your planking above the waterline and below YES! 2:- You need to sand the hull and allow for the second planking in your case this will be 0.5mm to be sanded from the hull or you could have problems later on trying to get parts to fit (e.g. the keel) 3:- Before you fit the gun port linings you would fit your second planking, then the gun port linings, then fit the stern gallery. 4:- You are going to use 0.5mm planks so you will need to use contact adhesive to stick the planks. 5:- Don't forget the stem, stern post and keel will need to be covered in veneer so you would need to sand it down by 1mm (when it is veneered it should be 6mm thick) or replaced it with solid wood 6mm thick in the same wood as your veneer use the original parts as a template to remake them.
|
|
|
Rank: Pro  Groups: Registered
Joined: 30/06/2010 Posts: 242 Points: 720
|
Hi Jeff,
The reason I have veneered already is so that I can fit the stern gallery over it, rather than have to veneer around the edge of the window curve on either side. This also means it will be ready to run the wales from the gallery along the hull on top of the veneer.
Also, I already veneered the keel so the lower hull is set to be veneered aswell.
As it seems that once the gallery is fitted, and hull sanded etc (sanded again after the veneer is on), the hull will no longer need serious tasks of flipping it around and sanding and otherwise generally large tasks, it will I think be more of a case of keeping it stationary and doing the smaller details like gun port framing. My belief is that the only other major construction event to do now after the gallerys will be the remaining decks. Might be wrong however!
Just some thoughts!
Tom
|
|
|
Rank: Pro Groups: Registered
Joined: 30/06/2010 Posts: 242 Points: 720
|
Forgot to mention, as has been said RE contact adhesive; I found that varnishing the hull and then sanding creates a hard surface with a clear 'layer' of varnish that the superglue (what I used) or other adhesive will stick to, as it might have trouble sticking to bare wood!
Tom
|
|
|
 Rank: Super-Elite       Groups: Registered
Joined: 04/04/2010 Posts: 3,955 Points: 11,809 Location: uk
|
I would like to mention that darren expressed his opinon on when to veneer if doing so. I will be doing my veneer as soon as all planking and sanding is done,and the painting of the gunport frames,then the veneer will be cut at the outside of the gunport frames to leave a rabbit(rebate) around the gunports,the rest of darrens procedure is spot on, thanks for that darren,and thomas show us some pics of the veneer? Current builds: SotS, USS Consitution, San Felipe, D51 loco, HMS Surprise, RB7, Arab Dhow, Jotika HMS Victory Completed builds: HMS Pickel, Thermopylae, Mississipi river boat, Mary Rose, Cutty Sark, San Francisco II, HMS Victory x5, Titanic Lifeboat, Panart HMS Victory Launch, Hachette Titanic, Virginia Schooner, Endeavour Longboat. http://www.model-space.com/gb/
|
|
|
Rank: Pro Groups: Joined: 24/08/2009 Posts: 48,827 Points: -13,348
|
Hi Karl! Just finished the veneer on the stem, I still need to let the glue dry before the final shaping but it has been great to remake it from scratch I will post the pics tomorrow, your right it is my opinion as to when to start the veneer, I will wait until I have completed the planking after I fit the upper gun deck, I'm still sanding the lower hull.
|
|
|
Rank: Pro Groups: Registered
Joined: 30/06/2010 Posts: 242 Points: 720
|
Karl - theres a topic floating around here with some pictures on I posted recently, albeit in the early stages of veneering, haven't got round to posting any new ones yet!
Regards,
Tom
|
|
|
Rank: Super-Elite Groups: Registered
Joined: 04/04/2010 Posts: 3,955 Points: 11,809 Location: uk
|
thanks tom yes I seen it,interested in your fitting of the whales so soon,where did you get the info from? Current builds: SotS, USS Consitution, San Felipe, D51 loco, HMS Surprise, RB7, Arab Dhow, Jotika HMS Victory Completed builds: HMS Pickel, Thermopylae, Mississipi river boat, Mary Rose, Cutty Sark, San Francisco II, HMS Victory x5, Titanic Lifeboat, Panart HMS Victory Launch, Hachette Titanic, Virginia Schooner, Endeavour Longboat. http://www.model-space.com/gb/
|
|
|
Rank: Pro Groups: Registered
Joined: 30/06/2010 Posts: 242 Points: 720
|
Hi Karl, I saw on Tomicks build diary that the wales will be coming along in the next few issues? Although maybe I mis-read it  Best wishes, Tom
|
|
|
Rank: Pro Groups: Joined: 24/08/2009 Posts: 48,827 Points: -13,348
|
Hi Tom,
Correct as follows...
Issue 42 - Contains wood strips/pins used to make the wales and two different metal eyebrows or 'wriggles' which will act as cutting patterns in 43; and has instruction for the fitting of the middle/lower wales and stern trim strip.
If you want to leave your model unpainted to show off the woodwork, you can choose woodstain to highlight features such as the wales, you'll need to decide this at 42 where you will need to stain the edges of the wales before fitting them to your model.
It is inadvisable to use a wood dye, its thin viscosity makes it spread rapidly and without control where it will creep beyond where you want it to be, therefore use a woodstain, always test the stain on scrap of the supplied wood before applying to your model, the example in the magazine shows a walnut woodstain, but you can choose any colour you prefer.
Issue 43 - Contains wood strips and shaped pieces for reinforcing the hawsehole's, bow and stem, plus gratings and round shot; and has instruction for the planking of the bow deck where you will need a black permanent marker pen to simulate deck caulking, the fitting of the upper wale and moulding strip, making the eyebrow cut-outs over the gun ports, and the drilling of holes for the lower two rows of gun port hatch ropes (a 1.5mm drill bit is needed).
|
|
|
Rank: Pro Groups: Joined: 24/08/2009 Posts: 48,827 Points: -13,348
|
Hi shipmates! Well here is my solution to the keel problem I've veneered a walnut stem with walnut veneer to look like the block structure as shown in 'Anatomy of the ship The 100-gun ship Victory' by John McKay.  I've used the original as a guide to file the slots and drill the holes in the stem.  The two side by side.  As the light catches it from different angles the grain of the blocks shows up well.
|
|
|
Rank: Pro Groups: Joined: 24/08/2009 Posts: 48,827 Points: -13,348
|
Nice work and attention to detail Darron There is an additional hole to drill into/thru the stem at issue 44, but it shouldn't pose any problem.
|
|
|
Rank: Pro Groups: Registered
Joined: 30/06/2010 Posts: 242 Points: 720
|
Thanks Tomick, and looking very good Darron!
Tom
|
|
|
Rank: Pro Groups: Registered
Joined: 29/03/2010 Posts: 202 Points: 569 Location: sunderland
|
Thank's for the input chap's, lovely piece of work Darren.  I was wondering whether or not to do the gun ports before or after the vineer, but already decided to put them in and vineer up to the ports, I will have a 'rabbet' installed in the ports before proceeding. The bottom keel issued will do as I'm 'coppering' the lower hull, but like the look of Darren's hardwood 'prow' & sternpost, although I'll be painting I am hoping to do it so that the grain shows through!(if thats possible?), I will also round off the edges of the vineer so that the planking lines are showing. As for the glue, I bought some 'alphatic' as was recomended from one of the books I bought, it's good stuff but not 'contact' adhesive, I dont fancy 'superglue' for the vineer although will be using it for the 'copper plates' (too quick and a beggar to get off) I'll trial a few products before committing, I may just use the alphatic but superglue the ends or tape in place till 'cured'. This is all unchartered ground for me so keep your advice and 'pics' coming in, I must admit I've been lazy in updating my build diary. I'll do it this weekend!! P.S The 'wales' or is it 'whales'?? it looks like these are just strips of planking, but on photo's look as though they are built from interlocking pieces of wood, do we need to detail them ourselves or am I worrying about 'nowt'??? Jeff
|
|
|
 Rank: Vice-Master Groups: Registered
Joined: 20/04/2010 Posts: 545 Points: 1,536 Location: lossiemouth
|
decide to double plank after i found a site with amercan walnut 0.6x5x1000 mm strips 25 for £2.5o and normal postage order 75 just over £11 with vat
|
|
|
Rank: Super-Elite Groups: Registered
Joined: 04/04/2010 Posts: 3,955 Points: 11,809 Location: uk
|
willie can you let me have the web address please for where you got the walnut veneer from? and jeff,use superglue thick for tiles just a small blob on in the cetre of the tile.you should have no probs,I disagree 'bout aliphatic glue not being contact,I used it for my veneering,you coat both sides and whenTACKEY you stick,unlike contact glue you can still move it. Current builds: SotS, USS Consitution, San Felipe, D51 loco, HMS Surprise, RB7, Arab Dhow, Jotika HMS Victory Completed builds: HMS Pickel, Thermopylae, Mississipi river boat, Mary Rose, Cutty Sark, San Francisco II, HMS Victory x5, Titanic Lifeboat, Panart HMS Victory Launch, Hachette Titanic, Virginia Schooner, Endeavour Longboat. http://www.model-space.com/gb/
|
|
|
Rank: Vice-Master Groups: Registered
Joined: 20/04/2010 Posts: 545 Points: 1,536 Location: lossiemouth
|
Karl the web site is SP Models go to the artesania latin secton click woods its seems i got the last of the stock for now but its the cheapes i have seen various sizes there also bass and sapelly
|
|
|
Rank: Vice-Master Groups: Registered
Joined: 20/04/2010 Posts: 545 Points: 1,536 Location: lossiemouth
|
order yesterday afternoon, received to day @2 p.m.talk about quick
|
|
|
Rank: Pro Groups: Registered
Joined: 29/03/2010 Posts: 202 Points: 569 Location: sunderland
|
Definitely agree with you Karl, have tried various glues and found alphatic for the vineer and superglue 'gell' for the copper plates ideal.
Still hav'nt started to vineer the 'Vic' yet, probably wait till I've fitted keel and stem, still a bit unsure.
I've vineer'ed the cross section that I started to build instead of the open hull, it's a good finish but have dificulty in distingishing the individual planks, (need to sort that before applying to main build), as you said about the copper plates, they go on a treat with the superglue, but I think I may try to get hold of one of those sucker things like what people use to put contact lenses in to pick up the plates with as I'm sick of dropping them with my fat fingers!
I'll post a few snaps of the 'cross section' progress soon, probably tomorrow.
Thank's everybody for help so far,
Jeff
|
|
|
Rank: Pro Groups: Registered
Joined: 29/03/2010 Posts: 202 Points: 569 Location: sunderland
|
As promised here's some snaps of work so far on the 'cross section' I'm building allongside the main model. I've coppied the dimentions from our kit so it's like the front and back have been saw'n off. the length of the cross section is greater than bought versions, this is mainly so I can get the mast rigging more like the actual model (ratlines etc), it means more internal work but I think it will be worth it, there's only one deck made so far, my next job will be re-creating the other decks, these will be removeable (sliding in & out) until the detail is done then fixed from bottom to top. As you can see the planks (vineer) are barely disernable, so that needs sorting before doing main model, the copper plates are from 'Cornwall MB'(about £2 per 100) and it took well over two packs, that works out about 15 packs for the actual model (although I did use some 'artistic lisence' by tiling from lower than the waterline) it will probably take 20 packs for pure accuracy. The glues used are as mentioned above and recomended by Karl. 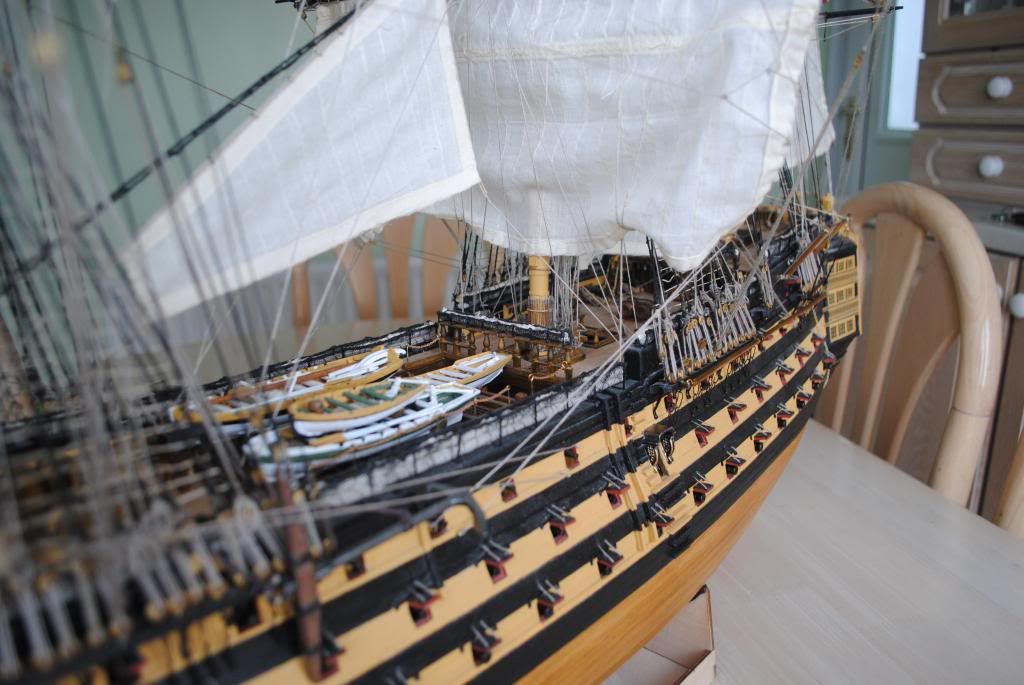 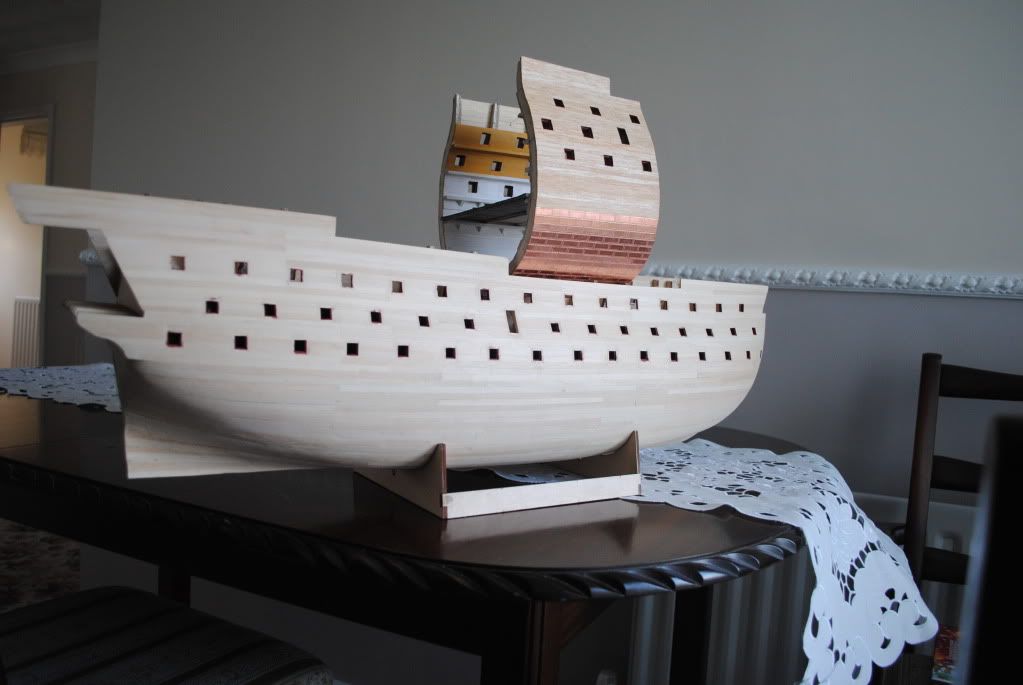  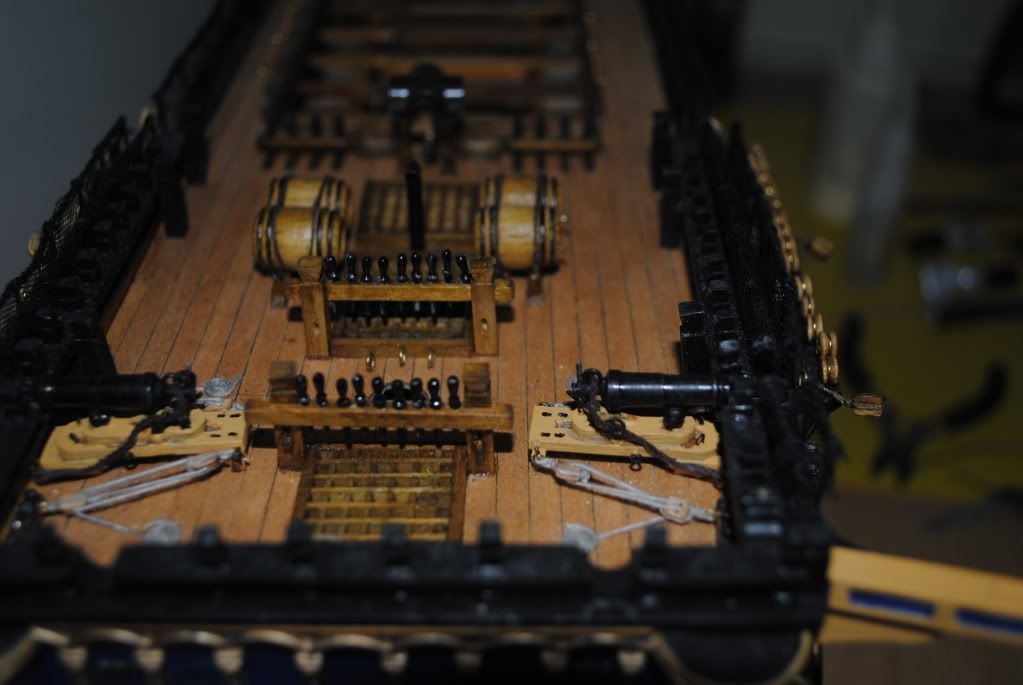 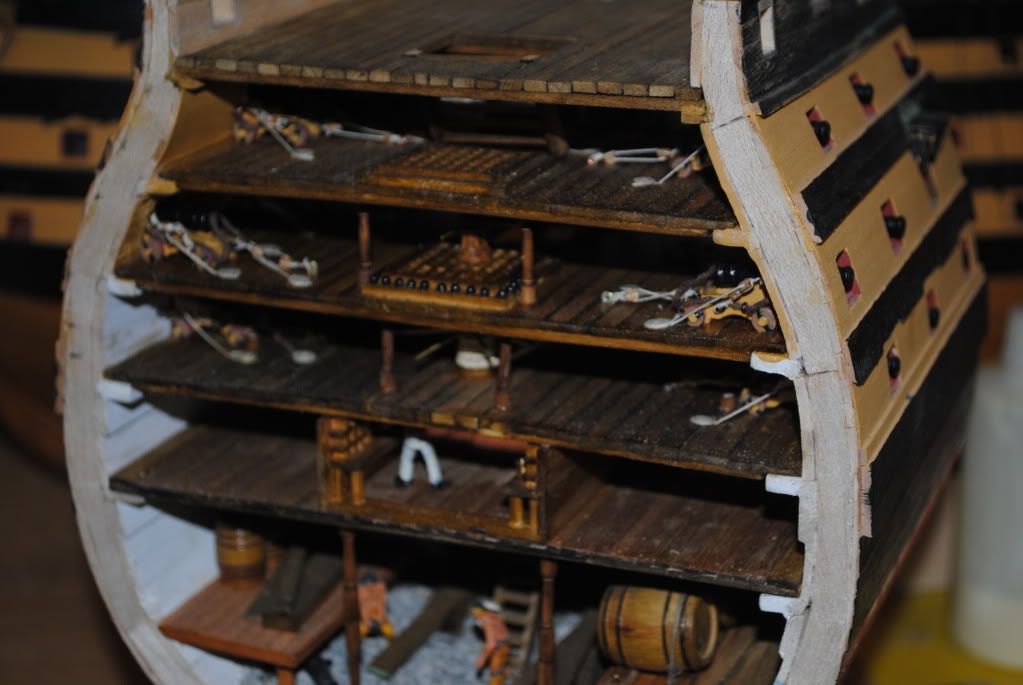 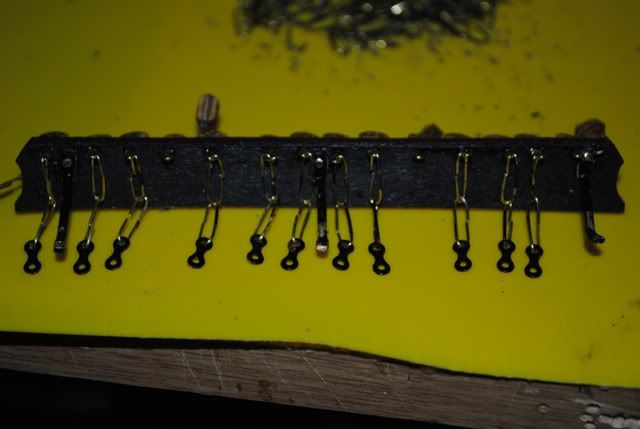 I'd like to think we'll get some discount off DeAg for their copper plates but I wont hold my breath!! TTFN Jeff
|
|
|
|
Guest (2)
|
 US
US

