|
|
 Rank: Super-Elite       Groups: Registered
Joined: 19/06/2013 Posts: 4,588 Points: 13,553 Location: West Yorkshire
|
Progressing nicely Steve, mines now outgrown its storage box as its that long  Al
|
|
|
 Rank: Super-Elite       Groups: Registered
Joined: 27/01/2014 Posts: 5,060 Points: 14,980
|
Looking good Steve 
|
|
|
 Rank: Pro   Groups: Registered
Joined: 22/03/2016 Posts: 175 Points: 552 Location: Merseyside
|
Cheers dave I know Spal i knew it would be big but ive been surprised along the way at the size/weight of it Built- Shelby Mustang, Lamborghini Huracan
Building-Spitfire, Redbull racing RB7, 3d printer, Honda CB750, Stage coach and Revell 1/400 Titanic
|
|
|
 Rank: Pro   Groups: Registered
Joined: 22/03/2016 Posts: 175 Points: 552 Location: Merseyside
|
Just a small update to let those following know i havent forgotten this months build im in the process of doing it now and will update the diary with pictures tomorrow  Built- Shelby Mustang, Lamborghini Huracan
Building-Spitfire, Redbull racing RB7, 3d printer, Honda CB750, Stage coach and Revell 1/400 Titanic
|
|
|
 Rank: Super-Elite       Groups: Registered
Joined: 19/06/2013 Posts: 4,588 Points: 13,553 Location: West Yorkshire
|
Look forward to seeing it  Al
|
|
|
 Rank: Pro   Groups: Registered
Joined: 22/03/2016 Posts: 175 Points: 552 Location: Merseyside
|
Hi again its time to show you the progress of the next 4 issues Its all work on the interior for this part so here goes ISSUE 45 PARTS LIST:Right and left kick panels Switch housing Accelerator pedal switch Brake pedal switch Pedal unit Screws 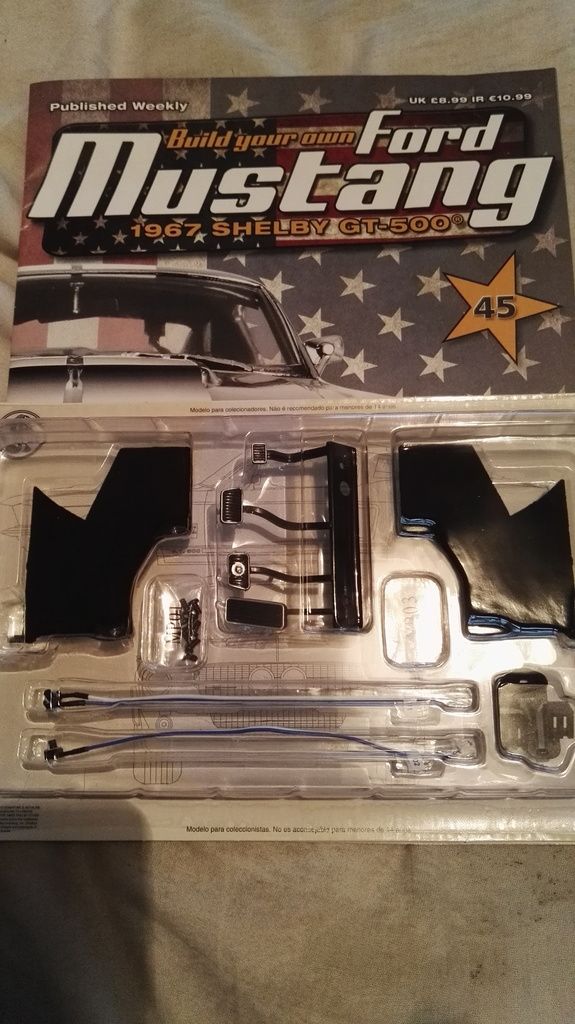 THE BUILD THE BUILDFirst we need the front floor from the previous issue, align the right kick panel up with the projecting lugs on the floor pan, Insert 2 MP01 screws into two of the projecting lugs and 1 MP03 screw in the final lug to secure. The same process then follows to fix the left kick panel. Next we install the switches into the recess ensuring you have them the correct way around, the wires are numbered 01 02. Placing the floor pan upside down hold the switches in position (can be a bit of a fiddle) and secure the switches onto the angled post fixing with an MP01 screw. Next we fit the pedals be careful here not to break the plastic pins on the back of the pedals as they will operate the switches later on. Secure the pedals to the underside of the dash via 2 MP01 screws. 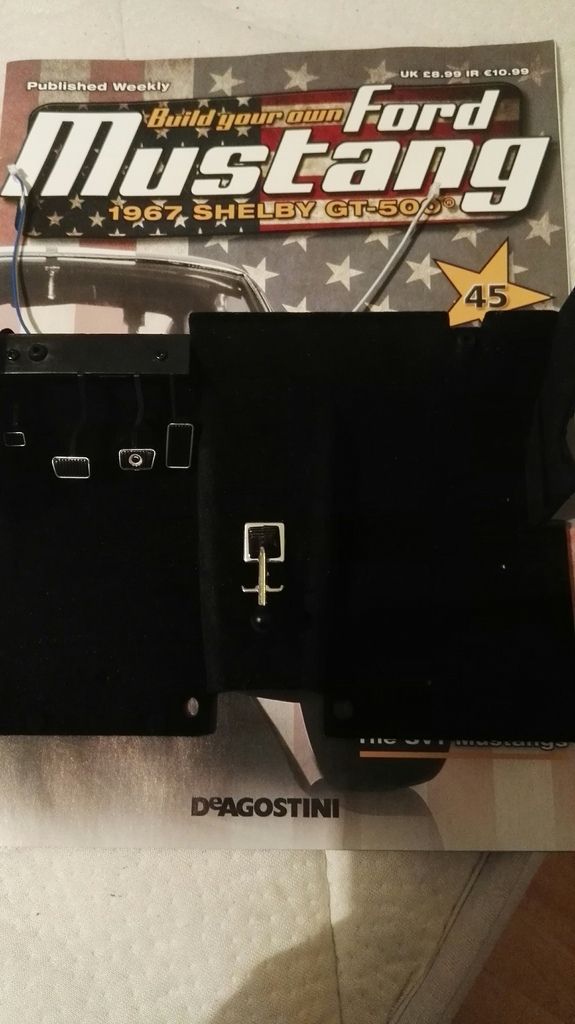 ISSUE 46PARTS LIST: ISSUE 46PARTS LIST:Dashboard Fuse cover Screws 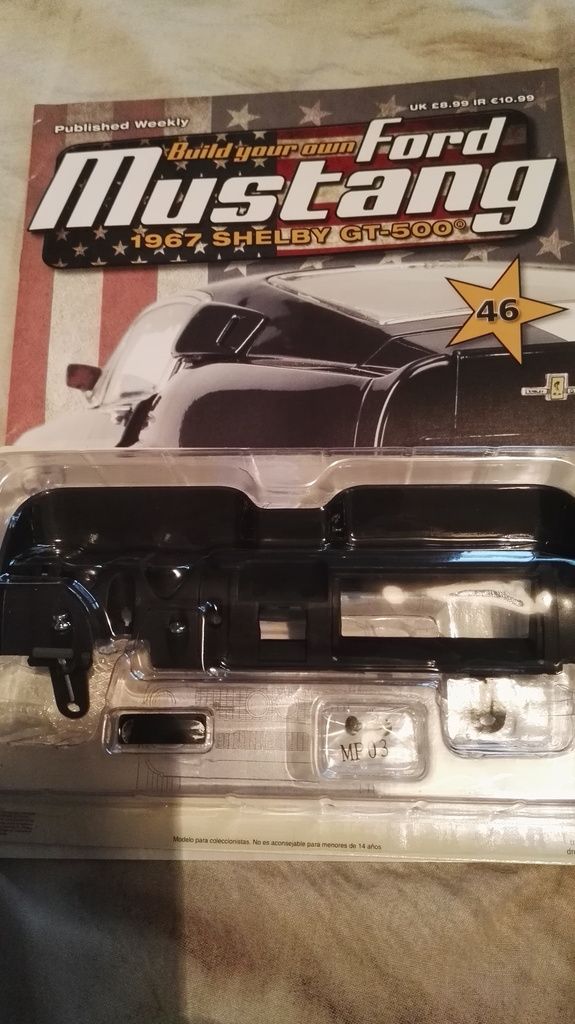 THE BUILD THE BUILDLocate the hole in the dashboard for the fuse cover, Insert the post in the fuse cover in the hole in the dashboard making sure the recess in the cover is at the bottom, Press fit and simply tighten with 1 MP03 screw. To finish this stage we simply test fit the dashboard to the floor pan. 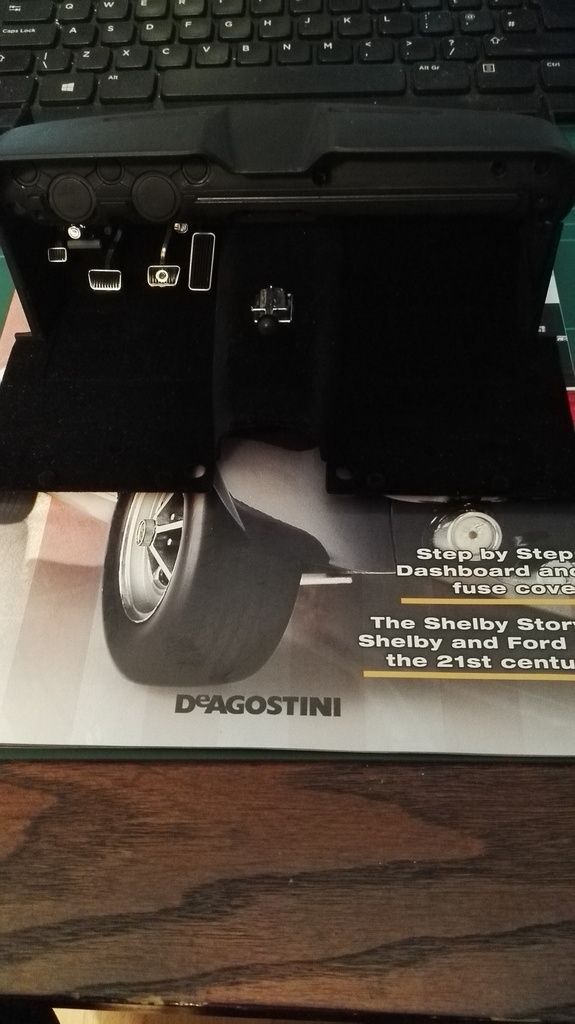 ISSUE 47PARTS LIST: ISSUE 47PARTS LIST:Stickers Instrument glass Dashboard frame Dashboard trim Shelby badge base Screws 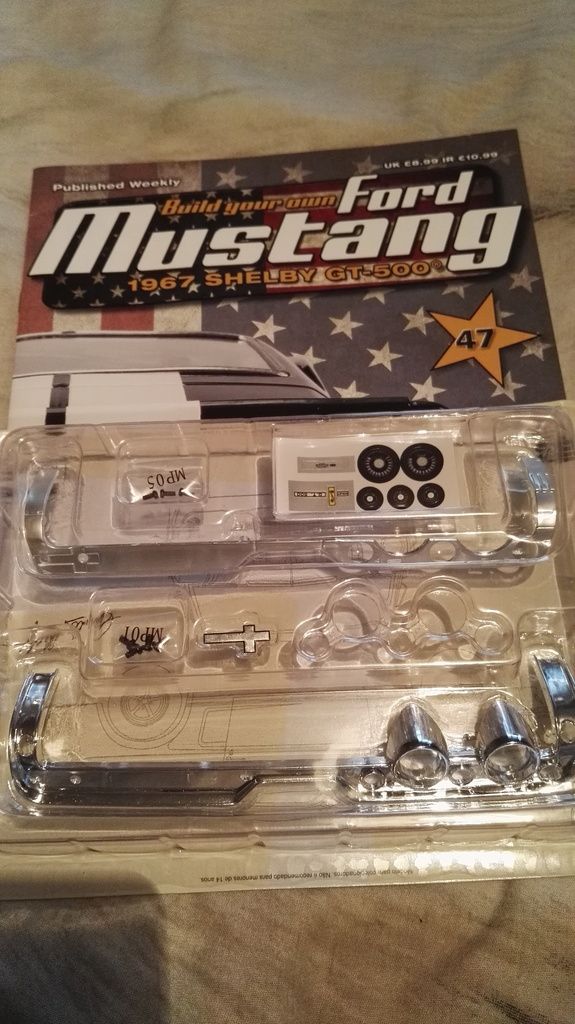 THE BUILD THE BUILDNow we move on to the details in the dashboard, Using the tip of a craft knife and a pair of tweezers place the stickers for the clocks and dials onto the dash, as always with stickers ensure everything is clean and the stickers should adhere properly. Next we fit the binacle glass into the back of the dashboard frame (careful not to mix this up with the dashboard trim like I did lol) Fit the frame onto the dashboard the glass should sandwich between the two parts. Next we place another sticker in the middle of the dashboard trim and secure the trim with 3 MP01 screws. Finally fix the Shelby sticker to the badge base. The base then secures to the dash trim via 2 MP05 screws. 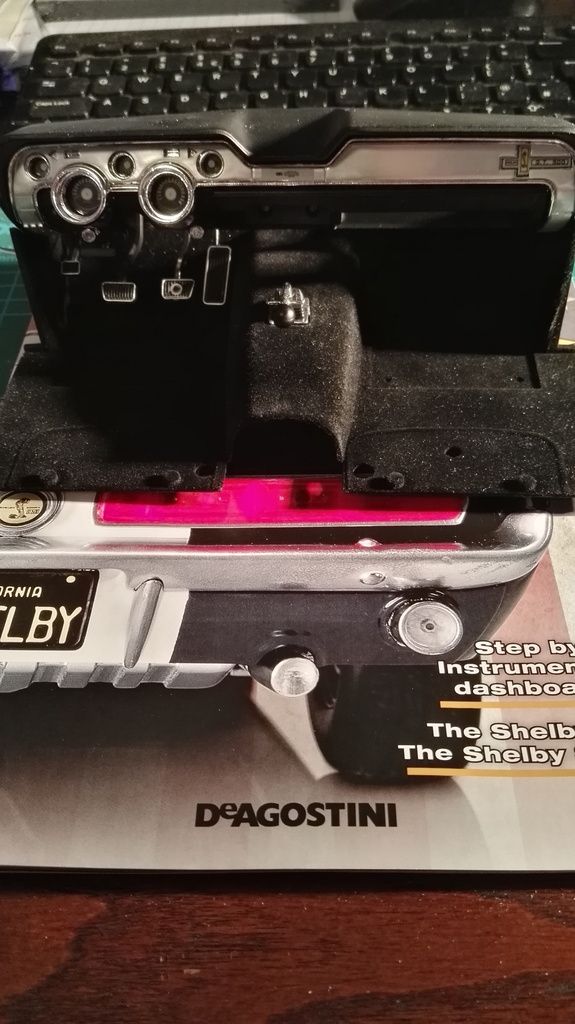 HINT HINTMake sure surfaces are clean for stickers to adhere properly. Be sure to wipe any finger prints/smudges from the dial glass before securing in place. And finally ISSUE 48PARTS LIST:Radio Gauge stickers Gauge pod mount Gauge glass Gauge pod Glove box Glove box lid Screws 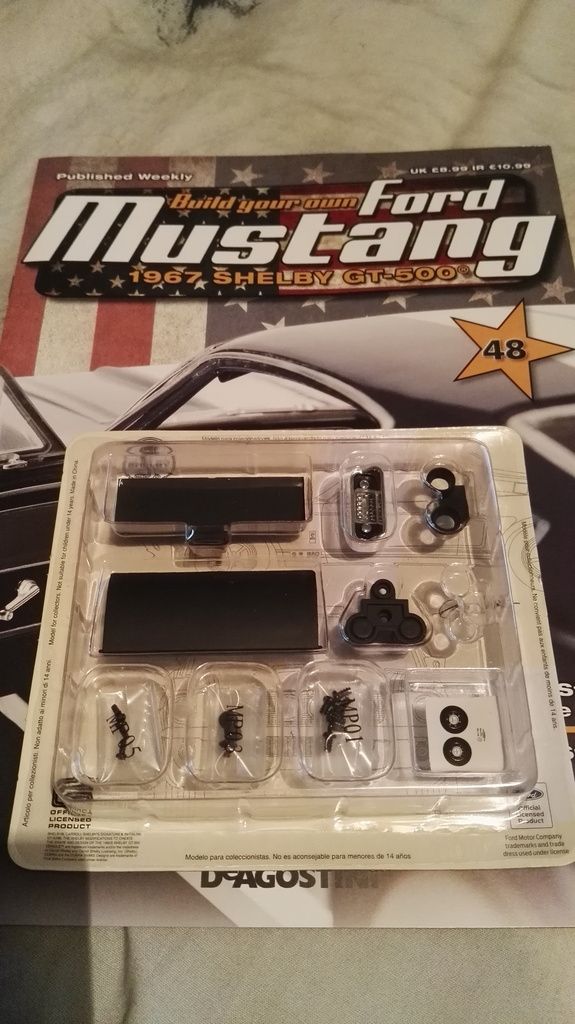 THE BUILD THE BUILDFirst step with this stage we install the radio, Nice simple step, Secure with 2 MP01 screws. Next we have more stickers. Place the 2 gauge stickers onto the pod mount, Now place the gauge glass over the stickers. Next we place the gauge pod over the gauge mount sandwiching the glass and secure with a single MP05 screw. Apply the final sticker in the centre of the pod gauges (Mine went a little wonky) Next we secure the pod to the dash under the radio via 1 MP05 screw. Now is the glove box. Nice simple step, secure the glove box to the dash via 3 MP01 screws. Then we attach the glove box lid to the dash by inserting the 2 plastic pins into the holes in the dash board. This can be a bit of a fiddle, Careful not to snap the pins< Once completed you should have a glove box that opens/closes. Fianlly we can secure the dashboard to the floor section via 2 MP03 screws. 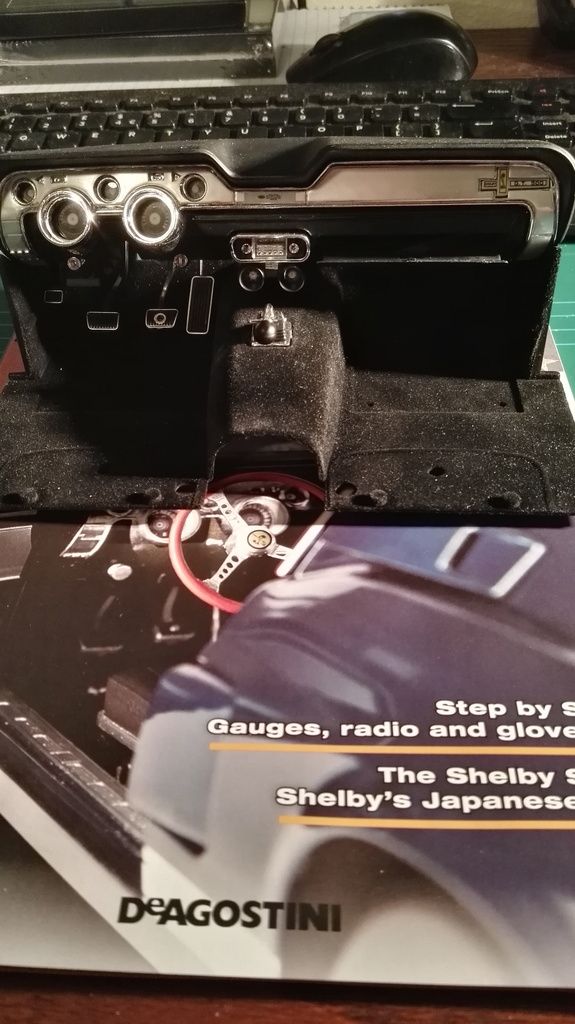 MODS MODSI think it would be a good idea here to have the dashboard clocks illuminated for that extra detail. Also maybe some subtle lighting in the foot wells to enhance the detail That concludes this months build and leaves us 48% complete Once again thank you for following my build diary and I hope you all have a great christmas and all the best for new year Next update Jan 2017  Built- Shelby Mustang, Lamborghini Huracan
Building-Spitfire, Redbull racing RB7, 3d printer, Honda CB750, Stage coach and Revell 1/400 Titanic
|
|
|
 Rank: Super-Elite       Groups: Registered
Joined: 19/06/2013 Posts: 4,588 Points: 13,553 Location: West Yorkshire
|
Nice update Steve  Al
|
|
|
 Rank: Super-Elite       Groups: Registered
Joined: 27/01/2014 Posts: 5,060 Points: 14,980
|
Looking good Steve  I really love the carpet effect on the floor 
|
|
|
 Rank: Pro   Groups: Registered
Joined: 22/03/2016 Posts: 175 Points: 552 Location: Merseyside
|
Cheers Al and Dave The carpet effect does look good. Finishes it off nicely  Built- Shelby Mustang, Lamborghini Huracan
Building-Spitfire, Redbull racing RB7, 3d printer, Honda CB750, Stage coach and Revell 1/400 Titanic
|
|
|
|
|
Looking great, your efforts on this build are definitely paying off....   Regards Alan
|
|
|
 Rank: Pro   Groups: Registered
Joined: 22/03/2016 Posts: 175 Points: 552 Location: Merseyside
|
Cheers Alan really am enjoying this build, glad others are too  Built- Shelby Mustang, Lamborghini Huracan
Building-Spitfire, Redbull racing RB7, 3d printer, Honda CB750, Stage coach and Revell 1/400 Titanic
|
|
|
 Rank: Semi-Pro Level 2    Groups: Registered
Joined: 08/12/2016 Posts: 87 Points: 254 Location: Fife
|
Looking great so far. Roll on Jan 
|
|
|
 Rank: Pro   Groups: Registered
Joined: 22/03/2016 Posts: 175 Points: 552 Location: Merseyside
|
Just a small update. I now have issues 49,50,51,52 more interior All will be updated shortly Built- Shelby Mustang, Lamborghini Huracan
Building-Spitfire, Redbull racing RB7, 3d printer, Honda CB750, Stage coach and Revell 1/400 Titanic
|
|
|
 Rank: Pro   Groups: Registered
Joined: 22/03/2016 Posts: 175 Points: 552 Location: Merseyside
|
Welcome back everyone Hope everyone had a nice Christmas Lets get going again with ISSUE 49
PARTS LIST
Rear floor Passenger seatbelt anchorage Drivers seatbelt anchorage Seatbelts 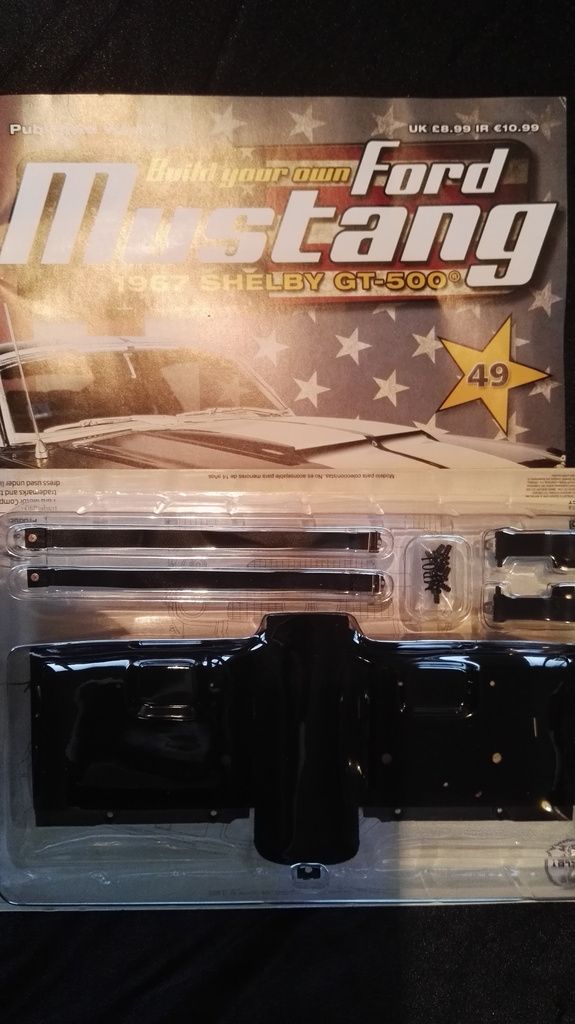 THE BUILD THE BUILD
Align the holes on the bottom of the anchorage to the corrosponding holes in the rear floor, Next we marry the front and rear floor together with 4 screws. Now we push the metal buckle of the seatbelt into the slot on the floor, If you look closely there is a plastic pin that the buckle secures to. Stage complete 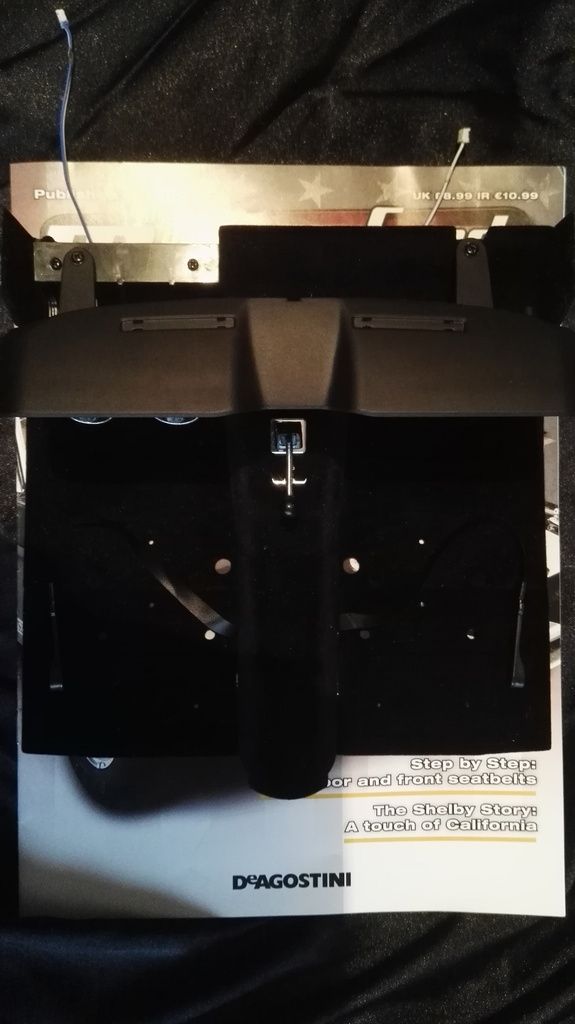 ISSUE 50 ISSUE 50
PARTS LIST
Front and rear floor mats 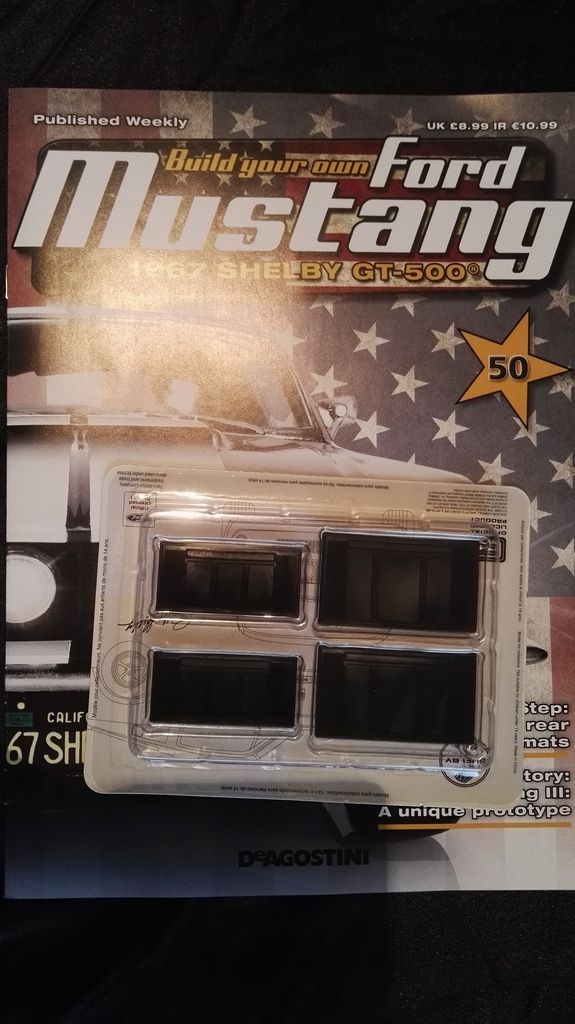 THE BUILD THE BUILD
Simple step here just take the front floor mat and align the pins on the underside to the hole in the floor and push fit (can take some gentle persuasion) Repeat this with the other 3 floor mats. Now we finally get to fit the front seats. Place the pins on the underside of the seat to the holes on the bottom of the floor and just secure the seats with 2 MP01 screws 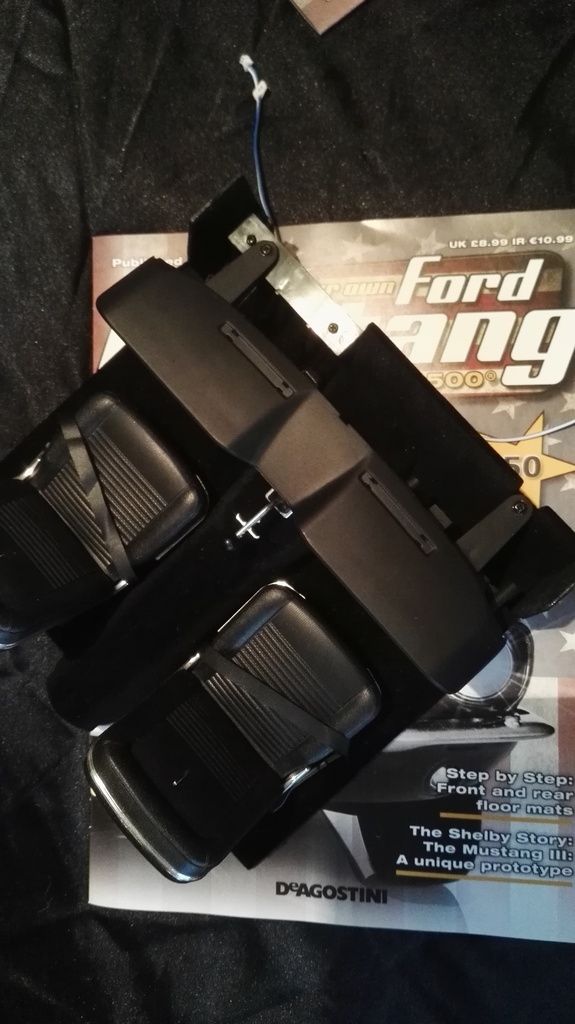 MODS MODS
Maybe paint a little piping on the floor mats the same colour as the car ISSUE 51
PARTS LIST
Rear seat base 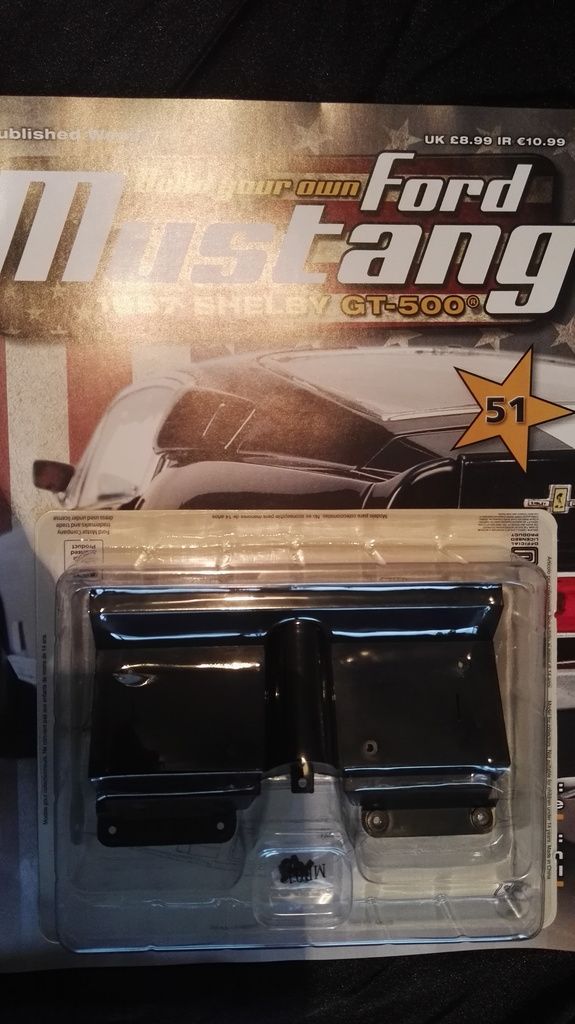 THE BUILD THE BUILD
Nice simple step here, place the floor assembly upside down and marry the rear seat base to it via 4 MP01 screws 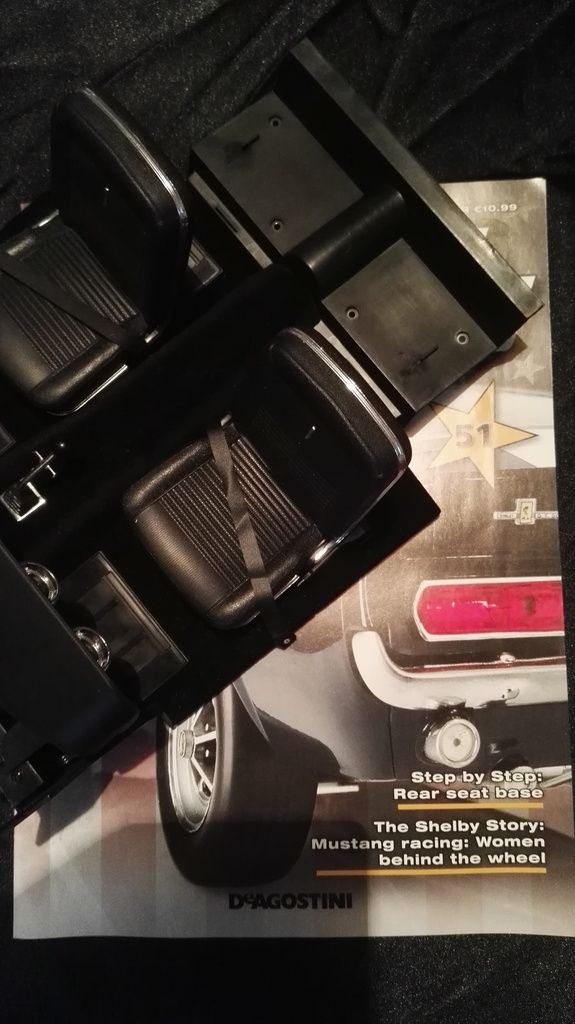 ISSUE 52 ISSUE 52
PARTS LIST
Rear luggage platform 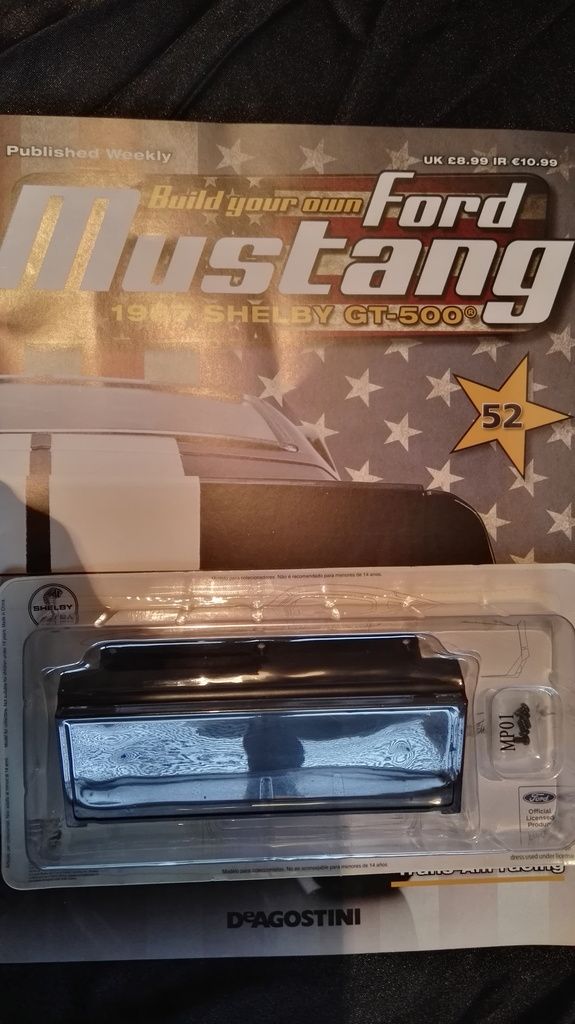 THE BUILD THE BUILD
Again a simple step.Turn the cabin floor assembly from the previous stage upside down, align the holes from the luggage platform onto the posts on the cabin floor and secure with 3 MP01 screws 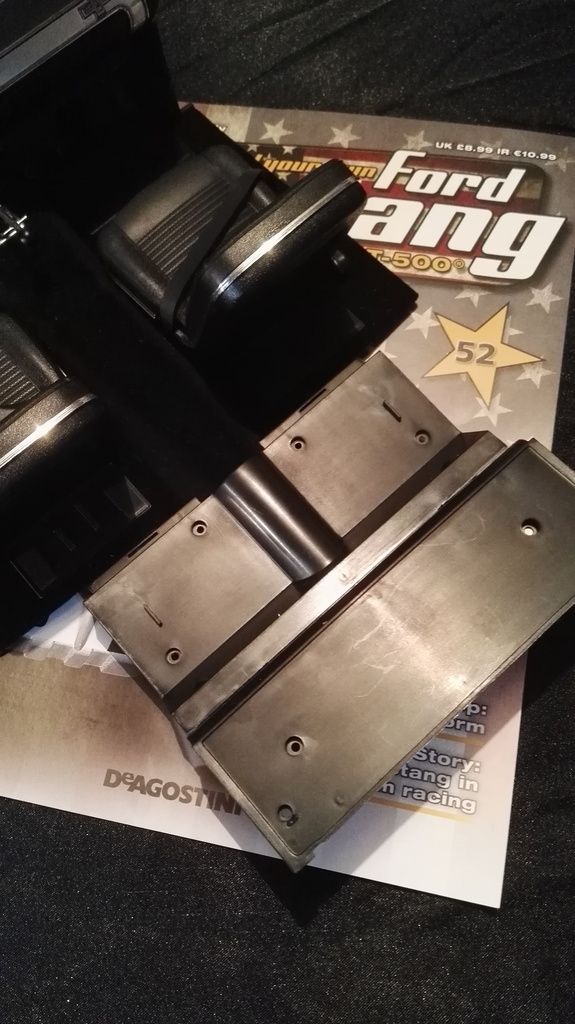 Thats it for this month and leaves us 52% complete Thanks for following  Built- Shelby Mustang, Lamborghini Huracan
Building-Spitfire, Redbull racing RB7, 3d printer, Honda CB750, Stage coach and Revell 1/400 Titanic
|
|
|
 Rank: Pro   Groups: Registered
Joined: 22/03/2016 Posts: 175 Points: 552 Location: Merseyside
|
|
|
|
 Rank: Pro   Groups: Registered
Joined: 22/03/2016 Posts: 175 Points: 552 Location: Merseyside
|
August 2017 since I last updated 
But as promised the finished model is here and what a labour of love this was
A truly fantastic kit
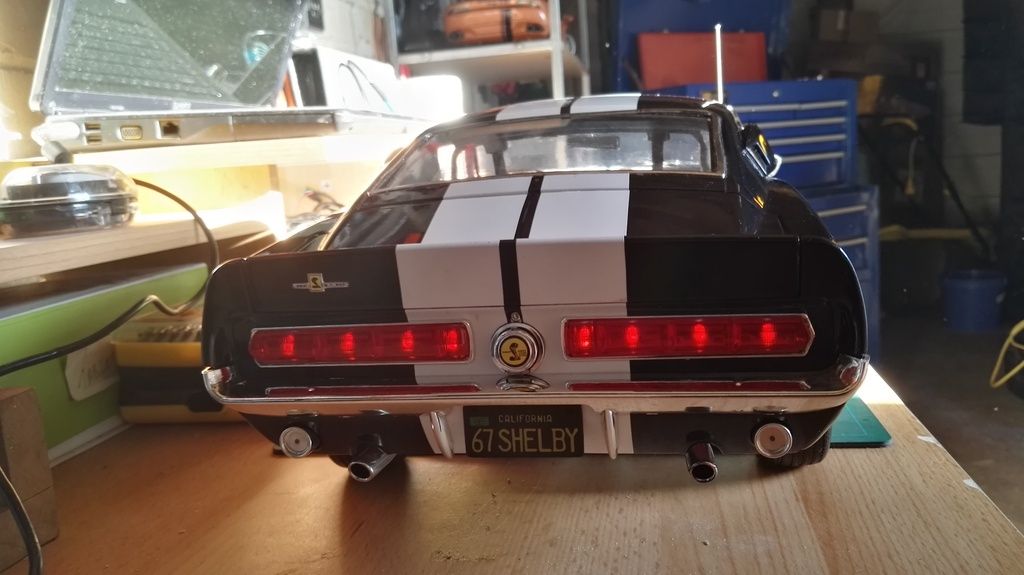
I finished her the end of jan but then moving house and work commitments haven't allowed me the time to keep up with the updates
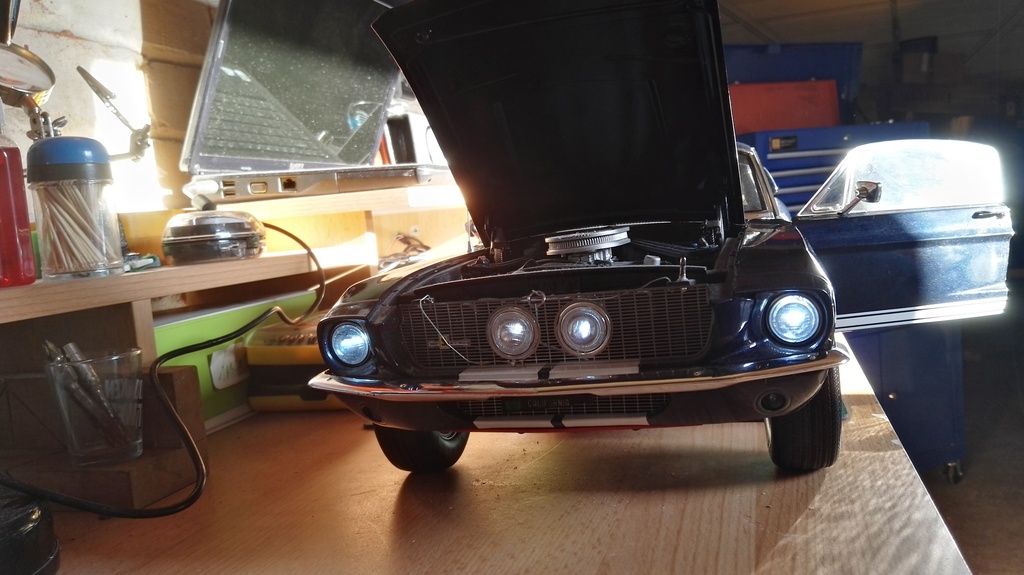
Ive still got a few niggles to sort, 1 being the number plate at the front got snapped during house move
Ive got the new one now tho
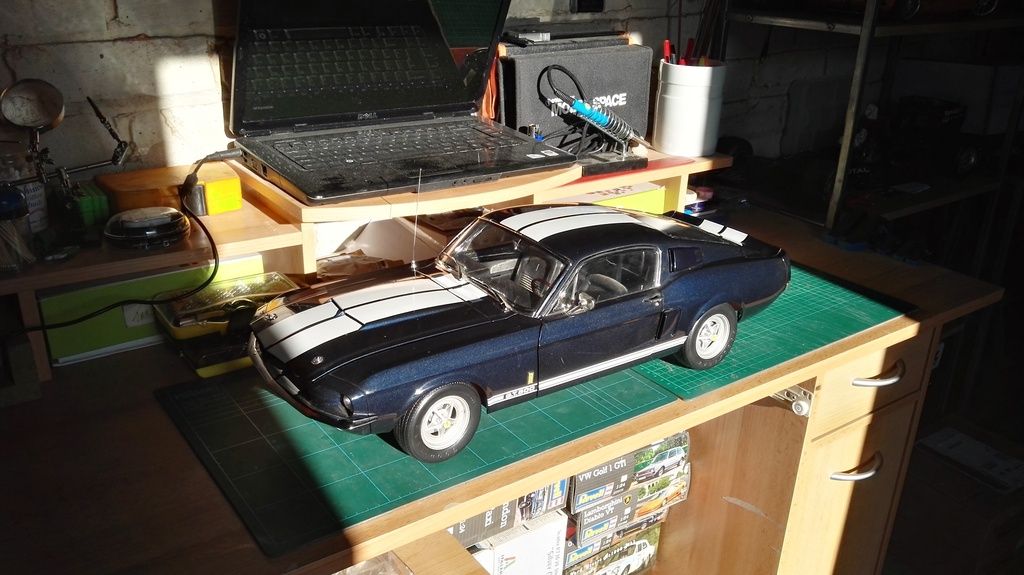
She really is a heavy one, large too again reminding you of the quality of this kit
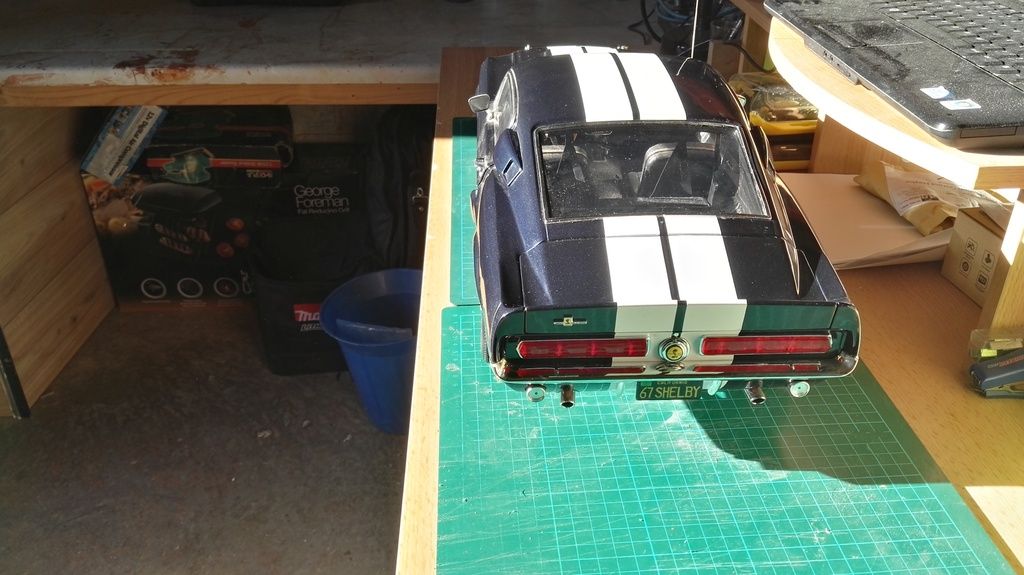
I do have some future plans 1, being to dust it off 2, fit the replacement number plate/tag and more,,, but for now I still enjoy looking at her as an out of the box build 2, fit the replacement number plate/tag and more,,, but for now I still enjoy looking at her as an out of the box build
Hope you enjoy and sorry for the build diary running dry
Built- Shelby Mustang, Lamborghini Huracan
Building-Spitfire, Redbull racing RB7, 3d printer, Honda CB750, Stage coach and Revell 1/400 Titanic
|
|
|
 Rank: Super-Elite       Groups: Registered
Joined: 28/07/2014 Posts: 4,269 Points: 12,713 Location: Scotland
|
Excellent build  great kit   regards Phil  COMING SOON =1/72 Italeri diorama`s Battle for the Reichstag and Stalingrad battle at the tractor factory 1/16 Trumpeter King Tiger with loads of extras ON THE GO= refurbishment of 1/25 Tamiya tiger 1 , amt Star trek kits and space 1999 models
So Much to Build,But What a Hobby!
|
|
|
 Rank: Super-Elite       Groups: Registered
Joined: 19/06/2013 Posts: 4,588 Points: 13,553 Location: West Yorkshire
|
Nicely done Steve  she looks great. Al
|
|
|
 Rank: Pro   Groups: Registered
Joined: 22/03/2016 Posts: 175 Points: 552 Location: Merseyside
|
Thanks it really was a pleasure to build Built- Shelby Mustang, Lamborghini Huracan
Building-Spitfire, Redbull racing RB7, 3d printer, Honda CB750, Stage coach and Revell 1/400 Titanic
|
|
|
Rank: Administration         Groups: Registered, Administrators, Global Forum Support, Moderator, Forum Support Team, Official Builds Joined: 04/01/2016 Posts: 7,027 Points: 21,388 Location: Northamptonshire, England
|
Nicely done, she sure looks a beauty.  Mark Regards
Markwarren
(Mark) Admin
|
|
|
|
Guest (3)
|