|
|
 Rank: Master       Groups: Registered
Joined: 08/07/2010 Posts: 1,036 Points: 3,086 Location: Thetford, Norfolk, UK
|
Great tutorial Jase. Thank you for sharing with us that simple (tape) method of shaping the irregular tiles. That must make life a lot easier, and making those shapes is something that I have often wondered about. Thanks again.
Happy building
David
|
|
|
 Rank: Elite       Groups: Registered
Joined: 22/03/2010 Posts: 2,065 Points: 6,295 Location: Gorleston-on-sea
|
Terrific work as usual jase...Great tutorial too. I am sure many on here will benefit greatly from your very valuable input...Well impressed!!  Current Builds: Deagostini HMS Victory: Deagostini HMS Sovereign of the seas. Completed Builds: Del Prado: HMAS Bounty: Hachette: RMS Titanic: Del Prado: Cutty Sark...
|
|
|
 Rank: Pro   Groups: Registered
Joined: 08/02/2015 Posts: 274 Points: 812 Location: Malmesbury
|
  Loving the work on the copper plates  cant wait to see the rest of your build. keep up the great work  Regards Shaun Building-RC spitfire
Build- titanic,Skyrider drone, solar system, T72 tank
|
|
|
|
|
Many thanks for the feedback. I am sure there are ither approches but this way works for me Jase “Whenever you find yourself on the side of the majority, it is time to pause and reflect.”
-Mark Twain
|
|
|
|
|
Completing the outer Hull finishWith the copper plating completed we now turn our attention to the planking above the whale. Due to the short distances between the gun ports it is possible to use the offcuts from thew lower hull planking to complete the remaining planking. Planks should be formed and fitted as per the lower hull. leave a small overhang, aprox 1 mm, over the gun port edges. 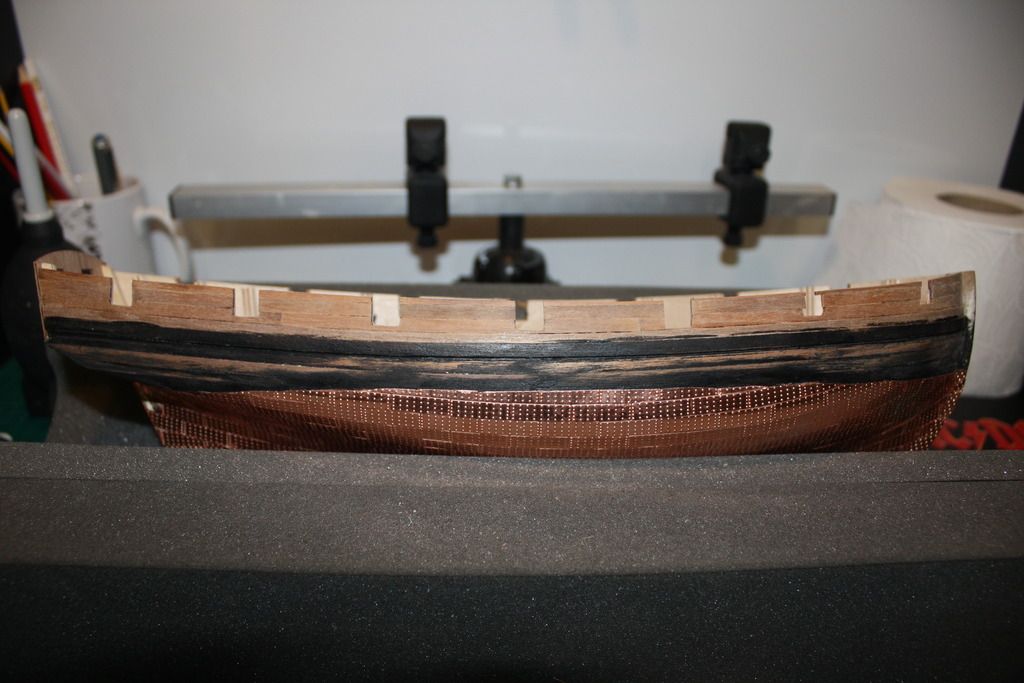 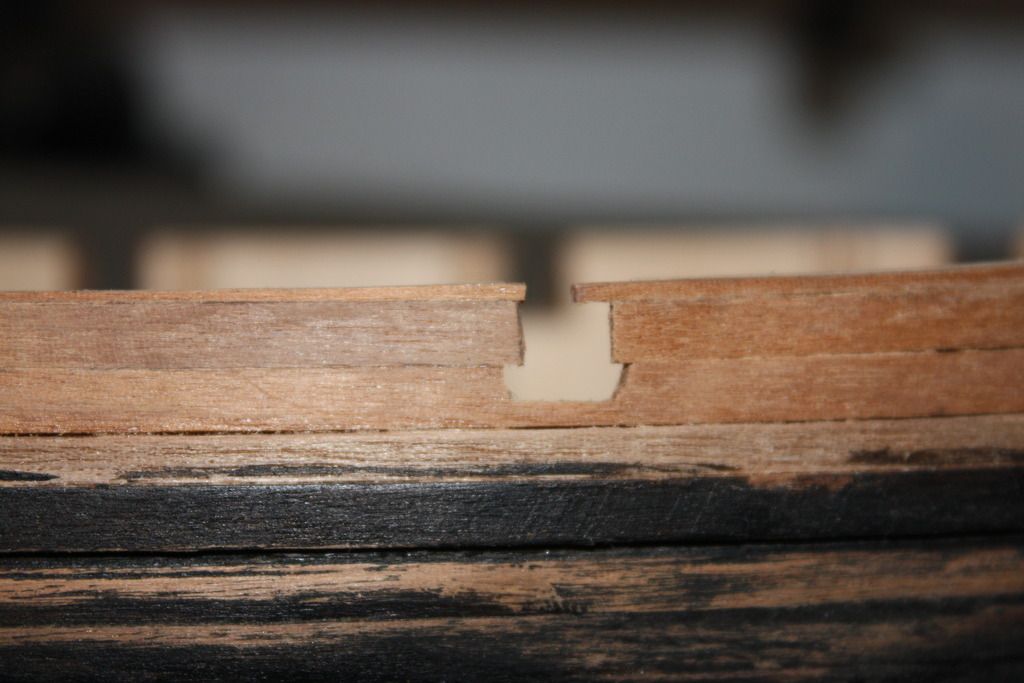 Once the adhesive has cured the gun ports can be filed to shape. using a sharp blade carefully trim back the wood as close to the actual edge as possible. first take a corse file such as a diamond cut file and rough out the shape. At this point please take care as file edges are often abrasive and it is easy to file an unwanted notch into the corner. once the outline is roughed out a finer needle file can be used to finish. a share file can be used to carefully define the bottom corners. finally the overhanging planking should be sanded down level with the bulkhead former.
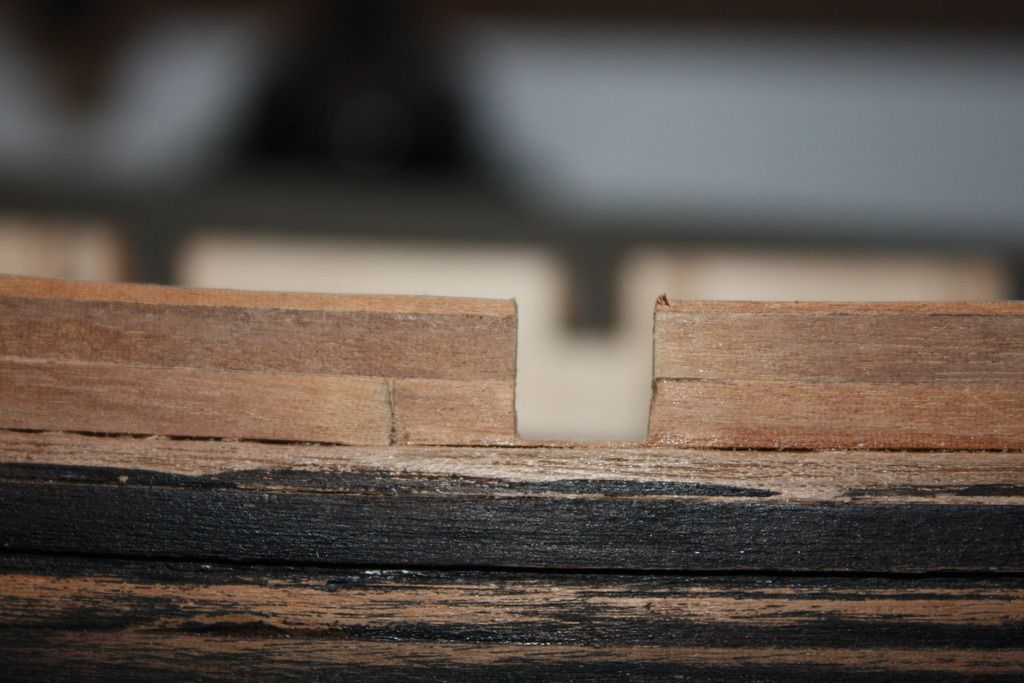
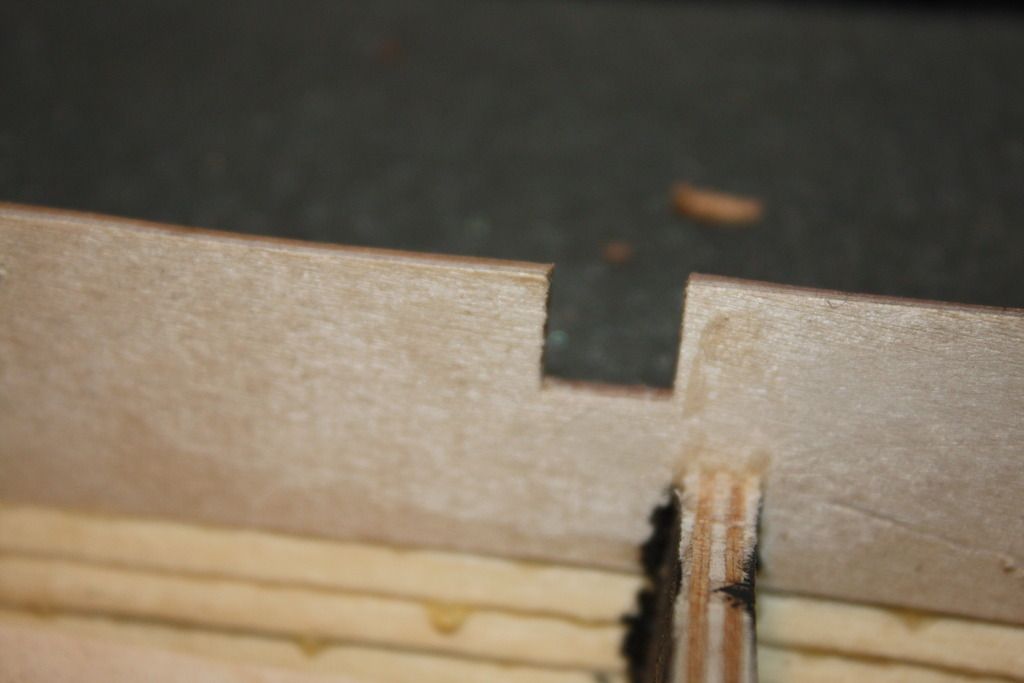
Unless you particularly wish to show the planking joints, you now need to fill any gaps. using a fine sanding filler apply a thin coat of filler over the planking, this will fill any gaps and heavy grain. once this is done a medium grit abrasive paper can be used to smooth down the planking. a second sand with a fine paper will give a nice paint finish.
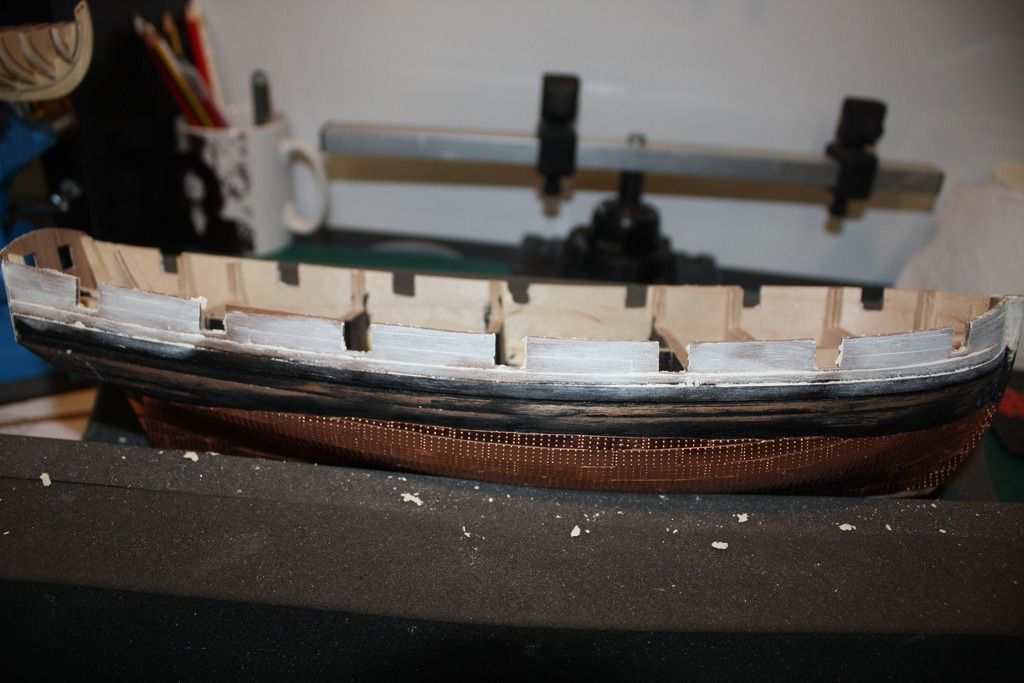
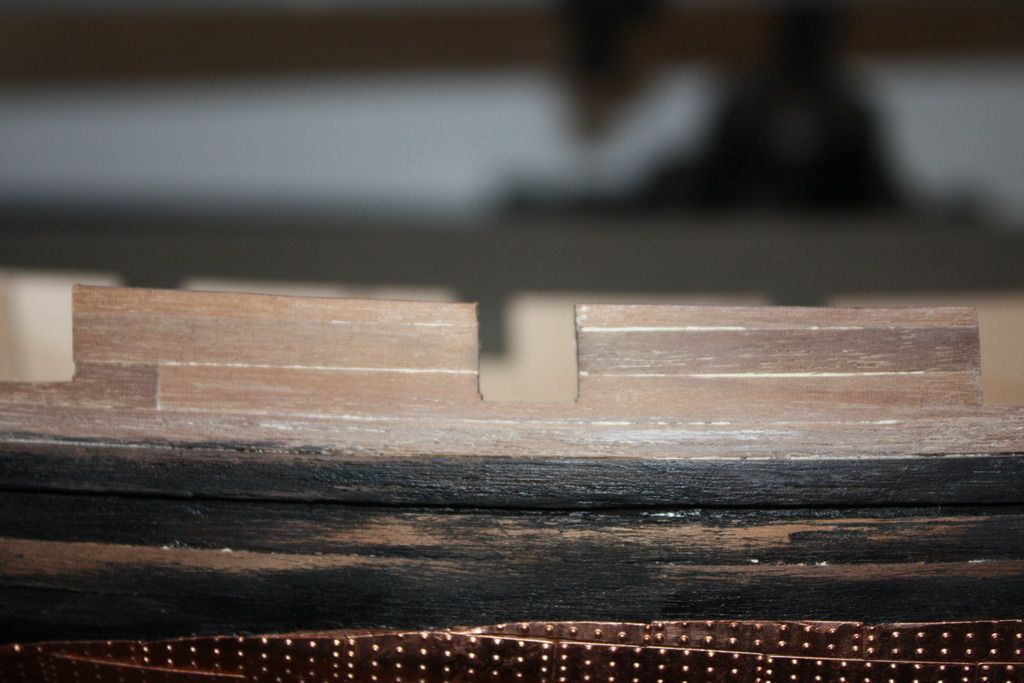
Painting the hull.
Everything from the top of the black strake to the top of the copper plating is painted dull black, as is the transom. Yellow ochre is used above the black. I have chosen to paint in the gunport lining first, this will be done again but helps visual get a good cover of the edge with the yellow. If you chose to paint in the Red ochre you will need to give any over spill on the outer hull a gentle sand down with fine wet and dry to ensure it does not show through.
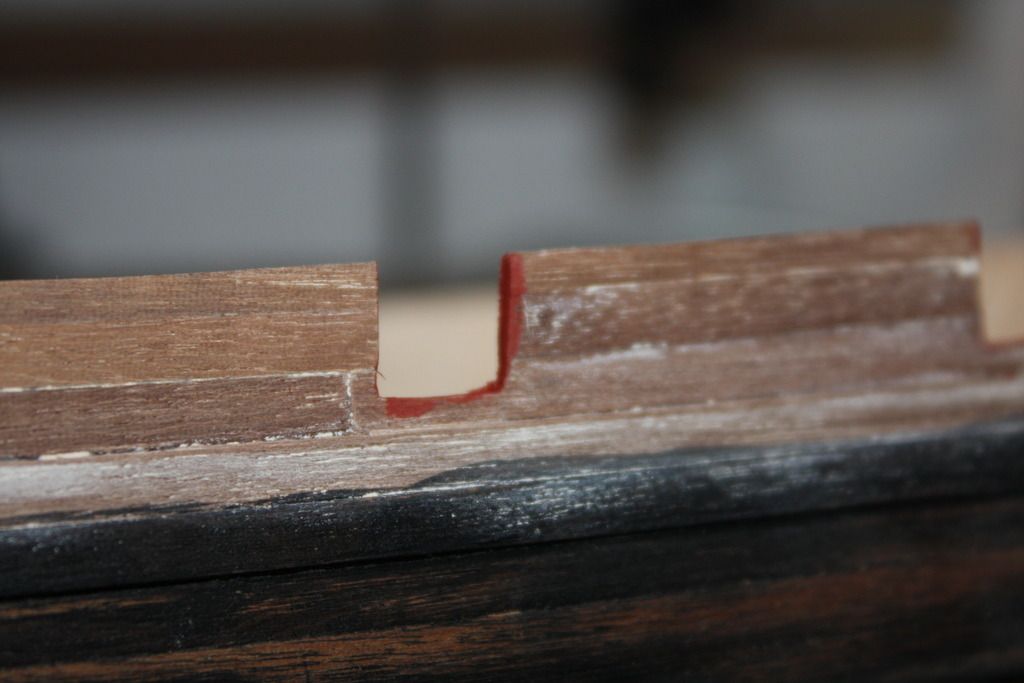
The yellow is applied first as black will show through the yellow paint if the black is applied first. You should be able to paint this free hand without any tape
Once the Yellow has had two coats the black can be painted in, again this should be possible free hand, however you can apply masking tape above the strake if you chose to. If applying masking tape it is best to paint over the edge of the tape in the base yellow to seal the edge and stop any black paint ingress.
Once the hull is painted you will need to seal this with a varnish. Typically wooden ships are varnished in either a satin or matt Varnish. I have chosen matt.
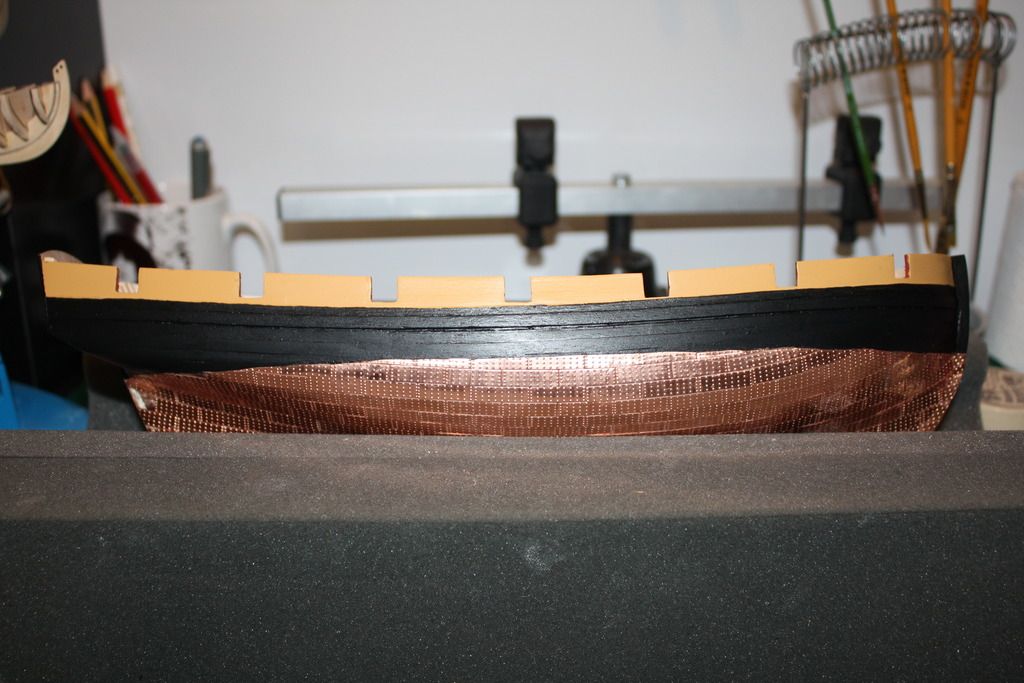
This completes the decoration of the outer hull, we will look at installing the upper gun deck next
any questions or comments gratefully received.
Jase.
“Whenever you find yourself on the side of the majority, it is time to pause and reflect.”
-Mark Twain
|
|
|
 Rank: Master       Groups: Registered
Joined: 08/07/2010 Posts: 1,036 Points: 3,086 Location: Thetford, Norfolk, UK
|
Hi Jase,
Good to see another instalment of your tutorial. She's really looking rather nice now that the paint has been applied. Good work
Happy building
David
|
|
|
|
|
Inserting the upper Deck.Before we can fix the second false deck in place, this will become the substright for the upper deck, we need to remove the rib tops that the outer bulwarks were mounted to. This can be a tricky process and care is needed not to damage the bulk head. Begin by cutting through the base of the rib at the correct point. a razor saw is best for this job. However the ribs at the bow will be much more difficult to get a razor saw into. using a sharp craft knife blade and gently rocking the blade backwards and forwards while applying pressure you will slowly make your way through the wood. Do not cut right through 1-2mm can be left.
Then using a pair of suitable pliers or mole grips gently 'waggle' the rib until it breaks free. do not worry if some splinters of rib are left behind. These can be removed with a craft knife and then sanded flush along with any glue that may be left behind.
Once this task is complete the deck supports need to be sanded to ensure they are smooth and even ready for fixing the false deck. The bulwarks should also be sanded smooth at this point ready for lining at a later stage. It is important you do not over sand. The formers are deliberately shaped to give the upper deck a camber and this should not be removed.
Test fit the false deck to ensure it fits comfortably. When your sure you have a good fit you will need to paint any visible wood black so that it cannot be seen through gratings and deck fittings, if you have not already done so.
Before fixing the false deck in place mark out a line running the full length of the deck at the half way point, this will be used to start the planking.
Wood glue is applied to all the contact points, once the Deck is installed I used pins to ensure it stayed in place and sat correctly on the supports. you could use weights if you prefer. the pins are removed once the glue is cured.jase attached the following image(s): “Whenever you find yourself on the side of the majority, it is time to pause and reflect.”
-Mark Twain
|
|
|
 Rank: Master       Groups: Registered
Joined: 08/07/2010 Posts: 1,036 Points: 3,086 Location: Thetford, Norfolk, UK
|
Hi Jase, nice little continuation of the Pickle build. This is now a serious contender for my next build. Just wondered though, does she have any sails. I looked at the CMB website again and the picture shows her without sails, and there's no mention of a set being available.
Seasons greetings to you and family.
Happy building
David
|
|
|
 Rank: Pro Groups: Joined: 24/08/2009 Posts: 48,827 Points: -13,348
|
Caldercraft don't provide or sell any sail sets for any of their period ship kits
|
|
|
 Rank: Master       Groups: Registered
Joined: 08/07/2010 Posts: 1,036 Points: 3,086 Location: Thetford, Norfolk, UK
|
Thanks Tomick, that puts my mind at rest, still think I may buy this one and follow Jase's excellent tutorial
Happy building and seasons greetings
David
|
|
|
|
|
Planking the upper deck.
In the real world Deck planking begins with a 'king plank' which is laid at the centre line of the deck and is the point all other decking works out from. For the sakes of ease in this tutorial I will plank from a centre line which means there will be no central plank. It is quite possible to lay the deck planking using a central row of planks following the description below if you so chose.
First job is to decide the 'shift' pattern and plank length you wish to apply to your deck. The plans with the kit offer this solution for this

This uses the three butt shift pattern typical on British ships of this period.

Every 4th butt should begin at the same point as the first leaving 3 stepped planks that shift 1/4 of a planks length up before the 4th reverts to the start. You can see in the picture above the crosshatched planks that represent the first two rows to be put down.
The simplest method for cutting these deck planks is with a sharp curved craft blade. Mark the plank at the point to be cut and either draw a straight line for cutting using a set square or use the grid of a cutting mat as a cutting guid.


The planks can be fixed in place by smearing a thin layer of wood adhesive on the underside of the plank. I find a cocktail stick is ideal for this. in some instances a weight may be needed to ensure contact along the full length of the plank. once the glue has firmed up but not set use a clean cocktail stick to remove any excess glue that may be present. This is important as excess glue will prevent the planks from butting together tightly. Simply drag the point along the edge of the planks, this should gather any glue up.

Before laying the first plank we need to add the calking. Planking on a real ship has each plank edge sealed using rope and tar, known as caulking. There are a number of methods for doing this, most of which have been explored on Model Space at some point. For the beginner the simplest solution is to use a HB pencil and colour in all the edges of the plank. Once two planks are butted together a nice dark join is visible. Don't worry if you get pencil on the upper surface of the plank, a pencil eraser will remove it and we will be sanding the deck later.
Warning, many kits advise the use of black marker pen for this. many of these pens can bleed into cheaper wood or give a purple smear when sanded or under varnish. my advice is to steer clear of this method, or test the pen for suitability before hand. Its my opinion that black pen gives a caulking line that is to dark and often out of scale.


Lay a single row of planks along the length of the marked out centre line. the bow and seen planks will need cutting to length. it is best to cut them around 1mm over length and carefully sand back while repeatedly dry fitting to get a good fit, do not worry to much if you have small gaps of less than 1mm as the edges will be covered when the bulwarks are line.
I find it good practice to trim and file any planks that lay over any of the deck openings for masts and grates as you go. be carful not to use a knife for this as the treasure of cutting can cause the grain to compress causing the plank to split. it is better to use a fine razor saw then finish with a needle file.
Once you have laid a row of planks either side of the centre line begin planking from the centre of the deck out one row at a rime, trimming and filing as you go.


Once this is done the deck can be given a gentle sand with medium grit sand paper followed by a fine paper. Before sanding I find it good practice to remove any high spots with a razor blade. with a sharp blade drag the razor blade in the direction of the plank grain, this effectively works like a micro plane and will remove material fairly quickly. Use a puffer brush or equivalent to remove the sanding dust.
at this point you can mark the plank ends with tree nail spots if you wish. Tree nails on the real ship are spikes of wood made from the same material as the deck planks that are driven home to nail the deck in place. even on the real thing they are sometimes hard to spot. Given the scale of the model I have chosen not to replicate the tree nails, however, if you wish to, this can simply be done using a propelling pencil.
Once compleat the deck should be sealed using a clear matt varnish.

Finally cover the deck openings with masking tape so that you do not lose parts later in the build.
If you have any questions please ask within the build diary so that everybody can see the discussion.
many thanks for looking in.
Jason“Whenever you find yourself on the side of the majority, it is time to pause and reflect.”
-Mark Twain
|
|
|
|
|
I have updated the last post with better walk through and improved pics Jason “Whenever you find yourself on the side of the majority, it is time to pause and reflect.”
-Mark Twain
|
|
|
|
|
|
|
|
 Rank: Elite        Groups: Registered
Joined: 20/04/2012 Posts: 1,787 Points: 5,292 Location: Thurso
|
Nice update Jase. One day I'll dig out my Pickle and follow your example.
Graeme
|
|
|
|
|
pemberg wrote:Nice update Jase. One day I'll dig out my Pickle and follow your example.
Graeme Its a loverly kit Thanks for looking in “Whenever you find yourself on the side of the majority, it is time to pause and reflect.”
-Mark Twain
|
|
|
 Rank: Beginner Level 2 Groups: Registered
Joined: 12/11/2016 Posts: 13 Points: 60 Location: South Africa
|
This is a fantastic tutorial, Jase ! Shows me a million things that can be improved over the antiquated methods I use ! Regards Martin
|
|
|
|
|
Xebek101 wrote:This is a fantastic tutorial, Jase ! Shows me a million things that can be improved over the antiquated methods I use ! Regards Martin Thanks for looking in Martin, always happy to share ideas Jason “Whenever you find yourself on the side of the majority, it is time to pause and reflect.”
-Mark Twain
|
|
|
 Rank: Pro Groups: Joined: 24/08/2009 Posts: 48,827 Points: -13,348
|
I notice that Humberside is the new home for the restored HMS Pickle replica..
http://www.bbc.co.uk/new...england-humber-33509196
|
|
|
|
|
hear you go available to book for corporate days out. http://www.visitnorthlin...er-sloop-and-hms-pickle/“Whenever you find yourself on the side of the majority, it is time to pause and reflect.”
-Mark Twain
|
|
|
 Rank: Pro Groups: Registered
Joined: 08/05/2015 Posts: 239 Points: 693 Location: Wisconsin
|
Very interesting to follow. Do you know if the model is available anywhere in the United States. I have done a limited internet search and have not found anything.
Thanks
|
|
|
|
Guest
|