|
|
 Rank: Beginner Level 1 Groups: Registered
Joined: 03/03/2017 Posts: 7 Points: 36
|
Hi - it's been many years since I ever made a model - about 30! and then it was just a young lad's poor attempts! So...I've collected all the parts, now stored in many boxes, read up a lot, seen others build photos, watched many model makers videos on Youtube etc, bought my own, (first!) air brush, the paints, brushes etc etc - basically starting from scratch! And now I've started, after a few false starts - and inspired by what I've seen others do - I'm trying to follow in their footsteps - trying to pick my way though all the different methods and choosing what I think works best for what I'm trying/able to achieve. Like I've said, I'm no expert - and looking at all the Ref photos, the 5ft foot model, and the 32 inch one, I've decided to combine the best of what I've seen (detail wise) and add what details I feel I achieve. What I'm also trying to do (my personal choice) is try to create my own reality on the model - where paint details look like they were quickly airbrushed for film modelling, I'm taking the extra time I have to create my own logic of how panels might in a 'real' world have been painted etc - if any of this makes sense!!! I will try to post pics as I go, I'm also buying 3rd part additions and i hope some ideas my either inspire or give other something to avoid!!!  It's also taken me a bit of courage to start posting this - so will start with a few examples of what I've been up to for the last month....and will try to keep this updated as I carry on...any comments and/or suggestions very very welcome!!! thank you Below are my first attempt at repainting the hull, I'd already managed to turn the 'window' to the correct angle, filled the existing 'holes' and painted the base coat of 'insignia white'....and now all masked off ready for spraying.. 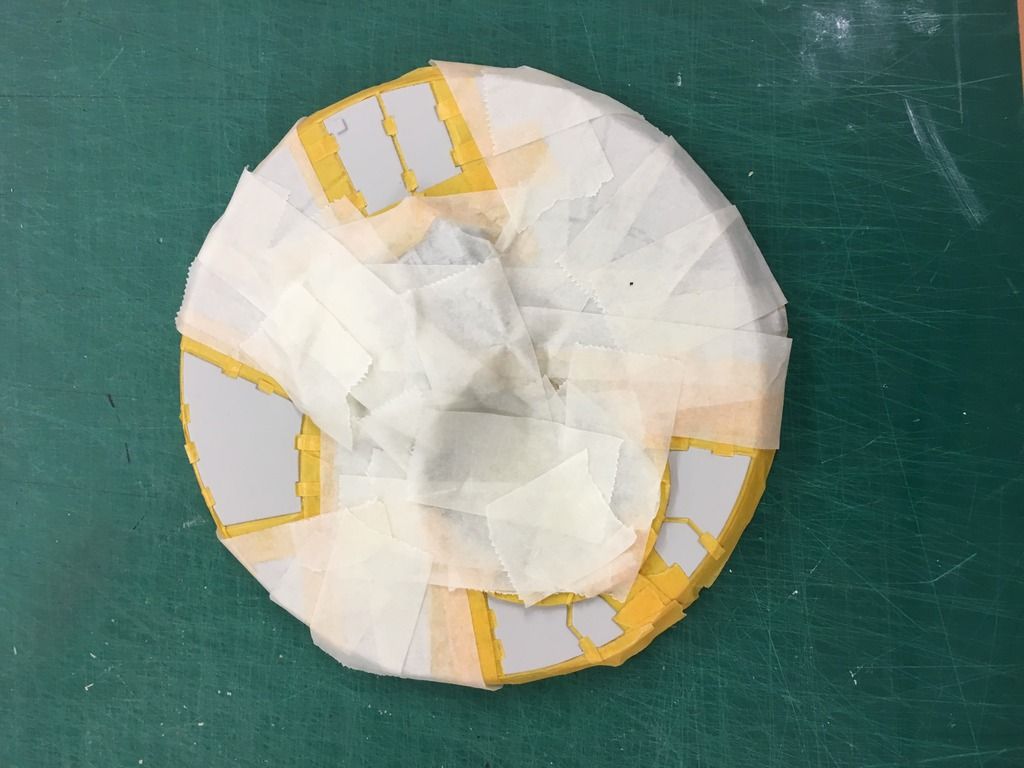 as you can see, I've decided to treat each panel separately, and unlike the original I'm not blanket spraying the colour across in one solid area...never tried this, or seen this done before...so hoping the end result is worth the effort,I'm imagining each panel has been built and added as it might have been, pre-painted and then attached to the ship's frame - my own logic!! 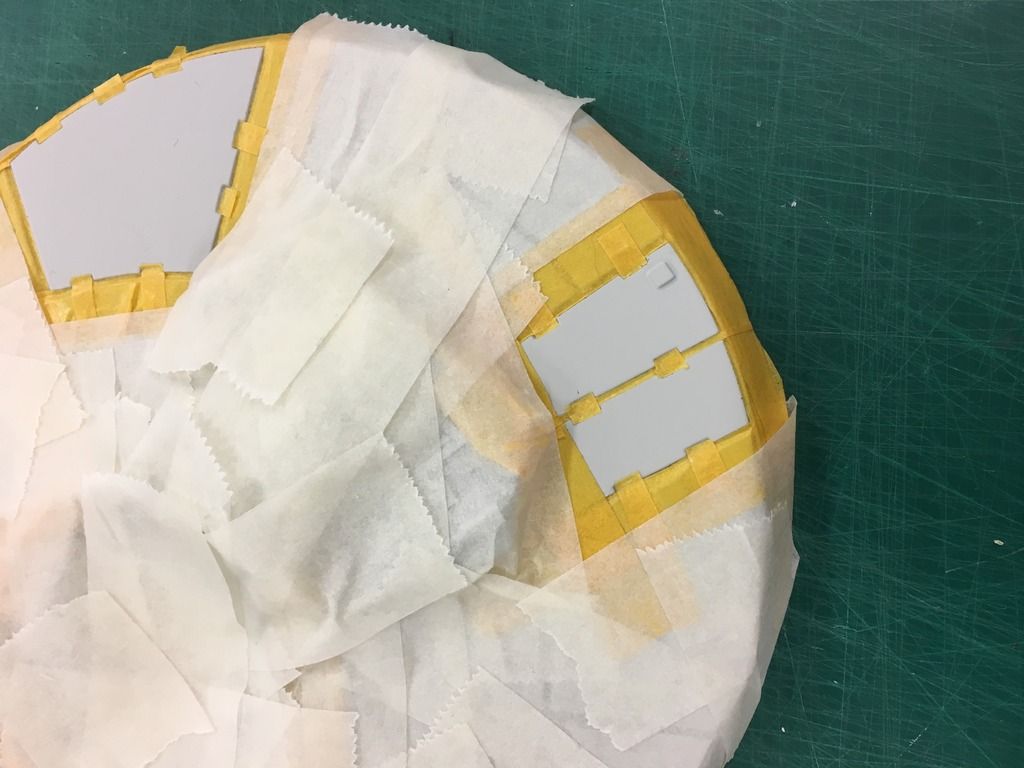 masking tape removed... 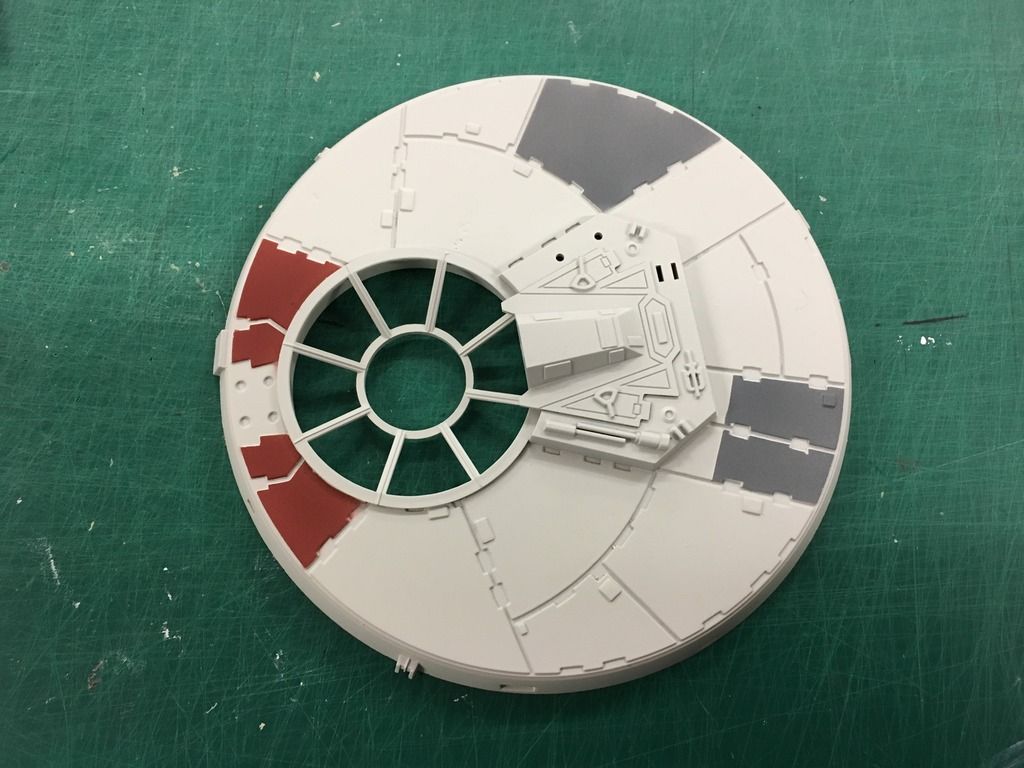 finally....aged and weathered, Oil paint washes, rubbing and scraping back the worn highlights - the damage 'holes' are painted on at the moment, but even though happy with the end result, I'm planning on drilling them out a bit....the black areas, and painting black again to see if the added texture creates a better overall effect. Hopefully my idea to not overspray the panels works for some of you? 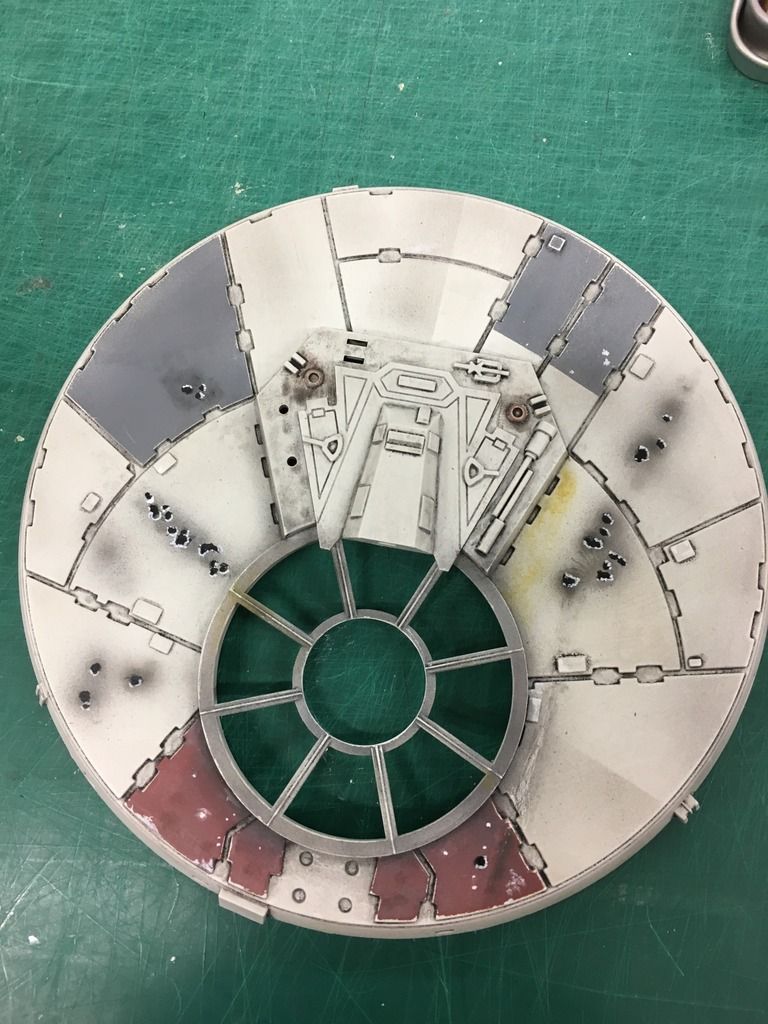
|
|
|
 Rank: Amateur level 2  Groups: Registered
Joined: 07/12/2015 Posts: 40 Points: 120 Location: South Dakota
|
Hey, I like your panel idea. I think that gives it some extra detail. Looking great, looking forward to following your work.
|
|
|
Rank: Beginner Level 1 Groups: Registered
Joined: 03/03/2017 Posts: 7 Points: 36
|
Here the start of my interior as well, more firsts for me, never worked with etched materials, or even cut holes to adapt existing models..... I thought long and hard, looked at others who had done the same and then took the plunge to have a go myself. Looking at the etch kit, and the template that came with it, adding tabs in a circle to support the frame, I decided there must be a quicker and simpler way. Instead I cut a strip of plastic, the right width, thickness and length to glue to the inside of the archway, and basically glued the etched archway to this - the plastic I added was completely hidden by the rim of the etched detail, and once attached, the padded cushion detail was then glued to the inside edge 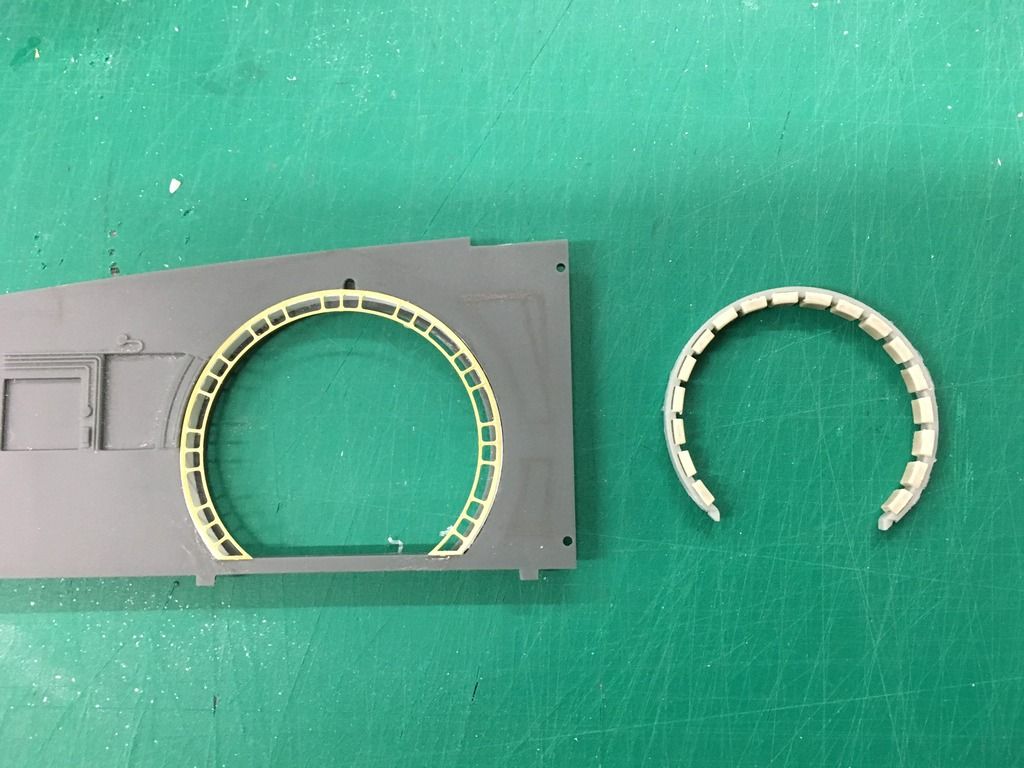 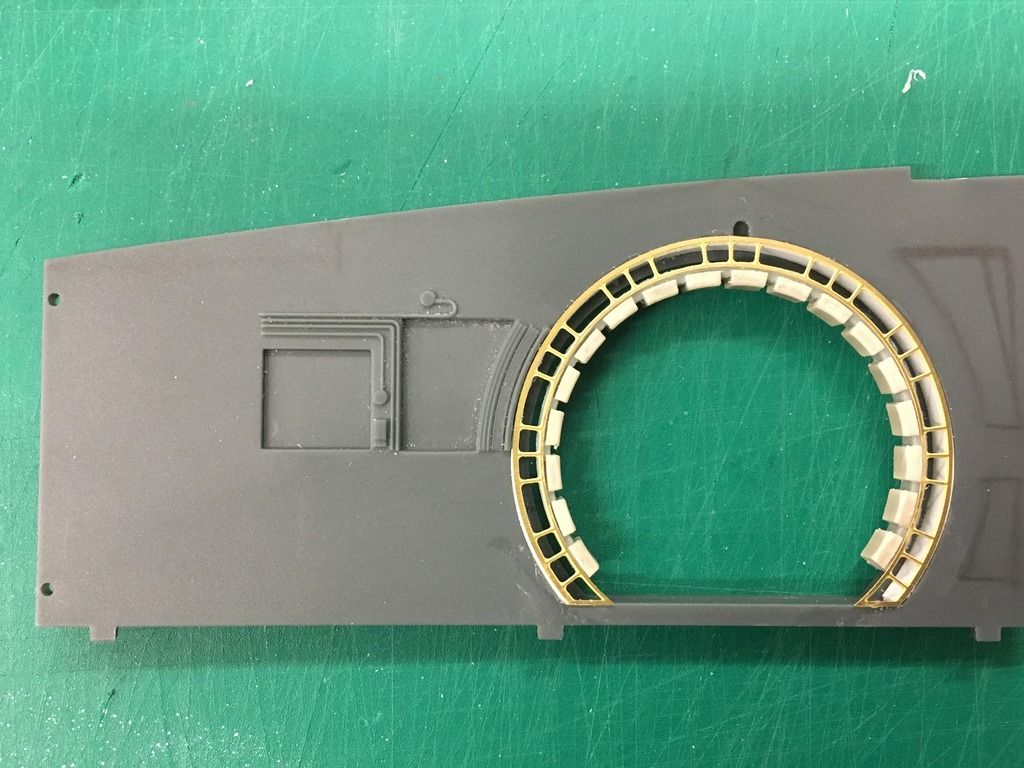 I did trim off the small tabs on the bottom of the padded cushions before attaching, and replaced them eventually with slightly longer plastic strips to fill the resulting small gap at the bottom or the arches. The open gap at the back meant it was fairly easy to run the dressing wires/cables round the inside to reproduce the 'real cabin details. 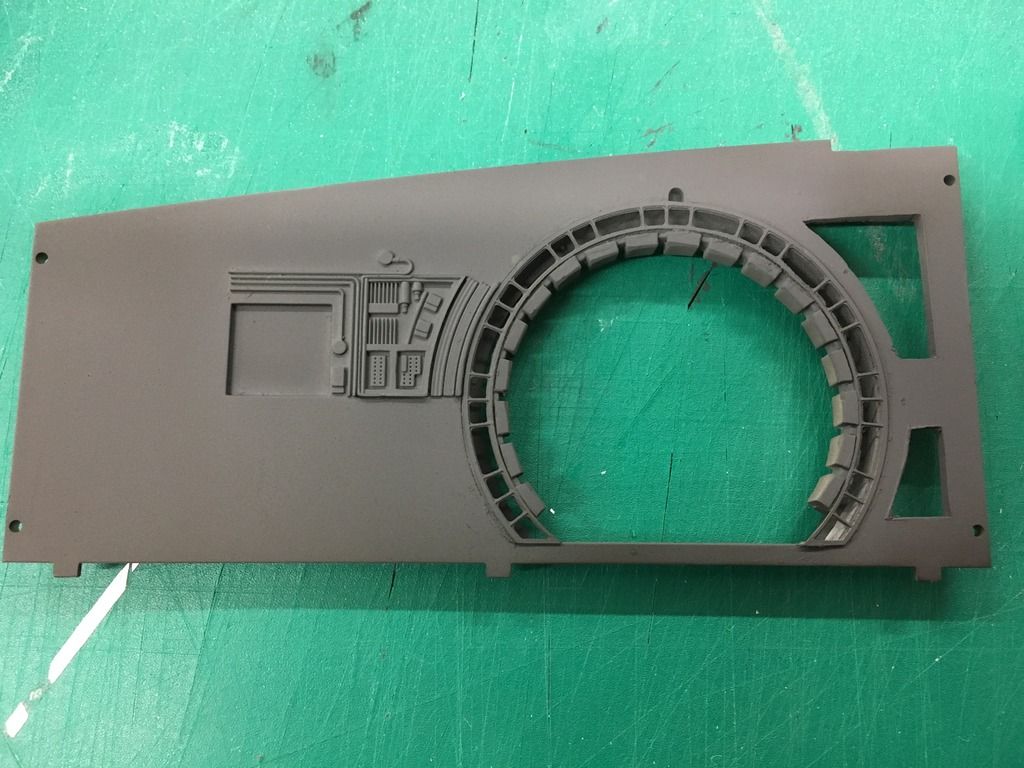 Holes cut...drilled small holes just inside some pencil lines I'd drawn on the 'wall', then once a very rough hole was created, I then, with a very sharp knife, slowly carved back the edge as smooth as possible - plus a little sanding. This was the first time I'd ever done this, and once painted with Tamiya Neutral grey, I could see some rough edges (below) so I ended up sanding again) Once I was happy. I filled the new holes with some bits form some cheap kits I'd bought, cut to fit - and then looking at the ref photos - starting adding more details/cables/wires - some using the kit parts, others just painted plastic or bear metal wires followed with lots of detail painting. Finally dirtying down with oil paint washes.....more to come 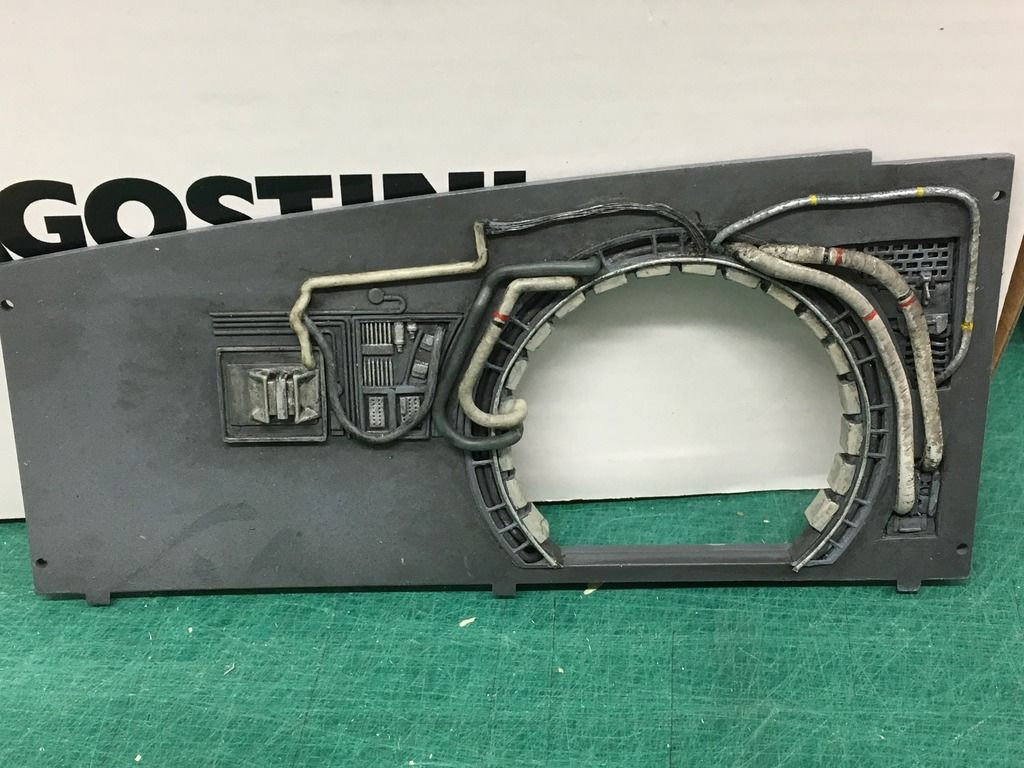
|
|
|
Rank: Beginner Level 1 Groups: Registered
Joined: 03/03/2017 Posts: 7 Points: 36
|
The cockpit exterior.... Looking at all the ref, so far I've painted the base colour, insignia white, and added oil paint washes into the details, black and rust. I also filled the 'damage hole' and tried to remake it to match the more subtle version on the 5ft model  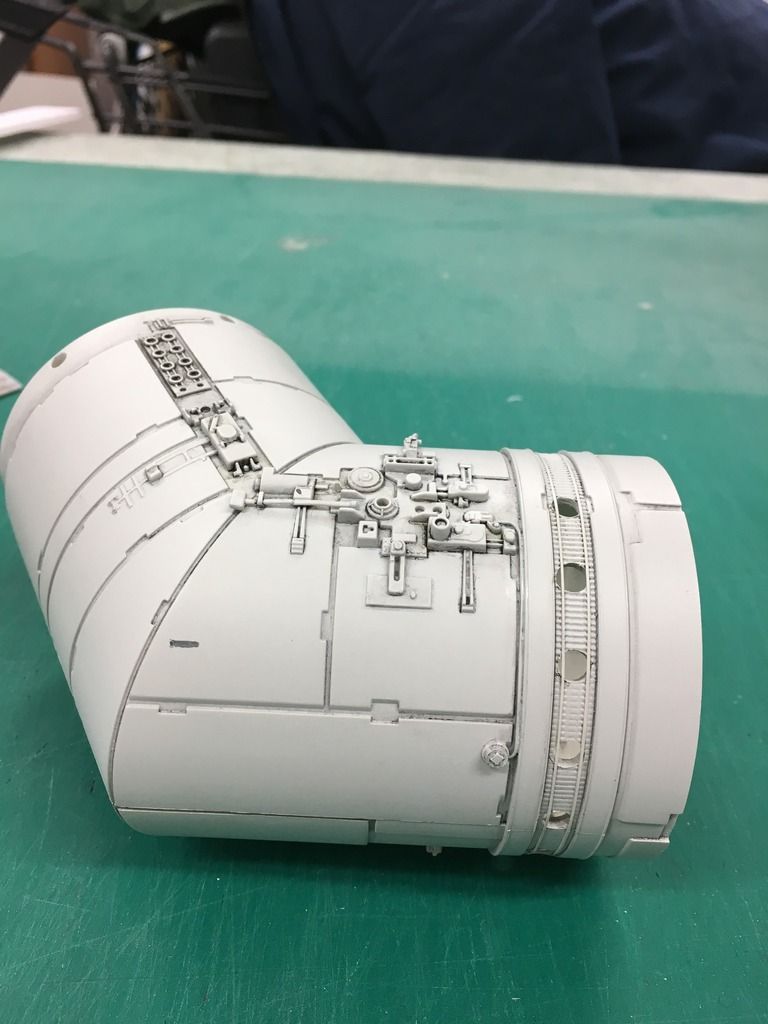 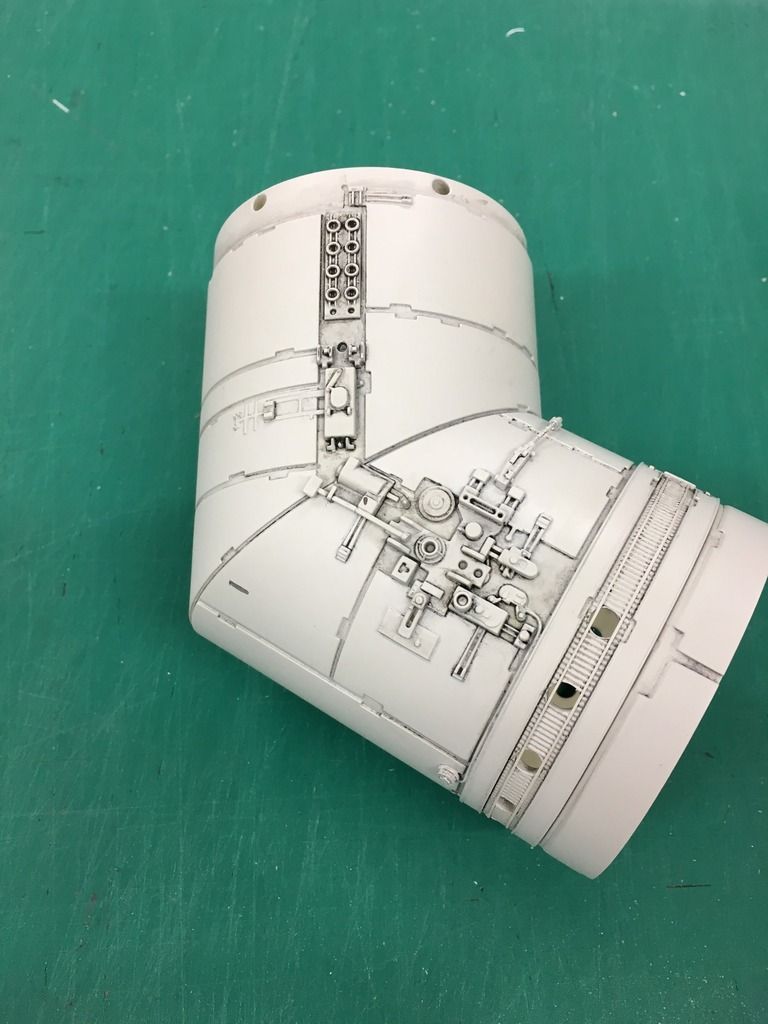 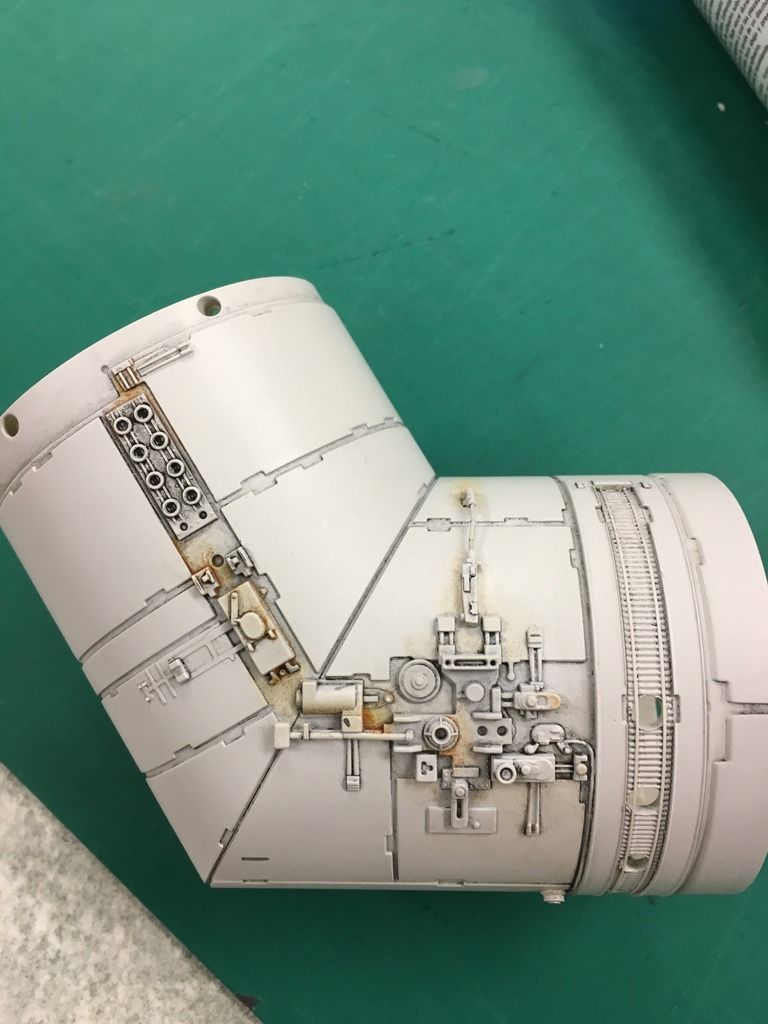 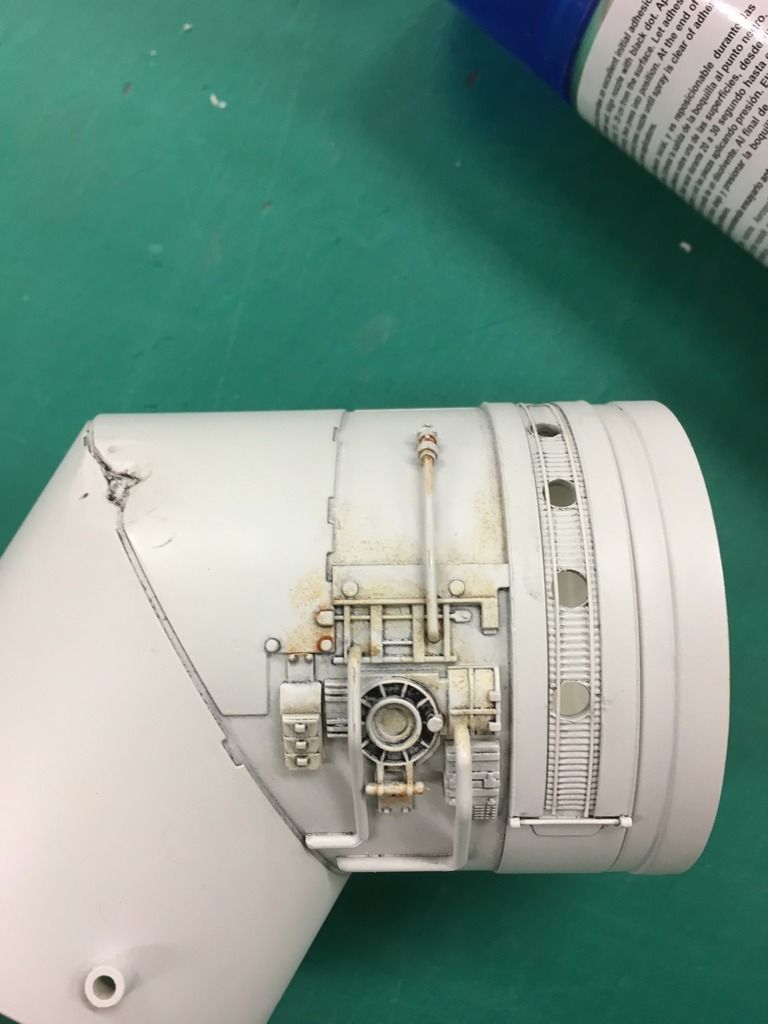 For some that might notice, I've added a small detail from the 5ft Model next to the 'collar' Looking at the original 5ft model I could see 9 holes, used for two red landing lights? light behind the louvres on the 'collar'.... so madly!!! I've decided to have a go to reproduce this. I scaled up the 'holes' and with the spacing on the 5ft ft model, and this one - ended up decided that 10 would space out better on this one - and match better with the look of the original - match with 9 didn't look right unfortunately. I drilled the holes, and have added two narrow strips or plastic card to eventually hold the louvres..... The plan is to try!!!! to etch these myself and add them one by one...never etched anything before!! - I have no idea if my plan will work - but going to give it go!!! - I have lots of patience and enjoy a challenge!!! 80+ to do!!!! If I achieve this - I plan to add decals, and more original details from the photo refs, the whole lot will finally have the final dirty down etc wish me luck!
|
|
|
Rank: Amateur level 2 Groups: Registered
Joined: 07/12/2015 Posts: 40 Points: 120 Location: South Dakota
|
Hey, I would love to see how you add the grill onto the collar of the cockpit. I will be doing the same but haven't seen how its done. I've only seen the finished version. Looking great so far.
|
|
|
Rank: Administration        Groups: Registered, Administrators, Global Forum Support, Moderator, Forum Support Team, Official Builds Joined: 04/01/2016 Posts: 7,178 Points: 21,841 Location: Northamptonshire, England
|
What an excellent job you are doing, looks fantastic. I'm looking forward to seeing how the hold area looks when finished, you attention to detail is excellent.  Regards
Markwarren
(Mark) Admin
|
|
|
Rank: Amateur Level 1 Groups: Registered
Joined: 09/01/2016 Posts: 31 Points: 93 Location: UK
|
Very nice painting and weathering. When I read your 1st post I thought I had suffered 'senior moment' and started a new thread...... The Falcon is my 1st model for 30+ years , I too now have a nice airbush and an ever growing collection of paints, and many hours of watching you tube modelling videos :) I look forward to seeing you build progress On the WorkBench : DeAg Millennium Falcon , Deag R2-D2
To Build : various 1/72 , 1/32 WW II Military Planes
|
|
|
Rank: Beginner Level 1 Groups: Registered
Joined: 03/03/2017 Posts: 7 Points: 36
|
Having painted the 'holes' damage on the surface, I decided this wasn't good enough, and have drilled out the BLACK painted holes, and painted them - probable this difference doesn't show up much in the photo, but in my hands the surface finish look improved. here, I've now added the canons i've just weathered down, having been painted with a base colour of insignia white. I've tried as best I can to drill out the ends of the canons to hopefully improve them, and painted the 'holes' black. 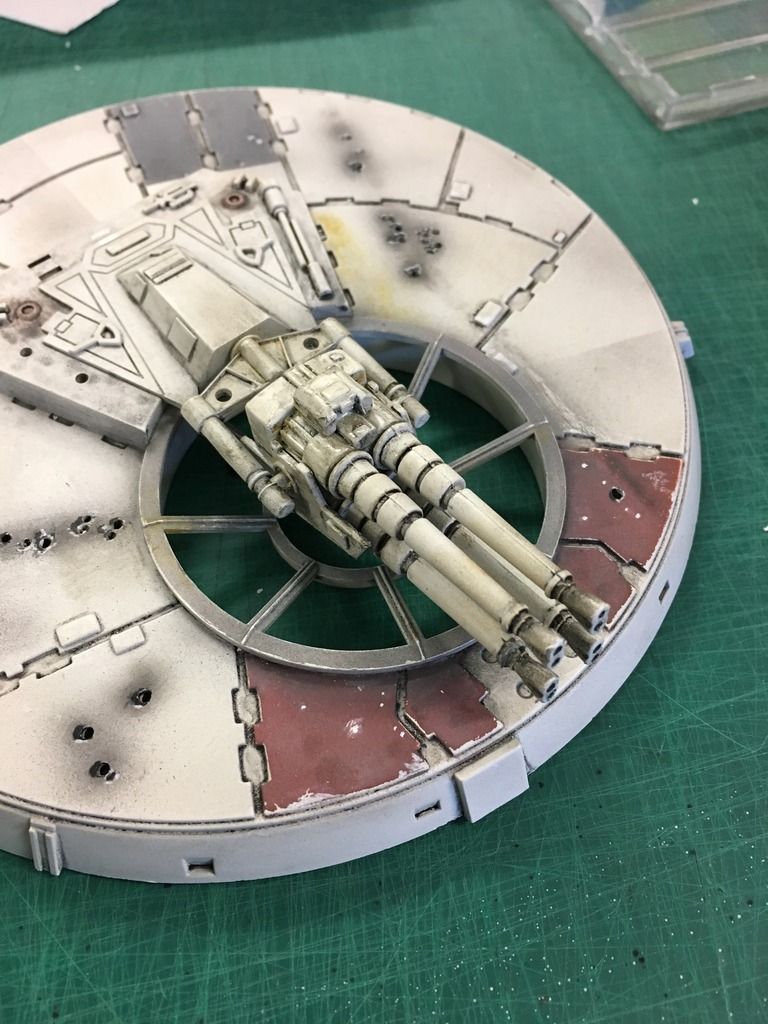 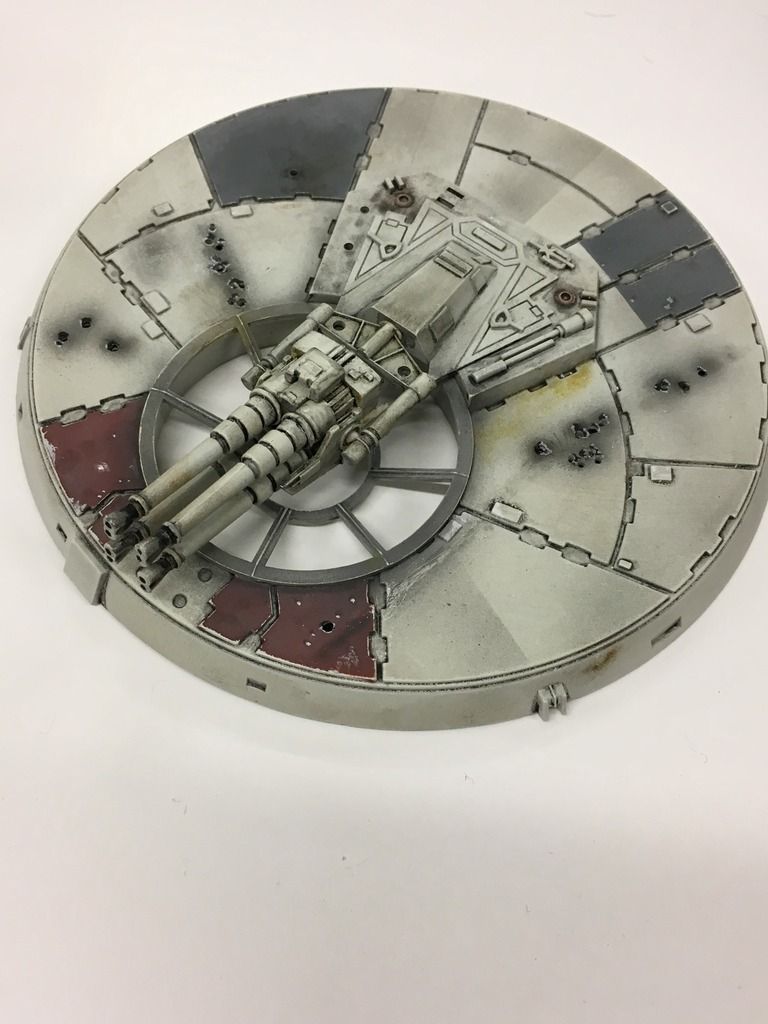
|
|
|
 Rank: Semi-Pro Level 1 Groups: Registered
Joined: 25/05/2015 Posts: 66 Points: 204 Location: Minneapolis
|
Nice paint work so far! Feels very authentic, and the subtle wearing around the panels - plus the drilled-out blast holes - adds a lot. Looking forward to more.
|
|
|
 Rank: Pro  Groups: Registered
Joined: 13/05/2016 Posts: 130 Points: 386 Location: Murrieta, CA (USA)
|
looking good keep up the great work. Make things as simple as possible but not simpler... - Albert Einstein
|
|
|
Rank: Beginner Level 1 Groups: Registered
Joined: 03/03/2017 Posts: 7 Points: 36
|
Before i start on the cockpit, thought I'd start on he smaller gun interiors, as I'm planning to add some fibre optics and a small scale first go would probably be a better start. Looking at the size and how much you're going to see through the small windows and past the 'gun mounting' - I've decided it's not worth investing in a 3rd party upgrade, so I'm sticking with the supplied parts. 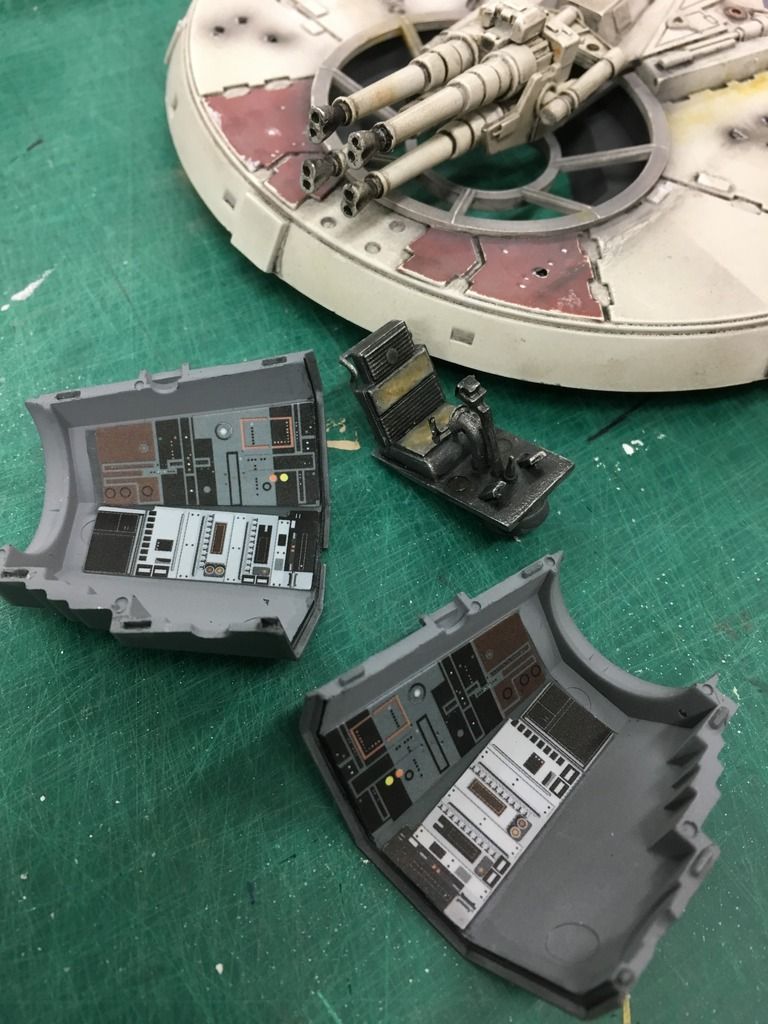 Tamiya Neutral grey for the walls, and German grey for the seat, with some black washes over, dry brushed silver and oil paints for the seating The supplied decals added, is per instructions. Looking at the ref film photos and the images on the Photoetch website etc - I decided to have a go at cutting some of the grills/panels I've seen in black vinyl (I'm lucky to have a vinyl cutter etc...which gave me the idea) because all this is very oblique and n the shadows etc etc - I'm just going for shape and texture - anything more, I feel won't be seen in detail. 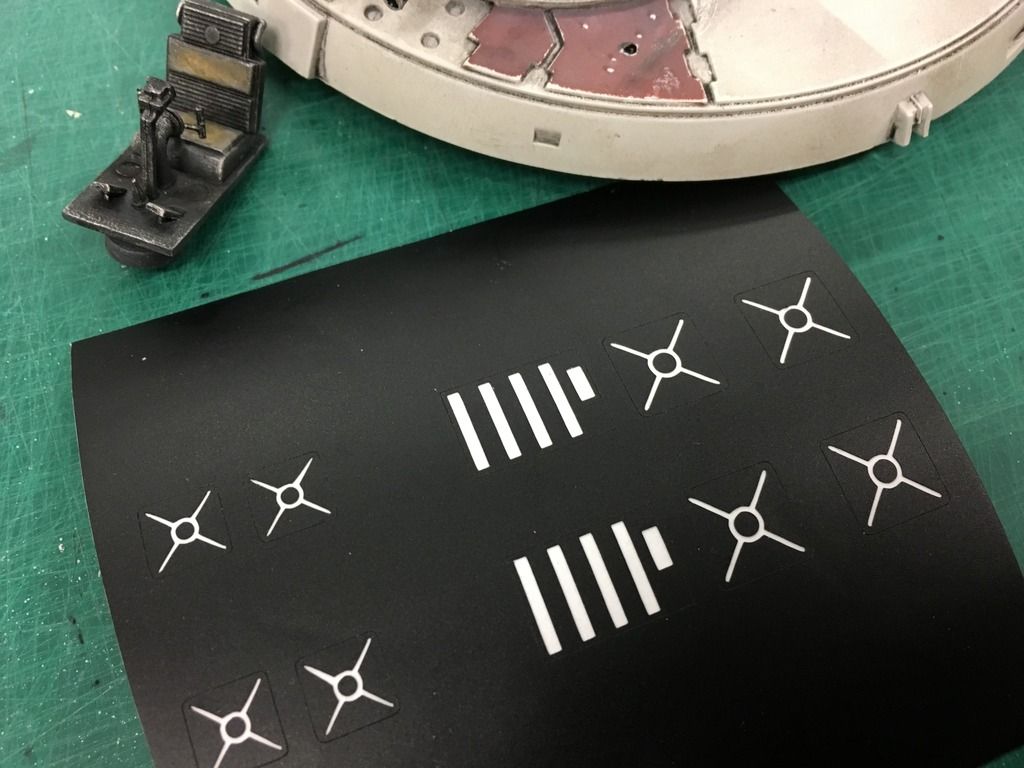 Once 'weeded' I dry brushed with silver - hopefully when the fibre optics are fitted, some of this might catch the light. 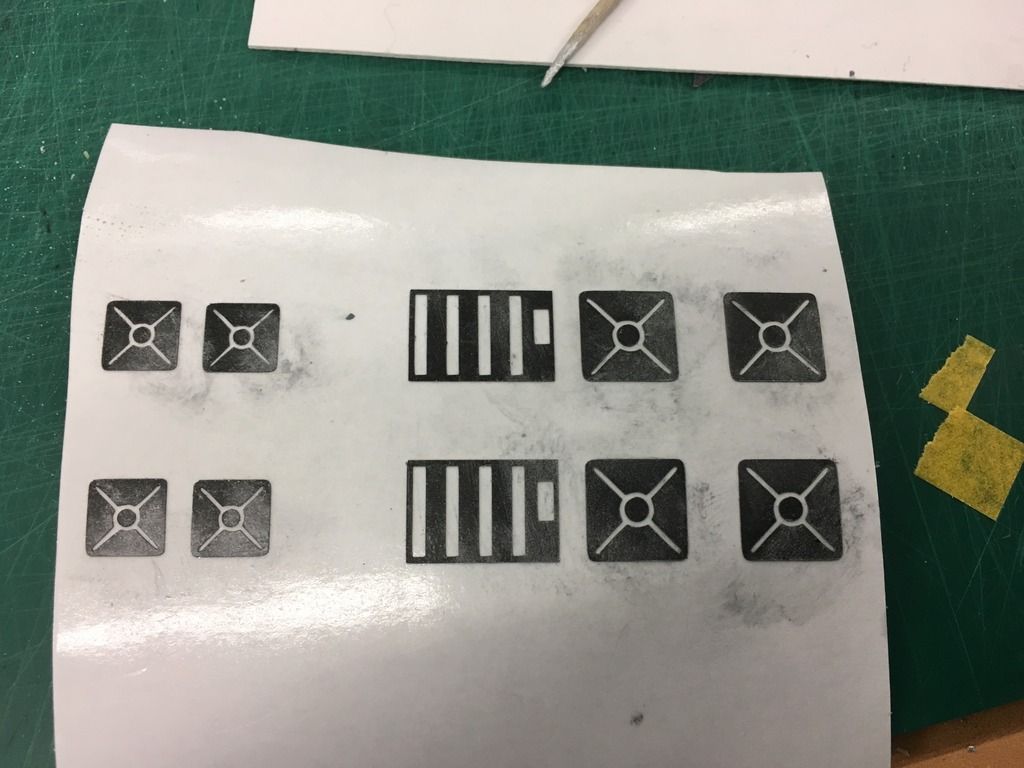 The first, smaller ones applied to walls and some dirty down etc 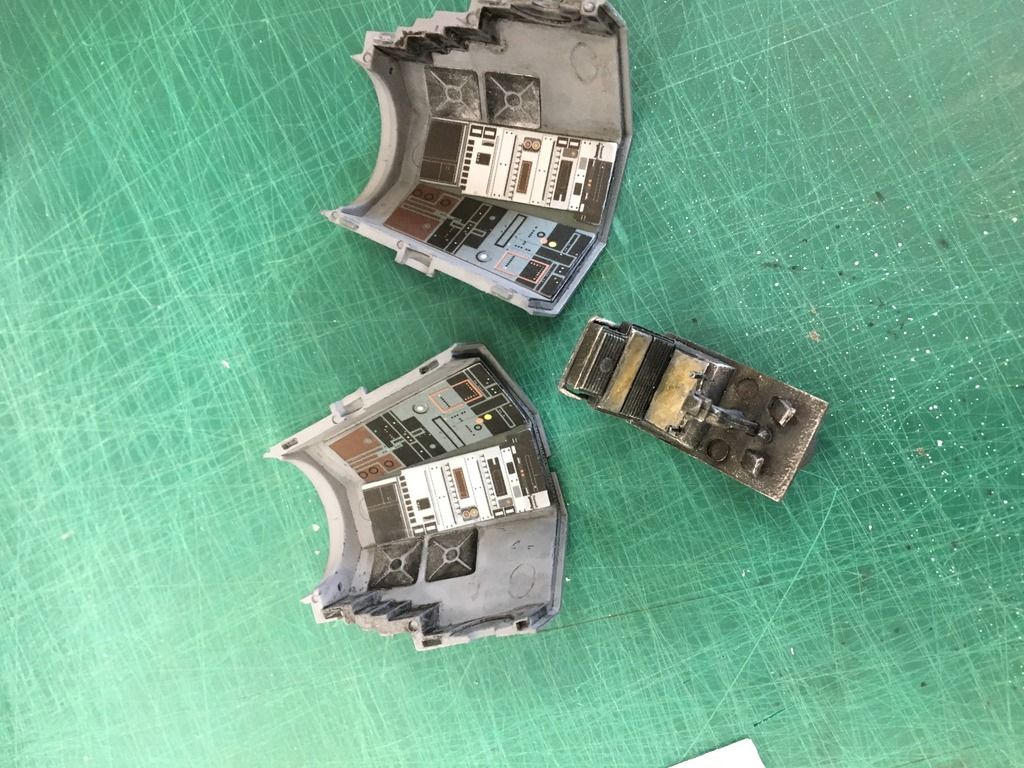 I'm not going to use the small light in the roof, that came with the model, (might see if and can use it somewhere else later!) - in stead when the fibre optics are fitted (planned static 10x yellow and 10x red) I'm going to put a thin roof plate to hide the join/hold with the rest of the cut vinyl effect added This is where i've got so far - awaiting the fibre optic to arrive in the post...and a whole new set of things I've never tried before!!!! There are still some blank areas, but will work on the fibre optics first, and see what it all looks like with the gun/through the window etc.... to see if any of it is actually needed. 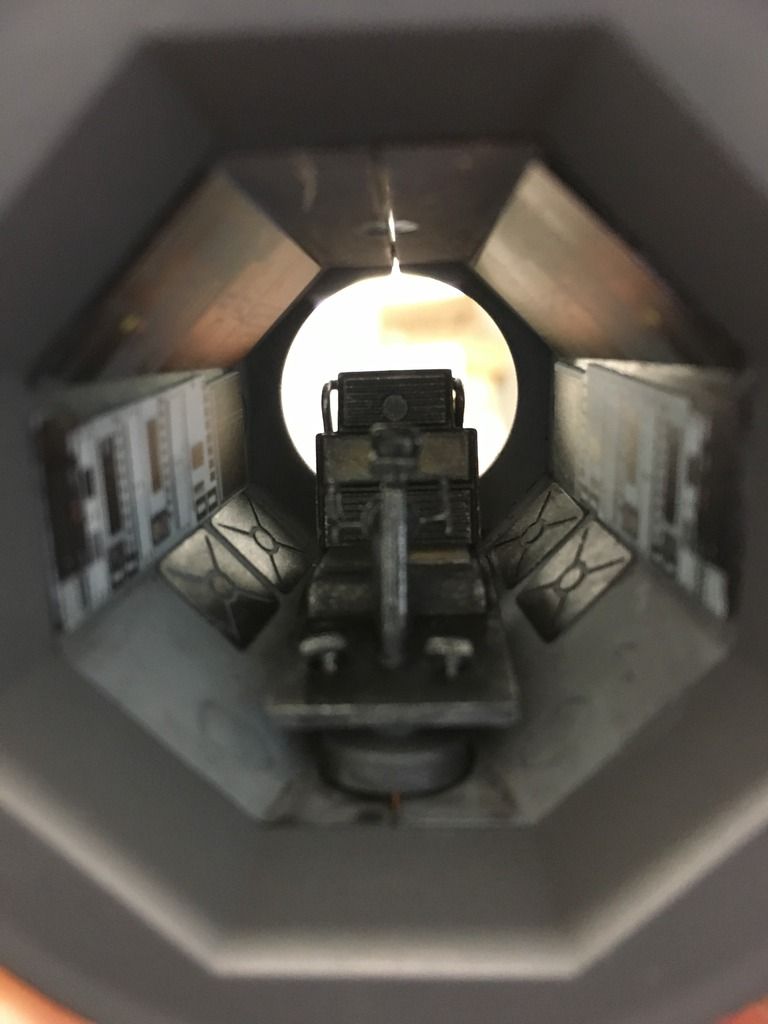 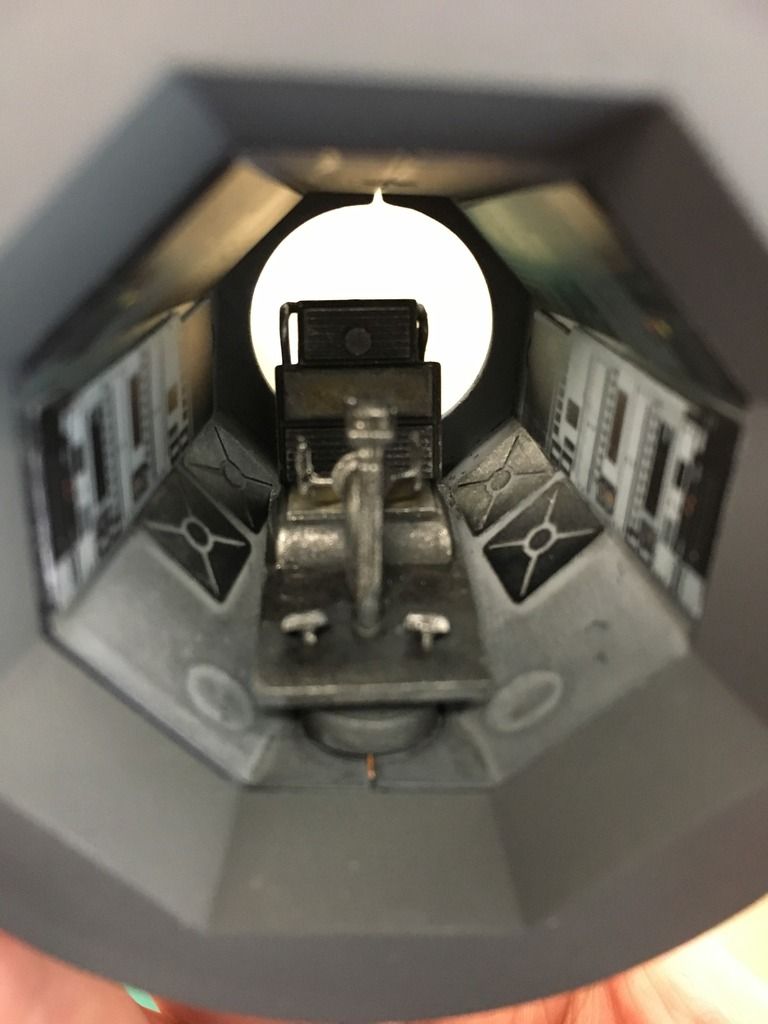 Don't worry, all the 'rough' edges/finish will be treated when the finally assembly and final washes are added. This is going to be a very dark 'hole' lit only by red and yellow fibre optics set far behind behind the windows and gun, so hopefully any faults won't be seen to closely, if at all!!! - not sure if the two ovals at the front are moulding marks, but they add a little symmetrical detail so happy to keep them - some 'kit bashing parts' might be added as well later.... If the silver this time is a little heavy handed this is intentional - I'm hoping this will help to reflect some of the red/yellow of the fibre optics. I keep saying this but I've not made a model for over 30/35 years so it's thanks to everyone thats gone before me and all the tips and help I've read before starting this!
|
|
|
|
|
Showing some beautiful skills here, she's looking fab.....  Regards Alan
|
|
|
 Rank: Super-Elite Groups: Registered
Joined: 27/01/2014 Posts: 5,060 Points: 14,980
|
Really nice job so far and some new interesting ideas, it looks great
|
|
|
Rank: Administration Groups: Registered, Administrators, Global Forum Support, Moderator, Forum Support Team, Official Builds Joined: 04/01/2016 Posts: 7,178 Points: 21,841 Location: Northamptonshire, England
|
Looking really good, great additions. Mark Regards
Markwarren
(Mark) Admin
|
|
|
Rank: Beginner Level 1 Groups: Registered
Joined: 03/03/2017 Posts: 7 Points: 36
|
Apologies, first, for the apparent random direction of the build, I'm using these first different updates, hull exterior, ship interiors, and this time, the recessed pipework, to get used to the methods I'm using trying to apply the painted detail and work out what works best for me and what I'm trying to achieve. Behind the scenes I've assembled the lower hull - and I'm currently waiting for my 3rd Part fibre optics to arrive in the post to learn the joys and pitfalls of fitting them for the first time. For these recessed panels I airbrushed all over with Tamiya Neutral Grey, once dry I flooded, and I mean flooded! - with thinned down black oil paint, let it dry - and then again, and finally a third time - getting nice random pooling and patches of dirt etc, on the final wash I added blobs and swirls of Burnt sienna and yellow ochre for rust. After each coat/wash,either a bit of tissue and even my finger' I rubbed and polished the highlights. (when I say pooling...once coat I poured some of the excess liquid out!! to help dry it!) The last coat I used a hair dryer to speed up the drying process impatient as I am! The final coat as silver - but rather than dry brushing from the jar I mixed a very very week solution (almost clear) and washed it over the areas a wanted a metallic feel - and in my hands it's given me the look I wanted. Some slightly stronger silver wash was used to pick a few highlights out. Once all dry one more light black wash into the cracks to pick out a few lost details and darkened anything I felt was too bright, and probably breaking all the rules, once all dry I used my finger to 'polish' some of the pipes and highlights - somehow with all the oils and the silver I got a nice effect where I wanted it. The photos look brighter than in reality! 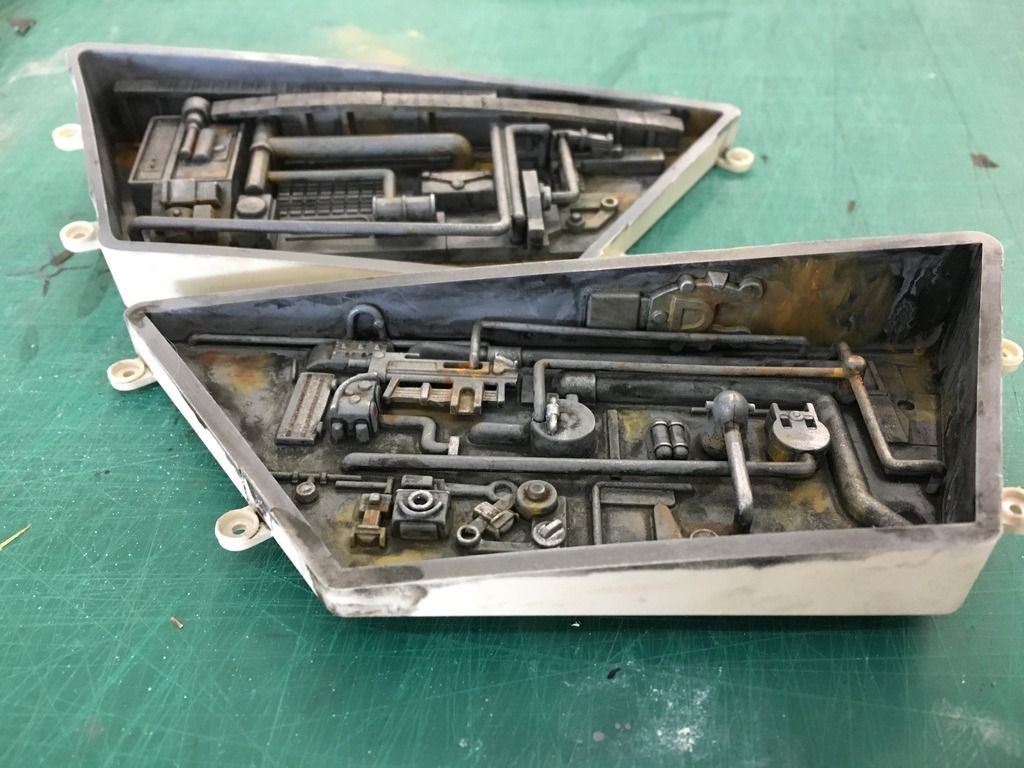 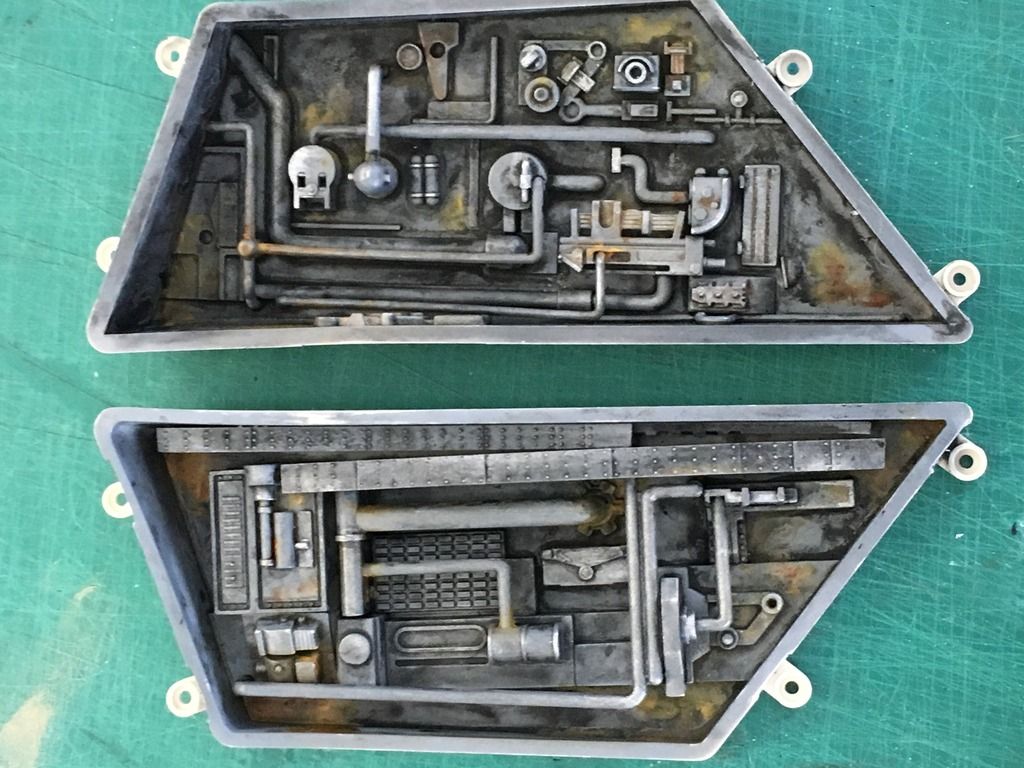 I've probably made everything sound a lot more complicated than it was, love the randomness I got with the washes and rust and the rest was just dive in and have fun! and go with the flow!
|
|
|
Rank: Beginner Level 1 Groups: Registered
Joined: 03/03/2017 Posts: 7 Points: 36
|
Just a quick update, the bottom gun post exterior panel, a little work to on it next week, but mostly done. next weeks first attempts.......try fitting fibre optics and having my first attempts at photo etching as well! 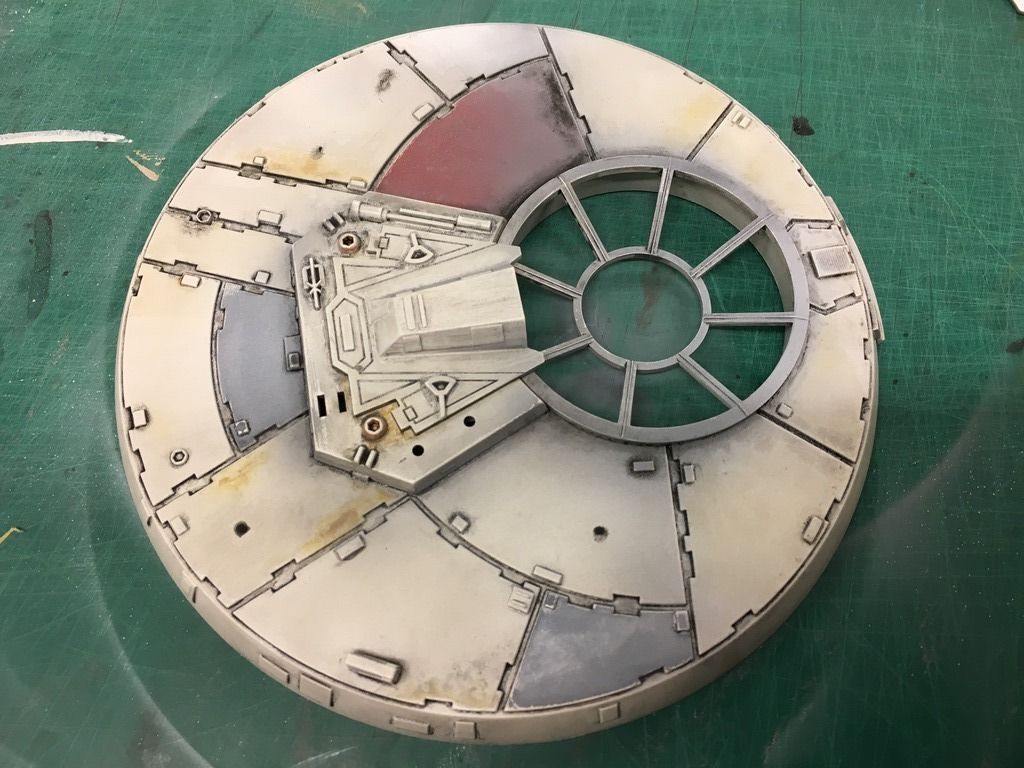
|
|
|
|
Guest
|
 US
US

