|
|
 Rank: Semi-Pro Level 2   Groups: Registered
Joined: 04/01/2017 Posts: 83 Points: 252 Location: South Witham
|
I rechecked my screw and nut count and indeed it turns out I had lost a screw. However, all was not lost as I tracked down another issue 7, which had more of the required screws in plus it also had that all important hinge piece I mentioned about that could be easily lost. I now have two of them, so the extra £9 I spent was worth it for an added bit of security. If you build it he will come Built - Eaglemoss 3D Printer. Building - R2D2  National league Champions 2017 FA Cup Quarter Finalists 2017
|
|
|
 Rank: Pro  Groups: Registered
Joined: 04/05/2011 Posts: 173 Points: 528 Location: Sussex
|
Its quite frustrating and easy just for the little bits to go walkies when you're not looking especially if you don't realise until maybe 5 months down the line and you need them for a later build component. I must admit I have kept all my bags with the issue number cards in and placed all these in a big box and I'm trying to watch all my build parts like a hawk lol.
|
|
|
Rank: Semi-Pro Level 2 Groups: Registered
Joined: 04/01/2017 Posts: 83 Points: 252 Location: South Witham
|
Well issues 10 through to 13 arrived today, postie had left them on the back door stop for all to see, just glad they weren't nicked. Anyway on with the build. Issue 10, comprised of parts for the dome and a couple of leg parts not to be used for this issue, it also came with the lens mounting plate.  The frame piece that was to go on the dome was for the lens,the best way to see where to fit it is to ensure it is on the two holes opposite the shortest groove at the top of the dome  Also on this row the nuts go underneath  The next thing to do was to fit the lens to it's cover and the mounting plate   Most importantly the lens should curve outwards  It is a bit of a tight fit, but looking at the instructions and how I had it I noticed as long as the tabs were angled outwards it should be ok. To secure it I used the SMALLER self tapping screws as I only had 4 of these.  I was then able to do a 'test' fit to the dome  That was basically Issue 10, so onto issue 11, again another dome frame part, loads of screws, that went in my pill box, and the first part of the dome stand.  Again self explanatory for fitting, remember on this row, screws on top, nuts underneath  The rod for the stand isn't used yet. Issue 12 next and a bit more to do.  Now luckily I spotted this before I fitted it, but one of the dome frame pieces is different in that it has a smaller 'window' and two holes in 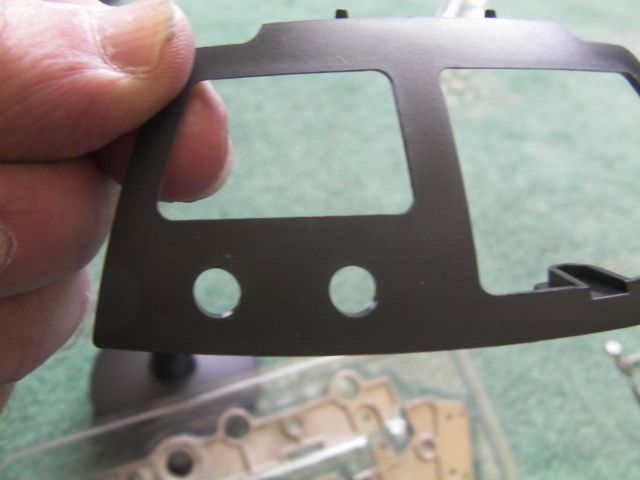 This frame piece lines up with the longer groove in the dome top, and the round cut out.  Basically if you fit the 'normal' frame first you will be OK.  The next step at first had me a little confused, but then I realised the instructions are WRONG. 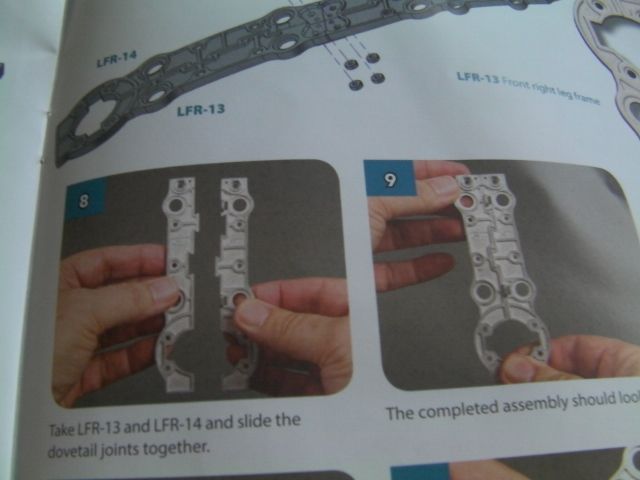 Numbers 8 and 9 should be in place of 5 & 6 and vise-versa. Then it makes sense.   The leg piece without the holed end is held together with one of larger screw and nut, whereas the holed end leg piece has to rely on the connector piece.    Despite this the final leg assembly is pretty sturdy. 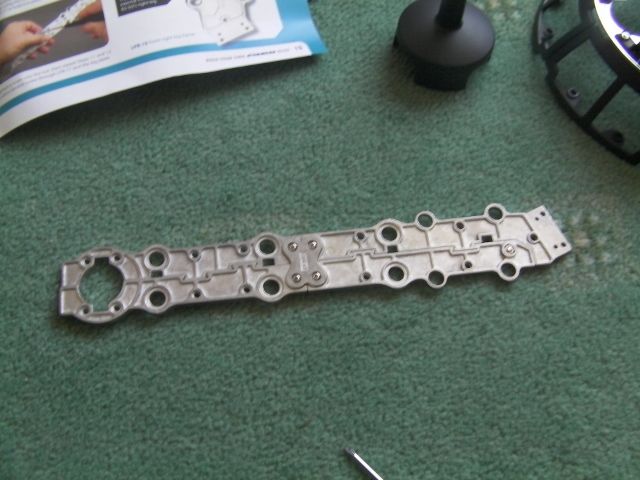 The final issue I had was issue 13, and all that gave me was the rest of the dome stand, and the final pieces of the dome frame, and what looks suspiciously like the next chassis down parts. 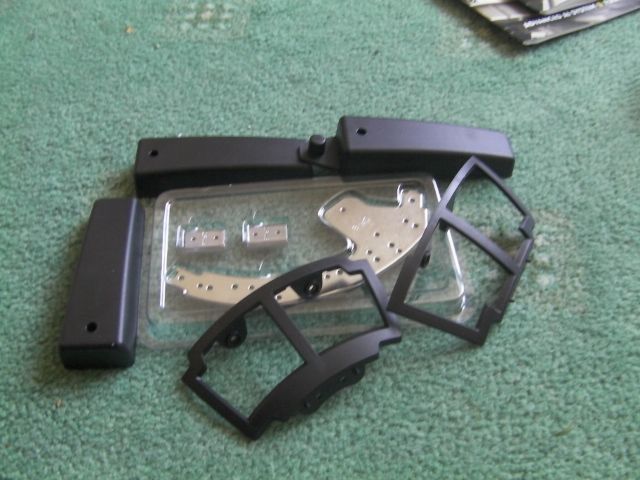 Not going to insult anyones intelligence by doing a step by step of stand build, but here is the completed dome so far  and here it is on it's stand  So that is basically it, I like looking at the back of the magazine to see what is coming up in the next issue...ahhh more dome parts  If you build it he will come Built - Eaglemoss 3D Printer. Building - R2D2 National league Champions 2017 FA Cup Quarter Finalists 2017
|
|
|
 Rank: Beginner Level 2 Groups: Registered
Joined: 07/01/2017 Posts: 18 Points: 57 Location: Edinburgh
|
|
|
|
 Rank: Super-Elite      Groups: Registered, Forum Support Team, Administrators, Global Forum Support Team, Moderator, Official Builds Joined: 09/11/2012 Posts: 8,520 Points: 24,651 Location: East midlands
|
Nice update and good to see how quick this build grows.  Keep up the good work. Regards delboy271155 (Derek) COME BACK GUY FAWKES "YOUR COUNTRY NEEDS YOU"
|
|
|
Rank: Super-Elite  Groups: Registered
Joined: 27/01/2014 Posts: 5,060 Points: 14,980
|
Nice update impman  It's great to see the overal shape of the head coming together
|
|
|
Rank: Administration  Groups: Registered, Administrators, Global Forum Support, Moderator, Forum Support Team, Official Builds Joined: 04/01/2016 Posts: 7,178 Points: 21,841 Location: Northamptonshire, England
|
It's amazing how quickly this is taking shape, looking good.  Mark Regards
Markwarren
(Mark) Admin
|
|
|
Rank: Semi-Pro Level 2 Groups: Registered
Joined: 04/01/2017 Posts: 83 Points: 252 Location: South Witham
|
Finally. managed to get online with my rubbish computer dying on me. So am a little late in doing issues 14 to 17. Lets kick off with issue 14, not many parts to this  All that required doing was to join the frame plate together again best to go with the side the writing is on.  The right hand leg parts then needed doing simply a case of fitting the right piece into the correct location, as long as the piece for the screw had nothing at the bottom it was right.  This was true for both leg parts  Issue 14 completed looked like this  Issue 15 was next  This would enable me to complete the next stage of the dome chassis, and where I found a mistake I had made.  Try as I might I couldn't get the dome frame to line up with all the 12 holes, there was always a gap no matter what I did. I then found it. These two frame parts  were in the wrong positions, one of them had longer tabs on than the other, something I never originally noticed so I swapped them over and had a lovely fit.  The long thin metal tab should be at 1'o'clock position from the frame eyehole. This is it on the stand.  Onto issue 16  Again this was just a case of putting the frame on the chassis, luckily there was an arrow on the frame and an arrow on the chassis to indicate where it went. But it is hard to see.  Easier on the chassis  Once fitted it really starts to take shape   Finally issue 17, another frame part and some wires that I just put to one side.  I found it a little awkward to fit as it didn't quite line up but a little 'persuasion@ and it fitted nicely.  Plus the final look is great, its really taking shape now.  Looking forward to the next issue as it has the microphone in it If you build it he will come Built - Eaglemoss 3D Printer. Building - R2D2 National league Champions 2017 FA Cup Quarter Finalists 2017
|
|
|
 Rank: Elite  Groups: Registered
Joined: 20/04/2012 Posts: 1,787 Points: 5,292 Location: Thurso
|
Nice work, the dome is certainly taking shape now.
Graeme
|
|
|
Rank: Administration Groups: Registered, Administrators, Global Forum Support, Moderator, Forum Support Team, Official Builds Joined: 04/01/2016 Posts: 7,178 Points: 21,841 Location: Northamptonshire, England
|
Looks great, taking shape very nicely Mark Regards
Markwarren
(Mark) Admin
|
|
|
 Rank: Vice-Master  Groups: Registered
Joined: 12/01/2017 Posts: 572 Points: 1,731 Location: Cambridgeshire
|
Had exactly the same problem with the two parts from the middle 'ring' being swapped over during my build. Nice to be able to take some tips from this build before I work on my pieces as yours are coming along nicely. I think it's good that so many issues so far have been for the dome, hope we get to start tying in the electronics soon as I know where some of the electronics will go already, but know there may be other considerations so I can't just slap them in with some spare screws. Hope to start a diary of mine this weekend if I get time and weather to do some painting. I need to get some done tonight really for the lens frame and a couple of the leg fittings if I am to give a true indication of what I am doing with him. Current Builds
Eaglemoss: Ecto-1, BTTF Delorean [Installing Mods]
Hachette: T800 Endoskeleton
Agora Models Shelby Cobra 427 [Plate 031]
BanDai 1:5000 Imperial Star Destroyer
AMT 1991 U.S.S. Enterprise Bridge [Installing Mods & Lights]
Finished Builds
Deagostini: R2-D2 [Never getting batteries]
|
|
|
Rank: Pro Groups: New Members, Unapproved Joined: 24/08/2009 Posts: 48,827 Points: -13,348
|
really coming along nicely, i am one issue behind you, wonder when we get the dome. cant wait to see that.
|
|
|
Rank: Semi-Pro Level 2 Groups: Registered
Joined: 04/01/2017 Posts: 83 Points: 252 Location: South Witham
|
OK so the next set of 4 arrived, just in time for the bank holiday weekend. Obviously being bank holiday we were going to have crappy weather so gave me enough time to build it. Here we go then with issue 18 and yet another electronic part - the microphone.  First thing to do is the dome frame again, and this time I made sure I wouldn't go wrong by checking the tag on the part.   The same with the next frame piece   Which gives us the frame completed for issue 18  The microphone was built up next and is very straightforward to do, as has all the build being so far The parts were as follows;  putting them together as I say was so easy, although it may be an idea to handle the microphone carefully and no pull too hard on the wires. stage 1  stage 2  Stage 3 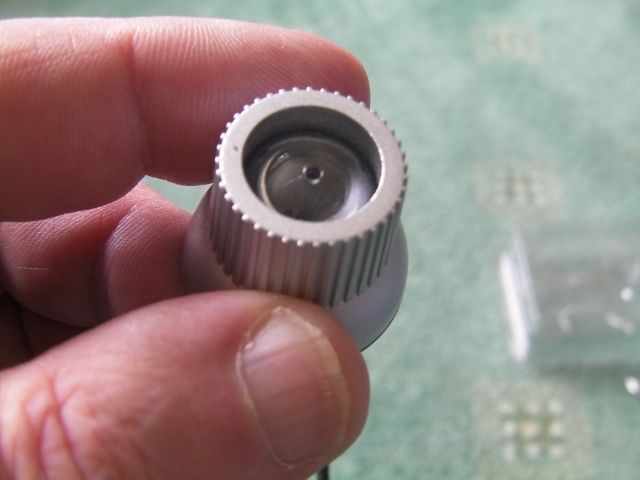 Finally Stage 4, for this I used the smallest black self tapping screws, as usual it didn't say exactly which ones to use so I picked these as it felt right  and that completed issue 18  Issue 19 had few parts, and was hardly worth doing, slot two pieces into two slots - really taxing.   So onto issue 20, yet another frame part, a leg part and a sensor, things are beginning to get interesting I thought.  But alas no, the only thing to do was fit the frame, the sensor was for later.  So onto the final part of the four issues, issue 21. This is where things started to get a little bit more of think for yourself mode.  The instructions say to take the leg piece and fit the casting to it, now looking at the pictures, the centre piece that was fitted previously in the shoulder, wasn't there it was just a hole. so REMOVE it.  The casting assembly can now be fitted. to do this I used the black screws that came with issue 21, seemed to make sense. Also, made sure that the nuts and writing were uppermost.  So it is more ore less like this when fitted.  The arched bracket from issue 20 could now be fitted, make sure that the curved part and flat edge faces upward towards the blue bits, which is shown in final image. The wheel fitting is also added now, all it says in the instructions is use silver screws. Well I used the thicker screw as this seemed to be the best one.   Which meant issue 21 was finished, lots of parts now waiting to be fitted, can't wait.  If you build it he will come Built - Eaglemoss 3D Printer. Building - R2D2 National league Champions 2017 FA Cup Quarter Finalists 2017
|
|
|
Rank: Elite Groups: Registered
Joined: 20/04/2012 Posts: 1,787 Points: 5,292 Location: Thurso
|
Great job, coming along nicely and you did use the correct silver screws - the shorter, thicker ones that came with he issue.
Graeme
|
|
|
Rank: Pro  Groups: Registered
Joined: 22/02/2017 Posts: 155 Points: 474 Location: Ireland
|
Some great tips you're posting here. Having only just started mine I'll be checking in with your regularly. Graham I was drowning my sorrows. But my sorrows they'd learned to swim.
|
|
|
|
|
Great progress, looking good... Regards Alan
|
|
|
Rank: Administration Groups: Registered, Administrators, Global Forum Support, Moderator, Forum Support Team, Official Builds Joined: 04/01/2016 Posts: 7,178 Points: 21,841 Location: Northamptonshire, England
|
Looking really good, coming along very nicely. Mark Regards
Markwarren
(Mark) Admin
|
|
|
Rank: Semi-Pro Level 2 Groups: Registered
Joined: 04/01/2017 Posts: 83 Points: 252 Location: South Witham
|
pemberg wrote:Great job, coming along nicely and you did use the correct silver screws - the shorter, thicker ones that came with he issue.
Graeme Well that is a relief would hate to have dismantled it 15 issues later, when I found the screws were wrong If you build it he will come Built - Eaglemoss 3D Printer. Building - R2D2 National league Champions 2017 FA Cup Quarter Finalists 2017
|
|
|
Rank: Semi-Pro Level 2 Groups: Registered
Joined: 04/01/2017 Posts: 83 Points: 252 Location: South Witham
|
Narayan wrote:Some great tips you're posting here. Having only just started mine I'll be checking in with your regularly.
Graham Thanks nice to know they help If you build it he will come Built - Eaglemoss 3D Printer. Building - R2D2 National league Champions 2017 FA Cup Quarter Finalists 2017
|
|
|
Rank: Pro  Groups: Registered
Joined: 16/04/2011 Posts: 328 Points: 998 Location: Anglesey
|
Nice progress Dave, deagostini need to take a leaf out of eaglemoss for numbering the screws, not saying use the screws from issue 5!!! 😕 Darren
Have an AWSOME day and may the Force be with you always 😉 Building: Millennium Falcon https://forum.model-spac...sts&t=14381&p=7 - Building: BTTF Delorean - Building: Dom's Dodge Charger - Building : X-Wing https://forum.model-spac...aspx?g=posts&t=34899
|
|
|
|
Guest (5)
|
 US
US

