Welcome Guest Search | Active Topics | Log In | Register

Perfecting the Gratings Options
jase
#1 Posted : 01 May 2011 14:39:00

Rank: Super-Elite

Publisher Medal: Featured Build of the MonthActive Service Medal: 500 post active service MedalPurple Medal: Super active service medal for 1000 postsTurquoise Medal: Turquoise Medal for model making know-how contributionOutstanding Build: An award for an outstanding buildBuild-Diary Medal: Build-Diary Medal of HonourRed Medal: Red Medal
Groups: Registered

Joined: 21/03/2010
Posts: 7,582
Points: 21,739
Anybody with the detail packs will know that the gratings in the magazine look quite different to the real things. so here is my attempt at making a more authentic grating as per the pic below

All pictures Authors collection.


This is the medium grating in issues 48 but the principle will be the same for all of them.

I started by following the instructions in the magazine up to step 6. In step 7 i disregard the 2x2 as i have not used them. before making the assembly in step 8 I painted the inside edge of the wood strips walnut brown.


To make the shot rack i used some spare 2x5 left over from my planking. First this needed to be cut to length., slightly shorter than the 56mm strips


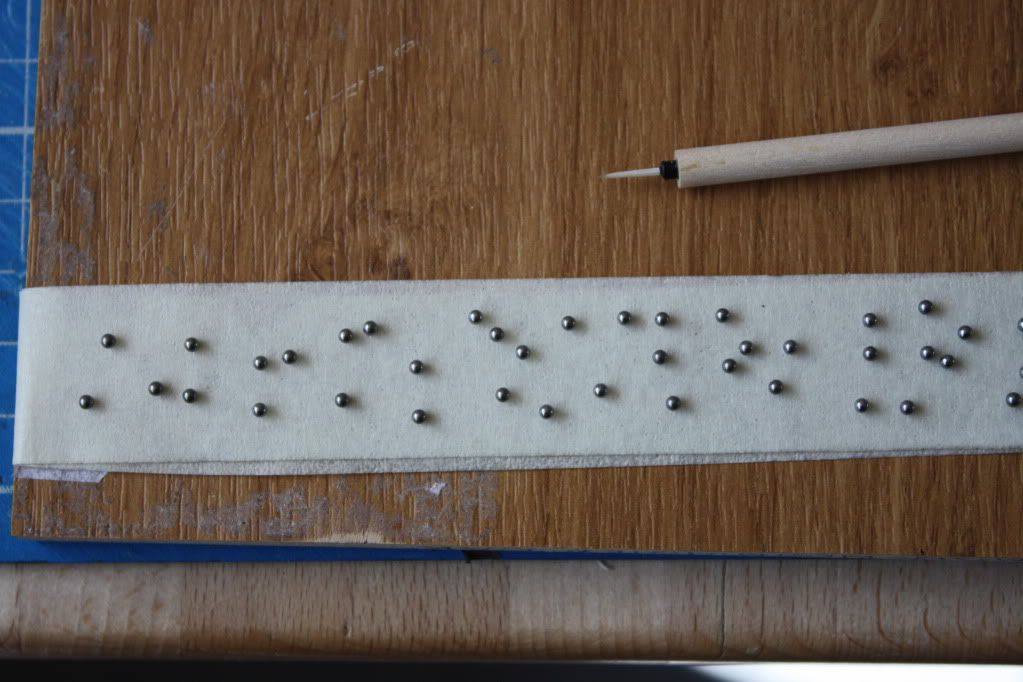
The 5mm width is to wide so i cut down to 2 x 3 and then sanded the ends into shape. next I drew a line down the centre and marked 2mm in from the end and then every 4mm


Using a round nosed power tool I put a countersink into the strip at the points I had marked. that gave me space for 17 shot.


I finished the frame and glued the shot racks to the sides, a quick sand and then two coats of walnut brown.


To paint the shot I first scatted it on some masking tape and painted the shot as much as possible.


once dry each shot was given a dab of glue and put in place. when the glue has set you can touch up the top of the shot wit a quick lick of black paint. Job done!!BigGrin
“Whenever you find yourself on the side of the majority, it is time to pause and reflect.”
-Mark Twain
Son of Bulwark
#2 Posted : 01 May 2011 14:50:00

Rank: Pro

Groups:

Joined: 24/08/2009
Posts: 48,827
Points: -13,348
Hi Jase! Cool

Well what can I say? SPOT ON MATE! Drool

I know that the magazine has the grates different I'm ok with that but the detail you are going for shows that you have seen the ship for real and are going for that look!

Nice Work Jase!
jonny7england
#3 Posted : 01 May 2011 18:15:12

Rank: Elite

Publisher Medal: Featured Build of the MonthActive Service Medal: 500 post active service MedalPurple Medal: Super active service medal for 1000 postsBuild-Diary Medal: Build-Diary Medal of HonourRed Medal: Red Medal
Groups: Registered

Joined: 22/03/2010
Posts: 2,065
Points: 6,295
Location: Gorleston-on-sea
Ruddy good work there jase, lovely job mate...that's one task I'm not looking forward to...me thinks I will be accidentally losing the tiny cannon balls when It comes to fitting them.
Blink LOL
Current Builds: Deagostini HMS Victory: Deagostini HMS Sovereign of the seas. Completed Builds: Del Prado: HMAS Bounty: Hachette: RMS Titanic: Del Prado: Cutty Sark...
ian smith
#4 Posted : 01 May 2011 22:19:24

Rank: Super-Elite

Publisher Medal: Featured Build of the MonthActive Service Medal: 500 post active service MedalPurple Medal: Super active service medal for 1000 postsBuild-Diary Medal: Build-Diary Medal of HonourRed Medal: Red Medal
Groups: Registered

Joined: 16/08/2010
Posts: 2,771
Points: 8,344
Location: Brighton
Nice job Jase like the idea IanLOL
Current builds.Hachettes build the bismark,HMS Victory, HMS Hood.
Finished Builds Corel HMS Victory cross section.
Users browsing this topic
Guest
Forum Jump  
You cannot post new topics in this forum.
You cannot reply to topics in this forum.
You cannot delete your posts in this forum.
You cannot edit your posts in this forum.
You cannot create polls in this forum.
You cannot vote in polls in this forum.

Powered by YAF | YAF © 2003-2009, Yet Another Forum.NET
This page was generated in 0.096 seconds.
DeAgostini