|
|
 Rank: Pro  Groups: Registered
Joined: 30/06/2010 Posts: 242 Points: 720
|
Hi everyone, I thought I'd post some photos of my build so far! 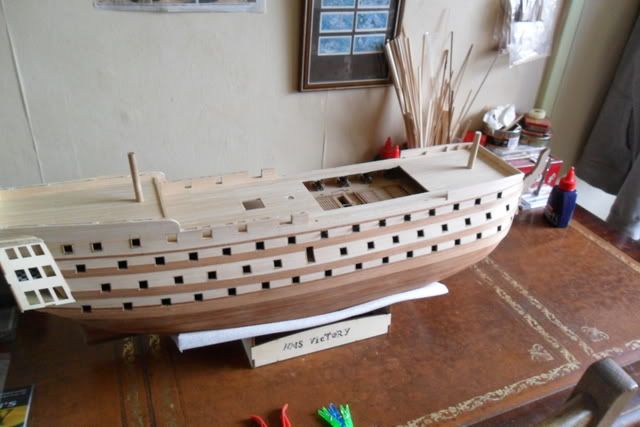 Here is my version of the cabin partition; based on some photos I took on a visit to Portsmouth last year. One has been oiled to show the difference. I also bought some o.4 clear acetate to use as the windows, which I might also use on the stern later. 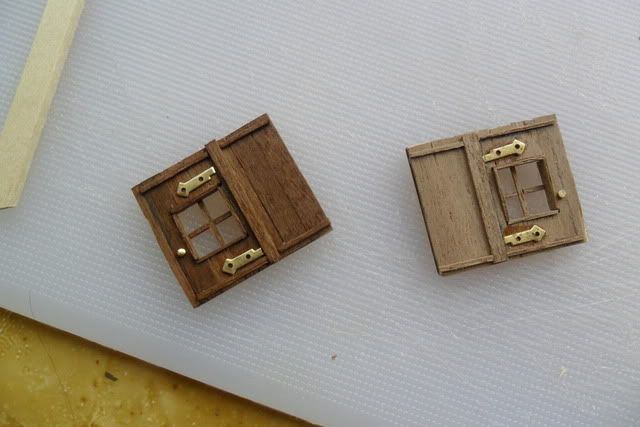 I built a deck over the stern gallery to give at least something to look at if I'm using clear acetate, its very dark in there so I think the level of visibility will be just right. 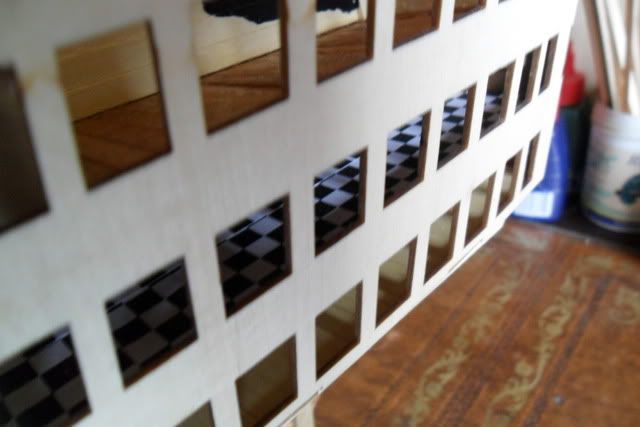 Painting the end of the cabin at the poop black:  Fitting the poop deck: 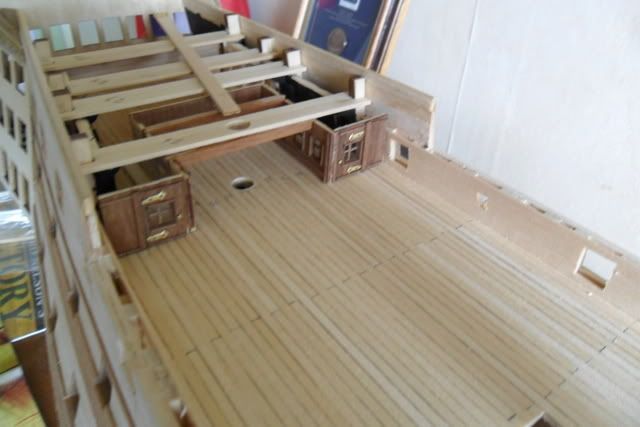 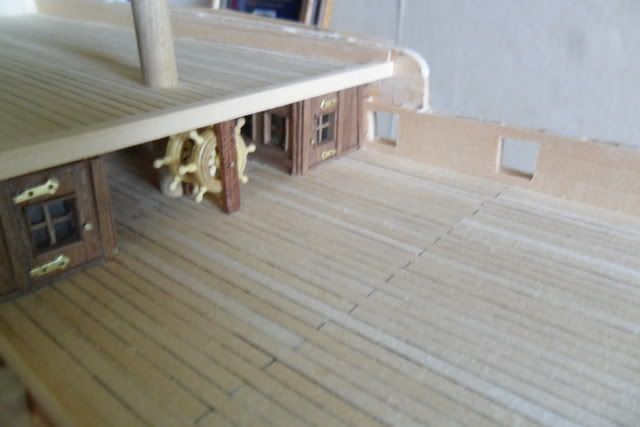 The poop edging strip will be replaced by 4x4 walnut when I next go home to work on her; I used the supplied strip as a guide to fit the inside bulwarks in, but its not fixed in. Thanks for looking at my build. I will post more photos after I have done some more progress. Regards, Tom
|
|
|
Rank: Pro Groups: Joined: 24/08/2009 Posts: 48,827 Points: -13,348
|
Coming along nicely 
|
|
|
 Rank: Vice-Master     Groups: Registered
Joined: 30/01/2011 Posts: 865 Points: 2,410 Location: Cambs
|
Looking nice and tidy Thomas, is there any way you could re-post the partition door picture in a larger size, it looks really good, but I would like to see the detail better Come on you Jimmies
|
|
|
Rank: Pro Groups: Registered
Joined: 30/06/2010 Posts: 242 Points: 720
|
saintsman123 wrote:Looking nice and tidy Thomas, is there any way you could re-post the partition door picture in a larger size, it looks really good, but I would like to see the detail better I think theres a problem at my end; the photos were resized to 160 wide, but they still appear really big on my screen (i have to scroll horizontally). Are they really small on your computer? Cheers, Tom
|
|
|
Rank: Pro  Groups: Registered
Joined: 22/03/2010 Posts: 369 Points: 1,150 Location: Broadstairs
|
Nice looking model Tom. I agree with Saintsman, the images are on the small size, about 50x35mm. Double the size would be better.
TIS
|
|
|
Rank: Pro Groups: Registered
Joined: 30/06/2010 Posts: 242 Points: 720
|
I resized them to 640x480 so hopefully (!!) that will be better. On my screen they are tiny but clearly something is wrong at my end!
Hope thats better,
Thanks a lot,
Tom
|
|
|
Rank: Vice-Master Groups: Registered
Joined: 25/04/2010 Posts: 748 Points: 2,285 Location: bognor regis
|
very nice tom well done cheers benny
|
|
|
Rank: Pro Groups: Joined: 24/08/2009 Posts: 48,827 Points: -13,348
|
Hi Tom! Great work mate! like the detail, a little tip as you have now closed the decks in at the gallery area put some masking tape over the ladders in the upper deck grates or if you drop a small part down there it will take an age to get it out!.
|
|
|
 Rank: Semi-Pro Level 1  Groups: Registered
Joined: 18/12/2010 Posts: 59 Points: 177 Location: Pretoria (SA)
|
Hi Thomas I like your extra details, its looks perfect . Albatross, build in 1982 from plans.
Hms Bounty, build in 1987 from plans.
Duyfken,build in 1991 from plans
Oosterland, build in 1998 from plans
2010 Hms Victory kit from Deagostini
In the meantime.
2011 Building MFV 1963 fishing trawler from plan.
|
|
|
Rank: Pro Groups: Joined: 24/08/2009 Posts: 48,827 Points: -13,348
|
Nice finishing touches Tom 
|
|
|
Rank: Pro Groups: Registered
Joined: 30/06/2010 Posts: 242 Points: 720
|
Thanks for the comments everyone! I'm back home again later today so I can check if the canon shot has successfully been installed or not. Unfortunately some were dropped down  but when the model is static it wont matter. I varnished them in, is this the method others have used? I'll post more photos sometime shortly! Also, I was wondering; the inside bulwark bit near the poop edge (where the curve was made with the coin) - will this have an internal bulwark strip fitted, as I was thinking of adding them but wasnt sure if it would alter any later additions? thanks again, Tom
|
|
|
Rank: Pro Groups: Joined: 24/08/2009 Posts: 48,827 Points: -13,348
|
If your meaning the curved space on the inside, then its unlikley as part of the instructions, as this part has been completed.
|
|
|
|
Guest
|
 US
US

