|
|
 Rank: Vice-Master   Groups: Registered
Joined: 25/04/2010 Posts: 748 Points: 2,285 Location: bognor regis
|
|
|
|
 Rank: Vice-Master   Groups: Registered
Joined: 25/04/2010 Posts: 748 Points: 2,285 Location: bognor regis
|
MY PICS AV GON BIG?? cheers benny
|
|
|
 Rank: Vice-Master   Groups: Registered
Joined: 25/04/2010 Posts: 748 Points: 2,285 Location: bognor regis
|
now there small it must be photobucket cheers benny
|
|
|
 Rank: Pro   Groups: Registered
Joined: 29/03/2010 Posts: 202 Points: 569 Location: sunderland
|
Verry good looking deck there Benny, nice and even, good colour. Excelent work mate. (and that's not an advert for a 'Black & Decker' work bench!!  Jeff
|
|
|
 Rank: Pro   Groups: Registered
Joined: 25/03/2010 Posts: 472 Points: 1,357 Location: Hyde
|
Great stuff mate. I like colour of your deck. Very nice.
|
|
|
 Rank: Super-Elite      Groups: Registered
Joined: 24/04/2010 Posts: 5,787 Points: 17,662 Location: Stafford, United Kingdom
|
Good stuff Benny   deck colour is very nice MWG BUILD DIARIES: HMS VICTORY, SOVEREIGN OF THE SEAS, SAN FRANCISCO II, HMS HOOD, HMS ENDEAVOUR LONGBOAT, HMS VICTORY X-SECTION, 007 DB5, NISSAN GTR, CUTTY SARK, RB7, AKAGI, BARK HMS ENDEAVOUR, HUMMER H1, MITSUBISHI ZERO.
|
|
|
 Rank: Vice-Master   Groups: Registered
Joined: 25/04/2010 Posts: 748 Points: 2,285 Location: bognor regis
|
hi mwg thanks but am having trouble with pic size so i deleted ..watch this space cheers benny
|
|
|
 Rank: Vice-Master   Groups: Registered
Joined: 25/04/2010 Posts: 748 Points: 2,285 Location: bognor regis
|
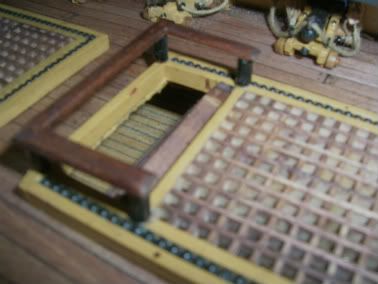
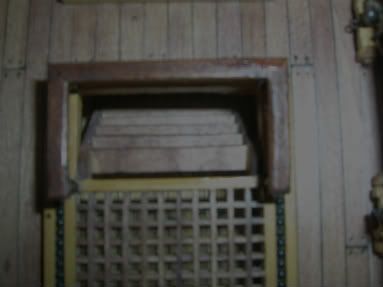
hi all not been about for a while what with holidays and work so i will hopfully start where i left off ..i replaced the horrible pins and string around the stairwells with a wooden handrail..in all these pics the painting and varnishing is not finished   cheers benny
|
|
|
 Rank: Vice-Master   Groups: Registered
Joined: 25/04/2010 Posts: 748 Points: 2,285 Location: bognor regis
|
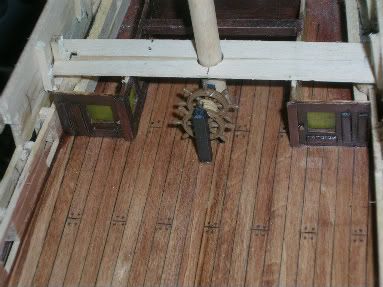
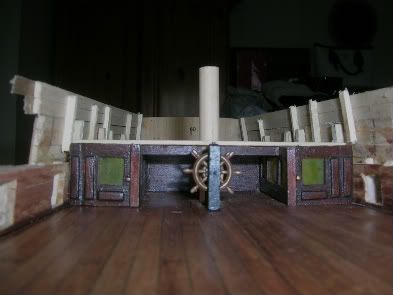
next pics are the cabins and wheel ..i replaced the wheel supports with a peice of 3x3 it looks more solid to me   cheers benny
|
|
|
 Rank: Vice-Master   Groups: Registered
Joined: 25/04/2010 Posts: 748 Points: 2,285 Location: bognor regis
|
|
|
|
 Rank: Vice-Master   Groups: Registered
Joined: 25/04/2010 Posts: 748 Points: 2,285 Location: bognor regis
|
|
|
|
 Rank: Pro Groups: Joined: 24/08/2009 Posts: 48,827 Points: -13,348
|
Hate to tell you, but your topgallant mast holes appear to have been drilled on the wrong side of the mast.
The dotted lines on the plan represent holes that run forward to aft, it is only the bottom pair of holes that run port to starboard.
For the top six holes, the mast was to be rotated thru 90 degrees, I seem to recall SoB and one or two others making the same mistake which is easy to overlook during the haste of build.
|
|
|
 Rank: Vice-Master   Groups: Registered
Joined: 25/04/2010 Posts: 748 Points: 2,285 Location: bognor regis
|
thanks tomick i will look into it much appreciated .. is there anything positive to say to a beginner  thanks anyway cheers benny
|
|
|
 Rank: Pro Groups: Joined: 24/08/2009 Posts: 48,827 Points: -13,348
|
You've ploughed on very well, and it seems to be taking shape nicely and the peronal touches making it your own. For a novice builder you've done very well, simply because a model ship of this level is not an easy build by any standard, but the magazine certainly makes it possible and far easier than the build manual in the standard kit, which is formatted in the knowledge that you know or have a good idea as what needs to be achived and how to go about it. Keep up the good work! 
|
|
|
 Rank: Pro Groups: Joined: 24/08/2009 Posts: 48,827 Points: -13,348
|
Hi benny!  Glad to see your build again mate! you have been away for a while doing other things. I look forward to seeing more soon. Tomick wrote:Hate to tell you, but your topgallant mast holes appear to have been drilled on the wrong side of the mast.
The dotted lines on the plan represent holes that run forward to aft, it is only the bottom pair of holes that run port to starboard.
For the top six holes, the mast was to be rotated thru 90 degrees, I seem to recall SoB and one or two others making the same mistake which is easy to overlook during the haste of build. It is easy to overlook this problem as there is no mention of it on the plans.
|
|
|
 Rank: Pro Groups: Joined: 24/08/2009 Posts: 48,827 Points: -13,348
|
But there is clear note of the process in the instructions
|
|
|
 Rank: Pro Groups: Joined: 24/08/2009 Posts: 48,827 Points: -13,348
|
SOME-ONES BEEN BUSY.
You have done a lot since your last post, the holes for the the mast are simple to fix. Cocktail sticks are so useful for filling misdrilled holes, I have had to use them to fill in some misdrilled holes in the main fighting top.
As Tomick has pointed out the instructions are quite clear, but, if the reader doesn't interpret the instruction as the writer intended mistakes will happen. That is the benefit of this forum, Tomicks excellent step by step guide and some very good build diaries posts by other members.
Not forgetting the usually very good build instructions with the magazine, But all in all your build is coming along very well, and I can see by your posts that you are for the most part enjoying the build!
Keep up the good work, I look forward to your next post.
Steve..
|
|
|
 Rank: Vice-Master   Groups: Registered
Joined: 25/04/2010 Posts: 748 Points: 2,285 Location: bognor regis
|
|
|
|
 Rank: Pro   Groups: Registered
Joined: 22/03/2010 Posts: 369 Points: 1,150 Location: Broadstairs
|
I agree with all that has been said before, a nice clean build with some extra personal touches. Well done Benny.
TIS
|
|
|
 Rank: Vice-Master   Groups: Registered
Joined: 25/04/2010 Posts: 748 Points: 2,285 Location: bognor regis
|
thanks tis i have repainted the main mast as how it is now and not per instructions,will be posting pics tomorrow cheers benny
|
|
|
|
Guest (4)
|