|
|
 Rank: Amateur level 2   Groups: Registered
Joined: 20/02/2016 Posts: 45 Points: 135 Location: SoCal
|
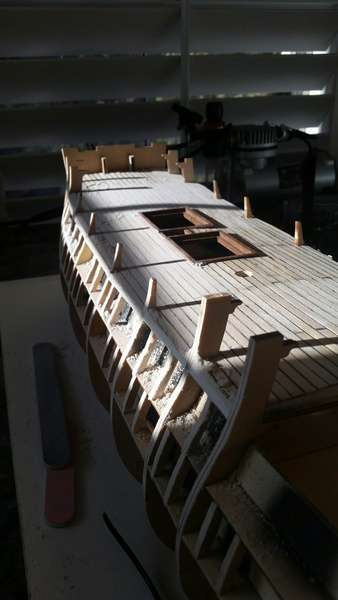
Hello again. Busy at work on the deck. I've managed to get all of it down.   I know what you're thinking... " love the curved deck and all the work but, It kinda looks like 12 miles of bad road..  Yes I agree but I'm confidant a bit of sanding will make it ship shape  So first thing I slather the whole deck with my matt varnish with extra attention on saturating the grouting, hoping the whole thing hardens and becomes more of 1 big piece. Better for sanding is the idea. So with no more delay, lets get sanding!!   And more sanding  and more sanding  Not even close yet  So what felt like a month of sanding (it was closer to 2) I have block sanded with emery boards until all varnish has been removed. Much better.  So from here I'll give it a finer grit sand and then a natural stain and a coat of varnish. I gave it a try on some deck scraps, looks pretty good.  Stay tuned :)
|
|
|
Rank: Administration         Groups: Registered, Administrators, Global Forum Support, Moderator, Forum Support Team, Official Builds Joined: 04/01/2016 Posts: 7,060 Points: 21,487 Location: Northamptonshire, England
|
Lovely work on the decking, she’s taking shape very nicely.  Mark Regards
Markwarren
(Mark) Admin
|
|
|
|
|
She's looking fab, great work....   Regards Alan
|
|
|
 Rank: Super-Elite       Groups: Registered
Joined: 28/07/2014 Posts: 4,269 Points: 12,713 Location: Scotland
|
What a great job  lovely work  regards Phil  COMING SOON =1/72 Italeri diorama`s Battle for the Reichstag and Stalingrad battle at the tractor factory 1/16 Trumpeter King Tiger with loads of extras ON THE GO= refurbishment of 1/25 Tamiya tiger 1 , amt Star trek kits and space 1999 models
So Much to Build,But What a Hobby!
|
|
|
 Rank: Superelite      Groups: Registered
Joined: 10/05/2010 Posts: 2,608 Points: 7,519 Location: Lincolnshire
|
I'm loving your whole approach to this build! Some of your solutions are just outstanding. Keep up the good work.  Regards Gray
|
|
|
|
|
Great work, looks great after your sanding session.
Chris On the bench 1/350 Revell Tirpitz Platinum Edition (Pontos PE and Wooden deck) plus extra Eduard PE set and extra MK1 door sets.
|
|
|
 Rank: Amateur level 2   Groups: Registered
Joined: 20/02/2016 Posts: 45 Points: 135 Location: SoCal
|
Hello again. Yes, it is done. At last the deck is done  Yes, I did rip out the hatches, I was never happy with them. They will be better next time  So with no more delay.... shameless deck porn    That's the last coat of matt after the fine sand. I like it  So the foredeck is next on the list. This time I am going to use the flat deck as a base, it makes more sense for the blends that need to be made at the front and back to the vertical sections. I made up some more lumber from the birch sticks for framing the foredeck.  with the hatch mocked up I'm going to infill the rest of the deck and cut it down to the curved shape   Stay tuned :)
|
|
|
 Rank: Super-Elite        Groups: Registered
Joined: 31/05/2010 Posts: 5,679 Points: 17,011 Location: Wiltshire
|
Very neat and skilled work as always. Happy Modelling
BUILDING: Hachette Spitfire Mk 1A, Constructo Mayflower
SUBSCRIPTION COMPLETE (Awaiting building): USS Constitution, Sovereign of the Seas, 1:200 Bismarck (Hachette)
COMPLETED: Porsche 911, E-Type Jaguar, Lam Countach
|
|
|
|
|
Beautiful work and a pleasure to see.....   Regards Alan
|
|
|
 Rank: Pro Groups: Joined: 24/08/2009 Posts: 48,827 Points: -13,348
|
Should be a stunning model when complete 
|
|
|
 Rank: Amateur level 2   Groups: Registered
Joined: 20/02/2016 Posts: 45 Points: 135 Location: SoCal
|
|
|
|
 Rank: Pro    Groups: Registered
Joined: 18/08/2015 Posts: 294 Points: 897 Location: Amesbury, Wiltshire
|
Jeff Excellent work, having looked at this build I feel like throwing mine in the bin. But I will persevere can't see it looking anything like this though, cant wait for further updates BRILLIANT JOB   Regards Terry FINISHED BUILDS---- HMS Victory--Bismarck--Battleship Yamato-D51 Steam Train--Pocher Ferrari Testarossa--Soleil Royal--Schnellboot S-100--StageCoach 1848--HMS HOOD-- Delorean (Back to the Future)
|
|
|
|
|
Stunning work and very inspirational....   Regards Alan
|
|
|
 Rank: Amateur level 2   Groups: Registered
Joined: 20/02/2016 Posts: 45 Points: 135 Location: SoCal
|
eebygum wrote:Jeff Excellent work, having looked at this build I feel like throwing mine in the bin. But I will persevere can't see it looking anything like this though, cant wait for further updates BRILLIANT JOB   Regards Terry Thanks Terry for the compliments, I'm just making this up as I go. There's a strong possibility this may end up looking more like a '69 Camaro before I'm done.. 
|
|
|
|
|
 Looks good to me  Current builds:-C57,Zero, Lamborghini Countach, Caldercraft HMS Agamemnon,Robi,R2-D2, MFH Cobra .
|
|
|
 Rank: Amateur level 2   Groups: Registered
Joined: 20/02/2016 Posts: 45 Points: 135 Location: SoCal
|
|
|
|
 Rank: Pro    Groups: Registered
Joined: 18/08/2015 Posts: 294 Points: 897 Location: Amesbury, Wiltshire
|
Hi Jeff Nice update excellent job such neat and tidy work Well done   OBTW The Jig works a treat Regards Terry FINISHED BUILDS---- HMS Victory--Bismarck--Battleship Yamato-D51 Steam Train--Pocher Ferrari Testarossa--Soleil Royal--Schnellboot S-100--StageCoach 1848--HMS HOOD-- Delorean (Back to the Future)
|
|
|
Rank: Administration         Groups: Registered, Administrators, Global Forum Support, Moderator, Forum Support Team, Official Builds Joined: 04/01/2016 Posts: 7,060 Points: 21,487 Location: Northamptonshire, England
|
Great update, very tidy work.  Mark Regards
Markwarren
(Mark) Admin
|
|
|
|
|
Excellent work, really enjoying following your progress....   Regards Alan
|
|
|
 Rank: Amateur level 2   Groups: Registered
Joined: 20/02/2016 Posts: 45 Points: 135 Location: SoCal
|
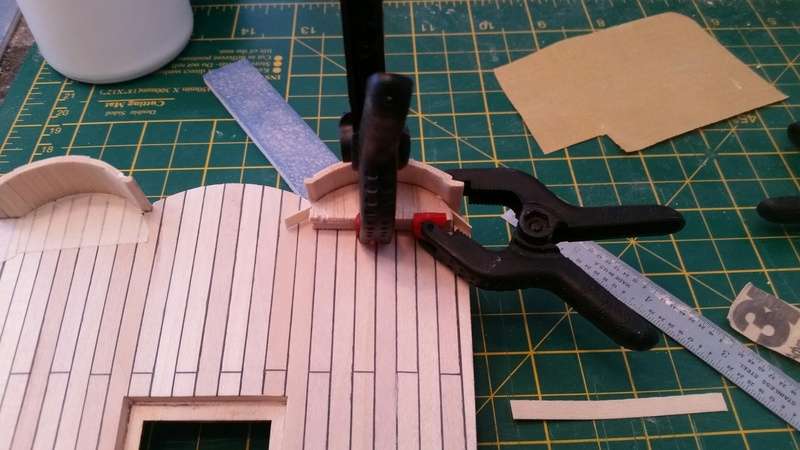
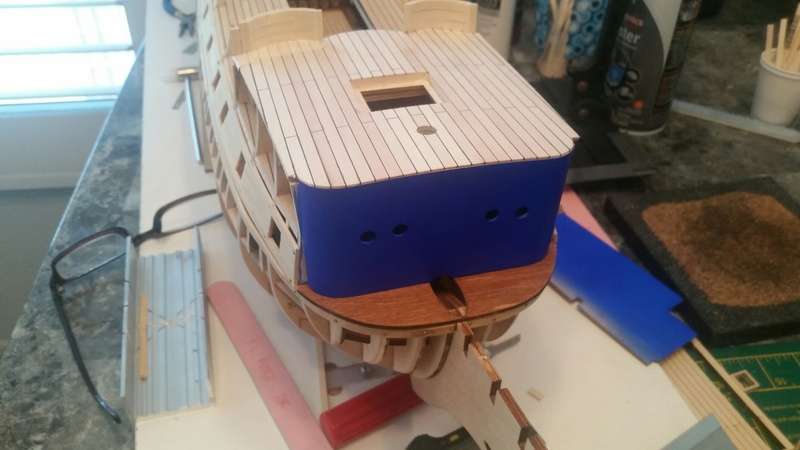
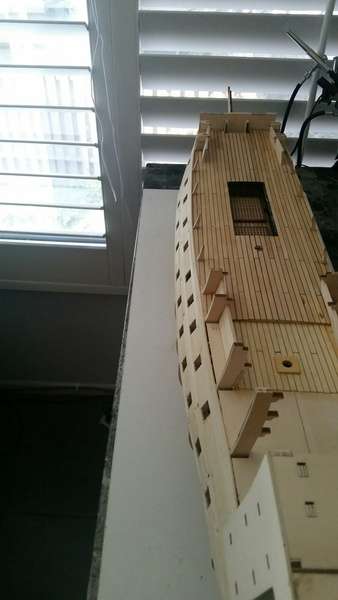
Hello again, So I was working on the foredeck...  Shaped a bit of balsa to match the curve and clamped a bit of the supplied decking as inside planking. Hey, I've got a lot of the decking to spare   Then I remembered I need to use wax paper to prevent things gluing to things I don't want to glue to. Fortunately the first plank was glued to the bulkhead better than the balsa     And I also finish shape sanded the foredeck to the front bulkhead. No, that blue you've been wondering about is not a primer.  It's going to be glorious    Ok from here I've been working on hull planking. Since day one I've had this kooky idea on how I'd do the gun ports. It's really quite simple really. Plank the top and bottoms of the ports with ship length runs and then just fill in the holes in between. I already have the sides framed in between the decks. So, after laying the first run even with the 2'nd deck, the upper ports start 5mm above that. I wanted a square edge facing the inside of the ports but the bamboo is rounded on the edges. I sorted thru the bamboo and found enough strips that were 5.5mm thick, enough to remove the roundness and finish at 5mm.  I lay the bottom run and then using 12mm spacers at each port I make the upper run the length of the ship.   And after that it's just filling in the blanks  The ports are 12mm tall so I had to cut down the filler strips to 4mm but I was figuring things wouldn't work out mathematically perfect.   Speaking of not working out mathematically, the lower ports start at 6mm below the top of the first row. The decking I haven't been using is .5 or .6 thick x 5mm wide, I figure I can cut some of these in half (2.5 wide) and glue the 2 together to get an approx. 1mm thick spacer material.  Again, just fill in the gaps.   The nose is always fun. I discovered a neat trick, when I wanted to actually nail all the way down and pin the plank down to the rib, I would use a scrap of plank to help me pull out the nail after. Before, I was just grinding off the heads with a Dremel.  Sanding. OK, the starboard side was first and it was a bit rough. I couldn't wait throwing filler over it just to ease the ugliness.    But I learned a lot. I keep forgetting I've never done this before. On the port side I used the plank bender ALOT more, not just on the nose and got a more consistent surface. My goal for this side was to get what I would call a "paintable surface" from the wood, no filler.      I shot a thin coat of primer and then sanded the high spots down just enough to cleanup 99%      So I guess that's where I'm at. Next level up I'm not sure how that's gonna work but I'll think of something.....  
|
|
|
|
Guest
|