|
|
 Rank: Pro  Groups: Registered
Joined: 25/08/2010 Posts: 170 Points: 537 Location: Germany
|
Hi folks, I just managed to glue the keel segments in issue #39 but afterwards I found out that I did NOT read exactly enough. Step 15 in the magazine: Quote:ensure that the stem is positioned 4mm below the top of the bow planks, Mine is flush with the top plank. Will this be a problem later on ? I am afraid that it will be quite difficult to get the stem off. Any advice is appreciated. Greetings, Timm My build diary hereCurrent Build:HMS Victory
|
|
|
Rank: Pro Groups: Joined: 24/08/2009 Posts: 48,827 Points: -13,348
|
Hi Timm, it means in your case that all the woodwork that sits on top of the stem will sit 4mm too high, which will need ajustment, however the bigger problem might be that the bowsprit may be too close for comfort (or may touch) with the figurehead located at the top of the stem; because your stem is 4mm higher than it should be, and therefore closer to the bowsprit, where there is only about 5mm space between the two when the stem is correctly seated.
If you can, have a go at releasing the stem and reset.
|
|
|
 Rank: Vice-Master     Groups: Registered
Joined: 26/09/2010 Posts: 851 Points: 2,565 Location: Walsall
|
Hi Timm
Only reason i can see as why it should be 4mm below the top is because of the wales being fitted later or the positions of the dolphins that are fitted after the wles as the holes in some parts have to line up with those on the stem.
Thibking about it that dolphin position seems more the right thing as to why its 4 mm below the top.
Hope this helps and hope you get it sorted out as you have a craqcking build there.
Regards
Foz
|
|
|
 Rank: Master    Groups: Registered
Joined: 08/07/2010 Posts: 1,036 Points: 3,086 Location: Thetford, Norfolk, UK
|
Mr.Quist wrote:Hi folks, I just managed to glue the keel segments in issue #39 but afterwards I found out that I did NOT read exactly enough. Step 15 in the magazine: Quote:ensure that the stem is positioned 4mm below the top of the bow planks, Mine is flush with the top plank. Will this be a problem later on ? I am afraid that it will be quite difficult to get the stem off. Any advice is appreciated. Greetings, Timm Hi Mr.Quist, it might mean that when we get to the stage of installing the bowsprit, the front top edge of the keel may interfere with the correct alignment of said bowsprit. Do you have a piece of 10mm dowel that you could insert in the locating hole for the bowsprit to check the alignment? It should clear the top of the beak by approximately 4mm. You'd have to ask a more experienced shipmate about how to correct this problem. I'm sure someone on here can help. Happy building Daffy09
|
|
|
Rank: Pro Groups: Registered
Joined: 25/08/2010 Posts: 170 Points: 537 Location: Germany
|
Thanks guys. So far I did not dare to get it off again. It is all glued with PVA. And I am afraid, if I start putting water on it that all the planks come loose. Should I nail again to fix the planks before? My build diary hereCurrent Build:HMS Victory
|
|
|
Rank: Pro Groups: Joined: 24/08/2009 Posts: 48,827 Points: -13,348
|
Hi Timm!  That is a problem if you want to play safe with the planks then Yes re-pin the planks before you try to remove the stem. If you know a person with a steam cleaner with a nozzle for cleaning small areas you could use that to steam along the joint of the hull and stem on each side, put a cutting mat over the planks to protect them and point the steam jet away from the planking. You then get the steam to wet the joint with the stem and the heat as well to soften the joint (NOT TO MUCH STEAM) work from the top of the stem down to the keel. Then slowly ease the stem off, I hope this helps Timm.
|
|
|
Rank: Pro Groups: Joined: 24/08/2009 Posts: 48,827 Points: -13,348
|
Might also be an idea to run a sharp knife blade along the edge between planking and keel to split the glue joint, good luck!
|
|
|
 Rank: Super-Elite    Groups: Registered
Joined: 04/04/2010 Posts: 3,955 Points: 11,809 Location: uk
|
failing the above,try hot water applied with a small brush,then you can ease it off slowly,worked for me on occations. Current builds: SotS, USS Consitution, San Felipe, D51 loco, HMS Surprise, RB7, Arab Dhow, Jotika HMS Victory Completed builds: HMS Pickel, Thermopylae, Mississipi river boat, Mary Rose, Cutty Sark, San Francisco II, HMS Victory x5, Titanic Lifeboat, Panart HMS Victory Launch, Hachette Titanic, Virginia Schooner, Endeavour Longboat. http://www.model-space.com/gb/
|
|
|
Rank: Pro Groups: Registered
Joined: 25/08/2010 Posts: 170 Points: 537 Location: Germany
|
Thank you so much guys Tomick wrote:Might also be an idea to run a sharp knife blade along the edge between planking and keel to split the glue joint, good luck! Unfortunately I did glue on the bottom of part 54, that side that faces the bow.  So just cutting the sides won't work I am afraid. @Darron: steamcleaner sounds promising, but I don't have one. I will check tomorrow, maybe I can rent one for one day. And if nothing helps, I will get me a big saw, cut that damn thing off and either glue it back on or get a spare part from DeAg. Will keep you posted. Thanks again and Good night. Timm My build diary hereCurrent Build:HMS Victory
|
|
|
Rank: Master Groups: Registered
Joined: 08/07/2010 Posts: 1,036 Points: 3,086 Location: Thetford, Norfolk, UK
|
Hi Mr Quist,
Might I ask where you purchased the copper foil tape from that you used to trim your barrels? I've just got round to staining my barrels and spotted your pics on your build diary which looked really good.
happy building
Daffy09
|
|
|
Rank: Pro Groups: Registered
Joined: 25/08/2010 Posts: 170 Points: 537 Location: Germany
|
Darron, YOU are my hero of the week !!!The steamcleaner worked perfect !!!! I just steamed the edge between bow and planks several times, removed all water immediately, went with a knife between bow and planks and with a little bit of bouncing and pushing it came off after 5 Minutes !! Thanks a lot, you saved my weekend. daffy09 wrote:Hi Mr Quist,
Might I ask where you purchased the copper foil tape from that you used to trim your barrels? I've just got round to staining my barrels and spotted your pics on your build diary which looked really good.
happy building
Daffy09 Hi Daffy, you mean this one? 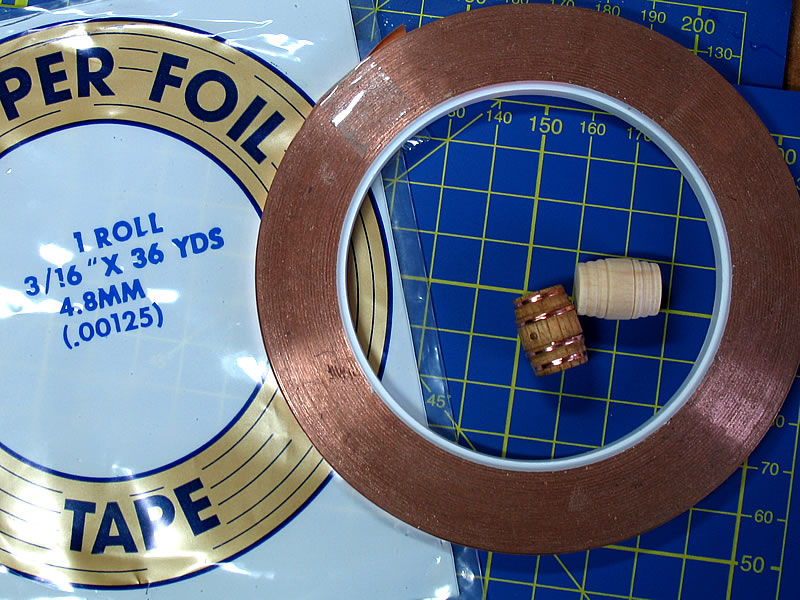 I just bought it on ebay a few months ago. Its actually being used for tiffany glas art work. Wasn't that expensive, maybe 6-7 € the whole roll. Just enter the search term "copper foil tape" there and you will get dozens of hits. Timm My build diary hereCurrent Build:HMS Victory
|
|
|
Rank: Master Groups: Registered
Joined: 15/04/2010 Posts: 1,266 Points: 3,841 Location: The Quantock Hills,Somerset
|
Heres where I got foil to do copper plating on my other build,they do all different widths http://www.tempsfordstai...nd_Edco_copper_foil.htmlRob Nolli Illigitimi Carborundum!!!Current Builds: HMS Victory, SV Thermopylae
|
|
|
Rank: Pro Groups: Joined: 24/08/2009 Posts: 48,827 Points: -13,348
|
Glad To help Timm!
|
|
|
Rank: Master Groups: Registered
Joined: 08/07/2010 Posts: 1,036 Points: 3,086 Location: Thetford, Norfolk, UK
|
|
|
|
|
Guest (2)
|
 US
US

