|
|
 Rank: Vice-Master    Groups: Registered
Joined: 09/02/2012 Posts: 569 Points: 1,675 Location: Scotland
|
How do you actually do that. Do you twist the thread in to coils before putting it on the duck tape. Thanks for that Mike. Mo Mo
|
|
|
Rank: Vice-Master   Groups: Registered
Joined: 20/10/2010 Posts: 511 Points: 1,459 Location: Loughborough
|
I found the easiest way of doing it was to stick double sided tape to a flat board then take off small squres of the top tape, then spiraling the cord onto the tape, when enough ciols are done then i mix some pva and water in a 50/50 mix and paint onto the coils and leave then overnight to dry. Hope this helps and keep up the good work Mo. Builds in progress: HMS Victory.HMS Surprise.
Completed builds: Revell London Bus 1/24.
Builds to do:Sovereign of the seas, Hms Albion.
|
|
|
 Rank: Super-Elite   Groups: Registered
Joined: 24/04/2010 Posts: 5,787 Points: 17,662 Location: Stafford, United Kingdom
|
Hi Mo Petpole has got it in one  Regards Mike MWG BUILD DIARIES: HMS VICTORY, SOVEREIGN OF THE SEAS, SAN FRANCISCO II, HMS HOOD, HMS ENDEAVOUR LONGBOAT, HMS VICTORY X-SECTION, 007 DB5, NISSAN GTR, CUTTY SARK, RB7, AKAGI, BARK HMS ENDEAVOUR, HUMMER H1, MITSUBISHI ZERO.
|
|
|
Rank: Vice-Master Groups: Registered
Joined: 09/02/2012 Posts: 569 Points: 1,675 Location: Scotland
|
Here are a few pictures showing how I make the hooks for the blocks. First I bent a piece of wire through 90 degree's. 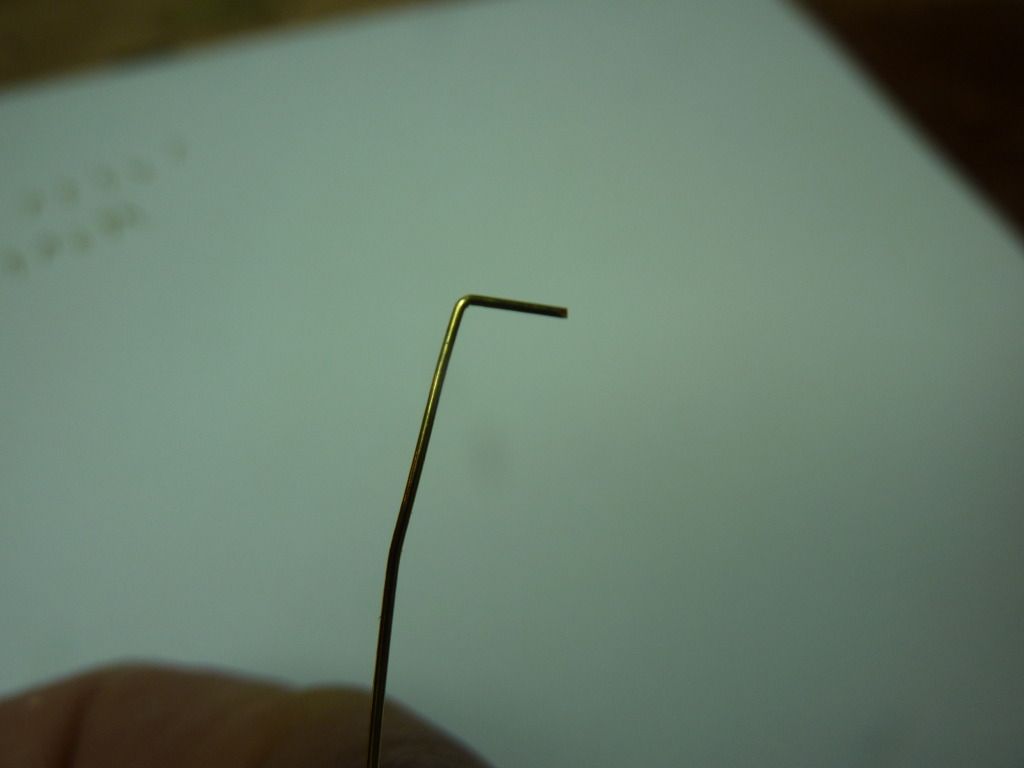 I then bent it over my rule and crimped it with the pliers 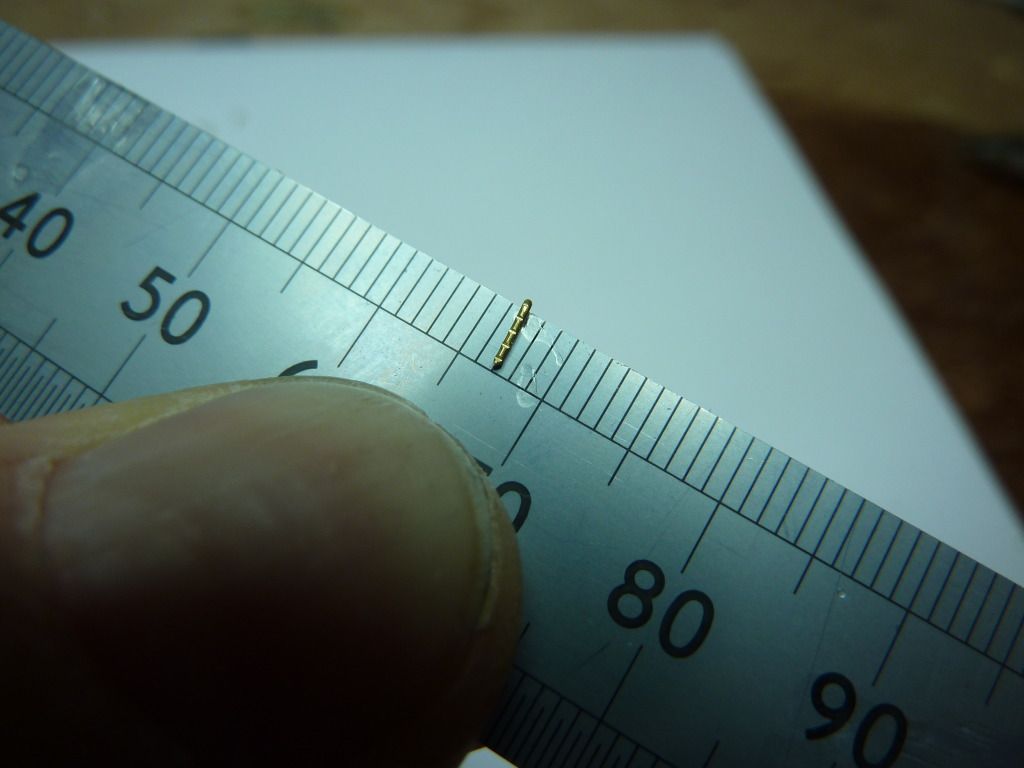 The tail here is to long, so I nipped it with my nip's 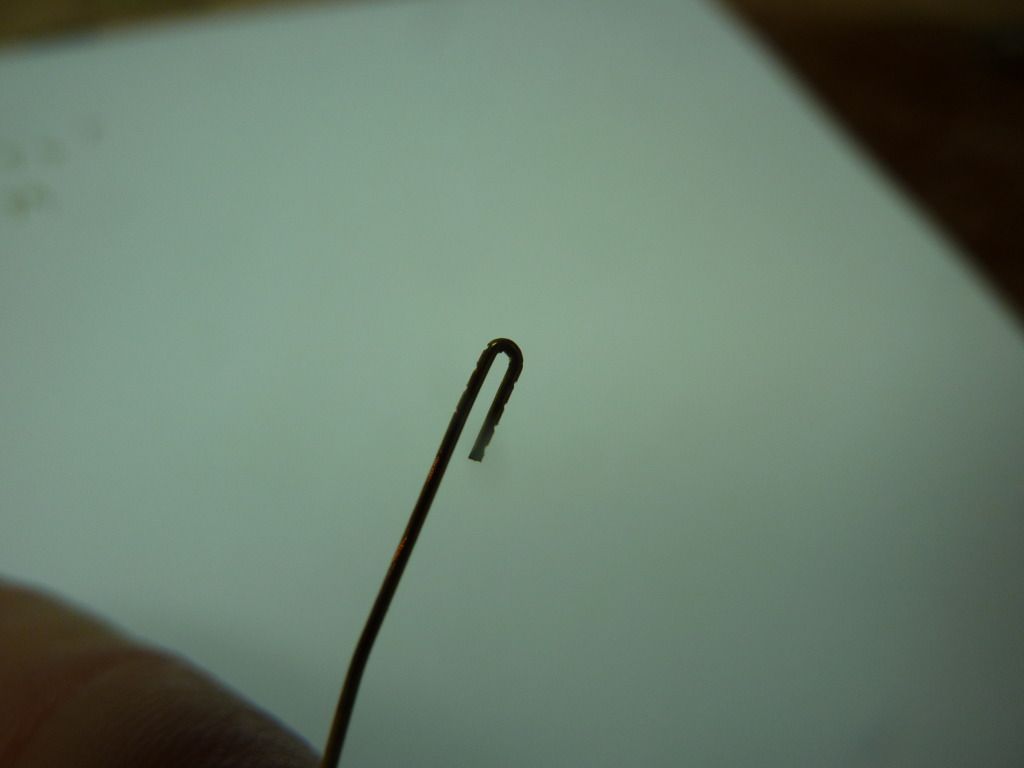 Hook formed, just cut to length now,   Mo
|
|
|
Rank: Vice-Master Groups: Registered
Joined: 09/02/2012 Posts: 569 Points: 1,675 Location: Scotland
|
This is tyhe contraption I used to make my coil's  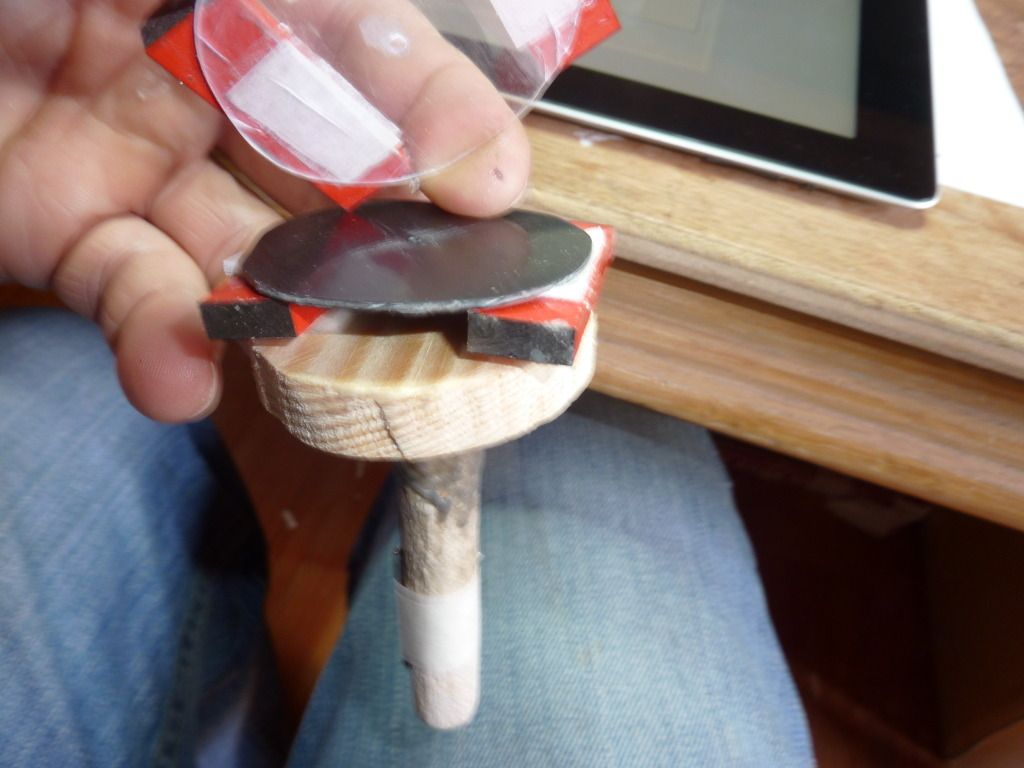 I got the idea of another site, works ok, but a bit of work making the jig. I am now doing the liners to the gun ports. 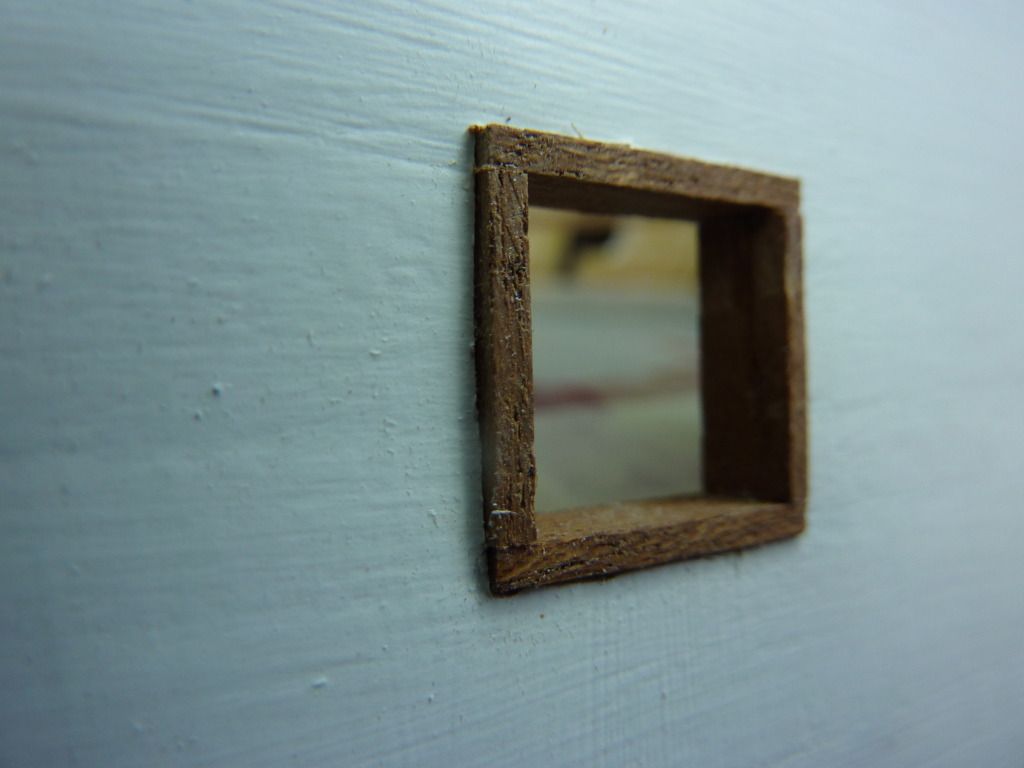 The instructions say to line the ports with 4 or 5mm walnut, but the gunports within the bulwarks ( is that the term ) they use a wider walnut piece, the instruction say to do the bulwarks only to 7 frames, If I were to do it again I would do the bulwarks to all the frames, as you can see the differance of the timber sizes from the outside. 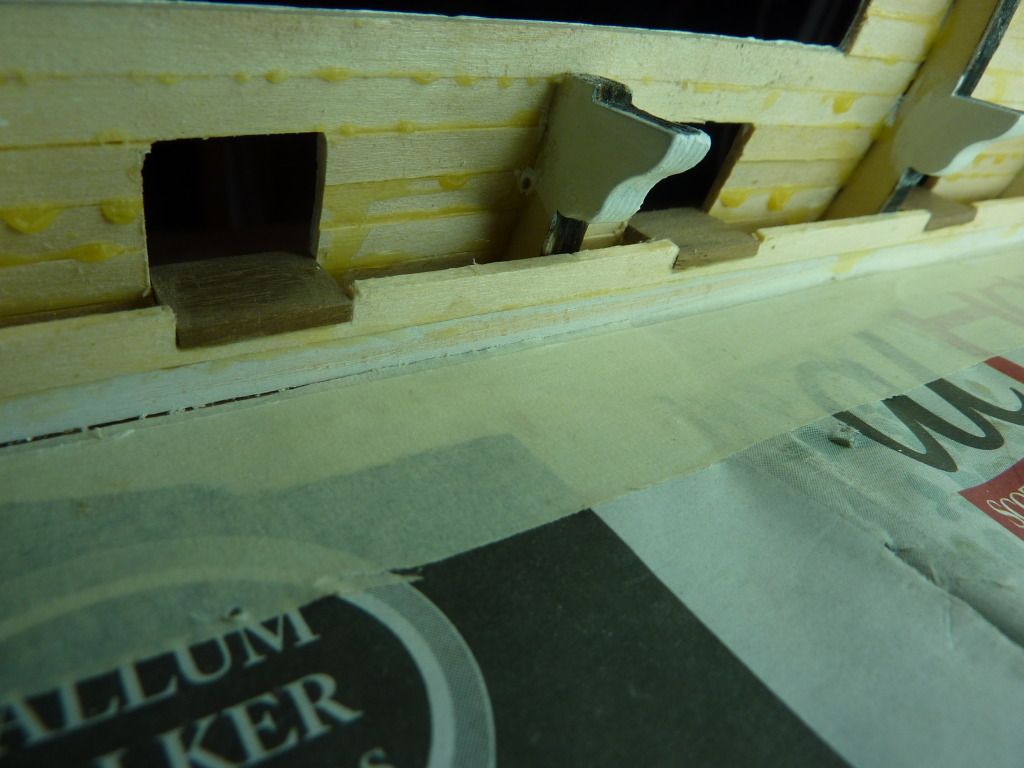 As for the gunport liners, I have done one side, I put the bottom piece in first, then the top and put the verticle pieces in last, On the other side I will be putting in the verticle pieces first then the horizontals, It will be a lot easier that way. 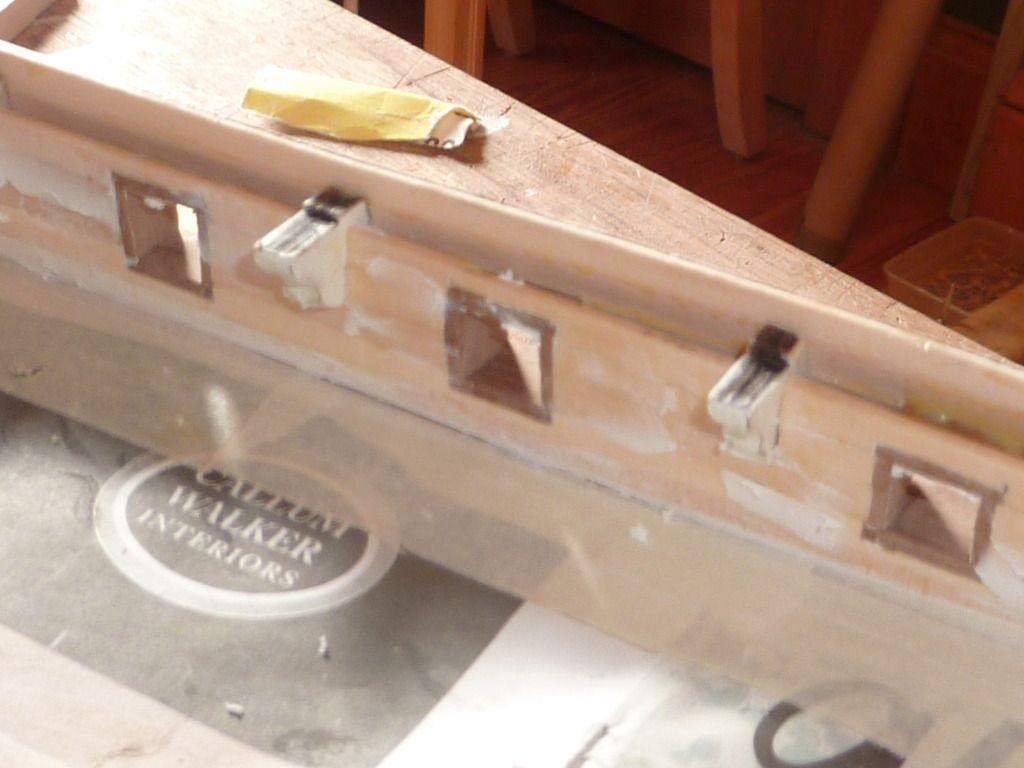 The completed bulwarks, filled ready to sand and prime. This has been the hardest job so far. Mo Mo
|
|
|
Rank: Vice-Master Groups: Registered
Joined: 09/02/2012 Posts: 569 Points: 1,675 Location: Scotland
|
Well its been Work Work Busy Busy Chop Chop Bamg Bank again in the boatyard, I have been tidying up the Captains Quarters area, I have fitted all the window beads, and fitted the first two sections to the side window roofs, 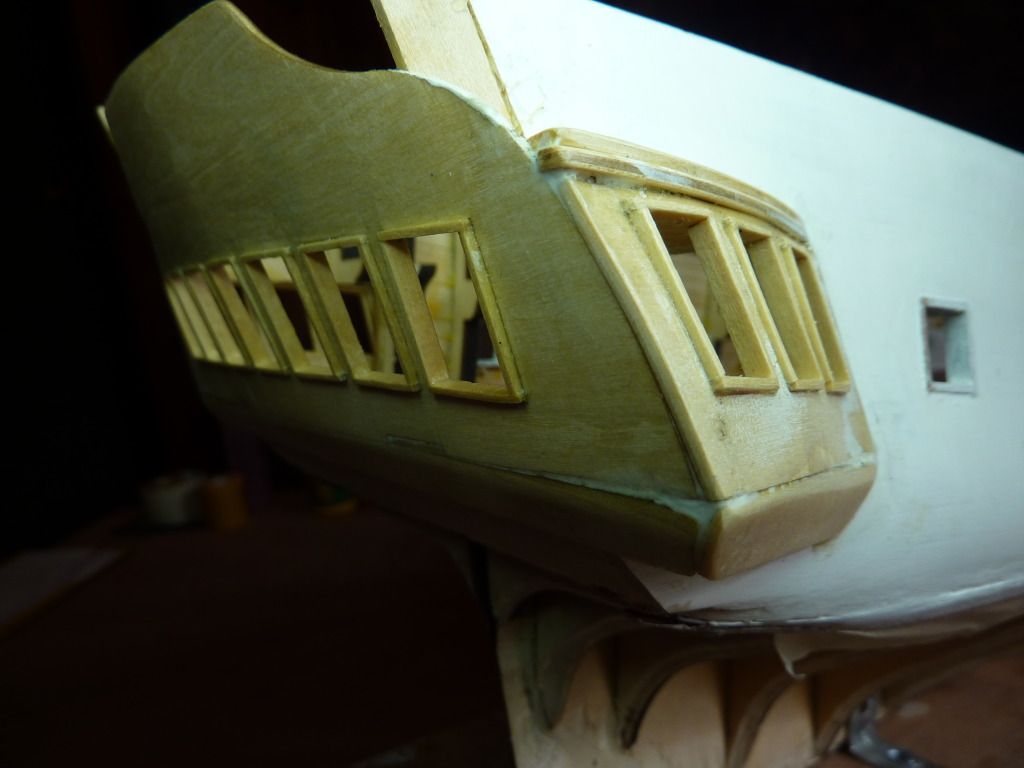 I filled asnd sanded and gave them a coat of sealer before painting them.I am quite happy with the way the window beads have turned out.Its great what a bit of sandpaper can turn out. 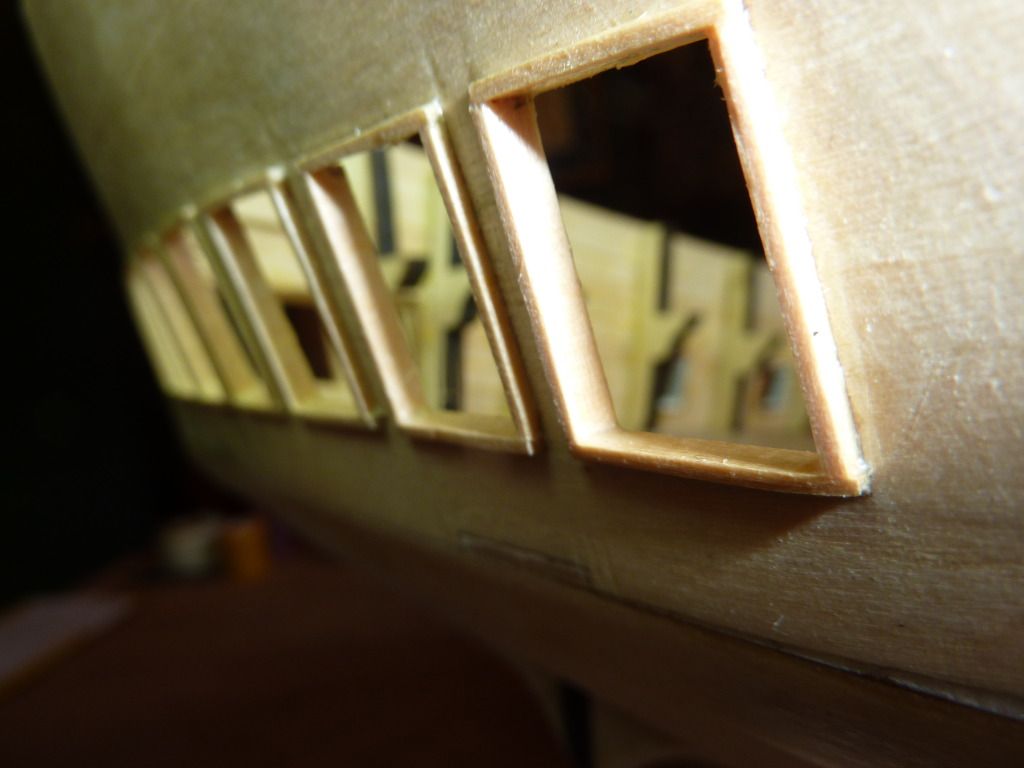 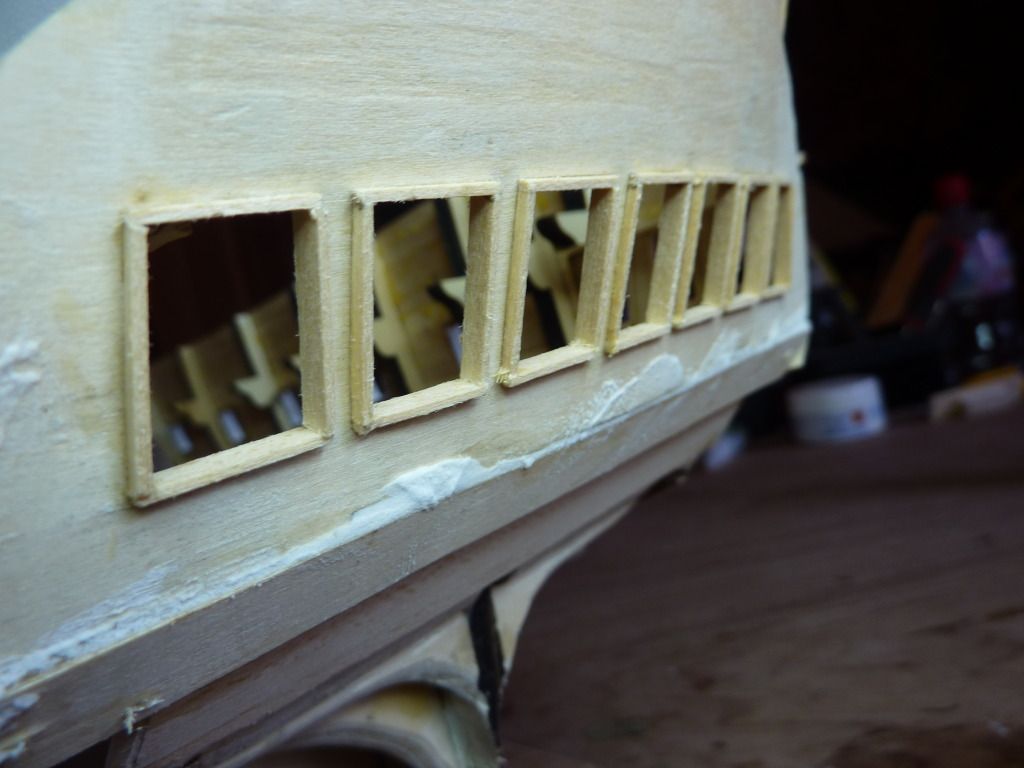  This is the finished Bulwarks, Again happy enough with this. I know some of the boards are uneven and twisted but I think this is quite authentic, as the real ships have a lot of warped and twisted boards. ( thats my excuse and I am sticking to it. ) 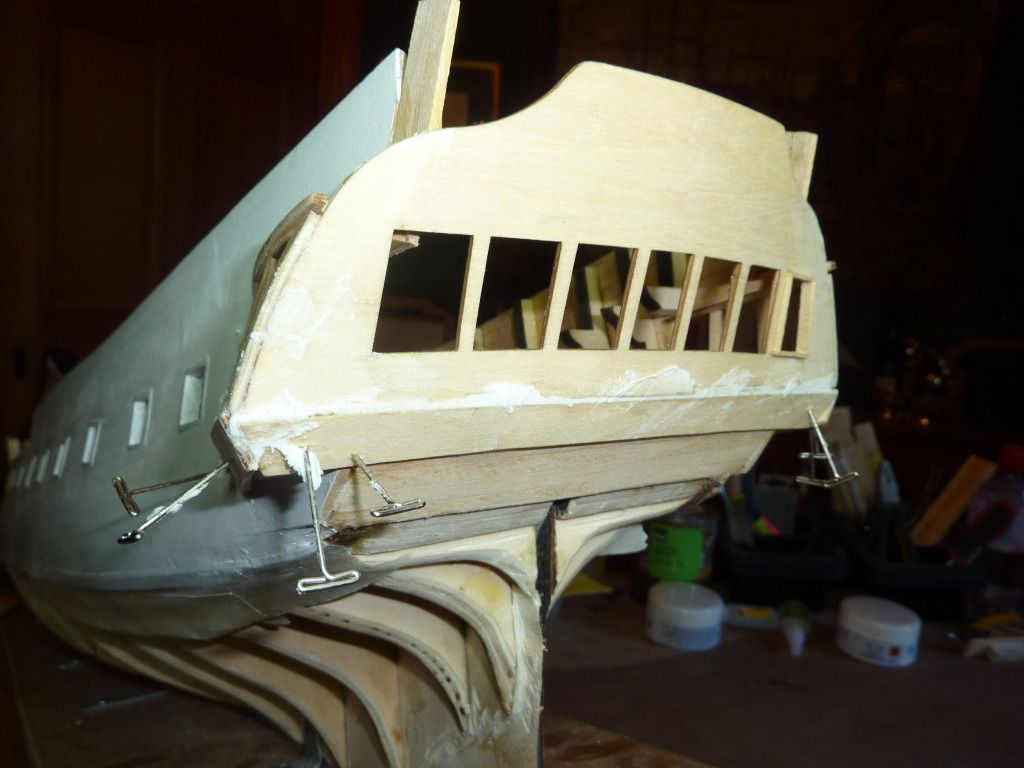 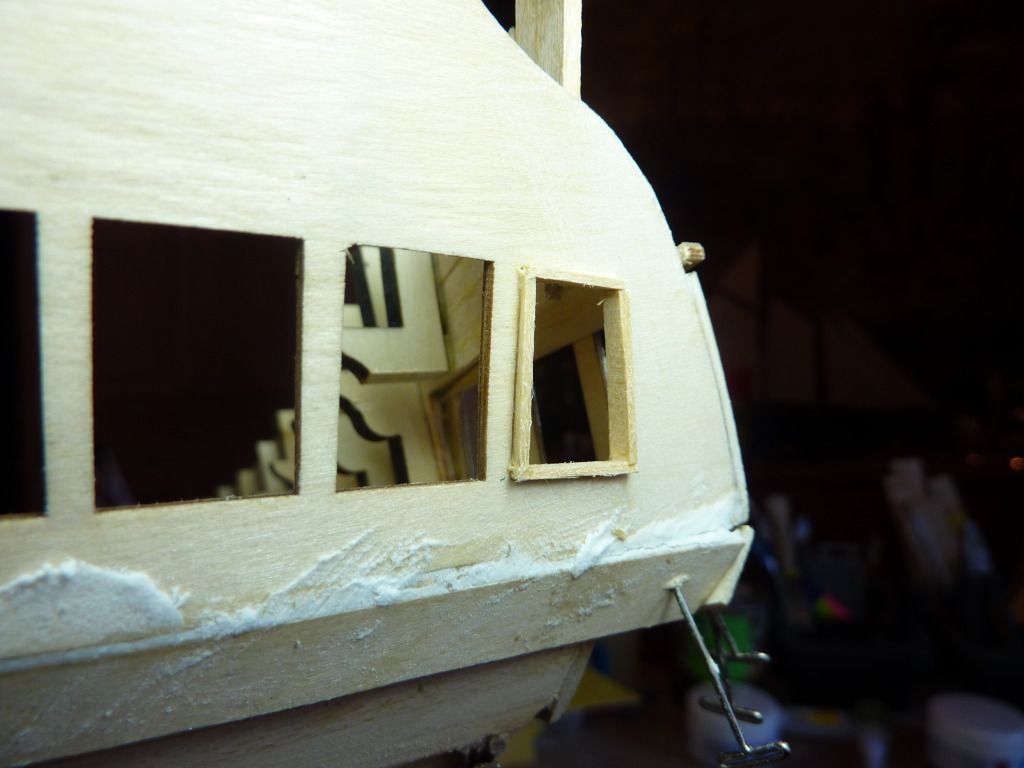 I have now also painted the inside of the gun ports, I am trying to add a bit of colour to my model to cheer myself up a bit. Its probabally a bit out of secuence but who cares. I am avoiding the bottom planking like the plague, But it will come soon enough. MoMo
|
|
|
Rank: Vice-Master Groups: Registered
Joined: 09/02/2012 Posts: 569 Points: 1,675 Location: Scotland
|
I have now painted the gunport liners Ochre Red, and I am now cutting in around the liners to tidy them up, with Yellow Ochre It taking 3 coats to get a reasonable result, 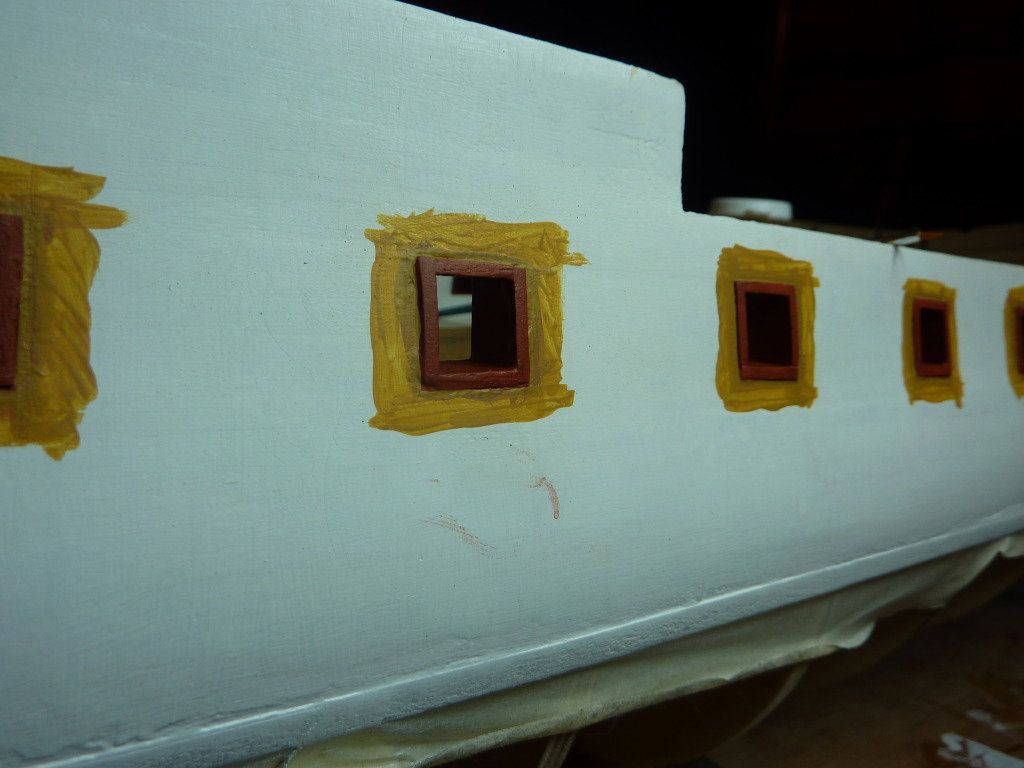 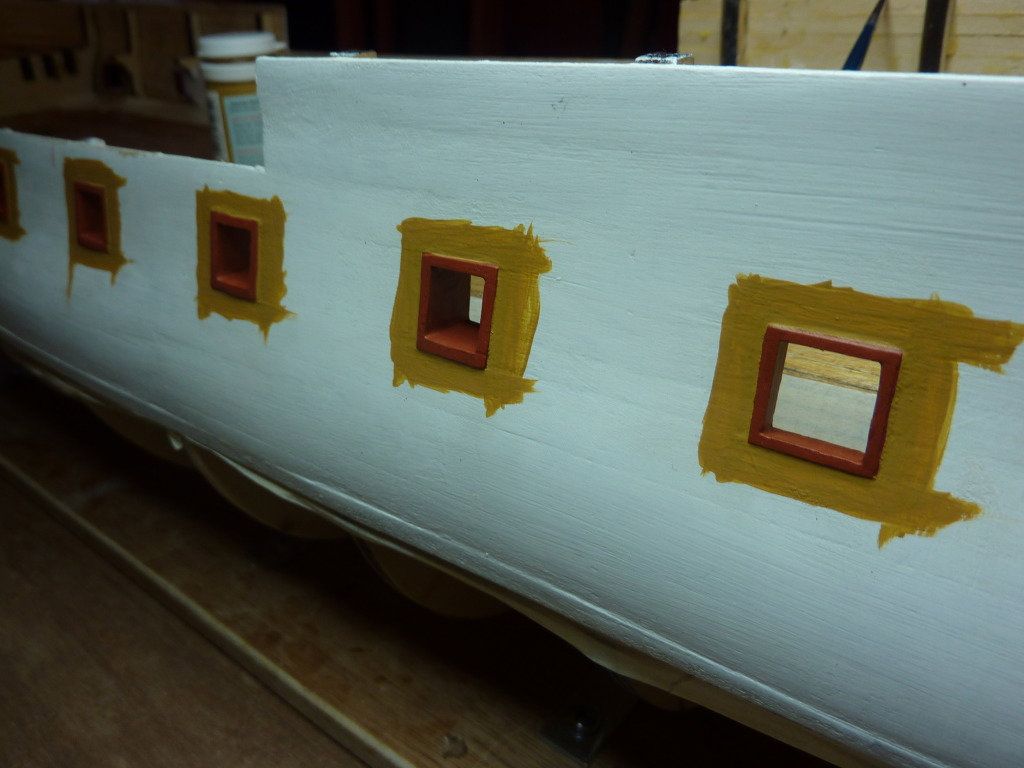 Mo Mo
|
|
|
Rank: Vice-Master Groups: Registered
Joined: 09/02/2012 Posts: 569 Points: 1,675 Location: Scotland
|
Can anyone tell me how to put smaller pictures on the forum, I am uploading the pictures to Photobucket, but can't see an option for size. Mo Mo
|
|
|
 Rank: Master Groups: Registered
Joined: 15/04/2010 Posts: 1,266 Points: 3,841 Location: The Quantock Hills,Somerset
|
You should see a tab at the top of your album saying EDIT PHOTOS,click on this then select pic you want to resize,underneath there will be a blue tab saying SWITCH TO ADVANCED EDITOR,click on it,this will open up the picture with the ability to do all sorts of editing including resizing,in fact this is vastly better than it used to be.Hope this helps. PS: DON'T FORGET TO SAVE YOUR EDITED PHOTO!!!! Rob Nolli Illigitimi Carborundum!!!Current Builds: HMS Victory, SV Thermopylae
|
|
|
Rank: Vice-Master Groups: Registered
Joined: 09/02/2012 Posts: 569 Points: 1,675 Location: Scotland
|
This is a test for smaller pic'sMo Mo
|
|
|
Rank: Vice-Master Groups: Registered
Joined: 09/02/2012 Posts: 569 Points: 1,675 Location: Scotland
|
 Mo
|
|
|
Rank: Master Groups: Registered
Joined: 15/04/2010 Posts: 1,266 Points: 3,841 Location: The Quantock Hills,Somerset
|
Mo,try sizing them to 450 x6oo px(pixels)just remember to save them. Rob Nolli Illigitimi Carborundum!!!Current Builds: HMS Victory, SV Thermopylae
|
|
|
Rank: Vice-Master Groups: Registered
Joined: 09/02/2012 Posts: 569 Points: 1,675 Location: Scotland
|
Will do Rob. It took me long enough to get the hang of posting pictures in the first place, but got the hang of it now.
Mo Mo
|
|
|
Rank: Vice-Master Groups: Registered
Joined: 09/02/2012 Posts: 569 Points: 1,675 Location: Scotland
|
|
|
|
Rank: Vice-Master Groups: Registered
Joined: 09/02/2012 Posts: 569 Points: 1,675 Location: Scotland
|
|
|
|
Rank: Vice-Master Groups: Registered
Joined: 09/02/2012 Posts: 569 Points: 1,675 Location: Scotland
|
P S
the white residue is wipeing off with a quick rub of the fingersMo
Mo
|
|
|
|
|
looking good Mo  Current builds:-C57,Zero, Lamborghini Countach, Caldercraft HMS Agamemnon,Robi,R2-D2, MFH Cobra .
|
|
|
Rank: Vice-Master Groups: Registered
Joined: 09/02/2012 Posts: 569 Points: 1,675 Location: Scotland
|
And now on to the launch, The frames for this are made out of timber, very very easy to break, It would have been better bif they were made from plywood. I broke a couple of them trying to get the planking bent to the shape of the hull, The launch is to be double planked, I am quite happy with the outcome so far, I still have to do the 2nd planking, I will takle this later, it should be easy to do , as the planking is very thin. 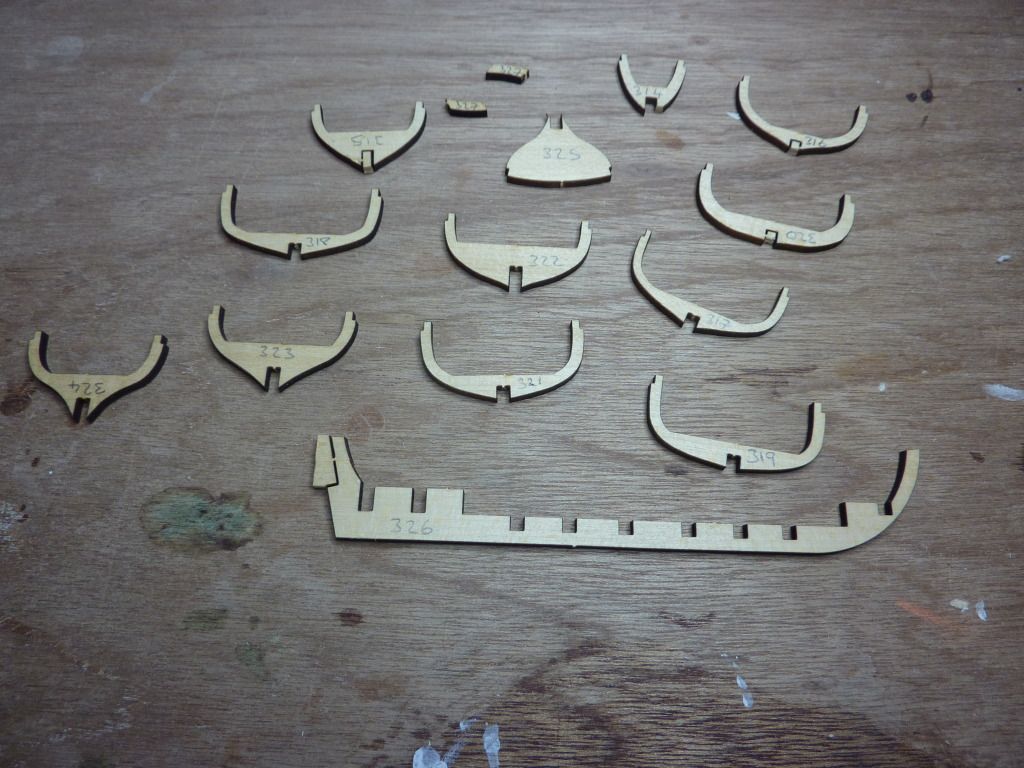   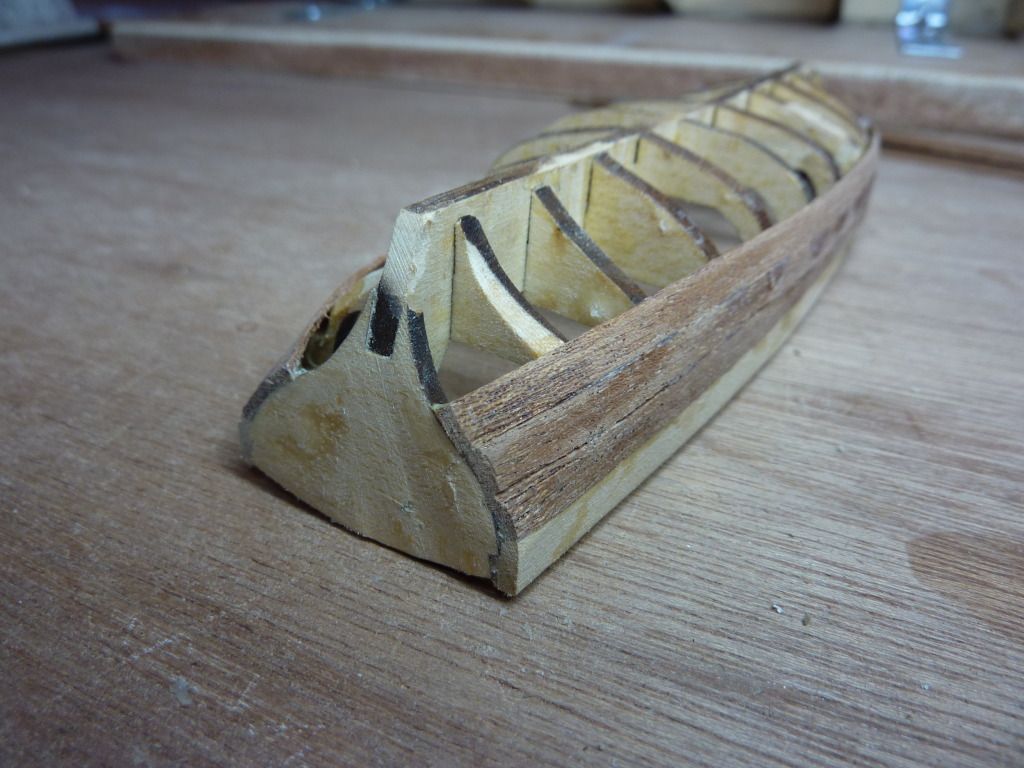 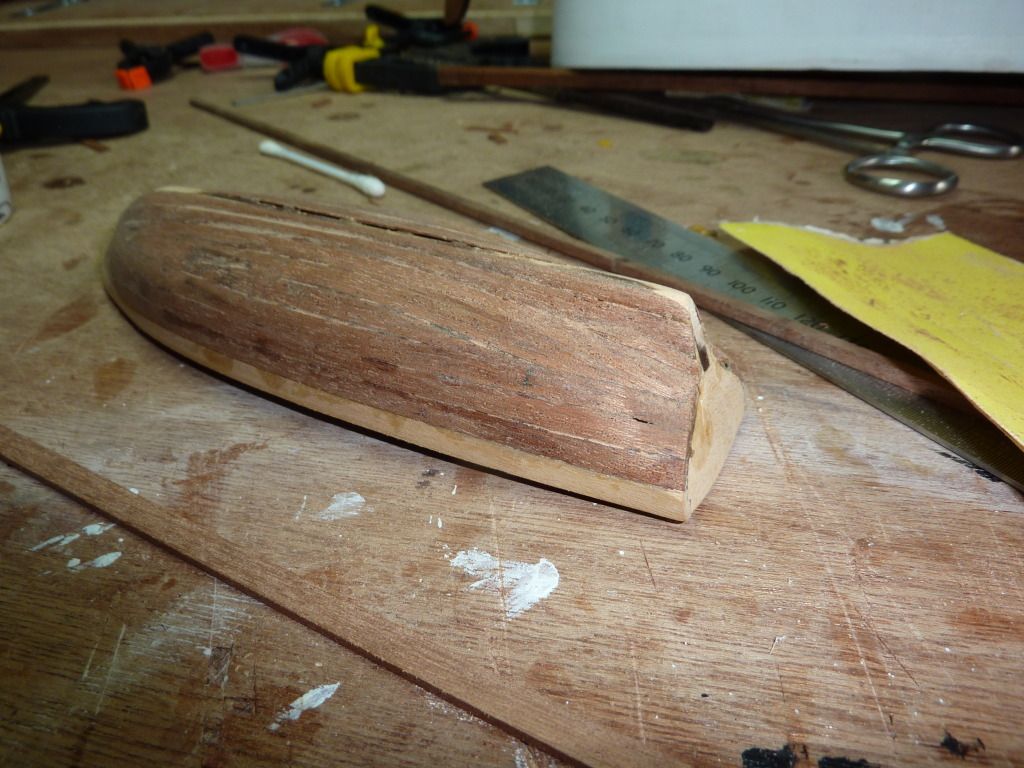 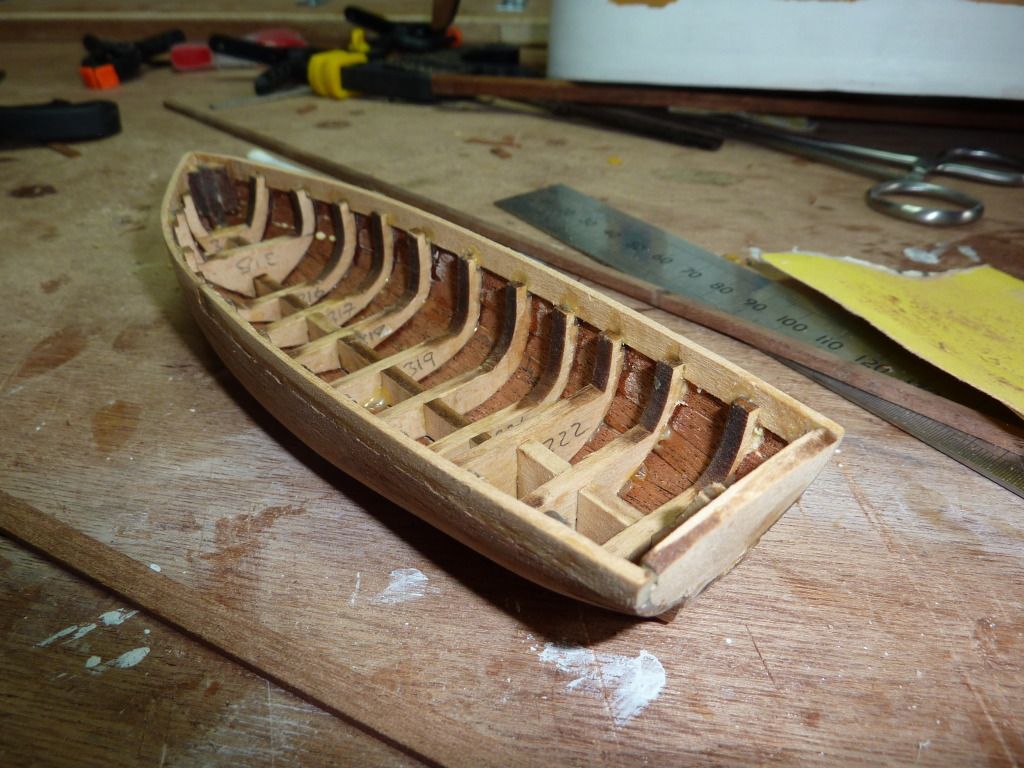 The keel of the launch is 3 x 3 walnut, but the curved bit of the keel that comes up the front of the launch, supplied with the kit is not the right shape for my build, That is because I have not got the planking tight enought to the frames supplied, I will get a sheet of walnut and cut and fit one at a later date. Mo Mo
|
|
|
Rank: Vice-Master Groups: Registered
Joined: 09/02/2012 Posts: 569 Points: 1,675 Location: Scotland
|
|
|
|
Rank: Super-Elite Groups: Registered
Joined: 24/04/2010 Posts: 5,787 Points: 17,662 Location: Stafford, United Kingdom
|
Hi Mo, your build looks great regards Mike MWG BUILD DIARIES: HMS VICTORY, SOVEREIGN OF THE SEAS, SAN FRANCISCO II, HMS HOOD, HMS ENDEAVOUR LONGBOAT, HMS VICTORY X-SECTION, 007 DB5, NISSAN GTR, CUTTY SARK, RB7, AKAGI, BARK HMS ENDEAVOUR, HUMMER H1, MITSUBISHI ZERO.
|
|
|
|
Guest (5)
|
 US
US

