|
|
 Rank: Semi-Pro Level 1  Groups: Registered
Joined: 22/07/2012 Posts: 69 Points: 144 Location: Belgium
|
Mid deck planking finished: 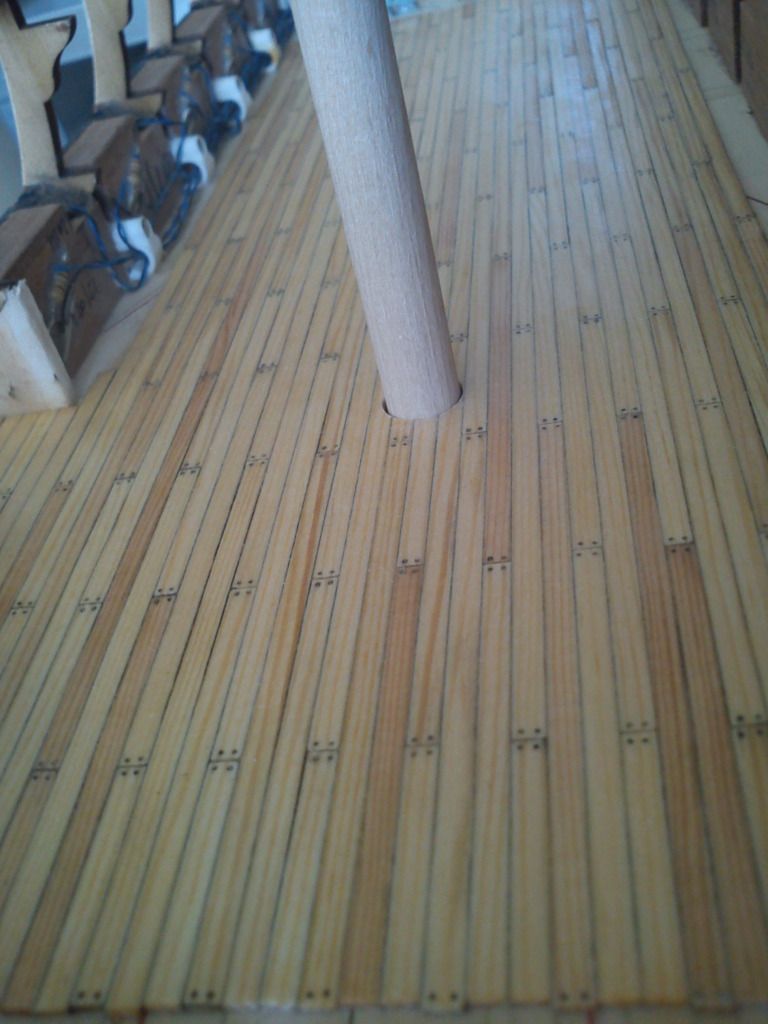 Mid deck planking finished: 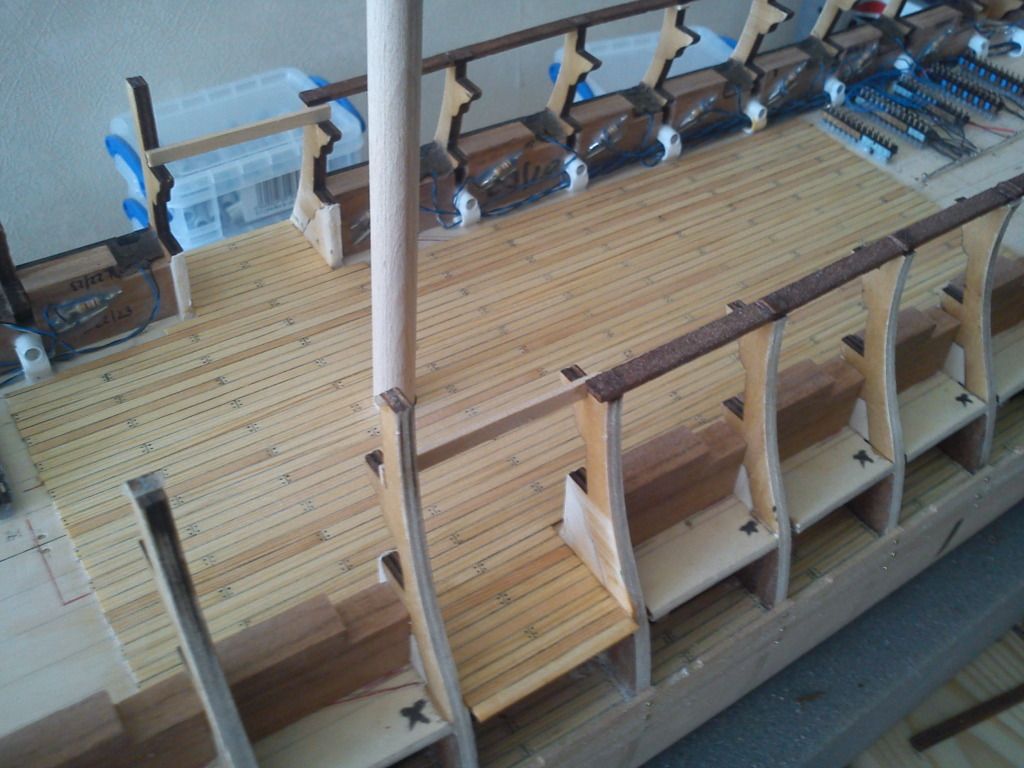 And finally completed the design on the interior.. this is rev3 :p 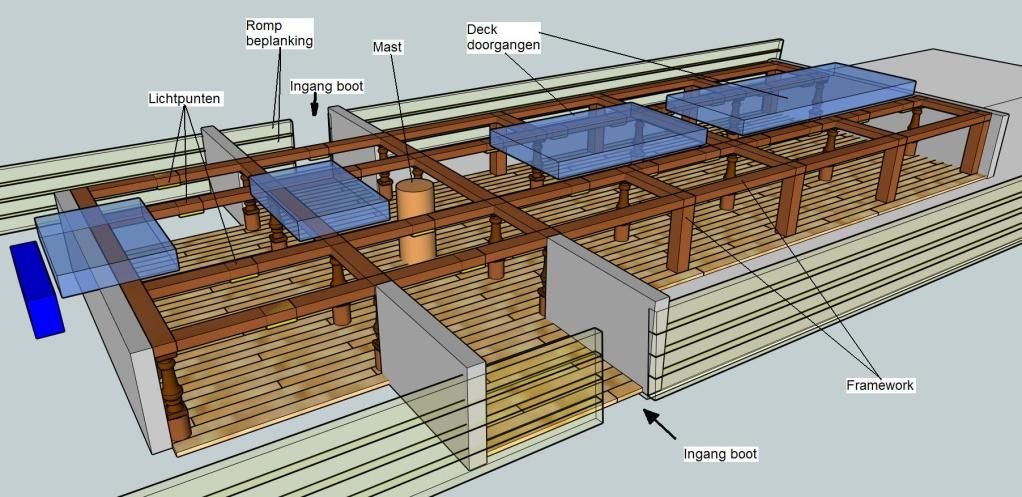 What i don't seem to find pictures from though, is from this deck & more especially what stuff i should place there (or not), like barrels, ... ? Some links to good pictures/plans would be v much appreciated! Cheers Bam
|
|
|
 Rank: Super-Elite        Groups: Registered
Joined: 04/04/2010 Posts: 3,955 Points: 11,809 Location: uk
|
hi Bameraam, lovely decking and working lights design,and the graphics are excellent,will be keeping my good eye on this build. Current builds: SotS, USS Consitution, San Felipe, D51 loco, HMS Surprise, RB7, Arab Dhow, Jotika HMS Victory Completed builds: HMS Pickel, Thermopylae, Mississipi river boat, Mary Rose, Cutty Sark, San Francisco II, HMS Victory x5, Titanic Lifeboat, Panart HMS Victory Launch, Hachette Titanic, Virginia Schooner, Endeavour Longboat. http://www.model-space.com/gb/
|
|
|
 Rank: Semi-Pro Level 1  Groups: Registered
Joined: 22/07/2012 Posts: 69 Points: 144 Location: Belgium
|
Thanks Karl! In the mean time finished the upper frame work: Milled out some strips of nutwood (4.2 by 2.1mm) so they fit together 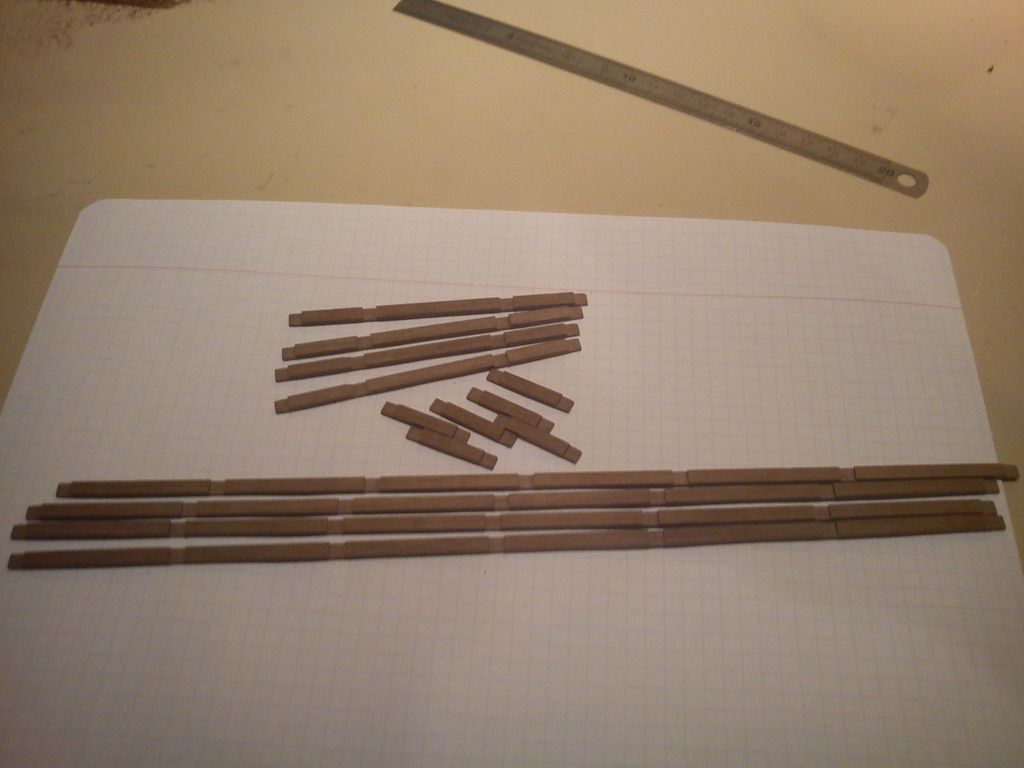 Dryfitted them here, (some small adjustments needed to keep a right angle though). Can't glue them together yet as i need to foresee the lighting spots first and mill out the gutters for the wires 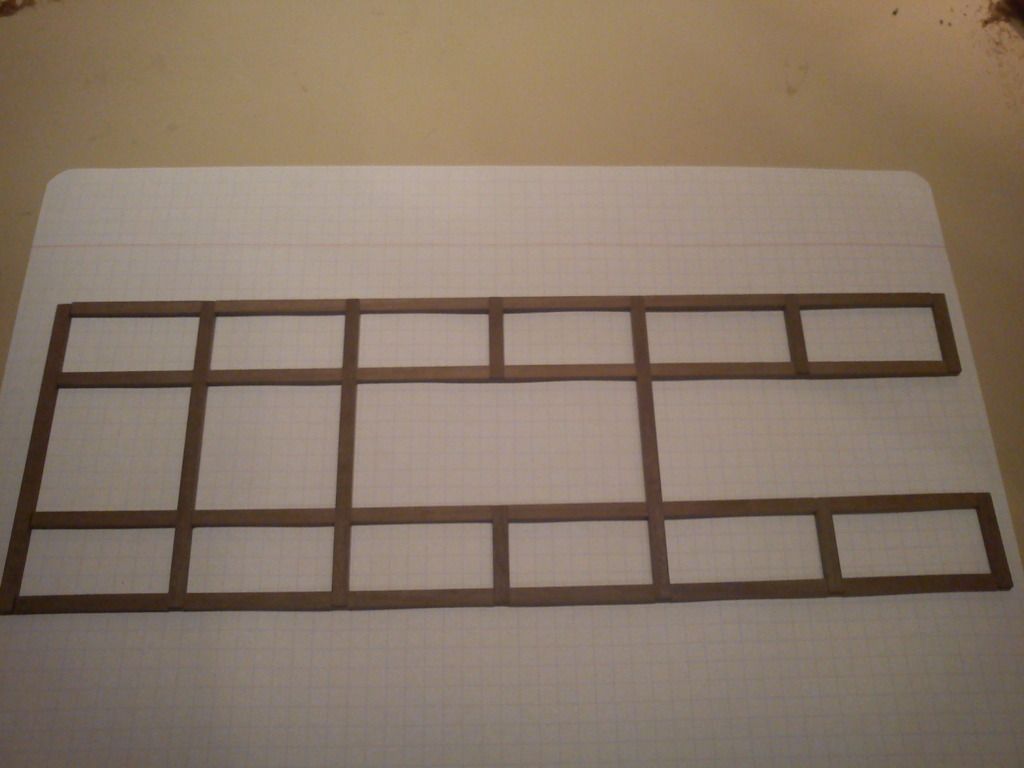
|
|
|
 Rank: Semi-Pro Level 1  Groups: Registered
Joined: 22/07/2012 Posts: 69 Points: 144 Location: Belgium
|
Holiday for me, so work advances quite a bit  Milled out the LED spaces, the wire holes & the wire gutters: 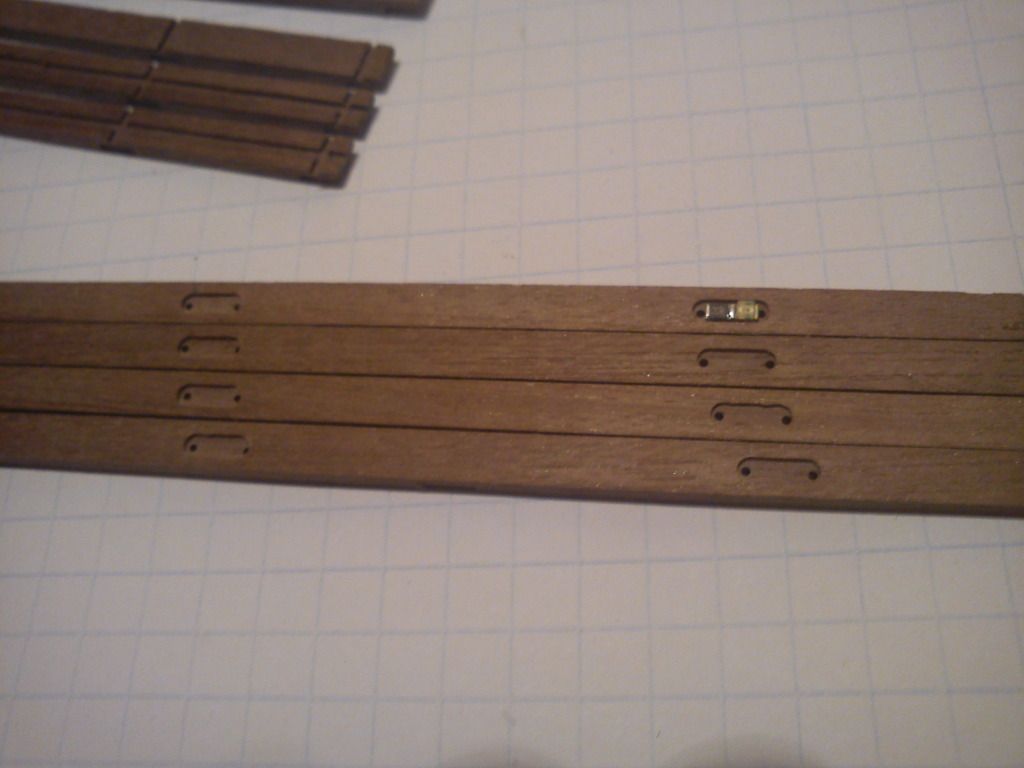 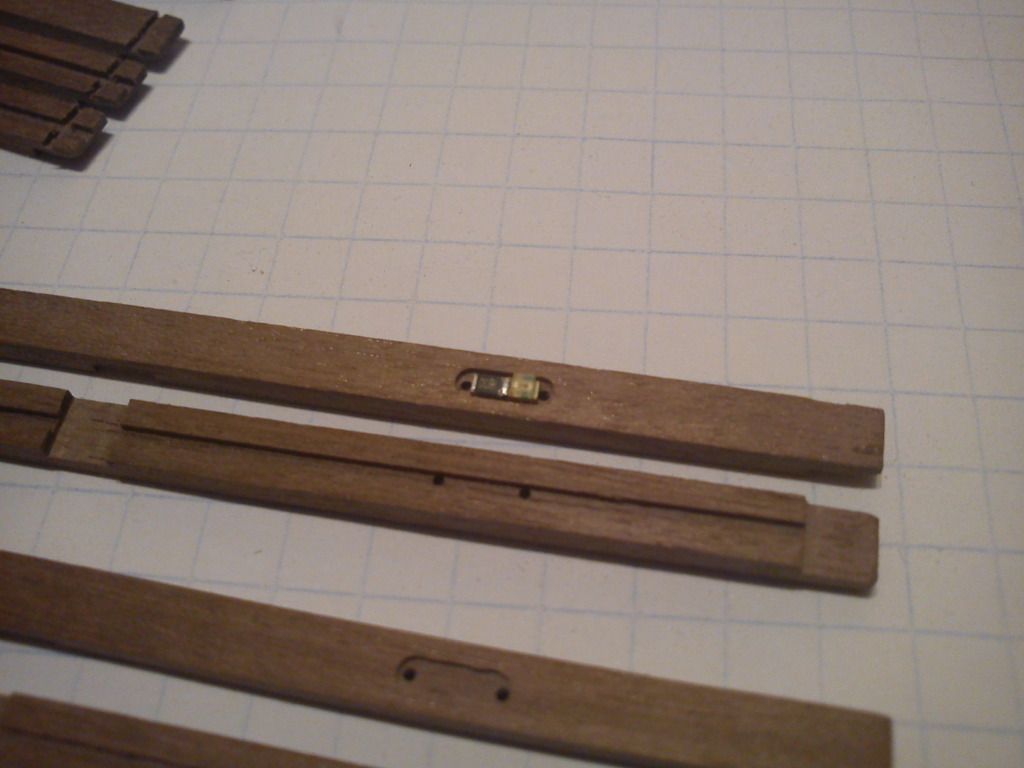 Best regards!
|
|
|
 Rank: Pro Groups: Joined: 24/08/2009 Posts: 48,827 Points: -13,348
|
Very nice work Bameraam, can't wait to see the end result 
|
|
|
 Rank: Pro Groups: Joined: 24/08/2009 Posts: 48,827 Points: -13,348
|
|
|
|
 Rank: Semi-Pro Level 1  Groups: Registered
Joined: 22/07/2012 Posts: 69 Points: 144 Location: Belgium
|
Frame assembled & sanded a bit. Bought some pillars & extended them with a 3mm diameter wooden piece to get to the correct height to support the lighting/support frame. 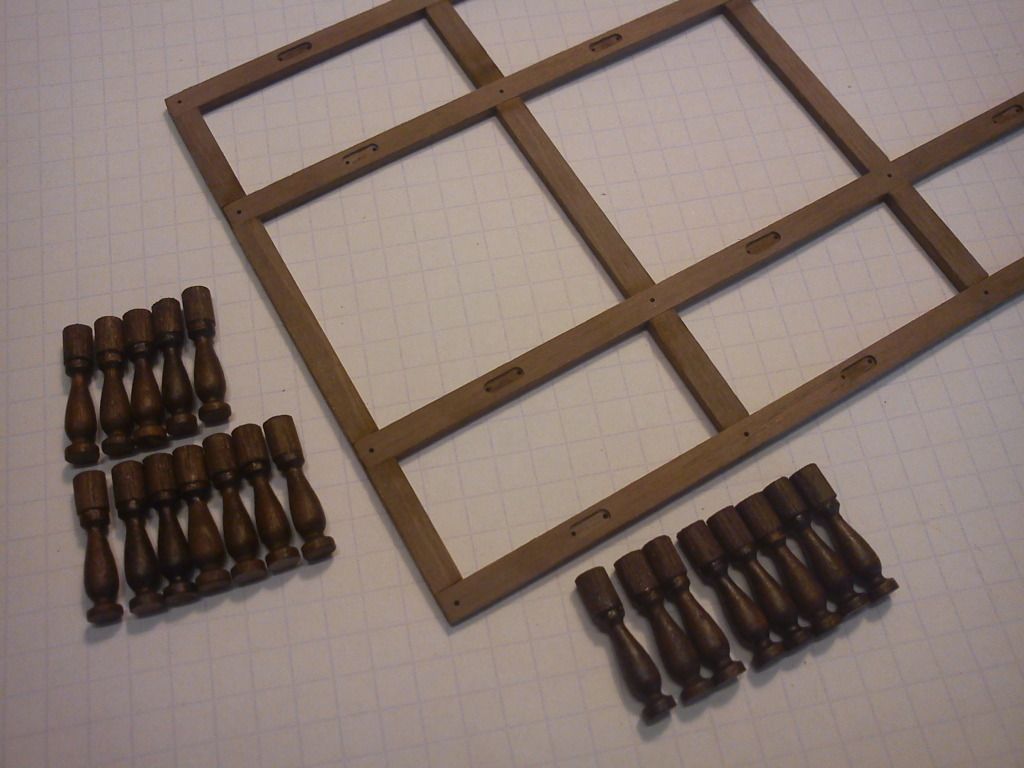 Dryfitted: 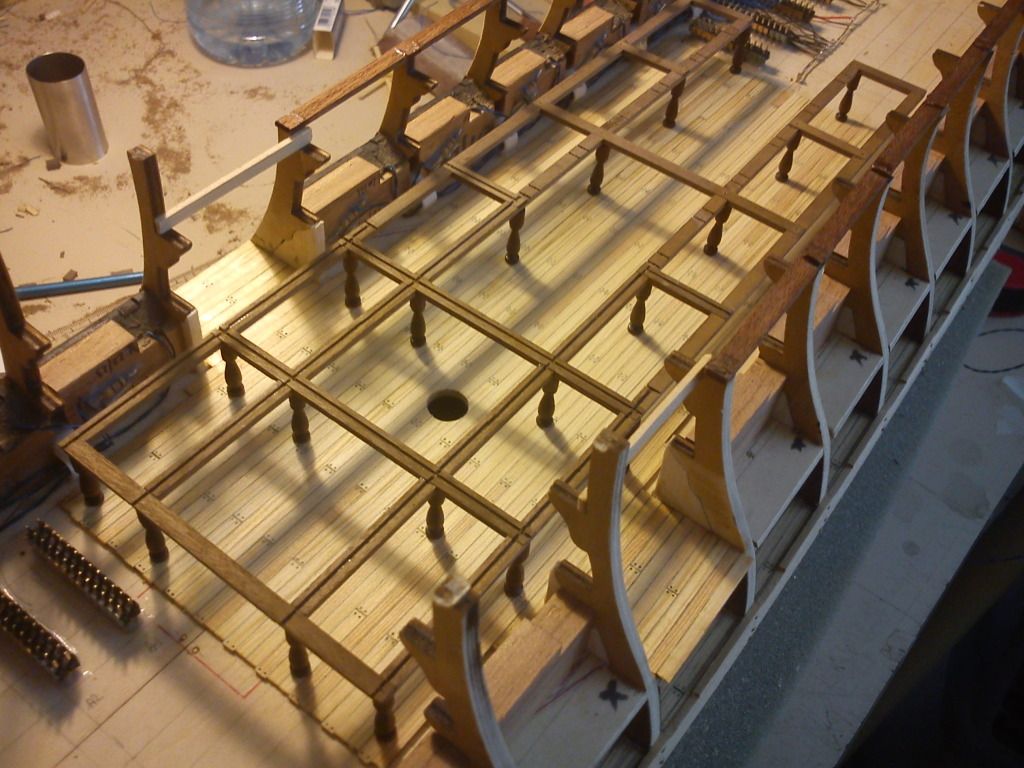 ..and the view later on through the door 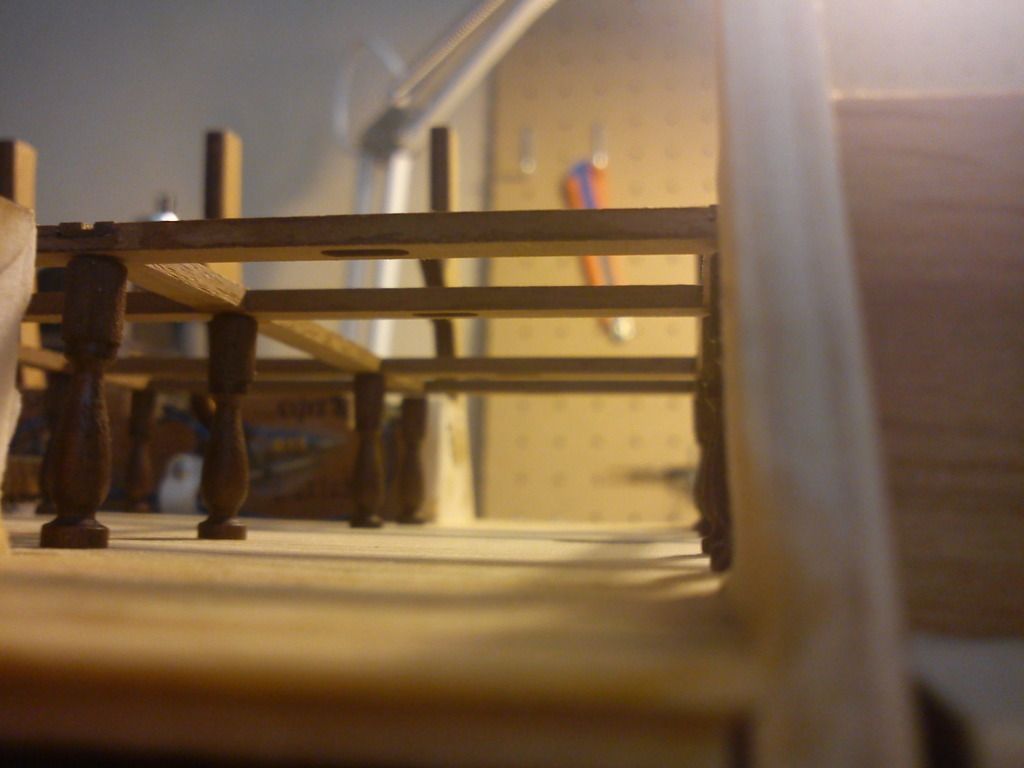 A bit worried though with the angular lightcone, hopefully the height will be good & i don't get "spotlights" only illuminating circles on the deck. Ach well - we'll see later on i guess 
|
|
|
 Rank: Super-Elite      Groups: Registered
Joined: 24/04/2010 Posts: 5,787 Points: 17,662 Location: Stafford, United Kingdom
|
Hi Bam very nice work  Agreat enhancement Kind regards Mike MWG BUILD DIARIES: HMS VICTORY, SOVEREIGN OF THE SEAS, SAN FRANCISCO II, HMS HOOD, HMS ENDEAVOUR LONGBOAT, HMS VICTORY X-SECTION, 007 DB5, NISSAN GTR, CUTTY SARK, RB7, AKAGI, BARK HMS ENDEAVOUR, HUMMER H1, MITSUBISHI ZERO.
|
|
|
 Rank: Semi-Pro Level 1  Groups: Registered
Joined: 22/07/2012 Posts: 69 Points: 144 Location: Belgium
|
Finally finished with the frame, had a hard time on it: solders breaking, resistors breaking when fixing the lightpoint.. anyways here is the result, and I'm happy with it    The topside with the wiring 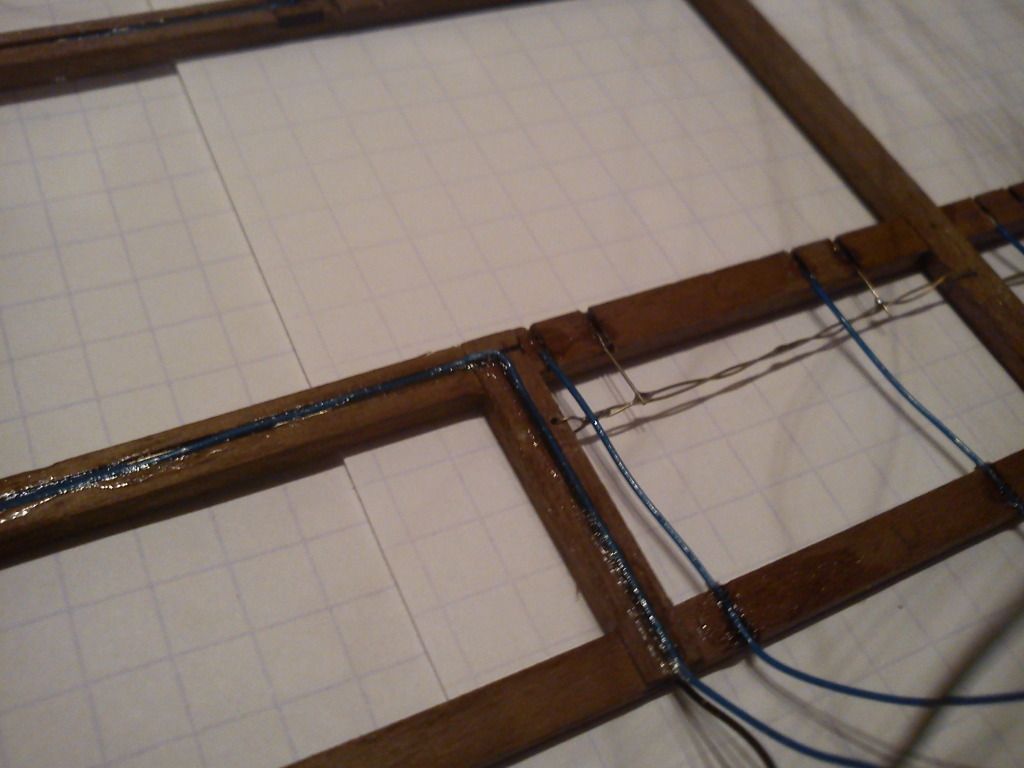 An LED 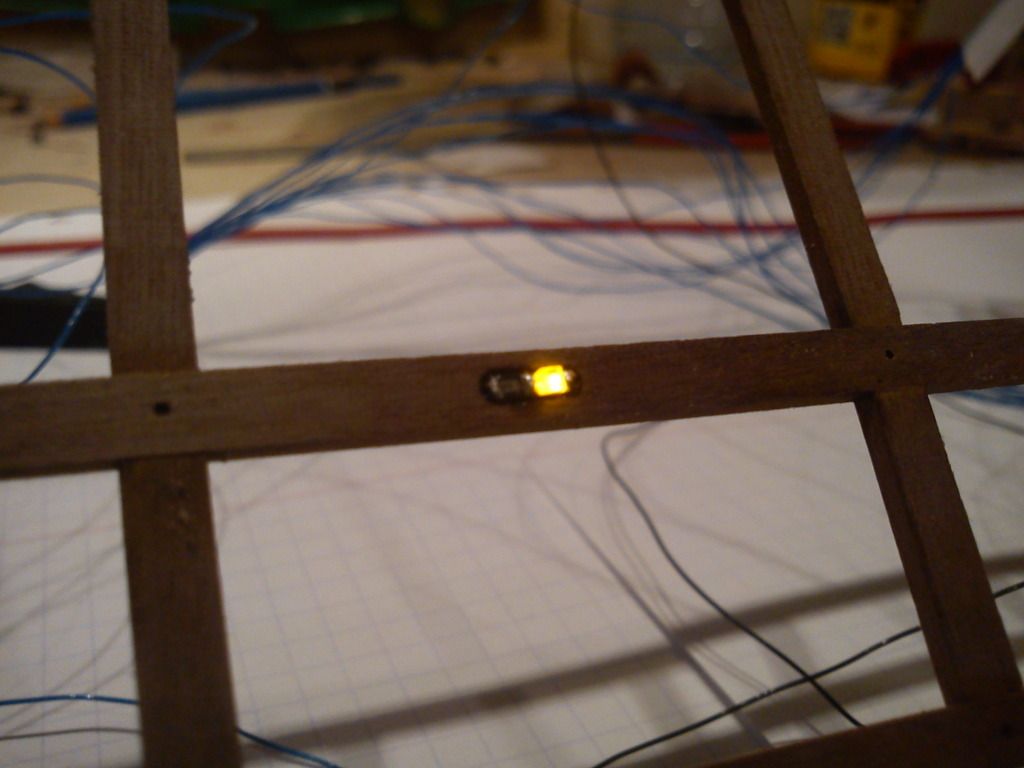 All lighting up, hope it stays this way 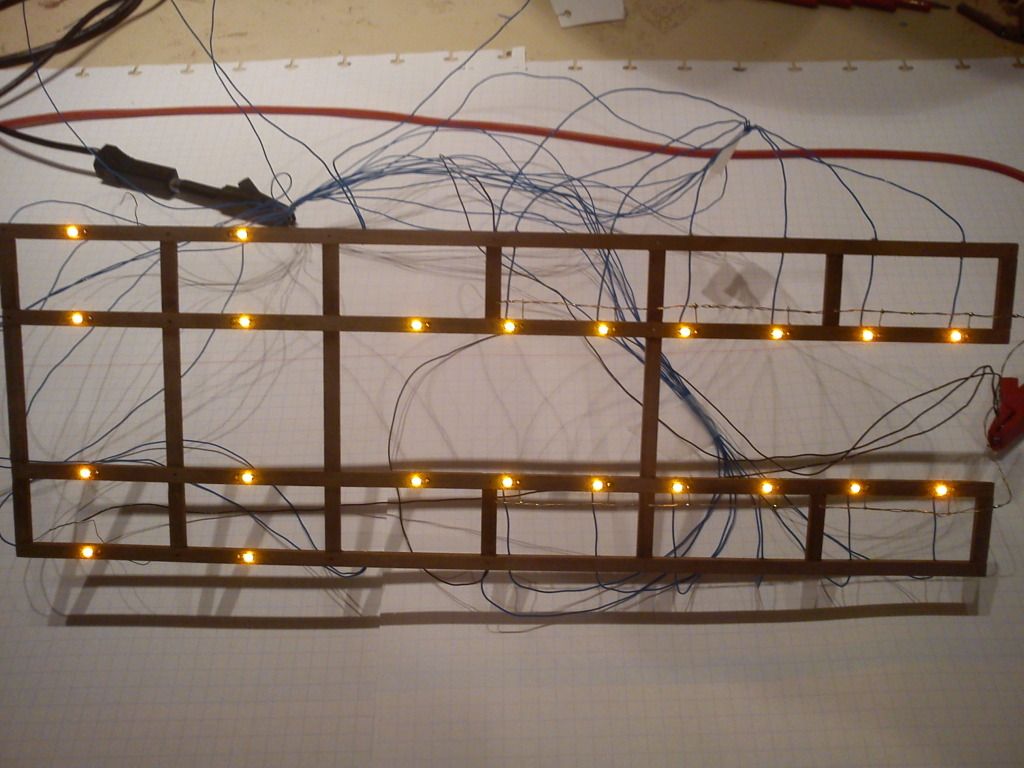 The wires are all coming out of the sides, as there's another deck to put on top of this one 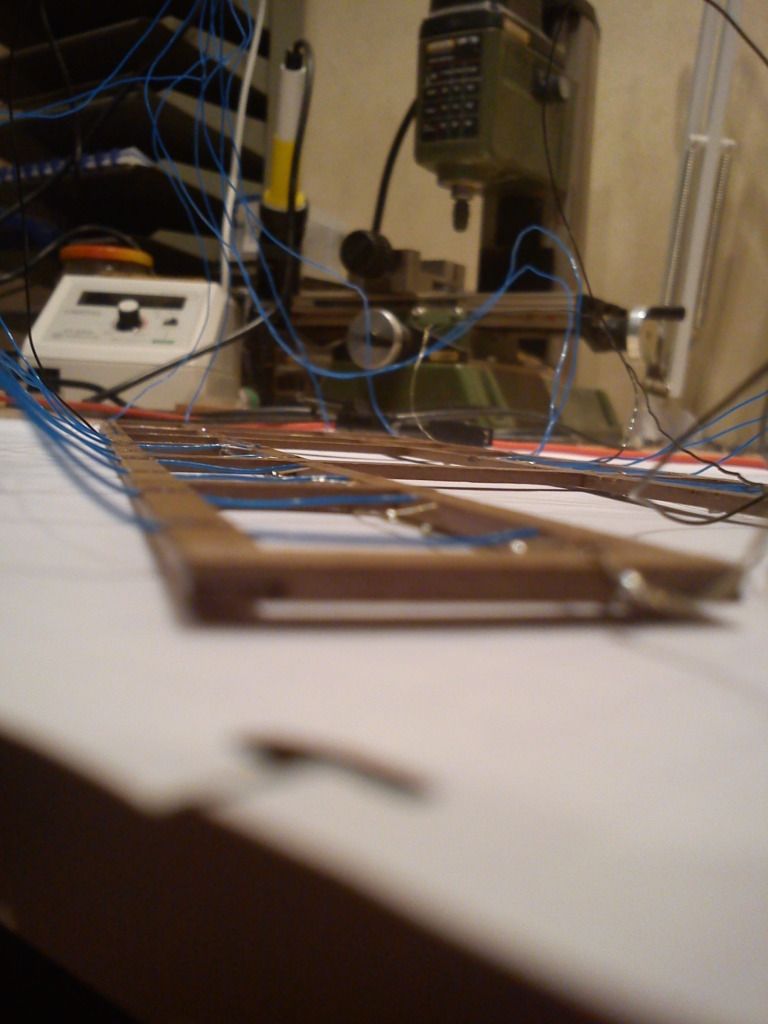 From the entrance, pillars not fixed yet 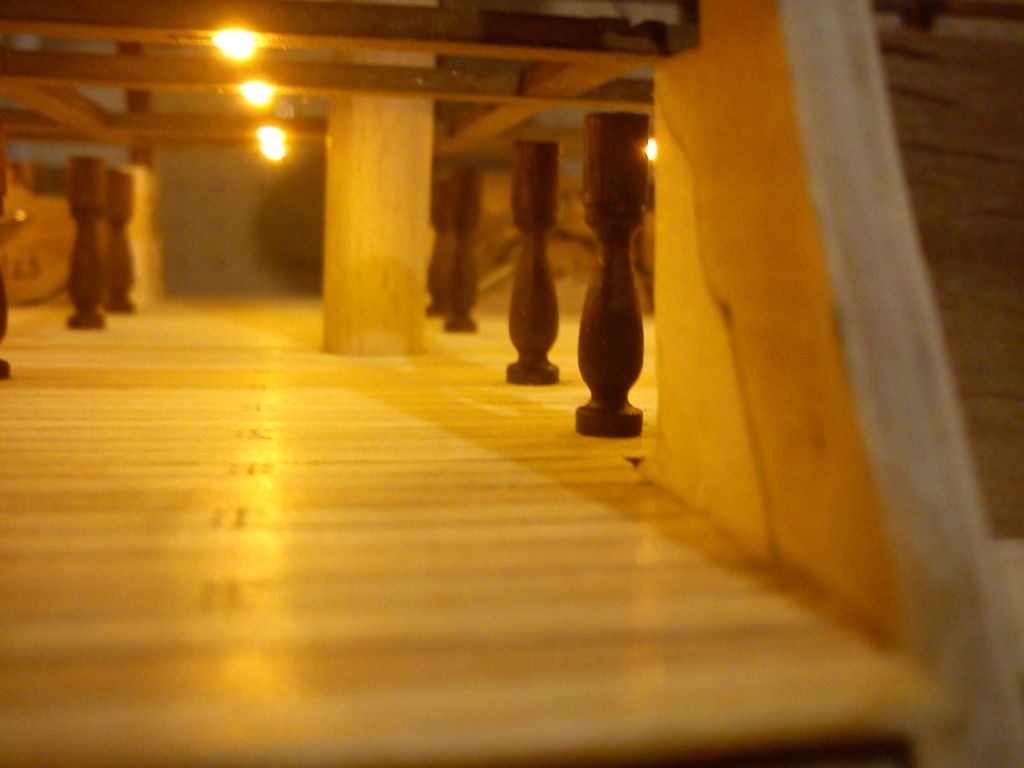 At night :) 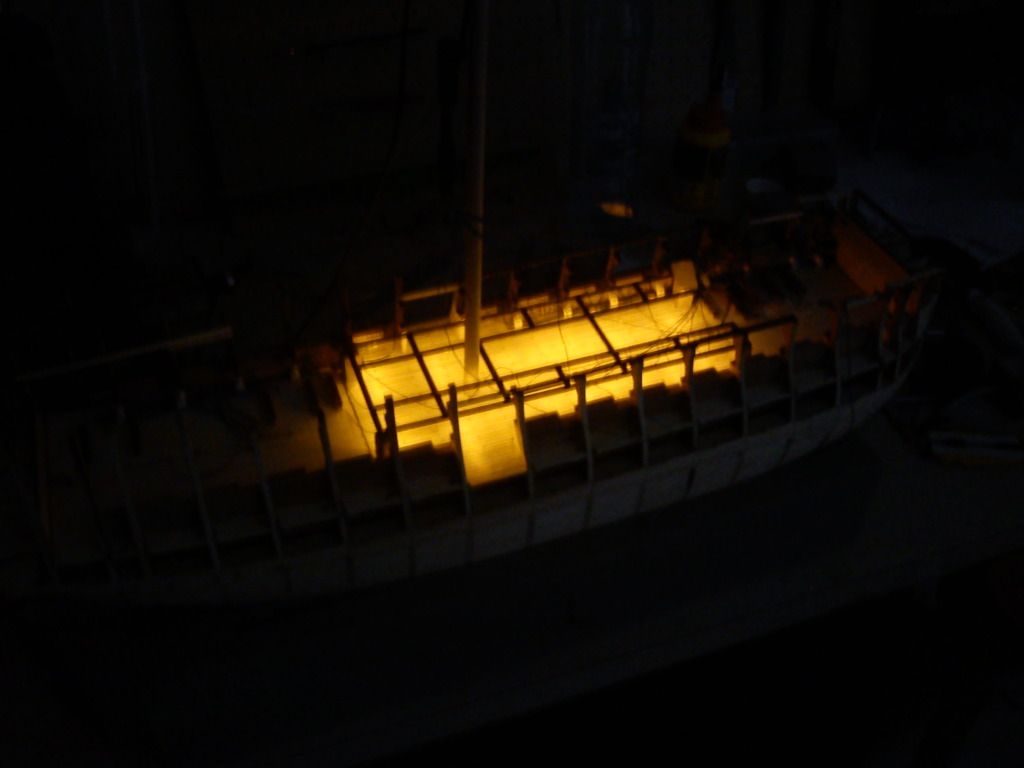 Best regards, Bam
|
|
|
 Rank: Vice-Master    Groups: Registered
Joined: 11/05/2011 Posts: 766 Points: 2,128 Location: Dagenham
|
Looks fantastic mate. Can I ask where u got all the lighting equipment from as I'm building HMS hood and would love to light it up CURRENT BUILDS
Mclaren MP4-23
Ford 1/12 Shelby Mustang GT500 2010
HMS Pandora
|
|
|
 Rank: Semi-Pro Level 1  Groups: Registered
Joined: 22/07/2012 Posts: 69 Points: 144 Location: Belgium
|
S2ksean wrote:Looks fantastic mate. Can I ask where u got all the lighting equipment from as I'm building HMS hood and would love to light it up Thanks :) Sure, i bought the parts at a local electronics shop.. nothing too special. What you want is SMT components, as those are the smallest. So here i use yellow SMT LEDs and SMT resistors in series. The shape is "0805" Have to know something from soldering as well, as it's not easy i find in these dimensions.. and i have about 12yrs experience in it.. You could go for bigger components, but then it will take more space in your model. Have to know a bit electronics as well if you intend to use µcontrollers like i did. Otherwise you could directly connect the LED/resistor sets to the +5VDC power & then everything will shine at 100%. A bit more straight forward that. Can highly recommend it, and with a bit of patience anyone can do it! Id say go for it :) Best regards
|
|
|
 Rank: Super-Elite        Groups: Registered
Joined: 04/04/2010 Posts: 3,955 Points: 11,809 Location: uk
|
brilliant mate,can I make a comment 'bout your wood pillars.instead of using dowel(round)why not us square section top and bottom as spacers,it gives the pillars a more authentic look.you can still get the same dimensions as you've already got.but what a great looking ship,well done mate. Current builds: SotS, USS Consitution, San Felipe, D51 loco, HMS Surprise, RB7, Arab Dhow, Jotika HMS Victory Completed builds: HMS Pickel, Thermopylae, Mississipi river boat, Mary Rose, Cutty Sark, San Francisco II, HMS Victory x5, Titanic Lifeboat, Panart HMS Victory Launch, Hachette Titanic, Virginia Schooner, Endeavour Longboat. http://www.model-space.com/gb/
|
|
|
 Rank: Semi-Pro Level 1  Groups: Registered
Joined: 22/07/2012 Posts: 69 Points: 144 Location: Belgium
|
karl1113 wrote:brilliant mate,can I make a comment 'bout your wood pillars.instead of using dowel(round)why not us square section top and bottom as spacers,it gives the pillars a more authentic look.you can still get the same dimensions as you've already got.but what a great looking ship,well done mate. Thanks for the nice words & tip Karl. Didn't know that was more authentic.. Can give it a try & see the difference. So from bottom to top: square piece, pillar, square piece? The problem i noticed with the dowels (learned a new word, thnx :p) is that their height is very small, tending to not being able to fix it during milling.. Best regards
|
|
|
 Rank: Super-Elite        Groups: Registered
Joined: 04/04/2010 Posts: 3,955 Points: 11,809 Location: uk
|
I should have been clearer mate,square base piece and square top piece,and you adjust the thickness to suit the height of the pillar. the dowel(our word for round wood lengths)if the dowel is 6mm,then use 6mm square wood lengths,if the space from deck to ceiling is 30mm. pillars cut at 25mm.and square spacer of 3mm.and 2mm. 3mm. base and 2 mm.for the top of the pillar.hope that is clearer.and keep up the good work. so lets recap one pillar= 6mmx3mm sq,base, 25mm x 6mm pillar and 6mm x2mm sq.top piece.I wish I had a pic to show so much easier. or keep me mouth shut,and not get involved,   Current builds: SotS, USS Consitution, San Felipe, D51 loco, HMS Surprise, RB7, Arab Dhow, Jotika HMS Victory Completed builds: HMS Pickel, Thermopylae, Mississipi river boat, Mary Rose, Cutty Sark, San Francisco II, HMS Victory x5, Titanic Lifeboat, Panart HMS Victory Launch, Hachette Titanic, Virginia Schooner, Endeavour Longboat. http://www.model-space.com/gb/
|
|
|
 Rank: Semi-Pro Level 1  Groups: Registered
Joined: 22/07/2012 Posts: 69 Points: 144 Location: Belgium
|
|
|
|
 Rank: Super-Elite        Groups: Registered
Joined: 04/04/2010 Posts: 3,955 Points: 11,809 Location: uk
|
it's an unfair world  why have some people got soooooo much skill and others have not much????????---------------------->gonna go and hide in a corner and cry.       those graphics  Current builds: SotS, USS Consitution, San Felipe, D51 loco, HMS Surprise, RB7, Arab Dhow, Jotika HMS Victory Completed builds: HMS Pickel, Thermopylae, Mississipi river boat, Mary Rose, Cutty Sark, San Francisco II, HMS Victory x5, Titanic Lifeboat, Panart HMS Victory Launch, Hachette Titanic, Virginia Schooner, Endeavour Longboat. http://www.model-space.com/gb/
|
|
|
 Rank: Semi-Pro Level 1  Groups: Registered
Joined: 22/07/2012 Posts: 69 Points: 144 Location: Belgium
|
Oh my - let me tell you it's a freeware software from Google: "Sketchup". Once you get the hang of it (and the "hang" comes fast), you can do almost anything with it. Try it out. It even contains a online library with 3D models you can import. And - surprize - I found a pillar there   
|
|
|
|
|
 Hi Bam Thanks for the info on the free software downloaded it straight away iv been looking for something like this for a while and nice enhancments with the lights regards Andy  Current builds:-C57,Zero, Lamborghini Countach, Caldercraft HMS Agamemnon,Robi,R2-D2, MFH Cobra .
|
|
|
 Rank: Vice-Master    Groups: Registered
Joined: 11/05/2011 Posts: 766 Points: 2,128 Location: Dagenham
|
Are these any good and if so what else will I need and where would I get them from http://www.cornwallmodel.../acatalog/gow-bulbs.htmlCURRENT BUILDS
Mclaren MP4-23
Ford 1/12 Shelby Mustang GT500 2010
HMS Pandora
|
|
|
 Rank: Semi-Pro Level 1  Groups: Registered
Joined: 22/07/2012 Posts: 69 Points: 144 Location: Belgium
|
[quote=S2ksean]Are these any good and if so what else will I need and where would I get them from http://www.cornwallmodel...acatalog/gow-bulbs.html[/quote] Well i think they might do well. A non-LED won't last as long In any case, its better to order like 5pcs for example & see what effect you get before you purchase a lot of them. As these are not LEDs, you won't need a serial resistor to limit the current, so you can ommit that So far as i understand what you'll do, this is what you need: Power supply providing the voltage + current mentioned (of ALL lights that you'll fit, need to sum up the current & the PS should be able to deliver that current) wire to connect all light bulbs together in parallel wire stripper to remove the insulation soldering iron solder 1mm diameter (take the one with lead, solders better) shrink sleeve (optional) some tantal capacitors rated for the voltage & with adequate capacity (will improve stability of the light) Some means of connection once the boat is finished, perhaps a mono audio jack set? (Edit: make sure the Powersupply is set off when making connection with this, there's a risk of shorting the ground & power when making the connection) I also recommend going by a local electronics shop, they'll provide explanation too (& solution based on your description what you want to achieve). Everything listed above should be purchaseable in that same shop
|
|
|
|
Guest
|