|
|
 Rank: Pro Groups: Joined: 24/08/2009 Posts: 48,827 Points: -13,348
|
Excellent work Harty, another great and skilful build from you and such a lovely looking ship too!! Well done mate, I am watching with interest!!
Bernie.
|
|
|
 Rank: Pro Groups: Joined: 24/08/2009 Posts: 48,827 Points: -13,348
|
Today has been mostly doing windows,painting and doing the in yer face brasswork. Nearly got it all done now, only the bow and the centre cabin to do, but got all the windows and doors to do there first  . I have set up the waterline for the future instalment of this by laser  ,should be some fun  . Keep finding little bits I,ve missed, any road up here is how she stands at the minute  
|
|
|
 Rank: Pro Groups: Joined: 24/08/2009 Posts: 48,827 Points: -13,348
|
Never ceases to amaze me how fast you can work Harty and yet still maintain the high level of neatness that you do!! Excellent stuff sir - loving it very much indeed!! More please!!
All the best,
Bernie.
|
|
|
 Rank: Pro Groups: Joined: 24/08/2009 Posts: 48,827 Points: -13,348
|
Today has been mostly the bow end and a few deck fittings and scanning other builds to see where everything goes. Found a couple of things so they were put right. Haven,t shown much of the bow end so here it is as it stands  
|
|
|
 Rank: Pro Groups: Joined: 24/08/2009 Posts: 48,827 Points: -13,348
|
One of the alterations was at this end. The mouldings were positioned too low and had to be bent to fit a bit higher. They look a bit better where they are now I think  
|
|
|
 Rank: Pro Groups: Joined: 24/08/2009 Posts: 48,827 Points: -13,348
|
Drainage pipes now installed  and thats all folks, see ya later and Monty you don,t do too bad yourself on the detailing  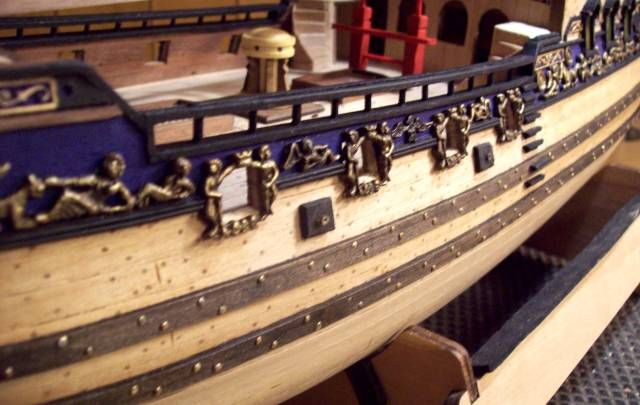
|
|
|
 Rank: Pro  Groups: Registered
Joined: 22/06/2010 Posts: 179 Points: 428 Location: Poole Dorset
|
Hi Harty, Still keeping up the good work I see. Are you going to paint below the waterline? And have you found many kit problems yet? Cheers Peter completed..... Endeavour Longboat, San Francisco 2, Virginia 1819
building Royal Caroline
|
|
|
 Rank: Pro Groups: Joined: 24/08/2009 Posts: 48,827 Points: -13,348
|
Thanks for the compliment Harty, very kind. Yet more excellent work from you today sir and looking forward to the next update with anticipation!! Keep up the good work!!
Bernie.
|
|
|
 Rank: Pro Groups: Joined: 24/08/2009 Posts: 48,827 Points: -13,348
|
Hi there Peter, the only problems I think were a lot of my own doing and not paying attention to plans and the like. Also you see other builds and say oooh I,ll build that in that looks good. Everybody sees different and I think you have got to go the way your skills allow or the tools you have got allow you to do it. My tools consist of a couple of hand drills, 2 mini craft drills with a few attachments ,a couple of scalpels, mini hand saw, tweezers, a load of cheap car boot sale clamps. a ruler, a little modellers mitre block, a bunch of files, sand paper,glue, a few surgical clamps which are used to help in the rigging and a pencil. Getting back to this boat, I would not reccommend this as a beginners although I did find the planking a doddle, its everything else, ie all the deck fittings have to be scratch made to name but one , Expierience is a must on this one I think  .  PS, I think I am being swayed towards coppering. This ship had a long lifespan and I think it may have been coppered at some stage for it to last that long unless some buff out there can advise differently 
|
|
|
 Rank: Pro Groups: Joined: 24/08/2009 Posts: 48,827 Points: -13,348
|
Today has been mostly doing this wall. I have deviated from the plans on this and tarted it up a bit, tried to make it look a bit more interesting  . 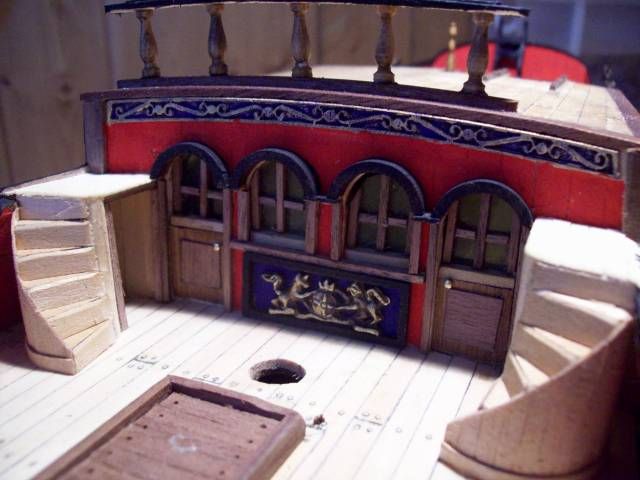
|
|
|
 Rank: Pro Groups: Joined: 24/08/2009 Posts: 48,827 Points: -13,348
|
Decided to give it a new belfry so I used the one from the Surprise that I won,t be needing. I will tart this up a bit with some gold paint  . 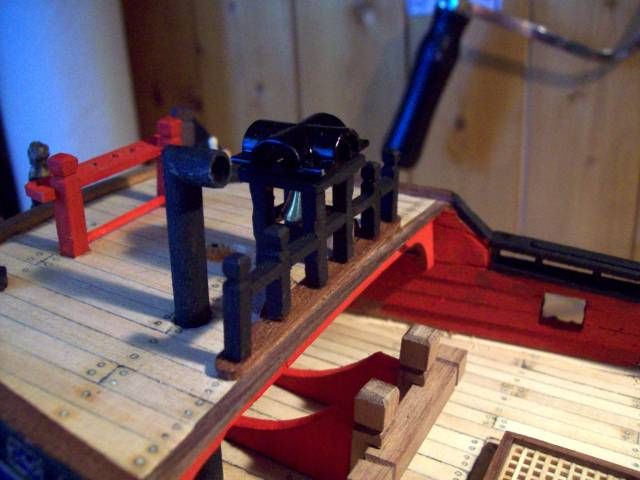
|
|
|
 Rank: Pro Groups: Joined: 24/08/2009 Posts: 48,827 Points: -13,348
|
State of play at the end of the day stands like this.  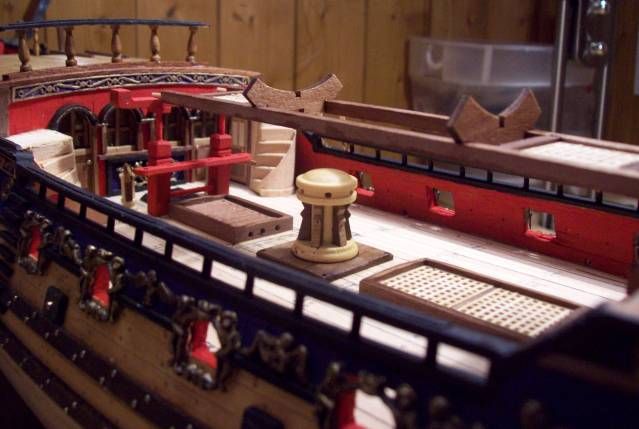
|
|
|
|
|
 Looking good Harty  Current builds:-C57,Zero, Lamborghini Countach, Caldercraft HMS Agamemnon,Robi,R2-D2, MFH Cobra .
|
|
|
 Rank: Pro Groups: Joined: 24/08/2009 Posts: 48,827 Points: -13,348
|
A fine looking model there Harty and some super work from you again, love it!! Will you be doing anything to enhance the two staircases?
Keep it up mate looking REALLY nice!!
Bernie.
|
|
|
 Rank: Pro Groups: Joined: 24/08/2009 Posts: 48,827 Points: -13,348
|
Hi there Monty, yes you are right about the staircases, they do look like they could do with something extra so I had a think and a rumage and came up with this. Wot you reckon?  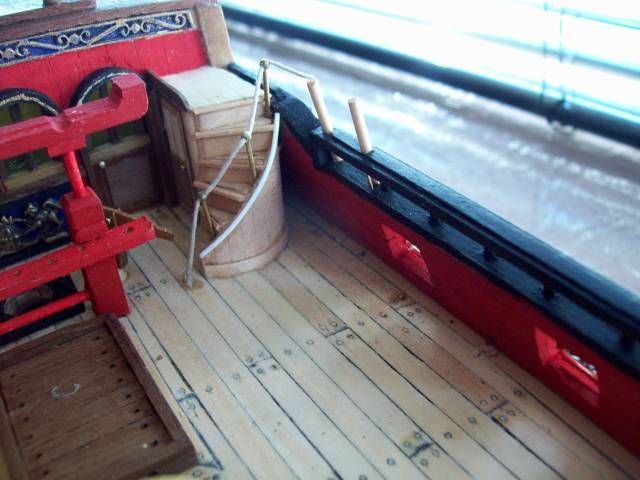
|
|
|
 Rank: Pro Groups: Joined: 24/08/2009 Posts: 48,827 Points: -13,348
|
Hello Harty,
I don't know much about period ships, but that certainly looks believable to me!! Only thing is, where the rope exits the topmost stanchion you have it turning towards the dowel in the centre of the ship. Would it not be more likely that it would continue towards the higher deck at the top of the stairs and be fixed at the baulkhead to stop anyone from falling off the ship?
Sorry if that sounds stupid, as I say I don't know much about these ships, I was just thinking more about 'Health and Safety' LOL!! Still a nice build though!! Keep up the good work mate.
All the best,
Bernie.
|
|
|
 Rank: Pro Groups: Joined: 24/08/2009 Posts: 48,827 Points: -13,348
|
Good point Bernie, I will endeavor to rectify asap. Trying to think up a new way of rigging the deadeyes instead of the soppy brass effort supplied, it looks to naff and untidy. Maybe do something with hooks and ropes  .
|
|
|
 Rank: Pro Groups: Joined: 24/08/2009 Posts: 48,827 Points: -13,348
|
Well here we are again, tried a couple of ways on these deadeyes and I think I will go this route. Wire up a hook with a bit of .75 rope,lash it round the deadeye, trap one side of the rope end and then just tie it off with a simple knot  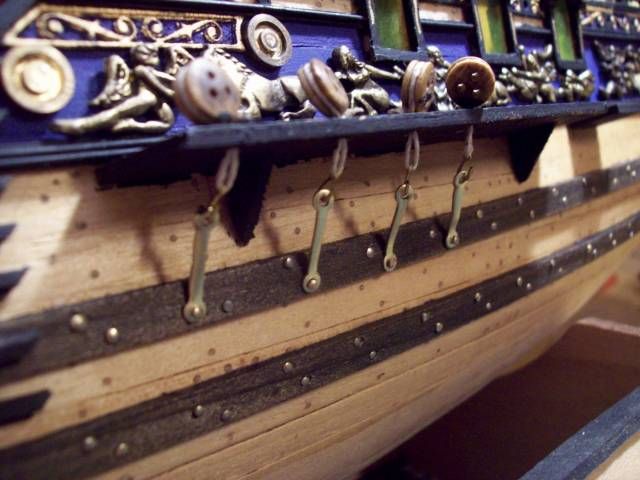
|
|
|
 Rank: Pro Groups: Joined: 24/08/2009 Posts: 48,827 Points: -13,348
|
Also today I have had a go at the lamps on the sterboard. These are big chunky efforts made with "proper" brass and are surprisingly heavy. Now I dont pretend to be the worlds best at soldering but something had to be done to stop these things flapping around. So here is my effort, just need a bit of touching up  . 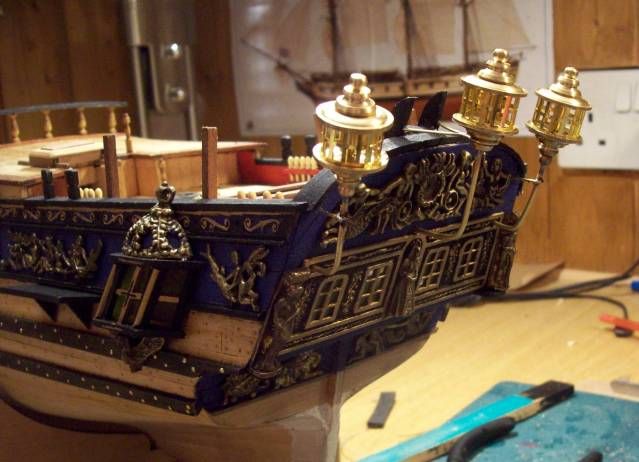
|
|
|
 Rank: Pro Groups: Joined: 24/08/2009 Posts: 48,827 Points: -13,348
|
Got all the ringbolts on and the front end done apart from the beak. Still looking for some matierial to construct this but I will get there in the end  . 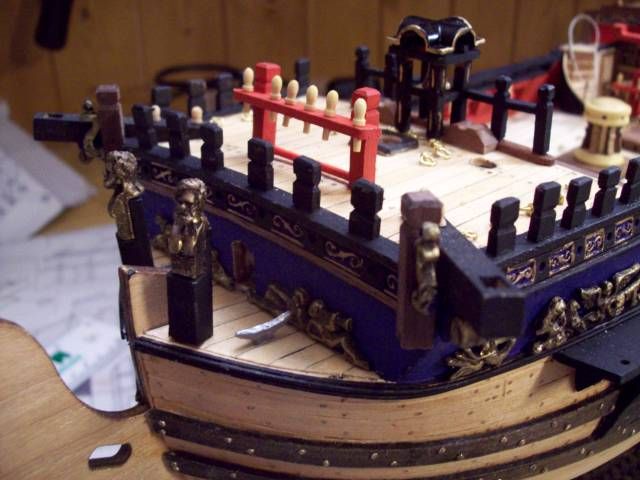
|
|
|
|
Guest
|