|
|
 Rank: Beginner Level 2 Groups: Registered
Joined: 10/09/2012 Posts: 12 Points: 22 Location: London
|
Hi all - glad to have joined and signed to all this. I have a burning issue to resolve. Basically I'm already struggling with the first issue build (a record perhaps?) I'm a total newbie etc. My first question (sorry if this has already been answered on here before) how do I add images to my posts? Appreciate any help at all........thanks
|
|
|
 Rank: Pro Groups: Joined: 24/08/2009 Posts: 48,827 Points: -13,348
|
|
|
|
Rank: Pro    Groups: Registered
Joined: 01/09/2012 Posts: 111 Points: 306 Location: Nottinghamshire
|
Hello Bronco, I thought it better to reply here, rather than on the how to post images thread. In answer to as to why your images are not showing is that I believe you have used the HTML code in the IMG tags in your post rather than the IMG code from photo bucket. The HTML code is a query code, rather than a direct URL which the IMG tags need to correctly render the image. Your build is looking good, and there is nothing wrong with it from what I can see. It looks like the bulkhead is to far forwards on the keel to locate in the slot provided. The flat part of the bulkhead (Part 2) must locate in slot number 2 of the keel. Note as well that apart from a trial fit, at this point in the build sequence this should not be glued. You may also find that this is a very close fit. I have took the liberty of inserting your images below so other members can comment and help as required. Hope this helps, Dave 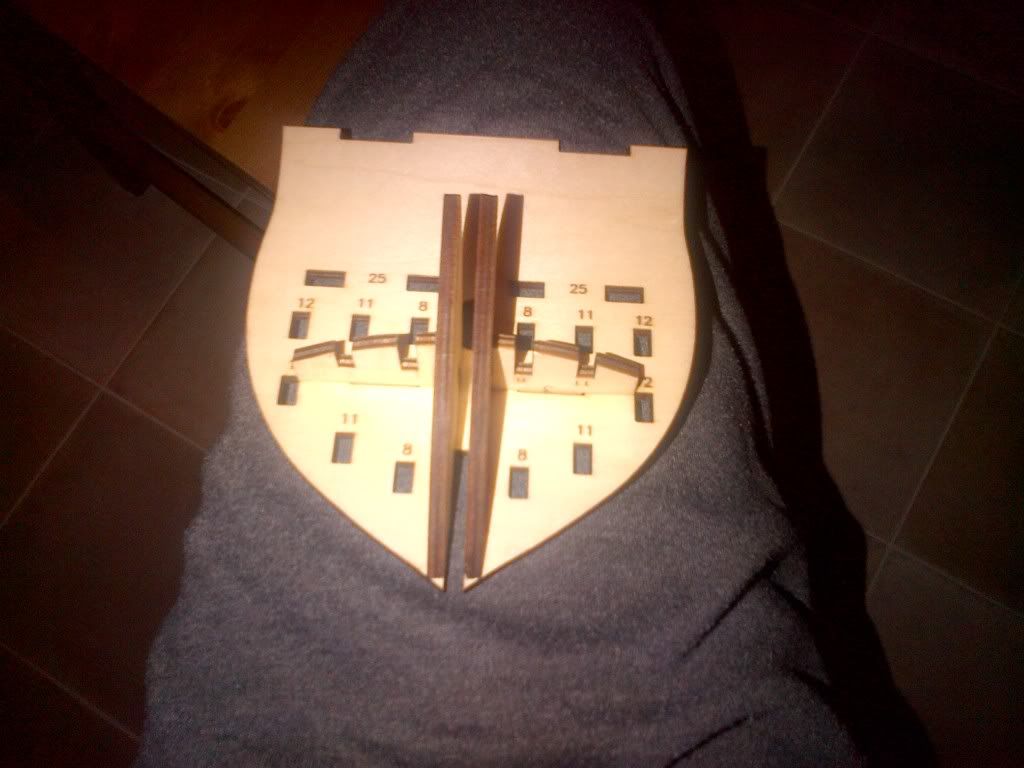 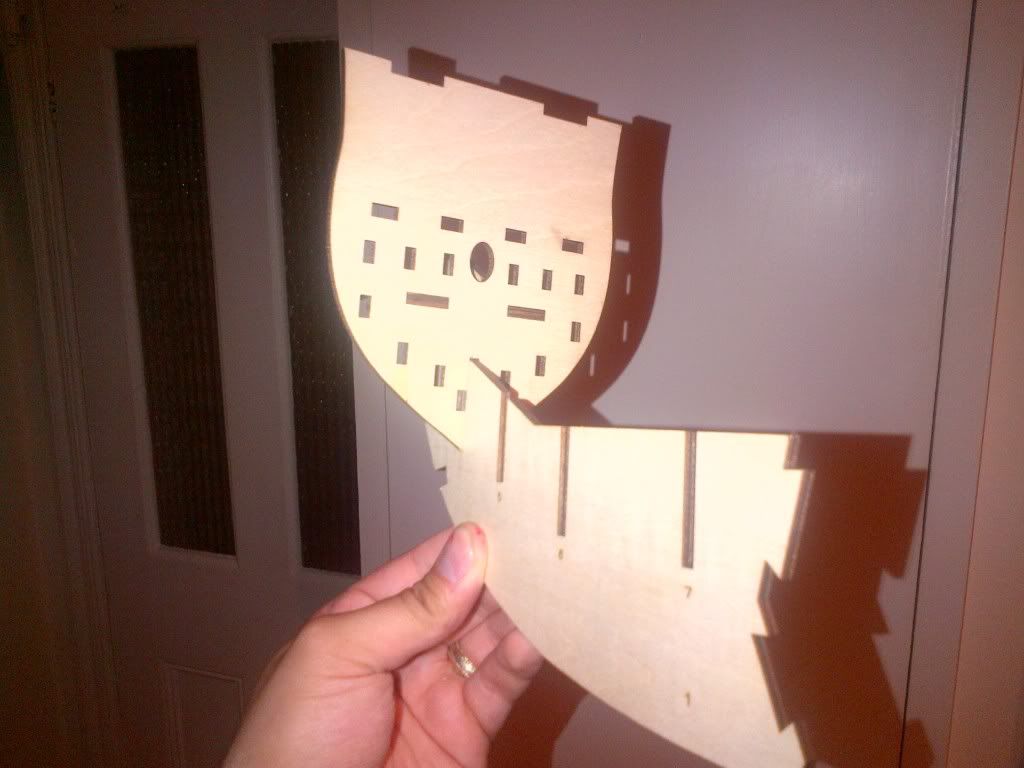 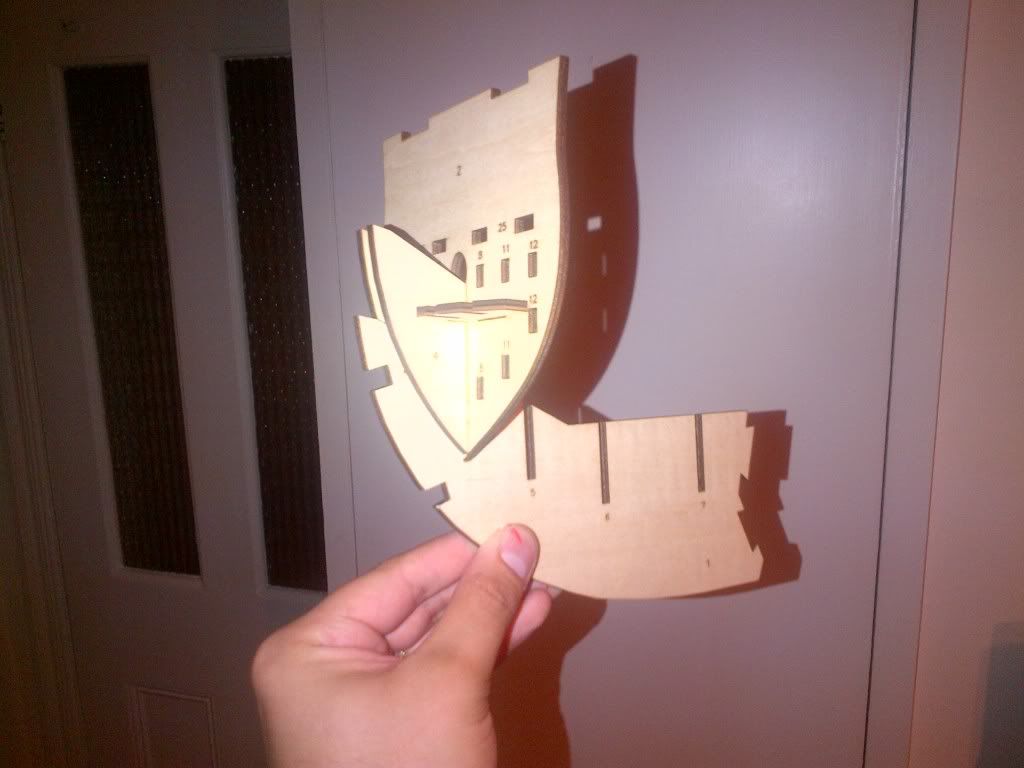 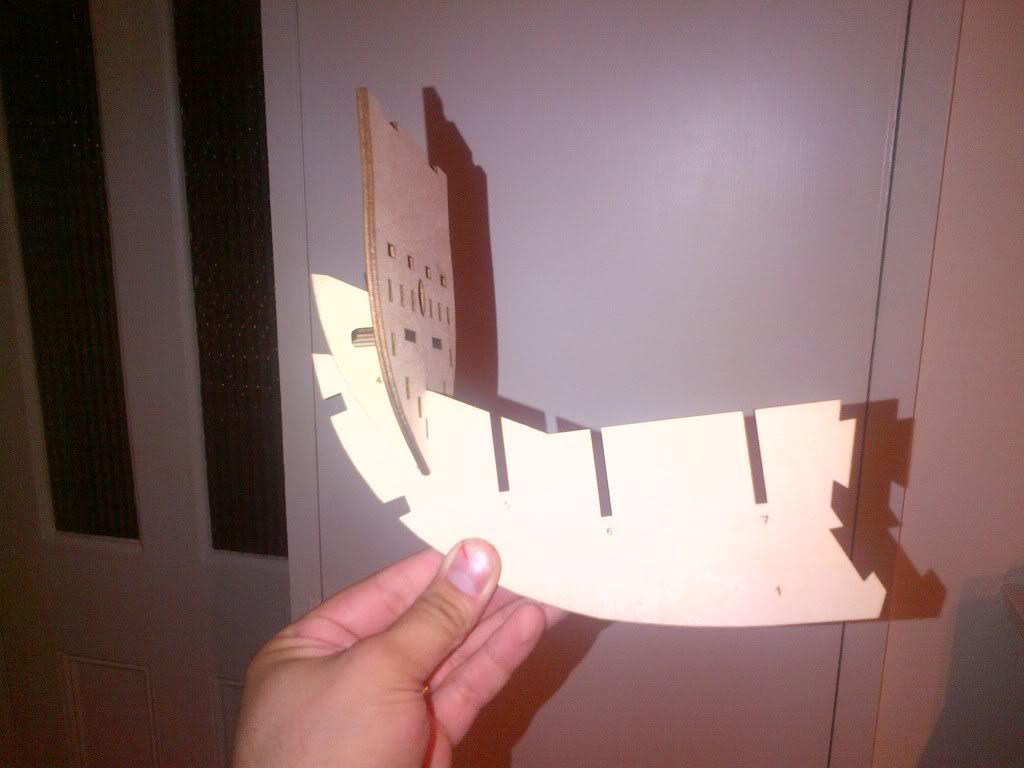
|
|
|
Rank: Beginner Level 2 Groups: Registered
Joined: 10/09/2012 Posts: 12 Points: 22 Location: London
|
Wow! Very efficient and helpful reply. I guess I'm being over Paranoid. However, when I look at the magazine for issue 1 it looks different when the pieces are together. Basically the magazine shows the fit once in slot 2 coming right down but that doesn't happen for me? The magazine also doesn't show the indented bits once on? I hope I'm making sense with my description...
|
|
|
 Rank: Super-Elite      Groups: Registered
Joined: 04/04/2010 Posts: 3,955 Points: 11,809 Location: uk
|
hi,you need to clean up the slots in bulkhead 2 and slot 2,so that it slides fully down to bottom of keel piece.I use a lolly stick with a piece of sandpaper superglued to it. Current builds: SotS, USS Consitution, San Felipe, D51 loco, HMS Surprise, RB7, Arab Dhow, Jotika HMS Victory Completed builds: HMS Pickel, Thermopylae, Mississipi river boat, Mary Rose, Cutty Sark, San Francisco II, HMS Victory x5, Titanic Lifeboat, Panart HMS Victory Launch, Hachette Titanic, Virginia Schooner, Endeavour Longboat. http://www.model-space.com/gb/
|
|
|
 Rank: Master  Groups: Registered
Joined: 05/09/2012 Posts: 1,400 Points: 4,690 Location: Beaminster, Dorset
|
Hi, It's a very snug fit and I found both pieces No 3 had to be on the outer edge of the play. I tried a dry fit first and then double checked before the glue set. Still time to rush out and buy a 2nd copy only 1.99. This is what it should look like 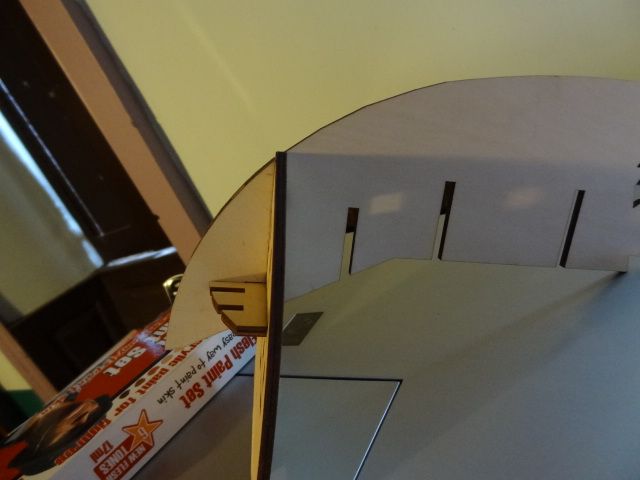
|
|
|
Rank: Super-Elite Groups: Registered
Joined: 04/04/2010 Posts: 3,955 Points: 11,809 Location: uk
|
that's perfect,a little trick if you glue a piece in error,a hot dip in the kitchen sink will free most bits,just soak until it pulls free.I have demolished whole ships using this method.and not broken a piece.will not work with superglue. Current builds: SotS, USS Consitution, San Felipe, D51 loco, HMS Surprise, RB7, Arab Dhow, Jotika HMS Victory Completed builds: HMS Pickel, Thermopylae, Mississipi river boat, Mary Rose, Cutty Sark, San Francisco II, HMS Victory x5, Titanic Lifeboat, Panart HMS Victory Launch, Hachette Titanic, Virginia Schooner, Endeavour Longboat. http://www.model-space.com/gb/
|
|
|
 Rank: Vice-Master  Groups: Registered
Joined: 30/01/2011 Posts: 865 Points: 2,410 Location: Cambs
|
i can endorse karls tip, when i built victory i did a dry fit with the stern ribs, they fitted well, but when i glued them i didn't force them down into the slots, i only noticed the problem after the glue dried, so i had to shove the victory bare bones in a basin of water to release the glue. it worked. Come on you Jimmies
|
|
|
Rank: Beginner Level 2 Groups: Registered
Joined: 10/09/2012 Posts: 12 Points: 22 Location: London
|
Hi guys - maybe its just me but still doesn't go all the way down - I mean do I have an incorrect piece? The pics above is where I'm at - I have glued it yet. When I slide it into slide 2 it only goes down a short way - the space just isn't there unwell I make slit at the back of the forward bulkhead longer? Sorry once again
|
|
|
Rank: Beginner Level 2 Groups: Registered
Joined: 10/09/2012 Posts: 12 Points: 22 Location: London
|
Guys I've got it! Bloody hell talk about tight fit? I had to give it a massive push - thought the wood was going to break? Didn't say ram the thing in the magazine? Thanks all!
|
|
|
Rank: Super-Elite Groups: Registered
Joined: 04/04/2010 Posts: 3,955 Points: 11,809 Location: uk
|
bronco did you read this?.I use a lolly stick with a piece of sandpaper superglued to it.so that I can widen the slot(s) yhe reason that the slot seems to close up is ,that it does close up,the glue is waterbased and the wood swells,so you need to widen the slots a little bit. Current builds: SotS, USS Consitution, San Felipe, D51 loco, HMS Surprise, RB7, Arab Dhow, Jotika HMS Victory Completed builds: HMS Pickel, Thermopylae, Mississipi river boat, Mary Rose, Cutty Sark, San Francisco II, HMS Victory x5, Titanic Lifeboat, Panart HMS Victory Launch, Hachette Titanic, Virginia Schooner, Endeavour Longboat. http://www.model-space.com/gb/
|
|
|
Rank: Pro Groups: Joined: 24/08/2009 Posts: 48,827 Points: -13,348
|
If the fit is so tight that you need too force it, remove and gently ease the slot as Karl has mentioned, otherwise there wont be a strong glue joint and it will be a strained fit.
If you are going to build the keel jig shown in the mag, then you shouldn't yet glue frames or the bulkhead to the bow keel, as you will need to draw around the bow keel section to make the jig as per that shown across issues 2/3. The Jig you need for the SotS is that shown completed in issue 3 (two jig versions are shown, it is the "straight keel" version shown on issue 3 that suits the SotS).
I recommend that a keel jig is used in your builds, as it will prevent a 'banana boat' being built.
|
|
|
Rank: Beginner Level 2 Groups: Registered
Joined: 10/09/2012 Posts: 12 Points: 22 Location: London
|
Thanks guys - ill do my best to build the assembly jig (straight keel) what wood is the base board? Plywood?
|
|
|
Rank: Pro Groups: Joined: 24/08/2009 Posts: 48,827 Points: -13,348
|
It needs to be something that is perfectly flat and without warp, a melamine or MDF shelf is often used approx 20mm thick, the info is provided in the mag.
|
|
|
 Rank: Newbie Groups: Registered
Joined: 10/09/2012 Posts: 4 Points: 12 Location: South Wales
|
Hi all, a 28 year old novice here. I've wanted to get into model building for some time, S'o'S is my very first build. I've found the forum helpful for advice, and interesting to see a few people are giving the model their own twist colour scheme wise. Everything has gone very smoothly touch wood! Here's my progress so far...  
|
|
|
Rank: Pro Groups: Joined: 24/08/2009 Posts: 48,827 Points: -13,348
|
You might want to start your own build diary and add the above into your own build diary, as this topic has little relevance to your post.
Thanks
|
|
|
|
Guest
|
 US
US

