|
|
 Rank: Vice-Master    Groups: Registered
Joined: 09/02/2012 Posts: 569 Points: 1,675 Location: Scotland
|
Got a couple to replys on the general disscussion board, re the columns, I will file down to size and fit in place.
Been having a bit of a hard time today trying to fit the ropes to the cannons, This is the rope from the bulwarks through the eye on the cannon barrel,
I did the first one with thread that just looked to thin, So I found some thread a bit thicker and used it, I am still not very happy,
From the pictures below you can see that I held the eye in the pinching tool, and tied a knot and glued it to secure it, This give me one end done, I bored holes to recieve the eyes in the bulwarks and glued in the eye, I then passed the rope through the eye in the cannon barrel, I glued the other eye in the other hole in the bulwark, but my problem was I could not tie this off, so I took the easy road out and just glued it in place and cut of the excess. Very sloppy. But it will not bee seen on the lower deck.
What I should have done, and I will be doing for the cannons on the top deck, is to prepare a length of rope, with eyes knotted and glued at each end, with a eye loose on the rope between the end eyes,All I will have to do then is bore the bulwarks, glue in the eyes to the bulwarks, and glue in the pin to the cannon barrel. Should be a lot earier and it will look the part. Having a problem with Photo Bucket, they have changed the format of there page, another learning curve to get over, will post the pict's soon.
MoMo
|
|
|
Rank: Vice-Master Groups: Registered
Joined: 09/02/2012 Posts: 569 Points: 1,675 Location: Scotland
|
|
|
|
Rank: Vice-Master Groups: Registered
Joined: 09/02/2012 Posts: 569 Points: 1,675 Location: Scotland
|
|
|
|
 Rank: Pro   Groups: Registered
Joined: 25/01/2010 Posts: 459 Points: 1,367 Location: Bridlington
|
Hi Mo, doing great work, your build looks Great mate. Regards
Rob
Bridlington.
Built Flying Scotsman (Train). Collecting HMS VICTORY
|
|
|
 Rank: Super-Elite    Groups: Registered
Joined: 24/04/2010 Posts: 5,787 Points: 17,662 Location: Stafford, United Kingdom
|
Hi Mo Good stuff  what size are those gallery windows? I wondering if the ply parts that contain the windows on the Victory enhancement would fit the surprise? I could just supply you with those parts. I have also sourced a ships wheel (10 spoke) in brass etch 1/48 scale for my Endeavour, which I believe is the same scale as the surprise? Kind Regards Mike MWG BUILD DIARIES: HMS VICTORY, SOVEREIGN OF THE SEAS, SAN FRANCISCO II, HMS HOOD, HMS ENDEAVOUR LONGBOAT, HMS VICTORY X-SECTION, 007 DB5, NISSAN GTR, CUTTY SARK, RB7, AKAGI, BARK HMS ENDEAVOUR, HUMMER H1, MITSUBISHI ZERO.
|
|
|
Rank: Vice-Master   Groups: Registered
Joined: 30/01/2011 Posts: 865 Points: 2,410 Location: Cambs
|
nice work mo, the cannon coils look great. the gallery could look better, but thats not your fault, you can only work with the parts you get, unless you pay for alternatives. if mikes gallery bits were to fit i think they would make a great enhancement. keep up the good work Come on you Jimmies
|
|
|
Rank: Vice-Master Groups: Registered
Joined: 09/02/2012 Posts: 569 Points: 1,675 Location: Scotland
|
Your right Saintsman, the gallery windows are crap, I have sent Mike a pm on the subject of the enhancement. I. will take even if only some bits fit, any kind of enhancement would help distract you from the plastic windows, but I am really happy how its looking for a newbie, I honestly did not think I could turn out something as good as this,
MoMo
|
|
|
Rank: Vice-Master Groups: Registered
Joined: 09/02/2012 Posts: 569 Points: 1,675 Location: Scotland
|
Today was a big day for me today in the boatyard, It was time to glue the top deck in place. I glued it up and stuck it on, No more access to the lower deck.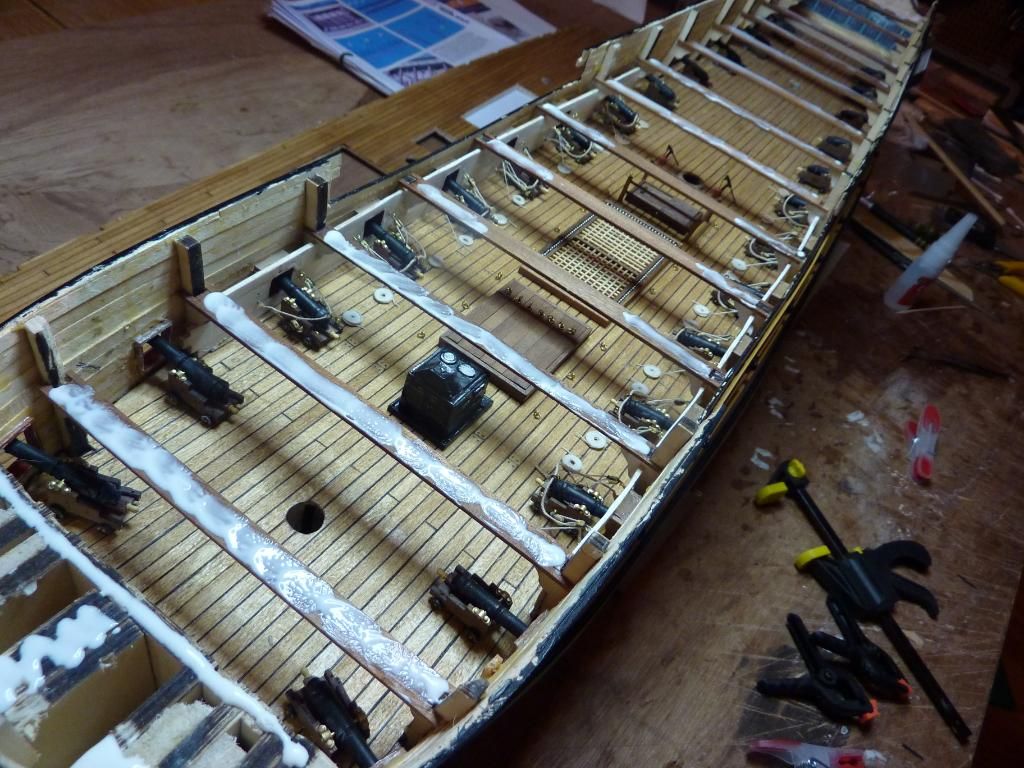 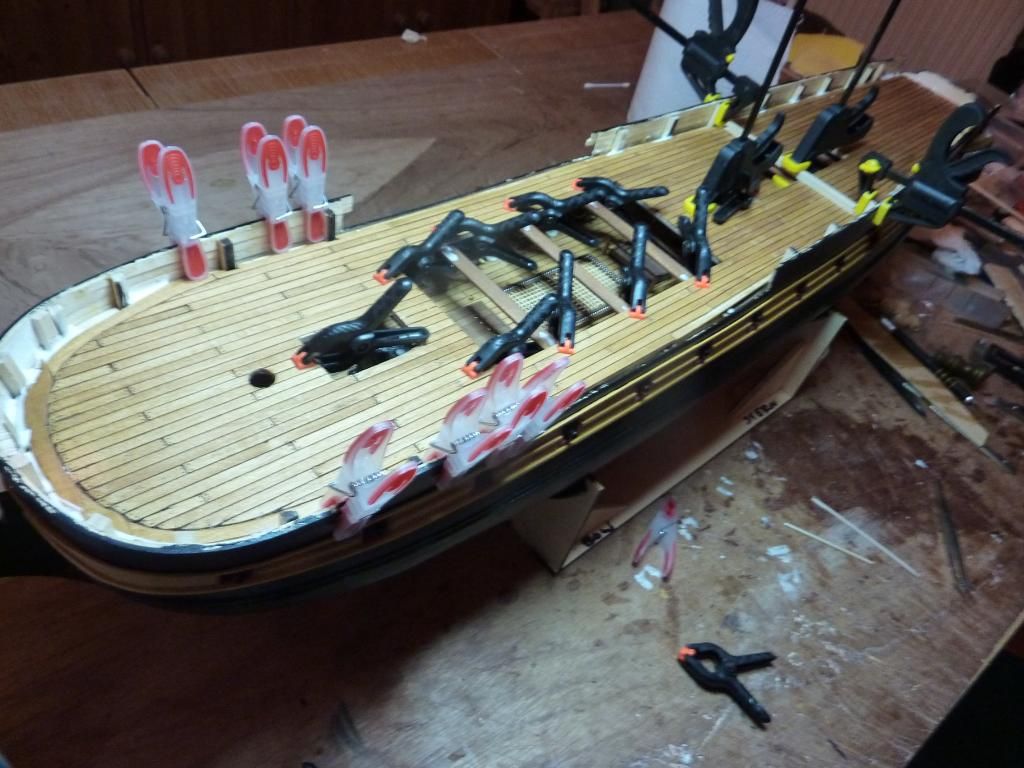 I have pre made 3 boards joined together for the bulwarks, I gave them 3 coats of red ochre as well, this will limit the work I have to do in situ. I have pre made 3 boards joined together for the bulwarks, I gave them 3 coats of red ochre as well, this will limit the work I have to do in situ.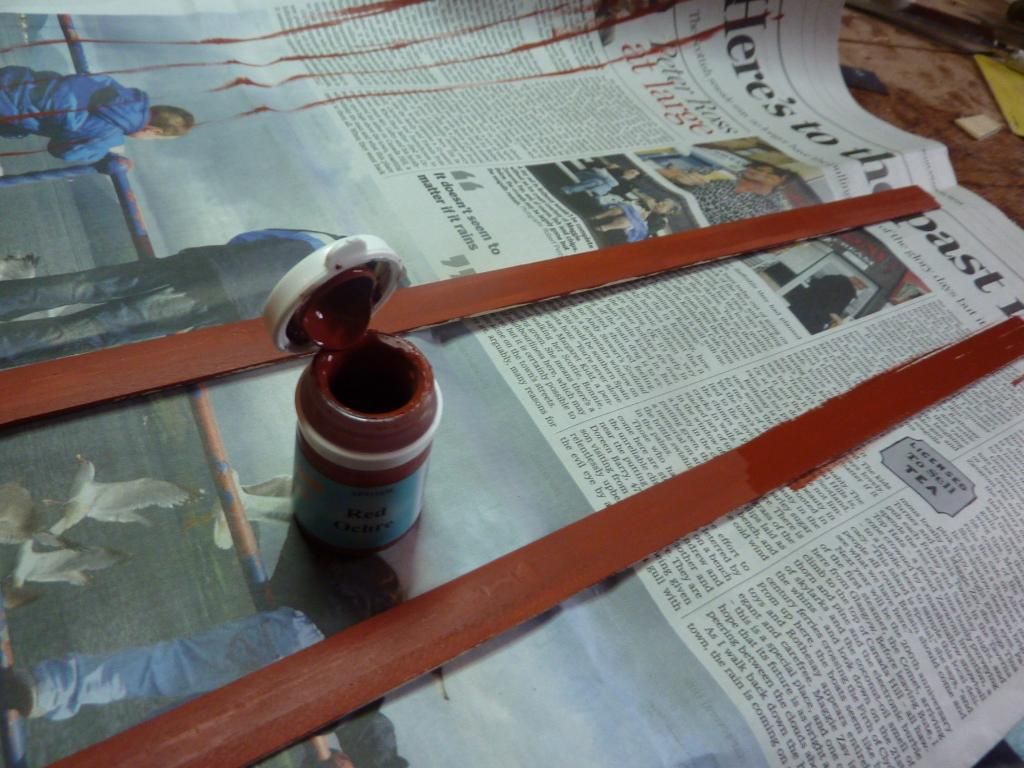 I have also done quite a bit of work on the rudder, another job I have been dreading, But it is surprising just how it all comes together, Firstly I clad the walnut rudder with some 05 mm planking. I have also done quite a bit of work on the rudder, another job I have been dreading, But it is surprising just how it all comes together, Firstly I clad the walnut rudder with some 05 mm planking. Once it was dry I shaped it to the profile and sanded it up, I also used a triangular file and put some V'd grooves between the planks, I gave it a sand up and a coat of danish oil. Once it was dry I shaped it to the profile and sanded it up, I also used a triangular file and put some V'd grooves between the planks, I gave it a sand up and a coat of danish oil.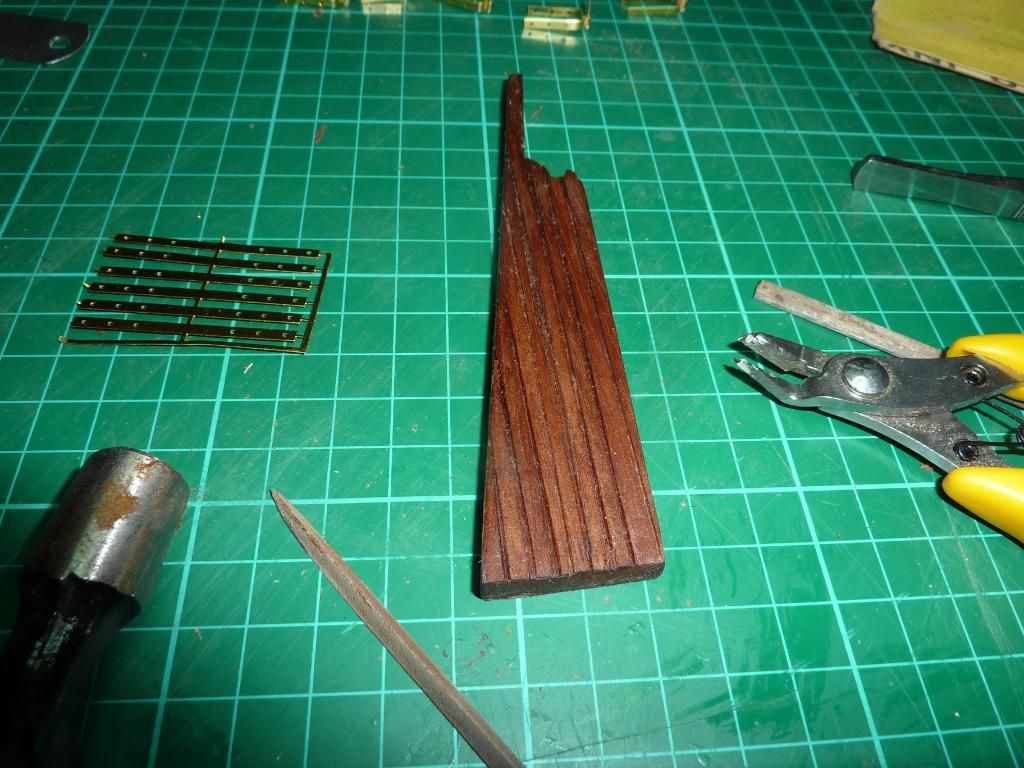 I then made an attempt at making the hinges, I have not fitted them yet, but am really happy with them. I then made an attempt at making the hinges, I have not fitted them yet, but am really happy with them.     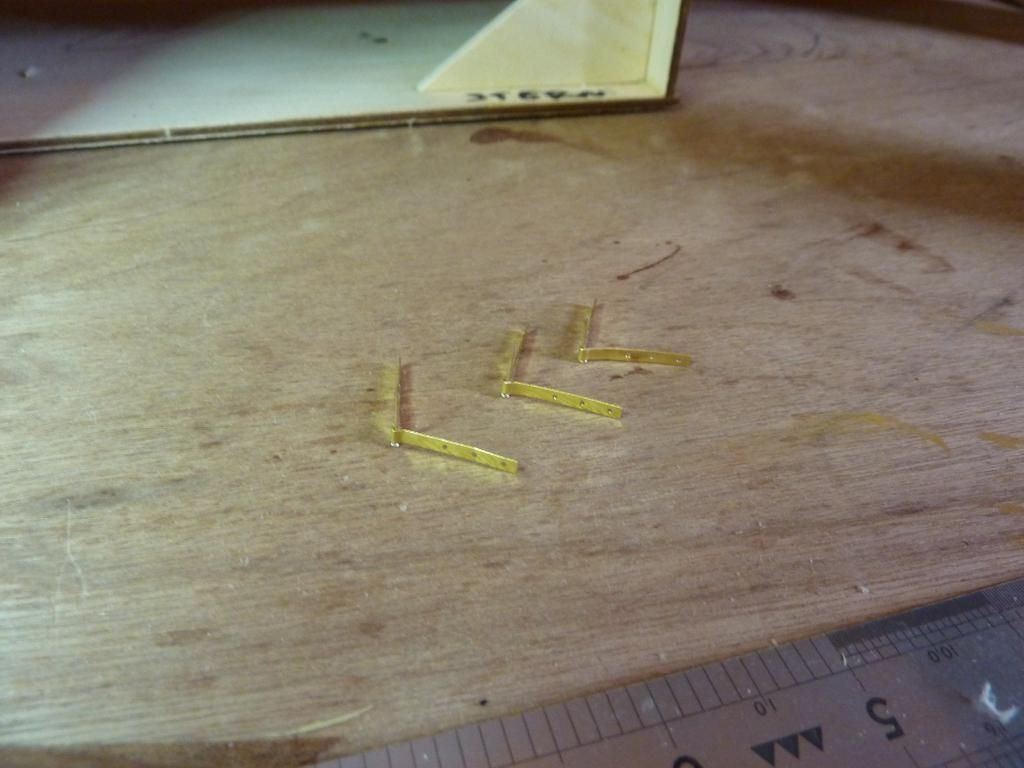 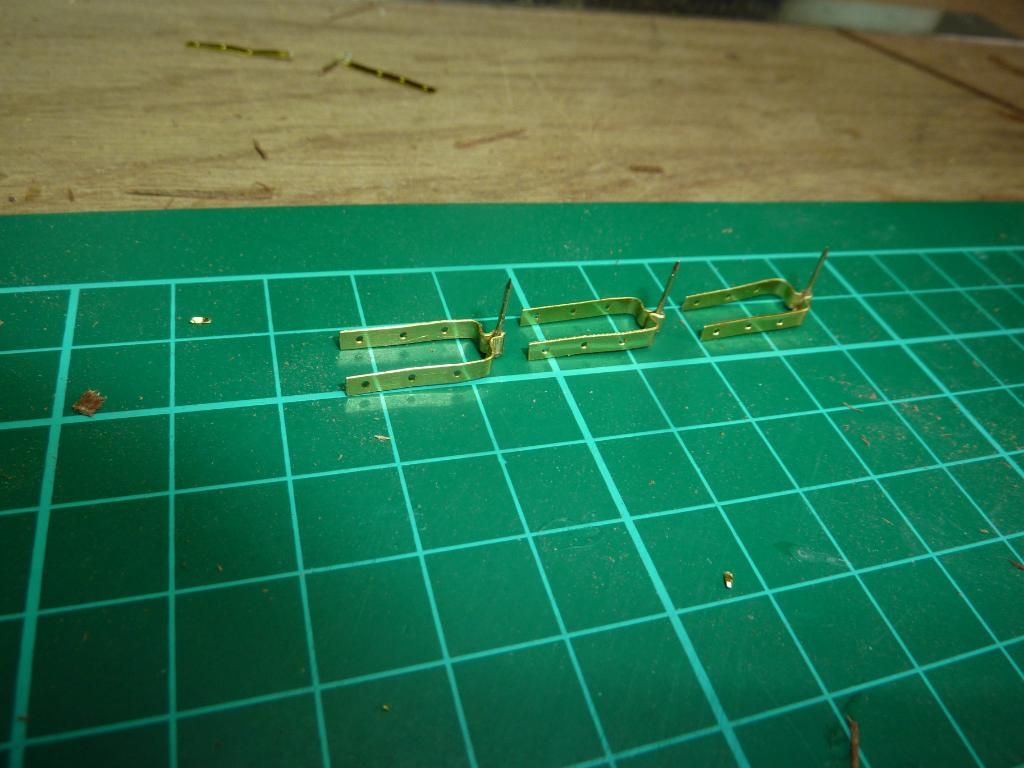  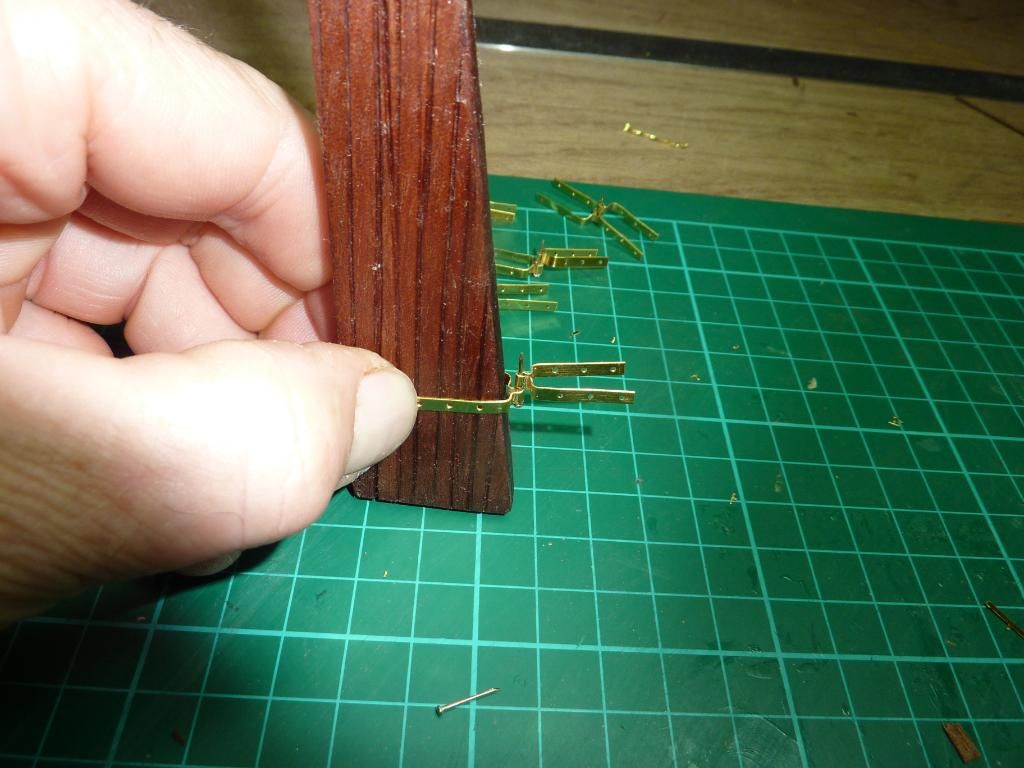 I have also removed all the clamps and glad to say the deck has stuck firm to the frames. I have now trimmed around the opening with the walnut timbers. I have also removed all the clamps and glad to say the deck has stuck firm to the frames. I have now trimmed around the opening with the walnut timbers.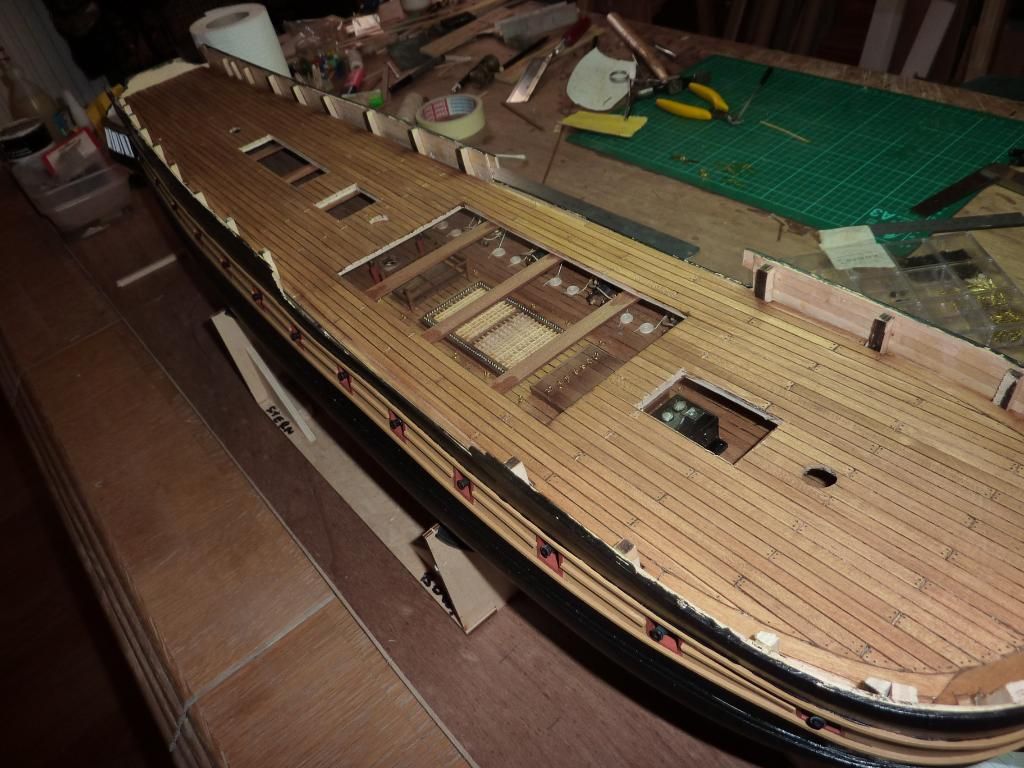  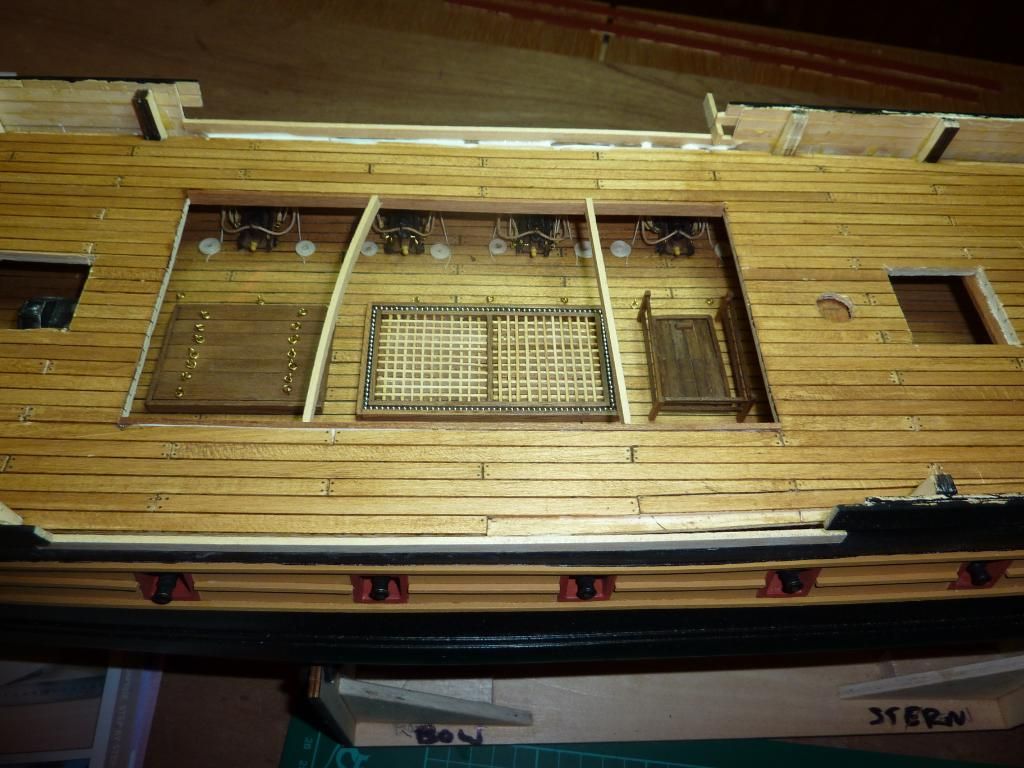 I like to do my log often, and to let everyone see what and how I am doing things, everybody elses logs have really helped me to achieve what I thought was not possible, Thanks Again. I like to do my log often, and to let everyone see what and how I am doing things, everybody elses logs have really helped me to achieve what I thought was not possible, Thanks Again.
MoMo
|
|
|
Rank: Vice-Master Groups: Registered
Joined: 09/02/2012 Posts: 569 Points: 1,675 Location: Scotland
|
I ment to say in my post, Where the bulwarks stop short in the middle of the boat, at the lower level, my planking to the frames did not quite come up to the lavel of the deck, as you can see I have had to add a extra plank on, I will sand this flush with the floor as and when the glue is dry.
MoMo
|
|
|
Rank: Super-Elite Groups: Registered
Joined: 24/04/2010 Posts: 5,787 Points: 17,662 Location: Stafford, United Kingdom
|
Hi Mo could any thing be used from this? I know not the brass etch windows on the transom are 10mm x 10mm, too12mm x 12mm. on the side same again tatal side ht is 80 cm, width is 50mm. Regards Mike MWG attached the following image(s): MWG BUILD DIARIES: HMS VICTORY, SOVEREIGN OF THE SEAS, SAN FRANCISCO II, HMS HOOD, HMS ENDEAVOUR LONGBOAT, HMS VICTORY X-SECTION, 007 DB5, NISSAN GTR, CUTTY SARK, RB7, AKAGI, BARK HMS ENDEAVOUR, HUMMER H1, MITSUBISHI ZERO.
|
|
|
Rank: Vice-Master Groups: Registered
Joined: 30/01/2011 Posts: 865 Points: 2,410 Location: Cambs
|
its hard to keep up with your diary with the speed of your work, i was told once that you can have a good build or you can have a fast build, but you can't have a good fast build, i have never believed it.and your build proves you can have both. Come on you Jimmies
|
|
|
Rank: Vice-Master Groups: Registered
Joined: 09/02/2012 Posts: 569 Points: 1,675 Location: Scotland
|
Saintsman, I am not working just now, I am recovering from having a metal plate removed from my leg, and it has got a bit infected as well, so not really doing a lot work wise, and I really enjoy doing my build, I am glad that people can keep up with the build. I like to keep on top of my log,
Thanks it's always nice to get comments.
MoMo
|
|
|
Rank: Vice-Master Groups: Registered
Joined: 09/02/2012 Posts: 569 Points: 1,675 Location: Scotland
|
Thanks Mike for you help, I think I will just stick with what I've got, by the time I have fitted the columns between the windows it will do, I have learnt so much from this forum, and I plan to do another build after this one, But I am not going to think about another build untill this one if complete, Don't think I could handle building 2 or 3 at a time.
MoMo
|
|
|
 Rank: Semi-Pro Level 2 Groups: Registered
Joined: 02/09/2012 Posts: 81 Points: 252 Location: Kingston upon Hull
|
Hello Mo, she's coming along nicely well done  The detail on the lower deck is really good it's a shame you have to glue the upper deck on but at least you can see it all through the upper deck openings and gratings. The more log updates the better keep um coming and I hope the leg gets better soon at least you have the build to keep you busy. Cheers Chris Builds in progress: DeAgostini HMS VictoryDeAgostini McLaren MP4-23 " If it looks right then it is right "
|
|
|
Rank: Vice-Master Groups: Registered
Joined: 09/02/2012 Posts: 569 Points: 1,675 Location: Scotland
|
I have now put the finishing timbers around the cut out to the upper deck, I have also given them a coat of Danish Oil, I have just applied the oil with a bit of kitchen roll.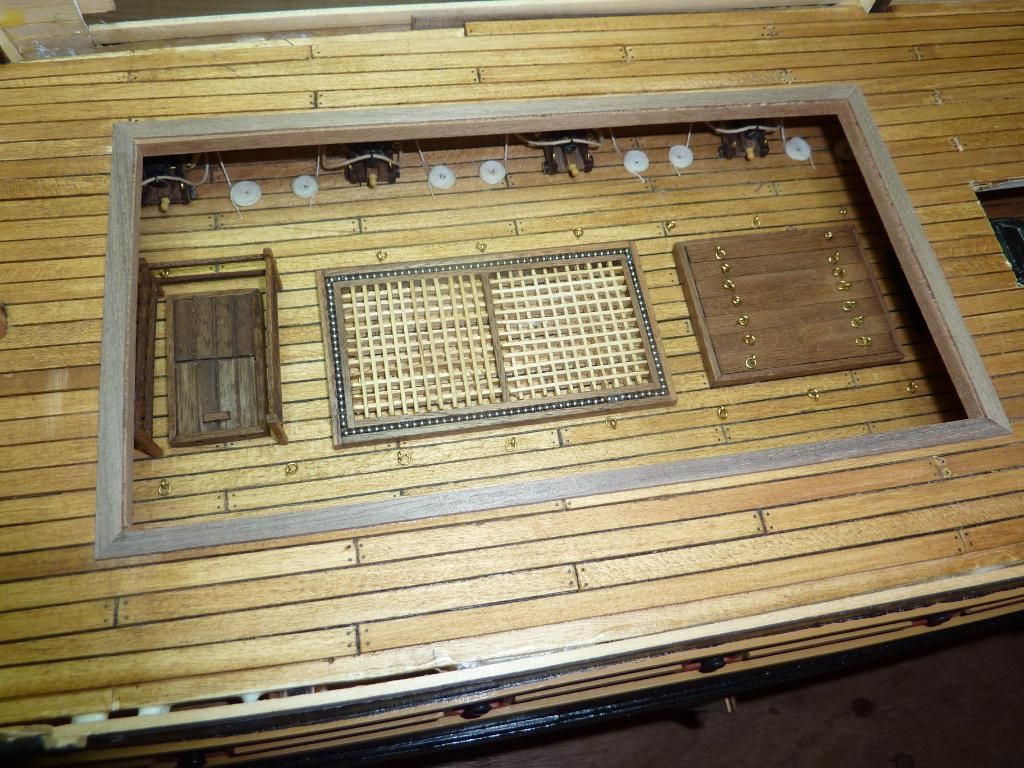  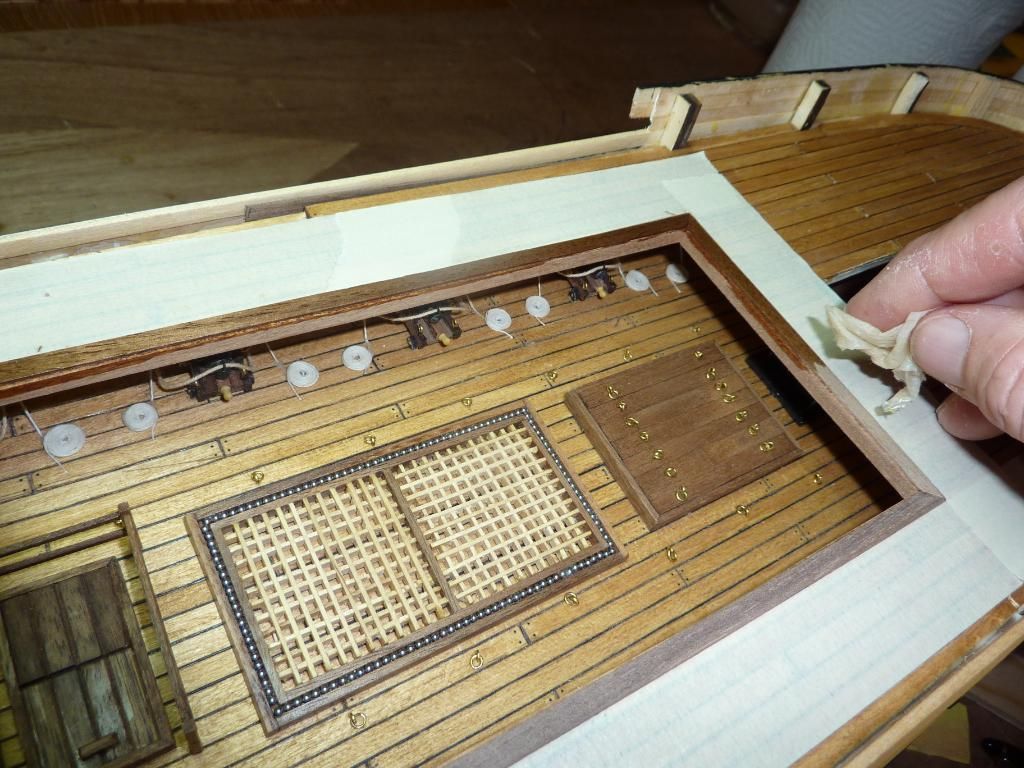 I have then made a start on the bulwarks to the upper decks, using the pre made board, which is 3 planke high, and pre painted. I have then made a start on the bulwarks to the upper decks, using the pre made board, which is 3 planke high, and pre painted. 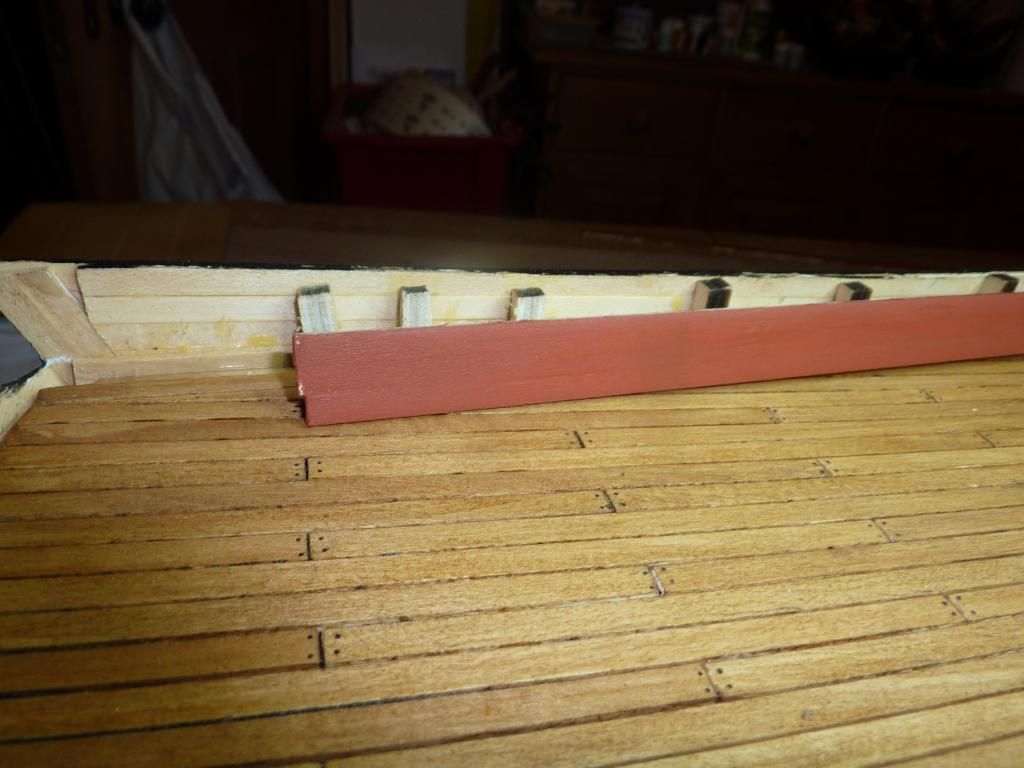 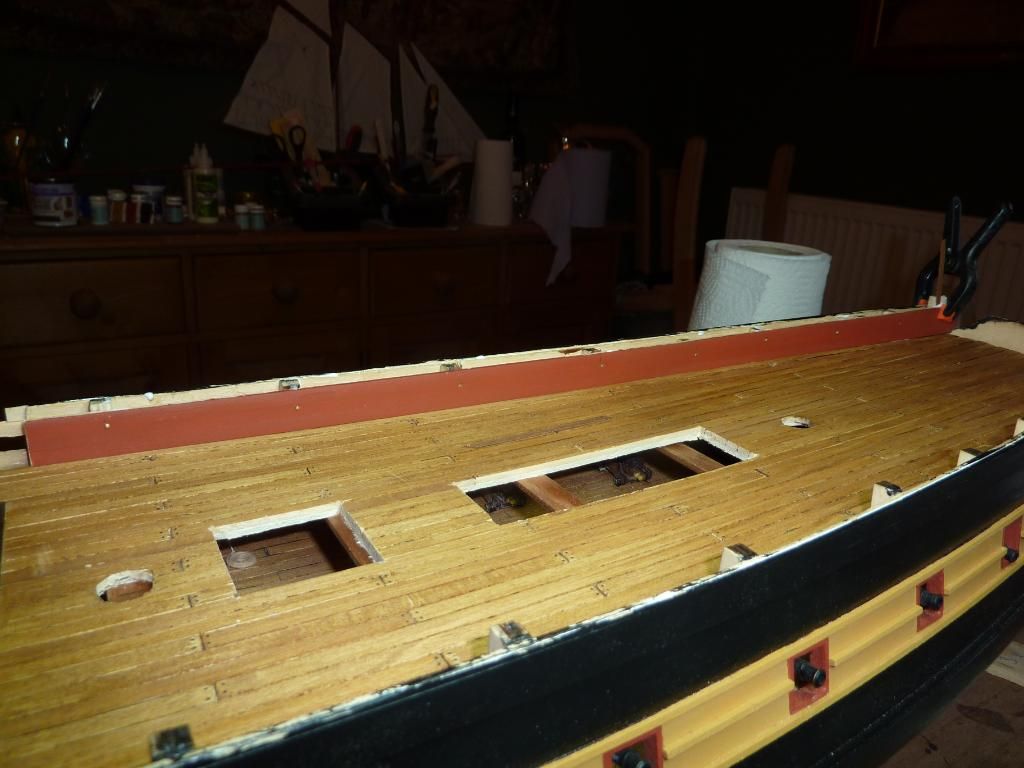 These are the first pins I have used on my build.It was then on to the rudder, First I put masking tape on the rudder to draw out the centers for the hinges. These are the first pins I have used on my build.It was then on to the rudder, First I put masking tape on the rudder to draw out the centers for the hinges.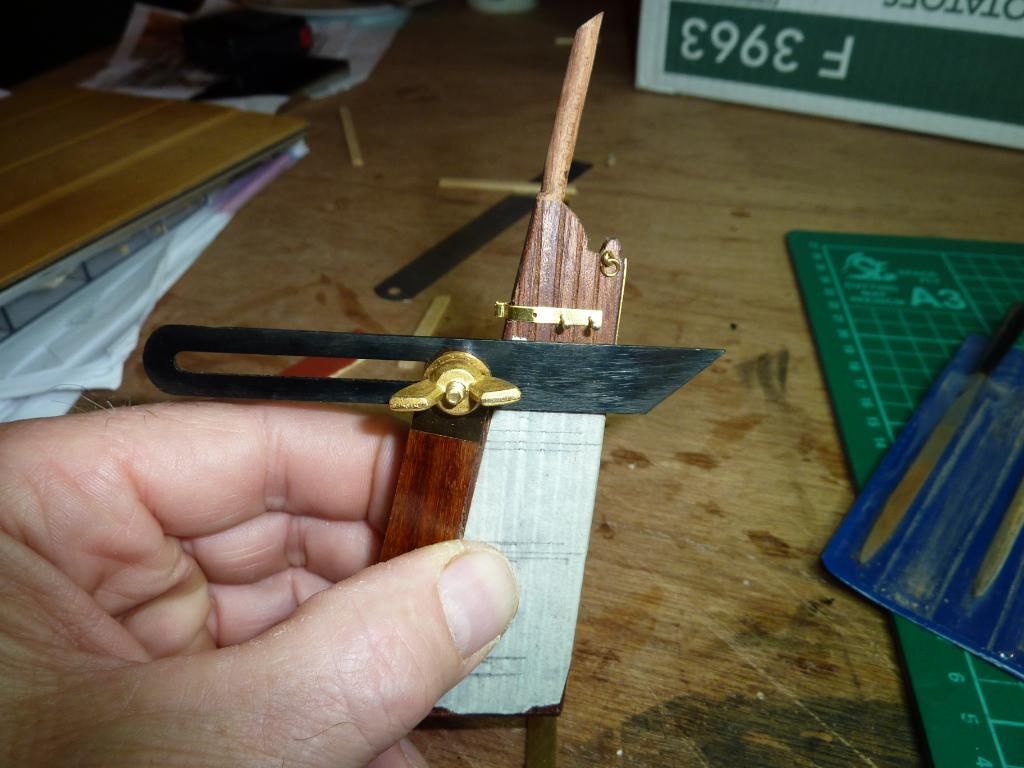 I have also used a file to sink the hinges into the rudder. I have also used a file to sink the hinges into the rudder.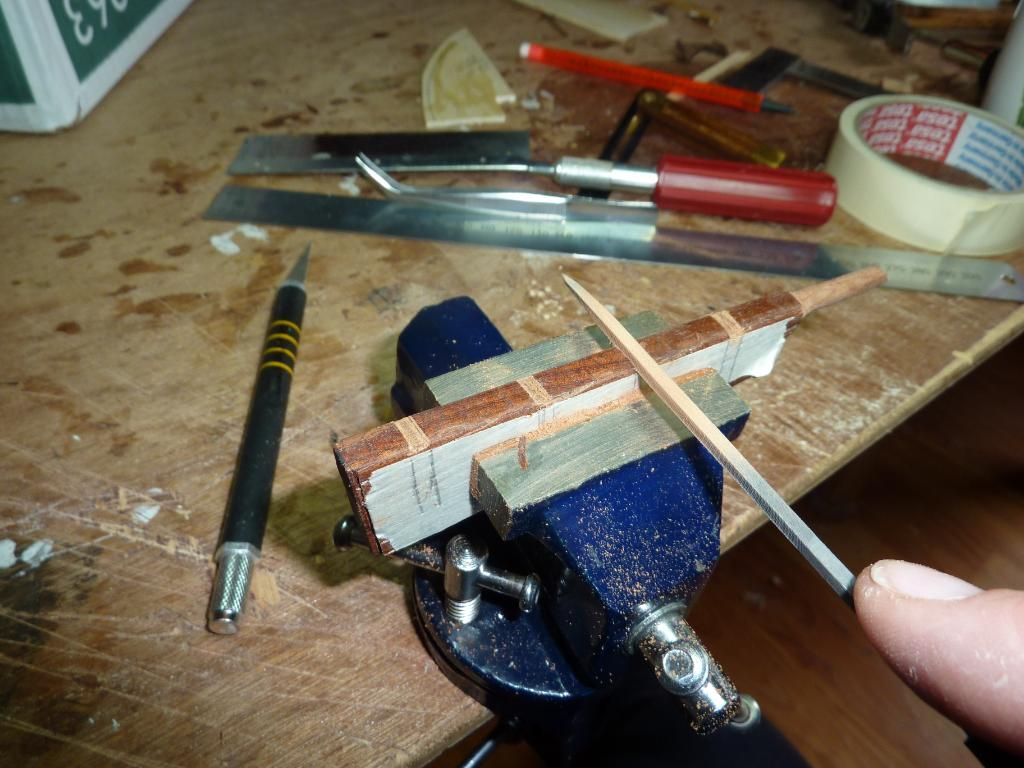 I then procedd to fix the hinges to the rudder, I bored holes in the rudder at the correct place, I used a small bevel stock to ensure the hinges were parrallel to the water line, I had to snip the pins to length and super glued in place. I then procedd to fix the hinges to the rudder, I bored holes in the rudder at the correct place, I used a small bevel stock to ensure the hinges were parrallel to the water line, I had to snip the pins to length and super glued in place.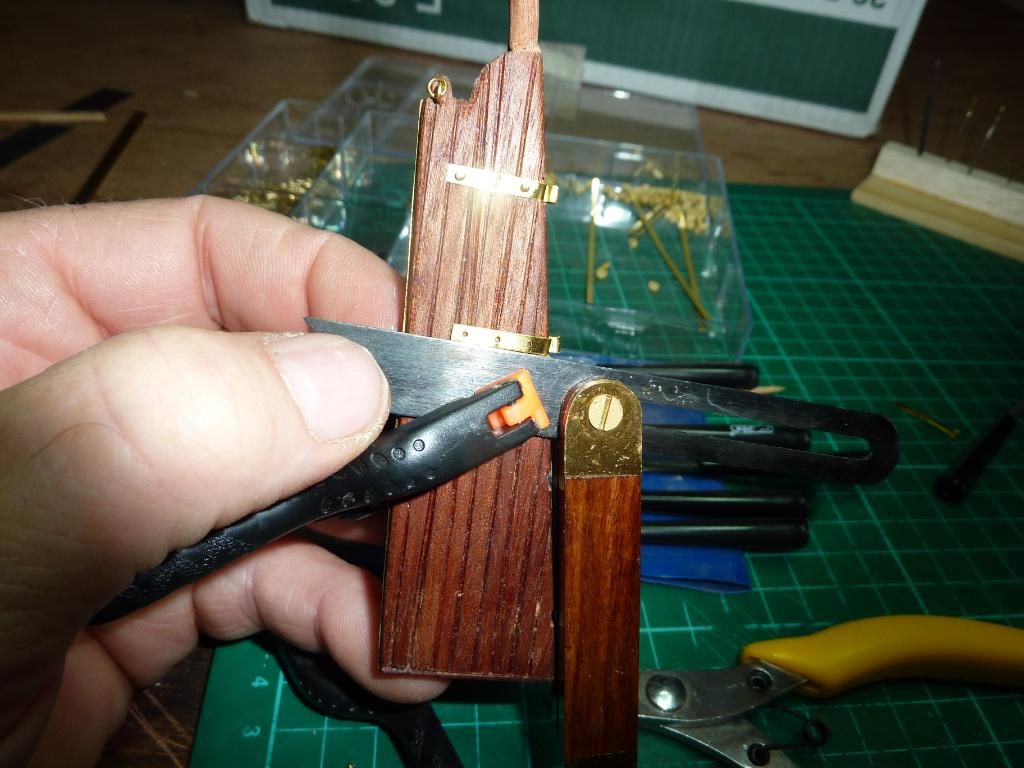   I also had to bore a hole in the ship to take the rudder stalk, I also had to round of the top of the rudder to form a dowel shape, again giving it a coat of the good old Danish. I also had to bore a hole in the ship to take the rudder stalk, I also had to round of the top of the rudder to form a dowel shape, again giving it a coat of the good old Danish. I messed up a bit next, but I think I will be ok, In my hinges I have put the pins in from the bottom up, I should have had them from the top down, there is a small chance they might fall out, I used masking tape to hold all the bits of the hinges together, and bored and pinned the other bits of the hinges to the hull. I messed up a bit next, but I think I will be ok, In my hinges I have put the pins in from the bottom up, I should have had them from the top down, there is a small chance they might fall out, I used masking tape to hold all the bits of the hinges together, and bored and pinned the other bits of the hinges to the hull.  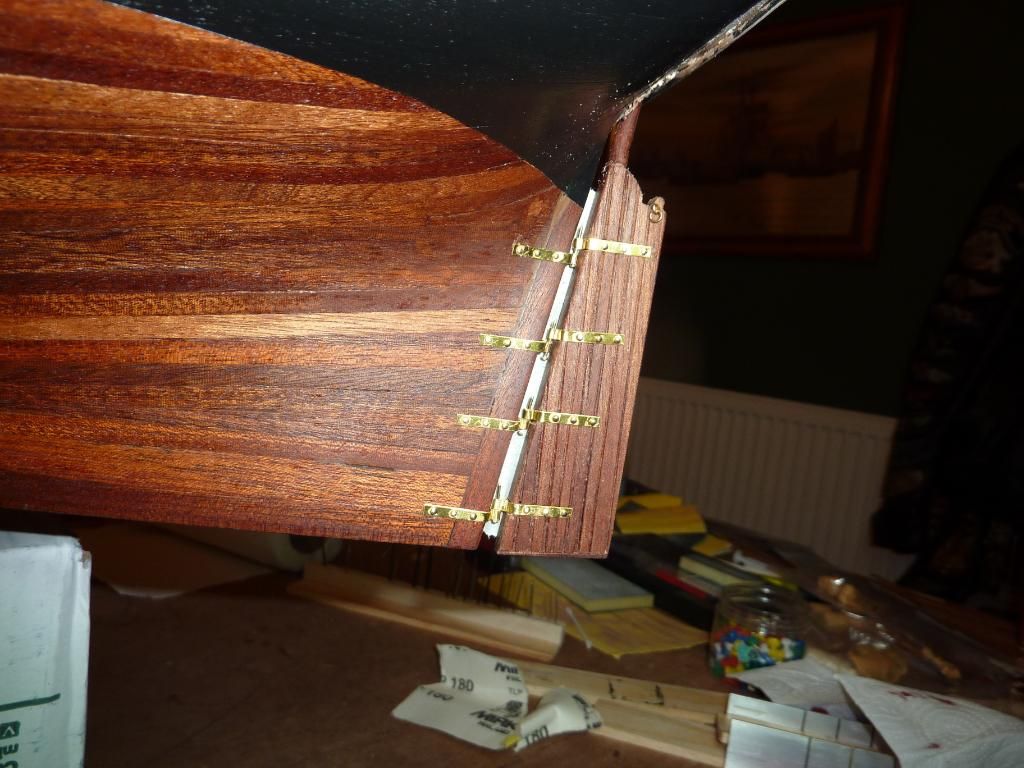 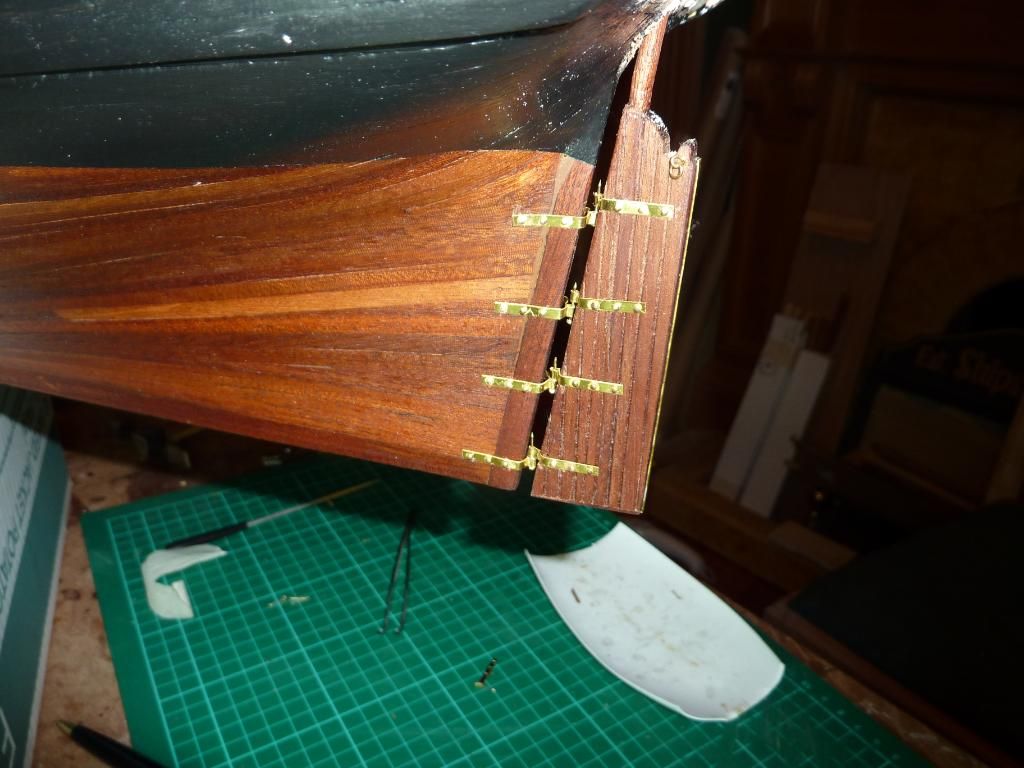 Again I have surprised myself at the end results. Very very happy with it. Again I have surprised myself at the end results. Very very happy with it.
Mo Mo
|
|
|
Rank: Vice-Master Groups: Registered
Joined: 09/02/2012 Posts: 569 Points: 1,675 Location: Scotland
|
there maybe trouble ahead, I am getting a new computer tomorrow, I have bought myself a Apple Mac, there will be a steep learning curve for me, so it may take me a while to set it up and get used to all the new formats etc, will post again when all is set up,
Mo  Mo
|
|
|
|
|
Top work on the rudder Mo and gl with the mac   Current builds:-C57,Zero, Lamborghini Countach, Caldercraft HMS Agamemnon,Robi,R2-D2, MFH Cobra .
|
|
|
Rank: Vice-Master  Groups: Registered
Joined: 13/01/2012 Posts: 605 Points: 1,630 Location: Bucks
|
Hurry back Mo, there is some good work going on there. HMS Surprise
HMS Snake
HMS Bounty
HMS Royal Caroline
HMS Victory rebuild
HMS Supply
|
|
|
Rank: Vice-Master Groups: Registered
Joined: 09/02/2012 Posts: 569 Points: 1,675 Location: Scotland
|
This is a test from my new computer.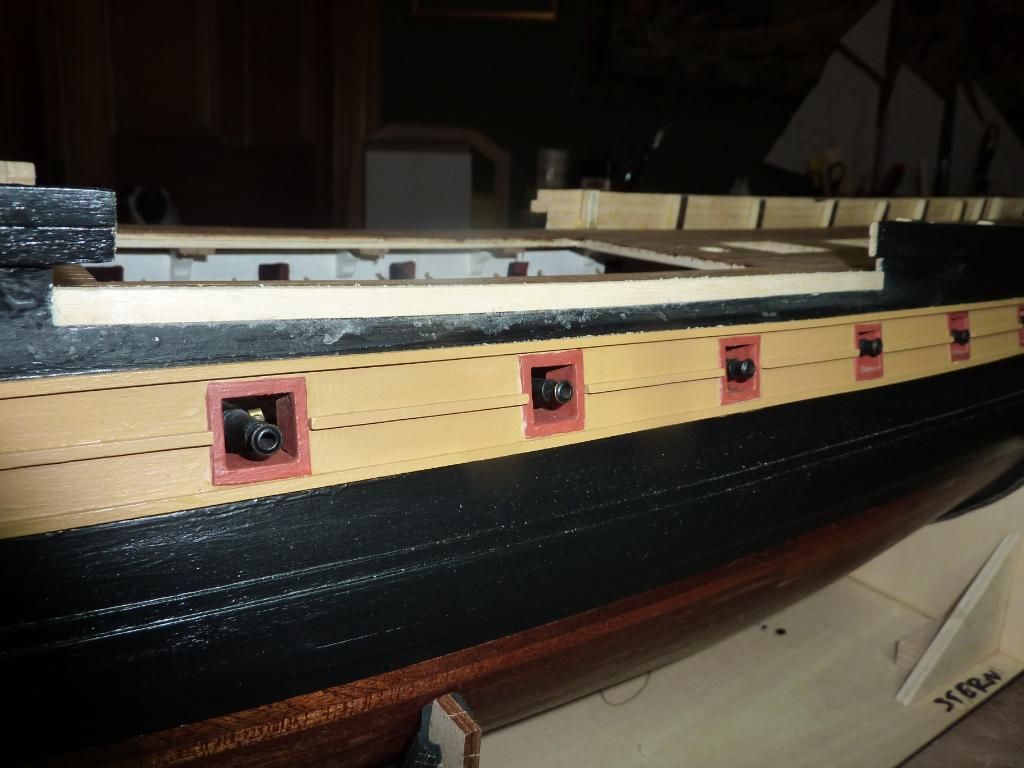 Mo Mo Mo
|
|
|
Rank: Vice-Master Groups: Registered
Joined: 13/01/2012 Posts: 605 Points: 1,630 Location: Bucks
|
Looks like its working fine Mo. HMS Surprise
HMS Snake
HMS Bounty
HMS Royal Caroline
HMS Victory rebuild
HMS Supply
|
|
|
|
Guest
|
 US
US

