|
|
|
|
 Ships i see no ships but i do see a ship,came out fine m8  Current builds:-C57,Zero, Lamborghini Countach, Caldercraft HMS Agamemnon,Robi,R2-D2, MFH Cobra .
|
|
|
 Rank: Vice-Master    Groups: Registered
Joined: 09/02/2012 Posts: 569 Points: 1,675 Location: Scotland
|
[img][/img/Users/mlaing/Documents/Boat Pictures/boat.photolibrary/Masters/2012/11/04/20121104-075621/P1020570.JPG Mo
|
|
|
Rank: Vice-Master Groups: Registered
Joined: 09/02/2012 Posts: 569 Points: 1,675 Location: Scotland
|
Well here we are again, Been struggling with the pictures again, Lets keep trying.
Mo  /Users/mo/Documents/Boat Pictures/boat.photolibrary/Masters/2012/11/04/20121104-162344/P1020580.JPG Mo
|
|
|
Rank: Vice-Master Groups: Registered
Joined: 09/02/2012 Posts: 569 Points: 1,675 Location: Scotland
|
/Users/mo/Documents/Boat Pictures/boat.photolibrary/Masters/2012/11/04/20121104-162344/P1020580.JPG Mo
|
|
|
Rank: Vice-Master Groups: Registered
Joined: 09/02/2012 Posts: 569 Points: 1,675 Location: Scotland
|
|
|
|
Rank: Vice-Master Groups: Registered
Joined: 09/02/2012 Posts: 569 Points: 1,675 Location: Scotland
|
 Mo
|
|
|
Rank: Vice-Master Groups: Registered
Joined: 09/02/2012 Posts: 569 Points: 1,675 Location: Scotland
|
Been having a bit of trouble with my new p.c. Hopefully I will get the hang of it, I think the picture posted above was a bit of a fluke.
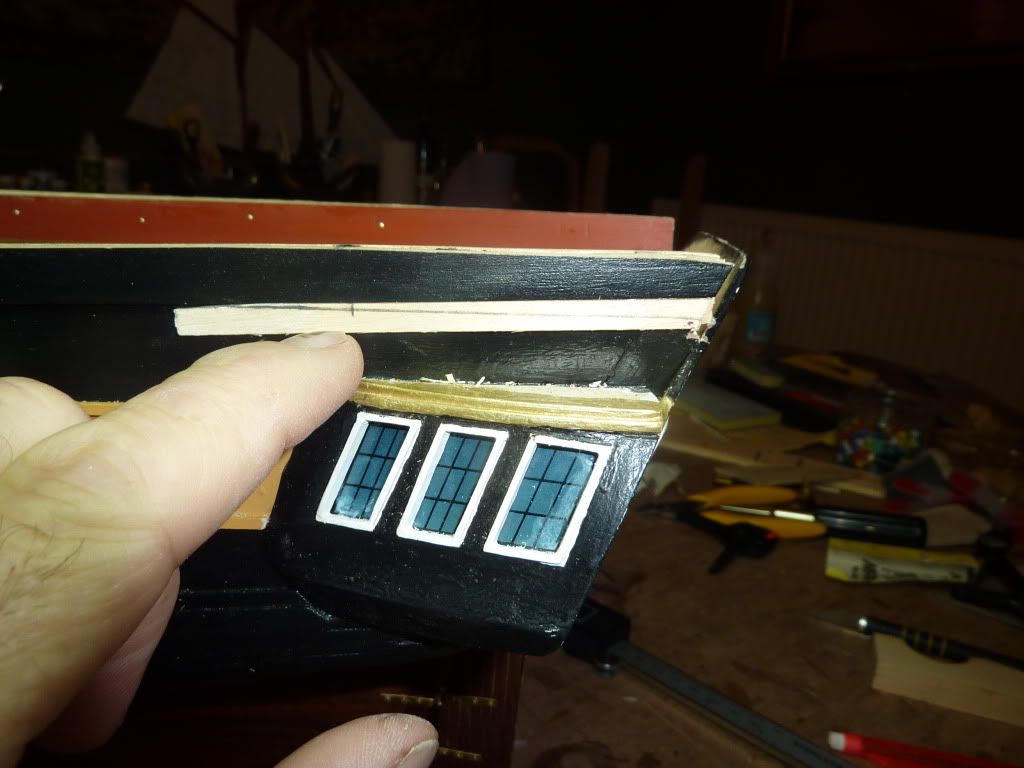
Anyway, after fitting the bulwarks to the inside of the top deck, I found I had to dress the height of the bulwarks down a bit, to achieve the same height from deck to the top. In doing so I ended up taking a bit of the outer upper planking, and because I had already fitted my Rubbing steaks at the top of the planking, they were tapering a bit, so the picture above shows the bit I have had to add on to keep the upper rubbing steaks parallel.
Mo Mo
|
|
|
Rank: Vice-Master Groups: Registered
Joined: 09/02/2012 Posts: 569 Points: 1,675 Location: Scotland
|
After I fitted the upper deck, I found the planking to the cut away area was not high enough, so I had to fit another plank on to gain the height required. I will sand or file to the correct height and paint.
Mo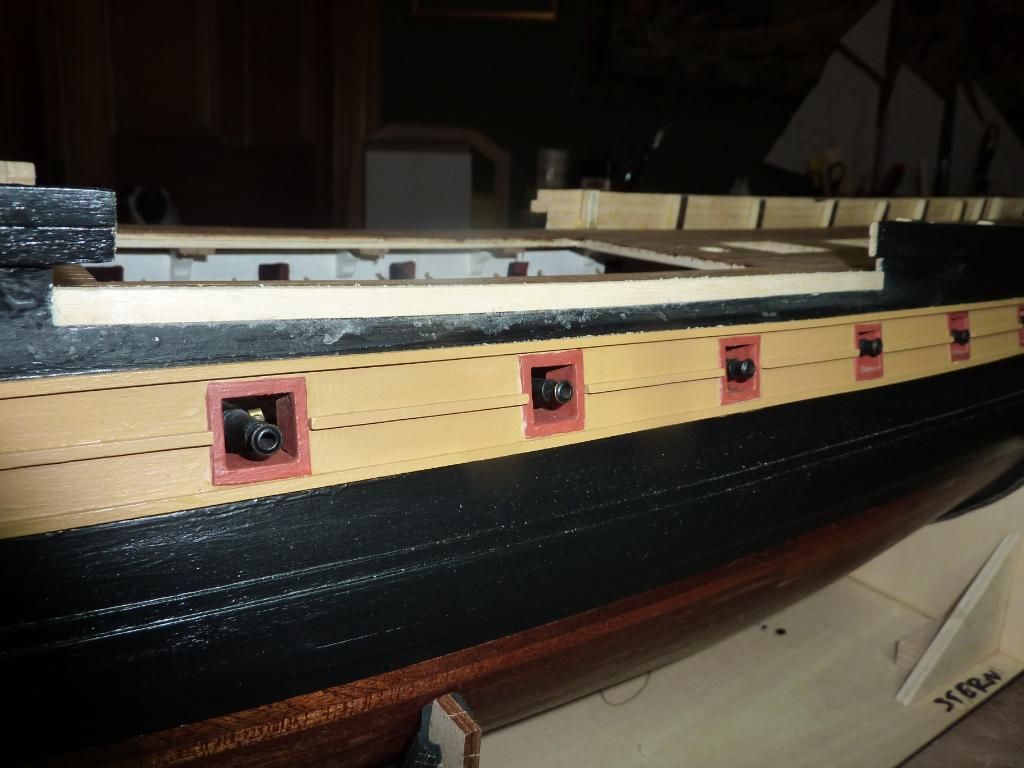 Mo
|
|
|
Rank: Vice-Master Groups: Registered
Joined: 09/02/2012 Posts: 569 Points: 1,675 Location: Scotland
|
I seem to being random bits of luck with loading my pic's from the mac, But lets try again.
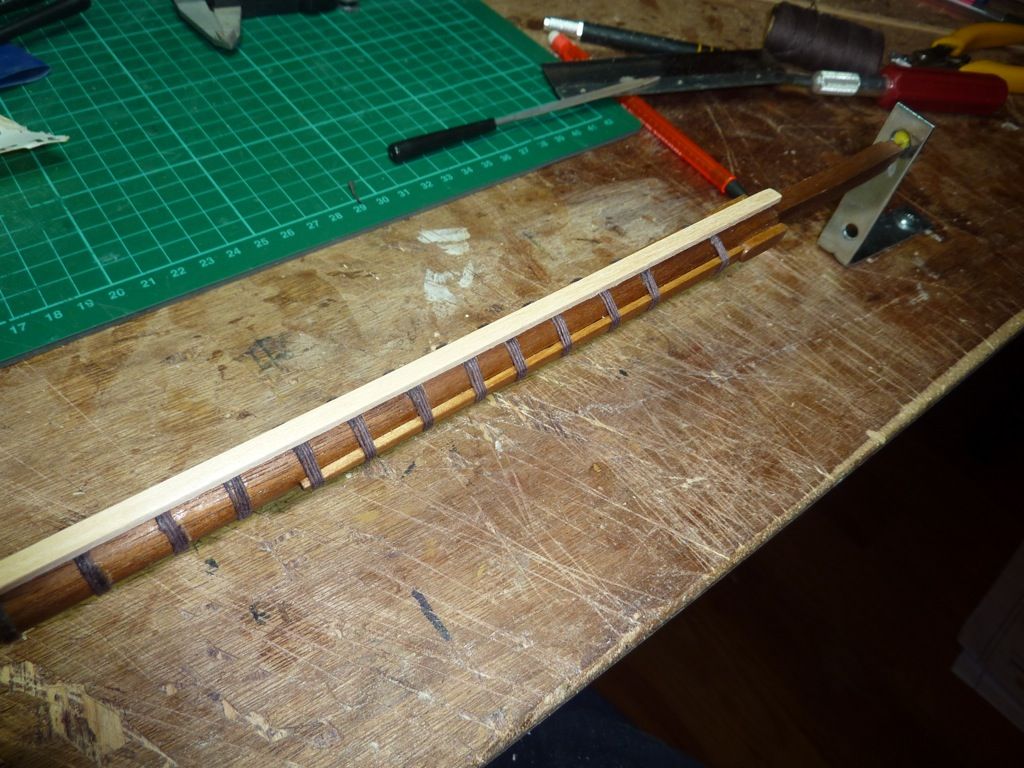
 I took a break from the ship, and put some time into the masts. This was my point of getting a full size 1 : 1 Drawing I started of by fileing the masts to receive the strengtheners. I took a break from the ship, and put some time into the masts. This was my point of getting a full size 1 : 1 Drawing I started of by fileing the masts to receive the strengtheners.Mo Mo
|
|
|
Rank: Vice-Master Groups: Registered
Joined: 09/02/2012 Posts: 569 Points: 1,675 Location: Scotland
|
|
|
|
Rank: Vice-Master Groups: Registered
Joined: 09/02/2012 Posts: 569 Points: 1,675 Location: Scotland
|
|
|
|
Rank: Vice-Master Groups: Registered
Joined: 09/02/2012 Posts: 569 Points: 1,675 Location: Scotland
|
|
|
|
Rank: Vice-Master Groups: Registered
Joined: 09/02/2012 Posts: 569 Points: 1,675 Location: Scotland
|
  Mo MoMo
|
|
|
Rank: Vice-Master Groups: Registered
Joined: 09/02/2012 Posts: 569 Points: 1,675 Location: Scotland
|
|
|
|
Rank: Vice-Master Groups: Registered
Joined: 09/02/2012 Posts: 569 Points: 1,675 Location: Scotland
|
My next task was to do the blocks, this is where the real problems began, I found a real lack of information regarding these items. And any help would be greatly recieved. This first picture I am going to call the foretop front elevation.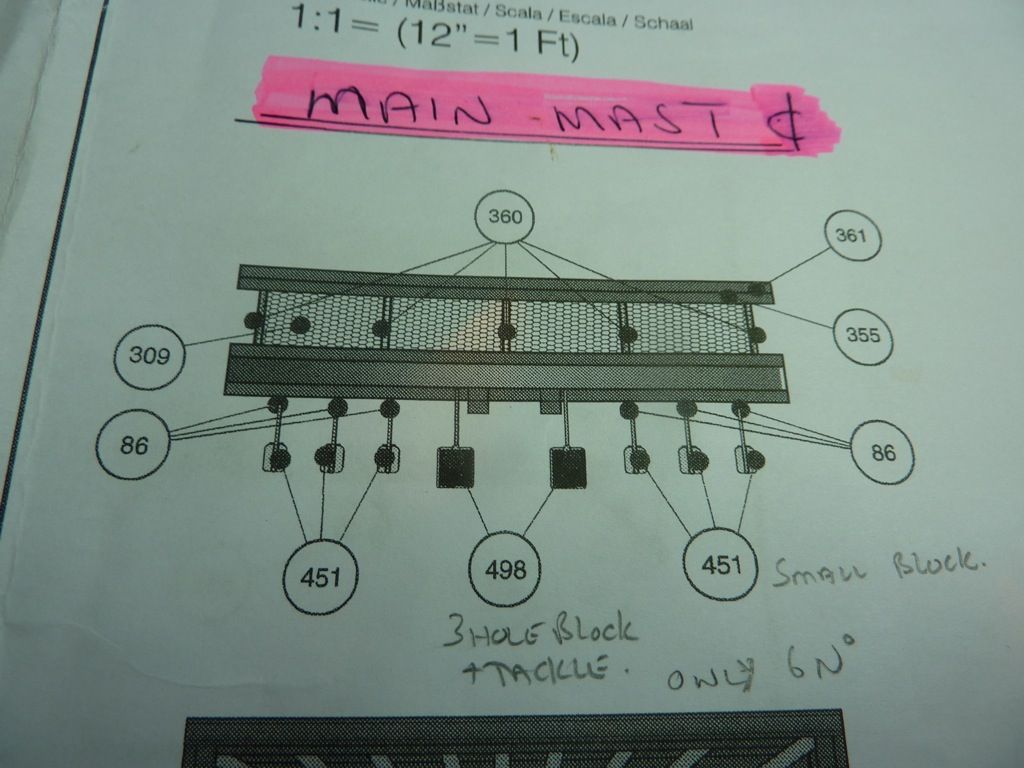 And this second picture I am going to call the mainmast side elevation. And this second picture I am going to call the mainmast side elevation.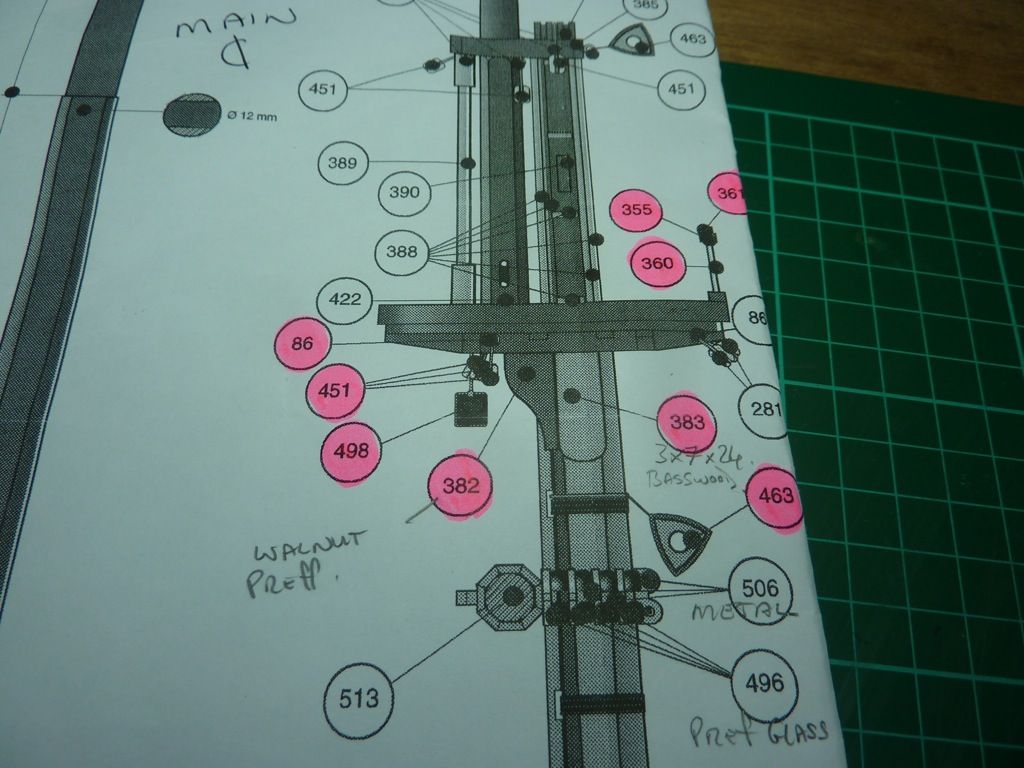 On the first drawing from left to right it shows, I have to fit 3 No 451 ( small blocks ) Then 2 No 498 Three hole block and tackles. and then a further 3 No 451 ( small blocks ) and to me it looks like they are all in a straight line, So that is what I have done. On the first drawing from left to right it shows, I have to fit 3 No 451 ( small blocks ) Then 2 No 498 Three hole block and tackles. and then a further 3 No 451 ( small blocks ) and to me it looks like they are all in a straight line, So that is what I have done.  But when you look at the second picture, the side elevation of the mast, at the same point, you can see item 451 with 3 lines pointing to its location, and item 498 with one line indicating its position, Therefore its fair to say that what is on the side elevation drawing, is specific to whats on each side. It make sense to me. But when you look at the second picture, the side elevation of the mast, at the same point, you can see item 451 with 3 lines pointing to its location, and item 498 with one line indicating its position, Therefore its fair to say that what is on the side elevation drawing, is specific to whats on each side. It make sense to me.
But I am struggling with the blocks marked 281 to the rear of the foretop. it shows 2 lines indicating to me there are 2 blocks on each side, and a 281 block is a 5 mm block and tackle, is a 281 block and tackle the same as a 451 small block. and if there are two blocks on the rear at each side are they together or separate. Sorry to be asking such intricate questions, but I just want to make the best that I can, but to do that I require the information.
Mo  Mo
|
|
|
Rank: Vice-Master Groups: Registered
Joined: 09/02/2012 Posts: 569 Points: 1,675 Location: Scotland
|
I am now tying the blocks, I found a very helpful post, under son of bulwark's victory build, he shows you how to hold the block, clamp the thread, tie the knot, etc, I have used it and it works great for me, I really did not know how I was going to do this job.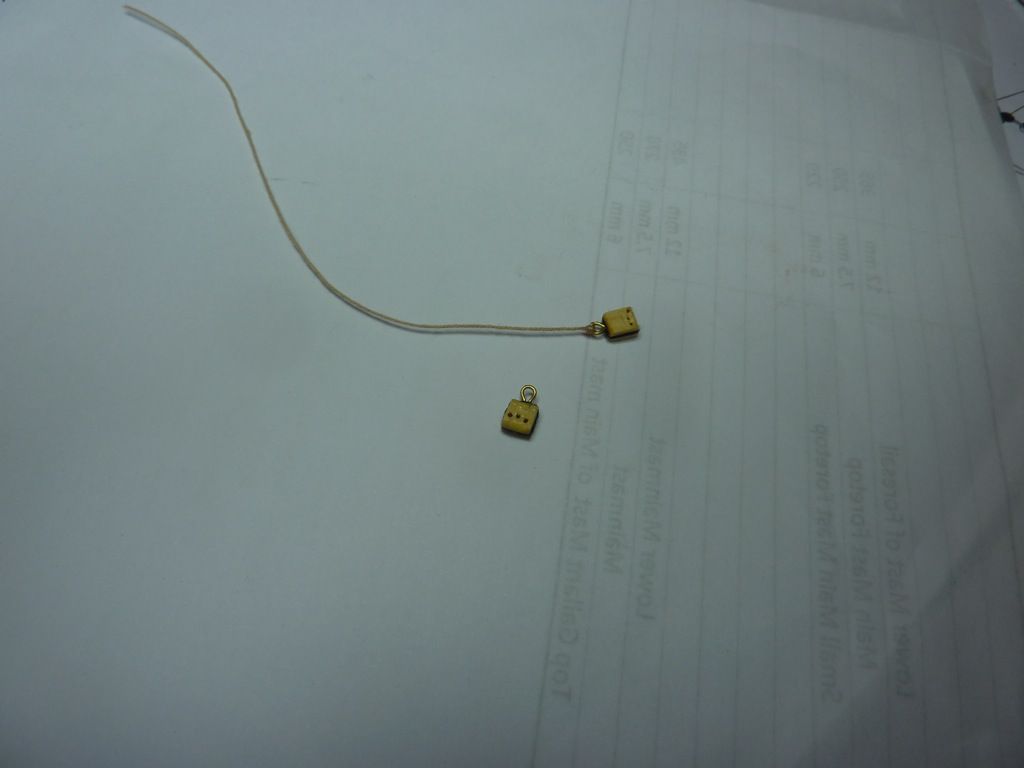 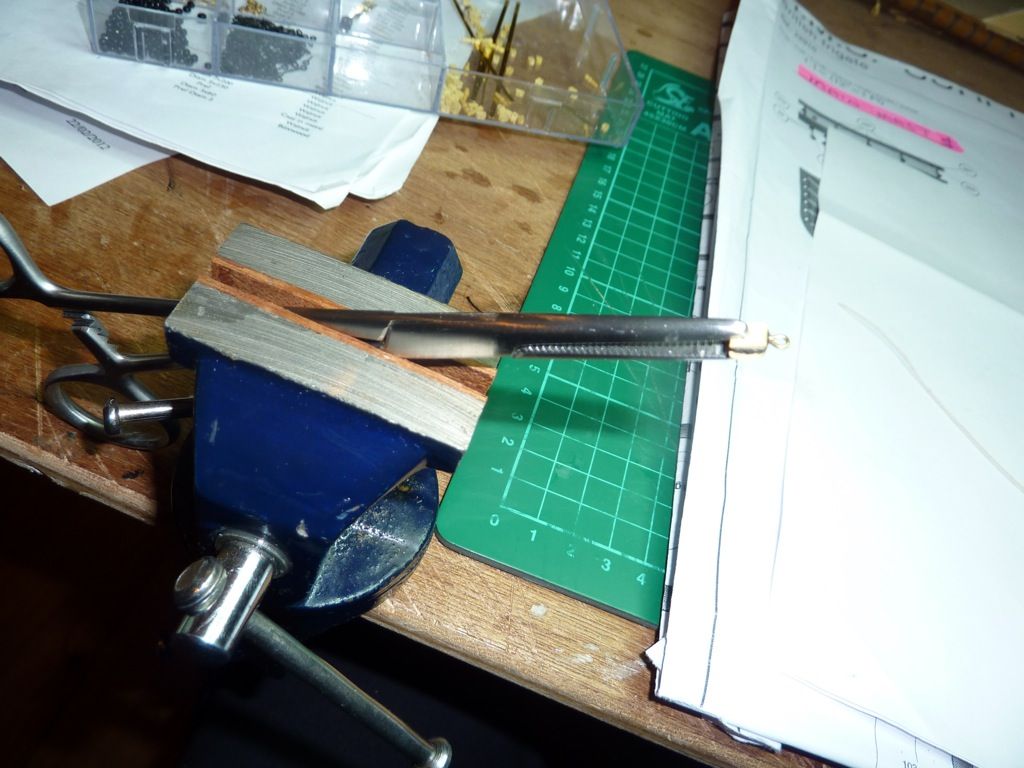 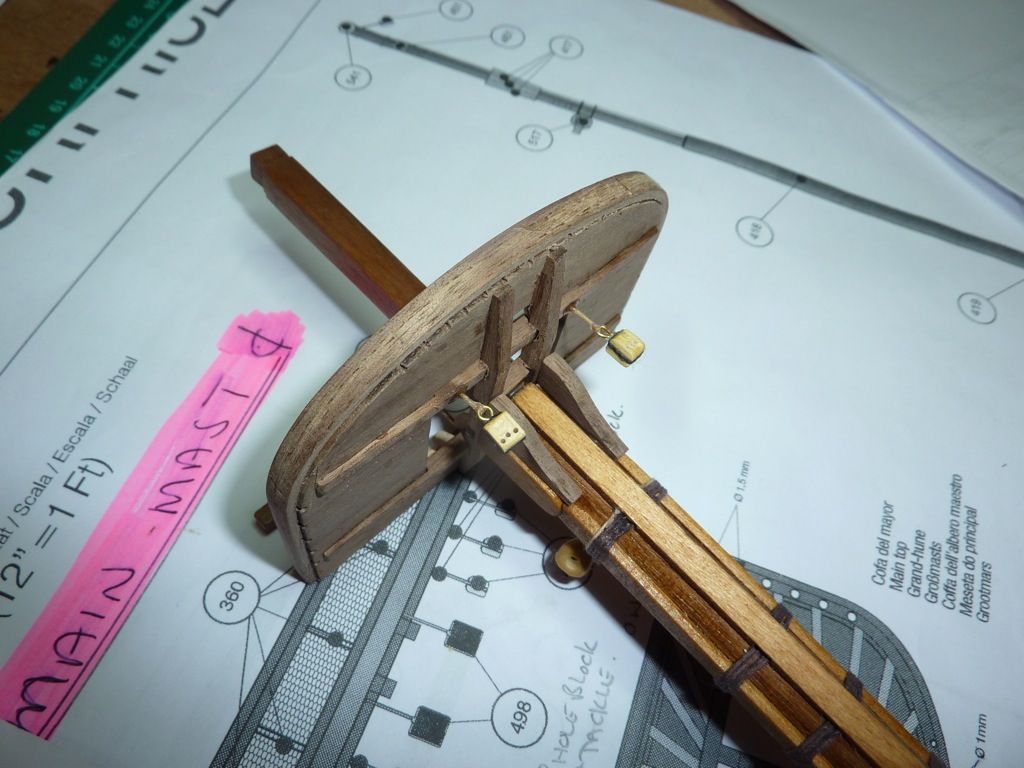  I have glued wooden pieces on to the face of the jaws on my vice, I them held the block on the pin mounted on a piece of scrap wood, I bored a hole in the wood on the jaws of the vice and that held the brass eye. This ensured that all the rope was of equal length, give or take. I have glued wooden pieces on to the face of the jaws on my vice, I them held the block on the pin mounted on a piece of scrap wood, I bored a hole in the wood on the jaws of the vice and that held the brass eye. This ensured that all the rope was of equal length, give or take.    That is me up to date with the log, The last few post have been quite rushed, But I am really happy how it is all coming together. I must at some point soon return to the ship and get on with the upper deck gun cut outs etc, etc. That is me up to date with the log, The last few post have been quite rushed, But I am really happy how it is all coming together. I must at some point soon return to the ship and get on with the upper deck gun cut outs etc, etc.
MoMo
|
|
|
Rank: Vice-Master Groups: Registered
Joined: 09/02/2012 Posts: 569 Points: 1,675 Location: Scotland
|
I ment to say in my post, that when I am tying the rope to the blocks, I am doing a half hitch, putting pva glue on the hitch before doing the second half of the hitch, Thus giveing the knot a good bit of stick.
MoMo
|
|
|
 Rank: Beginner Level 3  Groups: Registered
Joined: 31/08/2012 Posts: 22 Points: 56 Location: London
|
Looking good Mo keep it upand you'll be done in no time Building
HMS Surprise
HMS Victory
HMS Sovereign of the Seas
Built
EL cano
Christan Radich
HMS Bounty
|
|
|
 Rank: Pro   Groups: Registered
Joined: 25/01/2010 Posts: 459 Points: 1,367 Location: Bridlington
|
really good work mo. i am confused and I'm only reading your posts, god help me when i get to this part, i think its the LACK of clear n precise instructions that let us down.Regards
Rob
Bridlington.
Built Flying Scotsman (Train). Collecting HMS VICTORY
|
|
|
Rank: Beginner Level 3 Groups: Registered
Joined: 31/08/2012 Posts: 22 Points: 56 Location: London
|
I agree with Rob, i'm not as far as you 2 are yet but the instructions are not that good at explaining things, You'd think after the amount of money we are paying for these models atleast the intructions would be a bit better Building
HMS Surprise
HMS Victory
HMS Sovereign of the Seas
Built
EL cano
Christan Radich
HMS Bounty
|
|
|
|
Guest (5)
|
 US
US

