|
|
 Rank: Semi-Pro Level 1   Groups: Registered
Joined: 24/04/2012 Posts: 53 Points: 149 Location: Kent
|
Hi everyone. I wasn't expecting to do much more work in the build until the next delivery but a happy accident at the weekend has given me a nice little job today. Whilst shopping with my girlfriend on Saturday we went into hobby craft as she needed some bits for a chair she is upholstering. I happened to wonder upstairs and found a huge modelling section up there. So i was able to get myself a weathering kit.... 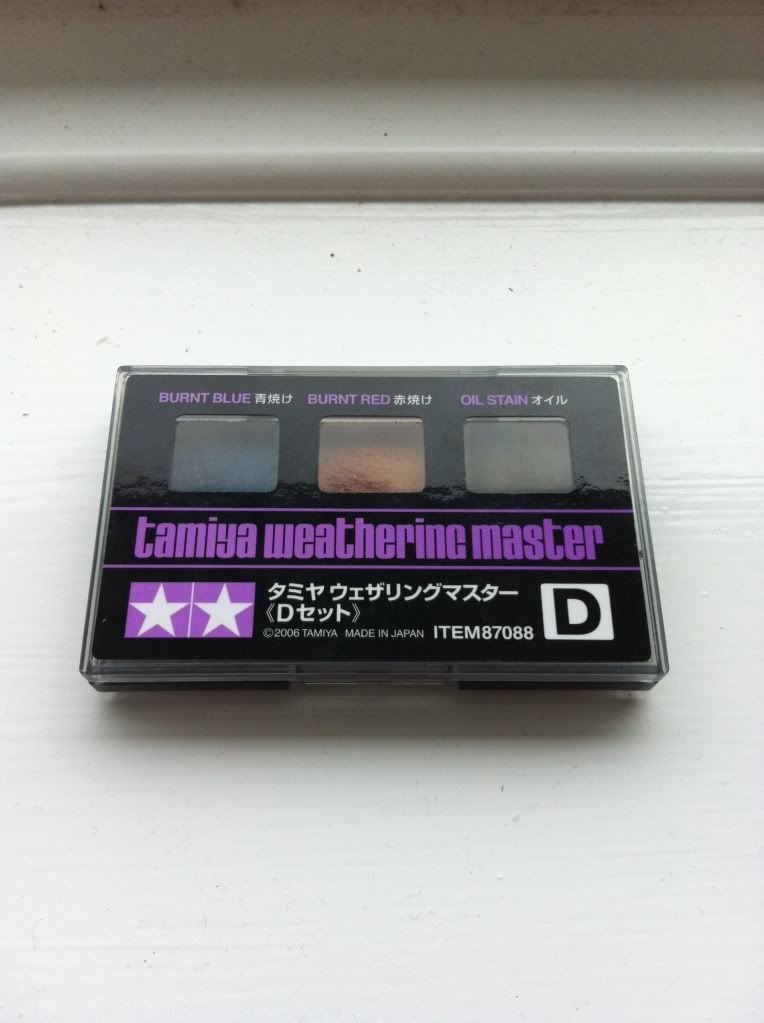 Now i've not been too enthused by the exhausts i must admit. Especially as one of them had a small lug broken off in the bag that i had to partially repair, as you will spot in the first pictre. But i had a go and was quite pleased with the results even though i had already glued them to the block and there was nooo way they were coming off. So a bit of masking was needed first. 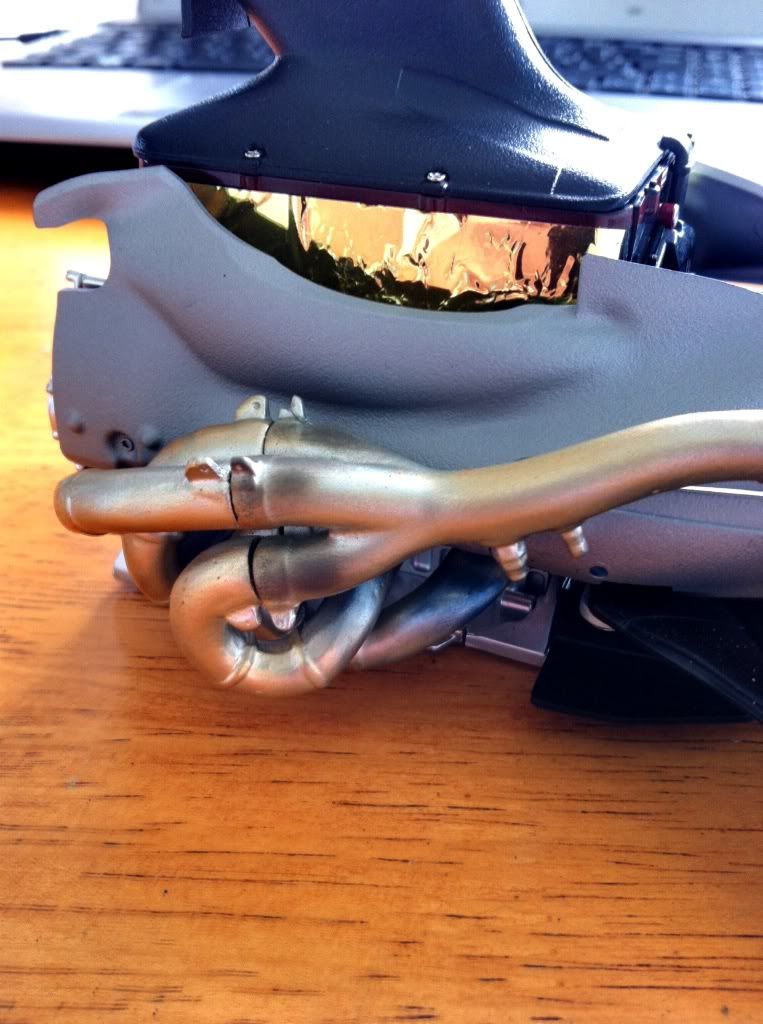 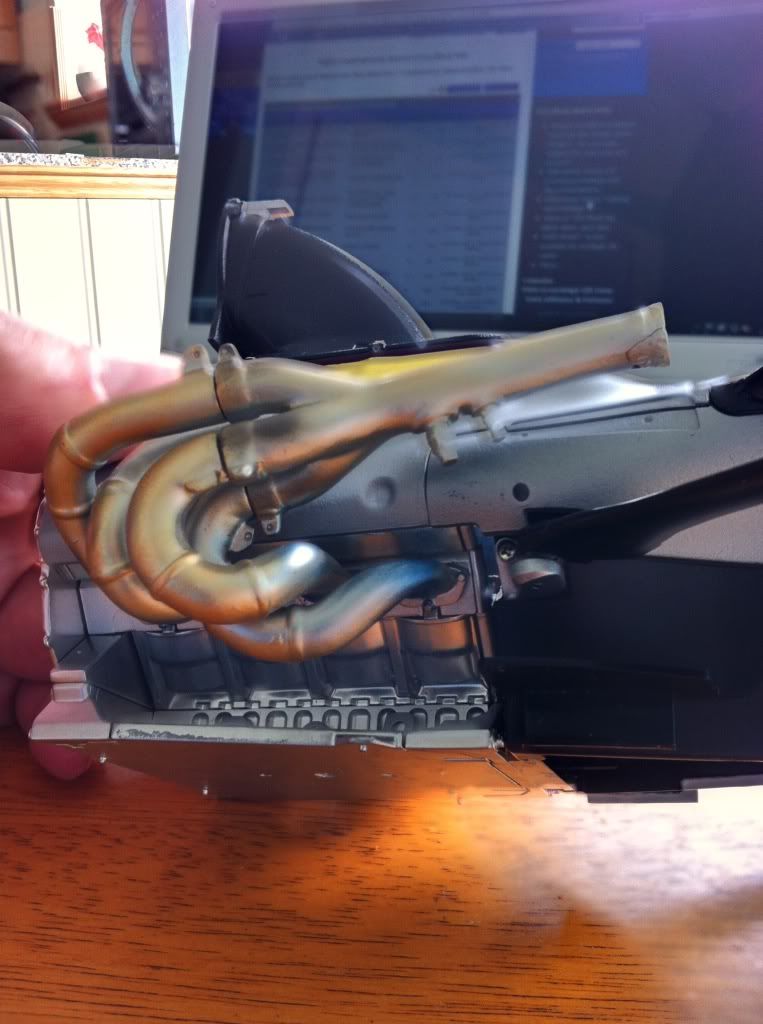 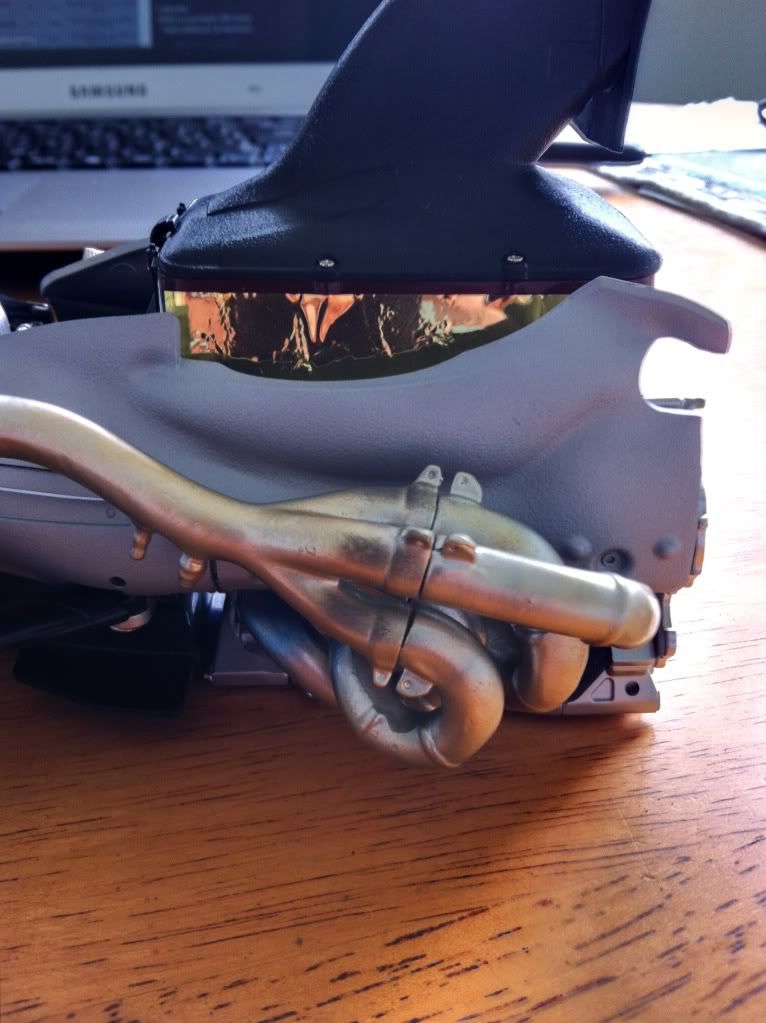 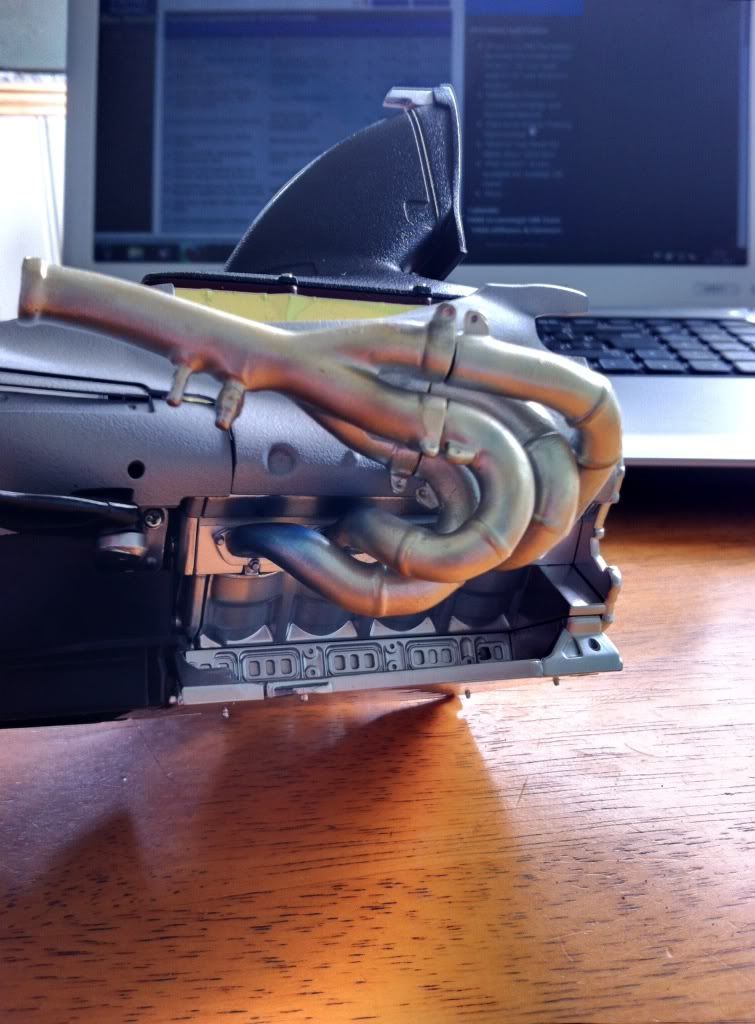 This is the same weathering kit as seen in the u-tube video. I'm pretty sure the guy in the video goes way over the top on purpose just to show the effect. But i think if you under-do it it looks quite effective... Keep calm and make models......  Chris
|
|
|
 Rank: Pro  Groups: Registered
Joined: 18/03/2011 Posts: 203 Points: 620 Location: Surrey
|
Looks good Chris! 
|
|
|
Rank: Semi-Pro Level 1 Groups: Registered
Joined: 24/04/2012 Posts: 53 Points: 149 Location: Kent
|
Thanks Scotty.:-) Just added a tiny bit of oil stain to the ends of the tail pipes.:-)) And am now going to leave it there as I don't want to over-tinker.. Chris
|
|
|
Rank: Semi-Pro Level 1 Groups: Registered
Joined: 24/04/2012 Posts: 53 Points: 149 Location: Kent
|
Well, on recieving what must be the greatest part yet in issue 67 i got to work on the fuel gates. It was on completion of these that i noticed that the right hand fuel gate lid didn't quite sit properly in the monocoque body. Even though the parts underneath were fitted correctly. 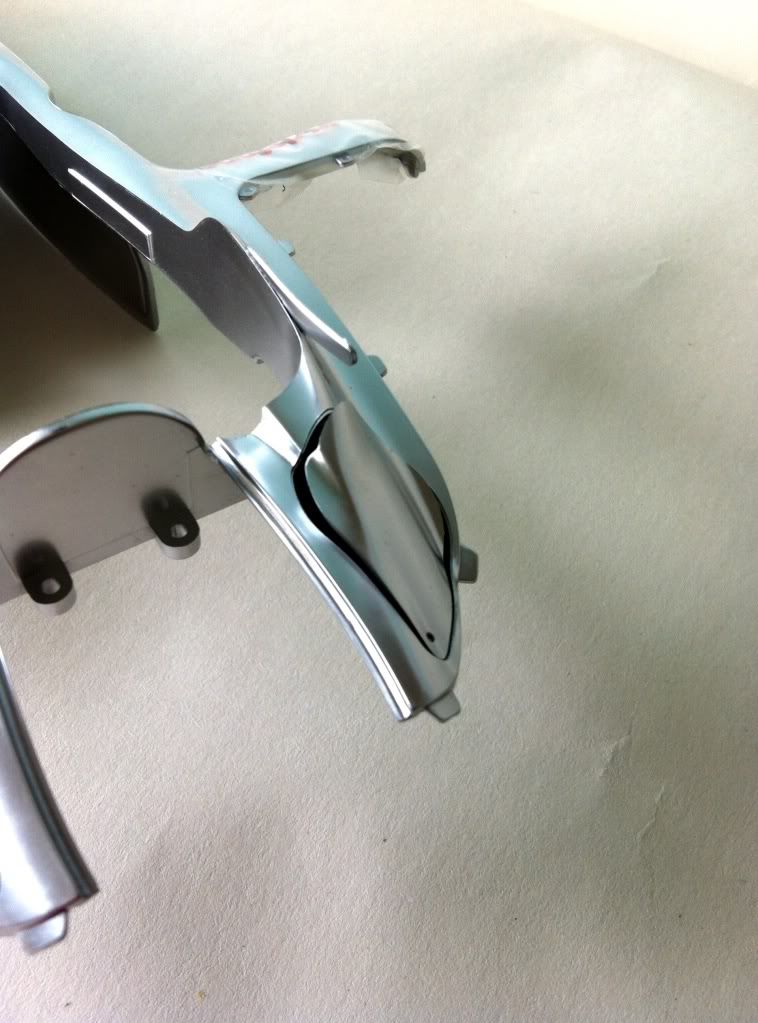 Has anyone else had the same problem.??? Not to worry though because with a little scraping with my hobby knife on the lug underneath i was able to make it fit properly. 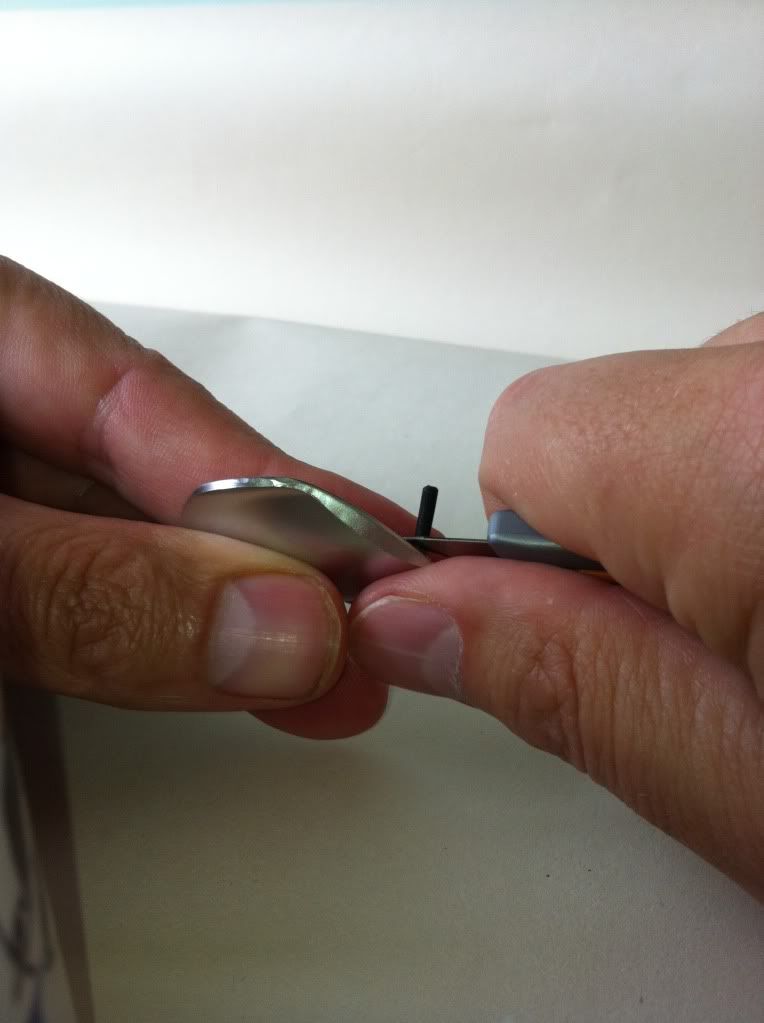 I'm sure if you have had this problem you have thought of this fix already but i thought i'd post it up anyway.  A little bit of care is needed. And obviously don't let the blade get anywere near the outside of the part. 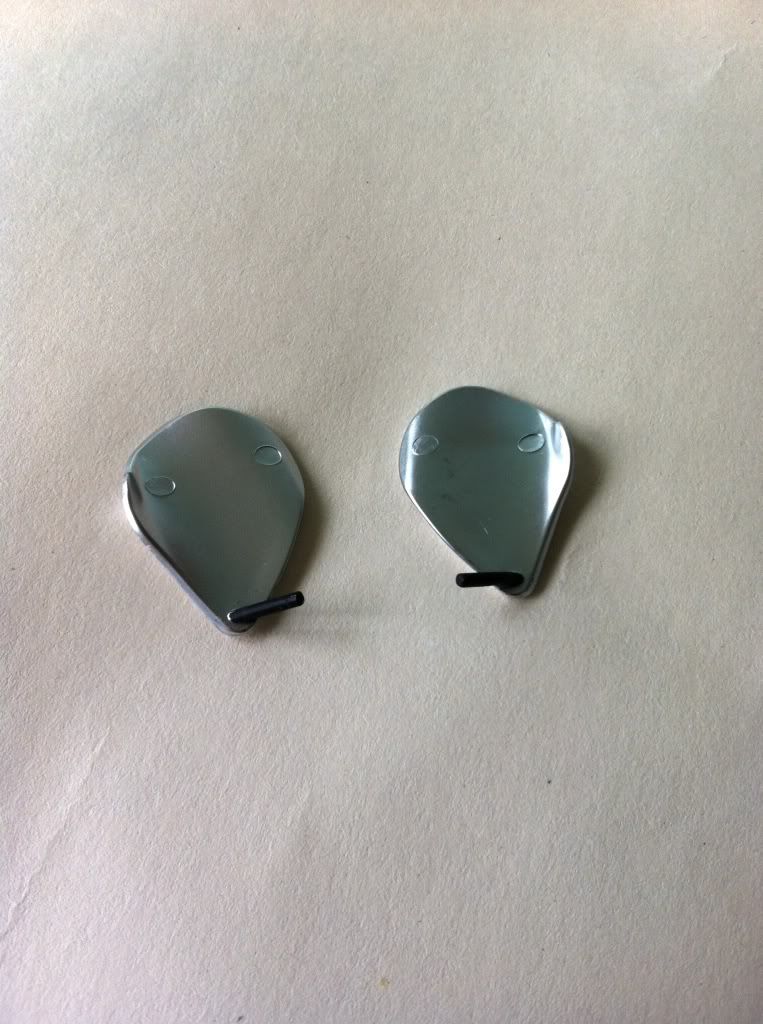 They do look pretty cool when thay are done.. 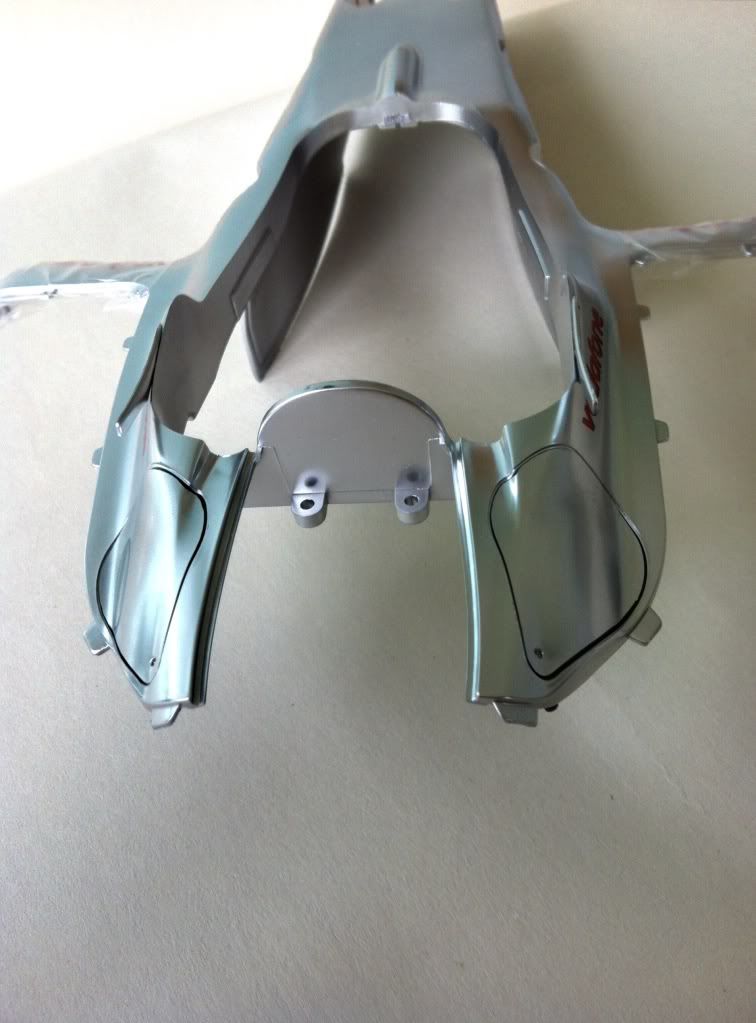 And as fixes go it all works out fine..
|
|
|
 Rank: Beginner Level 2  Groups: Registered
Joined: 25/03/2011 Posts: 12 Points: 36 Location: essex
|
That does look great , Well done .. JC Hurry up with my mag !!!!!!
|
|
|
 Rank: Vice-Master    Groups: Registered
Joined: 31/08/2011 Posts: 629 Points: 1,963 Location: Plymouth
|
Looking good mate! I have bought the weathering kit too! I found the exhausts a bit of a beggar If I am being honest!  Trying to get all the pipes to line up! However managed it......loving your build mate. Keep up the good work! Chris
|
|
|
Rank: Pro Groups: Registered
Joined: 30/06/2012 Posts: 207 Points: 583 Location: Dunfermline, Scotland
|
Hi Chris, Yeah those decals look really excellent.I didn't know i could get additional ones for this model, so thanks for that.Do they come with a diagram on where to put them on the model? Cheers. Stuart.
|
|
|
Rank: Vice-Master Groups: Registered
Joined: 31/08/2011 Posts: 629 Points: 1,963 Location: Plymouth
|
Hi Stuart...yes you get a VERY detailed diagram of where to fit the decals. Go for it!!!! Chris
|
|
|
Rank: Semi-Pro Level 1 Groups: Registered
Joined: 24/04/2012 Posts: 53 Points: 149 Location: Kent
|
Hi everyone. Well, not been on for nearly seven weeks now as work commitments and sadly a couple of funerals have been getting in the way, but hopefully that's all behind us now and i can crack on with the build. Getting near the end now boys and girls...... Not sure what i will do when it all ends to be honest.. Don't think i will undertake another one (if they bring the Senna Mc out) as i'll be moving abroad next year. But it's been great fun and i've enjoyed the last eighteen odd months a great deal.. I obtained some carbon fibre decals for the cockpit surround/headrest area.. And was pretty pleased with how it came out 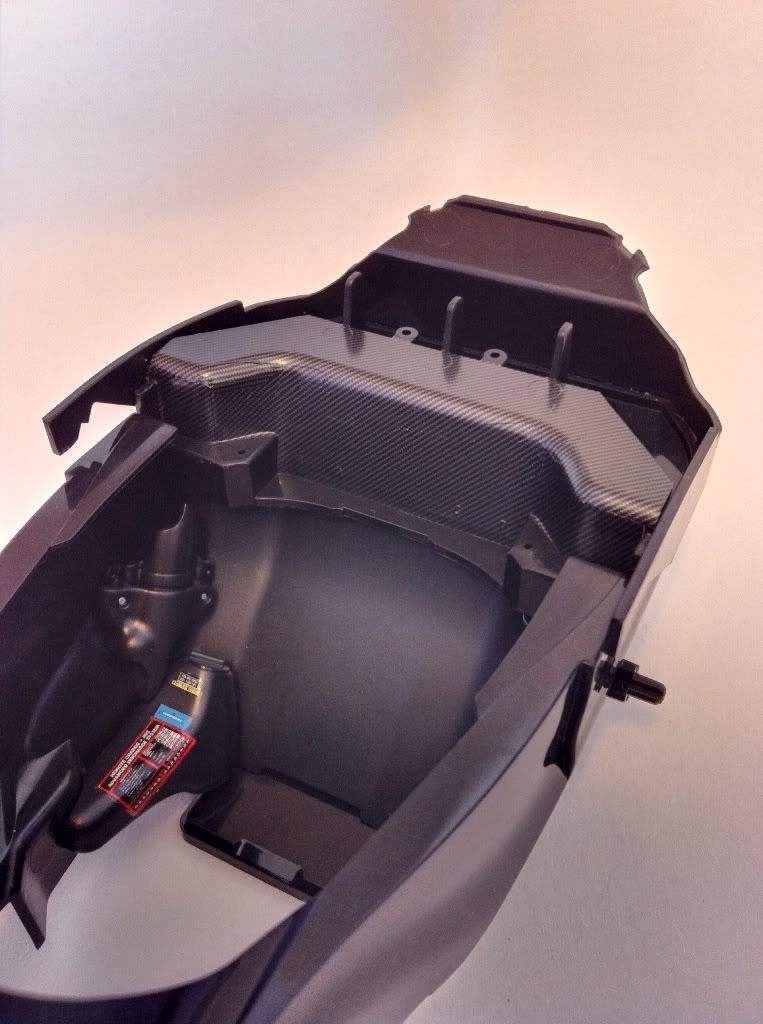 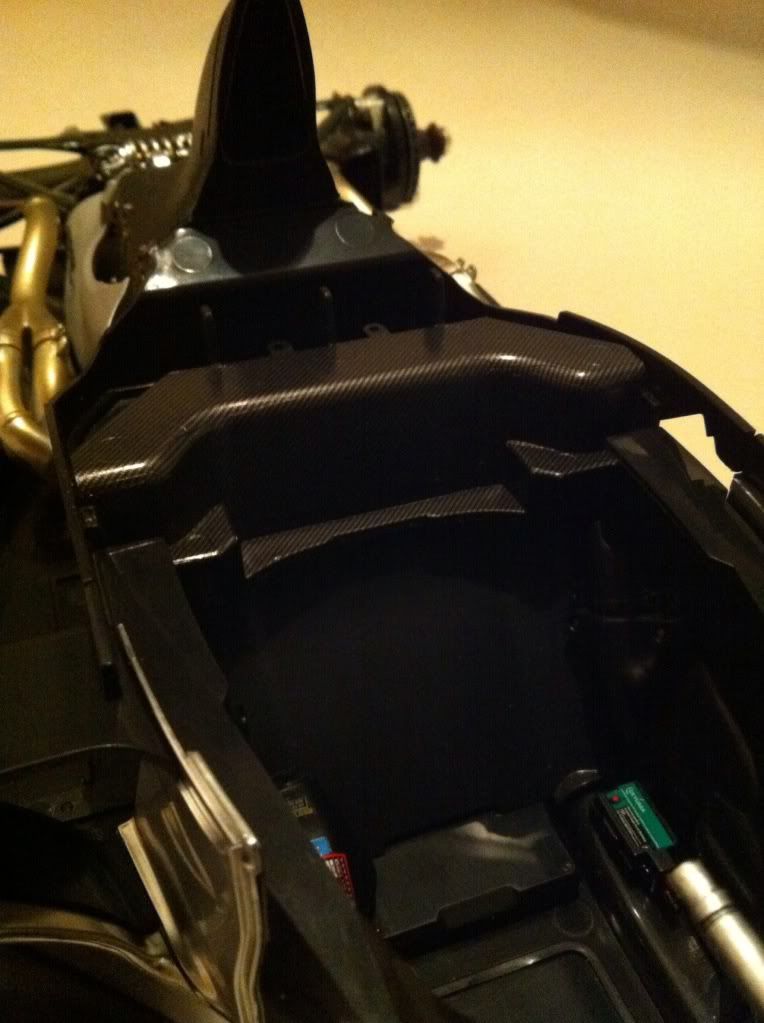 And then when the monocoque went on it looked pretty effective. 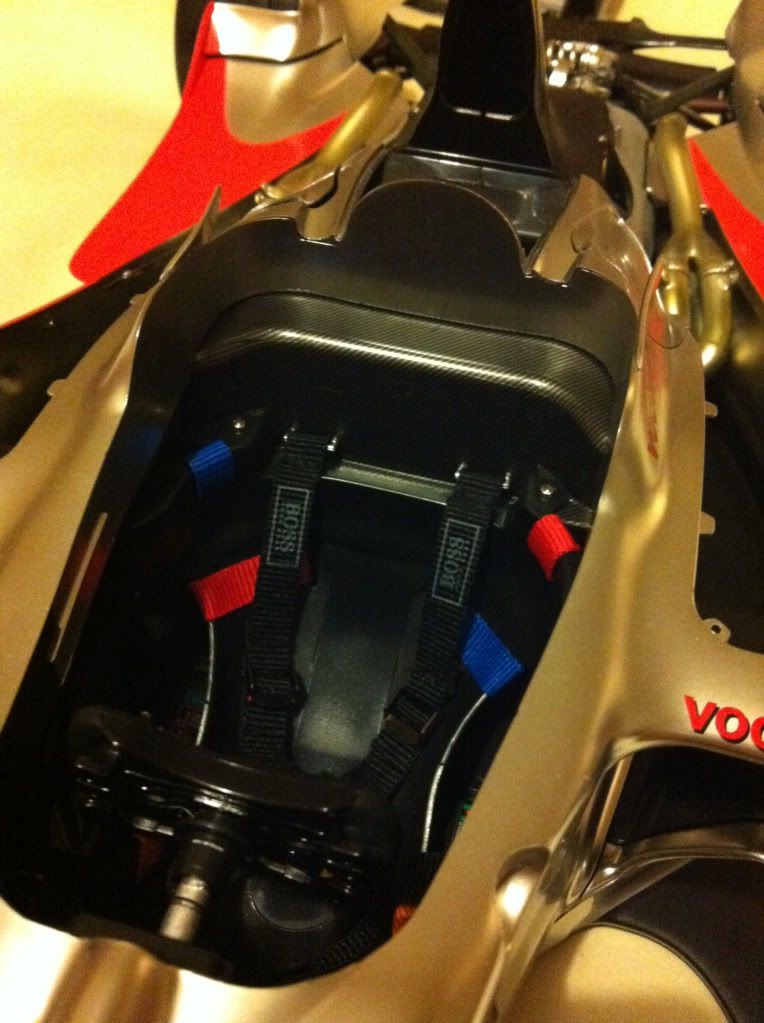 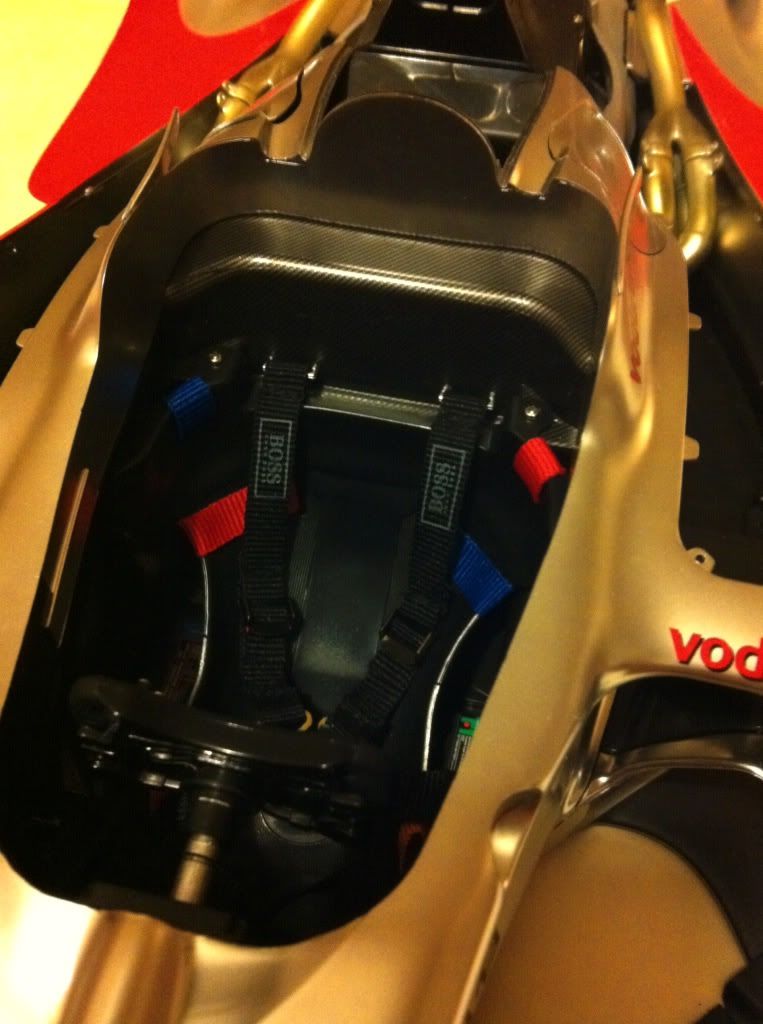 And with the head protector added...... 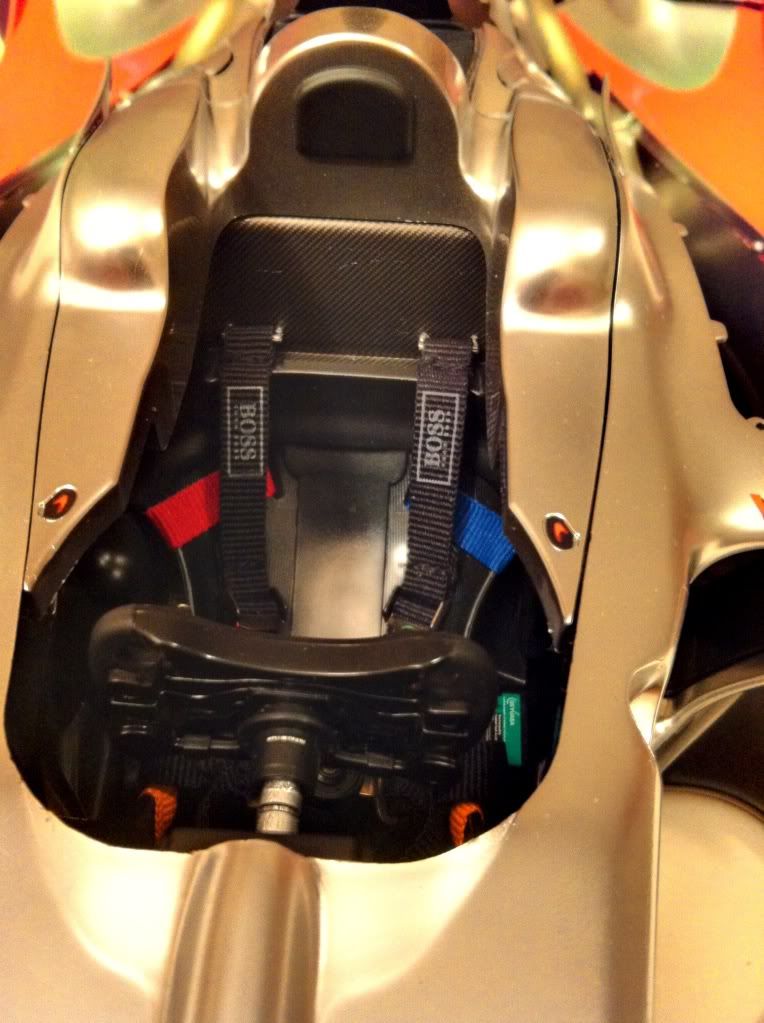 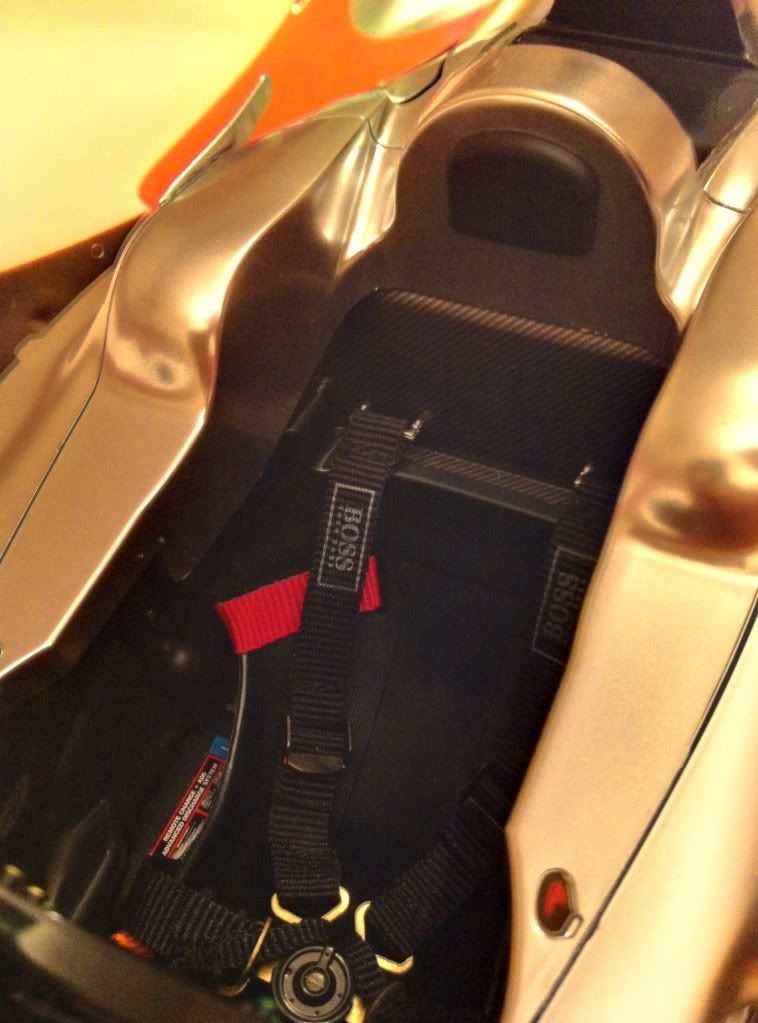 I also added some to the front cockpit where the instrument panel goes.... Cutting the template was a nerve wracking experience as i didn't want to damage the paintwork.. 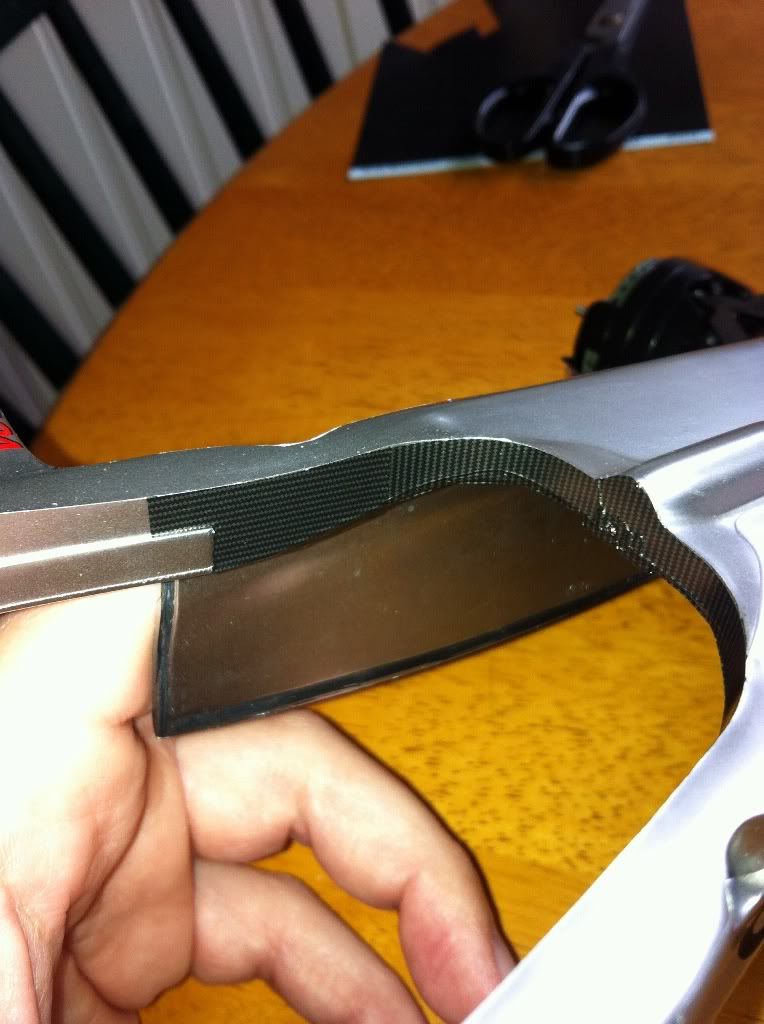 I would have gone all the way round (still might) but my nerves were jangling a bit..:-) But it looks pretty smart with the panel on and the head protector in place..  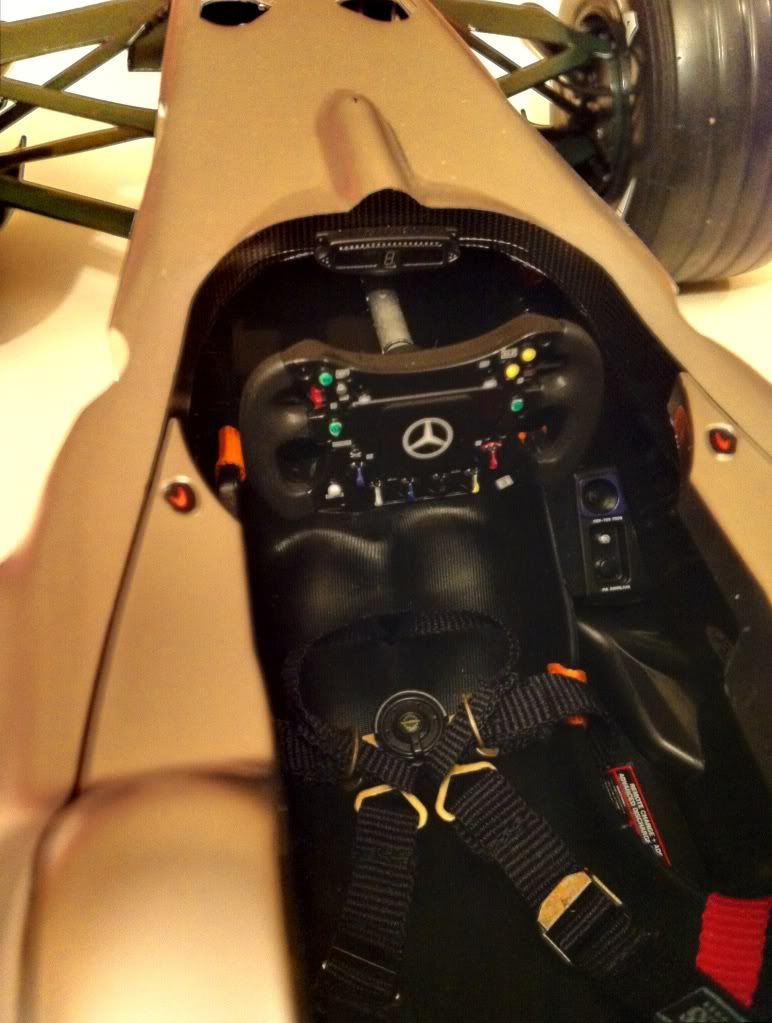 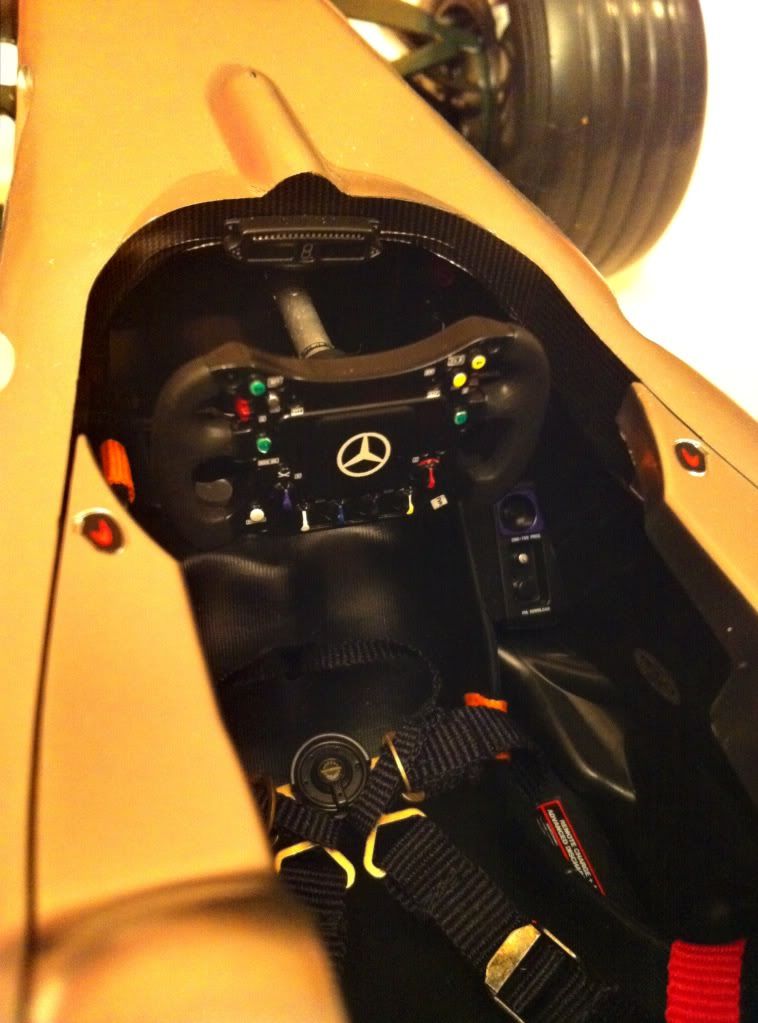 Hope you all like it... :-) Chris
|
|
|
Rank: Pro  Groups: Registered
Joined: 05/09/2012 Posts: 198 Points: 596 Location: Location
|
Looks excellent I do like the carbon extras! I too had the same problem with the fuel cover things. I bent the pins a tad and then they slotted home very nicely. I also got hold of the same weathering kit for my exhausts, as looking at pictures of the mp4-23 none showed any clean chrome or silver exhausts, even in the magazine that comes with the kit. The bits of them that can be seen show a copper/bronze looking exhaust, so i dabbed some tissue in some bronze/copper paint and rubbed it over the exhausts and carried on gently rubbing until it was touch dry. This meant in effect the exhausts have a 'lite dusting' of a coppery/bronze colour. I then used the weathering kit, and used my fingers to rub this in even more until i had a nice effect :-) Ive also noted the front pushrods on the real car have some silver bits on them that arent replicated in the kit, so ive been hunting round for somthing that mite give the same 'look'. Ive settled on some small strips of the silver foil from a club biscuit and i intend gluing it round the top part of the front pushrods.....time will tell if it looks right!!
|
|
|
Rank: Beginner Level 2 Groups: Registered
Joined: 22/10/2012 Posts: 10 Points: 33 Location: SCUNTHORPE
|
Hi Chris
I do like the extra carbon fibre detail.
How did you get the shape so accurate around the top of the monoque?
|
|
|
Rank: Semi-Pro Level 1 Groups: Registered
Joined: 24/04/2012 Posts: 53 Points: 149 Location: Kent
|
Hi TS58
You will probably have noticed that its made of three sections. One on the front and two on the sides.. Because the carbon fibre runs in different directions.
It's done with masking tape and a very sharp Stanley blade, at a shallow angle so as not to damage the paint... And a very steady hand..:-)) A good tip is to hold the tape that is going to be cut off up and hold it tight. That should cut down on the possibility of the tape tearing..
Also, if you are going to attempt it, do it before you attach the monocoque to the chassis because it would be very tricky to do otherwise..
|
|
|
Rank: Pro Groups: Joined: 24/08/2009 Posts: 48,827 Points: -13,348
|
Hello Chris,
You've done a great job on the carbon effect mate and it looks superb!! Well done!!
Little tip for you to save the risk of damaging that silver paint - if you just lay a piece of paper against the surface that you want the carbon to cover then get a softish (2B) pencil and carefully rub it on its' side across the whole of the area you will find that the edges of the cockpit moulding will leave darker lines than the flat bits, a bit like the age old method of taking a 'rubbing' of raised detail on plaques with wax crayons, etc, which I remember doing when I was at school!! Hope you understand what I mean mate??
Once you have the pencil rubbing just cut out the shape with scissors then flip it over so that it is a 'negative' shape of what you want and then lay it on the BACK of the carbon decal sheet, draw or cut around the template and hey presto, when you turn the decal paper right side up, you will have exactly the right shape to apply straight to the area you wish to cover!! If it is a complex shape with lots of curves, then just do it in sections and build it up that way which looks better anyway, as you say, and far more realistic!!
It works for me and at least there is nothing sharp to damage the paint work.
P.S. - You can buy solid sticks of graphite (the stuff inside a pencil) that looks like a normal pencil but without the wood. They are available in all grades from 9H (Very hard) to 9B (Very soft) from any Art shop or good Stationers and they are even better than using a plain pencil on this sort of job!!
Hope that helps??
Kev
|
|
|
Rank: Semi-Pro Level 1 Groups: Registered
Joined: 24/04/2012 Posts: 53 Points: 149 Location: Kent
|
Ohhh yeah....:-)) didn't think of that way. Much safer than my method... Top man !!!! :-))
|
|
|
Rank: Pro Groups: Joined: 24/08/2009 Posts: 48,827 Points: -13,348
|
Glad to help Chris!!
Forgot to mention it above but when you are drawing or cutting around your 'Negative' shape on the back of the carbon decal sheet, MAKE SURE that you pay attention to the printed side of the carbon sheet by laying the template down with the weave of the carbon running in the direction that you want it on the finished piece, otherwise it may come out in all sorts of strange and random directions!!
Kev
|
|
|
|
Guest
|
 US
US

