|
|
|
|
Hi Bernd Brilliant work as ever! I love the wooden handrail too.  I've still got this section to do on mine, I just had enough room to fit the gun tackle in the corner, (the 'blocks' are actually touching the cabins) but I think my problem is going to be finding enough room to fit the steps in between the two guns, I exactly followed the positioning of the gun ports on the kit plywood sides which I replaced with planking but it is a very tight fit, (probably should have ignored the kit and re-measured the dimensions from the proper plans - hindsight is always 20/20!) Keep 'em coming and Merry Christmas to you all! Best Wishes Robin First wooden ship: The Grimsby 12 Gun 'Frigate' by Constructo Second: Bounty DelPrado Part Works Third: HMS Victory DelPrado Part Works 1/100 scale Diorama of the Battle of the Brandywine from the American Revolutionary War Diorama of the Battle of New Falkland (unfinished sci-fi), Great War Centenary Diorama of the Messines Ridge Assault Index for the Victory diary is on page 1
|
|
|
 Rank: Vice-Master     Groups: Registered
Joined: 13/01/2012 Posts: 605 Points: 1,630 Location: Bucks
|
Very nicely built and great attention to detail. Love the cannon wheels and that handrail is a piece of art  . HMS Surprise
HMS Snake
HMS Bounty
HMS Royal Caroline
HMS Victory rebuild
HMS Supply
|
|
|
 Rank: Vice-Master        Groups: Registered
Joined: 17/11/2012 Posts: 863 Points: 2,608 Location: Gohfeld (Germany)
|
Hi Bernd! A nice work with superb detail modifications! Perfect job! Regards, Bernd
|
|
|
 Rank: Pro Groups: Registered
Joined: 31/12/2011 Posts: 123 Points: 369 Location: Graz, Austria
|
Thank you, Robin, moriarty, and Bernd! Robin, you are doing a great job with your Victory, which is even smaller. On my Victory, the relative positions of cabin walls, ladders, and adjacent gunports isn't quite correct, if compared to the original. There simply isn't enough room under the ladder. Regards, Bernd
|
|
|
|
|
Amazing Bernd, love the detail on the ladders and bullworks..... All being mentally noted for when I get round to starting my Vic.... May be picking up my pension first though....  ... Keep posting.... Regards Alan
|
|
|
 Rank: Pro Groups: Registered
Joined: 31/12/2011 Posts: 123 Points: 369 Location: Graz, Austria
|
Thank you, Alan! Meanwhile I placed the second carronade on the fore deck. 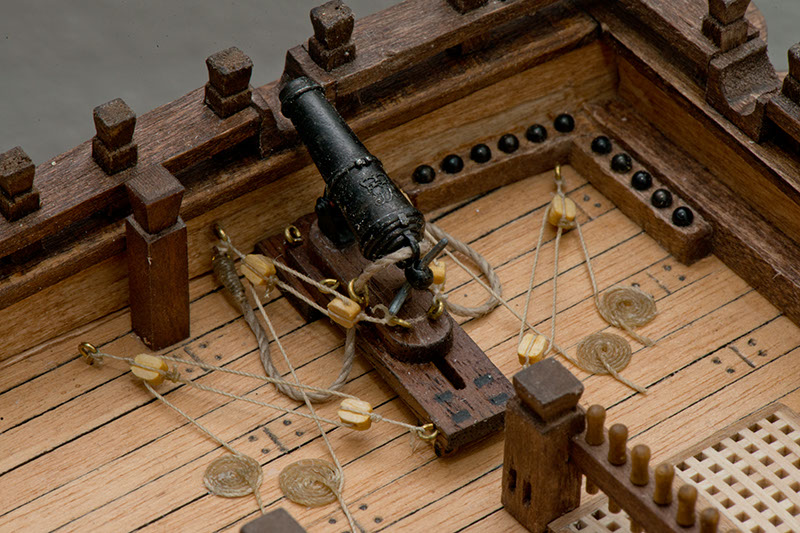 But now the rigging style of the guns on the quarter deck was not in line with the rigging of the carronades. So I changed it to the new style - quite some fiddling, because everything had to be done "in situ". 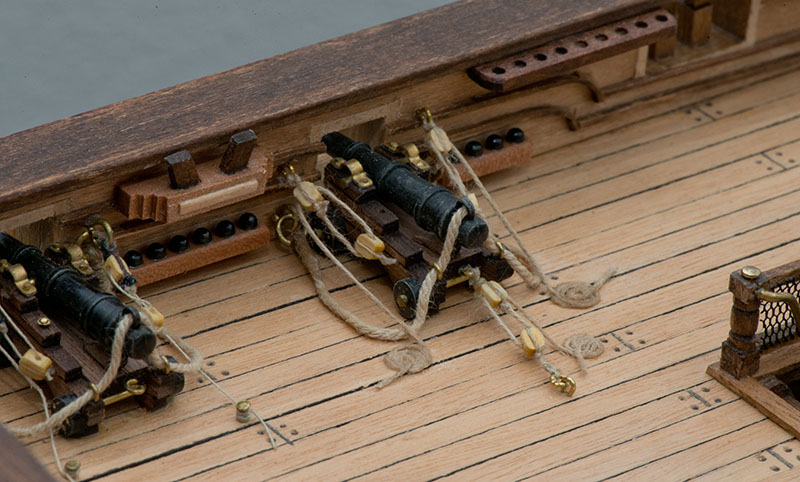 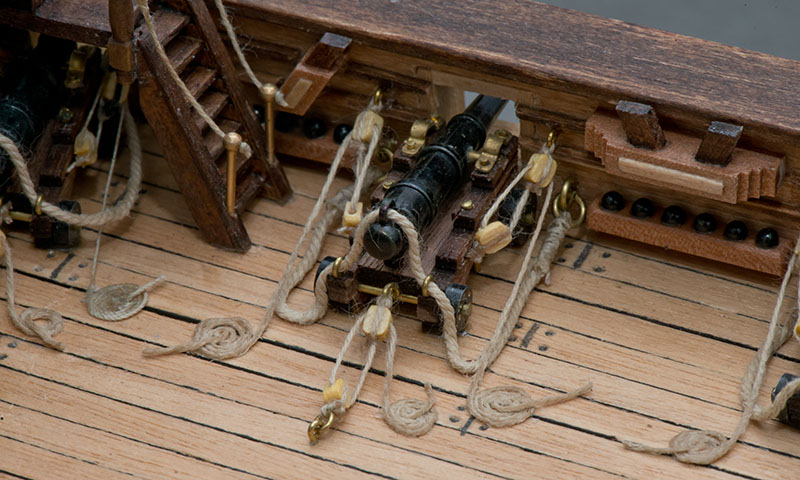 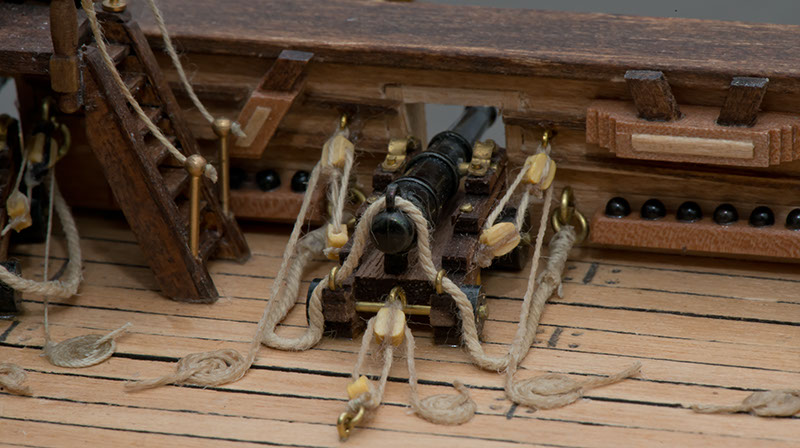 And this is the current state of the quarterdeck 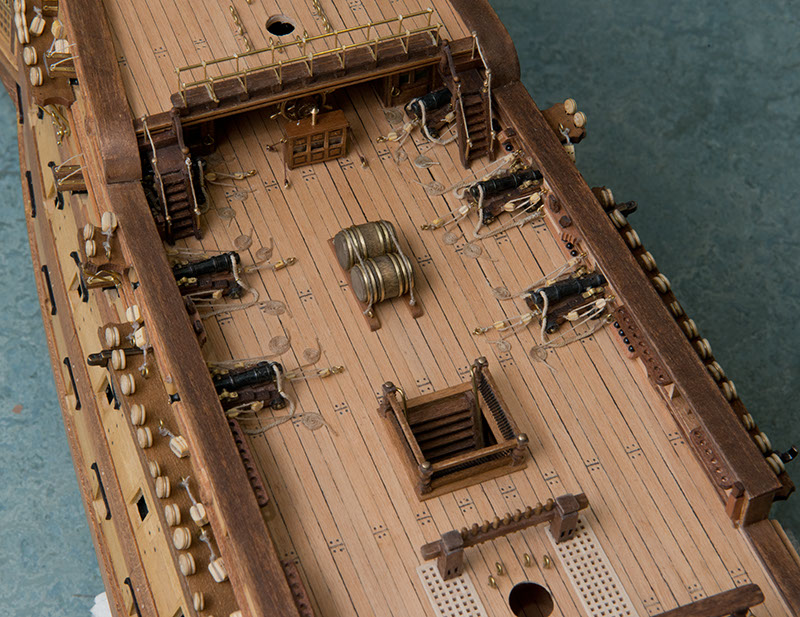 Kind regards, Bernd
|
|
|
 Rank: Master       Groups: Registered
Joined: 08/07/2010 Posts: 1,036 Points: 3,086 Location: Thetford, Norfolk, UK
|
I'm lost for words Bernd, what an amazing build.
Can you tell us the technique you used for coiling the ropes on the quarterdeck cannons please
David
|
|
|
 Rank: Pro Groups: Registered
Joined: 31/12/2011 Posts: 123 Points: 369 Location: Graz, Austria
|
David, the technique for coiling the rope is essentially described in the official build diary (Issue 14), see here: http://forum.model-space.co.uk/default.aspx?g=posts&t=731But now this has to be done directly on the deck. I use only a small piece of double-sided tape that I place next to the cannon. The piece of tape isn't much larger than the coil. Then I lay out the coil on the tape with the help of tweezers, millimeter by millimeter. This might not work with a rope that is too stiff. I first tried with a waxed rope (which is not so hairy), but the coil always sprung up again. With the rope provided with the kit it can be done. Then soak the rope in PVA glue and when dry, try to grab the coil with tweezers and slowly pull it off the tape. This is tricky, because it is easy to destroy the coil if you apply too much force. When you have separated coil and tape, remove the tape from the deck and glue the coil in place. (Sorry if the explanation isn't clear, I am not used to describe these things in English) Greetings from Austria, Bernd
|
|
|
 Rank: Master       Groups: Registered
Joined: 08/07/2010 Posts: 1,036 Points: 3,086 Location: Thetford, Norfolk, UK
|
Not at all Bernd, the explanation is very clear. Thank you for that. I have the same problem in that the work has got to be completed 'in situ' as I've already fitted the cannons, but seeing your work, I thought I must have a go at that  Thanks again and happy building David
|
|
|
 Rank: Semi-Pro Level 1  Groups: Registered
Joined: 22/07/2012 Posts: 69 Points: 144 Location: Belgium
|
Oh man this is some SWEET build. All that detail!! [Love]
Keep those pictures coming :)
|
|
|
 Rank: Pro   Groups: Joined: 04/05/2012 Posts: 362 Points: 1,089
|
That`s fantastic Bernd, great job 
|
|
|
 Rank: Vice-Master        Groups: Registered
Joined: 17/11/2012 Posts: 863 Points: 2,608 Location: Gohfeld (Germany)
|
Hi Bernd! A nice and detailled work, well done! Regards, Bernd
|
|
|
 Rank: Super-Elite       Groups: Registered
Joined: 16/08/2010 Posts: 2,771 Points: 8,344 Location: Brighton
|
Hi bernd. Really fantastic build. Keep the pictures coming ian  Current builds.Hachettes build the bismark,HMS Victory, HMS Hood.
Finished Builds Corel HMS Victory cross section.
|
|
|
 Rank: Vice-Master     Groups: Registered
Joined: 19/03/2010 Posts: 602 Points: 1,679 Location: Lincs
|
Bloody good build there mate - well done ! You do not need a parachute to skydive. You only need a parachute to skydive twice.
Built:
Golden Star, English Brig. RMS Titanic. (Academy 1/400 Centenary Anniversary Edition) Revell-Monogram 1/48 B-29 Superfortress 1:8 Baron von Richthofen's Fokker Tri-plane. HMS Victory. Nelsons Flag Ship. Sultan Arab Dhow. Artesania Latina Carmen II. The Battleship Yamato. Model Airways Wright Flyer 1:16 Scale. Trumpeter Bismarck 1/200. HMS Sovereign of the Seas. The Black Pearl.
Building:HMS Surprisel. Hatchette U96. Soleil Royal.
|
|
|
 Rank: Pro Groups: Joined: 24/08/2009 Posts: 48,827 Points: -13,348
|
Hi Bernd,
do you have some pictures from your rigging and sails ?
or haven't you reached that point yet, I'm curious about
your recent progress.
Adri Seidel Holland
|
|
|
 Rank: Pro Groups: Registered
Joined: 31/12/2011 Posts: 123 Points: 369 Location: Graz, Austria
|
Hi shipmates, thanks for all the comments, I'm glad you like it!  Yes, Adri, I have started rigging already and will show some pics soon. I'm sorry that I'm late with this, but presently I don't have much time left to spend on the forum  . Best regards, Bernd
|
|
|
 Rank: Pro Groups: Registered
Joined: 31/12/2011 Posts: 123 Points: 369 Location: Graz, Austria
|
Hi, all! I'm indeed a little behind with my posts. Let me try to catch up a little: Here is how I did the chainwales. I drilled some additional holes into the slits in front side of the wales and bent the wire around the deadeyes with long ends fitting into these holes. In that way, stability is improved and no glue is necessary to fix the deadeyes to the chainwales.  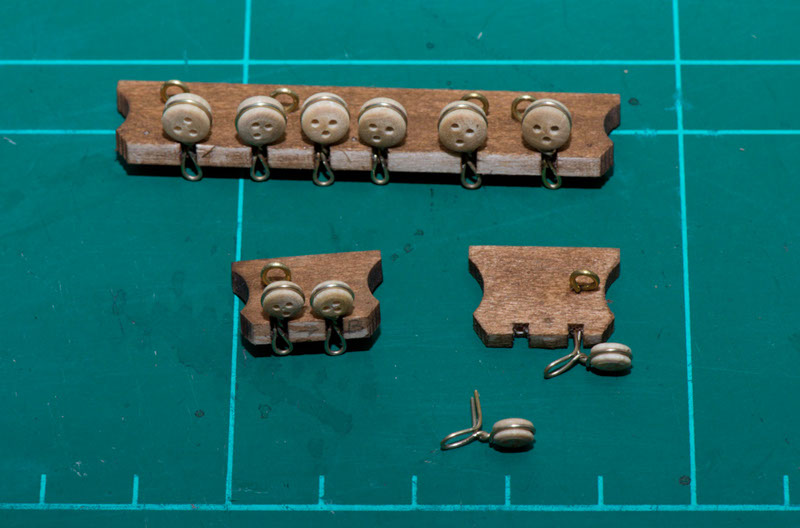 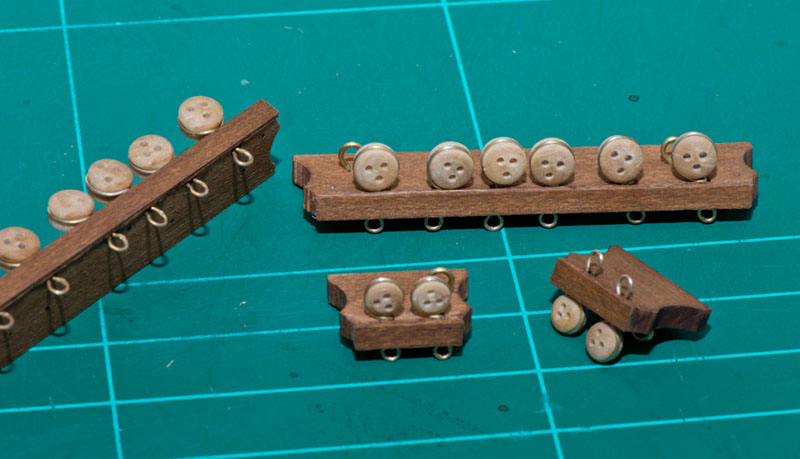 It is not quite easy to figure out the correct positions of the chainwales, here I followed closely the official build diary 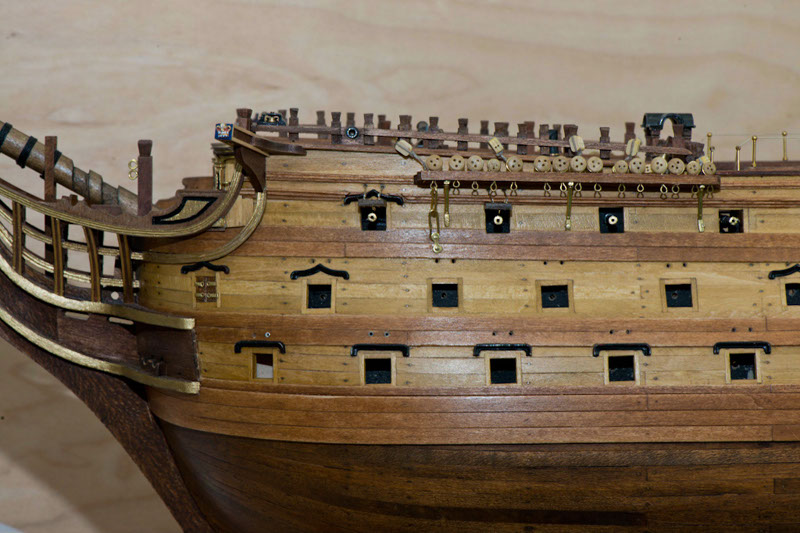 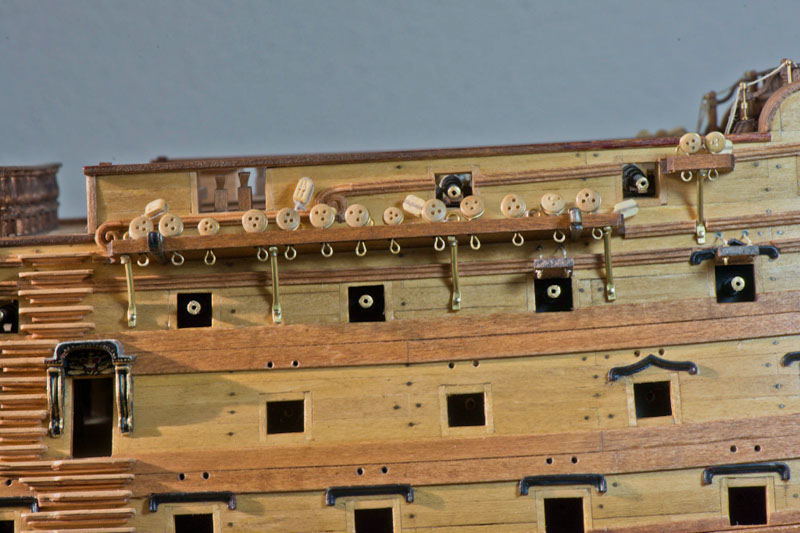 Here are the the mizzen-chainwales of the original. 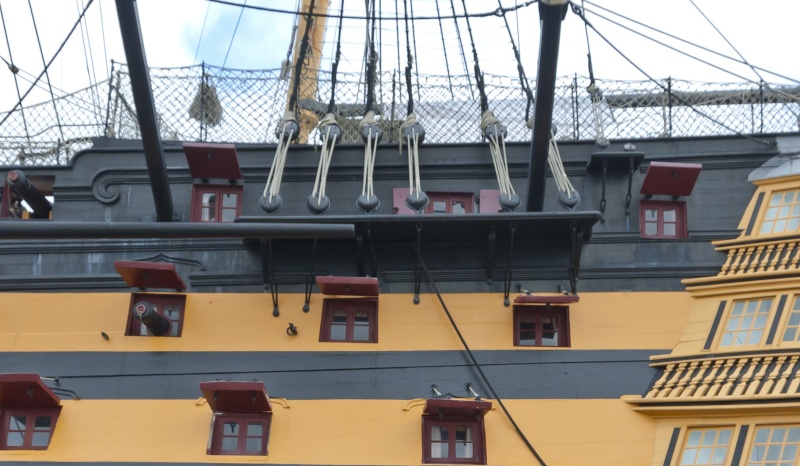 The spacing between the deadeyes closely matches the positions of the gunports. In the model, the small scale makes this more difficult. I found it easier to exchange the mizzen chainwales and place them as shown here (i.e., as in the magazine but different from Tomick's build and the original). 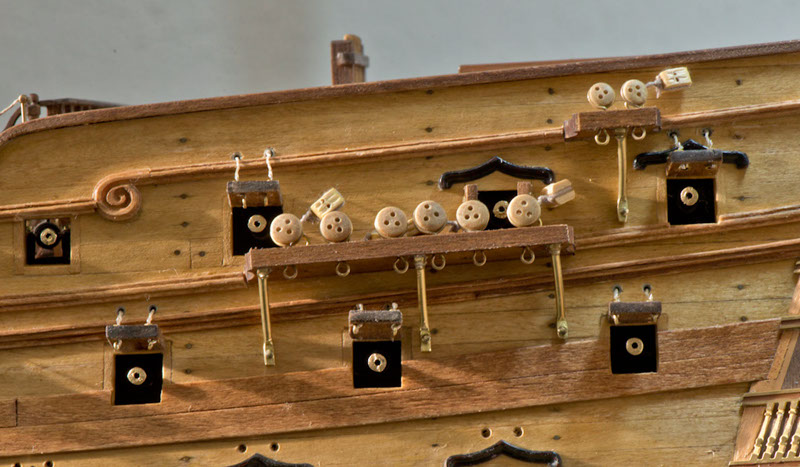 Next step was to complete the chainwale rigging by attaching straps: 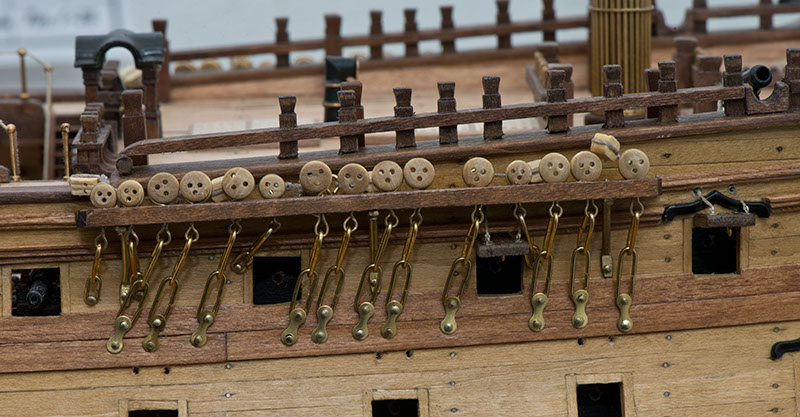 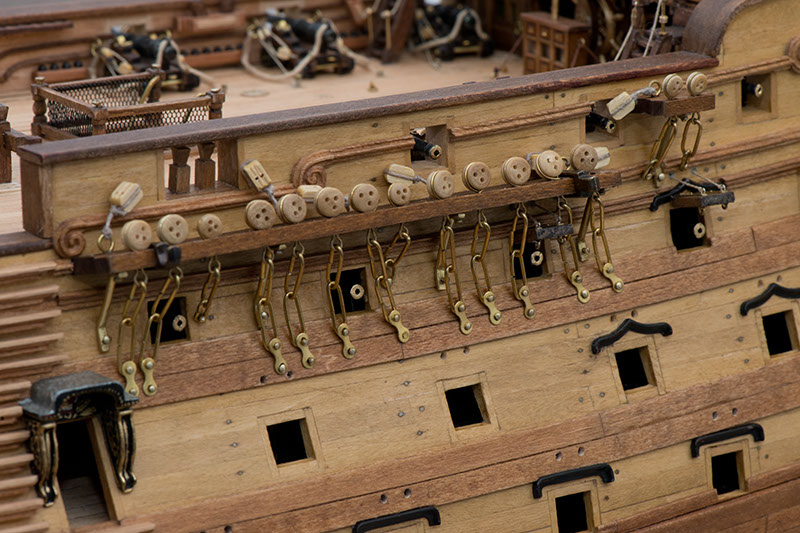 And here again the mizzen chainwale on starboard. Not quite correct, but, as mentioned above, it fits well to the positions of the gunports on my model 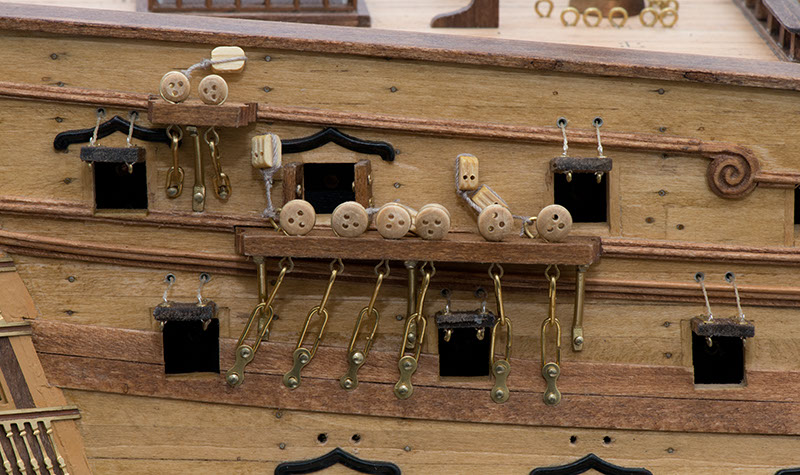
|
|
|
|
|
Very nice work there Bernd. Looking great and love the tip on drilling additional holes in the side of the chainwales...   . that one is banked for future use....   Keep up the great work you do and keep those images coming.....   Regards Alan
|
|
|
 Rank: Beginner Level 2 Groups: Registered
Joined: 11/04/2013 Posts: 14 Points: 42 Location: South Africa
|
Wow, your work is amazing! This must be the quickest I have bookmarked a page in a long time!
I am on issue 20 and got my planking ahead of me, but looking at your build I can't wait to come back and to follow your tips!
Cant wait to see more pictures as you progress! Good luck!
|
|
|
|
|
Your build is looking stunning J “Whenever you find yourself on the side of the majority, it is time to pause and reflect.”
-Mark Twain
|
|
|
|
Guest (6)
|