|
|
|
|
Coming on a treat there Admiral..... planking next, that should get your frustration levels up.....  ... Keep up the good work.. Regards Alan
|
|
|
 Rank: Pro    Groups: Registered
Joined: 24/09/2012 Posts: 491 Points: 1,452 Location: London
|
Gandale wrote:Coming on a treat there Admiral..... planking next, that should get your frustration levels up..... ... Keep up the good work.. Regards Alan ahah thanks, planking has always been a bit of a bother, but also fun watching the ship take shape :) Processing - Progressing
Previous builds: HMS Victory
Current build: HMS Sovereign of the seas
|
|
|
Rank: Pro Groups: Registered
Joined: 24/09/2012 Posts: 491 Points: 1,452 Location: London
|
So we move on to planking of the hull I've made a small change, i added some support to certain areas, just because if the wood is harder to cut in those places i dont want the strip to fall back into the gun ports, the support isn't perfectly fitted but thats okay it will stay where it is and does the job. Layed the planks in place, left the nails in place at some ribs, i used brass nails so they'll be easy to file down. The Stern under the galley looks a bit messy, had problems with the filler but i've gotten some new filler now, but i assure it you it is very smooth. 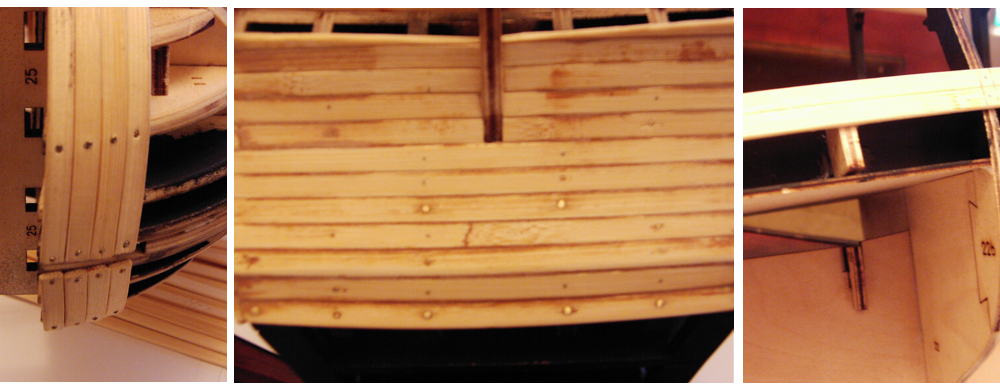 I've moved onto some lighting, 3mm orange LEDs placed around the ship with a 9v battery, possibly more areas too.. there's going to be a lot of wires.. and soldering is very testing to do but it should look great if it all works out. Updates soon. Processing - Progressing
Previous builds: HMS Victory
Current build: HMS Sovereign of the seas
|
|
|
|
|
All looking very good there Admiral... nice work..
Regards
Alan
|
|
|
Rank: Pro Groups: Registered
Joined: 24/09/2012 Posts: 491 Points: 1,452 Location: London
|
Thanks very much Alan :) Processing - Progressing
Previous builds: HMS Victory
Current build: HMS Sovereign of the seas
|
|
|
Rank: Pro Groups: Registered
Joined: 24/09/2012 Posts: 491 Points: 1,452 Location: London
|
Update on part of the lighting ive installed into the ship, the lights should be able to be seen from the third deck gratings, i've also realised other decks will have gratings which i may also add lighting too, i may draw up a diagram of places i'll be adding LEDS too, i dont think theres much need for fiber optics unless i choose to light lanterns. This is the look so far. 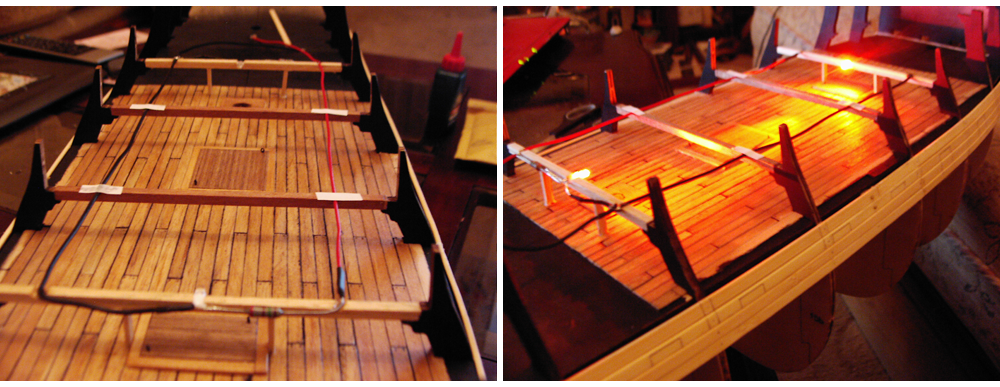 The wires stick out a bit but its not a big problem i'll just have to sand down certain parts of the underside of the third deck. LEDS look a bit bright but thats just the camera, its a fair intensity, not too low but not too high either. soldering is a pain, but if its somewhere where it wont be moved around it should work with only a bit of solder. thats all for now, thanks for viewing :) Processing - Progressing
Previous builds: HMS Victory
Current build: HMS Sovereign of the seas
|
|
|
|
|
Now that's impressive Admiral..... nicely done.  . Could you not notch the deck supports to accommodate the wiring, then brace them from below to give them the support they need..... This would prevent you having to sand or notch the underside of the decks...  Regards Alan
|
|
|
Rank: Pro Groups: Registered
Joined: 24/09/2012 Posts: 491 Points: 1,452 Location: London
|
Gandale wrote:Now that's impressive Admiral..... nicely done. . Could you not notch the deck supports to accommodate the wiring, then brace them from below to give them the support they need..... This would prevent you having to sand or notch the underside of the decks... Regards Alan Oh i did, but when i put the wires in place it looked like it was low enough in, it only sticks out by maybe 1mm or less, it shouldn't cause any problems but it would be preferable if it was perfect  Processing - Progressing
Previous builds: HMS Victory
Current build: HMS Sovereign of the seas
|
|
|
|
|
Hi AAS there is a guy lighting his vic and he made a framework that the wires are hidden in just an idea and if you've already seen it then you will know what im talking about regards Andy Current builds:-C57,Zero, Lamborghini Countach, Caldercraft HMS Agamemnon,Robi,R2-D2, MFH Cobra .
|
|
|
|
|
Admiral, the vic diary Andy is talking about belongs to 'Bameraam'... Think you would find this one helpful and impressive.... Hope this helps..
Regards
Alan
|
|
|
 Rank: Amateur Level 1  Groups: Registered
Joined: 02/09/2012 Posts: 36 Points: 58 Location: UK
|
Admiral Anti Spiral wrote:Issue 13 Parts for the ships launch Metal parts 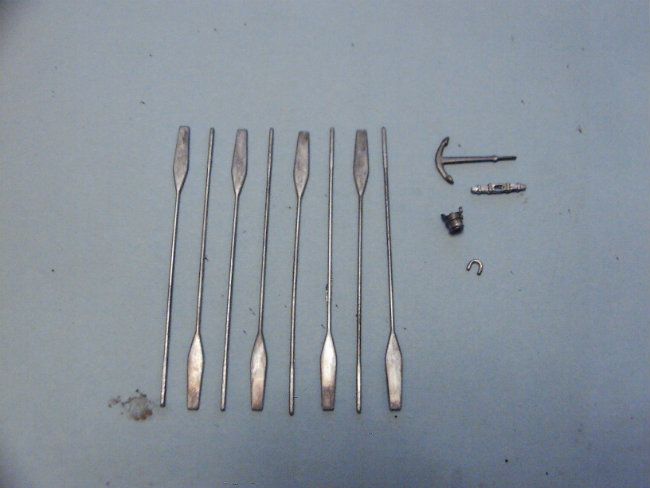 Wooden parts  Stuck the parts to some white tac, before that i put the oars in a wooden 'jig', simply cut some gaps in a strip of wood and stuck them in. Glued the handle of the bucket to a tooth pick to paint. 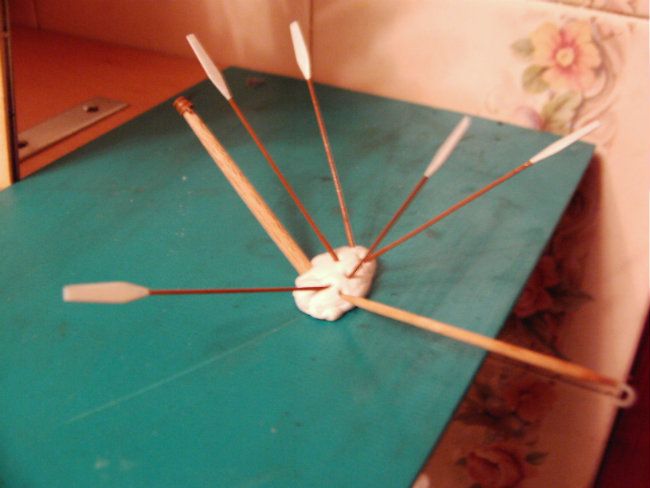 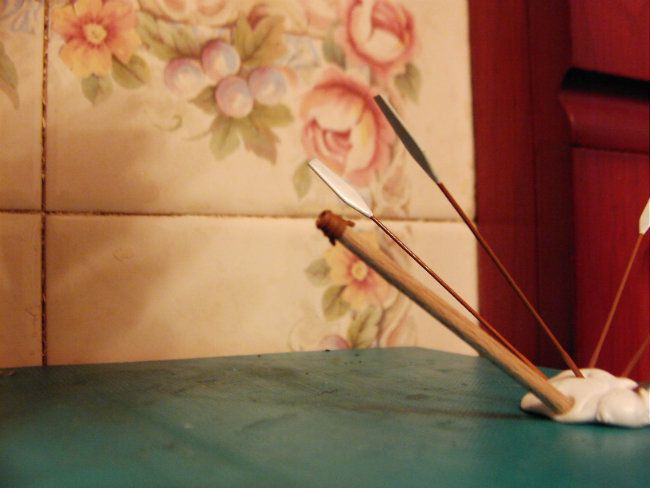  Same with the anchor, used some tweezers and a tooth pick 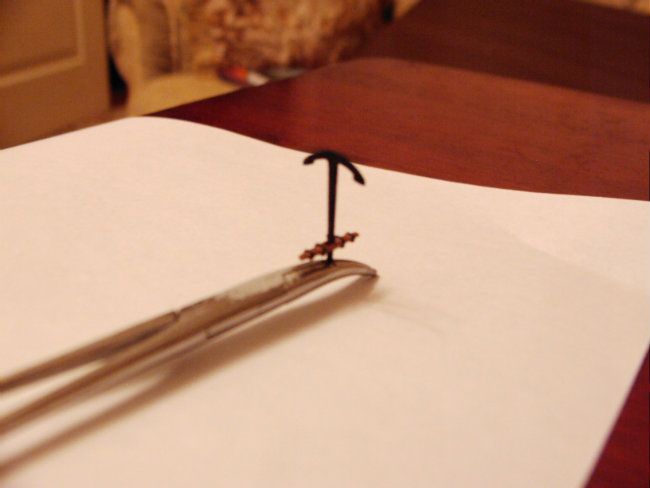 (apologies for the blur) Hi, Your build looks fantastic, What shade of brown are you using for the oars and bucket. Thanks Baz
|
|
|
Rank: Pro Groups: Registered
Joined: 24/09/2012 Posts: 491 Points: 1,452 Location: London
|
Thanks guys, i've had a look at Bameramms diary in the past, its very impressive and useful :) the wires will shouldn't be visible, though im not sure which side i'll want the wires sticking out, if i even choose to have them sticking out, might be possible to build some kind of housing for a battery on the side of the keel, im sure its possible just some designing and thinking will be needed Processing - Progressing
Previous builds: HMS Victory
Current build: HMS Sovereign of the seas
|
|
|
Rank: Pro Groups: Registered
Joined: 24/09/2012 Posts: 491 Points: 1,452 Location: London
|
Thanks bazas, im not particular sure on the name, its a kind of leather colour from humbrol Matt 62. Processing - Progressing
Previous builds: HMS Victory
Current build: HMS Sovereign of the seas
|
|
|
Rank: Amateur Level 1 Groups: Registered
Joined: 02/09/2012 Posts: 36 Points: 58 Location: UK
|
Admiral Anti Spiral wrote:Thanks bazas, im not particular sure on the name, its a kind of leather colour from humbrol Matt 62. Thanks
|
|
|
Rank: Pro Groups: Registered
Joined: 24/09/2012 Posts: 491 Points: 1,452 Location: London
|
Update on lighting. I've build a small area to hold a 9v battery, its nothing special, just to keep the battery in place using some spare parts. I've made this battery area here because it will be barely visible when the boat is sitting flat, im not sure if i'll try and cover the area with some kind of hatch or removable cover but once the lower hull is planked (leaving a gap for the battery) it will be very hard to spot. 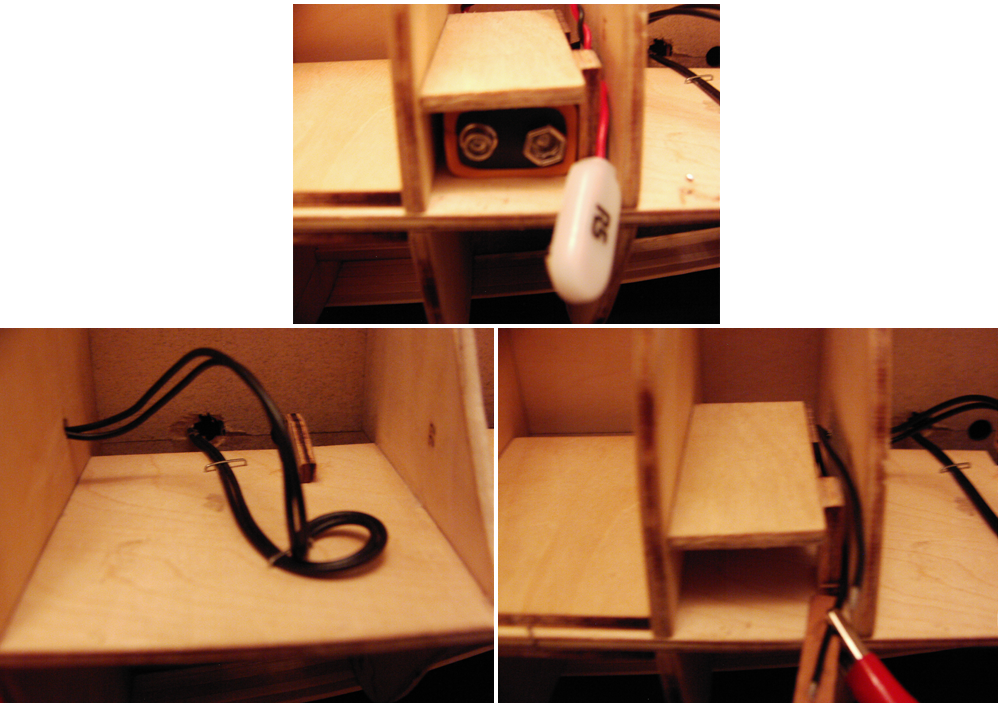 I've left the wires here exposed which i will later try and cover with hot glue or just some kind of filler, so that if i want to add more lights later i can simple connect it to the spots.  But now i've come across, something which isn't a big problem but would be preferable if there was another way, im thinking about adding a switch because taking the battery out a couple times or simple disconnecting the battery might be a pain, any ideas on where i could add a switch? im not really a big fan of wires sticking out.. though seeing as the base is pretty flat it might be possible to have a switch sticking out barely visible. Processing - Progressing
Previous builds: HMS Victory
Current build: HMS Sovereign of the seas
|
|
|
Rank: Pro Groups: Registered
Joined: 24/09/2012 Posts: 491 Points: 1,452 Location: London
|
Side planking is done for now, will carry on moving down when more information is available on how, though i dont think it matters how you lay the planks, as long as the finish is smooth outer shell, i've seen in the italian forum they simply lay the bamboo strips as they are, quite impressive. though for now i will be starting from the base up.  Front shot, planking is slightly 'clinker' but it should be fine when sanded down and filled.  Here are some shots of the back with the lighting, lighting seems a bit strong though we'll have to see when we get more of the parts, if it is too bright i'll have to get some translucent material and cover the areas (for example galley windows) 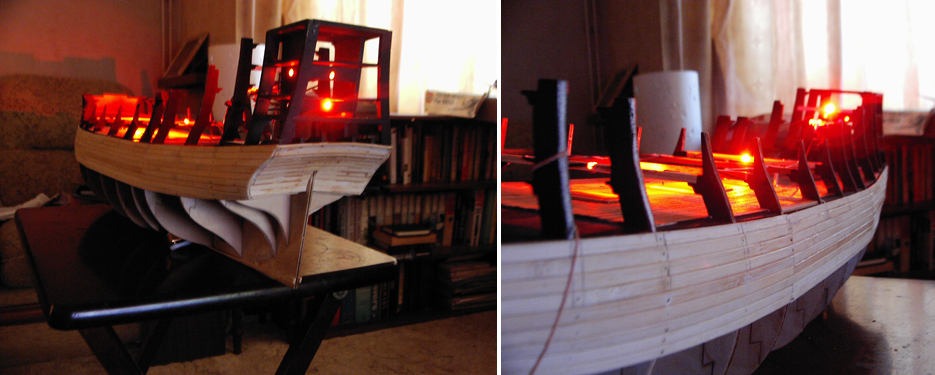 Processing - Progressing
Previous builds: HMS Victory
Current build: HMS Sovereign of the seas
|
|
|
Rank: Pro Groups: Joined: 24/08/2009 Posts: 48,827 Points: -13,348
|
Well done and looking really good
|
|
|
|
|
Progressing very nicely Admiral, really starting to take shape now....
Regards
Alan
|
|
|
|
|
Hi Admiral looking great! I was thinking about your adding a switch problem, I have no idea of the deck layout on the Sovereign but I wondered, does she have a capstan on the main deck? if so you could fit the capstan axle with a thin brass bolt down through the deck with a brass contact arm underneath and a couple of wires to your battery. Turning the capstan would then be able to turn the lights on and off. Best of Luck Robin First wooden ship: The Grimsby 12 Gun 'Frigate' by Constructo Second: Bounty DelPrado Part Works Third: HMS Victory DelPrado Part Works 1/100 scale Diorama of the Battle of the Brandywine from the American Revolutionary War Diorama of the Battle of New Falkland (unfinished sci-fi), Great War Centenary Diorama of the Messines Ridge Assault Index for the Victory diary is on page 1
|
|
|
|
|
Nice work on the planking Current builds:-C57,Zero, Lamborghini Countach, Caldercraft HMS Agamemnon,Robi,R2-D2, MFH Cobra .
|
|
|
|
Guest
|
 US
US

