|
|
 Rank: Vice-Master     Groups: Registered
Joined: 13/01/2012 Posts: 605 Points: 1,630 Location: Bucks
|
Looks good Mo. Some of the embossed wood on mine seemed to be a bit short also and the curved was snapped so I just made up my own to fit and done away with the rest  HMS Surprise
HMS Snake
HMS Bounty
HMS Royal Caroline
HMS Victory rebuild
HMS Supply
|
|
|
 Rank: Pro  Groups: Registered
Joined: 17/03/2010 Posts: 301 Points: 941 Location: fife
|
wow, she is really coming along, your a credit to modellers, and one for a few of us to inspire to current builds
victory,endeavour,thermoplye,constitution
|
|
|
Rank: Vice-Master  Groups: Registered
Joined: 09/02/2012 Posts: 569 Points: 1,675 Location: Scotland
|
Thanks for your kind comments Alan, really new to all this, my big problem will be the rigging, I am not to bad at the building, cutting, filing, painting, shaping etc, but the rigging looks very hard to understand, Moriaity has been very good in giving my things to read etc, his build is FAB, Anyway I will plod on a see how it all goes, My build log is a year old, any day now.
Mo Mo
|
|
|
Rank: Vice-Master Groups: Registered
Joined: 09/02/2012 Posts: 569 Points: 1,675 Location: Scotland
|
|
|
|
Rank: Vice-Master     Groups: Registered
Joined: 17/11/2012 Posts: 863 Points: 2,608 Location: Gohfeld (Germany)
|
Hi Mo! As everytime I only can say, you had made a perfect job, congrats! Best Regards, Bernd
|
|
|
|
|
Superb work Mo, mouth watering......
Regards
Alan
|
|
|
Rank: Vice-Master Groups: Registered
Joined: 13/01/2012 Posts: 605 Points: 1,630 Location: Bucks
|
Flying now Mo, looking really good. Looking forward to see how you work the lettering. I found it a right *!£$*+@ to do    HMS Surprise
HMS Snake
HMS Bounty
HMS Royal Caroline
HMS Victory rebuild
HMS Supply
|
|
|
Rank: Vice-Master Groups: Registered
Joined: 09/02/2012 Posts: 569 Points: 1,675 Location: Scotland
|
As for the lettering, I think I will stick them on to a bit of tape, face side to the sticky bit, get the spacing s right, then glue the letters, then stick the tape on to the wood, once the glue dry,s I can remove the tape, sounds ok, but will it work, not going to do that for a while yet,
MoMo
|
|
|
Rank: Vice-Master Groups: Registered
Joined: 09/02/2012 Posts: 569 Points: 1,675 Location: Scotland
|
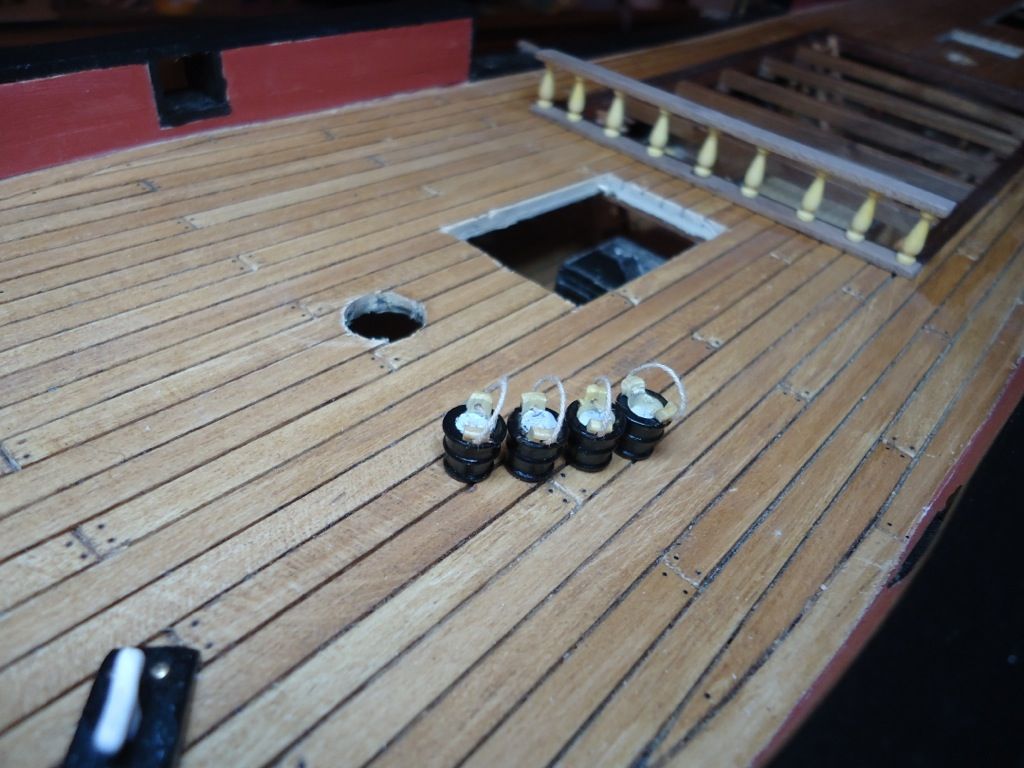
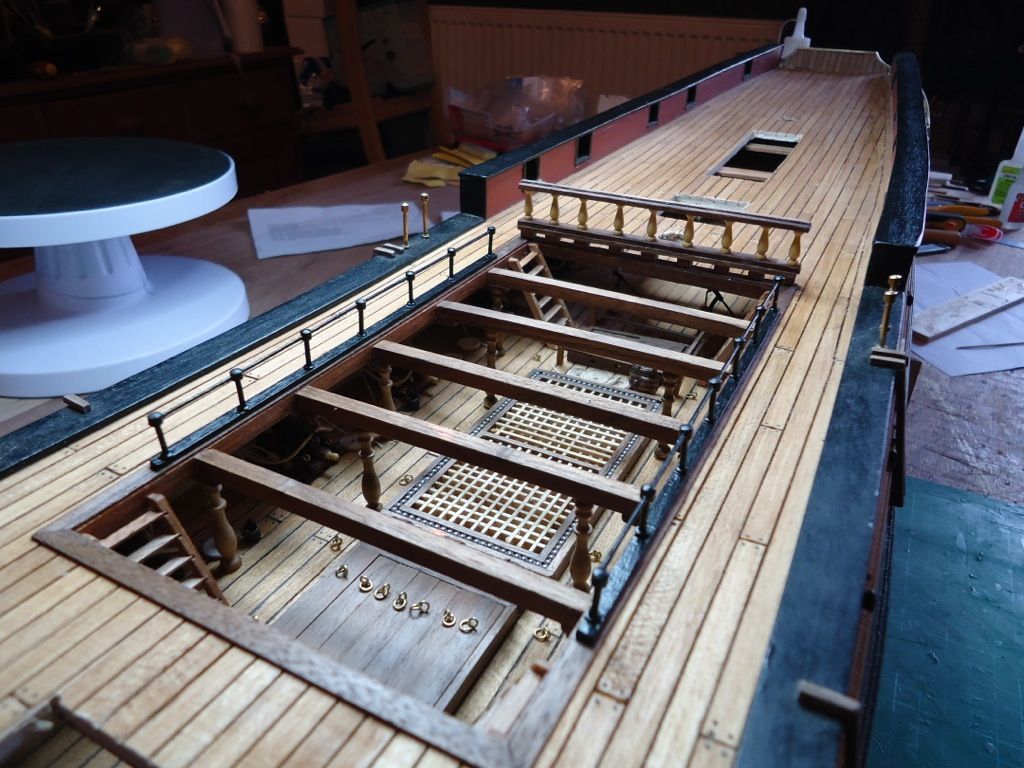
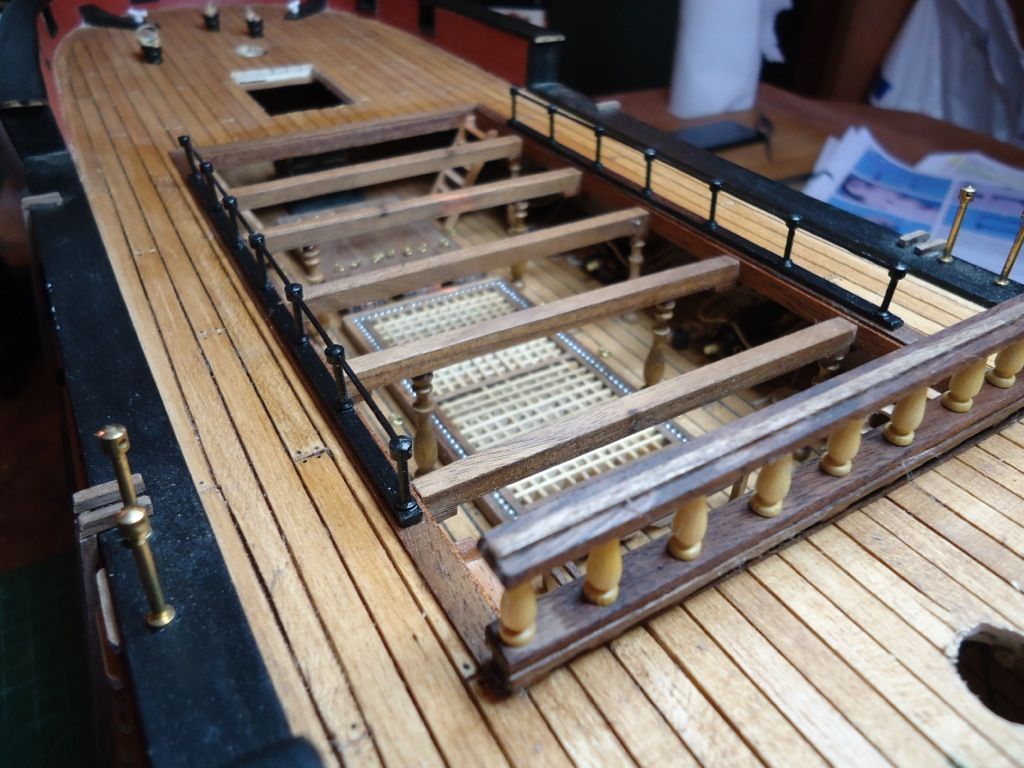
Decided to do the columns to the lower deck, as I have not finished down there yet, I bought 28 mm columns from Cornwall Model Boats, I needed them to be 30 mm but that was all I was able to get, Where needed I added a bit on the top to gain the extra height required.
My first job was to cut the 5 No cross beams, I cut the beams to length, and added a couple of cleats, One to each end to give the beams some support, this also helped with the extra height I was looking for.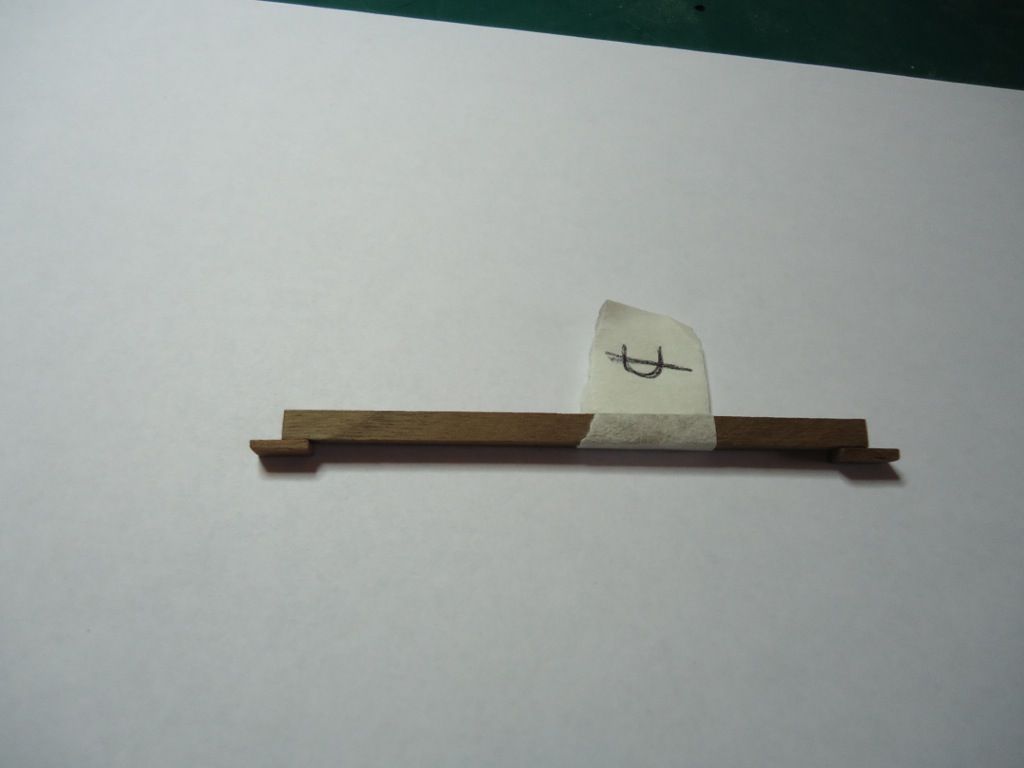 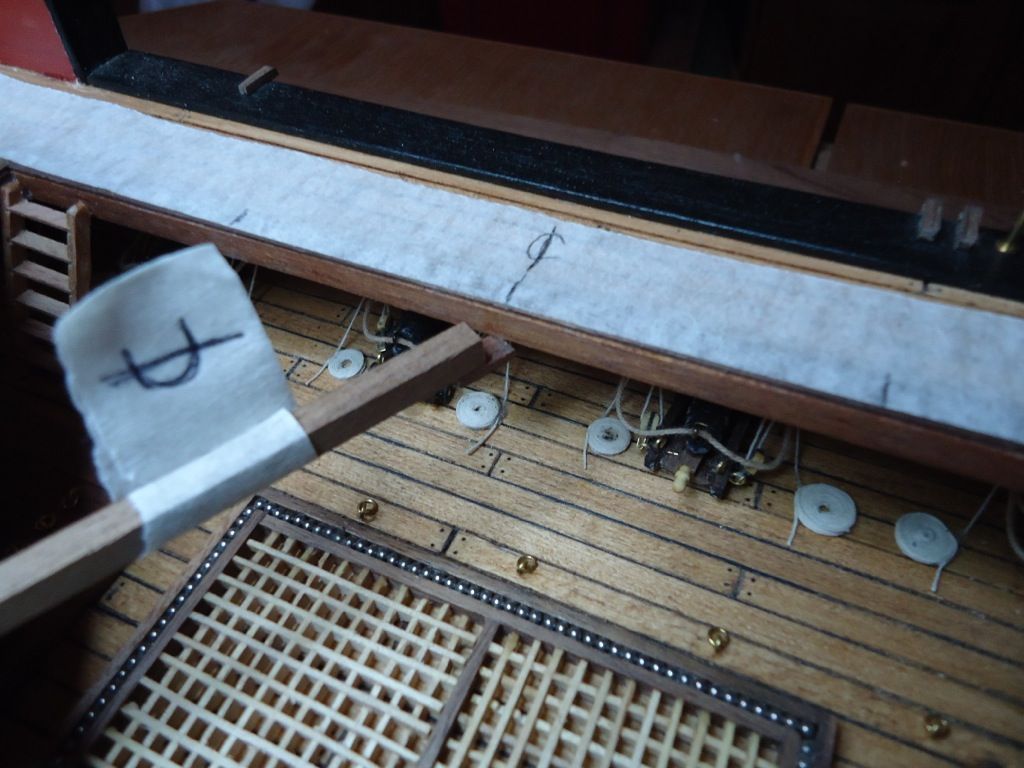 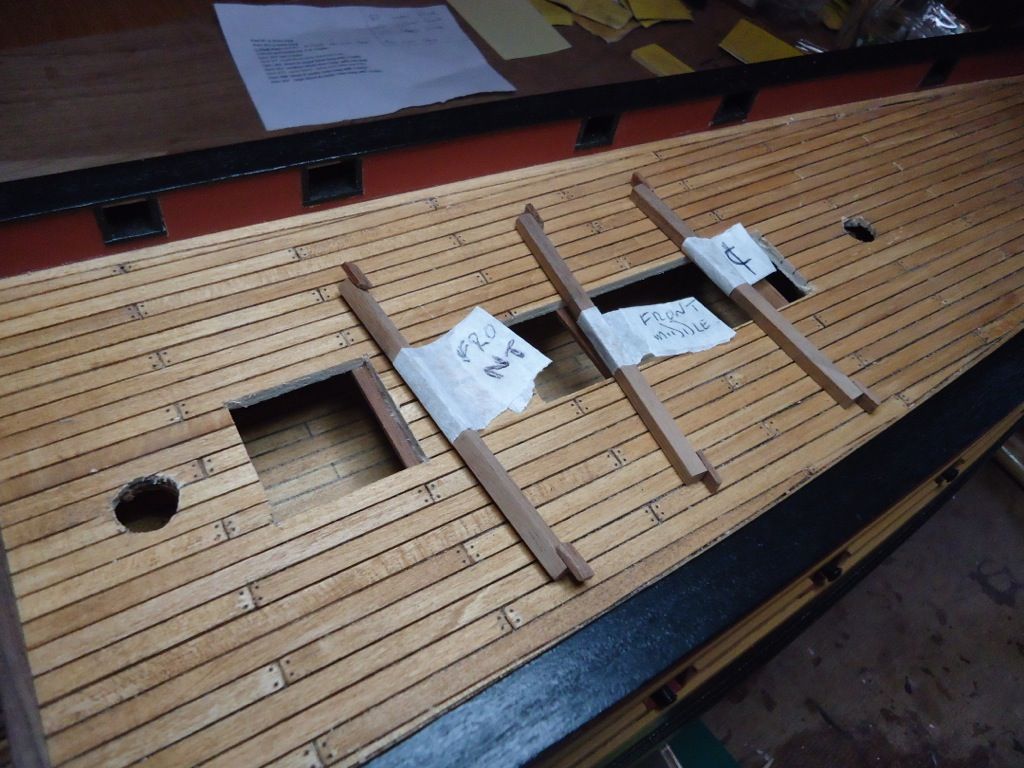 I used masking tape along the length of the opening, to mark the position of the cross beams, I then glued the beams and put in place, a good tight fit ensured they stayed where I wanted them to stay. I used masking tape along the length of the opening, to mark the position of the cross beams, I then glued the beams and put in place, a good tight fit ensured they stayed where I wanted them to stay. 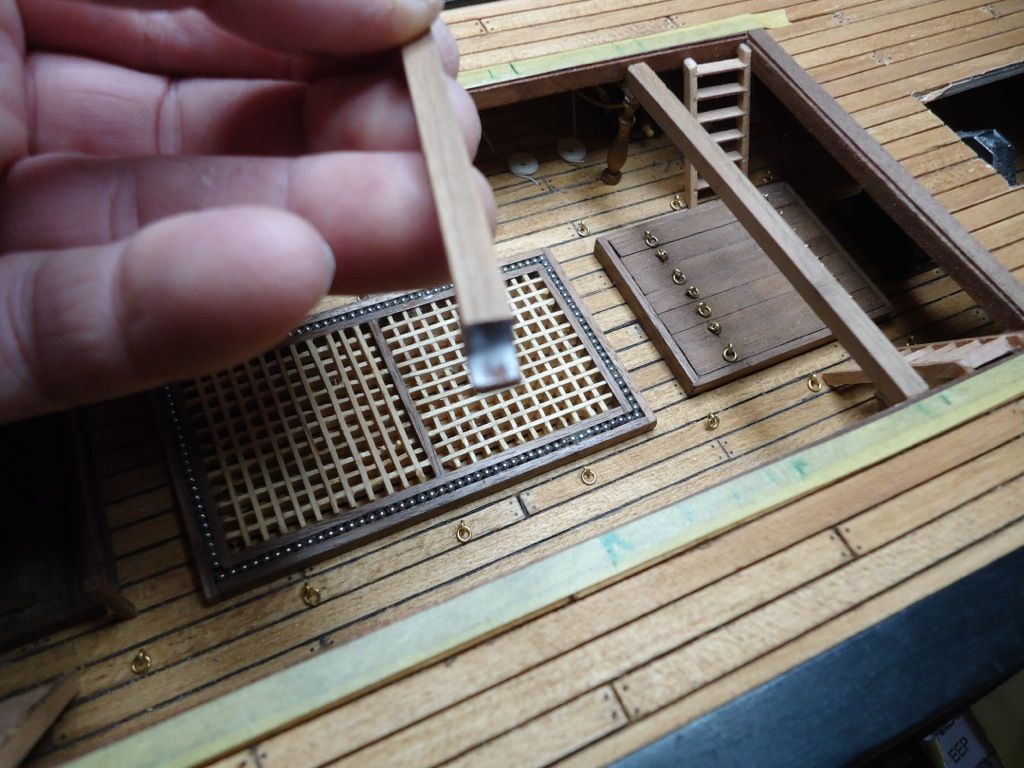 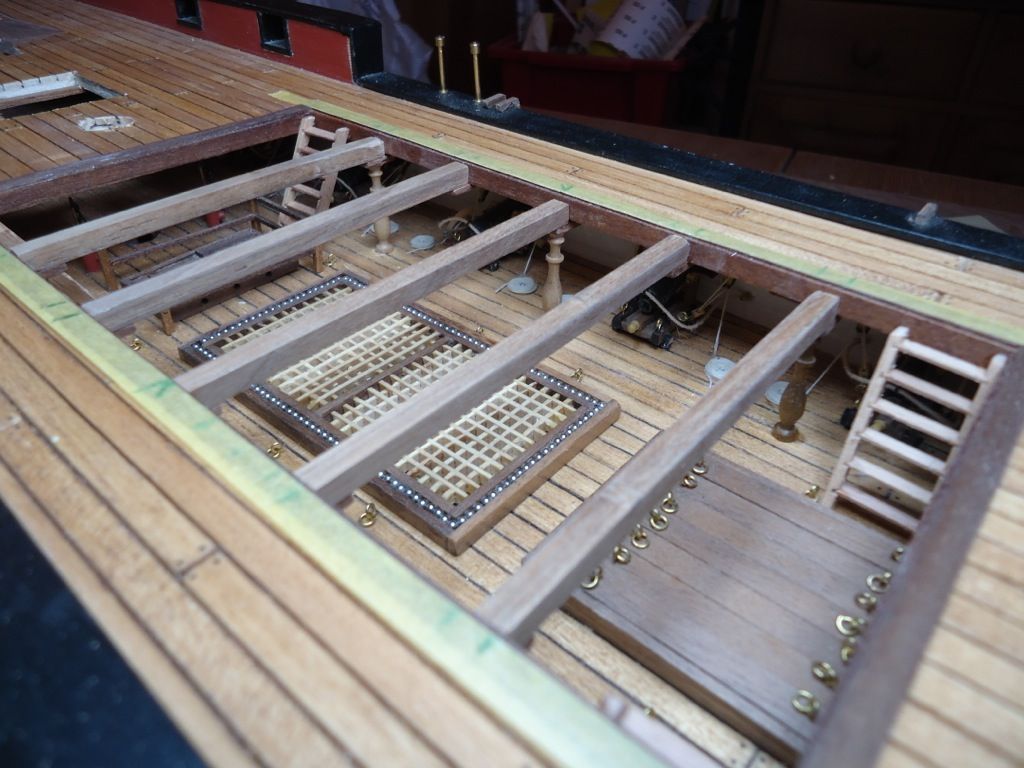 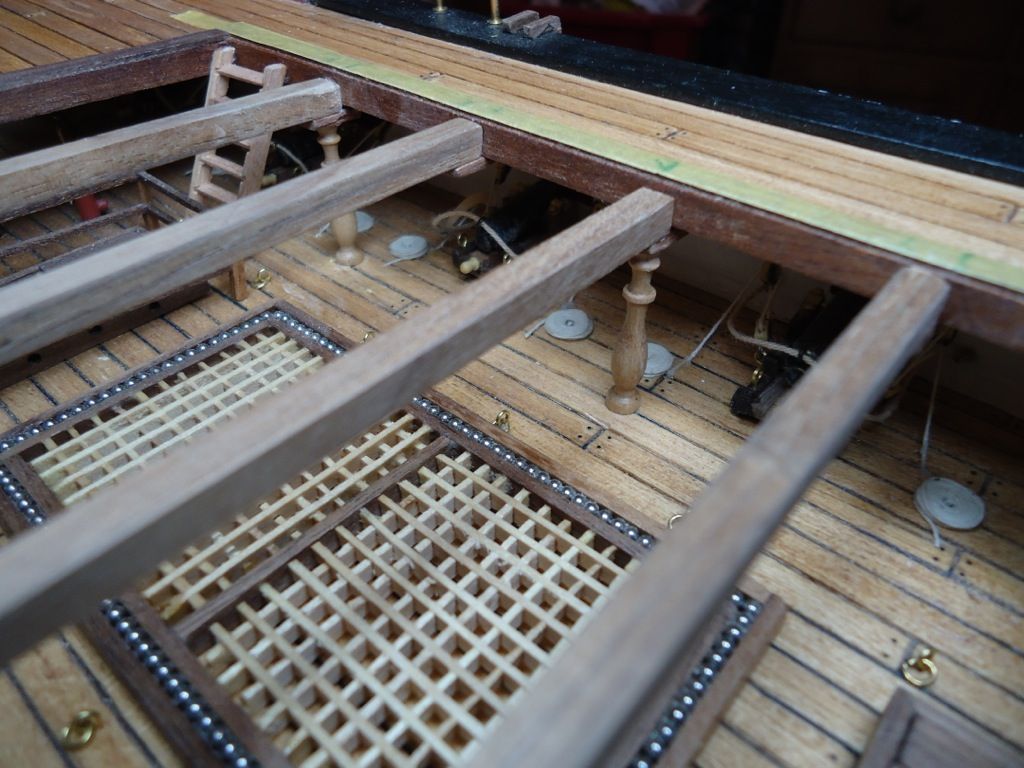 As I said the columns were 28 mm As I said the columns were 28 mm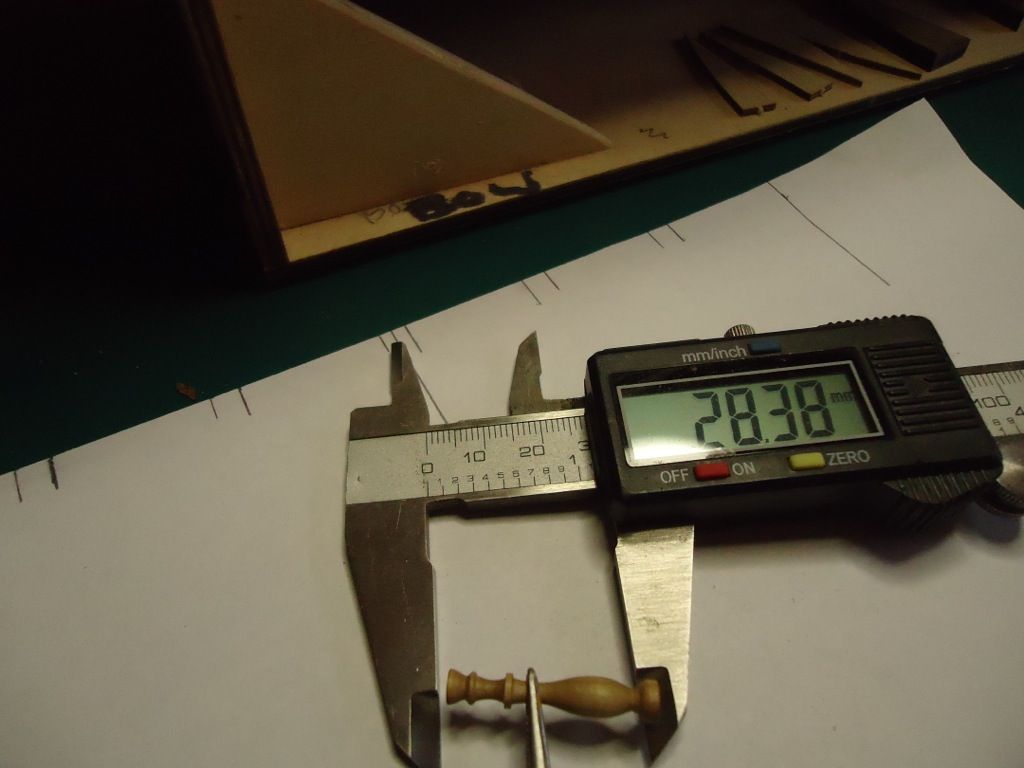 I still had to add an extra bit of timber to the top of some of the columns, to get a tight fit, I still had to add an extra bit of timber to the top of some of the columns, to get a tight fit,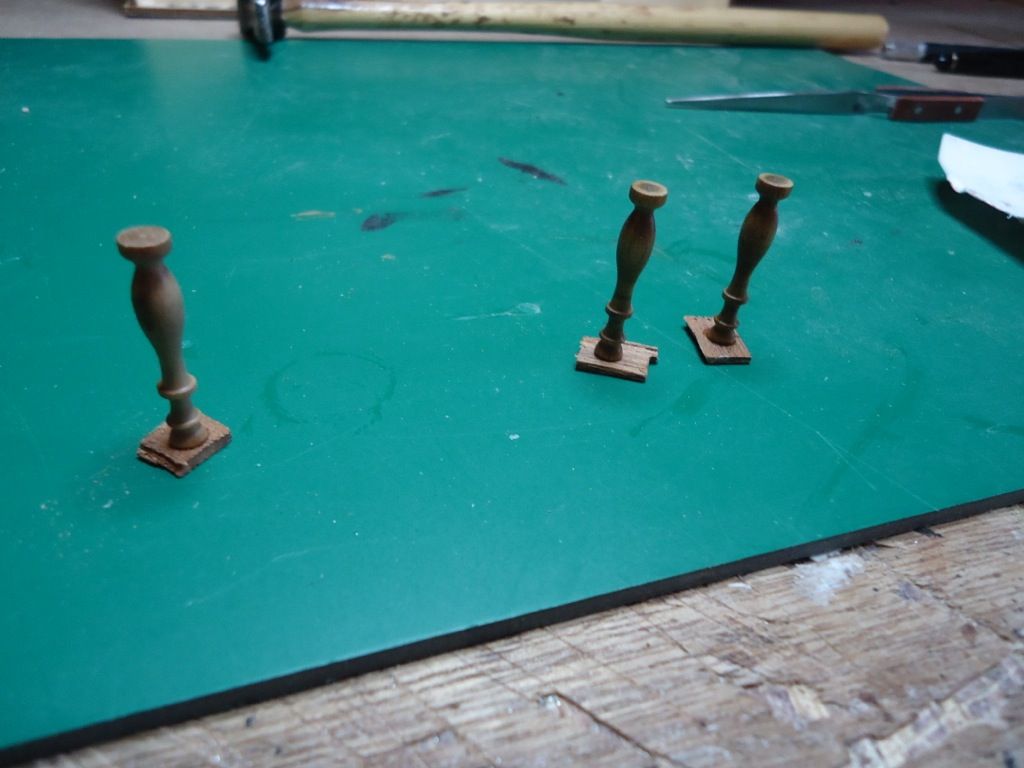 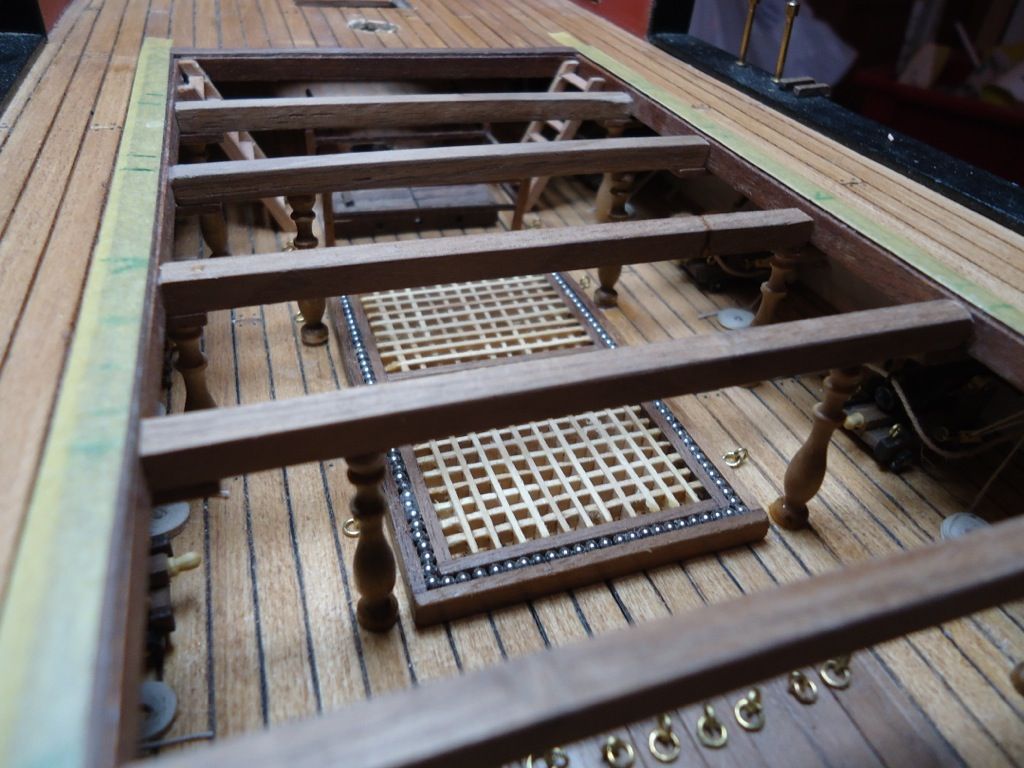 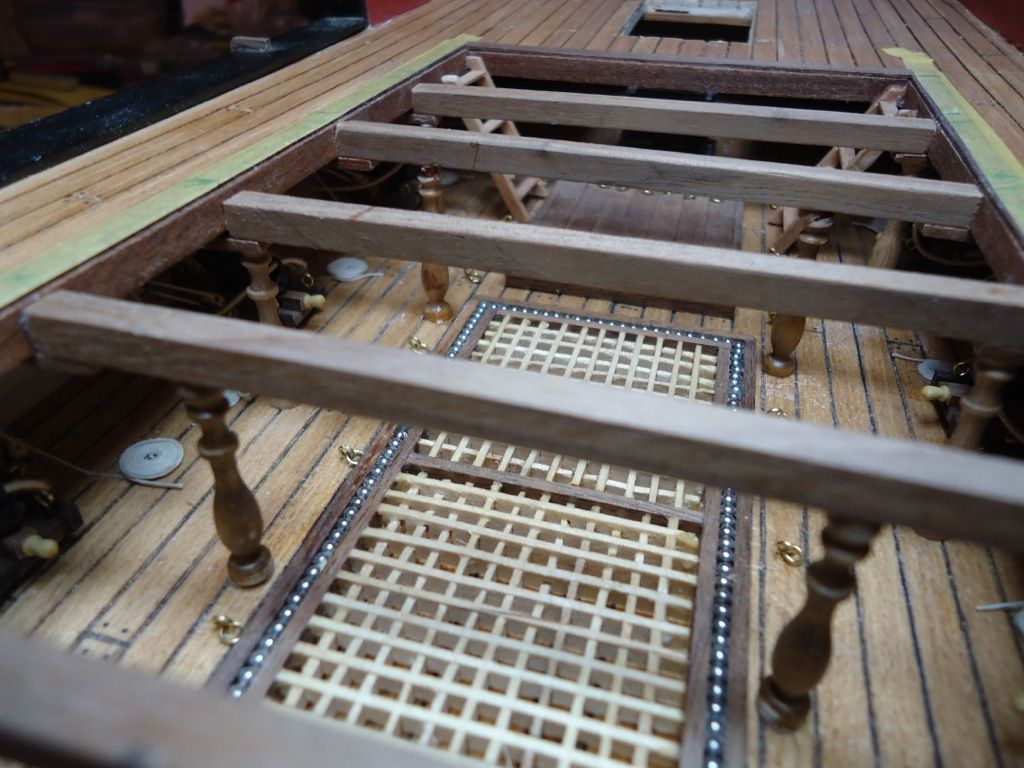 I am going to see if I can get some barrels, or the like to make the deck more cluttered, I would love a small cat to put down there, anyone got any idea's on that one. I am going to see if I can get some barrels, or the like to make the deck more cluttered, I would love a small cat to put down there, anyone got any idea's on that one.
MoMo
|
|
|
Rank: Vice-Master Groups: Registered
Joined: 13/01/2012 Posts: 605 Points: 1,630 Location: Bucks
|
Done the same on mine Mo, easier to buy them pillars rather than make em. If you are going to get extra barrels it might be worth looking the buckets also .Cornwall have got the Artesina ones. and model dockyard do them also HMS Surprise
HMS Snake
HMS Bounty
HMS Royal Caroline
HMS Victory rebuild
HMS Supply
|
|
|
|
|
Very nice work Mo and beautifully explained.. easy to follow... well done.... Regards Alan
|
|
|
Rank: Vice-Master Groups: Registered
Joined: 09/02/2012 Posts: 569 Points: 1,675 Location: Scotland
|
Thanks for your comments, I have now given all the timbers a coat of Danish Oil, it's all looking good now, I have stuck a few barrels and a few coils of rope down on the lower deck, looks ok, but the closer you look the more you seem to be able to do to add detail.
Will post some more pic's tomorrow.
Mo. 🔨. 📌🚢Mo
|
|
|
 Rank: Super-Elite   Groups: Registered
Joined: 24/04/2010 Posts: 5,787 Points: 17,662 Location: Stafford, United Kingdom
|
Hi Mo, You are doing a cracking job of this build it is a credit to your skill Kind regards Mike MWG BUILD DIARIES: HMS VICTORY, SOVEREIGN OF THE SEAS, SAN FRANCISCO II, HMS HOOD, HMS ENDEAVOUR LONGBOAT, HMS VICTORY X-SECTION, 007 DB5, NISSAN GTR, CUTTY SARK, RB7, AKAGI, BARK HMS ENDEAVOUR, HUMMER H1, MITSUBISHI ZERO.
|
|
|
Rank: Vice-Master Groups: Registered
Joined: 09/02/2012 Posts: 569 Points: 1,675 Location: Scotland
|
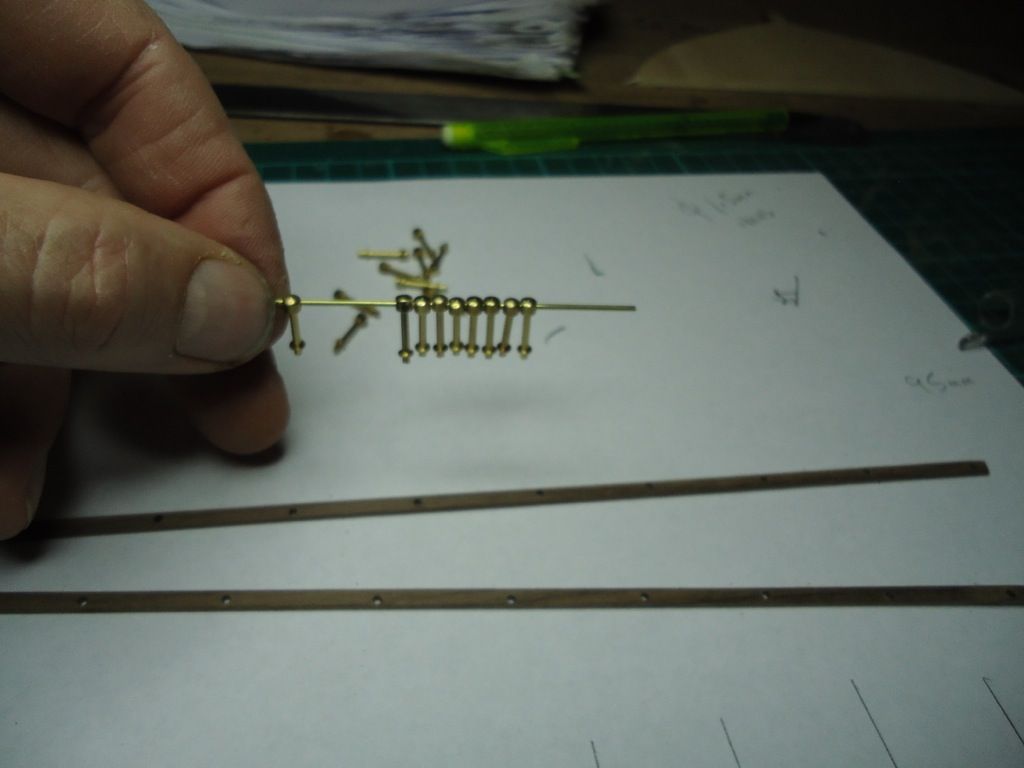
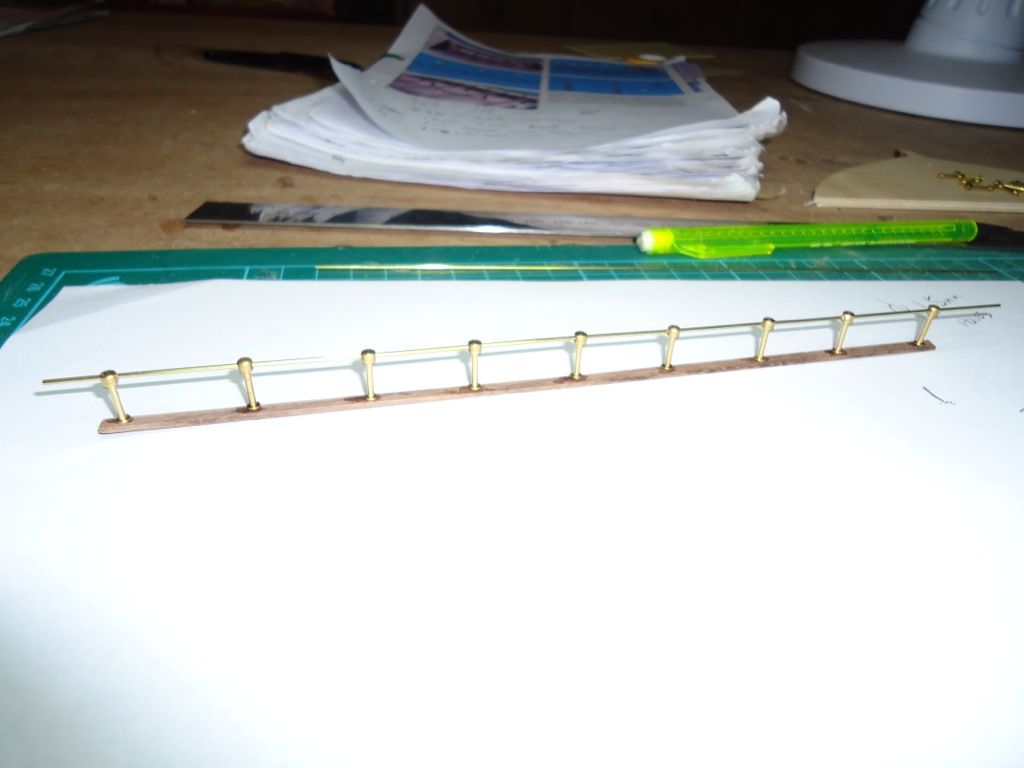
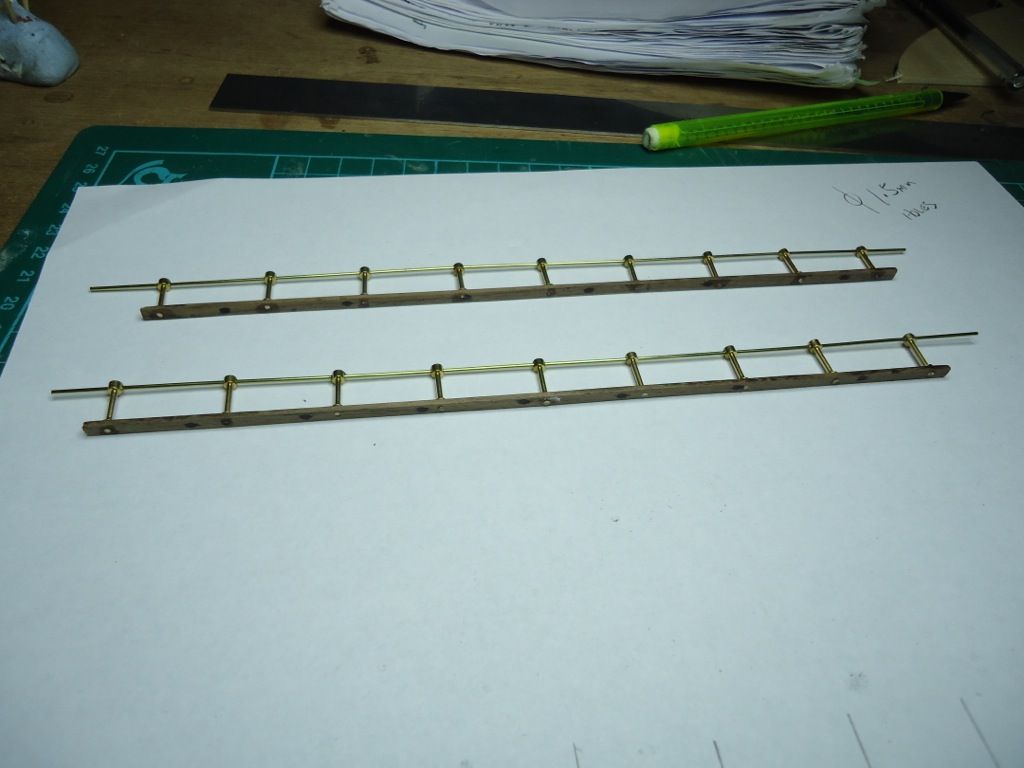
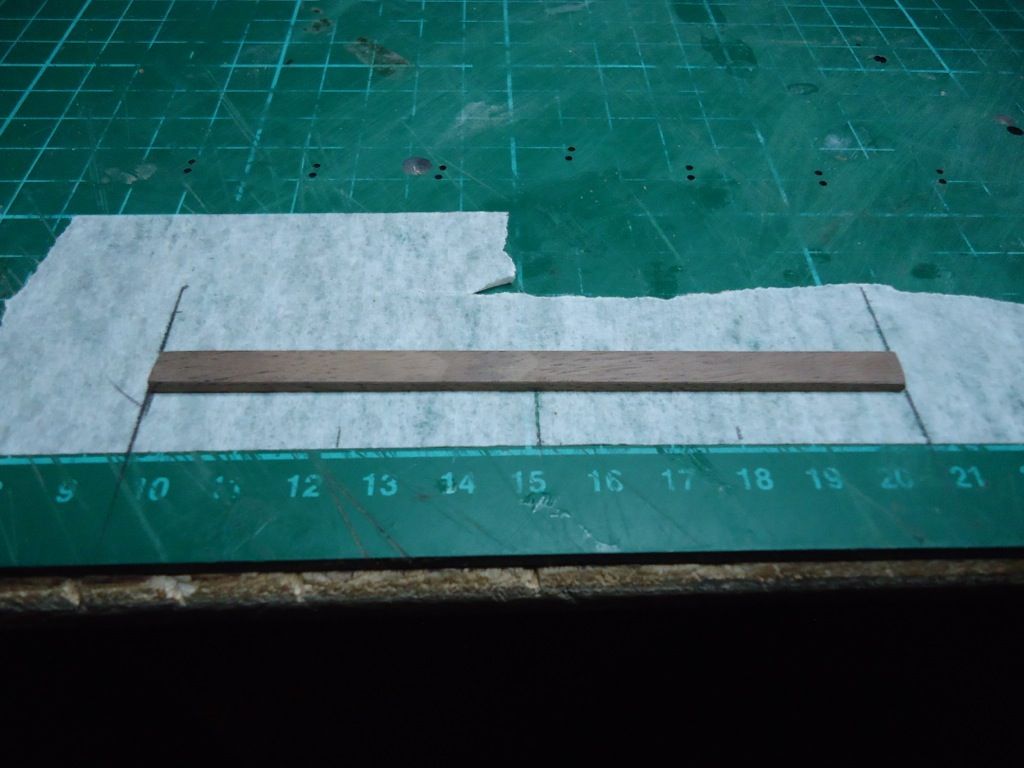
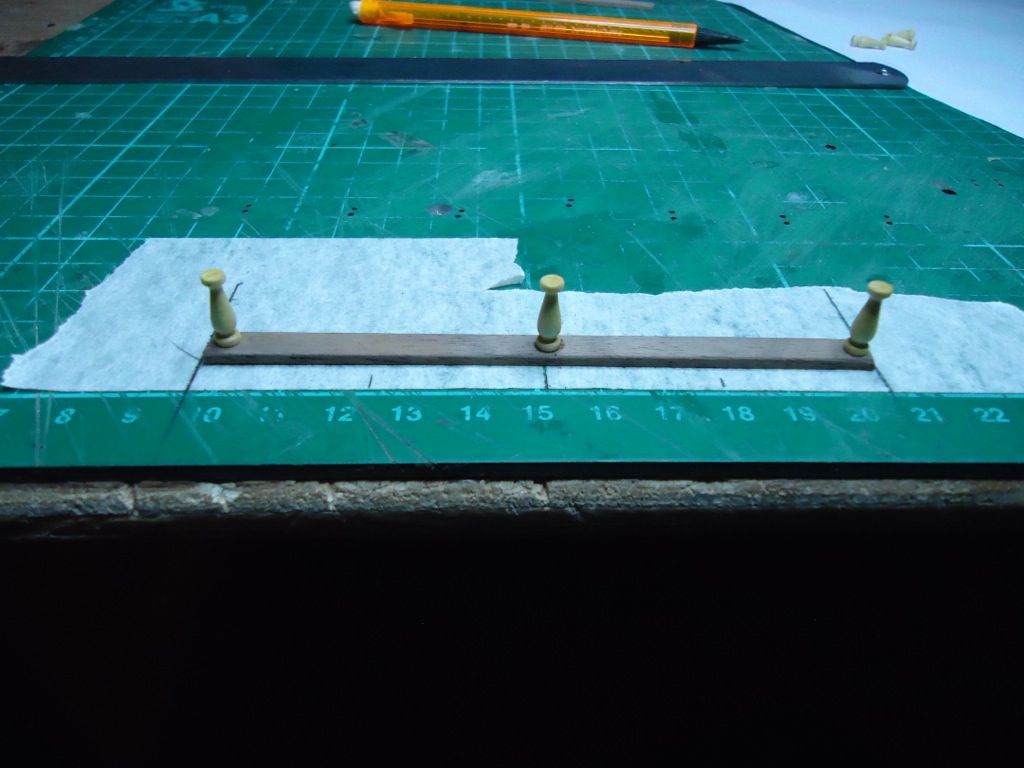
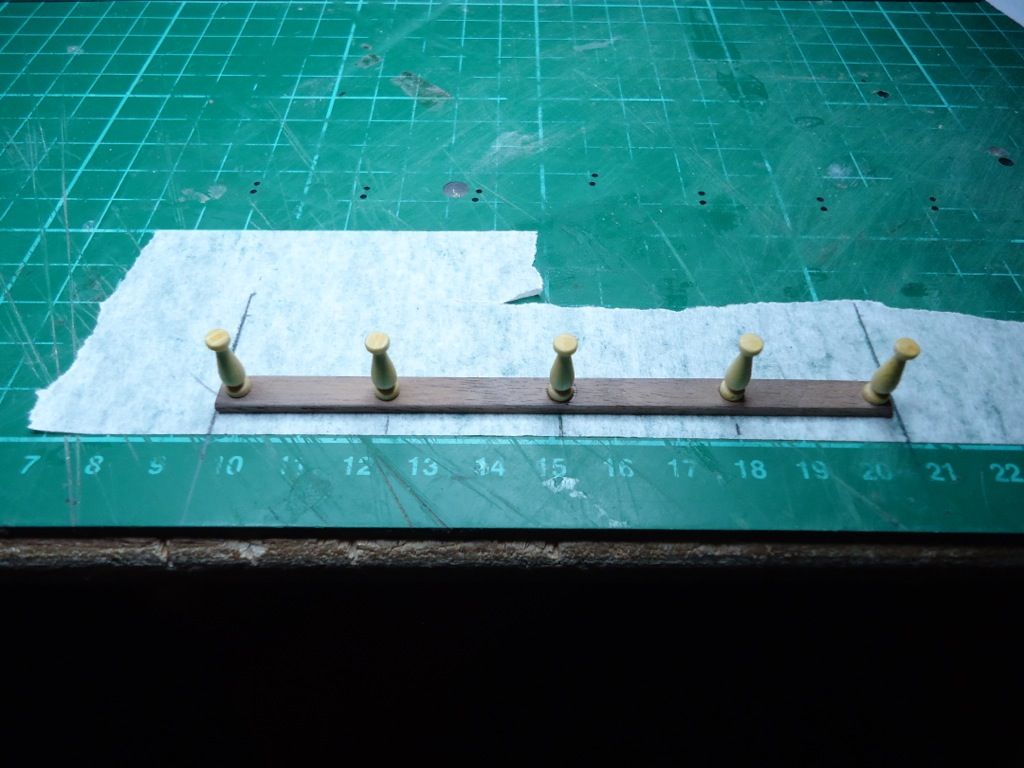
I have had a bit of time on my hands lately, so getting a good bit done on the Ship. I have been making the handrails to the cutout in the deck. I decided to paint the brass and wood black, I gave them 2 coats and seemed to cover well.
I cut the sole piece's to length, marked out the positions of the holes, and drilled them, The brass uprights were to long on the bottom, When I put them in to the holes they protruded out the bottom, so I filed a bit of the length.
I cut my brass rod, not wire as they tell you in the instructions, the brass rod will keep everything straight, and ridged. I then put all the uprights on to the brass rod, and glued all the holes, then located all the uprights in to the holes one by one, a lot easier this way, than trying to stick the uprights in and hoping all the holes are in line to take the brass rod. [size]
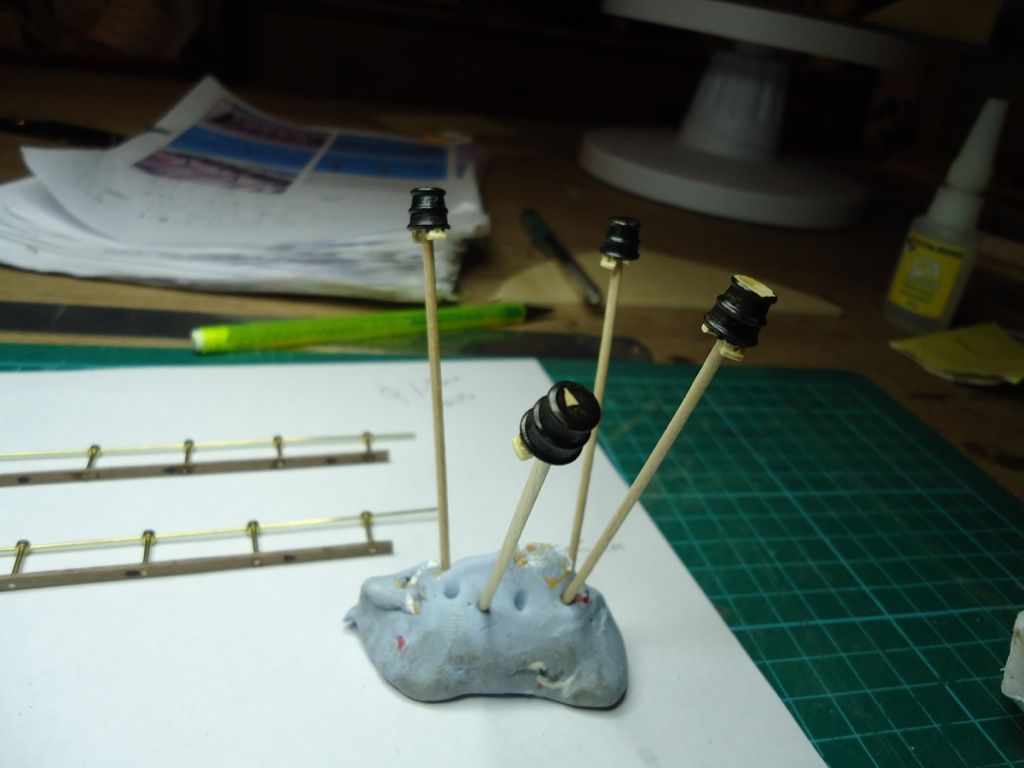
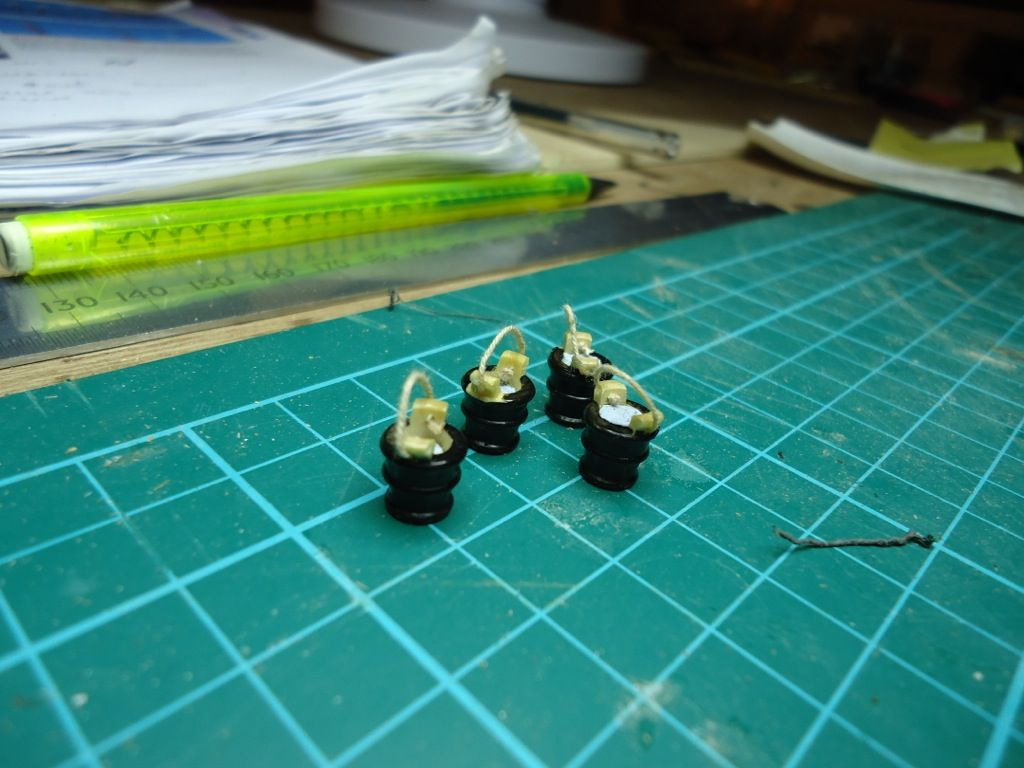
I have also got 4 buckets to put in the lower deck, I have painted them black, and put some blu tac in the bottom to make it like they are full of water.
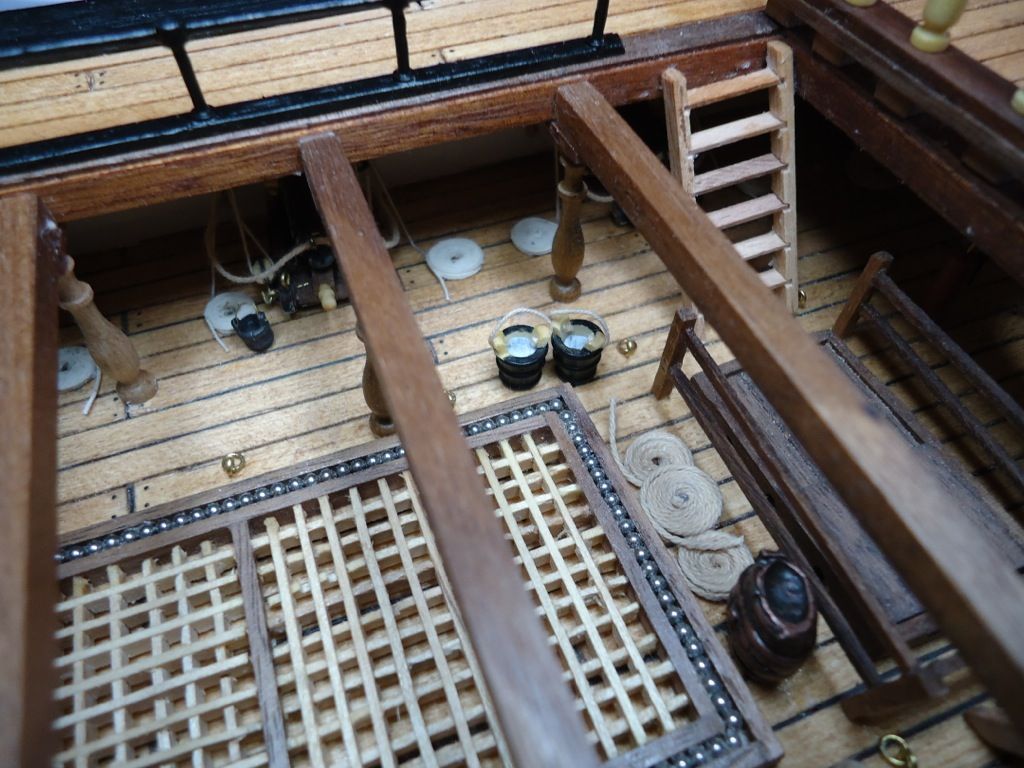
on the subject of the handrail to the opening, I cut the sole plate the length of the opening, and made the handrail at that length, but I forgot all about the stairs leading down to the lower deck, so I had to make a few adjustments.

It was then on to the balustrade detail at the stern end of the opening, Much the same as the metal one,

Now the 5 mm x 5mm x 5 mm blocks to the base of the balustrade, I kept the end grain of the wood horizontal, and not vertical, this ensured all the blocks were the same size, the thickness of the timber and not the size of the blocks I cut, Hope that makes sense.
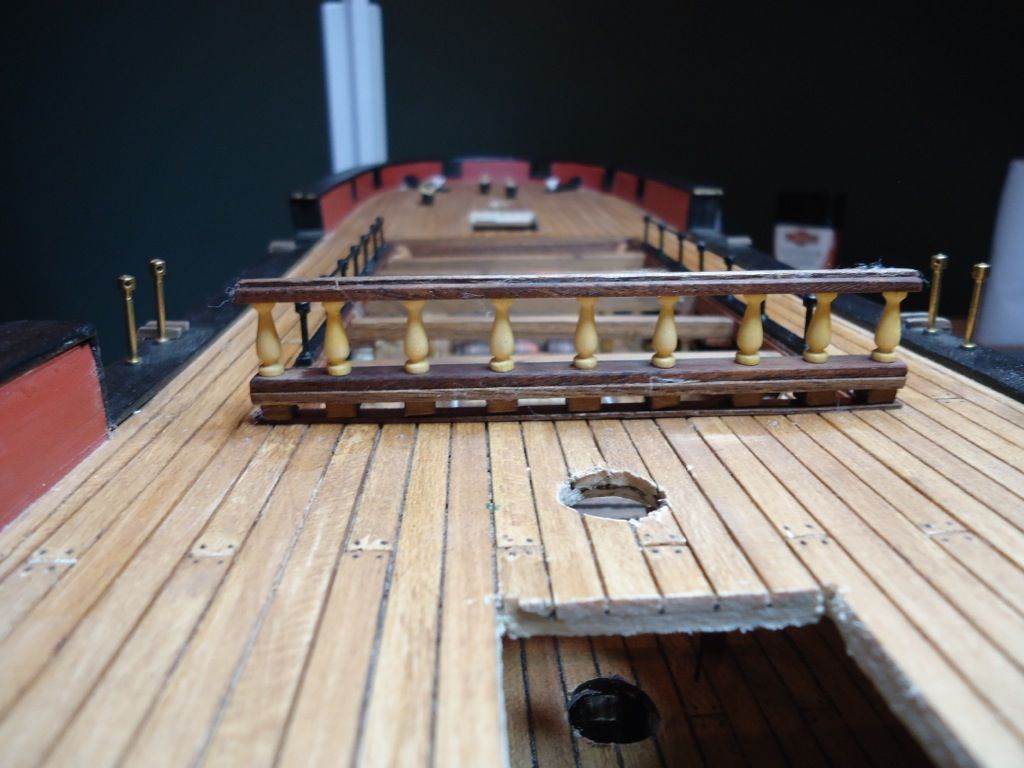
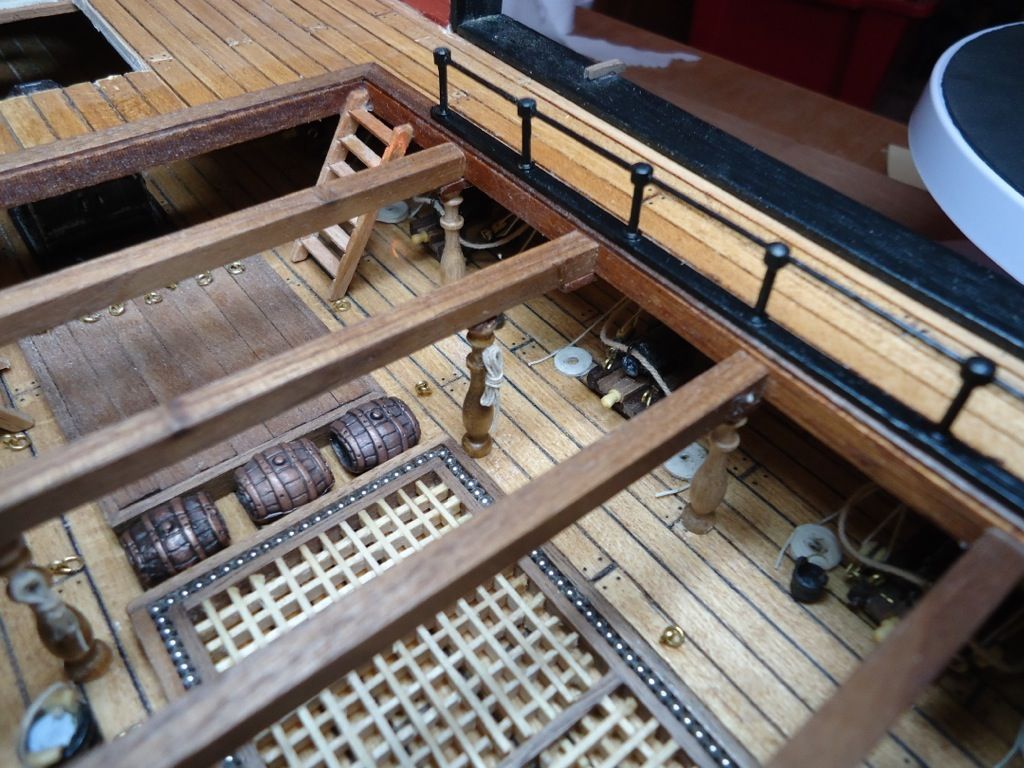
[size=7]I have also tied my first rope shank, drilled a hole in one of the columns and hung the rope from there, a bit more practice required on this item.
MoMo
|
|
|
Rank: Vice-Master Groups: Registered
Joined: 09/02/2012 Posts: 569 Points: 1,675 Location: Scotland
|
I have a problem with one of my paint brushes, 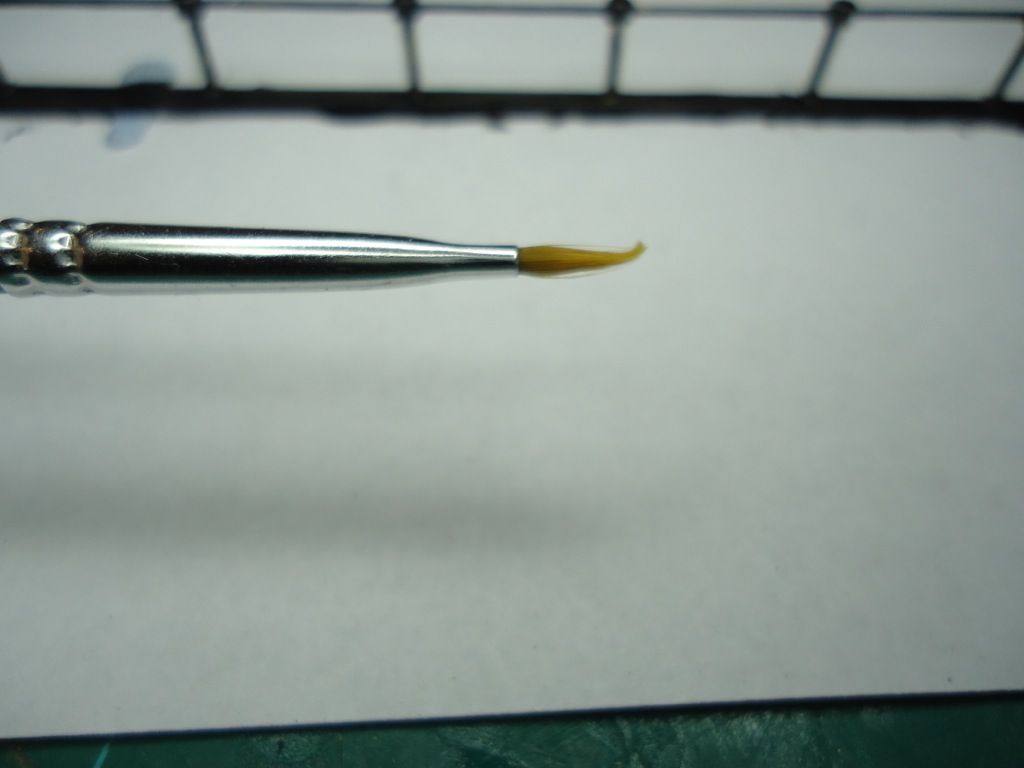 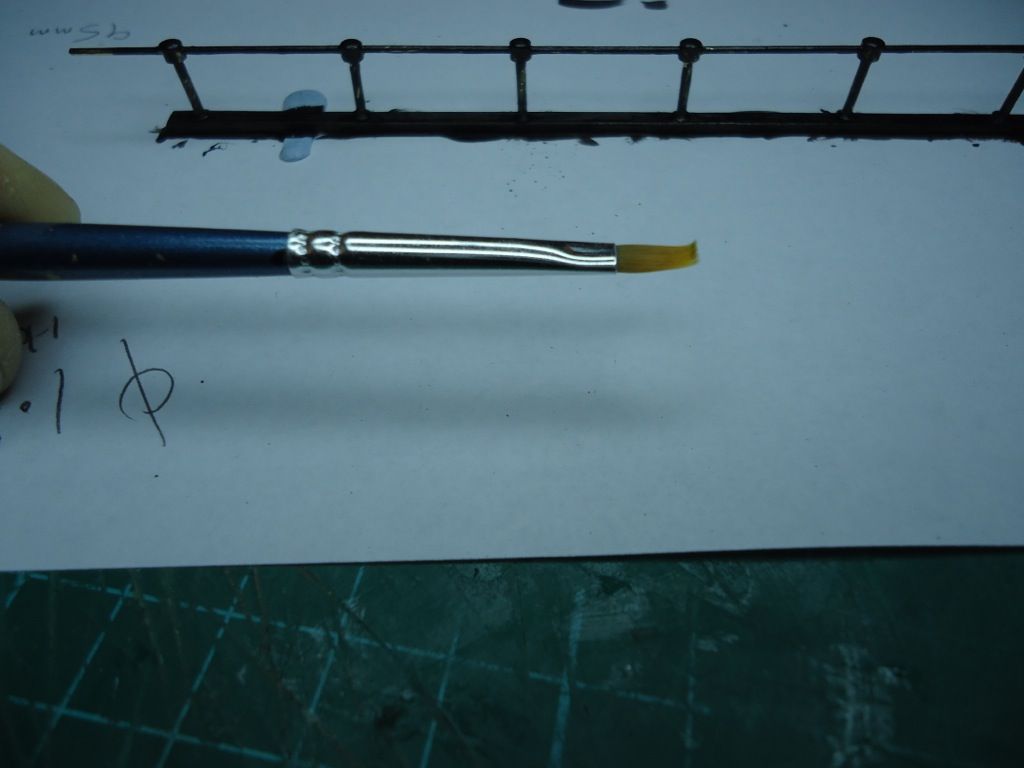 can anyone tell me whats happening here, every time I use the brush I clean it well, and always use the proper rinse wash I bought from Cornwall Model Boats, and I use my fingers to shape the brush before putting away. can anyone tell me whats happening here, every time I use the brush I clean it well, and always use the proper rinse wash I bought from Cornwall Model Boats, and I use my fingers to shape the brush before putting away.
MoMo
|
|
|
Rank: Super-Elite  Groups: Registered
Joined: 04/04/2010 Posts: 3,955 Points: 11,809 Location: uk
|
hi mo,do you stand them up on their bristles???? naughty naughty,store them upside down and all will be well. love the build. Current builds: SotS, USS Consitution, San Felipe, D51 loco, HMS Surprise, RB7, Arab Dhow, Jotika HMS Victory Completed builds: HMS Pickel, Thermopylae, Mississipi river boat, Mary Rose, Cutty Sark, San Francisco II, HMS Victory x5, Titanic Lifeboat, Panart HMS Victory Launch, Hachette Titanic, Virginia Schooner, Endeavour Longboat. http://www.model-space.com/gb/
|
|
|
|
|
Have to agree with Karl, it looks like its been stored bristles down!
|
|
|
Rank: Vice-Master Groups: Registered
Joined: 09/02/2012 Posts: 569 Points: 1,675 Location: Scotland
|
Sorry guy's but never bristles down, always blunt end down,
MoMo
|
|
|
Rank: Super-Elite Groups: Registered
Joined: 04/04/2010 Posts: 3,955 Points: 11,809 Location: uk
|
hi mo,can you take a pic of your brushes stored please? Current builds: SotS, USS Consitution, San Felipe, D51 loco, HMS Surprise, RB7, Arab Dhow, Jotika HMS Victory Completed builds: HMS Pickel, Thermopylae, Mississipi river boat, Mary Rose, Cutty Sark, San Francisco II, HMS Victory x5, Titanic Lifeboat, Panart HMS Victory Launch, Hachette Titanic, Virginia Schooner, Endeavour Longboat. http://www.model-space.com/gb/
|
|
|
Rank: Pro Groups: Joined: 24/08/2009 Posts: 48,827 Points: -13,348
|
Hi Mo,
They look like they are synthetic bristles in your brush and one of the major problems with synthetic bristles is that they can end up with a 'Set' or bend in the bristle which is usually due to one of several things:
1. The cleaning solvents used haven't been fully cleaned out, even though you might think they have, which can then have an adverse effect on the synthetic fibre and cause it to curl one way, because of the aggressive nature in the solvent which can really play havoc with the make up of the fibres and their ability to return to their normal shape after bending whilst applying the paint.
2. Are you guilty of 'pushing' the paintbrush? Pushing, as in when you are trying to get the paint into crevices, etc, can be very destructive to finer brush fibres and is a sure way of damaging them. Always try to 'pull' the brush if possible, that way you will keep the fibres aligned as you paint and they won't 'set' into a curl. If you have to 'push' into tight areas, try keeping a cheaper brush with thicker, stiffer fibres, like an artist 'Hog' brush alongside your better brushes and use them for when you have to push the paint.
3. Clean your brushes regularly, even mid job if needs be, as paint can easily wick up the fibres to the ferrule if the brush is used for an extended period and will then be the devil to clean out properly, which if it isn't, will also cause curling and splaying of the fibres as it dries. You should only ever load the brush with paint up to about one third of the length of bristle and that way you will keep the paint from getting to the danger zone nearer the ferrule. Also, NEVER leave your brush tip down in the cleaning medium, be it water or solvent, even if it is temporarily for a second or two, whilst you stop painting, as that will almost certainly create a set in the fibres, since it will put the fine fibres under pressue which it may never recover from!! When painting try to only use the tip as you paint and WITHOUT applying too much pressure which again can cause a 'set' to the fibres and try to rotate the brush as you paint so that you aren't using only one side of the brush.
I am an artist when I'm not a modeller and I can tell you that some of the more expensive brushes like sable really need looking after if they are to be financially viable and a good tip that I can give you is to use a normal hair conditioner on the brush fibres AFTER you have fully cleaned it. Just clean it thoroughly, apply the conditioner in its' undiluted form, to the bristles then shape the tip to however it should be and store it tip up until next time you want to use it, when you just wash it thoroughly in warm clean water to remove all the conditioner and dry before using. Or you can just shape the fibres after cleaning and then wrap them in a little roll of wet tissue, which when it dries will keep the fibres aligned until next time or you can use the little clear tubes that some of the better brushes come with to protect the fibres and maintain their shape, as that is what they are for.
Hope that helps?
Kev
|
|
|
|
Guest (10)
|
 US
US

