|
|
 Rank: Vice-Master    Groups: Registered
Joined: 09/02/2012 Posts: 569 Points: 1,675 Location: Scotland
|
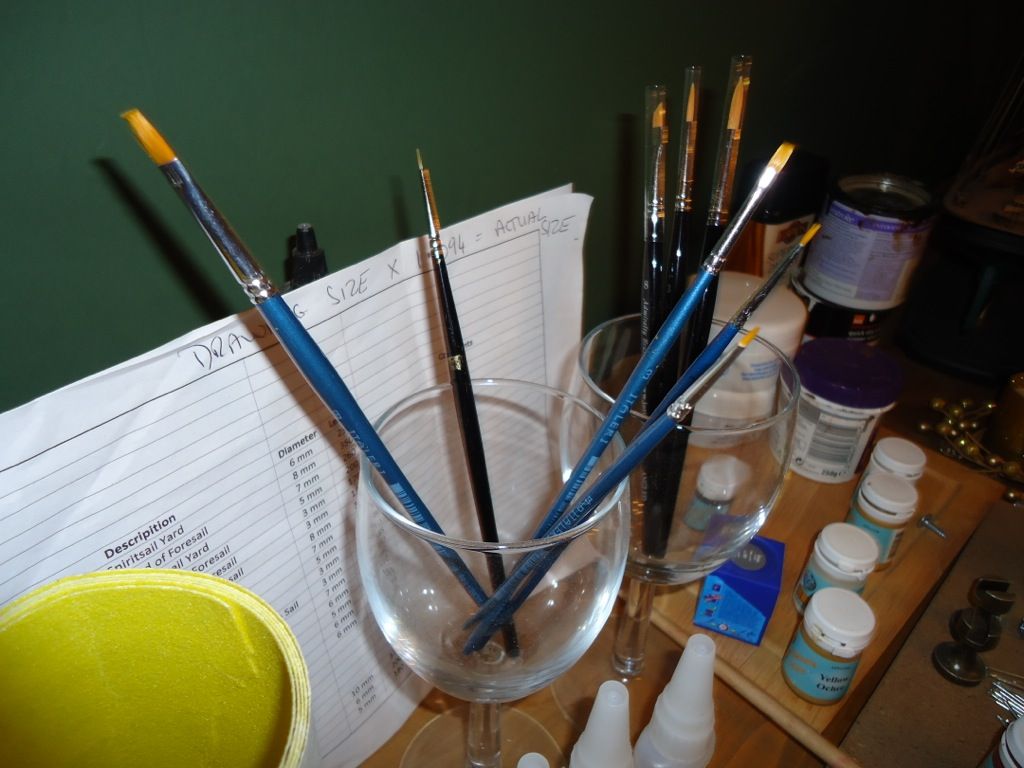
Thanks Kev for your very informative answer, Yes I am probably quite hashy with my paint brushes, I don't think I could do all the thing you recommend, although it would probably be best, I just dont have the patience for all that. I think I will just keep a stock of a few brushes and discard as and when necessary. But thanks very much for your help on this subject. As Karl had asked, I post a picture of my brush storage.
Mo Mo
|
|
|
 Rank: Super-Elite      Groups: Registered
Joined: 04/04/2010 Posts: 3,955 Points: 11,809 Location: uk
|
thanks for that,I just suspected you kept them under a shelf,clearly not,I have never known that happen to me,and I only use water based products,and for other types I generally use a lintfree cloth,for staining and varnishing. Current builds: SotS, USS Consitution, San Felipe, D51 loco, HMS Surprise, RB7, Arab Dhow, Jotika HMS Victory Completed builds: HMS Pickel, Thermopylae, Mississipi river boat, Mary Rose, Cutty Sark, San Francisco II, HMS Victory x5, Titanic Lifeboat, Panart HMS Victory Launch, Hachette Titanic, Virginia Schooner, Endeavour Longboat. http://www.model-space.com/gb/
|
|
|
 Rank: Pro Groups: Joined: 24/08/2009 Posts: 48,827 Points: -13,348
|
Mo wrote:Thanks Kev for your very informative answer, Yes I am probably quite hashy with my paint brushes, I don't think I could do all the thing you recommend, although it would probably be best, I just dont have the patience for all that. I think I will just keep a stock of a few brushes and discard as and when necessary. But thanks very much for your help on this subject. As Karl had asked, I post a picture of my brush storage.
Mo No worries Mo and I fully understand. The only reason I do it is because I have gotten into the habit of doing it over the years and because if it is a pure sable brush then the sheer cost would make it an absolute priority!! Nothing wrong with being less thorough and replacing brushes sooner if you are happy to do that - each to their own, as they say? 
Always worth hanging on to those curled and splayed brushes though as they are very useful for 'dry brushing' etc, so don't throw them away until they are worn down to the ferrule!!
Glad to help and your Surprise is looking splendid, well done sir!!
Kev
|
|
|
Rank: Vice-Master Groups: Registered
Joined: 09/02/2012 Posts: 569 Points: 1,675 Location: Scotland
|
On the subject of paint brushes, I see there are brushes from size 000, 00, 0, 1, 2 and so on which is bigger, a 000 or a 4
Mo. 🎨. Mo
|
|
|
Rank: Pro Groups: Joined: 24/08/2009 Posts: 48,827 Points: -13,348
|
Hi Mo,
The '4' is bigger than the '000'.
Below is a list of the Artists' Brush sizes commercially available as quoted from the Wikipedia page on brushes (sub heading - Artists Brushes). Although I call them artists brushes, the term will include the types of brushes used for craft and modelling work as well. Brushes used by Painters and Decorators have a different sizing system, which is usually given in both the old Imperial inches and the Metric millimetres sizes based on the physical dimensions with regard to the width of the brush at the bristle end of the ferrules, as in 1"(25mm), 2"(50mm), and so on.
From Wikipedia:
Artists' brushes are usually given numbered sizes, although there is no exact standard for their physical dimensions.
From smallest to largest, the sizes are:
20/0, 12/0, 10/0, 7/0, 6/0, 5/0, 4/0 (also written 0000), 000, 00, 0, 1, 2, 3, 4, 5, 6, 7, 8, 9, 10, 11, 12, 13, 14, 16, 18, 20, 22, 24, 25, 26, 28, 30. Brushes as fine as 30/0 are manufactured by major companies, but are not a common size.
Sizes 000 to 20 are most common.
From the list above size 20/0 is tiny through to size 30 which is huge.
I have a 5/0 brush in my arsenal which is very small so you can imagine how tiny a 20/0 really is, though I've never seen one!! You can see from the list that 4/0 is sometimes written as '0000' which is how they get the title 4/0 (4 x zero), so using that system if you ever see a brush labelled as a 3/0, a 2/0 or a 1/0 (unlikely nowadays), then they will be the same as a '000', '00' and '0'.
Hope that helps and is clear enough?
Kev
|
|
|
Rank: Vice-Master Groups: Registered
Joined: 09/02/2012 Posts: 569 Points: 1,675 Location: Scotland
|
[size=7] Thank's Kev, Thats my apprenticeship in brushes, When you get into the nut's and bolts of things, everything is so complex. Mo. 🎨 /size] Mo
|
|
|
Rank: Vice-Master Groups: Registered
Joined: 09/02/2012 Posts: 569 Points: 1,675 Location: Scotland
|
|
|
|
Rank: Vice-Master Groups: Registered
Joined: 09/02/2012 Posts: 569 Points: 1,675 Location: Scotland
|
|
|
|
|
|
Looking good think I am going to have to add surprise to my wants list!!! “Whenever you find yourself on the side of the majority, it is time to pause and reflect.”
-Mark Twain
|
|
|
Rank: Vice-Master  Groups: Registered
Joined: 13/01/2012 Posts: 605 Points: 1,630 Location: Bucks
|
Very nice and tidy Mo, good work. Remember about the belaying pins racks HMS Surprise
HMS Snake
HMS Bounty
HMS Royal Caroline
HMS Victory rebuild
HMS Supply
|
|
|
Rank: Vice-Master Groups: Registered
Joined: 09/02/2012 Posts: 569 Points: 1,675 Location: Scotland
|
Iain, you said in a earlier post, to keep my belaying pin racks, wide enough to clear the capping's and not to low, would you suggest doing this before fitting the cannons, when you say wide enough, is that for the overhang of the capping to the bulwarks. Do the rigging lines actually go through the holes in racks, and then the belaying pins put in to jam the line tight, or are the rigging lines tied off around the pins without going through the hole's.
Mo. . Mo
|
|
|
|
|
Very nice detailed work there Mo... setting a very nice standard...
Regards
Alan
|
|
|
Rank: Vice-Master Groups: Registered
Joined: 13/01/2012 Posts: 605 Points: 1,630 Location: Bucks
|
Hi there Mo, the pins will go through the holes you will make in the racks. The ropes will then pass underneath the pins and loop over the top and round the back in a figure 8 style just like the real thing. If you have done an overhang on your cappings and not done it flush to the walls it will be a struggle at best to wind the ropes round the pins therefor I suggest through expierience that you make the wood shelf for the pins about a 1mm or so larger than the plan suggests. this will then give you the clearence depending on your capping overhang for the ropes to pass round. I also suggest you fit these before or at the same time as the cannon because some are situated in the same place as the eyebolts for the securing of the cannon to the walls. You could end up with the opposite and not being able to pass the ropes under and around the pins. Hope this helps. I would also suggest an ideal hieght for fitting would be so that you can see about a 1.5 or 2mm of the pin above the capping. All will become clear when you start belaying or fixing your ropes to these . HMS Surprise
HMS Snake
HMS Bounty
HMS Royal Caroline
HMS Victory rebuild
HMS Supply
|
|
|
Rank: Vice-Master Groups: Registered
Joined: 13/01/2012 Posts: 605 Points: 1,630 Location: Bucks
|
Just done this little drawing Mo, hope this makes it a little clearer. Good idea about jamming the thread into the hole before fitting the pin but you will find you are going to use different guage thread and you might not be able to get the pin in and in doing so you will rip the shelf off the wall. I reinforce mine with a bit of brass wire going into the shelf and into the wall. Have fun  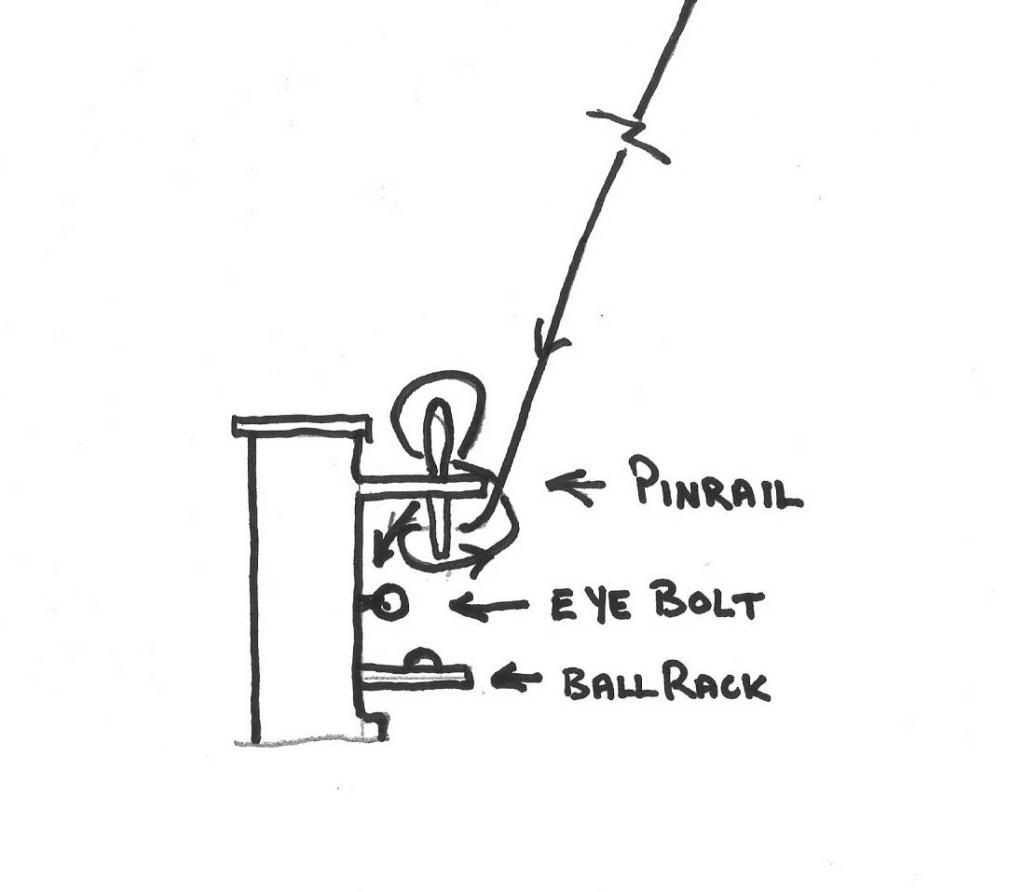 HMS Surprise
HMS Snake
HMS Bounty
HMS Royal Caroline
HMS Victory rebuild
HMS Supply
|
|
|
Rank: Vice-Master Groups: Registered
Joined: 09/02/2012 Posts: 569 Points: 1,675 Location: Scotland
|
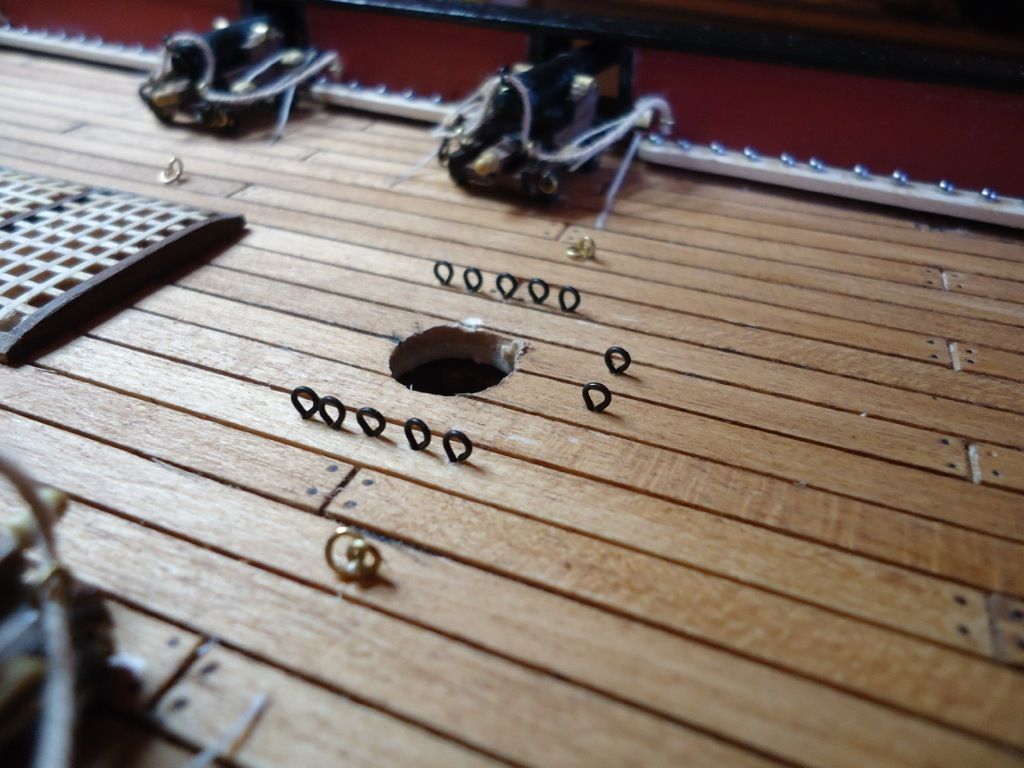
Been busy on the ship the last few days.My first task was to blacken the hooks for the blocks to the cannons. I used blacken-it, I think I left the hooks in the solution to long and they went kind of copper like, so I chucked them away and did another batch.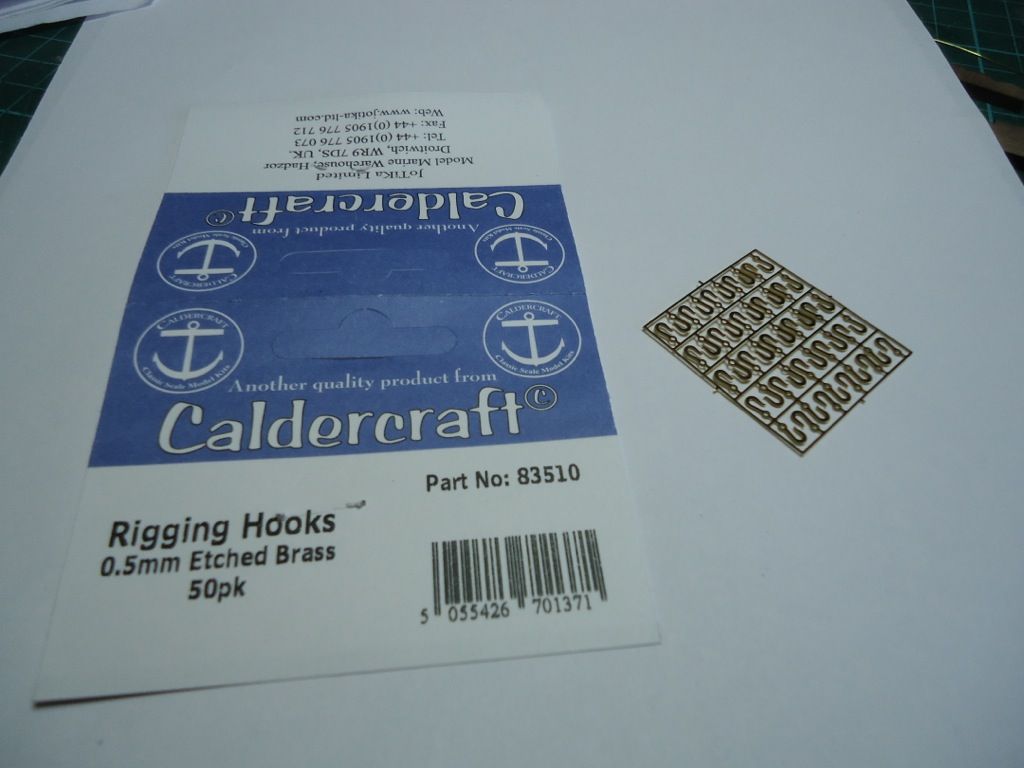 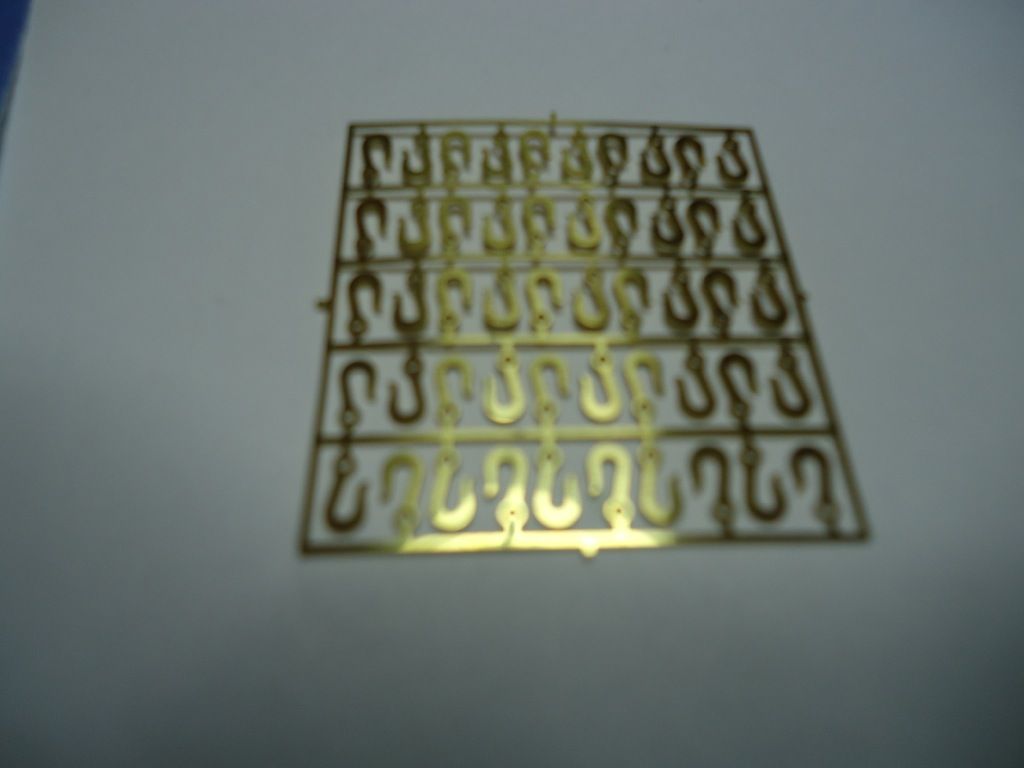 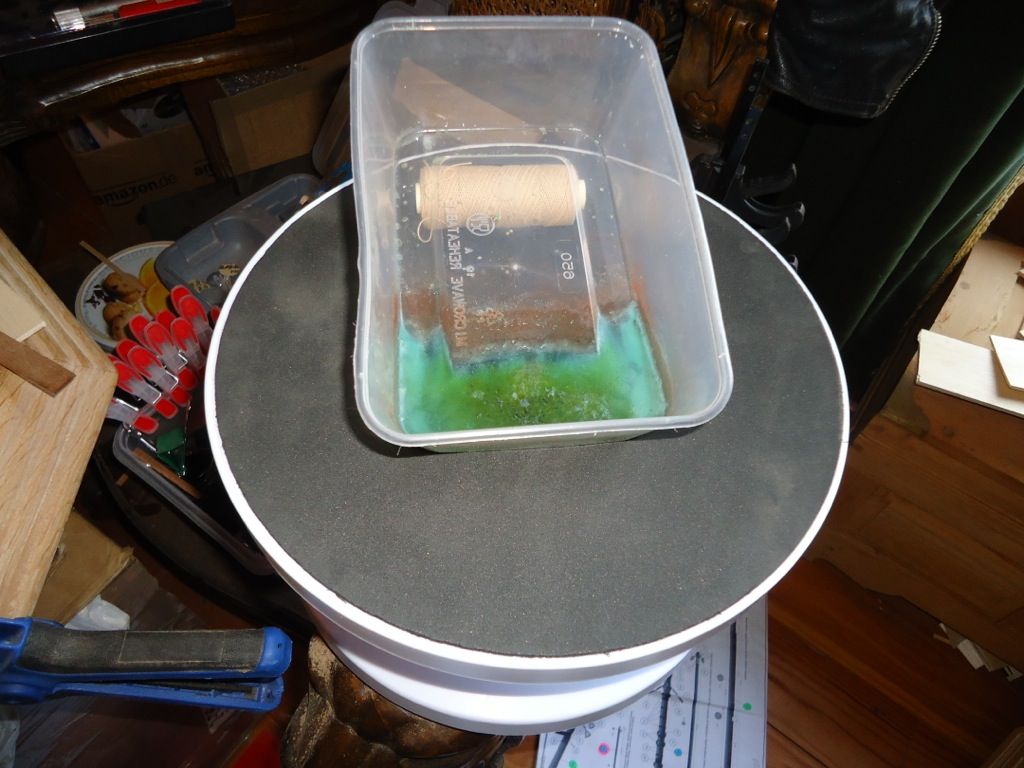 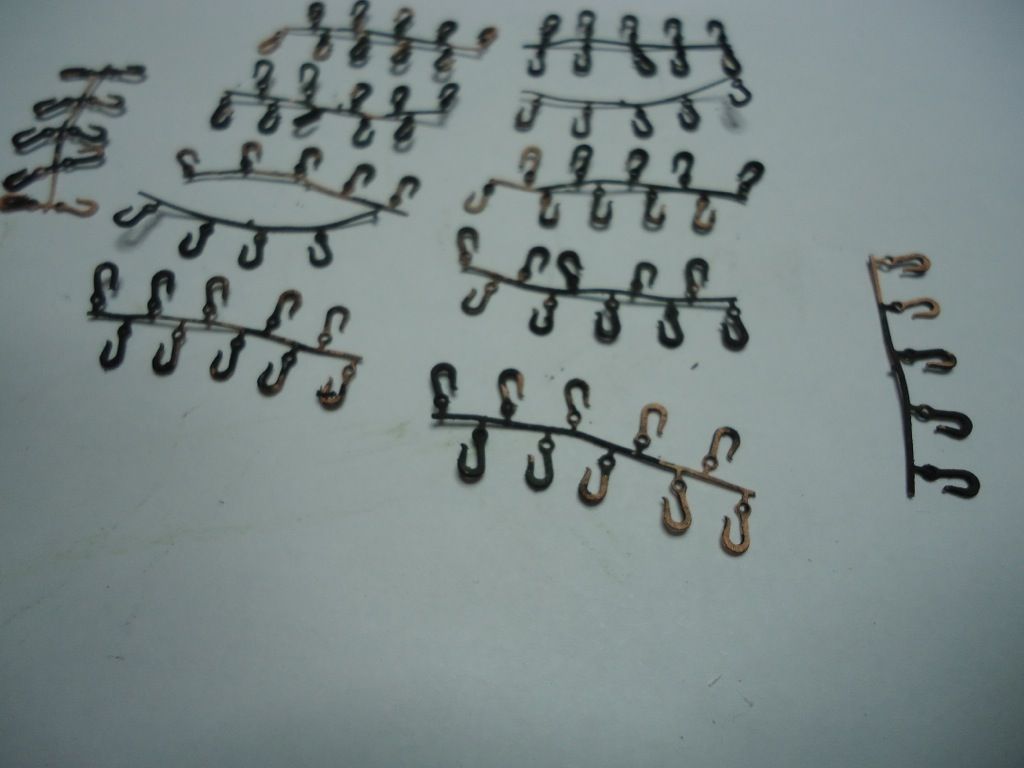 The second batch were ok. The second batch were ok. I bored a hole in the end of the blocks, and left a little tab on the end of the hook, the hook was then glued in to the block, Once set I rebored the hole through the block for the rope, to ensure there were no obstructions. I bored a hole in the end of the blocks, and left a little tab on the end of the hook, the hook was then glued in to the block, Once set I rebored the hole through the block for the rope, to ensure there were no obstructions.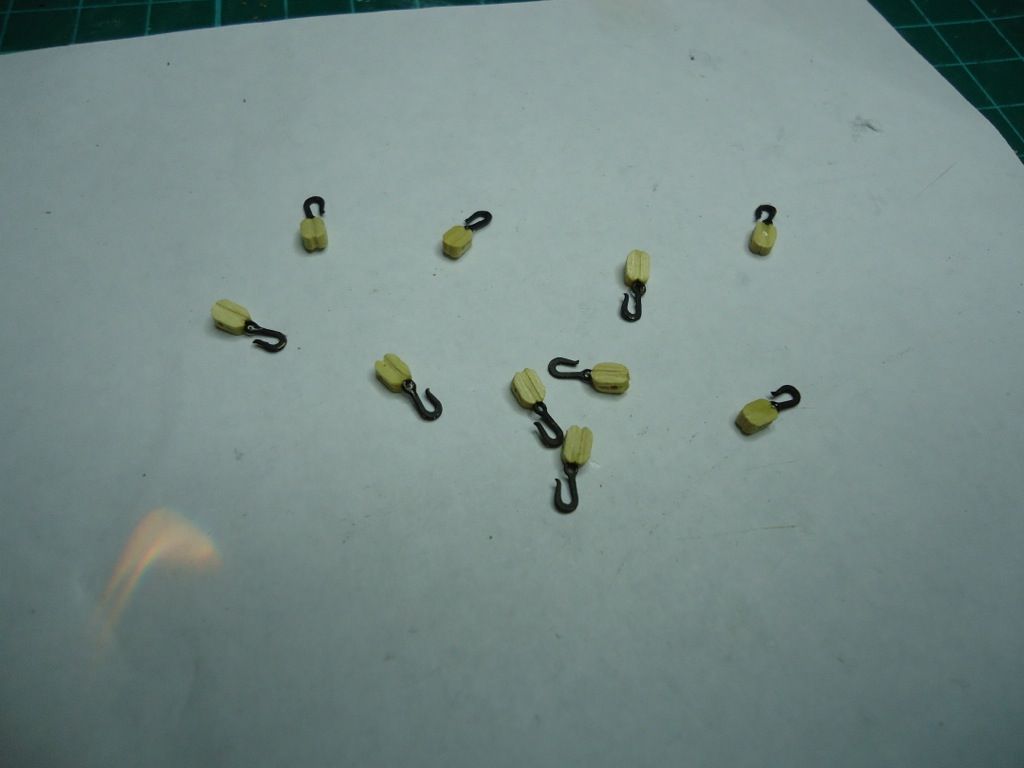 I then fully rigged the cannons to the upper deck, at the rear, I seen to be short of a few cannons to do the front ones. I then fully rigged the cannons to the upper deck, at the rear, I seen to be short of a few cannons to do the front ones.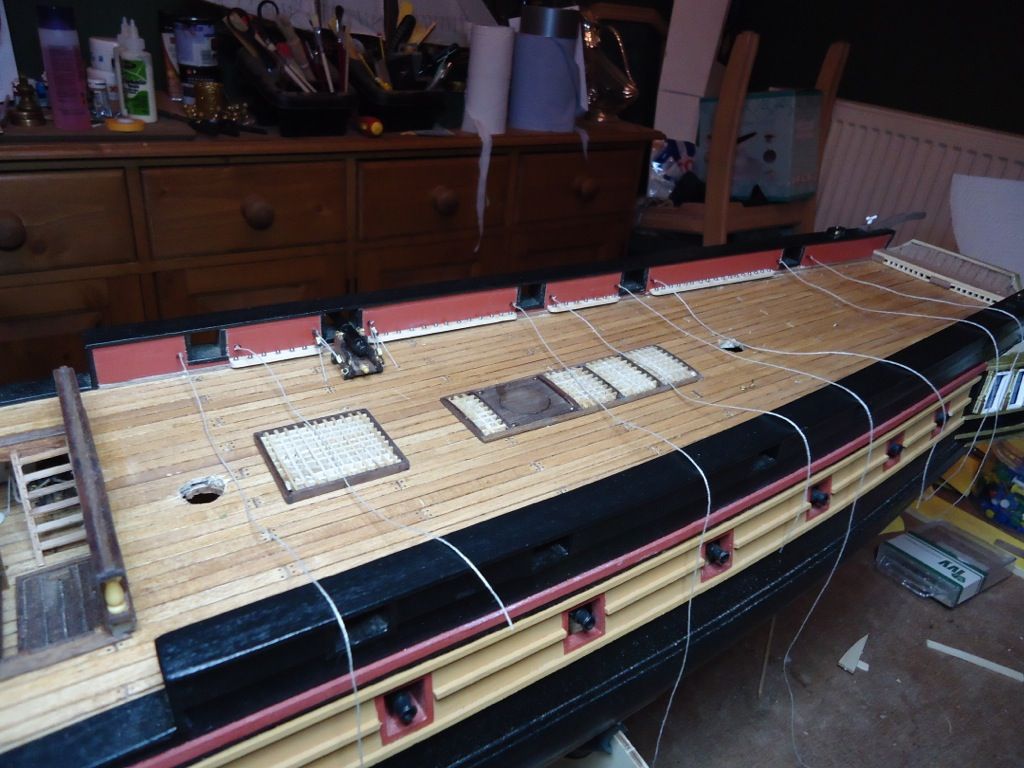 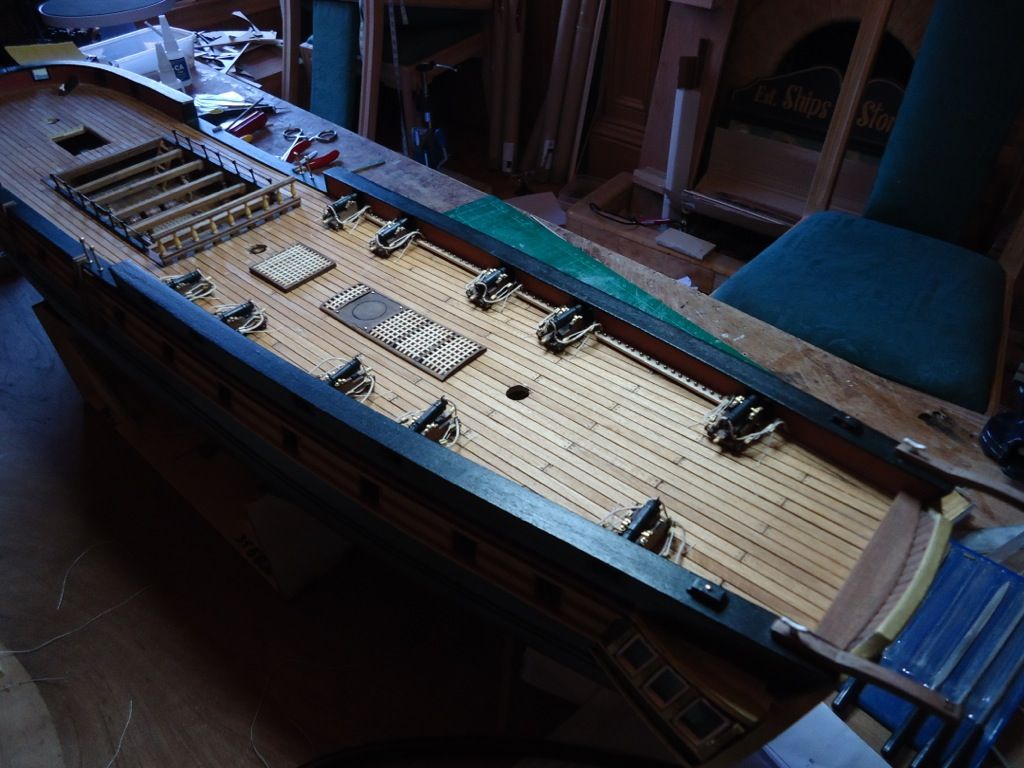 I then put in all the hooks, cleats and eyelets to the deck, /size] I then put in all the hooks, cleats and eyelets to the deck, /size]

It was then on to the racks for the belaying pins,
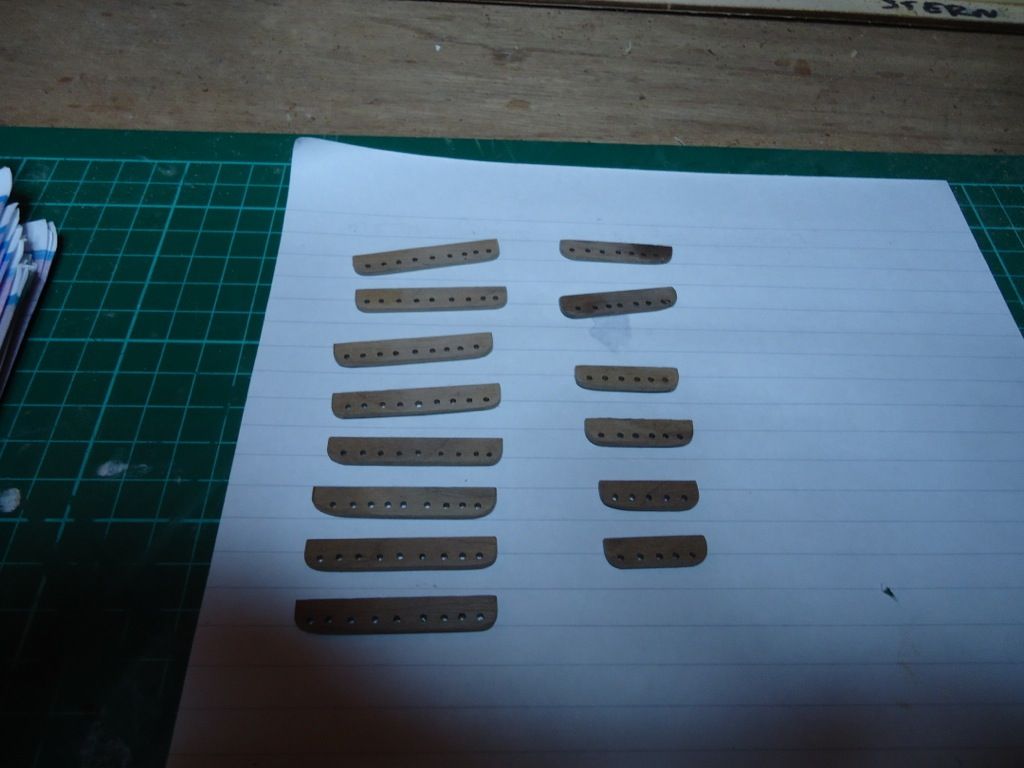
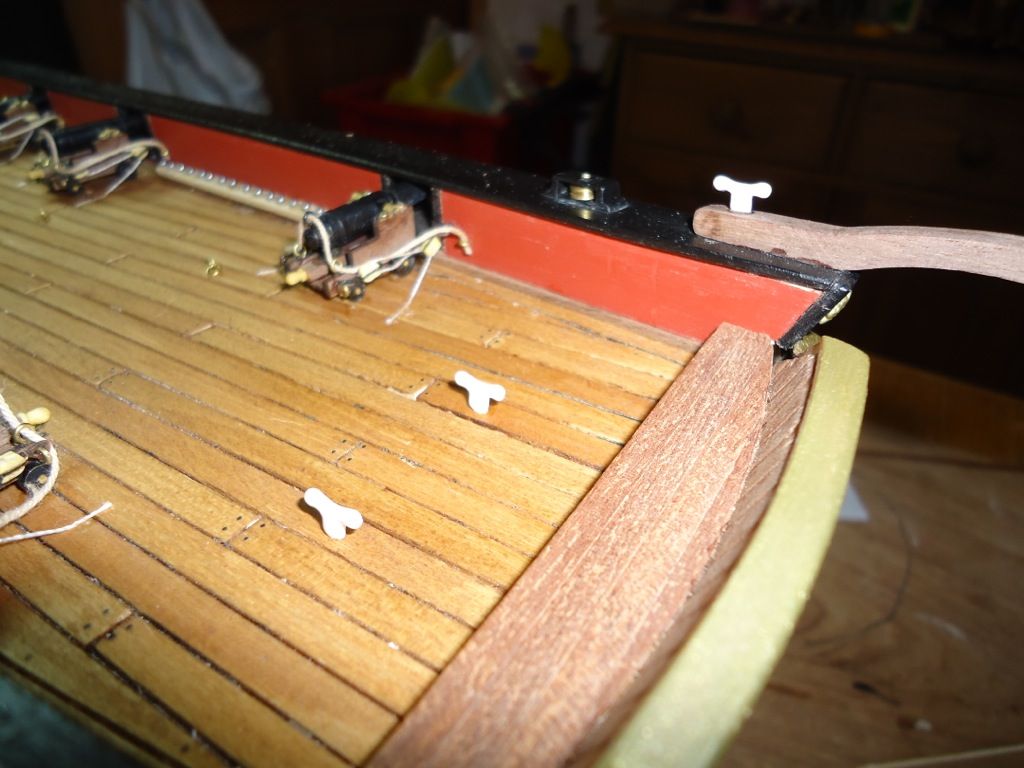
[size=7]I have coated the racks for the belaying pins with Danish Oil, and will put the pins in tomorrow, Is it a good idea to glue the pins into the rack or leave loose ?
MoMo
|
|
|
Rank: Vice-Master Groups: Registered
Joined: 13/01/2012 Posts: 605 Points: 1,630 Location: Bucks
|
Hi Mo, I have been trying to see where and how you are short of guns. I see that you have put 13 ports on each side ,I only put in 12 and the very last ports on the stern cabin I leave closed but there is a gun in there although a smaller weapon than supplied but you can only see it when the lights are on. That accounts for 4 but you would still be short . They must have packed it wrong mate. The pin rails look like they wont give you any trouble and as for glueing them in depends on how tight a fit you have got. Looking tidy though. HMS Surprise
HMS Snake
HMS Bounty
HMS Royal Caroline
HMS Victory rebuild
HMS Supply
|
|
|
|
|
She really is coming on a treat Mo... well done ..... Regards Alan
|
|
|
Rank: Vice-Master Groups: Registered
Joined: 09/02/2012 Posts: 569 Points: 1,675 Location: Scotland
|
The rack's for the belaying pin's, I glued a small piece of timber on to the rack, so as to give it an extra bit of surface area for the glue, to get a better fixing to the bulwarks.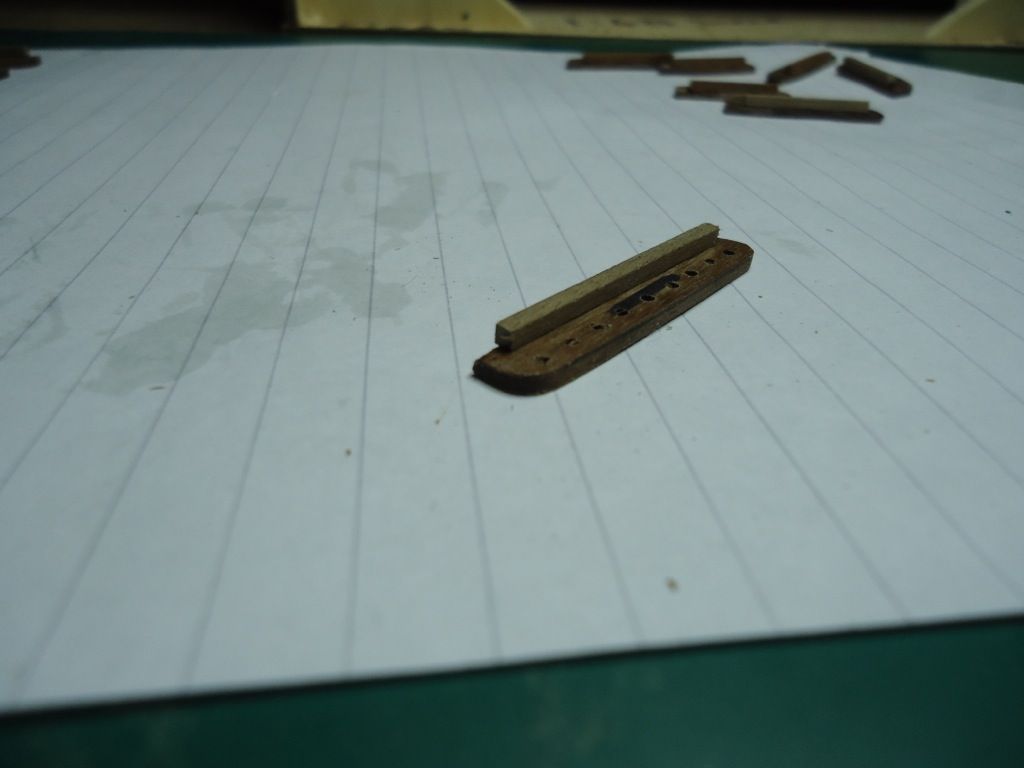 I am not sure if I should glue the pins into the racks or leave them loose, any advice ? I am not sure if I should glue the pins into the racks or leave them loose, any advice ? 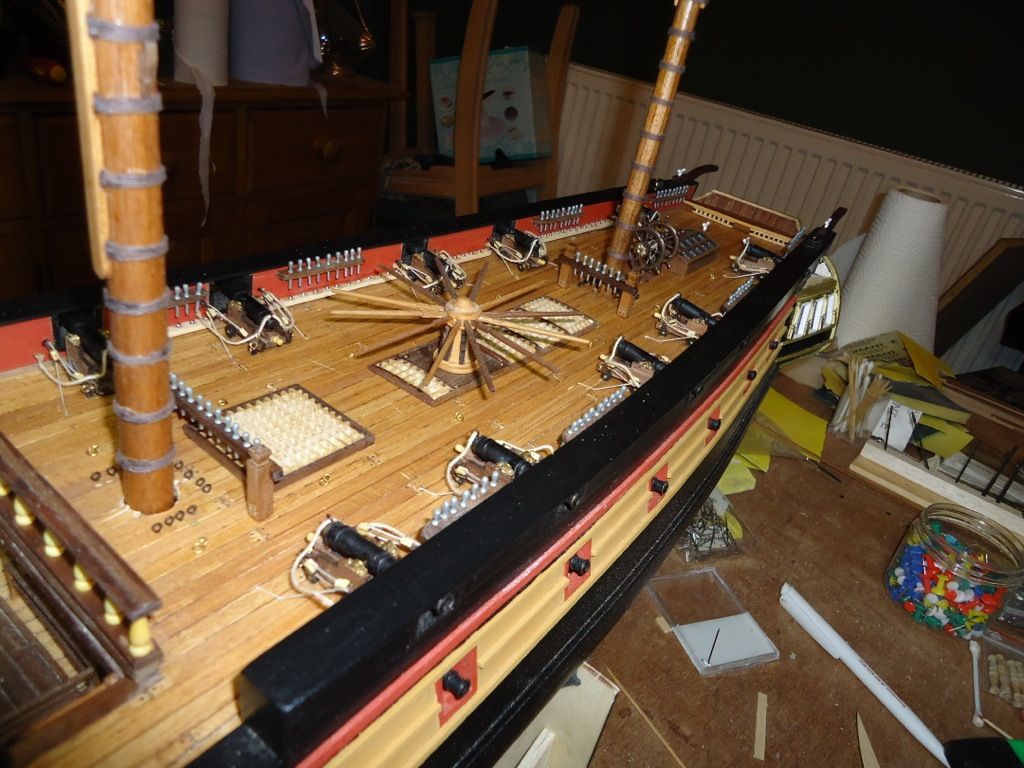 It was then on to the chainwales, this is a very fiddly job, seemed to be at it for ages untill I got a way to do them. I put 2 pins in to a piece of wood, the same thickness as the bit they are going to be attached to, this is to hold the clump block in place It was then on to the chainwales, this is a very fiddly job, seemed to be at it for ages untill I got a way to do them. I put 2 pins in to a piece of wood, the same thickness as the bit they are going to be attached to, this is to hold the clump block in place 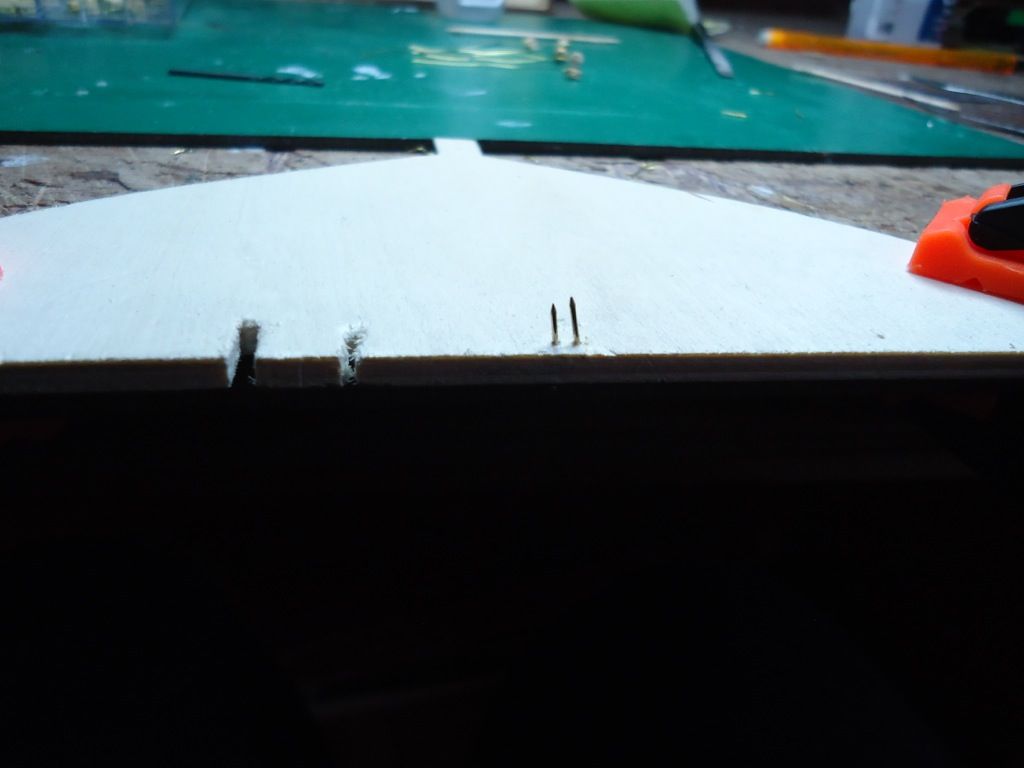 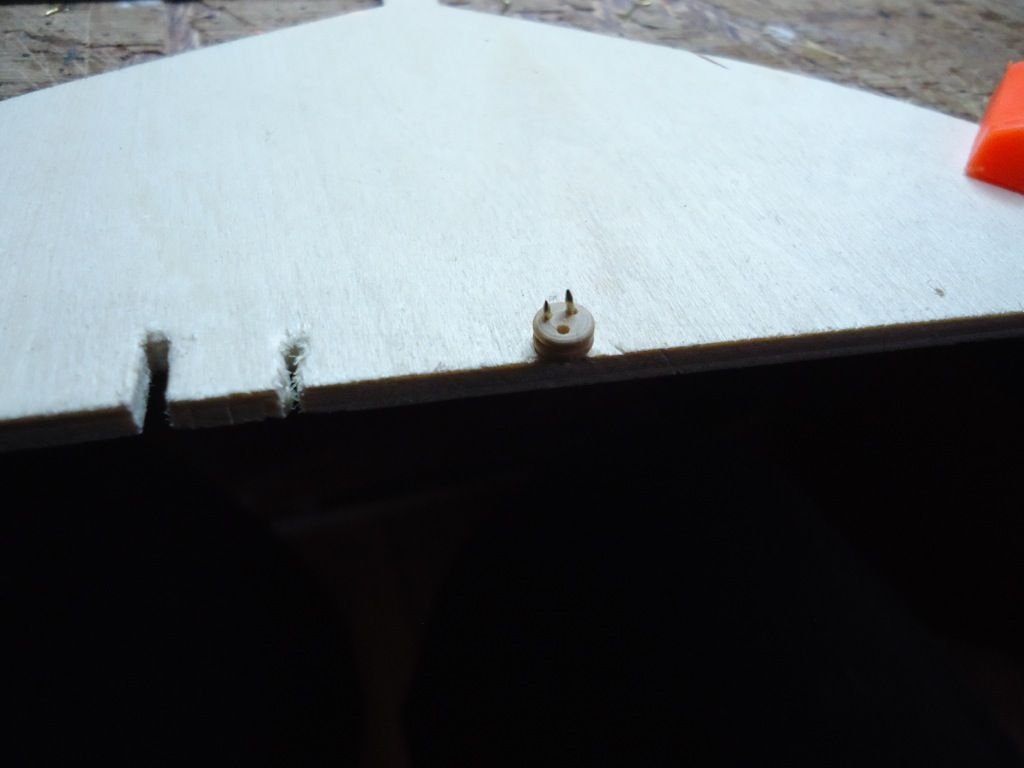 I then wound the brass wire around the block, twisted it a turn and a half, this secured the wire to the block. I then wound the brass wire around the block, twisted it a turn and a half, this secured the wire to the block.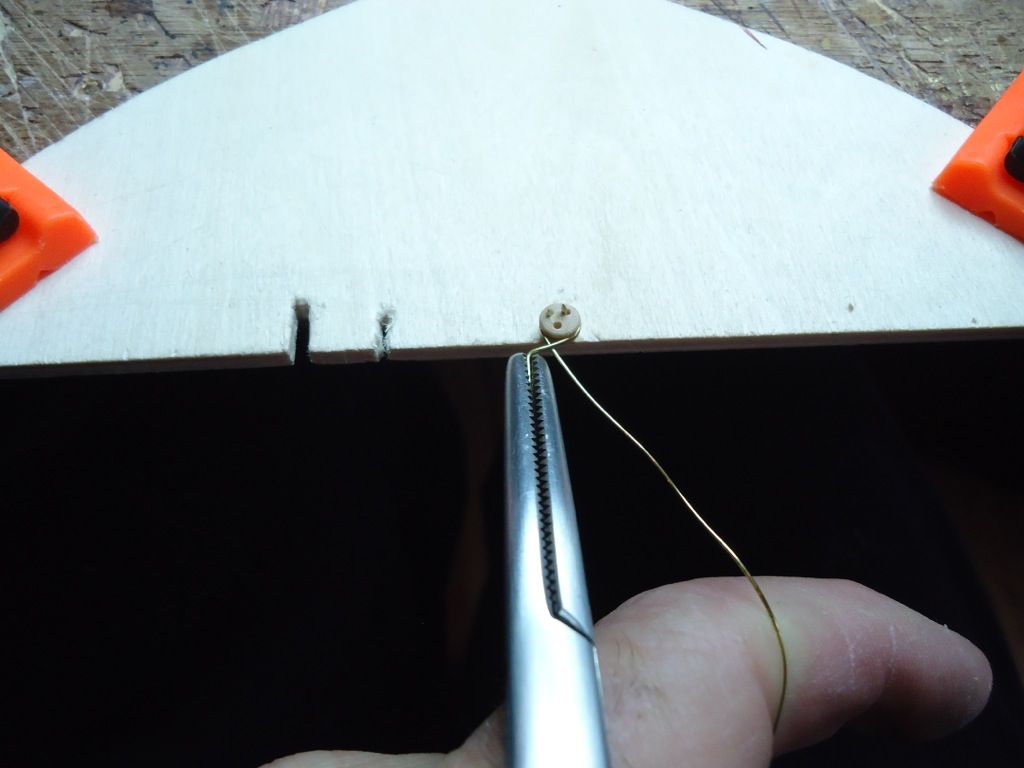 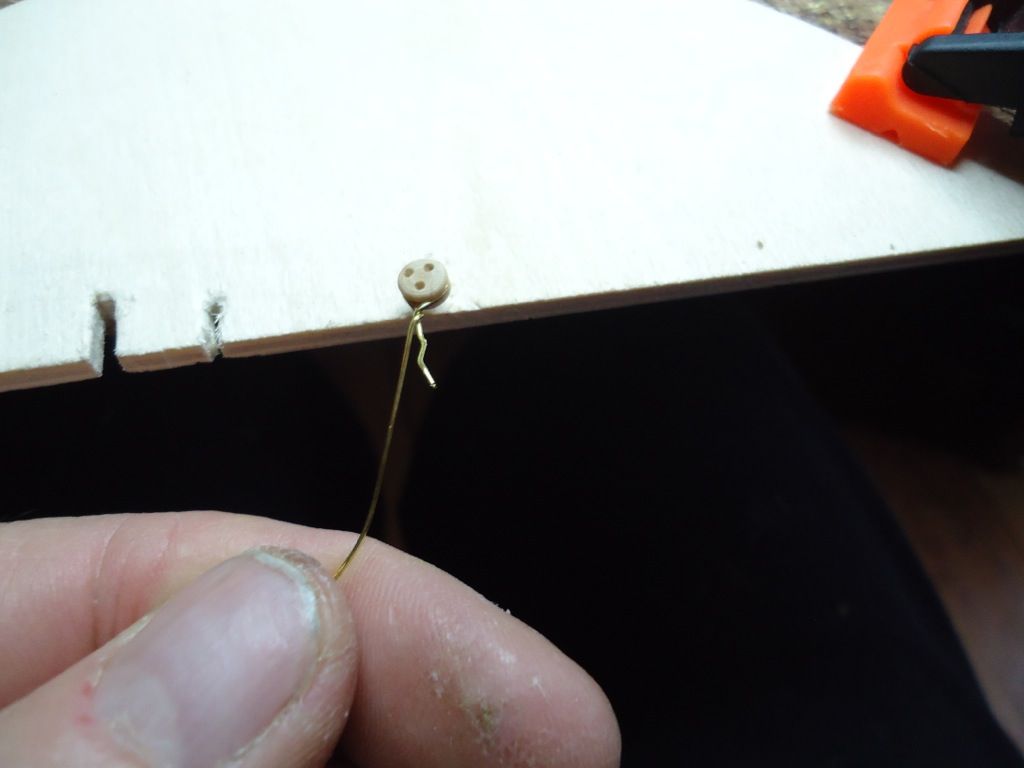 I then nipped of the unwanted piece of wire, I now have a block tied to the wire. I then nipped of the unwanted piece of wire, I now have a block tied to the wire.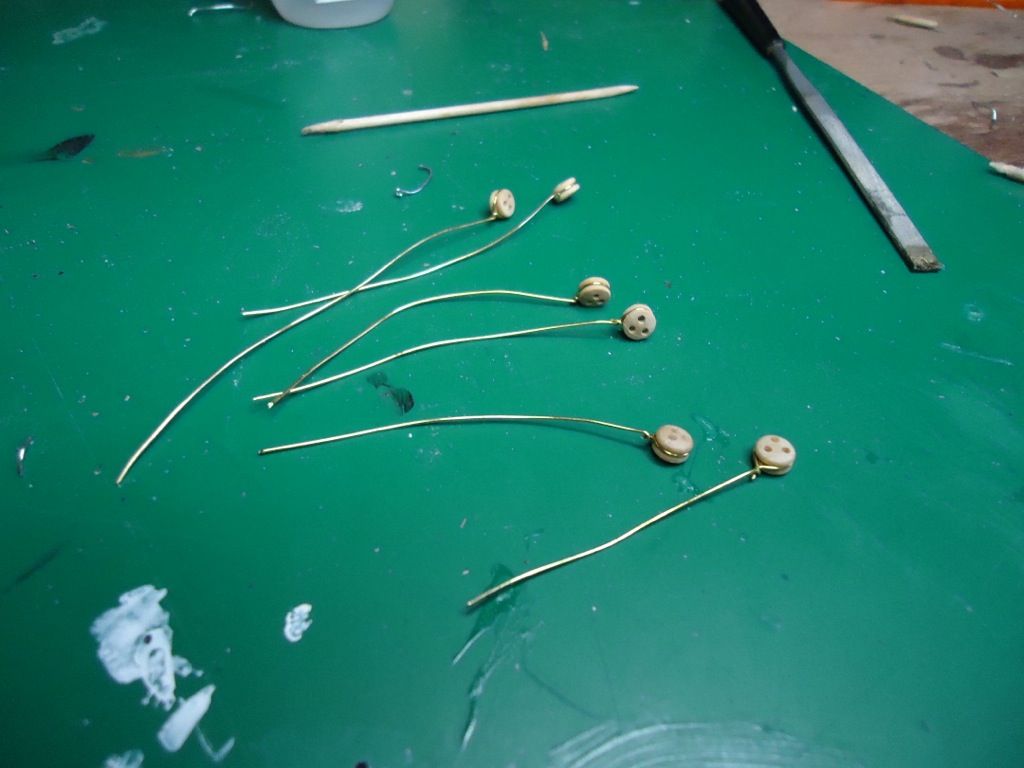 I then cut a saw draft in the same piece of wood, and inserted the wire with the block resting on the top of the wood, I held a 1.5 mm drill on the underside of the wood, and brought the wire up on it's self, giving the wire a twist to form a loop. I then cut a saw draft in the same piece of wood, and inserted the wire with the block resting on the top of the wood, I held a 1.5 mm drill on the underside of the wood, and brought the wire up on it's self, giving the wire a twist to form a loop. 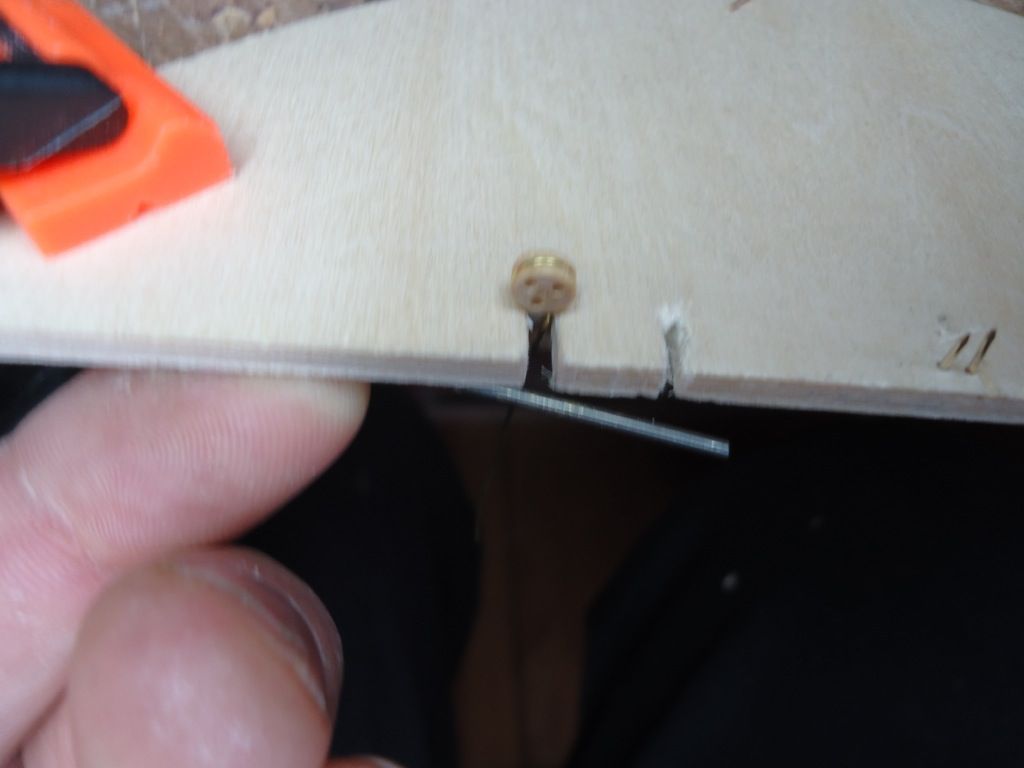  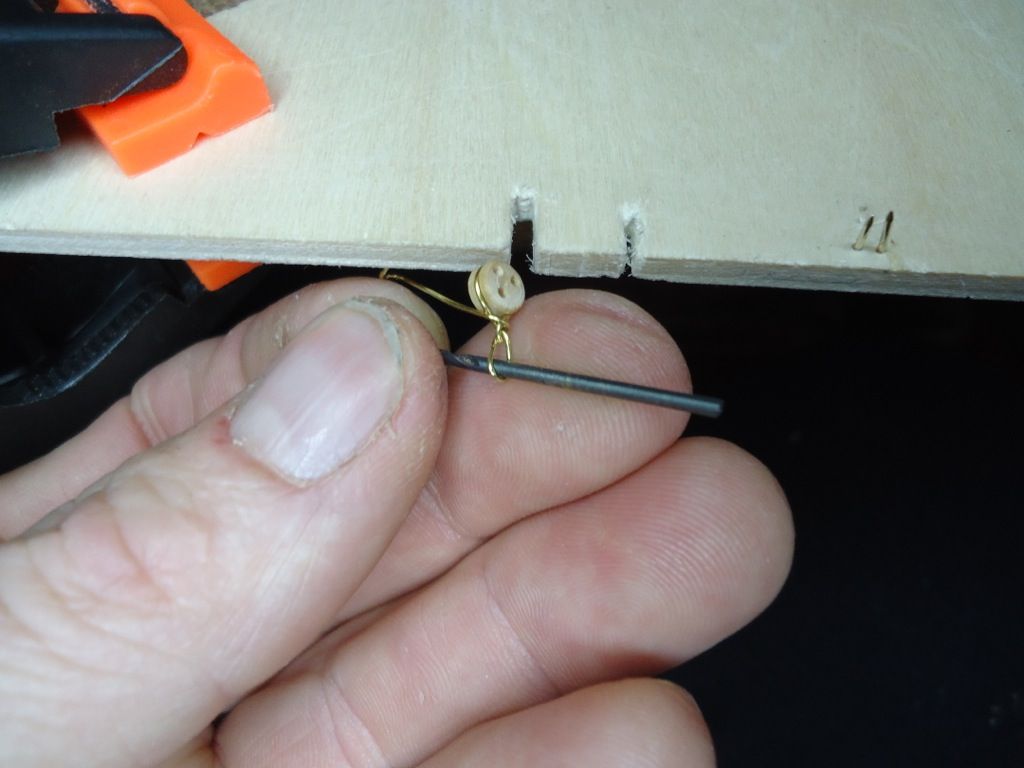 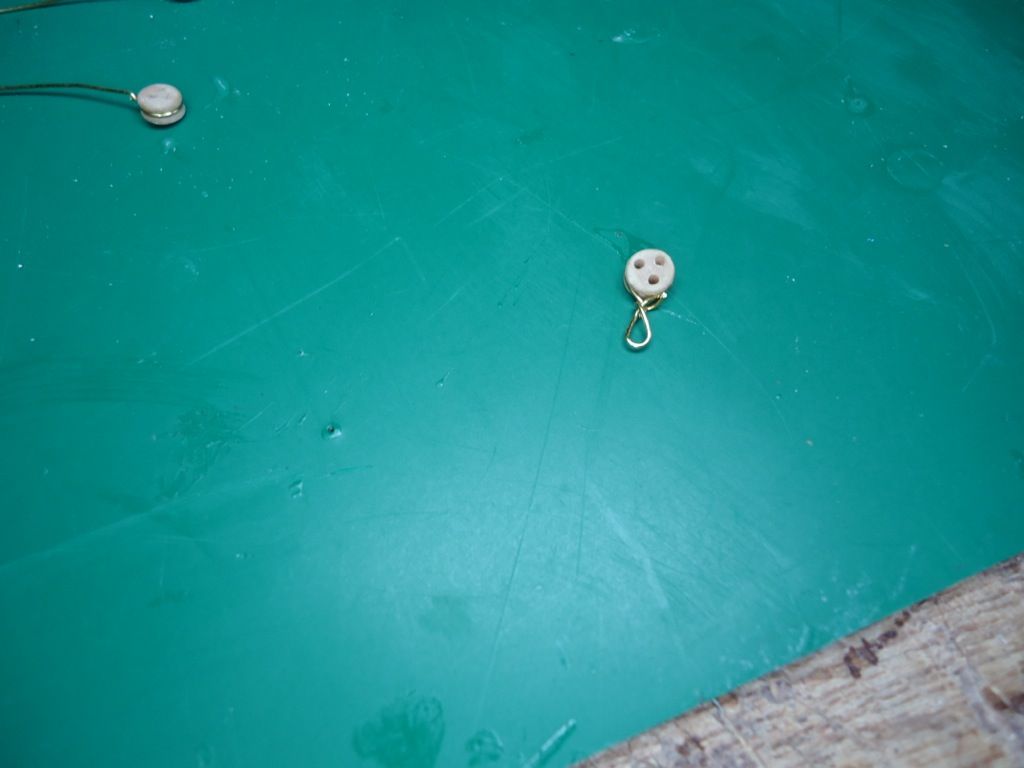 I then squashed them into the chainwale timbers, and gave them some glue to hold them in place, I then fitted the 3 x 1 mm cover plate, I will give them a coat of The old Danish Oil later. I can only say making these was a bit challenge, but getting there. I then squashed them into the chainwale timbers, and gave them some glue to hold them in place, I then fitted the 3 x 1 mm cover plate, I will give them a coat of The old Danish Oil later. I can only say making these was a bit challenge, but getting there. 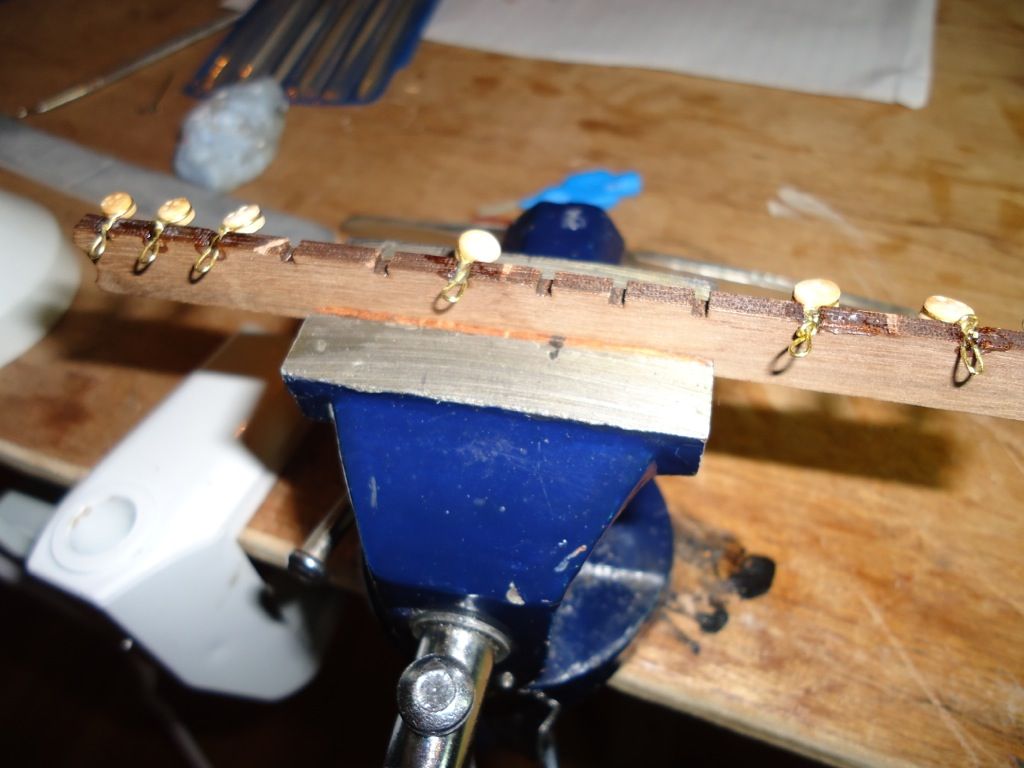 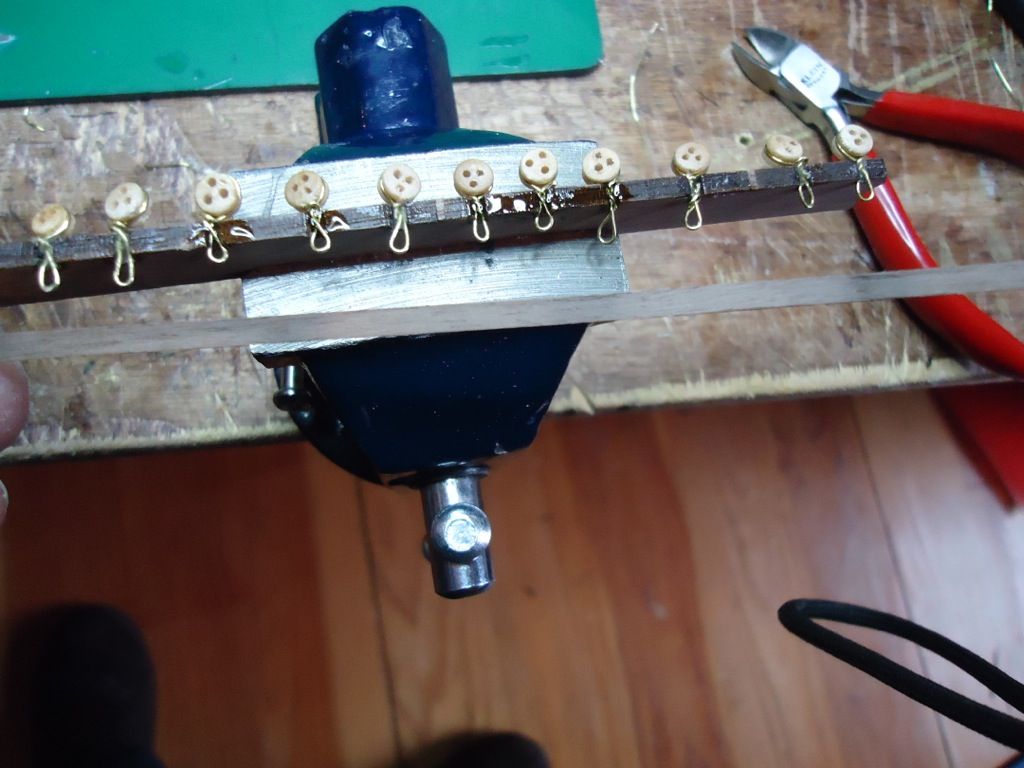 I will post a picture of the side of the ship with the chainwales fitted later. I will post a picture of the side of the ship with the chainwales fitted later.
MoMo
|
|
|
|
|
A very clever innovation Mo Current builds:-C57,Zero, Lamborghini Countach, Caldercraft HMS Agamemnon,Robi,R2-D2, MFH Cobra .
|
|
|
Rank: Pro  Groups: Registered
Joined: 17/03/2010 Posts: 301 Points: 941 Location: fife
|
similar to what i did mo.... but didnt think about the pins to hold the deadeyes.... pitty i am finished this now. as for the wire a few curses as it broke... if only you posted this a couple of months ago current builds
victory,endeavour,thermoplye,constitution
|
|
|
|
Guest (6)
|
 US
US

