|
|
 Rank: Amateur level 2  Groups: Registered
Joined: 21/09/2012 Posts: 42 Points: 129 Location: shropshire
|
Much to my surprise, my 1st delivery arrived today   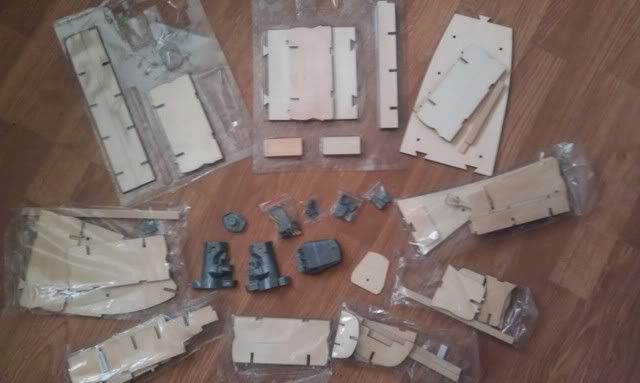 Only 10 days since subscribing and wasn't expecting till after xmas. Hull not being started until the new year, so will be concentrating on all metal assembly first, will be posting as I go Completed: Endeavour Longboat.Collecting: Yamato
|
|
|
 Rank: Pro Groups: Joined: 24/08/2009 Posts: 48,827 Points: -13,348
|
Look forward to seeing you progress 
|
|
|
Rank: Pro  Groups: Registered
Joined: 06/08/2011 Posts: 480 Points: 1,421 Location: Galway
|
Welcome aboard, I'm looking forward to watching your progress
|
|
|
|
|
Hi sJD77 welcome to the Yamato build forum,i will be looking forward to your diary regards Andy Current builds:-C57,Zero, Lamborghini Countach, Caldercraft HMS Agamemnon,Robi,R2-D2, MFH Cobra .
|
|
|
 Rank: Vice-Master     Groups: Registered
Joined: 21/04/2012 Posts: 747 Points: 2,233 Location: Tokyo, Japan
|
Hi sJD77 As Andy, I do, too. Building the Yamato is fun, have a good experience! Bon Voyage! Regards, Yutaro DeAGOSTINI 1/250 the YAMATO, 1/250 the AKAGI.
Hasegawa Co. 1/350 Battle ship NGATO, 1/350 Aircraft carrier Akagi, Battle ship MIKASA.
Water line series 1/700 Battle ship YAMATO, HIEI, YAMASHIRO, Aircraft carrier HIRYU,TAIHO, Heavy Cruiser Myoukou, Ashigara, Nachi, Haguro & others.
|
|
|
Rank: Amateur level 2 Groups: Registered
Joined: 21/09/2012 Posts: 42 Points: 129 Location: shropshire
|
Well made a start on the bridge, and the one set of main turrets. Only came across one problem, when trying the two halves of bridge together, there was a step. The height difference was probably only half mill, but was noticeable 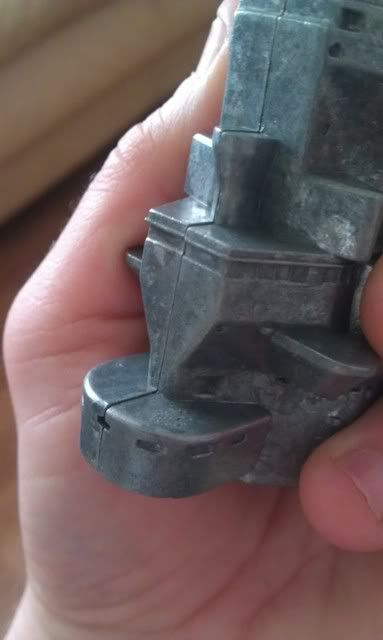 Decided to rectify the problem by filing off the front top locater to allow me to pivot off the back one, making sure both top and bottom remained flat 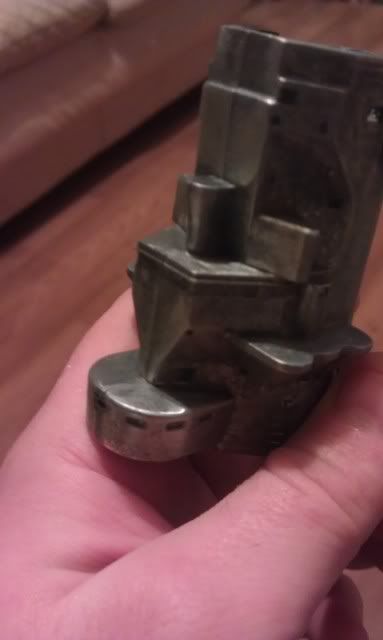 Everything else went together relatively easily, heres how things look now 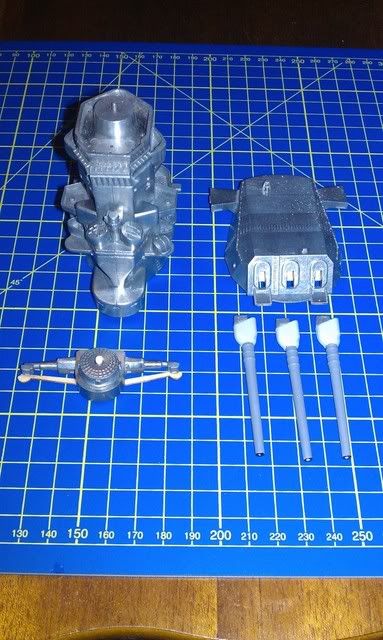 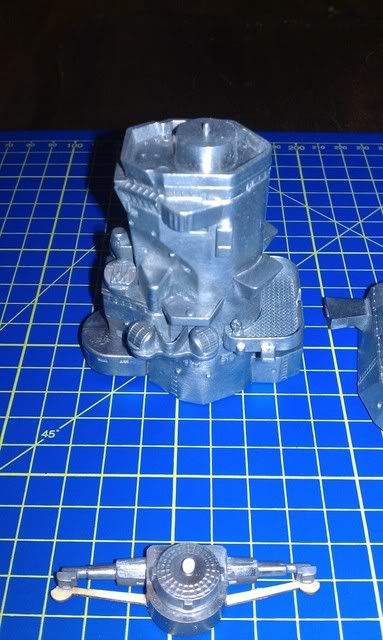 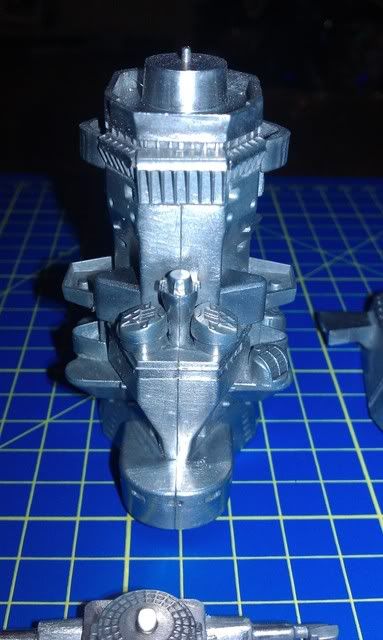 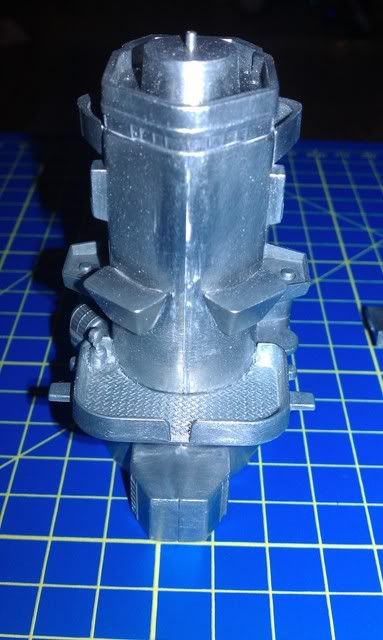 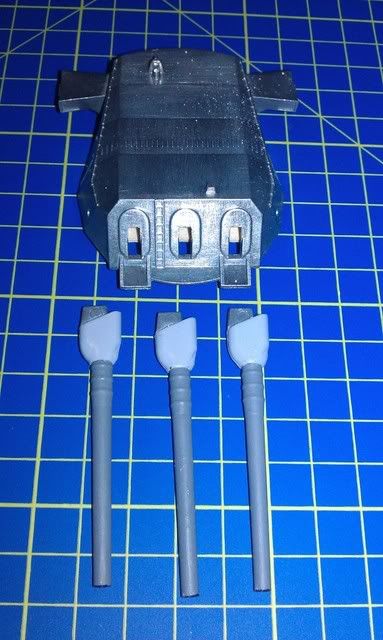 Not painting parts until all sub-assemblies are ready to put on to the main super structure. Have painted the turret barrels as they are ready to go on once the turret completed and painted. Just prior to posting, was checking through hull pieces and realised I had missed off one set of machine gun mechanisms to the bridge, these will be added soon. Thanks for looking in, please feel free to comment, Steve Completed: Endeavour Longboat.Collecting: Yamato
|
|
|
|
|
Hi sJ yh some of the castings are a little bit out but there all rectifiable with a little metal bashing,looking good regards Andy Current builds:-C57,Zero, Lamborghini Countach, Caldercraft HMS Agamemnon,Robi,R2-D2, MFH Cobra .
|
|
|
Rank: Amateur level 2 Groups: Registered
Joined: 21/09/2012 Posts: 42 Points: 129 Location: shropshire
|
|
|
|
|
|
Hi sJD77 Had an idea that you wouldn't be able to resist starting  , just one thing that might cause a problem later is the screw right at the front where the bow block will attach the two screws between formers 2 and 3 should keep it all flat at the front. Very nice tidy work keep it up regards Andy Current builds:-C57,Zero, Lamborghini Countach, Caldercraft HMS Agamemnon,Robi,R2-D2, MFH Cobra .
|
|
|
Rank: Amateur level 2 Groups: Registered
Joined: 21/09/2012 Posts: 42 Points: 129 Location: shropshire
|
Thanks for looking in Andy, and yes, was aware about the foremost screw, went abit overboard with screws to guarantee flatness whilst glue dried. Didn't want to end up with a banana Completed: Endeavour Longboat.Collecting: Yamato
|
|
|
Rank: Amateur level 2 Groups: Registered
Joined: 21/09/2012 Posts: 42 Points: 129 Location: shropshire
|
Started off this months build with the base of the bridge 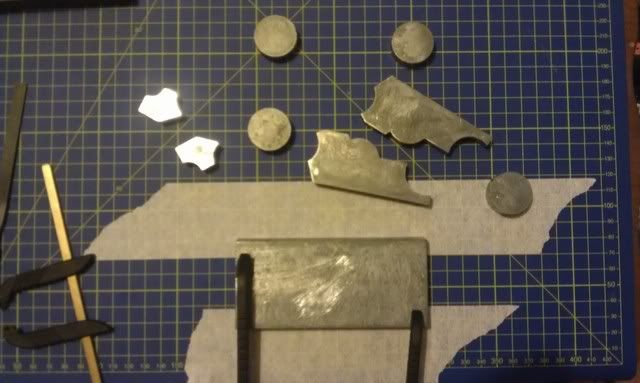 Everything filed and sanded down, then glued up and clamped flat 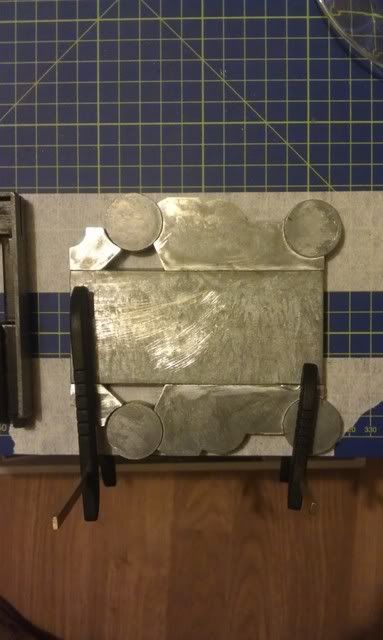 Once glue set, then filled in along joins with putty, left to dry and sanded down. 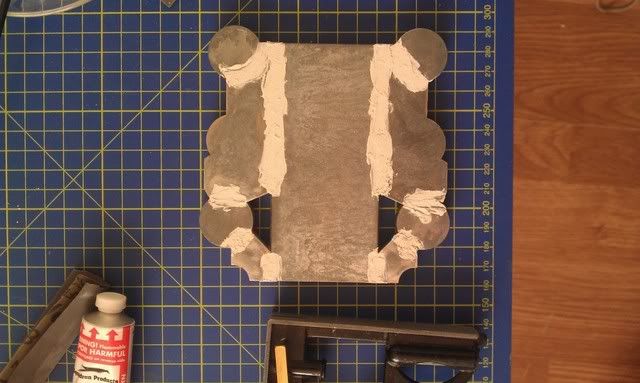 Even though i'm not painting any of the metal parts until I have everything in place for final assembly, I decided to give base a couple coats of undercoat as I wanted to see how visible the joins were after sanding down.  Even though there is a bit of visibility after sanding, after looking through official build, I think that after the other layers and gun placements are added, then the joins that are slightly visible are under these parts. Completed: Endeavour Longboat.Collecting: Yamato
|
|
|
|
|
Hi Steve the lower part of the bridge piece is mostly covered by the upper parts but I would recommend that you fill theses lines. To do mine I used isopon plastic car filler this gave a flat all over to the part, just a suggestion  and she's coming together nicely regards Andy Current builds:-C57,Zero, Lamborghini Countach, Caldercraft HMS Agamemnon,Robi,R2-D2, MFH Cobra .
|
|
|
Rank: Amateur level 2 Groups: Registered
Joined: 21/09/2012 Posts: 42 Points: 129 Location: shropshire
|
Etch parts for the radar up for construction next 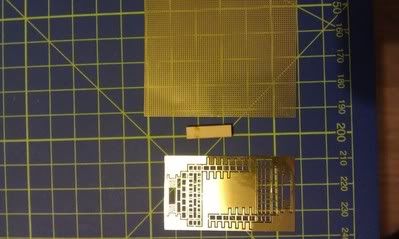 Basket pieces cut out to size and then formed around the wooden piece 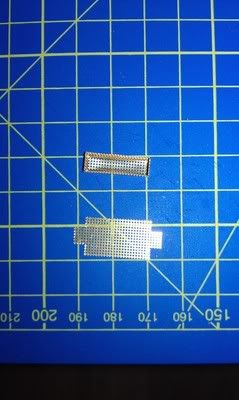 Next pieces also cut out, formed to shape, then baskets inserted 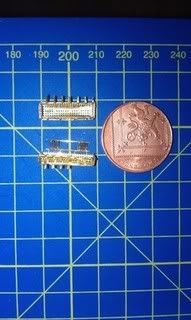 Finally, etch parts fitted to radar piece 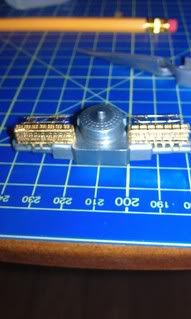 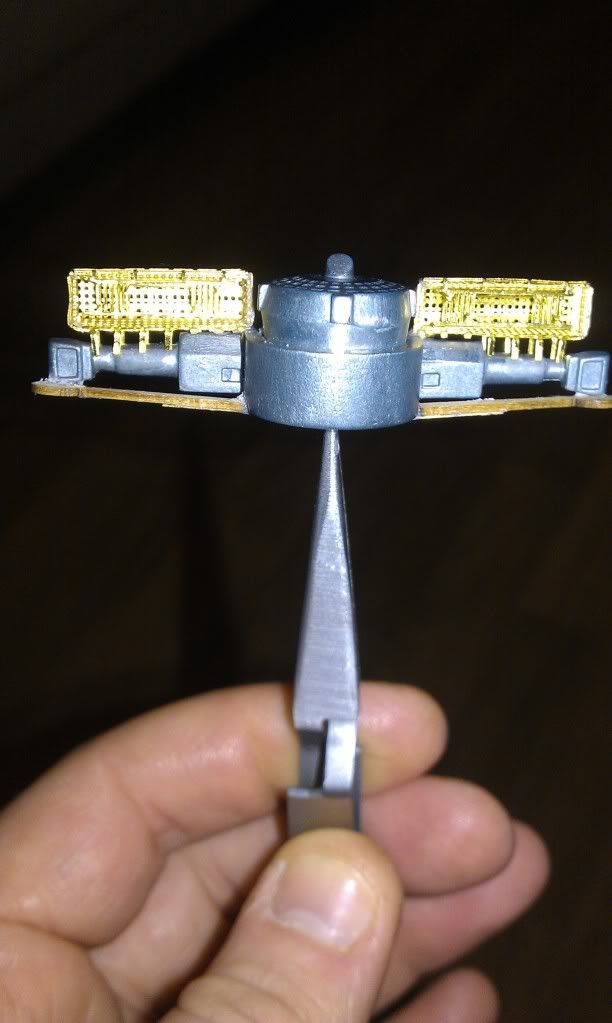 Just got the final bend to do on the etch which will be done after spraying to allow even coverage. Quite a fiddely set of parts to build. Overall, pleased with how they turned out. Completed: Endeavour Longboat.Collecting: Yamato
|
|
|
|
|
Hi Steve Nice work on the etch and yes it can be a little challenging with its size, may be a little late to say now but I used a panel pin hammer on the mesh whilst it was in the wooden former to get a good square shape to the panel. Also the indentations on the top of the range finder were not present on the Yamato I filed them off on mine but you can fill them aswell or leave the part as it is , its your choice. Hope this helps. regards Andy Current builds:-C57,Zero, Lamborghini Countach, Caldercraft HMS Agamemnon,Robi,R2-D2, MFH Cobra .
|
|
|
Rank: Amateur level 2 Groups: Registered
Joined: 21/09/2012 Posts: 42 Points: 129 Location: shropshire
|
Firstly for this installment, the stern deck, and stern block. No problems with these pieces. Stern block went together nicely, and was just a case of ensuring everything was even from the centre line with the stern deck pieces. 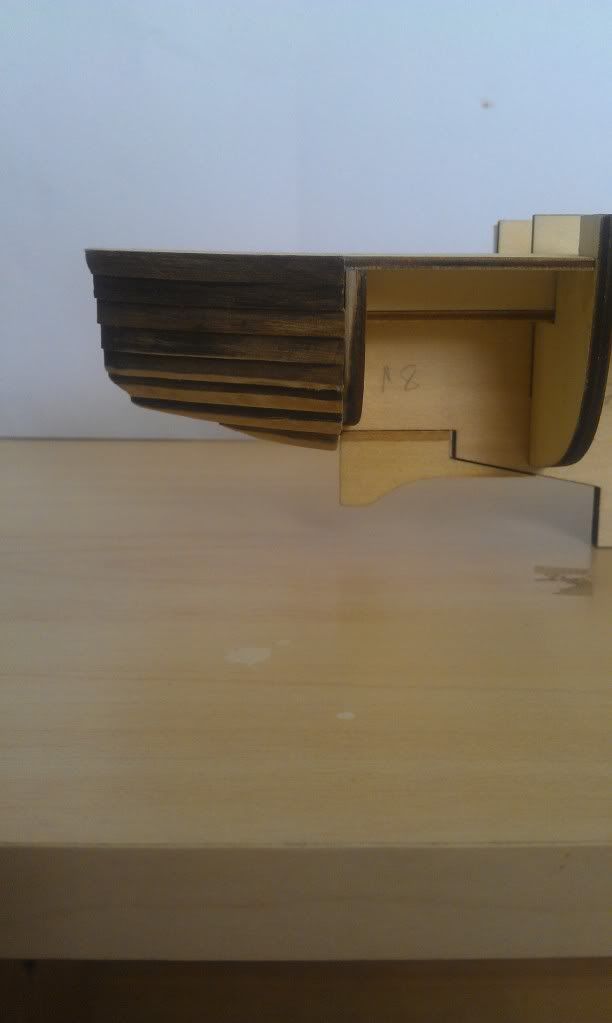  Now for the problem pieces  The bow block was firstly built as instructions as a sub assembly. This lead to problems with the back and front having a height difference of about 3mm, back being the highest point. Solution for this was dismantling block, and rebuilding in-situ on the hull,thanks Andy for advice. The problem however didn't go away As I approached top of block, I could see that it was giving me the same 3mm height difference. This time though, I didn't want to dismantle as found it difficult to do with the block as a sub assembly, so god only knows how I would have coped with taking apart on the hull. My solution was to place all but last piece on, then placed a 3mm packer at the front edge of final piece and glue it down to block. Gap was then filled in bit by bit with putty. 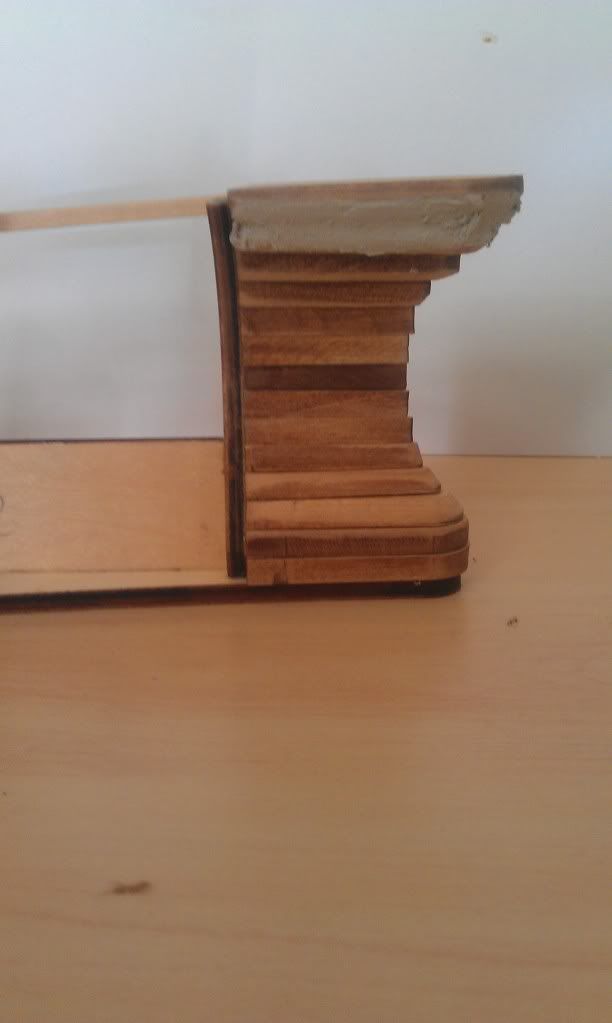 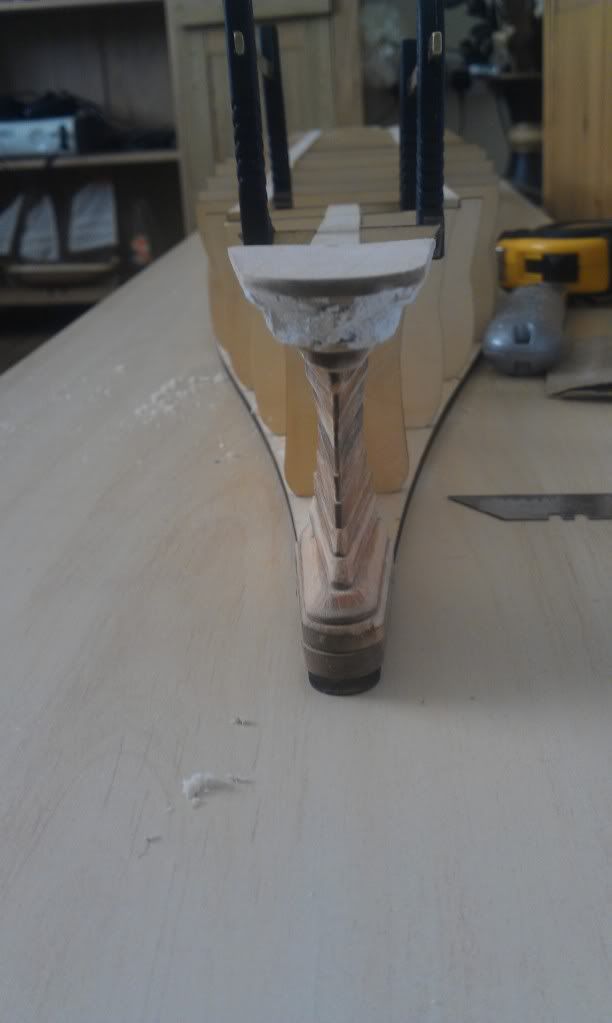 The horseshoe type piece still to be added yet, but have a fair bit of sanding to do as the top of block piece should be level with the reinforcement beam that runs from rib 1 to 4. Horseshoe piece will be added when deck pieces arrive to ensure everything sanded down to correct angles. Please feel free to comment, and if anyone thinks I have done the wrong thing with my bow block problem, then please let me know, all help greatly appreciated. Regards, Steve Completed: Endeavour Longboat.Collecting: Yamato
|
|
|
|
|
Hi Steve nice resolution to the bow block problem and looking good as for advice and help that's what the forums for to help each other get the best from our builds, I would have done the same on the bow block but I think I see the problem in your pics it looks like the no 1 former at the bow is warped bending back at the top, if so this is the problem area not the bow block. If its an optical illusion then my appologys, also if your going for a super smooth hull like mine all the filler will be covered. Hope this helps regards Andy Current builds:-C57,Zero, Lamborghini Countach, Caldercraft HMS Agamemnon,Robi,R2-D2, MFH Cobra .
|
|
|
Rank: Amateur level 2 Groups: Registered
Joined: 21/09/2012 Posts: 42 Points: 129 Location: shropshire
|
Been a while since last posting, but been quietly carrying on with the build. A few of the metal sections have been partially built  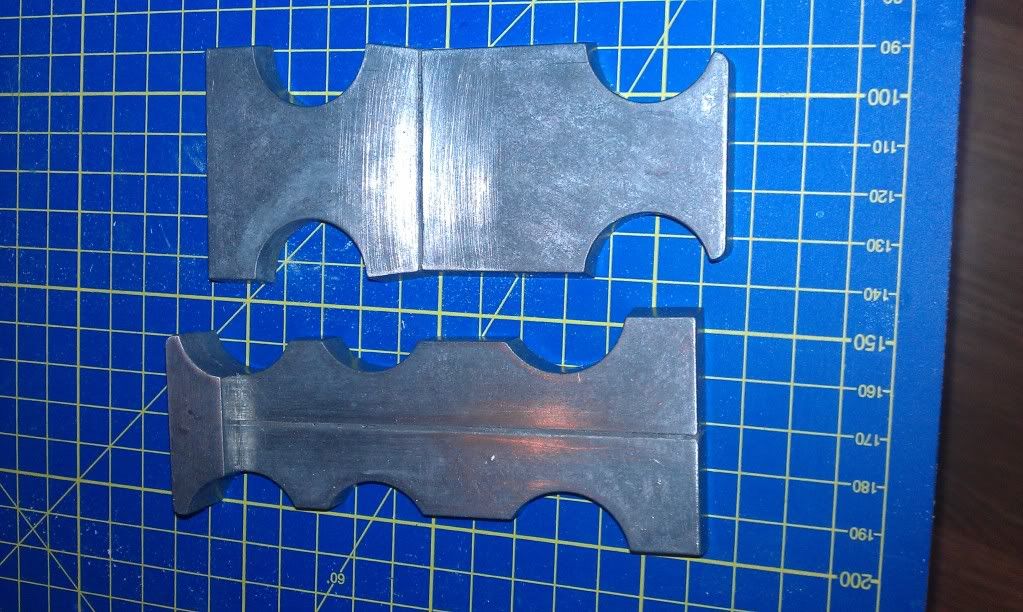 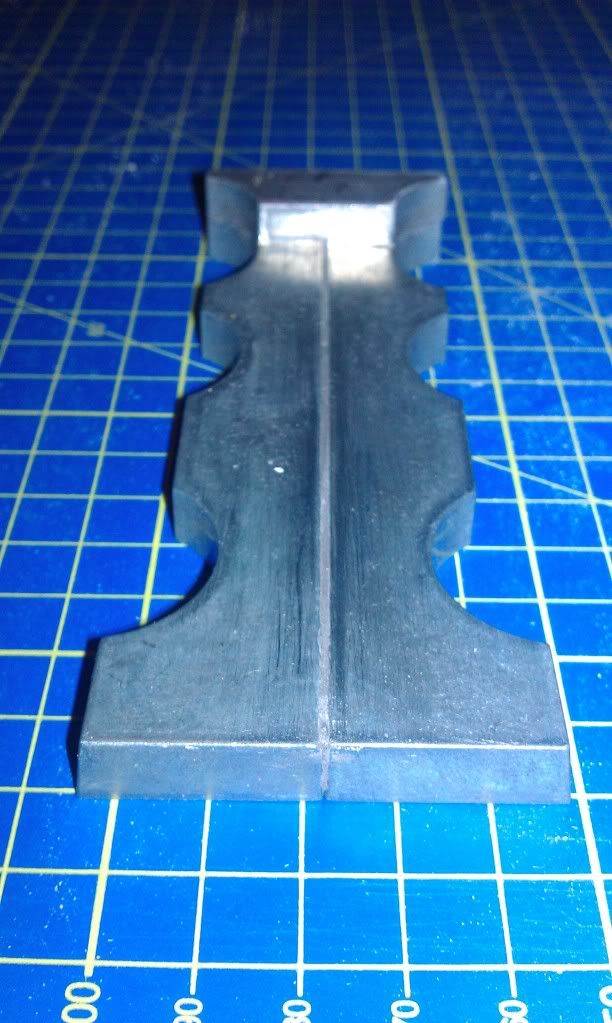 Had a bit of a problem getting the flush fitting parts to hold their grip, despite roughing up the two sides. Tried using both super glue, and epoxy glue, neither of which held well, my solution was to drill 3 holes in the two sides to be joined, then fix together with epoxy glue, which squeezed out of the drilled holes, then once set was like a rivet. Seems to have done the job this time 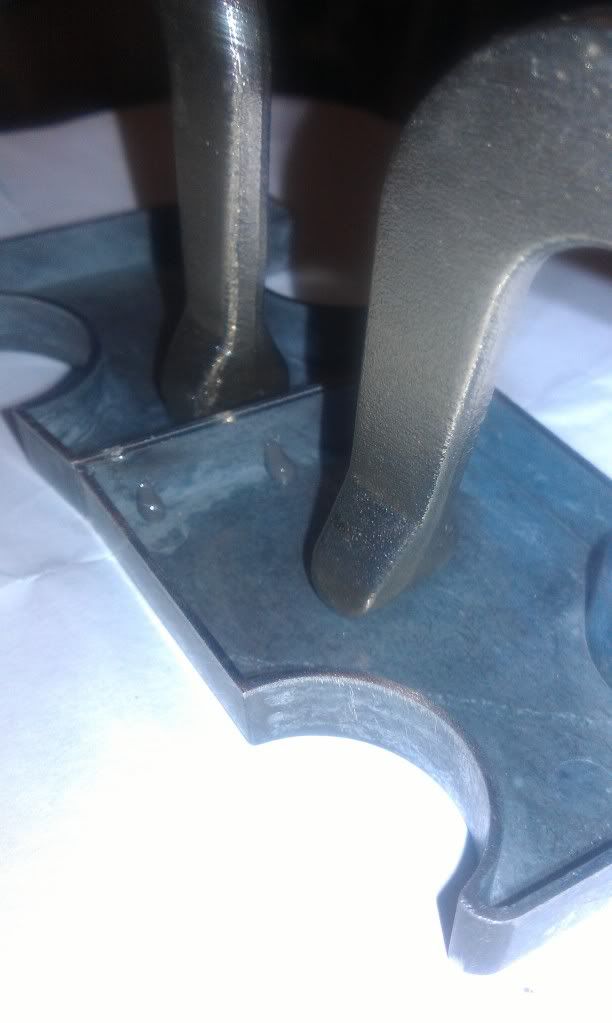 Of the main metal sections, still have to re-do the whole base piece of super structure. Originally when built, the join lines were visible under the coat of primer, so I was re-filling with putty and sanding down when the glue let me down and it came apart. Will be drilling these pieces and re-gluing soon. Completed: Endeavour Longboat.Collecting: Yamato
|
|
|
Rank: Amateur level 2 Groups: Registered
Joined: 21/09/2012 Posts: 42 Points: 129 Location: shropshire
|
|
|
|
|
|
coming along nicely “Whenever you find yourself on the side of the majority, it is time to pause and reflect.”
-Mark Twain
|
|
|
|
|
Hi Steve Nice work on the planking and progress. The problem I found with the bridge castings is that the sides are not at right angles [wider at the bottom than the top] so there is a gap at the top when fitted together correctly the unwary can end up with a dihedral instead of a flat section, a bit of filler cures the gap problem. regards Andy Current builds:-C57,Zero, Lamborghini Countach, Caldercraft HMS Agamemnon,Robi,R2-D2, MFH Cobra .
|
|
|
|
Guest
|
 US
US

