|
|
|
|
Looking really good Admiral, half way there now....   .. Keep the pics coming, it's all very helpful.... Regards Alan
|
|
|
 Rank: Pro    Groups: Registered
Joined: 24/09/2012 Posts: 491 Points: 1,452 Location: London
|
NMBROOK wrote:Looking good,shes starting to come alive now  You have the start of some lovely sweeping lines on the stern planking.You have set yourself a task with the half mil gap,I just did my caulking with pencil(well actually a lot of pencils   ) before fitting but im not painting mine. Kind Regards Nigel Thanks Nigel, Thats a good idea and i do that for the rest of the hull with a black marker, but for the lower hull im going to end up painting over it all with will probably cover up the pencil marks, not sure yet how im going to do the caulking but i leave the 0.5mm gap so that i'll still have the opportunity   Processing - Progressing
Previous builds: HMS Victory
Current build: HMS Sovereign of the seas
|
|
|
 Rank: Pro    Groups: Registered
Joined: 24/09/2012 Posts: 491 Points: 1,452 Location: London
|
Gandale wrote:Looking really good Admiral, half way there now....   .. Keep the pics coming, it's all very helpful.... Regards Alan thanks a bunch Alan, cutting out the gunports doesn't take as long as i thought, but after doing one side i am taking more time on the other, which is a good thing because while on display you usually dont see the other side of the ship, so in the end one side might end up looking better than the other haha   hopefully both sides will look the same Processing - Progressing
Previous builds: HMS Victory
Current build: HMS Sovereign of the seas
|
|
|
 Rank: Pro Groups: Joined: 24/08/2009 Posts: 48,827 Points: -13,348
|
Admiral Anti Spiral wrote:NMBROOK wrote:Looking good,shes starting to come alive now  You have the start of some lovely sweeping lines on the stern planking.You have set yourself a task with the half mil gap,I just did my caulking with pencil(well actually a lot of pencils   ) before fitting but im not painting mine. Kind Regards Nigel Thanks Nigel, Thats a good idea and i do that for the rest of the hull with a black marker, but for the lower hull im going to end up painting over it all with will probably cover up the pencil marks, not sure yet how im going to do the caulking but i leave the 0.5mm gap so that i'll still have the opportunity   Hi Admiral,before I decided to leave the underneath of my hull natural,I toyed with the idea of caulking and then airbrushing the underside with a very dilute wash of white that would allow the caulking to show through as well as a bit of the wood colour so it wouldn't be glaring.Just an Idea. Kind Regards Nigel
|
|
|
 Rank: Super-Elite      Groups: Registered
Joined: 24/04/2010 Posts: 5,787 Points: 17,662 Location: Stafford, United Kingdom
|
Hi Admiral, Very nice work,  the gun ports look spot on Kind regards Mike MWG BUILD DIARIES: HMS VICTORY, SOVEREIGN OF THE SEAS, SAN FRANCISCO II, HMS HOOD, HMS ENDEAVOUR LONGBOAT, HMS VICTORY X-SECTION, 007 DB5, NISSAN GTR, CUTTY SARK, RB7, AKAGI, BARK HMS ENDEAVOUR, HUMMER H1, MITSUBISHI ZERO.
|
|
|
 Rank: Pro    Groups: Registered
Joined: 24/09/2012 Posts: 491 Points: 1,452 Location: London
|
MWG wrote:Hi Admiral, Very nice work,  the gun ports look spot on Kind regards Mike Thanks for the feedback mike!  Processing - Progressing
Previous builds: HMS Victory
Current build: HMS Sovereign of the seas
|
|
|
 Rank: Pro    Groups: Registered
Joined: 24/09/2012 Posts: 491 Points: 1,452 Location: London
|
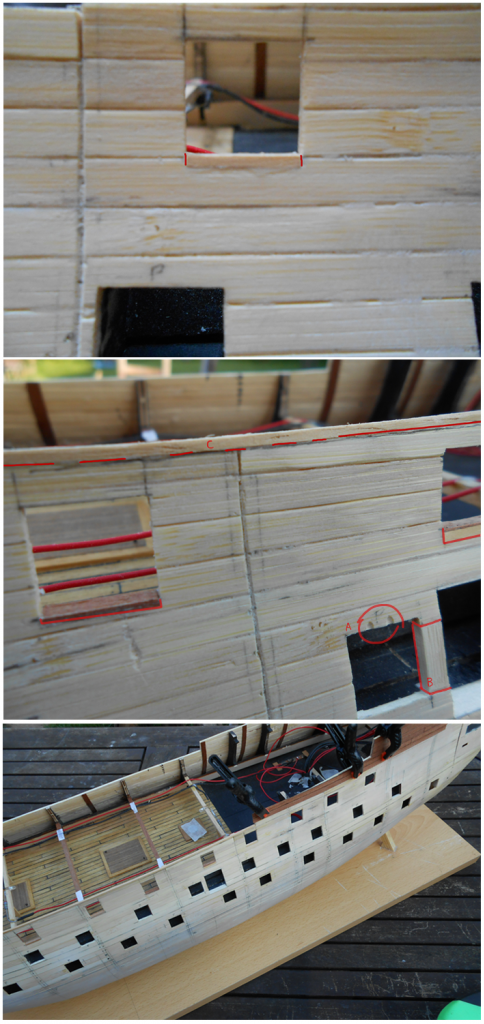
More images, just showing how i managed to fix some of the gun ports i messed up on On the second image i decided to add a 1.5mm strip of wood (c) just to add more height, the gap between the gun ports and the top of the hull just seemed a bit too short for me, i also tested to see how the cannons would fit, and to me the gun ports seem to low, so for the decking i'll probably just use some card and plank the deck on that to make it lower while i've also risen the gun ports by 1mm on that top deck. Whilst filing down the side of the gun port next to the the piece between the two broke off (B)though managed to fix it with some left over bammboo, didn't realise it'd be so flimsy. also managed to loose control of the router/dremel at times (A), making some marks that the second layer should nicely cover up, only a couple more ports to drill out then clean up, then can get ready for working fully on the second layer, should be fun!     Processing - Progressing
Previous builds: HMS Victory
Current build: HMS Sovereign of the seas
|
|
|
|
|
Very nice Admiral, your port repair is exactly how I did mine, well done .....   Regards Alan
|
|
|
 Rank: Master      Groups: Registered
Joined: 30/03/2011 Posts: 1,344 Points: 4,079 Location: Bryanston, Johannesburg. RSA
|
Well done, Admiral, looking good. Rgds, Hans
"It's okay to make mistakes. mistakes are our teachers - they help us to to learn, even if it is painfully"
Current Build:
Endeavour Cross section,D51
Completed: HMS Victory
Under the bench: Endeavour x 2,Sovereign of the Seas, Akagi and The Black Pearl!HMS Victory Cross Section
|
|
|
 Rank: Pro    Groups: Registered
Joined: 24/09/2012 Posts: 491 Points: 1,452 Location: London
|
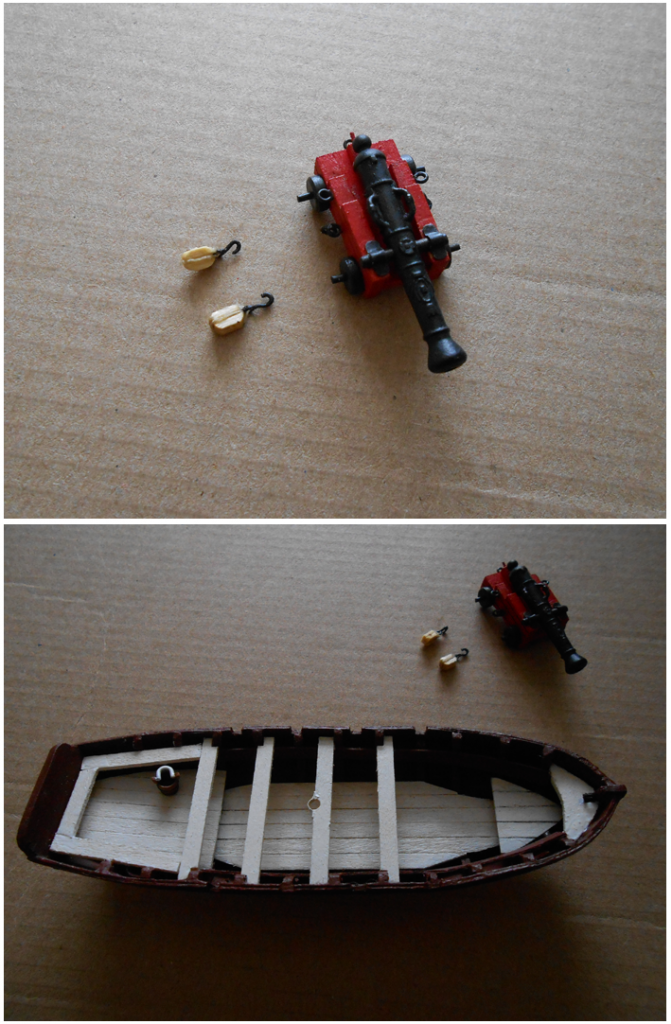
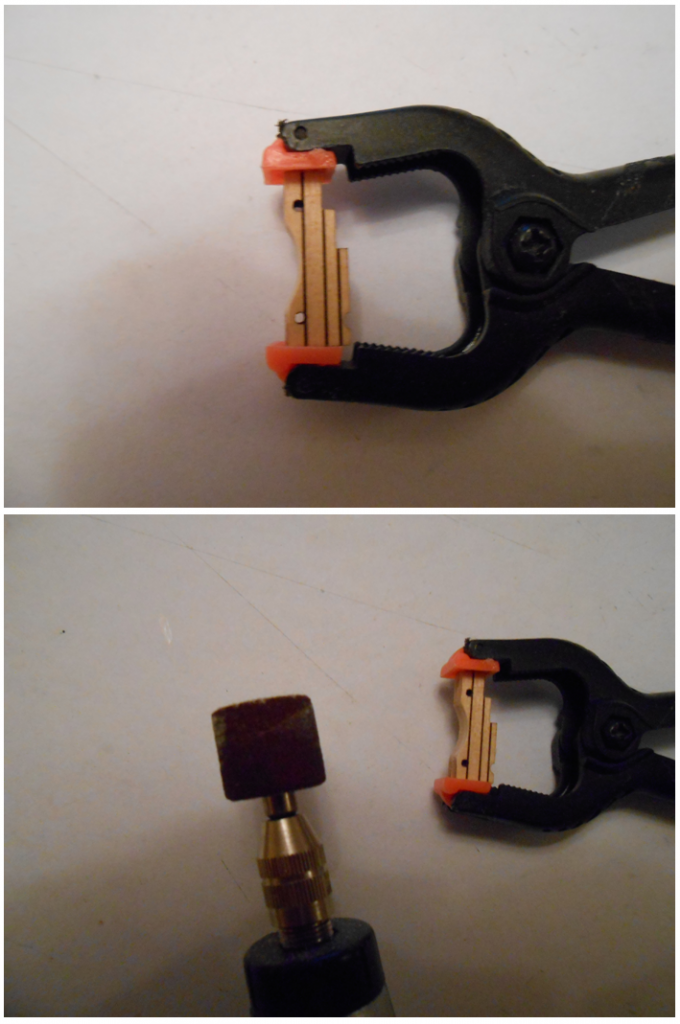
Thanks Andy and Hans  Small update on some modifications to the cannons Decided to make small hooks on the end of the blocks in, will be a daunting task to make so many for all the cannons but worth the added detail, im sure i'll find an easier way of making them, or even buying them, but they're also hard to get on the cannons without scratching the paint off, even with some varnish on    Processing - Progressing
Previous builds: HMS Victory
Current build: HMS Sovereign of the seas
|
|
|
 Rank: Pro    Groups: Registered
Joined: 24/09/2012 Posts: 491 Points: 1,452 Location: London
|
hmmm tried adding pics without photobucket, not as easy as i thought.. Processing - Progressing
Previous builds: HMS Victory
Current build: HMS Sovereign of the seas
|
|
|
 Rank: Pro Groups: Joined: 24/08/2009 Posts: 48,827 Points: -13,348
|
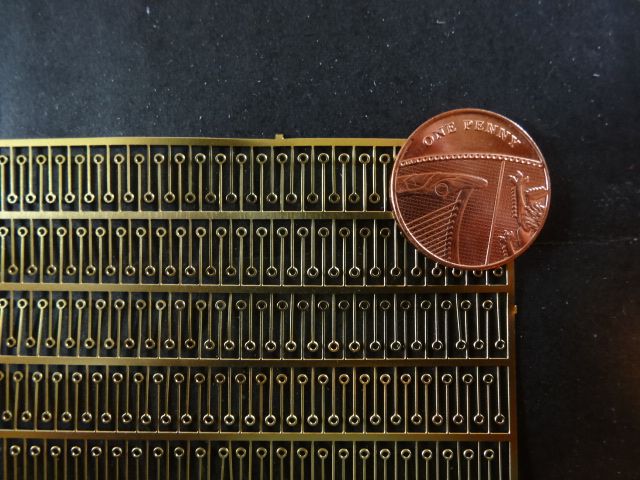
Thats a fine job with the cannons.I used the same technique on another build,the dremel sanding drum is just the right size at this scale.Caldercraft do make some hooks for this purpose and they are available seperately on an etched sheet but I'm not sure if they would be a little too large.
Kind Regards Nigel
|
|
|
 Rank: Pro Groups: Joined: 24/08/2009 Posts: 48,827 Points: -13,348
|
Additional detail is never a bad thing other than more work., well done Admiral 
|
|
|
|
|
 Love detail on gun's . Bril work  Rgd Martyn Building ?
Completed. Soliei Royal . Sovereign of the Seas . Virginia . Scotland . San Felipe . Corel vasa , Santisima Trinadad X section , Vasa
Next Build ?
When sailors have good wine, They think themselves in heaven for the time. John Baltharpe
|
|
|
 Rank: Super-Elite      Groups: Registered
Joined: 24/04/2010 Posts: 5,787 Points: 17,662 Location: Stafford, United Kingdom
|
Hi Admiral, very nice work  Kind regards Mike MWG BUILD DIARIES: HMS VICTORY, SOVEREIGN OF THE SEAS, SAN FRANCISCO II, HMS HOOD, HMS ENDEAVOUR LONGBOAT, HMS VICTORY X-SECTION, 007 DB5, NISSAN GTR, CUTTY SARK, RB7, AKAGI, BARK HMS ENDEAVOUR, HUMMER H1, MITSUBISHI ZERO.
|
|
|
|
|
Now that's a nice touch Admiral, may just follow you on that one....   Regards Alan
|
|
|
 Rank: Super-Elite        Groups: Registered
Joined: 04/04/2010 Posts: 3,955 Points: 11,809 Location: uk
|
as nigle said,caldercraft do hooks and eyes,and believe me they are SMALL, in fact they are sooooo small you can't see them at 3 ft. (I'm old and half blind anyway) I've used them on 2mm blocks and they still look too small. Current builds: SotS, USS Consitution, San Felipe, D51 loco, HMS Surprise, RB7, Arab Dhow, Jotika HMS Victory Completed builds: HMS Pickel, Thermopylae, Mississipi river boat, Mary Rose, Cutty Sark, San Francisco II, HMS Victory x5, Titanic Lifeboat, Panart HMS Victory Launch, Hachette Titanic, Virginia Schooner, Endeavour Longboat. http://www.model-space.com/gb/
|
|
|
 Rank: Master       Groups: Registered
Joined: 05/09/2012 Posts: 1,400 Points: 4,690 Location: Beaminster, Dorset
|
As already mentioned by Karl and Nigel I am planning to use the Caldercraft PE Eyelets which come in sheets of 250 for about a Fiver. I think the PE Rigging Hooks are still to big. So with a bit of careful snipping these Eyelets will be converted into Hooks as well. I am also using their small Blocks, as the supplied Blocks are too big. http://www.shipwrightshop.com/s...Rigging-Fittings_01.html
|
|
|
 Rank: Pro    Groups: Registered
Joined: 24/09/2012 Posts: 491 Points: 1,452 Location: London
|
Thanks for the great feedback guys   As the for the hooks i did see some online, though i only found them in sets for specific ships and they were at high prices and as karl said did look pretty small even at the scale they were for, so i'll probably go back to the idea of just bending eyepins/eyelets into hooks, which is easy enough, whats worse is getting them on the blocks  Thanks for the comments, very helpful  Processing - Progressing
Previous builds: HMS Victory
Current build: HMS Sovereign of the seas
|
|
|
 Rank: Pro Groups: Joined: 24/08/2009 Posts: 48,827 Points: -13,348
|
Just a thought Admiral,you could drill a tiny hole in the block and glue the end of the hook in.Then wrap the thread around the block.I know its not how it should be but you would be very hard pushed to tell the difference.
Regards Nigel
|
|
|
|
Guest (4)
|