|
|
 Rank: Master       Groups: Registered
Joined: 05/09/2012 Posts: 1,400 Points: 4,690 Location: Beaminster, Dorset
|
benny b wrote:nice tidy work on the cannon ports very nice indeed benny b. Thanks Benny 
|
|
|
 Rank: Master       Groups: Registered
Joined: 05/09/2012 Posts: 1,400 Points: 4,690 Location: Beaminster, Dorset
|
delboy271155 wrote:Hi Andy,  There may have been an easier road, but, the end result is a whole lot better. WTG Regards delboy271155 (Derek) Thanks Derek, I'm trying to be disciplined and do it the way I know I should and avoid rushing on to the next stage. I've done that before and you're left with a piece of work that gives you a feeling of dissatisfaction every time you look at it. Most of these things are 90% Perspiration and 10% Skill and what's the rush.  
|
|
|
 Rank: Master       Groups: Registered
Joined: 05/09/2012 Posts: 1,400 Points: 4,690 Location: Beaminster, Dorset
|
NMBROOK wrote:Now that is a job and a half Andy  Kudos to you for taking it on  A possibly easier way might be to make the frames up first in a jig and then open the ports where necessary to match,the advantage this way is every port would be exactly the same. Kind Regards Nigel I did think about a jig, but I was worried about managing to glue the frames to the jig and I would've needed several jigs to avoid having to wait 12 hours for each Frame. As I think you've said before, there's a certain peculiar enjoyment in these long-winded tasks, once you get into the rhythm of them. 
|
|
|
 Rank: Master       Groups: Registered
Joined: 05/09/2012 Posts: 1,400 Points: 4,690 Location: Beaminster, Dorset
|
Having got halfway through the Cannon Port lining, I thought I'd take a break and start working on the Rear Galleries. First the frame was added, instead of staining, I've lined them with Sapele, I have plenty to spare because of the Boxwood. I then painted the Side Panel matt black, after this I have lined the openings with Gold Metallic Paper. Next I have replaced the supplied Mesh with a Diamond Mesh, this is to match contemporary pictures which all seem to show this rather than Square Mesh, especially Endsor's 'The Restoration Warship'. I have used Secret Weapon Mesh, which is a nice sharp etch. Apologies for the Photos the light in here is terrible and it's too wet to Photograph outside. 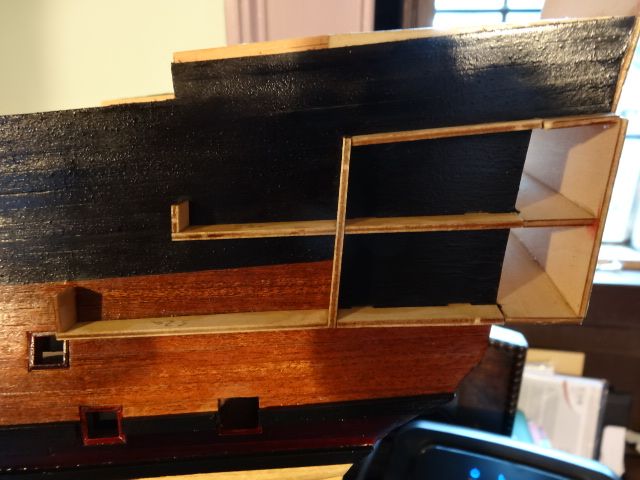  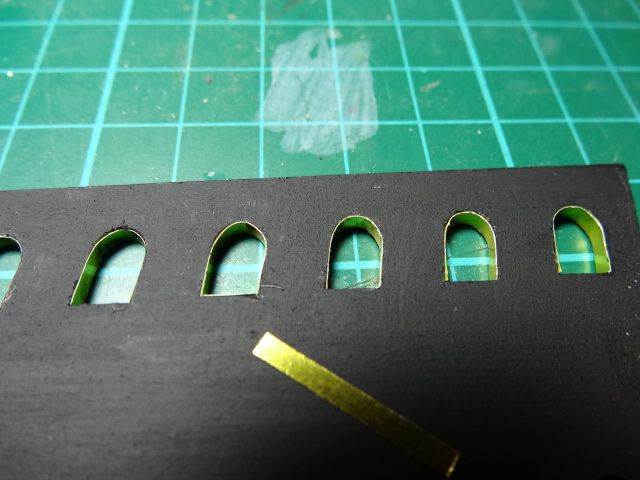 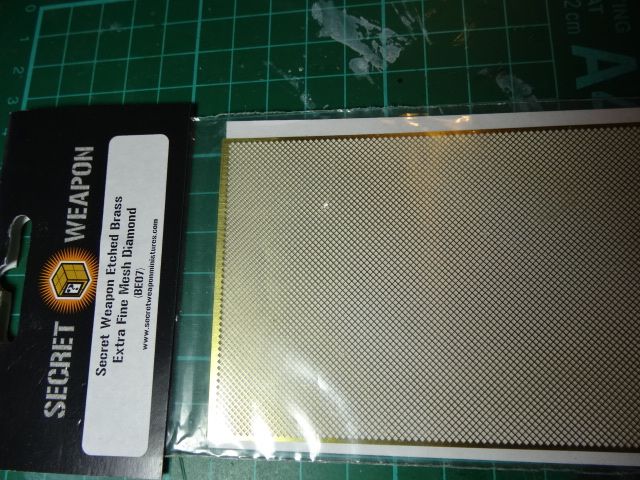 [img]http://i1240.photobucket.com/albums/gg482/andykirby194/DSC02236_zps9b70532c.jpg/img]
|
|
|
 Rank: Master       Groups: Registered
Joined: 05/09/2012 Posts: 1,400 Points: 4,690 Location: Beaminster, Dorset
|
I have backed the Mesh with Red Metallic Paper. For some reason I couldn't add this photo in the last post. So I've posted it separately. As an aid to my own memory, as well as anybody else's benefit, the Strips are for the Base 5 x 2mm and for the Top /Sides 19 x 2mm 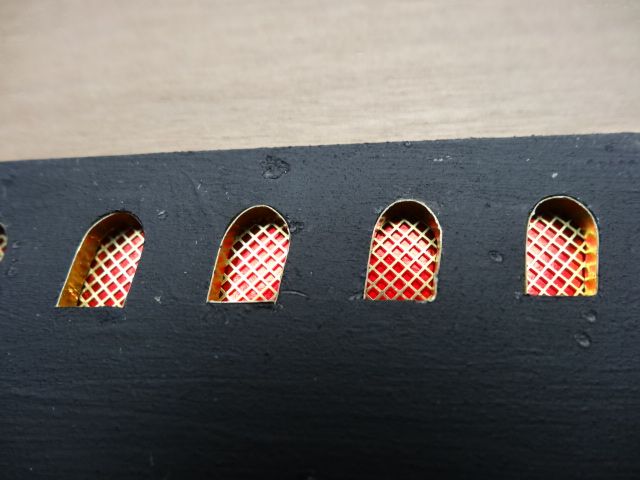
|
|
|
|
|
Looking great Andy, love the idea of the red window backing, really shows up the diamond mesh....   .. Regards Alan
|
|
|
 Rank: Pro Groups: Joined: 24/08/2009 Posts: 48,827 Points: -13,348
|
Great work Andy   I especially like the shim brass linings Kind Regards Nigel
|
|
|
 Rank: Super-Elite        Groups: Registered
Joined: 30/01/2013 Posts: 4,604 Points: 13,607 Location: Monmouthshire UK
|
This is looking like its going to be an amazing build, you are so right about what you said earlier about getting a feeling of dissatisfaction every time you look a model if you are not entirly happy with it. I have re-done so many things on my Vic that i just couldnt live with because I knew I could have done it better, including completely re-coppering the hull! Great build though, keep it up. Steve
|
|
|
 Rank: Vice-Master   Groups: Registered
Joined: 02/09/2012 Posts: 515 Points: 1,515 Location: Burnley
|
Hi andy, Coming along beautifully. keep up the 1st class work.  Regards Claret Also working on:
SOTS.
Moebius 1/32 Flying Sub with PE & lights.
Waiting in the wings:
Polarlights Spindrift from Land of the Giants.
finished:
007 Iconic DB5.
|
|
|
|
|
 Stunning work on the windows love it rgd Martyn  Building ?
Completed. Soliei Royal . Sovereign of the Seas . Virginia . Scotland . San Felipe . Corel vasa , Santisima Trinadad X section , Vasa
Next Build ?
When sailors have good wine, They think themselves in heaven for the time. John Baltharpe
|
|
|
 Rank: Master       Groups: Registered
Joined: 05/09/2012 Posts: 1,400 Points: 4,690 Location: Beaminster, Dorset
|
Gandale wrote:Looking great Andy, love the idea of the red window backing, really shows up the diamond mesh....   .. Regards Alan Thanks Alan  , my original intention was to use Green Backing, as according to Sephton the Diamond Panes were glazed with Green Mica, but when I tried Green it gave too little contrast.
|
|
|
 Rank: Master       Groups: Registered
Joined: 05/09/2012 Posts: 1,400 Points: 4,690 Location: Beaminster, Dorset
|
NMBROOK wrote:Great work Andy   I especially like the shim brass linings Kind Regards Nigel Thanks Nigel  , the Plywood edges are too rough to get a nice painted finish, so originally I was going to shim and then paint Black or Shim with Black Paper. But, the Gold gives a nicer appearance and there's a nice reflection which enhances the look of the Windows.
|
|
|
 Rank: Master       Groups: Registered
Joined: 05/09/2012 Posts: 1,400 Points: 4,690 Location: Beaminster, Dorset
|
stevie_o wrote:This is looking like its going to be an amazing build, you are so right about what you said earlier about getting a feeling of dissatisfaction every time you look a model if you are not entirly happy with it. I have re-done so many things on my Vic that i just couldnt live with because I knew I could have done it better, including completely re-coppering the hull!
Great build though, keep it up.
Steve Thanks Steve  . Your Victory certainly shows the results of time, care and attention to detail.
|
|
|
 Rank: Master       Groups: Registered
Joined: 05/09/2012 Posts: 1,400 Points: 4,690 Location: Beaminster, Dorset
|
claret wrote:Hi andy, Coming along beautifully. keep up the 1st class work.  Regards Claret Thanks very much, Claret, yours too 
|
|
|
 Rank: Master       Groups: Registered
Joined: 05/09/2012 Posts: 1,400 Points: 4,690 Location: Beaminster, Dorset
|
Martyn Ingram wrote: Stunning work on the windows love it rgd Martyn  Cheers, Martyn. I'm quite pleased with them 
|
|
|
 Rank: Master       Groups: Registered
Joined: 05/09/2012 Posts: 1,400 Points: 4,690 Location: Beaminster, Dorset
|
Moving on. Finished the Mitred Cannon Port Linings, I've used the same Dark Maroon as the Stripe. This took a long time but gives a nicer appearance (well I've got to say that now  ) I've now also Varnished the Hull, using 3 coats of Ronseal, with a sand down between coats 2 and 3 plus a wipe down with White Spirit. I found that the Sapele looked better, as did the Black Boxwood, with a final coat of Matt. But the Maple Lower Hull is Satin. I'm also using Satin on the Port Linings and the Maroon Stripe. The Gallery side panel has been added, I found this wasn't a particularly good fit and needed quite a bit of filling and trimming, as I've already mentioned I've lined the inside of the Galleries with Sapele, I didn't Stain or Line the back of the Panel as this surface is not visible. In retrospect I think it would've been better to spray the panels, rather than Brush Paint, although much of this will be hidden as the Decoration goes on. Again the Photos would look better with decent light, another wet day in Dorset. 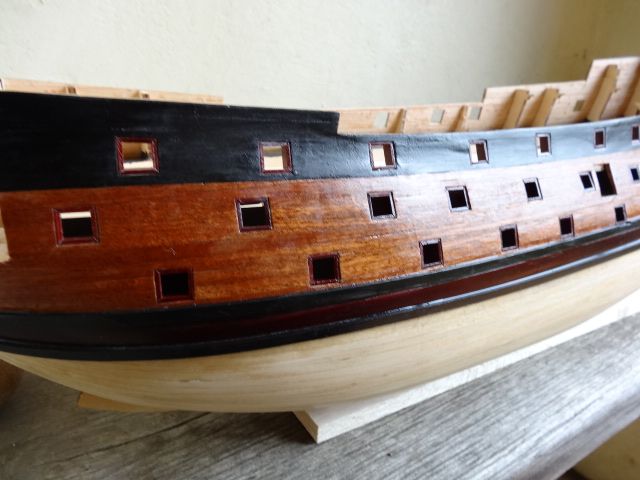 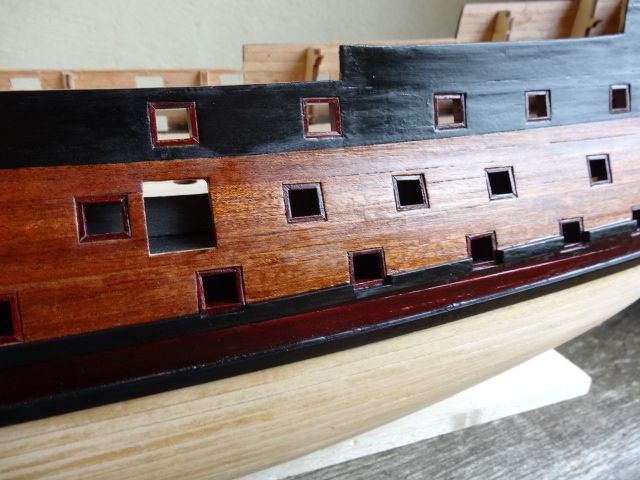  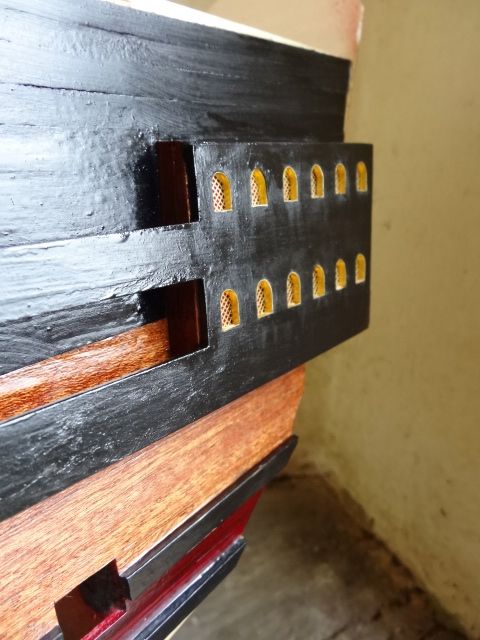
|
|
|
|
|
Beautiful work there Andy, think your efforts have been very well rewarded....   .. Have to say you have also given me food for thought as I really do like the finish you have gotten on the Sapele, think I just have another testing session on spare sapele strips....   .. Keep the pics coming Regards Alan
|
|
|
 Rank: Master       Groups: Registered
Joined: 05/09/2012 Posts: 1,400 Points: 4,690 Location: Beaminster, Dorset
|
Thanks Alan, the light and the camera are not kind, it actually looks better to the eye. i was planning to photograph outdoors in natural light, but it's been a bit wet here today. The Sapele does reward a little bit of care and comes up beautifully, compensation for all that splitting and splintering. 
|
|
|
 Rank: Pro Groups: Joined: 24/08/2009 Posts: 48,827 Points: -13,348
|
Looking good Andy   If you very lightly rub the blackpanels with 1200 grade dry then spray over with mattcoat thinned 30% all your brushmarks will vanish.The rubbing down is only to remove the highspots you don't need to flat it right back.You will kill the shine on the brass,but at the same time prevent it from discolouring with oxidization.Just a thought. Kind Regards Nigel
|
|
|
 Rank: Master       Groups: Registered
Joined: 05/09/2012 Posts: 1,400 Points: 4,690 Location: Beaminster, Dorset
|
Thanks for the tip Nigel, I think I'll give that a go, cheers. The Camera never lies, well not until you get onto Photoshop 
|
|
|
|
Guest (2)
|