|
|
 Rank: Pro     Groups: Registered
Joined: 09/08/2011 Posts: 400 Points: 1,171 Location: Hertfordshire
|
Just after a bit of advice really guys As mentioned in a previous thread, I hate decals and having to apply them Obviously I've done them in the past, but I certainly do not enjoy it! I find once the backing is soaked off and lifting the decal out of the water they just like to curl up And when you do straighten them out and try to apply them in position they split  Is there some handy hints you guys can give? I know whe're a little way off yet applying them to the MP4-23, but I was going to buy another smaller kit to practice on before D-day (get it, Decal day  ) Much appreciated in advance  The Brawn BuildWentworth Court Dolls HouseThe MP4/4 Build The Brawn BuildWentworth Court Dolls HouseThe MP4/4 Build[ulr=http://forum.deagostini.co.uk/default.aspx?g=posts&t=36693]The 97T Build[/url]
|
|
|
 Rank: Semi-Pro Level 1  Groups: Registered
Joined: 29/03/2011 Posts: 56 Points: 171 Location: WELLINGBOROUGH
|
Im not a big fan of them either but just need to take your time, abit of practice on a cheap model wont hurt, now im no king at decals but iv never left them to soak off in the water completely, i just hold it in the water with a pair of tweezers by the corner and give it just long enough for it to just slide staight off the backing papper and on the model, you have more control over it and it does not curl up on you. now i dont know if thats what your supposed to do but thats how i do it and it works well for me. i know you can get decal softners but iv always just stuck to warm water.
hope iv helped abit, if not never mind lol
|
|
|
Rank: Pro Groups: Registered
Joined: 01/07/2011 Posts: 383 Points: 1,194 Location: Birmingham
|
massive wrote:Im not a big fan of them either but just need to take your time, abit of practice on a cheap model wont hurt, now im no king at decals but iv never left them to soak off in the water completely, i just hold it in the water with a pair of tweezers by the corner and give it just long enough for it to just slide staight off the backing papper and on the model, you have more control over it and it does not curl up on you. now i dont know if thats what your supposed to do but thats how i do it and it works well for me. i know you can get decal softners but iv always just stuck to warm water.
hope iv helped abit, if not never mind lol I was gonna ask about decal softners? What are they actually for as i've done a few smaller models and they look great but then a couple of days later i find the decal starts curling and coming away from the model! Is there anything to stop this or is that what decal softner is for? Thanks Ian
|
|
|
Rank: Pro Groups: Joined: 24/08/2009 Posts: 48,827 Points: -13,348
|
The most popular type come from "MicroScale"
Personally I would say practice with some decals from a cheapo kit before expecting too much from a 1st attempt with your McLaren, because decal softening products if applied without care can destroy a decal.
Here's some basic info:
'Micro Set' is a decal setting solution that does several things to decals to improve application. Micro Set should be applied to the surface of the model where you will be sliding off the decal. Micro Set prepares the surface with special wetting agents that cuts the oils in new paint and converts the adhesive on the back of the decal to a stronger and more lasting one. Micro Set slightly softens the decals film to make it more flexible so that it can conform better to the model's surface. Better adhesion by the decal to the model prevents tiny air bubbles from occurring and results in an invisible carrier film or the so called 'painted on look'.
'Micro Sol' is for the most difficult irregular surfaces you find on models. It completely softens the decal allowing it to drape down onto the surface of the model conforming perfectly and without distortion. You can get the most amazing results in seemingly impossible places, because Micro Sol actually makes the decal part of the paint. For that reason you should coat Micro Sol on for only a few seconds and then leave it alone, it does the work. Do not touch until dry as the decal is very soft at this stage and could be easily damaged.
Always follow the manufacturer instructions, but in general you soak the transfer and position it in the usual way, then brush the softener onto the decal. The decal will start to soften, and it will likely break if you then try to move it.
Use a cotton bud to remove excess liquid but do not touch the decal itself. The surface will wrinkle, but this is normal and it will flatten as it dries out.
If necessary, you can apply softener again to remove any wrinkles that haven’t entirely disappeared. Allow to dry for 24 hours before handling the part.
|
|
|
Rank: Pro Groups: Registered
Joined: 01/07/2011 Posts: 383 Points: 1,194 Location: Birmingham
|
Tomick wrote:The most popular type come from "MicroScale"
Personally I would say practice with some decals from a cheapo kit before expecting too much from a 1st attempt with your McLaren, because decal softening products if applied without care can destroy a decal.
Here's some basic info:
'Micro Set' is a decal setting solution that does several things to decals to improve application. Micro Set should be applied to the surface of the model where you will be sliding off the decal. Micro Set prepares the surface with special wetting agents that cuts the oils in new paint and converts the adhesive on the back of the decal to a stronger and more lasting one. Micro Set slightly softens the decals film to make it more flexible so that it can conform better to the model's surface. Better adhesion by the decal to the model prevents tiny air bubbles from occurring and results in an invisible carrier film or the so called 'painted on look'.
'Micro Sol' is for the most difficult irregular surfaces you find on models. It completely softens the decal allowing it to drape down onto the surface of the model conforming perfectly and without distortion. You can get the most amazing results in seemingly impossible places, because Micro Sol actually makes the decal part of the paint. For that reason you should coat Micro Sol on for only a few seconds and then leave it alone, it does the work. Do not touch until dry as the decal is very soft at this stage and could be easily damaged.
Always follow the manufacturer instructions, but in general you soak the transfer and position it in the usual way, then brush the softener onto the decal. The decal will start to soften, and it will likely break if you then try to move it.
Use a cotton bud to remove excess liquid but do not touch the decal itself. The surface will wrinkle, but this is normal and it will flatten as it dries out.
If necessary, you can apply softener again to remove any wrinkles that haven’t entirely disappeared. Allow to dry for 24 hours before handling the part.
Awesome, thanks Tomick!! 
|
|
|
Rank: Semi-Pro Level 1 Groups: Registered
Joined: 29/03/2011 Posts: 56 Points: 171 Location: WELLINGBOROUGH
|
Yeah nice one Mr T, great advice thankyou, i didnt know anything about the softners but im gonna have a play now.
|
|
|
Rank: Pro  Groups: Registered
Joined: 05/04/2011 Posts: 266 Points: 784 Location: Essexshire
|
Top stuff Tomick... you never know Deag might even send us some
|
|
|
Rank: Semi-Pro Level 1 Groups: Registered
Joined: 01/05/2011 Posts: 52 Points: 152 Location: England
|
I'll be using MicroSol for sure,the stuff is a dream for curved or tricky decals. Builds in Progress
D'Ag 1/8 Mclaren MP4/23
Tamiya 1/24 Toyota Corolla WRC
|
|
|
|
|
Does anyone have any experience with tamiya's "Mark Fit" product. It's the only decal softner product that i've found in South Africa.
|
|
|
Rank: Pro  Groups: Registered
Joined: 12/08/2011 Posts: 100 Points: 323 Location: Kent
|
As a relative novice I was very nervous about the decaling so I practiced on another kit, You Tube is a great source of reference videos and helped me achieve a pretty good result as you can see if you follow the link below. http://forum.model-space...aspx?g=posts&t=2853
I used both MicroSol and MicroSet applied with a paint brush as Tomick has explained, to soak the decals I hold them with tweezers in warm water for 10 seconds and then leave to sit on a dry surface for about another minute before sliding the decal off onto the model with a small paint brush. Now I have no issues with the decaling on my McLaren, and I am actually looking forward to it.
|
|
|
Rank: Pro Groups: Registered
Joined: 09/08/2011 Posts: 400 Points: 1,171 Location: Hertfordshire
|
Thanks for the advice thanks guys I checked out a couple of videos on youtube too which I think will help In particular the Amalga 1:8 Ferrari! Smeg and the Heads wrote: Very nice work  , fancie doing mine at the end of the build! I'm definately considering getting the additional decal set for the MP4/23, they really do finish the kit off nicely with the extra detail Thanks again guys The Brawn BuildWentworth Court Dolls HouseThe MP4/4 Build[ulr=http://forum.deagostini.co.uk/default.aspx?g=posts&t=36693]The 97T Build[/url]
|
|
|
Rank: Pro  Groups: Registered
Joined: 05/07/2011 Posts: 126 Points: 354 Location: Withernsea East Yorkshire
|
Micro set and sol have been around for years i've been using them since i started doing models thats roughly 15 years ago now it's damn good stuff aswell!! MeffMan
|
|
|
Rank: Pro Groups: Registered
Joined: 09/08/2011 Posts: 400 Points: 1,171 Location: Hertfordshire
|
Picked up a "quick kit" at the weekend to practice on Jenson Buttons MP4/25 Its a 1:24 kit with hundreds of decals, some of them really really really teenie tiny, so hopefully when I'm done I should be a master! The Brawn BuildWentworth Court Dolls HouseThe MP4/4 Build[ulr=http://forum.deagostini.co.uk/default.aspx?g=posts&t=36693]The 97T Build[/url]
|
|
|
Rank: Semi-Pro Level 1  Groups: Registered
Joined: 24/04/2012 Posts: 53 Points: 149 Location: Kent
|
Yeah, I've got that one.. It's not the little ones that are bad on that kit but the large Vodafone decals along the side pods.. They bend and twist all over the place... Good luck ..:-))
|
|
|
Rank: Pro Groups: Registered
Joined: 09/08/2011 Posts: 400 Points: 1,171 Location: Hertfordshire
|
chrisgo wrote:Yeah, I've got that one.. It's not the little ones that are bad on that kit but the large Vodafone decals along the side pods.. They bend and twist all over the place... Good luck ..:-))  The Brawn BuildWentworth Court Dolls HouseThe MP4/4 Build[ulr=http://forum.deagostini.co.uk/default.aspx?g=posts&t=36693]The 97T Build[/url]
|
|
|
Rank: Pro Groups: Joined: 24/08/2009 Posts: 48,827 Points: -13,348
|
|
|
|
 Rank: Super-Elite   Groups: Registered
Joined: 24/04/2010 Posts: 5,787 Points: 17,662 Location: Stafford, United Kingdom
|
Great post MR T Regards Mike MWG BUILD DIARIES: HMS VICTORY, SOVEREIGN OF THE SEAS, SAN FRANCISCO II, HMS HOOD, HMS ENDEAVOUR LONGBOAT, HMS VICTORY X-SECTION, 007 DB5, NISSAN GTR, CUTTY SARK, RB7, AKAGI, BARK HMS ENDEAVOUR, HUMMER H1, MITSUBISHI ZERO.
|
|
|
 Rank: Beginner Level 1 Groups: Registered
Joined: 25/06/2011 Posts: 5 Points: 15
|
i think this has already been covered but I will forge ahead anyway. Dont allow the decals to float off the backing paper in the water, you only need to soak the backing paper and then put the decal on the table (on its backing paper) until the decal moves when touched. Then use the backing paper to position the decal next to where it belongs and slide it onto the model disgarding the backing paper when the decal has left it, it should move around quite easily but if it starts to grip simply re wet it in place, the decal will `grab` the water between it and the kit enabling you to manipulate it, when you are happy with it in place a Q-tip or paper towel placed near the decal will attract the excess water away.
As for the decals curling after the kit is finished this is probably because the paint finish is a little rough. Decals love gloss finish but struggle with uneven or matt finish. Micro set can be used as a droplet on the model before the decal is placed. The decal will take it between the kit and decal. Then a light brush with Micro sol will make the decal form to the shape required, Use caution however as the micro sol really softens the decal and if you touch it you will wreck it. Itll also make the decal shrivel up which is scary but somehow it always dries flat so just leave it to dry completely. Hope this helps.
|
|
|
Rank: Pro Groups: Registered
Joined: 01/07/2011 Posts: 383 Points: 1,194 Location: Birmingham
|
Brilliant, Thanks for the advice!!
|
|
|
Rank: Semi-Pro Level 1 Groups: Registered
Joined: 24/04/2012 Posts: 53 Points: 149 Location: Kent
|
I've just applied the red and black lines on the front wing. I am certainly not an expert at this, but (and i cannot stress this enough) you have to use the micro set and sol. Just throwing them on like we all did when we were kids won't work and it will look rubbish. And non of us want that on a £600+ model. 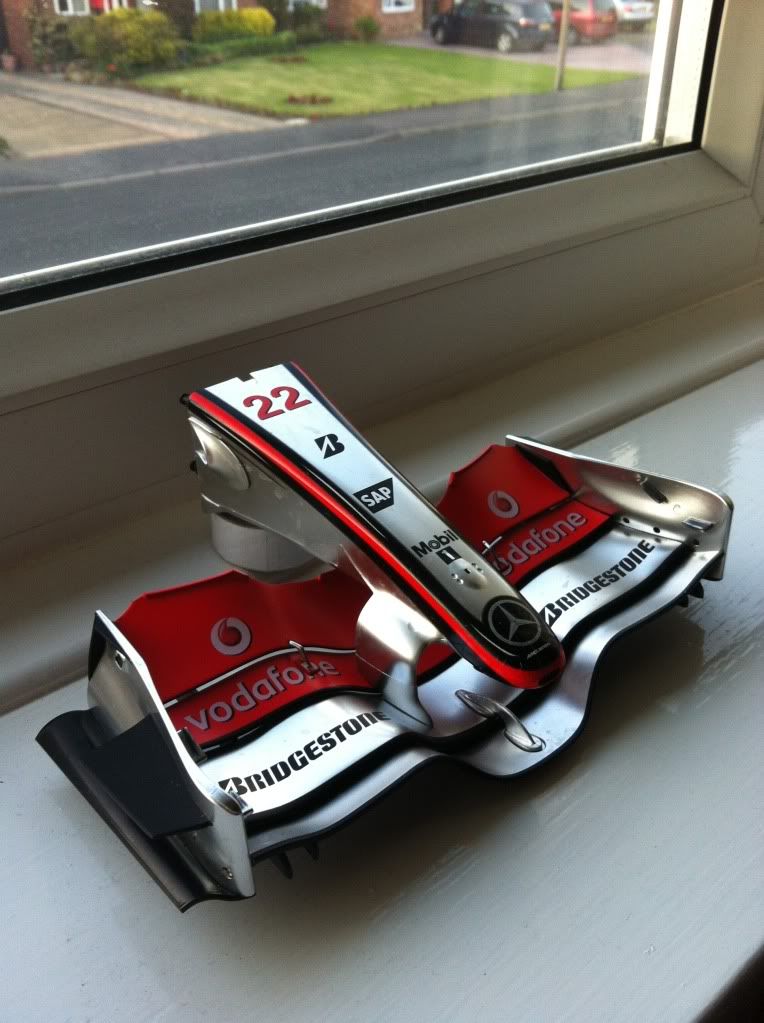 This one is just finished, it still has a few creases on it that will be gone by morning, and it does need a bit of a clean to get the residue off. Just use a nice soft brush, be patient, and as long as you don't panic and follow the fantasic advice on this thread, it will work out fine. I know a lot of people are getting a bit twitchy about putting these quite large decals on a very expensive model, and to be honest, my palm's were sweating a bit today, especially when it all starts bubbling up, but as long as it's lined up correctly, just walk away...!!!! Come back in an hour..!!! And on that note i'd like to thank everybody who posted advice on this subject, especially Tomick who doesn't get enough credit for what he does on here. I've always thought that putting the decals on at the end of any build was the best bit, and now i can continue this build looking forward to the fun that's coming.. Thanks again guys.. Chris
|
|
|
|
Guest
|
 US
US

