|
|
 Rank: Vice-Master     Groups: Registered
Joined: 13/01/2012 Posts: 605 Points: 1,630 Location: Bucks
|
I think maybe this is what you are looking for Mo. I usually sieze everything, thats the coil round the rope,so that you have got that little bit of flexability. I used to drill a hole through the dowel ,insert the block and wrap the rope round once and then glue. I dont do that now, well only sometimes ,it keeps it all neat. I sieze the fitting lay it upright against its position, wrap the tail round once just below the sieze and double back in the opposite way and then glue. Remember the plan is only a guide and the straight lines are just there for positioning and not the real deal. I will post a couple of pics to let you get an idea. 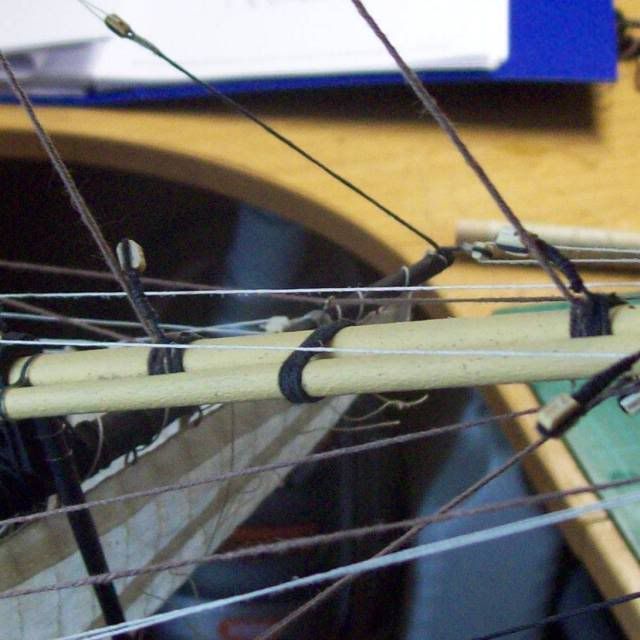 HMS Surprise
HMS Snake
HMS Bounty
HMS Royal Caroline
HMS Victory rebuild
HMS Supply
|
|
|
Rank: Vice-Master Groups: Registered
Joined: 13/01/2012 Posts: 605 Points: 1,630 Location: Bucks
|
 HMS Surprise
HMS Snake
HMS Bounty
HMS Royal Caroline
HMS Victory rebuild
HMS Supply
|
|
|
Rank: Vice-Master  Groups: Registered
Joined: 09/02/2012 Posts: 569 Points: 1,675 Location: Scotland
|
Thanks Hans & Moriarty, Seizeing, is that what you call the coiled rope, like the hangmans noose, I will take this all on board. and by the way Moriarty, you making a fab job, Hope your going to stay on this forum for a while, I am going to need all the help I can get.
Mo Mo
|
|
|
Rank: Vice-Master Groups: Registered
Joined: 09/02/2012 Posts: 569 Points: 1,675 Location: Scotland
|
|
|
|
Rank: Vice-Master Groups: Registered
Joined: 09/02/2012 Posts: 569 Points: 1,675 Location: Scotland
|
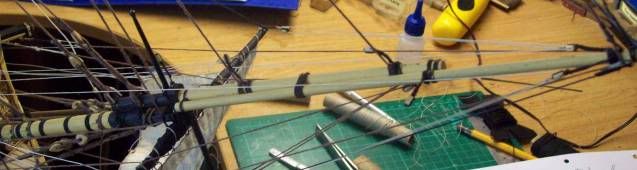
The new blocks.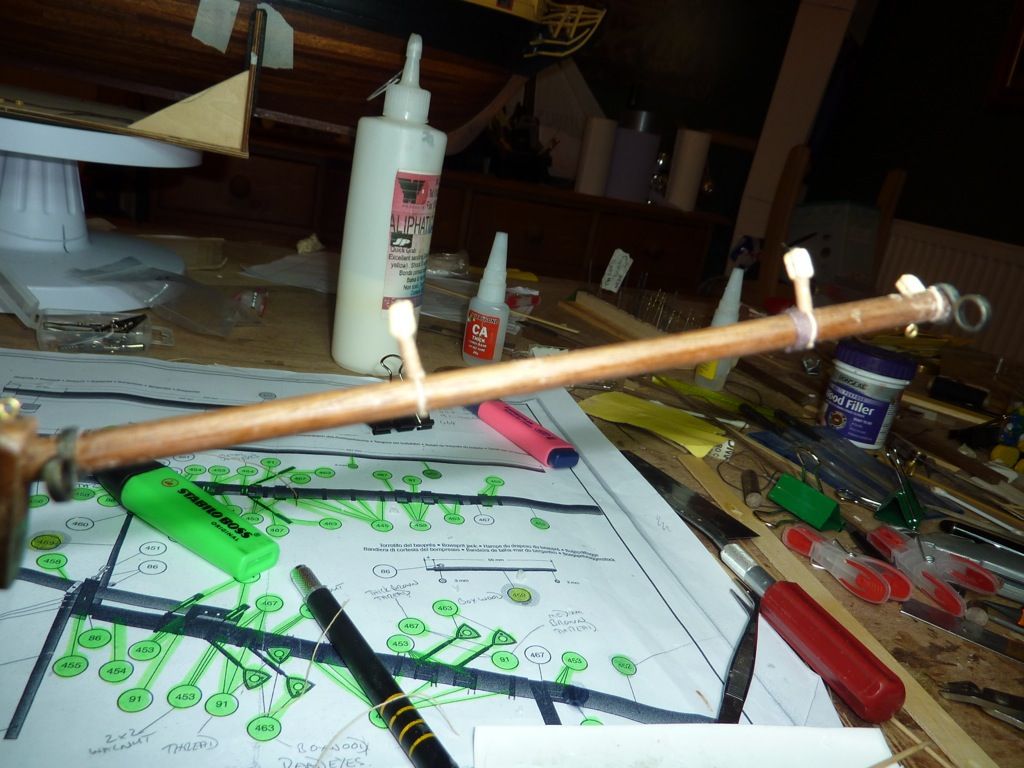 Mo Mo Mo
|
|
|
Rank: Vice-Master Groups: Registered
Joined: 13/01/2012 Posts: 605 Points: 1,630 Location: Bucks
|
Yes they look better now Mo, but careful not to do overly siezing. A maximum of 10 turns or less gives a better look and is more authentic  HMS Surprise
HMS Snake
HMS Bounty
HMS Royal Caroline
HMS Victory rebuild
HMS Supply
|
|
|
 Rank: Master   Groups: Registered
Joined: 30/03/2011 Posts: 1,344 Points: 4,079 Location: Bryanston, Johannesburg. RSA
|
Well done MO. Looks good. the size of the drill bit you are using will also make a difference. Smaller drill bit, smaller size seizing. Rgds, Hans
"It's okay to make mistakes. mistakes are our teachers - they help us to to learn, even if it is painfully"
Current Build:
Endeavour Cross section,D51
Completed: HMS Victory
Under the bench: Endeavour x 2,Sovereign of the Seas, Akagi and The Black Pearl!HMS Victory Cross Section
|
|
|
Rank: Vice-Master Groups: Registered
Joined: 09/02/2012 Posts: 569 Points: 1,675 Location: Scotland
|
|
|
|
Rank: Vice-Master Groups: Registered
Joined: 09/02/2012 Posts: 569 Points: 1,675 Location: Scotland
|
Drawing all coloured in.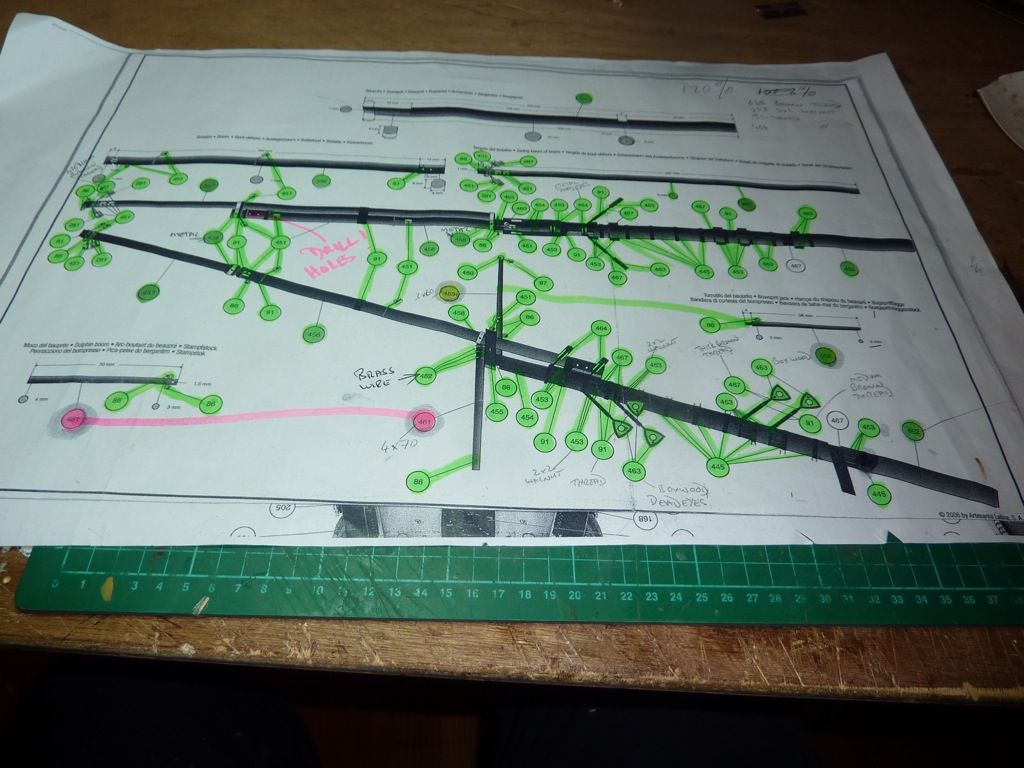 Mo MoMo
|
|
|
|
|
Great tip with the drawings and the use of a highlighter Mo, will have to store that one in the old memory bank for later use...... well done, all coming together nicely....  Regards Alan
|
|
|
Rank: Vice-Master Groups: Registered
Joined: 09/02/2012 Posts: 569 Points: 1,675 Location: Scotland
|
Thanks Grandale, the highlighter great to keep track of what's going on, there is so much detail all to try and get right, and because you have elevation and plan sections it quite tricky to know exactly what you've done, I am going on the masts now, to try and get them complete.
MoMo
|
|
|
Rank: Vice-Master     Groups: Registered
Joined: 17/11/2012 Posts: 863 Points: 2,608 Location: Gohfeld (Germany)
|
A very nice and clean work, respect! regards, Bernd
|
|
|
 Rank: Elite Groups: Registered
Joined: 13/02/2011 Posts: 2,243 Points: 6,849 Location: Sussex
|
Hi Mo, Great work Mo I do find close work appealing, it makes all the diference to the finish. Regards Trev Work in progress: Tombstone (Scratch) - San Francisco 2. -The Mayflower ( scratch by plan).
OcCre- Santa-Maria (Kit).
|
|
|
Rank: Vice-Master Groups: Registered
Joined: 09/02/2012 Posts: 569 Points: 1,675 Location: Scotland
|
Thanks Bernd & Trev for your encouragement, always nice when people comment. I am now trying to get all the masts complete, and stained, then I will lay them aside and get on with the deck furniture etc.
MoMo
|
|
|
Rank: Vice-Master Groups: Registered
Joined: 09/02/2012 Posts: 569 Points: 1,675 Location: Scotland
|
Mo wrote:The longest journeys started with the first step.
Mo Test to see what this quote box is all about.
MoMo
|
|
|
Rank: Vice-Master Groups: Registered
Joined: 13/01/2012 Posts: 605 Points: 1,630 Location: Bucks
|
Hi there Mo, just a little tip if you are going to be fitting out the deck. Be sure when you are making the racks for the belaying pins that they are wide enough to clear the cappings on the walls and not too low. It makes tieing ropes a hell of a lot easier if you can slip a rope underneath and around the pins. HMS Surprise
HMS Snake
HMS Bounty
HMS Royal Caroline
HMS Victory rebuild
HMS Supply
|
|
|
Rank: Vice-Master  Groups: Registered
Joined: 13/02/2012 Posts: 651 Points: 1,903 Location: croydon
|
Mo wrote:Drawing all coloured in.Mo Hi Mo. I hope you dont mind me asking but where did you get your plans enlarged. Fantastic job on the build and so informative . Best regards. Mark
|
|
|
Rank: Vice-Master Groups: Registered
Joined: 09/02/2012 Posts: 569 Points: 1,675 Location: Scotland
|
mark 2 wrote:Mo wrote:Drawing all coloured in.Mo Hi Mo. I hope you dont mind me asking but where did you get your plans enlarged. Fantastic job on the build and so informative . Best regards. Mark Hi Mark,
The original drawings I had printed of were not 1 : 1 , a size on the drawing of say 225mm actually measured 195mm, I got them enlarged to a 1 : 1 scale at a copy shop, quite easy, the is a calculation you do to get to the full size scale. much easier when you can put the actual mast along side the drawing. If you look close at the bowsprit drawing, in the top right hand side you can see that drawing was blown up to 120 %
MoMo
|
|
|
Rank: Vice-Master Groups: Registered
Joined: 09/02/2012 Posts: 569 Points: 1,675 Location: Scotland
|
Doing the lugs to the foremast now, and putting the round ball to the top of the masts.  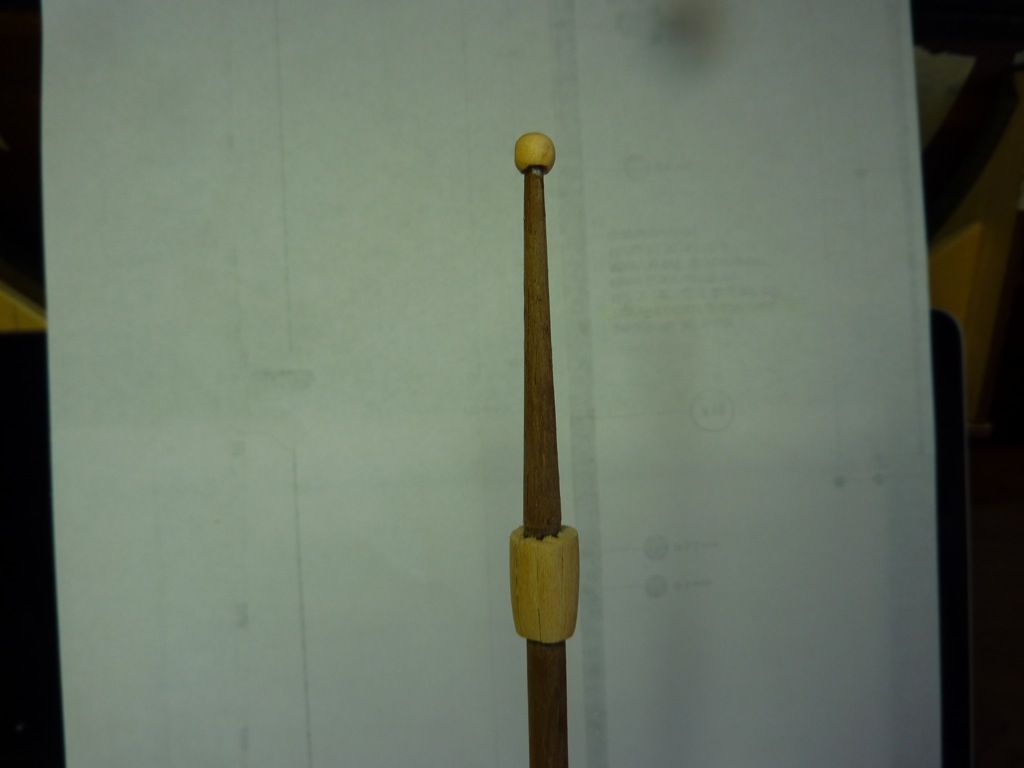 Again for shaping the masts, I put a cross saw draft in the bottom of the mast. Again for shaping the masts, I put a cross saw draft in the bottom of the mast.
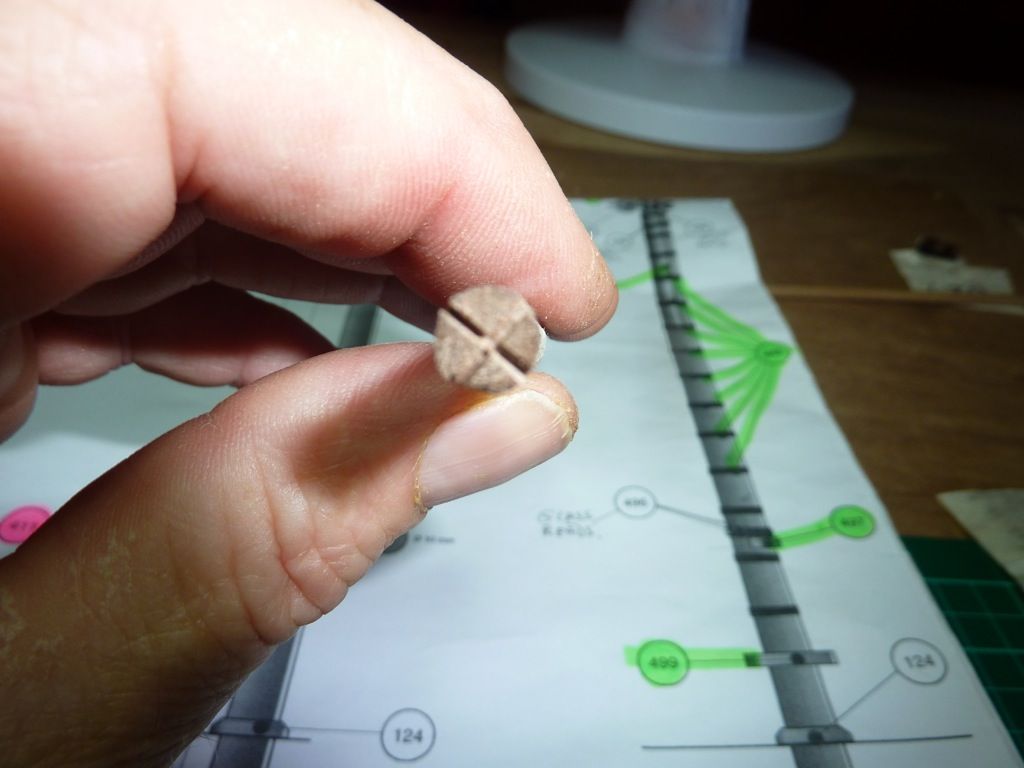 Inserted the steel rule in to the draft, keeping the rule level, it gave me a level to work to at the other end, to ensure the flats were in line with each other. Inserted the steel rule in to the draft, keeping the rule level, it gave me a level to work to at the other end, to ensure the flats were in line with each other.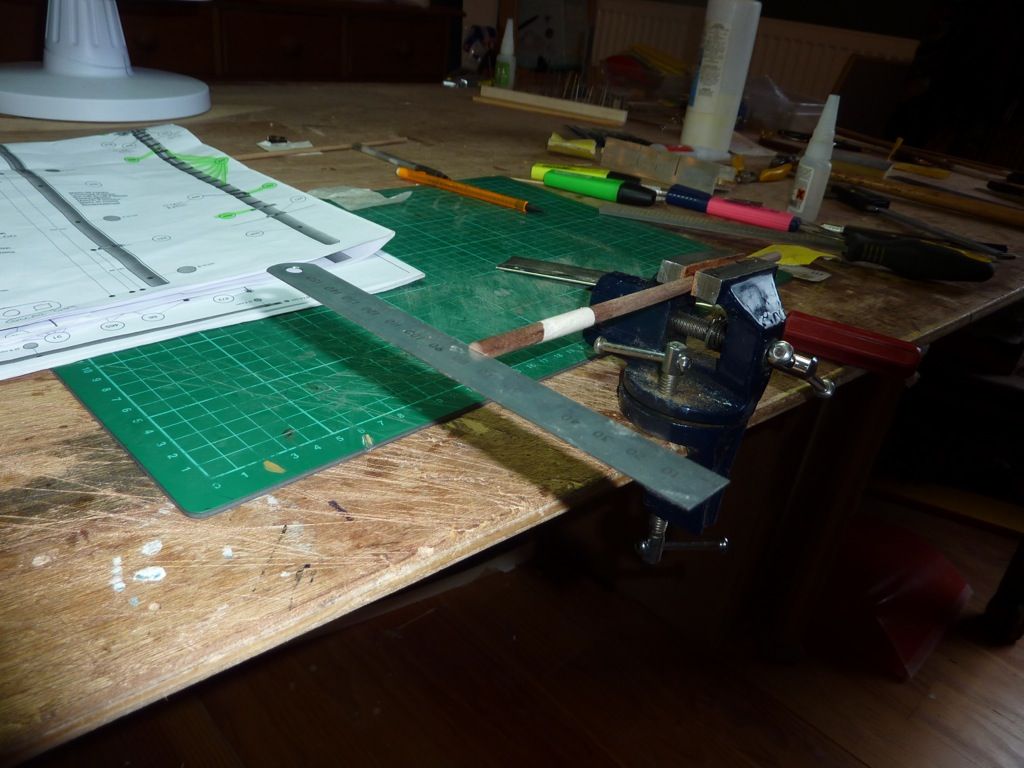 Making the last crosstrees for the small mast at the rear. Making the last crosstrees for the small mast at the rear.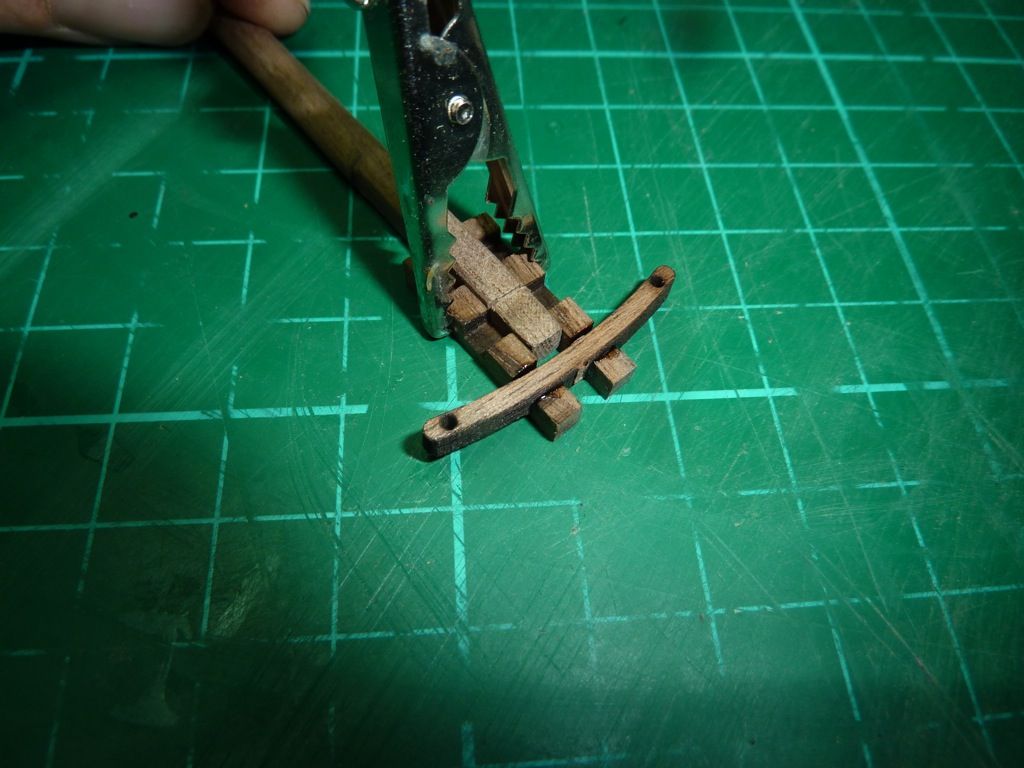 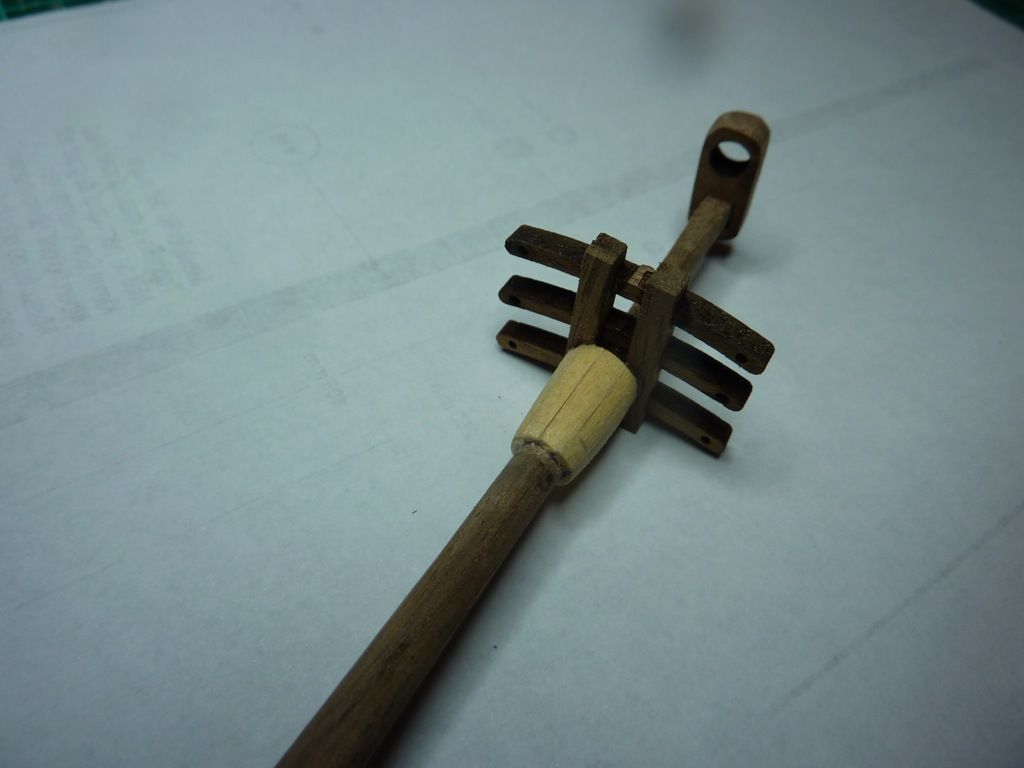 I lost or misplaced one of the caps for joining the top two masts together, so had to make a new one, out of some scrap's, don't throw anything away in this game, I lost or misplaced one of the caps for joining the top two masts together, so had to make a new one, out of some scrap's, don't throw anything away in this game,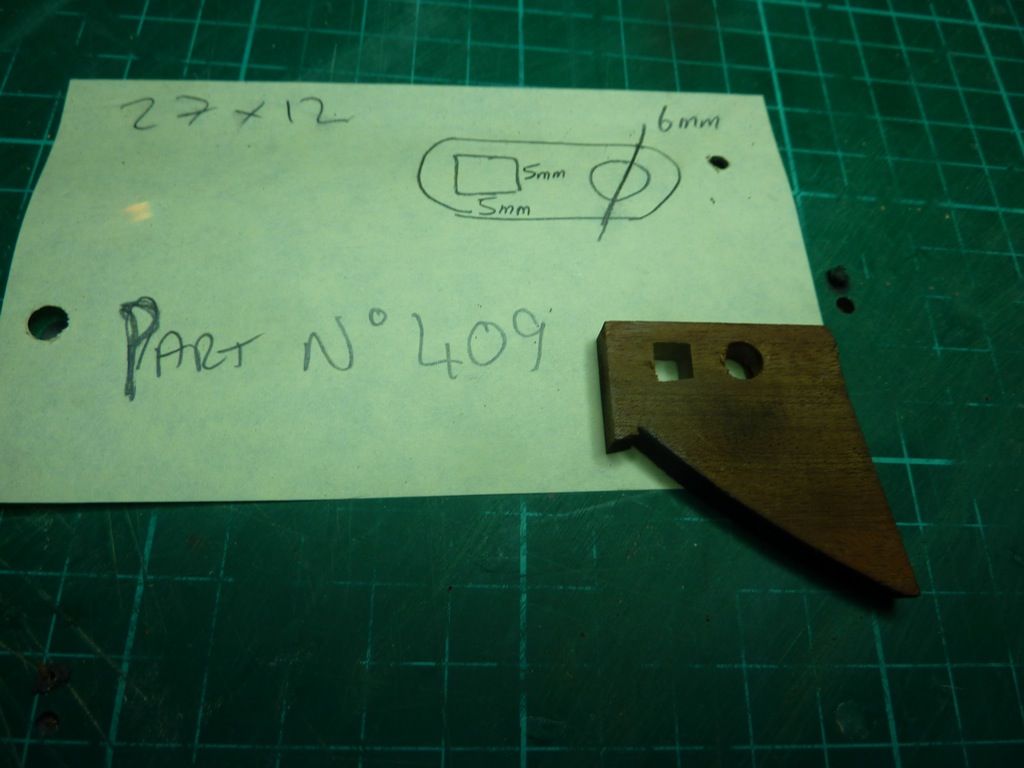 And lastly, but not least, did you notice Admin have given me my Blue Medal. And lastly, but not least, did you notice Admin have given me my Blue Medal.
Mo🏆 👍 Mo
|
|
|
Rank: Vice-Master Groups: Registered
Joined: 13/02/2012 Posts: 651 Points: 1,903 Location: croydon
|
Thanks Mo. Trev has very kindly told me of a printers near me that he has used in the past . Congratulations on your new medal  . Best regards. Mark
|
|
|
|
Guest (12)
|
 US
US

