|
|
|
|
Realy nice work there Mo, your tips are excellent so keep them coming....
Regards
Alan
|
|
|
 Rank: Vice-Master    Groups: Registered
Joined: 09/02/2012 Posts: 569 Points: 1,675 Location: Scotland
|
Its onwards and upwards with the masts now, trying to work out the blocks, how many and where they go, Moriaity has been a great help to me, thanks again Ian,
Just a wee note to let you see how I am doing the tying of the thread on to the blocks.
Firstly I am holding the block in a pair of reverse tweezers.
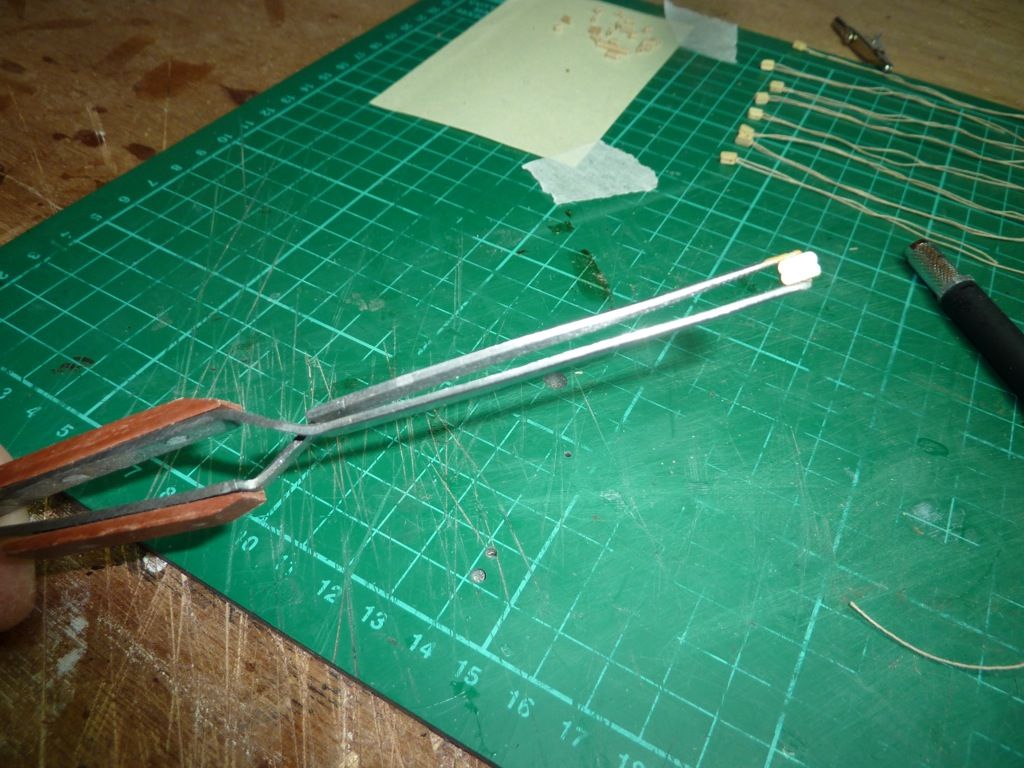 I have got the jaws of my vice open about 8 10 mm I have got the jaws of my vice open about 8 10 mm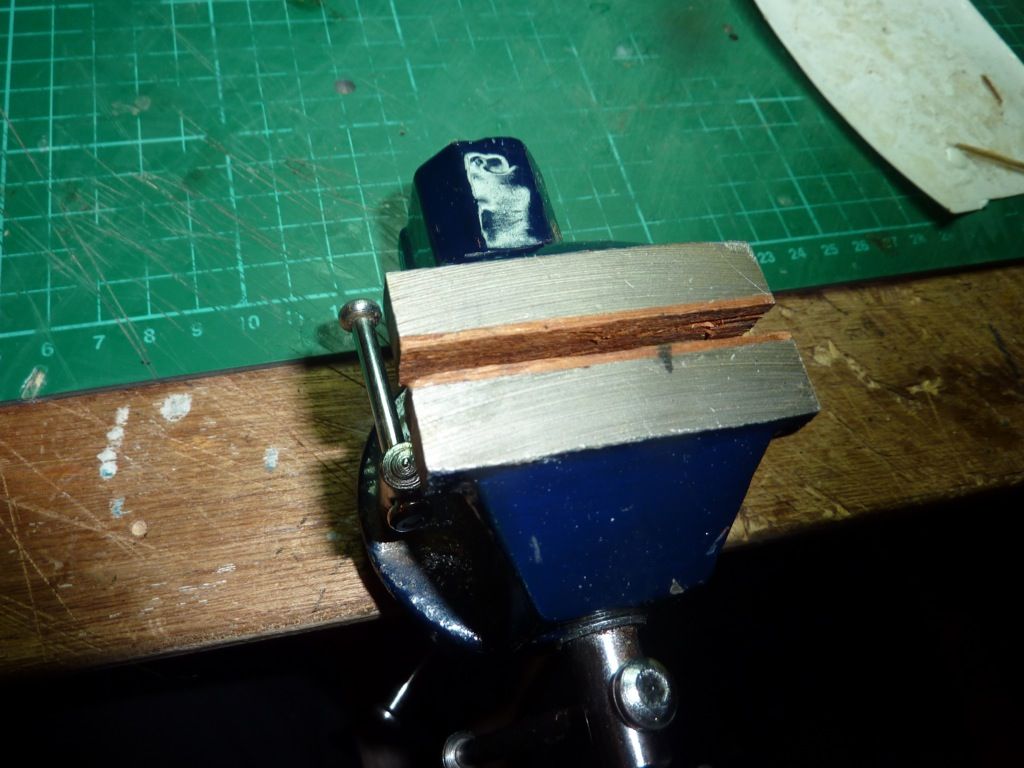 I then slip my tweezers in to the vice, this puts extra pressure on the end holding the block, so it good and secure. I then slip my tweezers in to the vice, this puts extra pressure on the end holding the block, so it good and secure.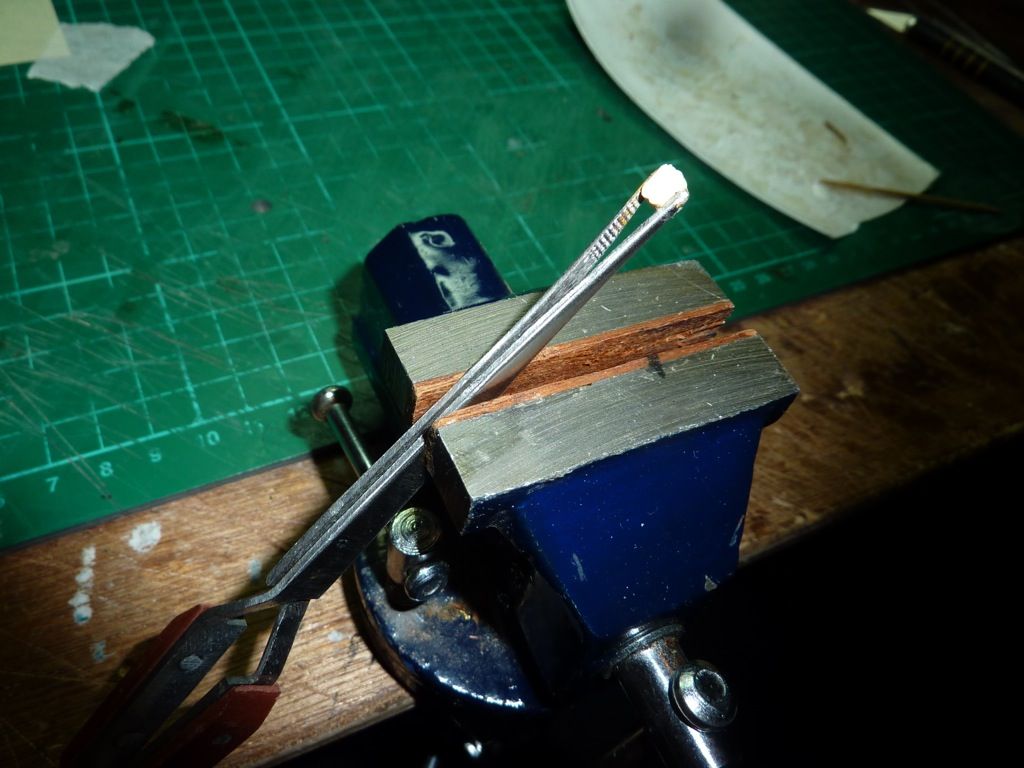 I then put some PVA Glue on to the block and thread the rope around the block tying it of with a little bit more PVA. Cant show you a picture of that, I only have 2 hands.I have made a batch up, in no time at all. Was really worried about this task at the beginining, but as you get into it, it not to hard a job. I then put some PVA Glue on to the block and thread the rope around the block tying it of with a little bit more PVA. Cant show you a picture of that, I only have 2 hands.I have made a batch up, in no time at all. Was really worried about this task at the beginining, but as you get into it, it not to hard a job. This is what I have done where I have two blocks hanging side by side, don't know if its the right way to do it, but it works. This is what I have done where I have two blocks hanging side by side, don't know if its the right way to do it, but it works. Mo MoMo
|
|
|
Rank: Vice-Master Groups: Registered
Joined: 09/02/2012 Posts: 569 Points: 1,675 Location: Scotland
|
|
|
|
Rank: Vice-Master Groups: Registered
Joined: 09/02/2012 Posts: 569 Points: 1,675 Location: Scotland
|
At the platform at the top of the first section I have done the following.[/size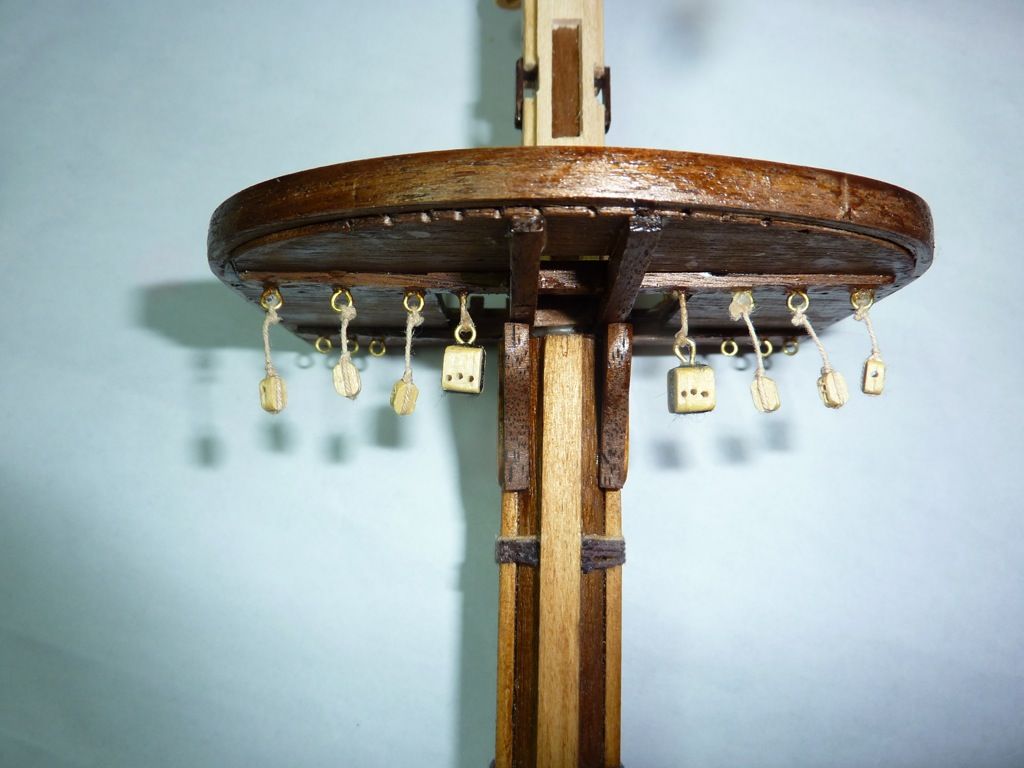
View from the front.
This is the rear view, I have put in 3 eyelets each side, but I am not sure what to hang from these eyelets,
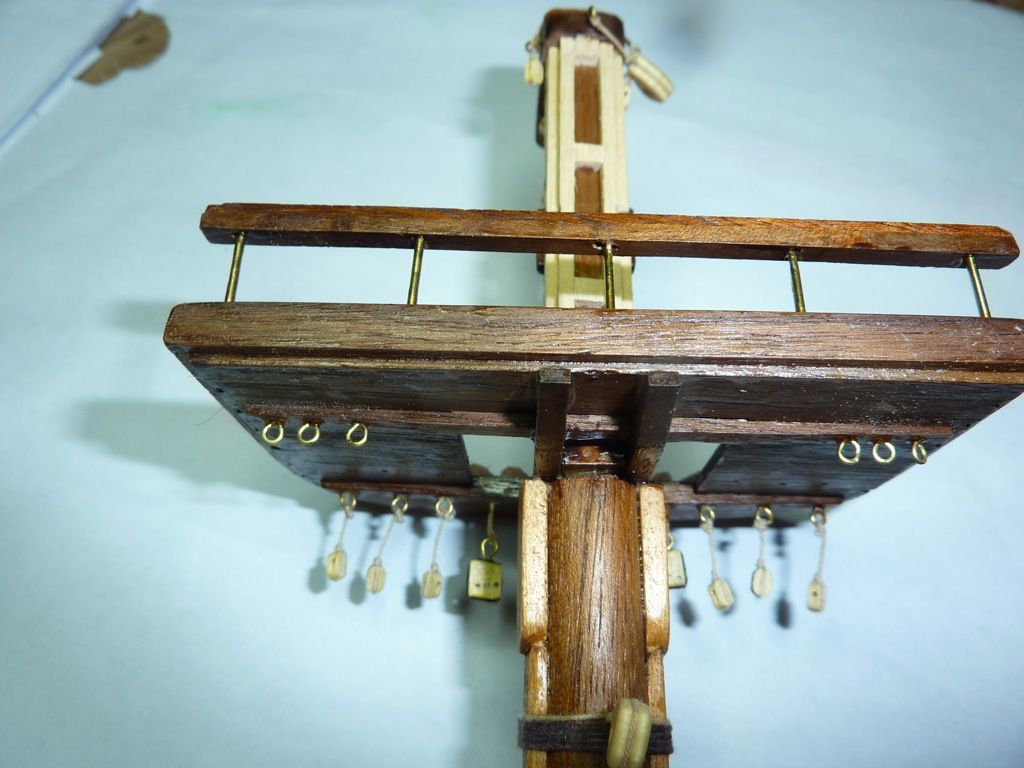
[size=7]MoMo
|
|
|
Rank: Vice-Master   Groups: Registered
Joined: 13/01/2012 Posts: 605 Points: 1,630 Location: Bucks
|
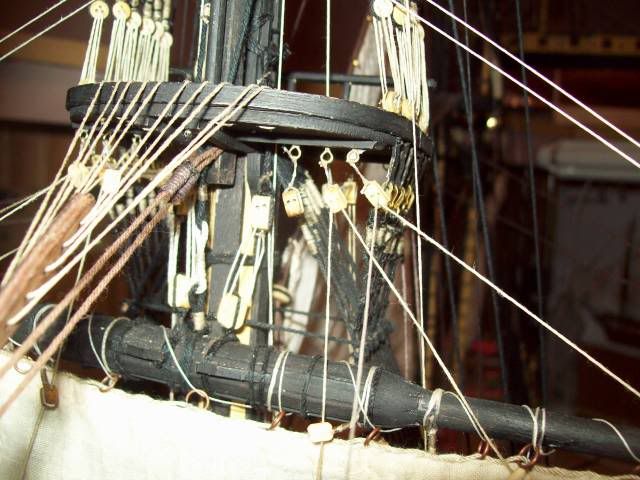
Hi there Mo, on mine I have installed double blocks. These are to take the lines which are connected to the sails to help furl them, 3 lines on each side. The plans dont show it this way but the other set I have sent you will. I sent them 2 days ago.The way you have done it will probably take the sheet and clue lines from the mainsail on the fore spar. A couple of pics fore and aft might show you this. Hope you dont mind them on your diary. 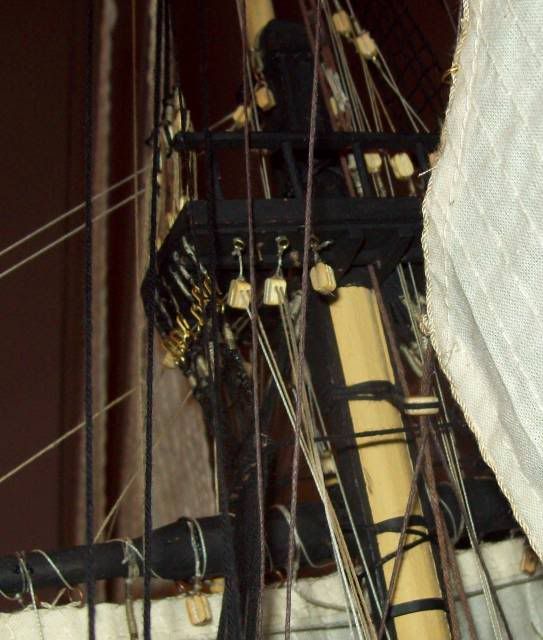 HMS Surprise
HMS Snake
HMS Bounty
HMS Royal Caroline
HMS Victory rebuild
HMS Supply
|
|
|
Rank: Vice-Master Groups: Registered
Joined: 13/01/2012 Posts: 605 Points: 1,630 Location: Bucks
|
 HMS Surprise
HMS Snake
HMS Bounty
HMS Royal Caroline
HMS Victory rebuild
HMS Supply
|
|
|
Rank: Vice-Master Groups: Registered
Joined: 13/01/2012 Posts: 605 Points: 1,630 Location: Bucks
|
Sorry Mo I just read this again and you are on about the main mast. I aint got anything on that yet but the same rule will probably apply. You just keep working back toward the stern and install as the fitting needed comes up.  HMS Surprise
HMS Snake
HMS Bounty
HMS Royal Caroline
HMS Victory rebuild
HMS Supply
|
|
|
Rank: Vice-Master Groups: Registered
Joined: 09/02/2012 Posts: 569 Points: 1,675 Location: Scotland
|
The story so far, Really getting in a tizz, about the rigging, I know I am not there yet, but with doing the masts, I am also putting on the blocks, and the blocks will have to be correct for the rigging, Moriaity has been a great help to me here, but I have decided to put a halt to the masts for now, and go back to the deck etc. This first picture I am posting, is showing the detail at the top of the bottom section of the rear mast, There is a small cleat for rope's to go through. I have done the front and Middle mast, but the drawing does not show it on the rear mast, but I am doing it anyway, because it just feels the right thing to do. 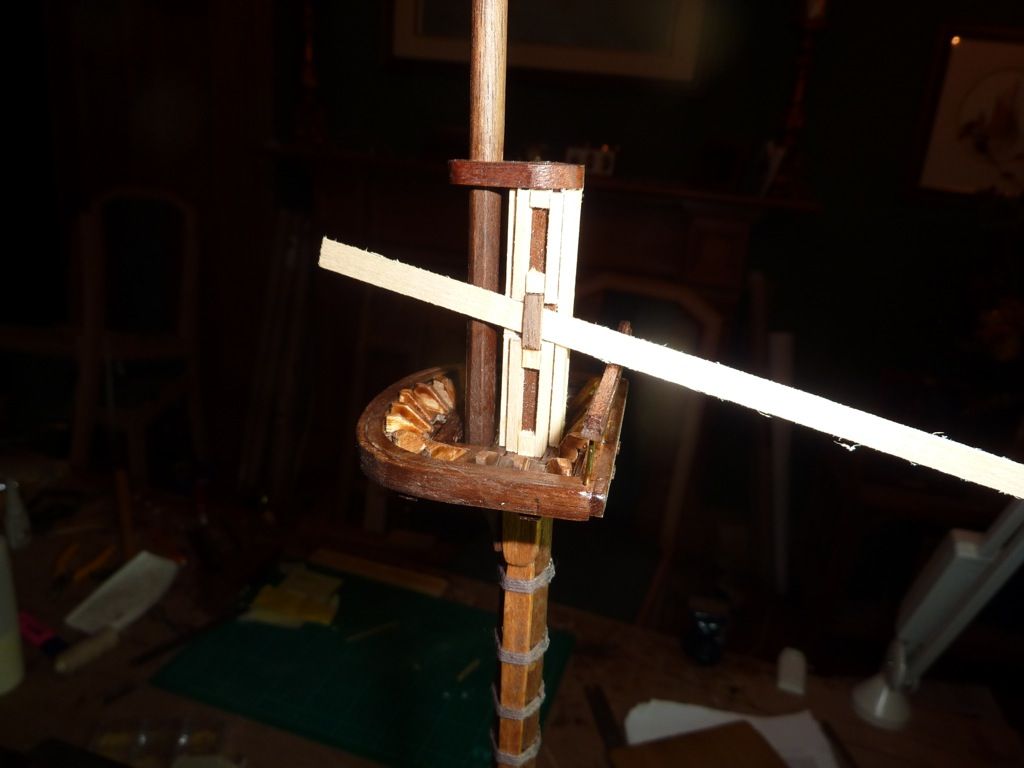 Over the weekend I am going to put the tops on the forward bulwarks, I have been avoiding this for ages, the wood is shaped to size, it just needs the final fit and glueing in place. Over the weekend I am going to put the tops on the forward bulwarks, I have been avoiding this for ages, the wood is shaped to size, it just needs the final fit and glueing in place.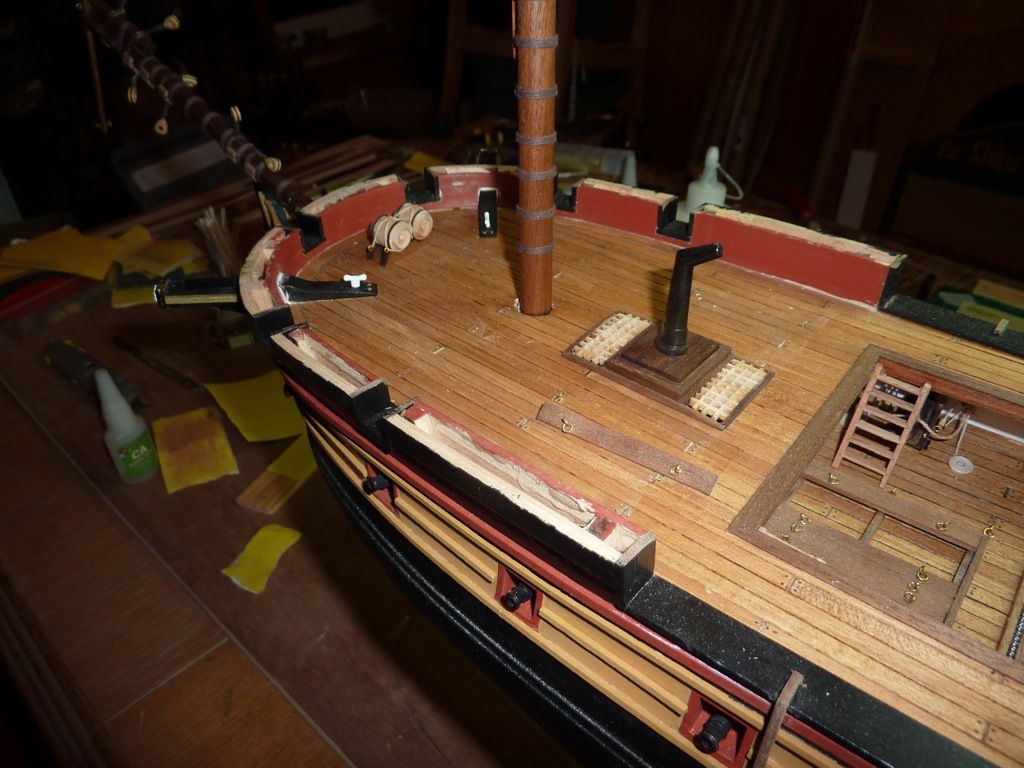  And finally a picture of the deck, really happy how its all turning out. And finally a picture of the deck, really happy how its all turning out.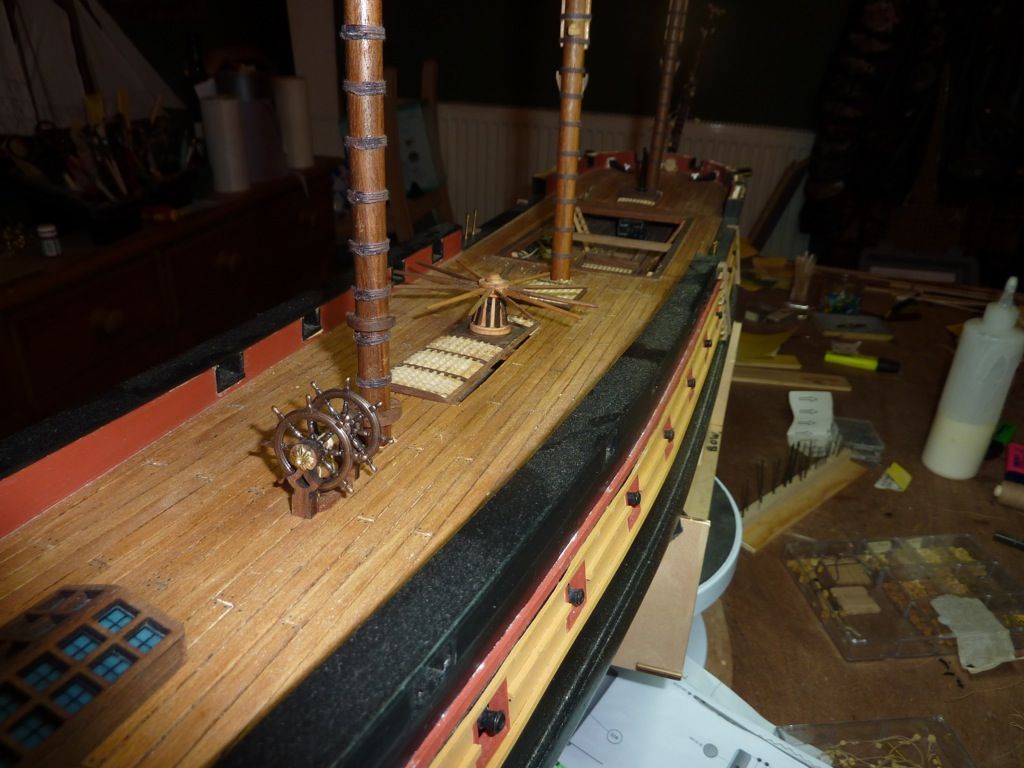 Mo MoMo
|
|
|
Rank: Vice-Master Groups: Registered
Joined: 09/02/2012 Posts: 569 Points: 1,675 Location: Scotland
|
|
|
|
|
|
Quality work there Mo, looking fantastic... well done...
Regards
Alan
|
|
|
 Rank: Master   Groups: Registered
Joined: 30/03/2011 Posts: 1,344 Points: 4,079 Location: Bryanston, Johannesburg. RSA
|
Some good neat and tidy building there, Mo. Following your build with interest. Well done. Rgds, Hans
"It's okay to make mistakes. mistakes are our teachers - they help us to to learn, even if it is painfully"
Current Build:
Endeavour Cross section,D51
Completed: HMS Victory
Under the bench: Endeavour x 2,Sovereign of the Seas, Akagi and The Black Pearl!HMS Victory Cross Section
|
|
|
|
|
Looks really good. Think Surprise is going to be on my wants list!!! “Whenever you find yourself on the side of the majority, it is time to pause and reflect.”
-Mark Twain
|
|
|
 Rank: Amateur level 2  Groups: Registered
Joined: 12/02/2010 Posts: 44 Points: 108 Location: Oakdale, Blackwood, Gwent
|
She's looking Great Mo. Regards, Andre Building:
DeAgostini:
HMS Victory
HMS Surprise
Sovereign of the Seas
H.M.S Victory Cross-Section
|
|
|
Rank: Vice-Master Groups: Registered
Joined: 13/01/2012 Posts: 605 Points: 1,630 Location: Bucks
|
Coming quite nicely Mo, remember about the belaying pins now would be a good time to sort them before you fit any guns. HMS Surprise
HMS Snake
HMS Bounty
HMS Royal Caroline
HMS Victory rebuild
HMS Supply
|
|
|
Rank: Vice-Master Groups: Registered
Joined: 09/02/2012 Posts: 569 Points: 1,675 Location: Scotland
|
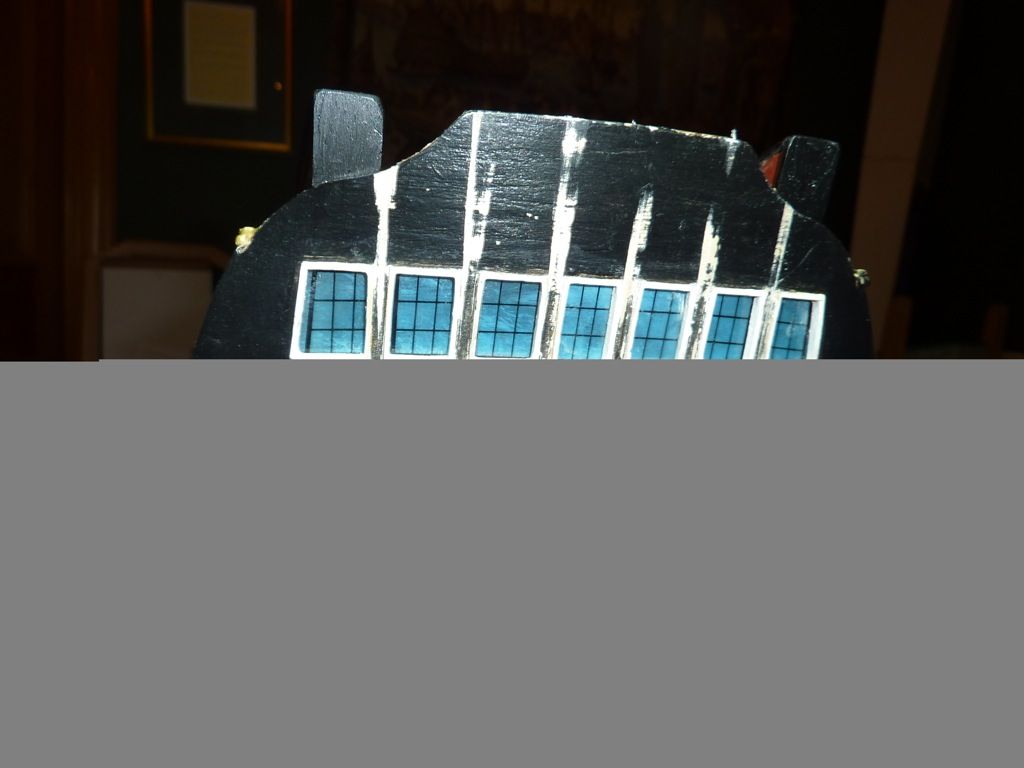
Quick update where I am now, still on the back of the ship, I have been tying to get the forecastle column's to fit, the gaps between the windows are to small, I should have used a spacer the size of the columns when I was fittting the window beads. anyway a bit of filing and grinding and I have made them fit. /size]
I have a brass sheet with what I think is the gunport lid hinges, they do not look like the ones on the instruction booklet, can anyone tell me if these are the hinges it the ones on the right hand side of the sheet below.
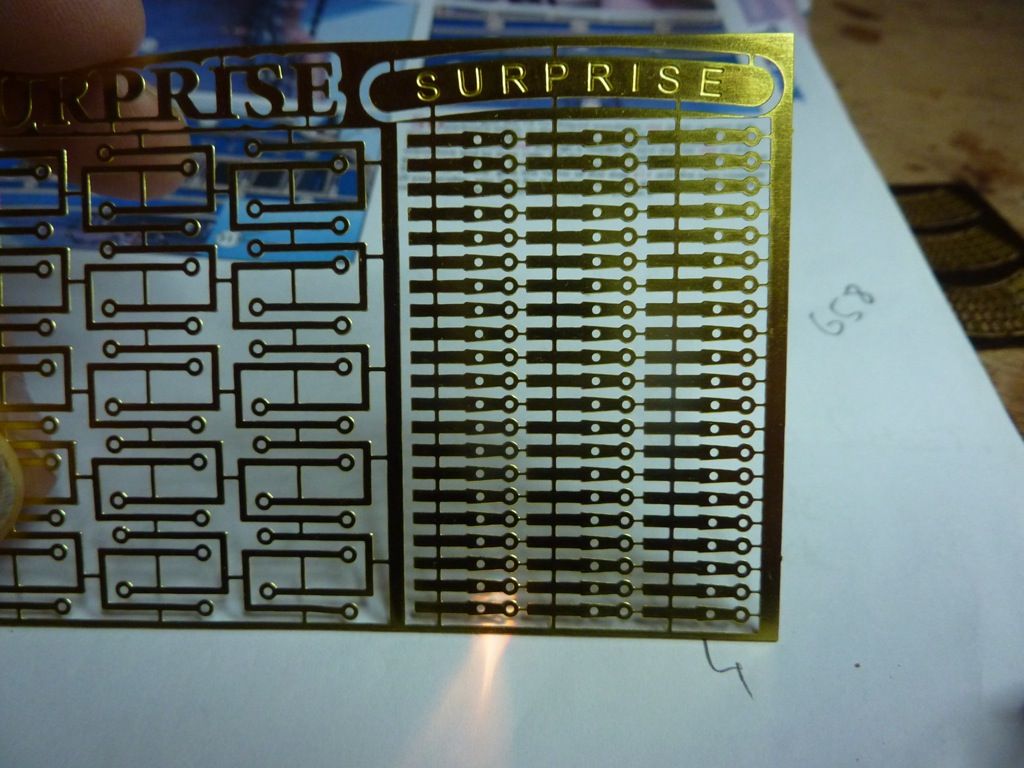
[size=7]I would post more pictures but I think my camera is on the blink.
Mo 📷 Mo
|
|
|
Rank: Vice-Master Groups: Registered
Joined: 13/01/2012 Posts: 605 Points: 1,630 Location: Bucks
|
They are the hinges Mo.With a lot of thought and work you could probably get them to open and close, but as they are it,s open or closed. I made my own and didnt use them so mine do both and I use them for other things HMS Surprise
HMS Snake
HMS Bounty
HMS Royal Caroline
HMS Victory rebuild
HMS Supply
|
|
|
Rank: Vice-Master Groups: Registered
Joined: 09/02/2012 Posts: 569 Points: 1,675 Location: Scotland
|
Thanks Iain, the firs two gunport doors I was going to do were the 2 at the rear, and I would make them closed, I think I have got my other camera to work, lets see. After filing the rear of the Captains Quarters, there is a bit of remedials to do, sand it all back flat again,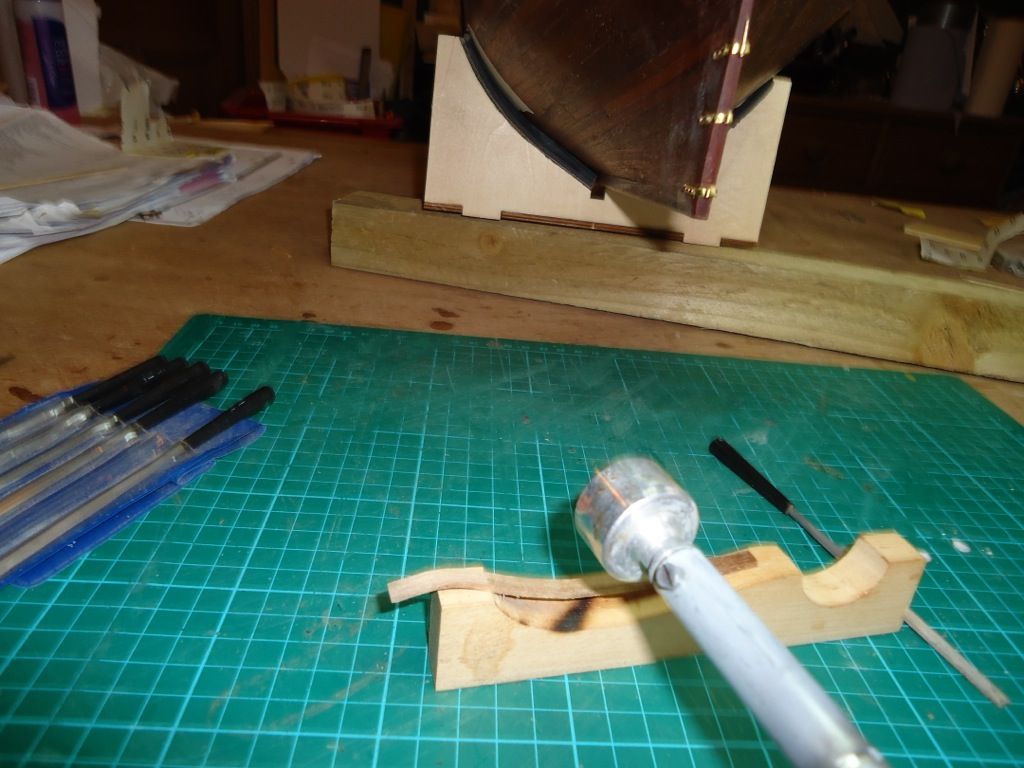 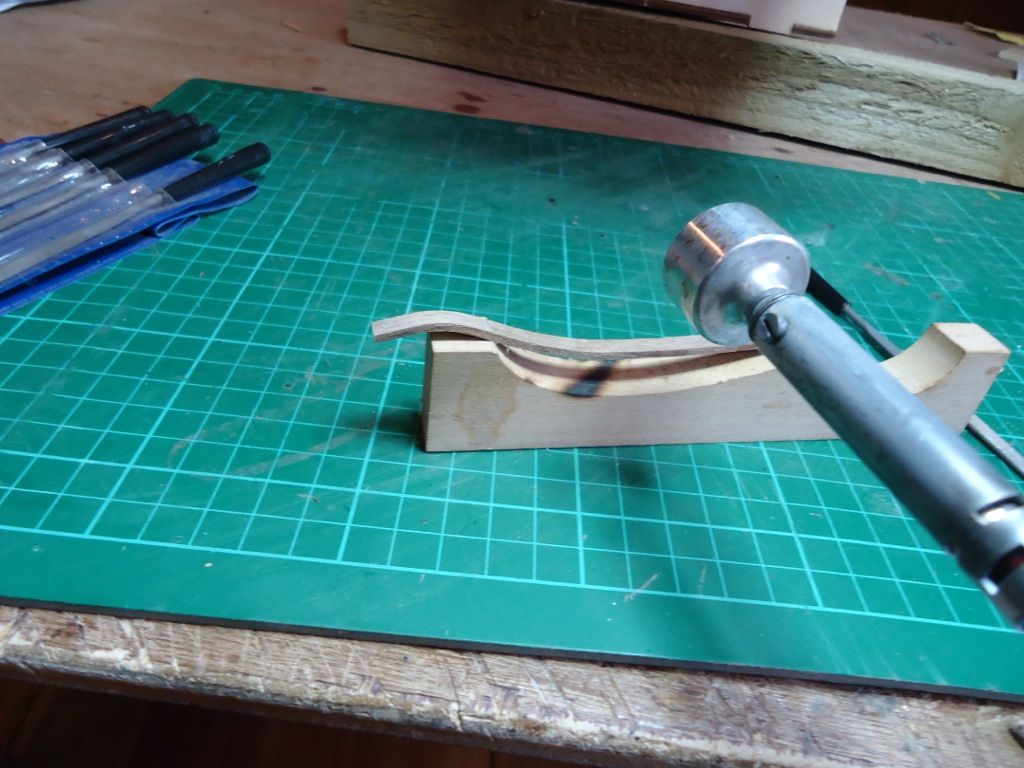 As you see above using the electric plank bender I am shaping the wood for around the window section. As you see above using the electric plank bender I am shaping the wood for around the window section.
Works out ok, I socked the timbers in hot water for 30 mins before bending, turned out good.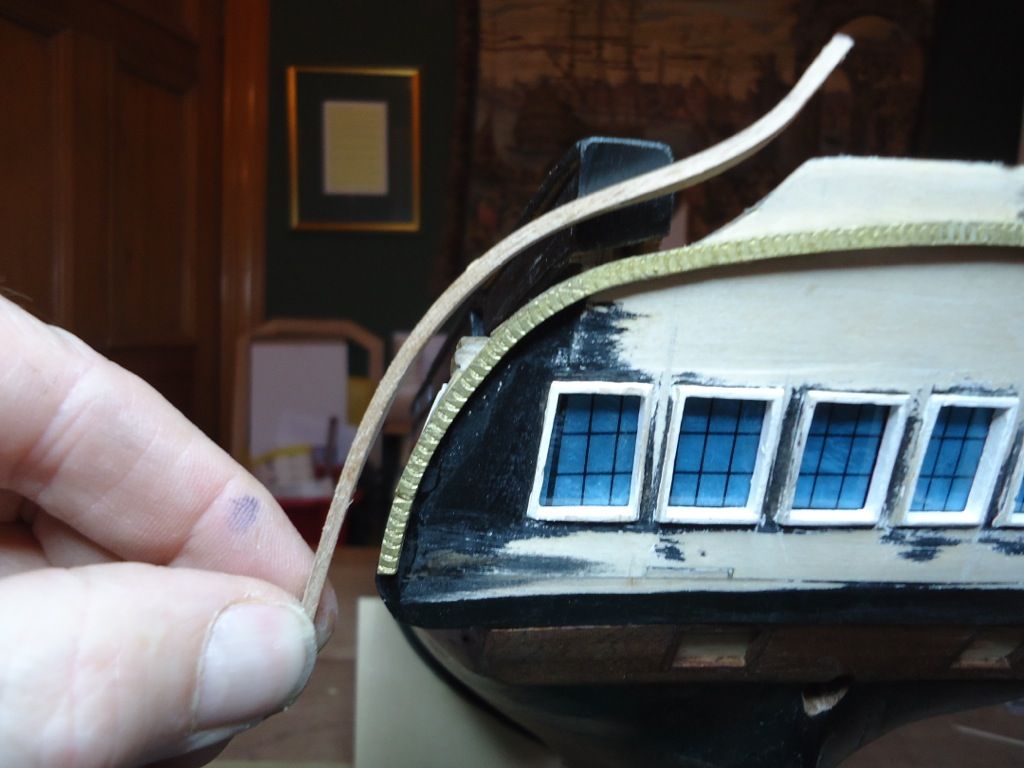 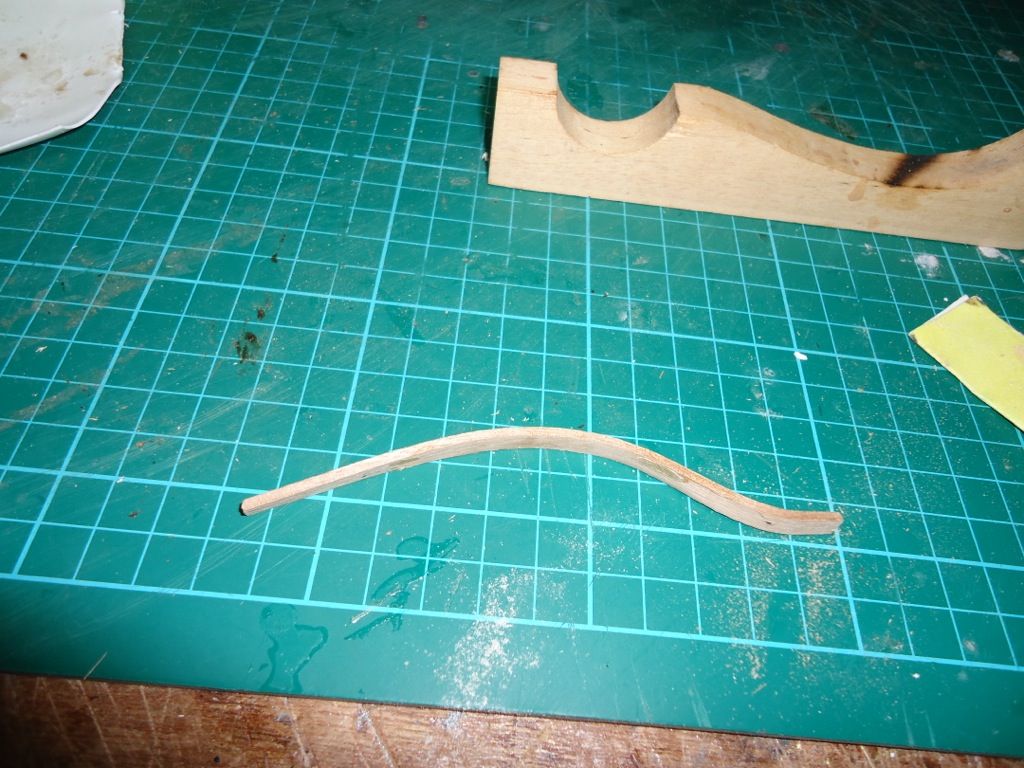 A bit of glue and the odd pin and made a start, A lot of sanding and final works to do before painting A bit of glue and the odd pin and made a start, A lot of sanding and final works to do before painting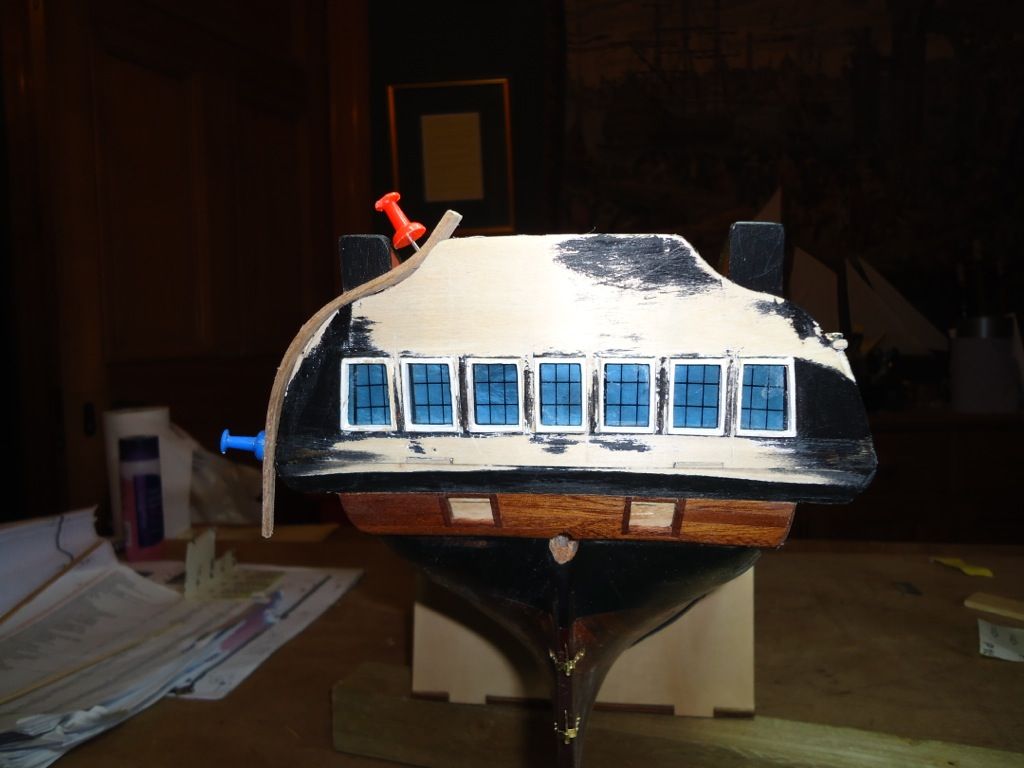 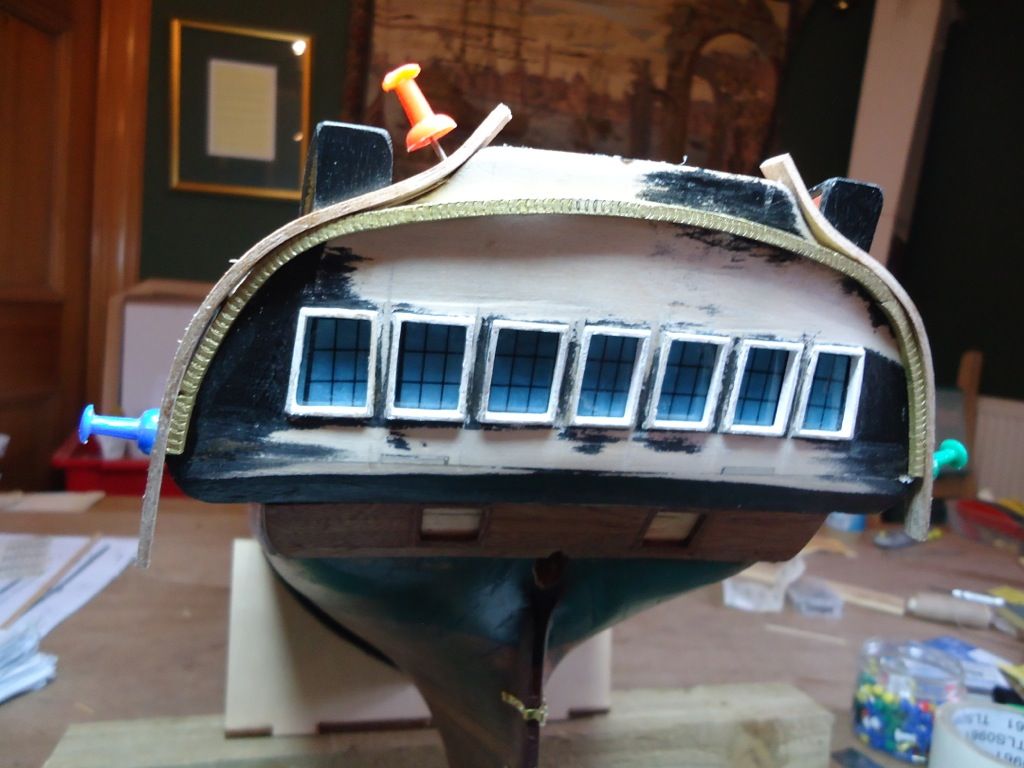 Will report back later, Hope the pic's are ok, as I said different camera. Will report back later, Hope the pic's are ok, as I said different camera.
MoMo
|
|
|
|
|
Looking great Mo.. very nicely done.... Regards Alan
|
|
|
Rank: Vice-Master Groups: Registered
Joined: 09/02/2012 Posts: 569 Points: 1,675 Location: Scotland
|
[size=7Its coming together now at the back of the ship. Just wished I had used a spacer at the time of putting the beads in for the windows.[/size]  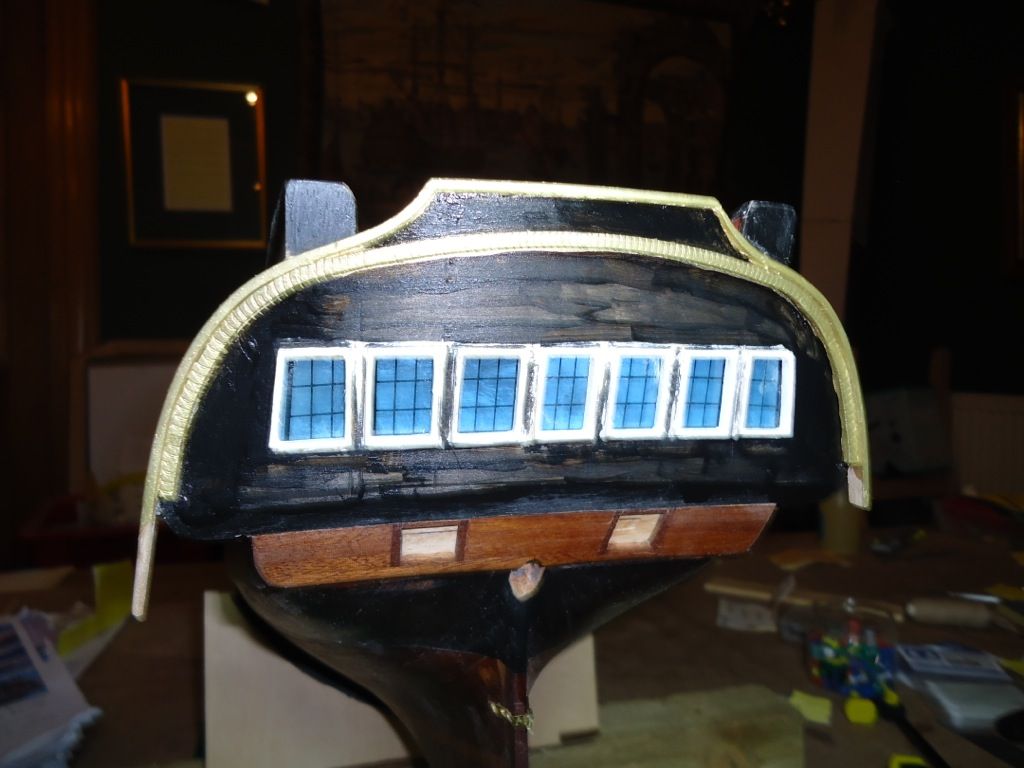 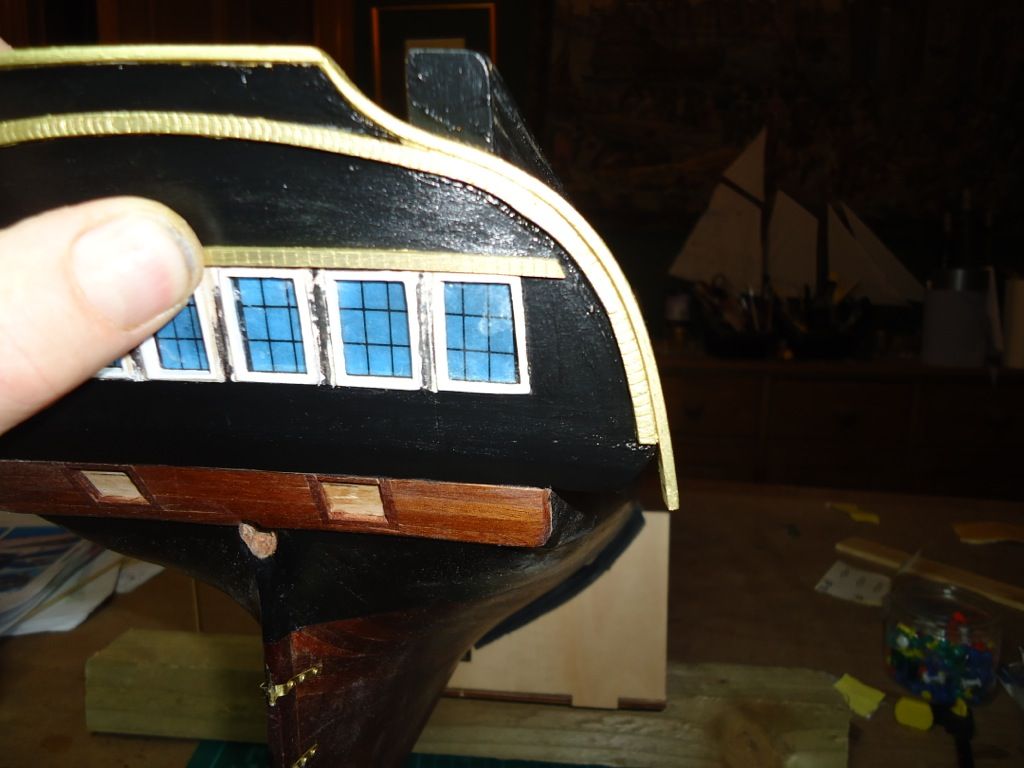 Looking better now, I have found the timber to go across the top of the windows is to short, I will either have to make a bit up to extend it, or ~I could put a little timber in at the centre point, Will have a look at that tomorrow. Looking better now, I have found the timber to go across the top of the windows is to short, I will either have to make a bit up to extend it, or ~I could put a little timber in at the centre point, Will have a look at that tomorrow.
Mo Mo
|
|
|
Rank: Vice-Master Groups: Registered
Joined: 09/02/2012 Posts: 569 Points: 1,675 Location: Scotland
|
|
|
|
|
Guest (7)
|
 US
US

