|
|
 Rank: Pro   Groups: Registered
Joined: 06/09/2011 Posts: 115 Points: 354 Location: Bristol
|
Hi Budgie Bismark looking good. will be following with interest. Ken
Completed Models
IJN Yamato, Hachette Titanic, Del Prado Victory, Tamiya 1/16 RC Pershing Tank, HMS Naiad, HMS Prince of Wales, Admiral Hipper, Tirpitz, USS North Carolina
[Current Build
USS Enterprise CV6
|
|
|
|
|
great to see this up and running will follow with interest Jase P.S. I am the last person to notice this but, Bismarck is spelt with a 'C' before the K J “Whenever you find yourself on the side of the majority, it is time to pause and reflect.”
-Mark Twain
|
|
|
 Rank: Master   Groups: Registered
Joined: 20/03/2010 Posts: 1,199 Points: 3,473 Location: Glenrothes
|
 Evenin' Folks  Decided to deviate from instructions  Uh Oh Instructions want me to strengthen the hull planks by using surgical gauze and white glue next and then fit the forward deck and then finish off the planking to the top off the frames I have decided to plank to top off frames 1st this will allow me to strengthen ALL the hull planks Used a felt tip to colour in the top off the frames this will tell me when to stop sanding Hopefully  Thinking pink is a bit girlie changed to blue  I have noticed that the ledge that starts to replicate the armour plating is virtualy unnoticeable that runs along the hull This is probably due to not enough care taken when sanding the frames and 1st planking The 2nd planking is very thin and after sanding will again just look like a bad crease I am hoping that when the time comes using a thicker plank along that line will help rectify this issue budgie attached the following image(s):
|
|
|
 Rank: Super-Elite   Groups: Registered
Joined: 27/01/2014 Posts: 5,060 Points: 14,980
|
Looking good budgie, keep them coming 
|
|
|
|
|
She's certainly progressing really nicely, impressive work so far Budgie... Very well done...  Regards Alan
|
|
|
Rank: Super-Elite  Groups: Registered
Joined: 16/08/2010 Posts: 2,771 Points: 8,344 Location: Brighton
|
Hi Budgie. Doing a fantastic job so far. The answer to some questions regaurding the decks in your post earlier. The middle section from the bow to the rear gun turrett is removable on the redaio control version and there is a removable stern quater piece. These are held in place on the model by four screws in each section, They are the only differnce to the static version. The deck sections are stuck on to ply type sections you can hardley notice the joins. The decks are removable to acess the radio gear in the model. The gause and glue you mentioned for strenthening are more for the radio comtrol version of the model where the rudder tubes go trouth the hull i think this is more of a water proofing method for the inner planking in case water comes up the rudder tubing wihich are filled with grease. Hope this helps with your questions. you can see some pictures in me Bismark build. Ian Current builds.Hachettes build the bismark,HMS Victory, HMS Hood.
Finished Builds Corel HMS Victory cross section.
|
|
|
Rank: Super-Elite   Groups: Registered
Joined: 30/01/2013 Posts: 4,604 Points: 13,607 Location: Monmouthshire UK
|
Lovely build so far, looks very solid Steve
|
|
|
Rank: Master Groups: Registered
Joined: 20/03/2010 Posts: 1,199 Points: 3,473 Location: Glenrothes
|
Thanks for comments guys ....appreciated @ Ian Took me a while to find your build diary...been some time since your last post Just wondering if there is a noticable line in the planking where the middle deck lifts off hence my reason for thinking off making the superstructure removable instead... once all the thingies that makes it go are in place
|
|
|
Rank: Super-Elite Groups: Registered
Joined: 16/08/2010 Posts: 2,771 Points: 8,344 Location: Brighton
|
Hi budgie have taken some pictures of the deck joins for you. Hope this will help with your thoughts.Ian. 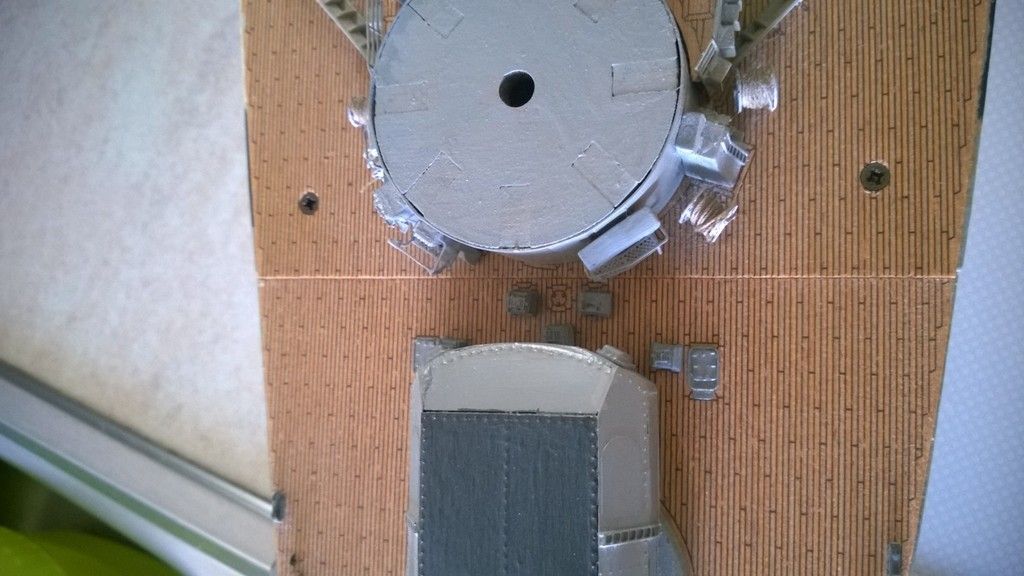 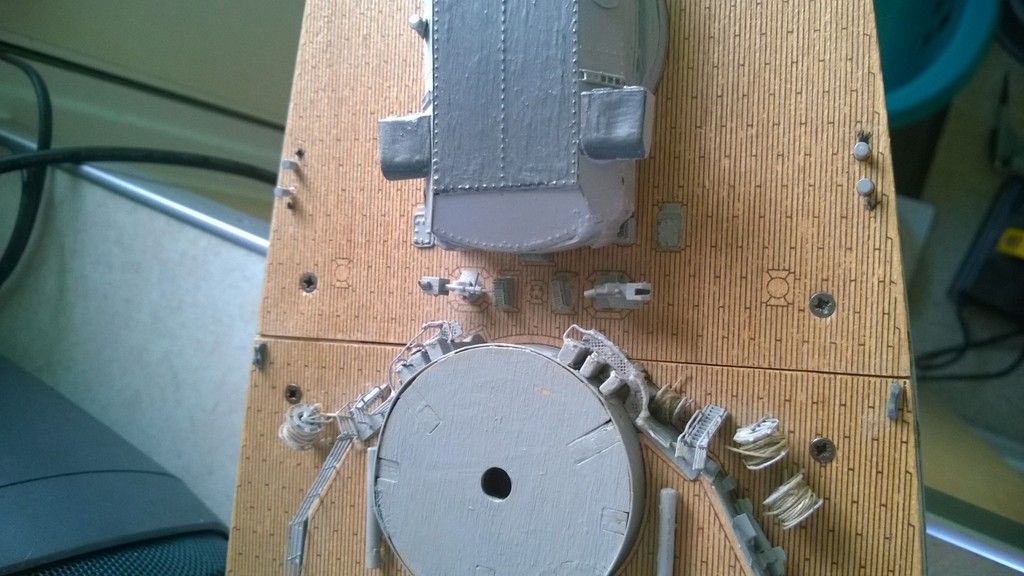 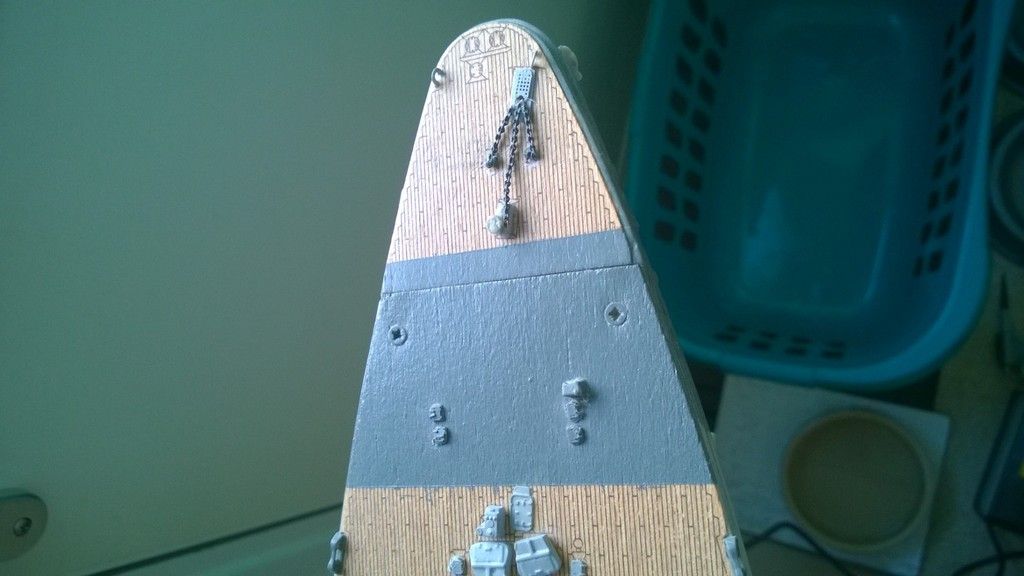 Current builds.Hachettes build the bismark,HMS Victory, HMS Hood.
Finished Builds Corel HMS Victory cross section.
|
|
|
Rank: Master Groups: Registered
Joined: 20/03/2010 Posts: 1,199 Points: 3,473 Location: Glenrothes
|
|
|
|
Rank: Master Groups: Registered
Joined: 20/03/2010 Posts: 1,199 Points: 3,473 Location: Glenrothes
|
Hi Folks made a boo boo 1st pic shows a slight bend in planking which is correct  but only on one side... silly me 2nd pic shows this rectified by loosening the top two planks and gluing a bit of planking to a couple of the frames to make them wider to push planks into the bend Have started strengthening the planking using gauze and diluted wood glue as per instructions Have also glued the forward deck on and keeping it in place with use of elastic bands There is a slight gap between the deck and last row of planks which i will fill in with putty later Also glued my first resin piece Instructions recommend 2 part epoxy but the tube of "serious glue" has done the job. That part aint going anywhere I hope it is as good as sticking brass to wood and i do not relish the idea of using epoxy for all those parts Ah well back to the gauzeing Thanks for lookin' budgie attached the following image(s):
|
|
|
Rank: Super-Elite Groups: Registered
Joined: 27/01/2014 Posts: 5,060 Points: 14,980
|
Nice work Budgie, shame about the boo boo but by the look of the pictures you do a great job rectifying it so its all good
|
|
|
Rank: Master Groups: Registered
Joined: 20/03/2010 Posts: 1,199 Points: 3,473 Location: Glenrothes
|
Mornin' Folks......been plodding along with the false deck Have noticed that if you do not clamp the strips together, the ply sides that has the shape of the deck can overlap the hull by quite a bit I suppose if you sand the inner edge this will rectify the issue as you do not want to sand the outer edge in case the shape gets distorted Pity i never thought of that before redoing Also made a start on the 2nd planking using the same thickness off planks as the 1st planking (from the "spares") so the armour plating ledge is more noticeable  Was concerned about doing this as there are thinner detailed parts to be added to the hull (ply with portholes) but a test fit seems tiddlyboo  Getting bored with the planking so started the big gun turrets Anton Bruno Cesar and Dora Thanks for lookin' budgie attached the following image(s):
|
|
|
Rank: Super-Elite  Groups: Registered, Forum Support Team, Administrators, Global Forum Support Team, Moderator, Official Builds Joined: 09/11/2012 Posts: 8,520 Points: 24,651 Location: East midlands
|
Hi Budgie, Looking good. Good job you noticed the little hiccup when you did, but nicely corrected. Keep on the way you are going and you`ll end up with a cracking build. Regards delboy271155 (Derek) COME BACK GUY FAWKES "YOUR COUNTRY NEEDS YOU"
|
|
|
|
|
Very nice work Current builds:-C57,Zero, Lamborghini Countach, Caldercraft HMS Agamemnon,Robi,R2-D2, MFH Cobra .
|
|
|
Rank: Master Groups: Registered
Joined: 20/03/2010 Posts: 1,199 Points: 3,473 Location: Glenrothes
|
Thanks for the positive comments chaps....appreciated Back to the planking The "cooling water openings" are to be placed 9 rows of 5mm planking down As i am using 6mm wide planks i only need 7 rows  Yippee and a half  budgie attached the following image(s):
|
|
|
|
|
looking good there, nice work Current builds:-C57,Zero, Lamborghini Countach, Caldercraft HMS Agamemnon,Robi,R2-D2, MFH Cobra .
|
|
|
|
|
Lovely work Budgie, think she is going to look something special when done.... Regards Alan
|
|
|
|
|
Great work Stuart, love the ship. It's a credit to u mate and look forward to the progress of the build. Chris On the bench 1/350 Revell Tirpitz Platinum Edition (Pontos PE and Wooden deck) plus extra Eduard PE set and extra MK1 door sets.
|
|
|
Rank: Super-Elite Groups: Registered
Joined: 16/08/2010 Posts: 2,771 Points: 8,344 Location: Brighton
|
Hi Budgie. Looking superp. have you decided which paint scheme you are going to do when you get there. look forward to seeing your progress Ian Current builds.Hachettes build the bismark,HMS Victory, HMS Hood.
Finished Builds Corel HMS Victory cross section.
|
|
|
|
Guest
|
 US
US

