|
|
 Rank: Amateur level 2  Groups: Registered
Joined: 01/05/2015 Posts: 43 Points: 132 Location: Clearwater, Florida USA
|
Glad to see another YT-1300 owner opening up the quad gun barrels. I feel sorry for those who don't the first time they try to fire 'em   Workbench lighting is sooooo important. Love your set up. Keep posting.
|
|
|
 Rank: Semi-Pro Level 1   Groups: Registered
Joined: 20/05/2015 Posts: 51 Points: 156 Location: Cary, NC
|
Ok well I got to do some painting on my old cut-out set tonight! This is my first EVER attempt at weathering of any kind. So feel free to tear it up but more importantly please any tips you have would be super helpful! I am basically taking this model in segments and practicing/attempting different techniques on each section. What I did first was take the red that was there and the gray panel and sanded them down a bit to make them look beaten up. Then I looked at some reference of this area of the studio Falcon and noticed the damage on it looks like little pot holes. So I took a grinder bit in my dremel and ground out damage to match the reference.  Next I used some Nuln Oil and added a wash to the lower section. While it was drying I used a rag to gently pull it down the panels to give it some streaking undercoat. This worked pretty well although I think I got a little over-zealous and also I did my streaks the wrong direction. This is the underside so the streaks would be going from out towards the inner part. Oh well, that's why I am practicing on this model before doing my big falcon. 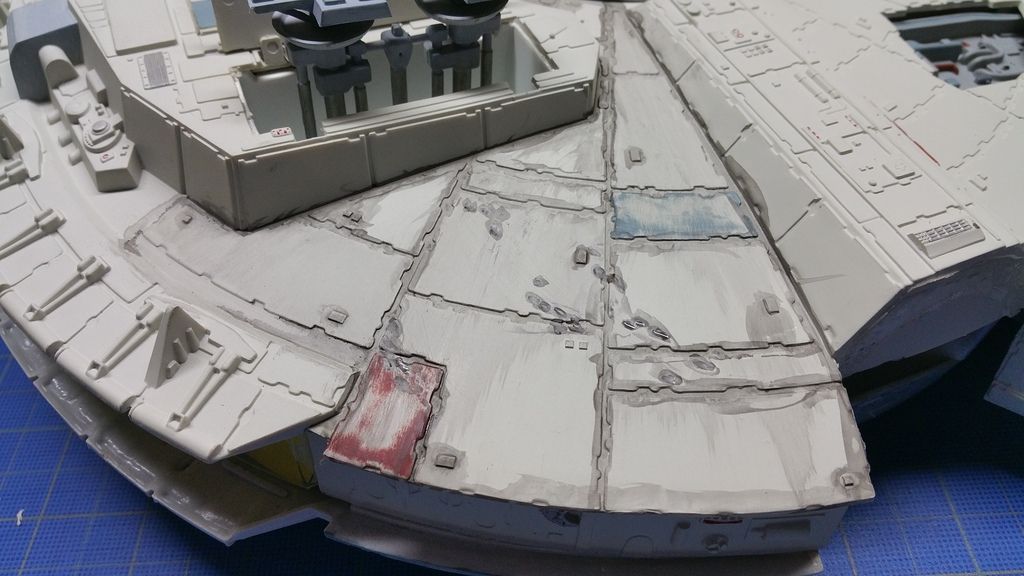 Next I used a little oil to fill in the damage holes so they look darker. After painting with the oil I put a super small amount of turpentine on a brush and lightly went over them to blend in the paint and to give it some light streaking. I plan to accentuate this with pastels later. I also did a light initial dry-brushing coat here just to start to give the panels some coloration. 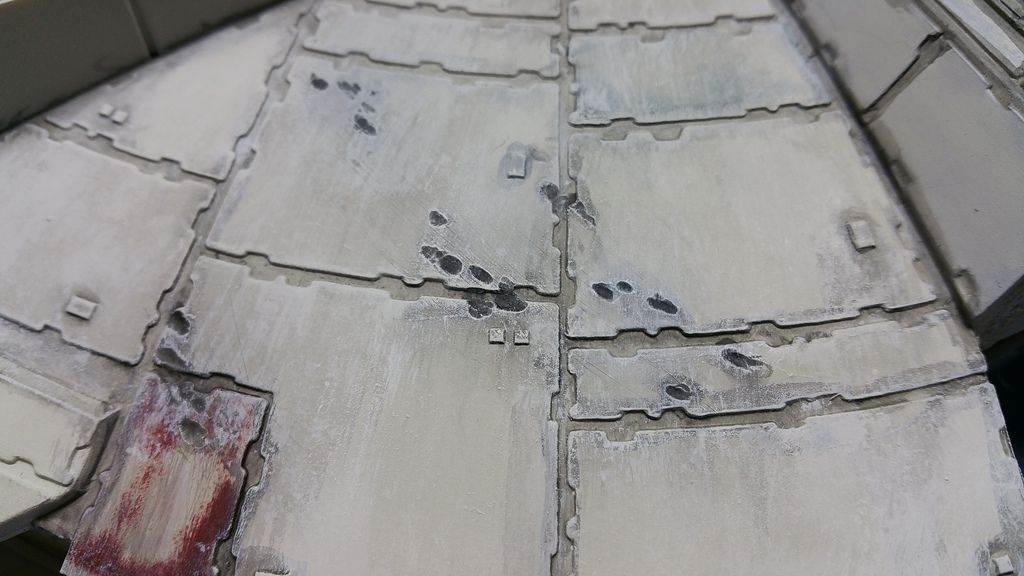 Next was just alot of dry-brushing with vallejo foundation white, medium sea gray, and silver grey. 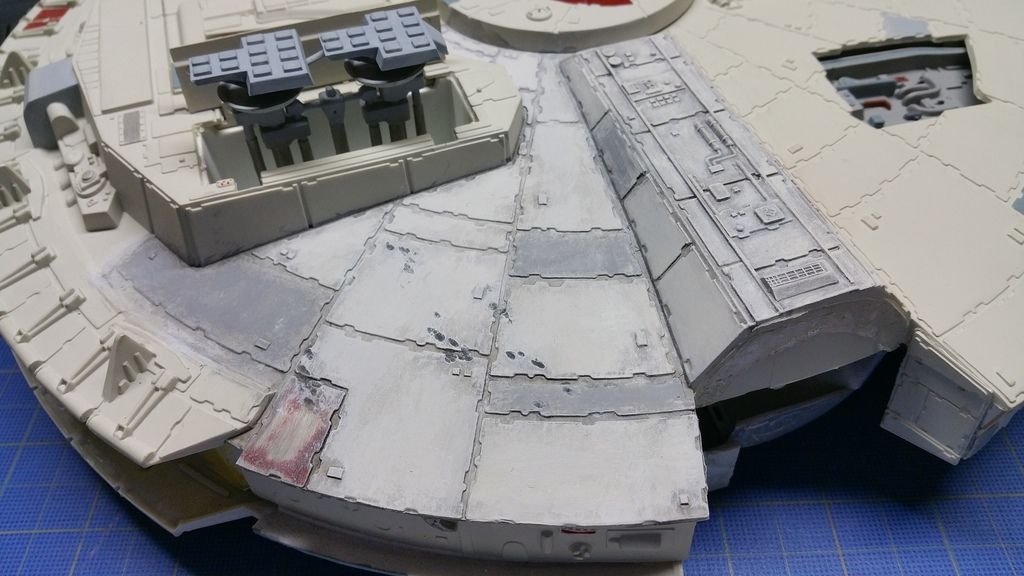 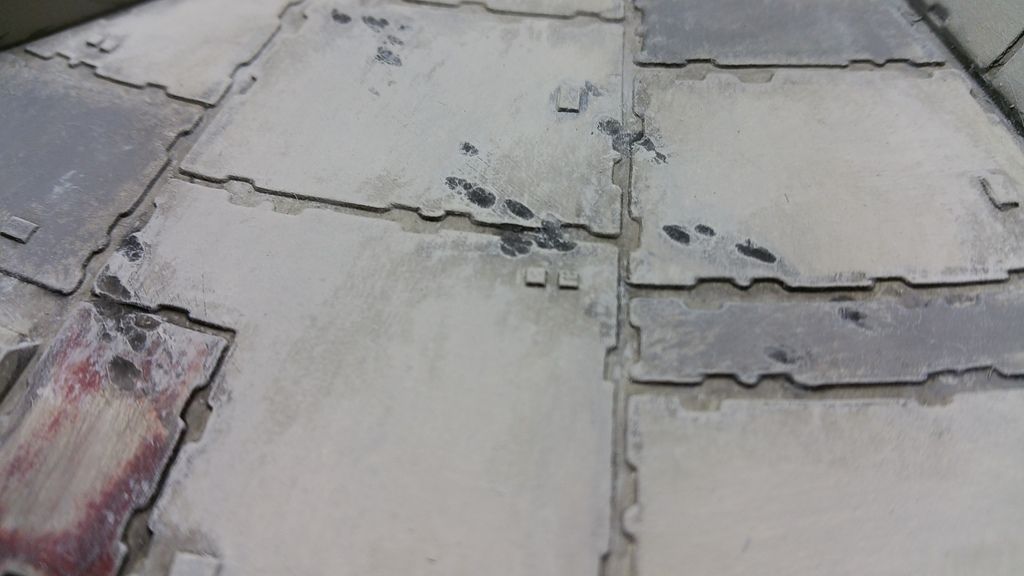 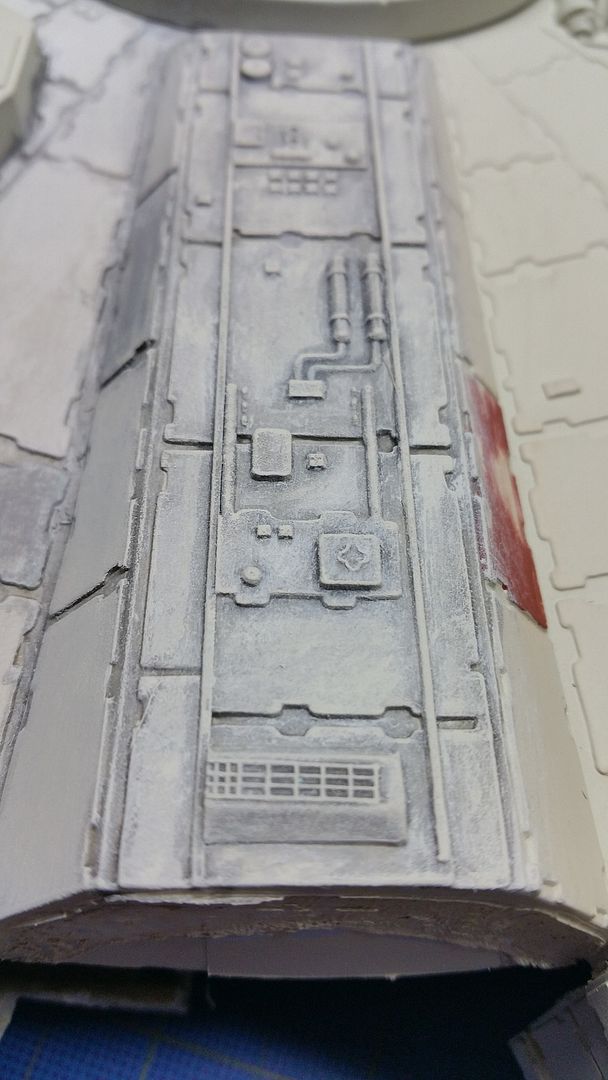 Next steps tomorrow I plan to do a pass with black and burnt sienna oils and turps to add some streaking and a bit more color. Then I am going to use some pastels to add the last touch. One question for those of you using pastels, after your all done, do you add a final coat of something to seal it all? And if so what and how? Charles R.
Building: DeAgostini Millennium Falcon...hasn't built a model since 1996...this is gonna be interesting!!
|
|
|
 Rank: Semi-Pro Level 1   Groups: Registered
Joined: 17/05/2015 Posts: 61 Points: 189 Location: PIckerington, Ohio USA
|
looking good, can't wait to see more...nice weathering, also got my new setup going, just. need to take some pics.
Adam
|
|
|
|
|
 Looks good  Current builds:-C57,Zero, Lamborghini Countach, Caldercraft HMS Agamemnon,Robi,R2-D2, MFH Cobra .
|
|
|
 Rank: Elite        Groups: registriert, Registered Joined: 20/03/2011 Posts: 2,356 Points: 7,122 Location: UK
|
Now that for a first attempt is looking mighty fine Mr Anderson and your technique will only improve over time so don't beat yourself up on this attempt as it looks great! I use non perfumed hairspray to "lock in" the pastels. Just a few light mist coats will do it and allow to thoroughly dry. Spencer
|
|
|
|
|
Love the effect you've created Charles, she really is starting to look as if she's been in a few hot spots on her travels..   Look forward to seeing how the next stage finishes the process... Very well done....   Regards Alan
|
|
|
 Rank: Semi-Pro Level 1   Groups: Registered
Joined: 20/05/2015 Posts: 51 Points: 156 Location: Cary, NC
|
Ok did some oil and rust streaks today. I had it actually looking better than this but then I tried to add something and screwed part of it up. Oh well, that's why I am practicing. 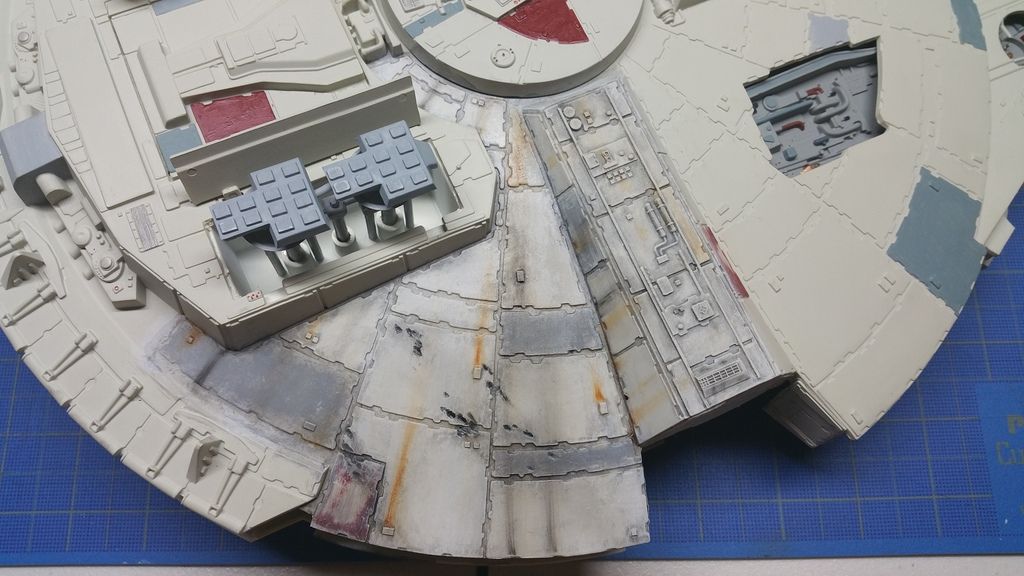 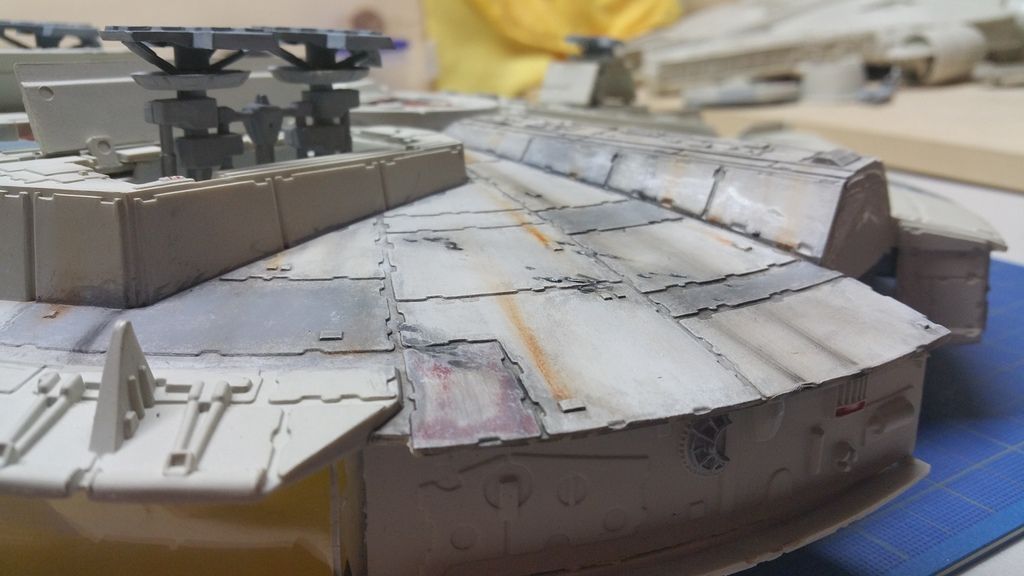 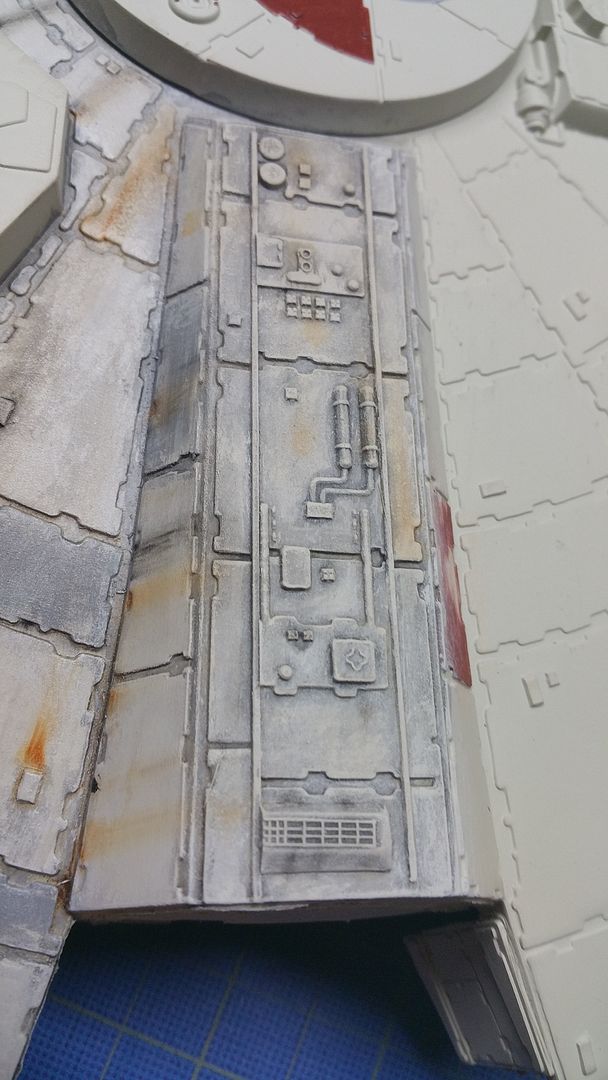 I am going to do some pastels tomorrow to add some more darkening and streaking effects. Anyone have any ideas for more types of effects I can learn and practice that will serve me going forward on the DeAgo falcon? And please give me honest critiques. If you think I could do something better let me know. I am very open to honest critiques. Also put together my cockpit today. Not glued or anything, just hooked it together so I could see what it looks like. Gets me excited to start painting the interior! 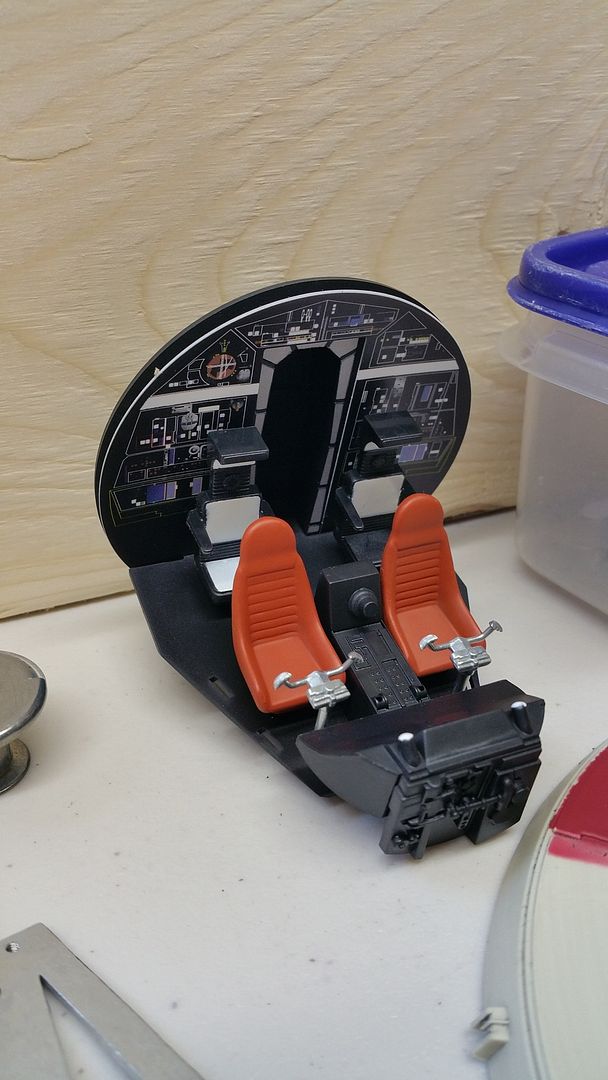 Charles R.
Building: DeAgostini Millennium Falcon...hasn't built a model since 1996...this is gonna be interesting!!
|
|
|
 Rank: Pro Groups: Joined: 24/08/2009 Posts: 48,827 Points: -13,348
|
Looking real good. I like the exterior weathering effects 
|
|
|
 Rank: Semi-Pro Level 1   Groups: Registered
Joined: 20/05/2015 Posts: 51 Points: 156 Location: Cary, NC
|
Did a pass with pastels tonight. Learned alot and I really like using them. I think I over-did it a bit though. Any suggestions on how to tone this down a bit? Also, once I have put on pastels, how do I seal them? I asked someone the other day in another diary but I can't seem to find that post again...would be really nice if these forums had a running g list somewhere of our posts. Like maybe in our profile or something. 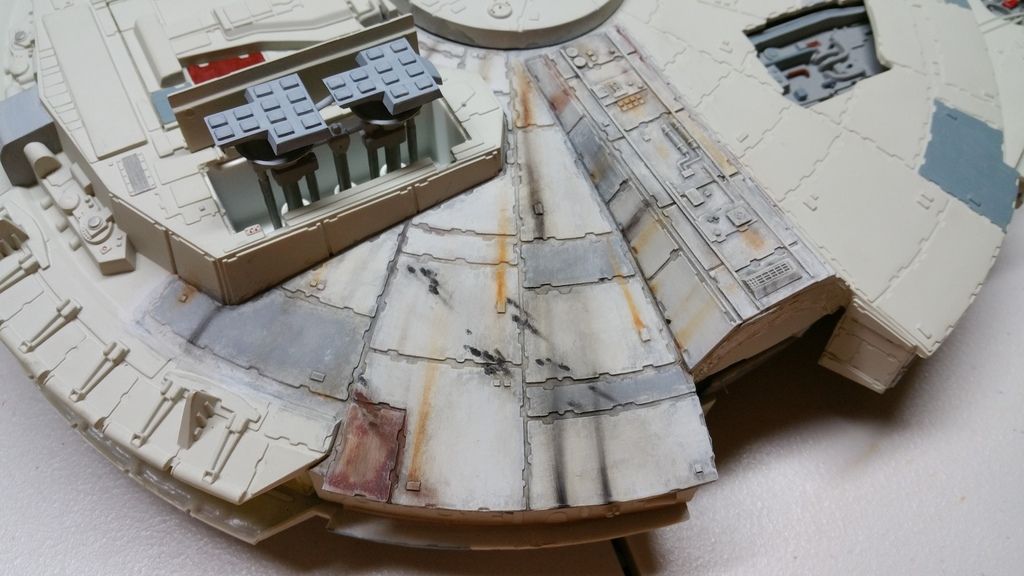 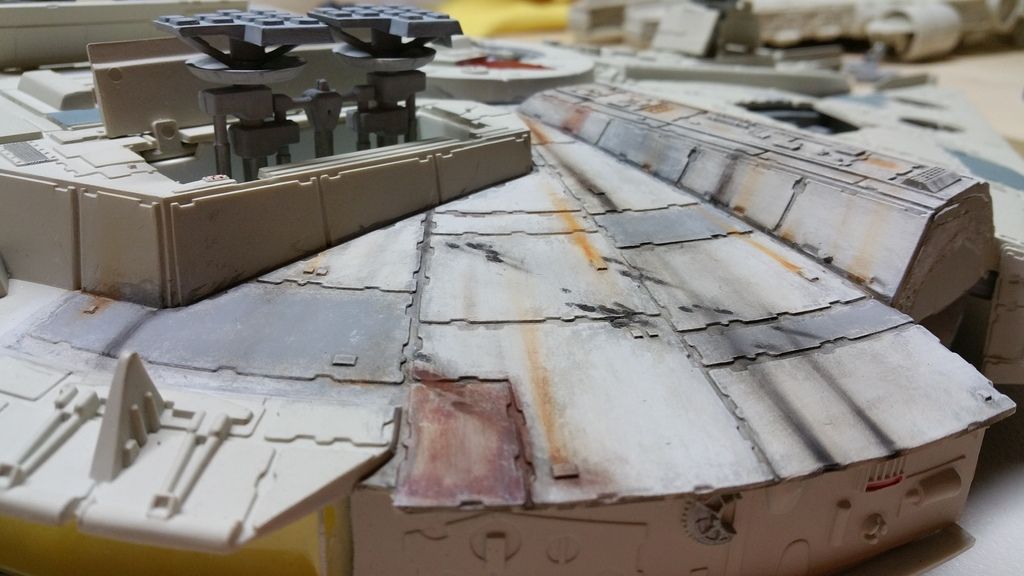 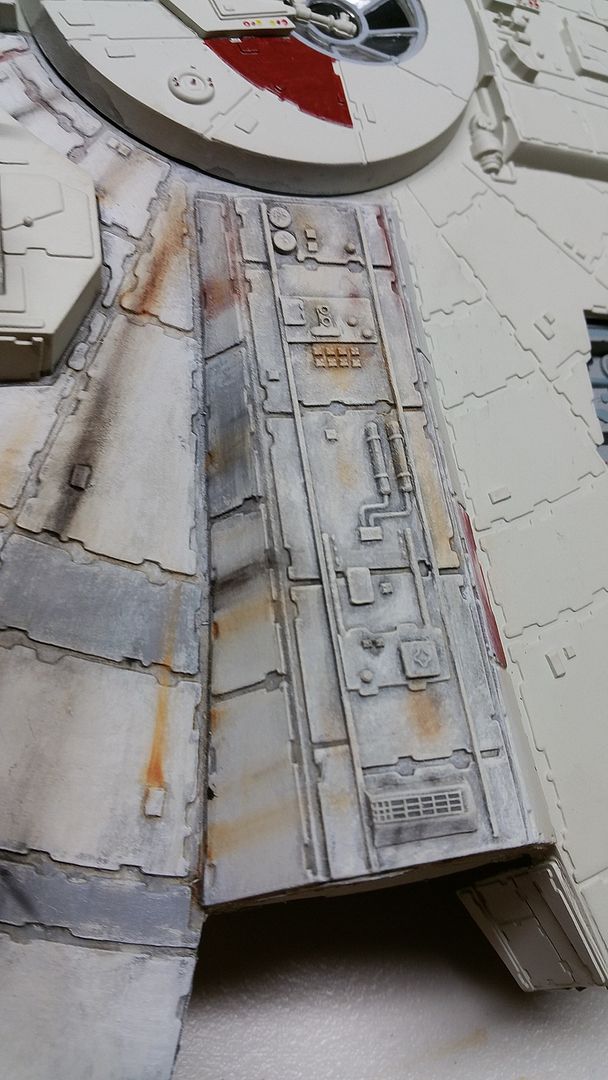 Charles R.
Building: DeAgostini Millennium Falcon...hasn't built a model since 1996...this is gonna be interesting!!
|
|
|
 Rank: Beginner Level 3  Groups: Registered
Joined: 28/05/2015 Posts: 26 Points: 78 Location: Oklahoma
|
Actually I don't think it looks overdone at all... especially for the scale of the model. And like you said, this is great practice for the DeAg!
|
|
|
 Rank: Semi-Pro Level 1   Groups: Registered
Joined: 20/05/2015 Posts: 51 Points: 156 Location: Cary, NC
|
|
|
|
 Rank: Semi-Pro Level 2  Groups: Registered
Joined: 09/06/2015 Posts: 76 Points: 228 Location: Lancaster, CA
|
Charles, Looks like fun.  I should have 5-8 also within the next few days. Is it all the final parts to complete flight deck? Tamiya 1/32 P-51D, Revell 1/32 Bf 109G-6 x2 1/32 P-51B, 1/32 Trumpeter Bf109K-4, 1/32 Hasegawa Bf 109E, Testors 1/32 F-117, RMF 1/35 Tiger 1
|
|
|
 Rank: Semi-Pro Level 1   Groups: Registered
Joined: 20/05/2015 Posts: 51 Points: 156 Location: Cary, NC
|
Got an email yesterday that my 3rd shipment has been processed! Really hope it arrives before I go on vacation in a few weeks. Also, I purchased the Hasbro Rebel packaging Millennium Falcon and the Hasbro X-Wing that I am going to use for practice models. REALLY impressed with the mold for the falcon. It needs a few changes and additions to make it really accurate but its cool. I will post some more pics later today. Charles R.
Building: DeAgostini Millennium Falcon...hasn't built a model since 1996...this is gonna be interesting!!
|
|
|
 Rank: Semi-Pro Level 1   Groups: Registered
Joined: 20/05/2015 Posts: 51 Points: 156 Location: Cary, NC
|
Got a few updates! Got my fiber optics in the mail. Can't wait to start putting these in! 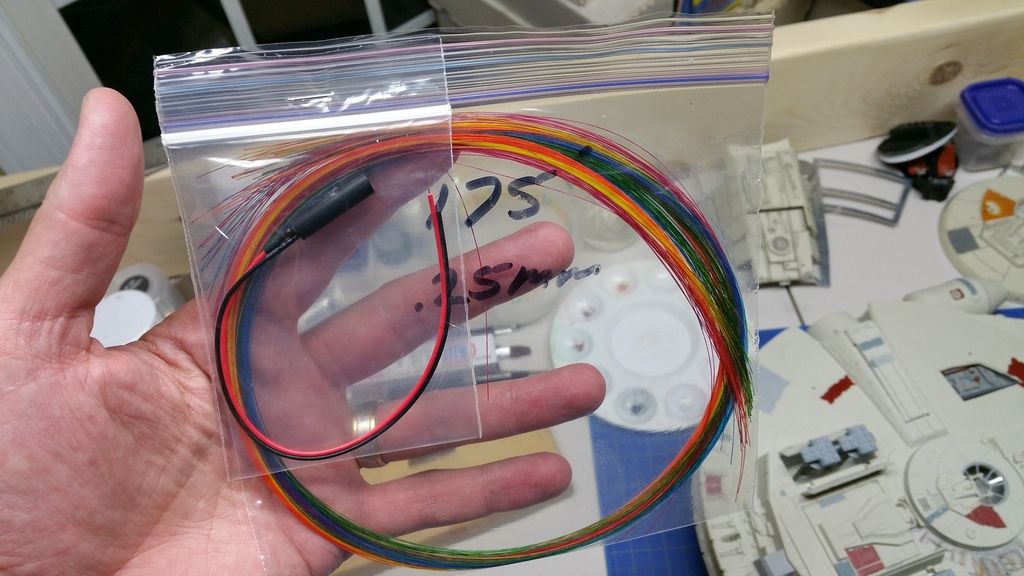 Put my cockpit together just to see what it will be like. 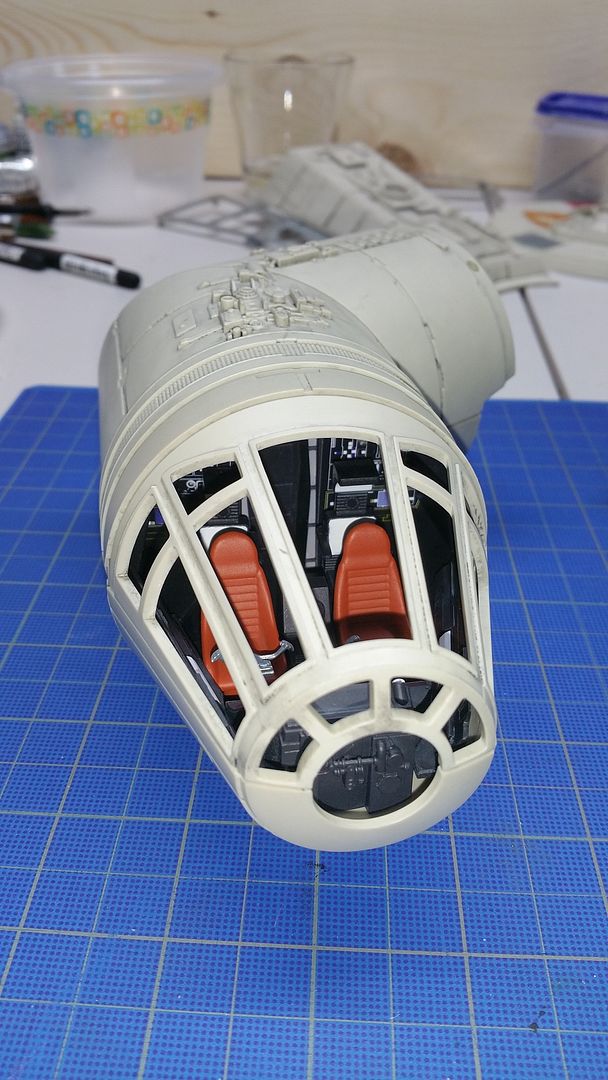 Charles R.
Building: DeAgostini Millennium Falcon...hasn't built a model since 1996...this is gonna be interesting!!
|
|
|
 Rank: Semi-Pro Level 1   Groups: Registered
Joined: 20/05/2015 Posts: 51 Points: 156 Location: Cary, NC
|
Ok I did a 2nd attempt at weathering and I think this time it turned out better. The non-heavily weathered areas aren't quite as dirty looking which adds contrast between it and the weathered areas so I think it looks better. Let me know what you think! This is before doing any real work. 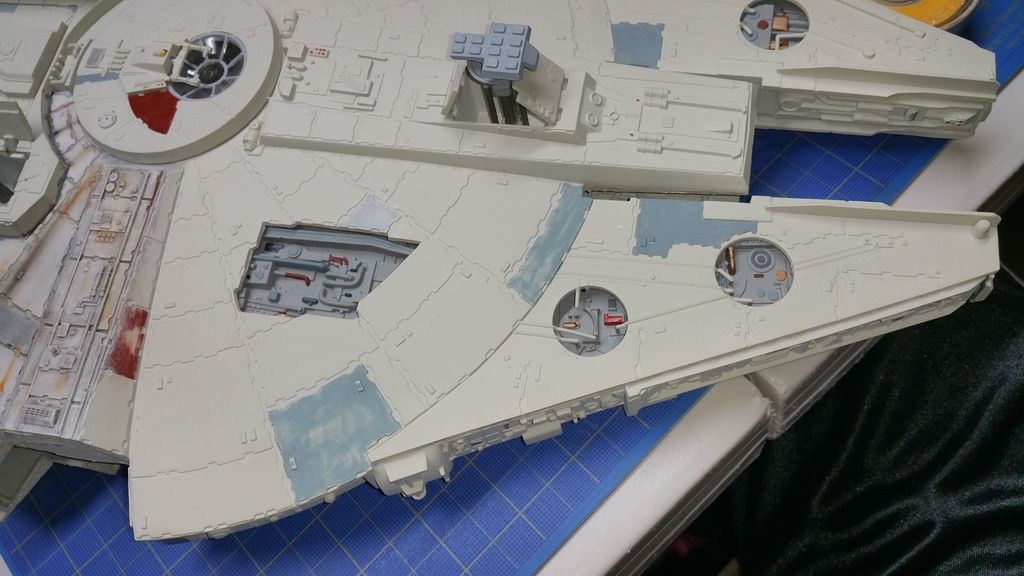 First pass on adding some dry-brushing to the panels to give them some variation. 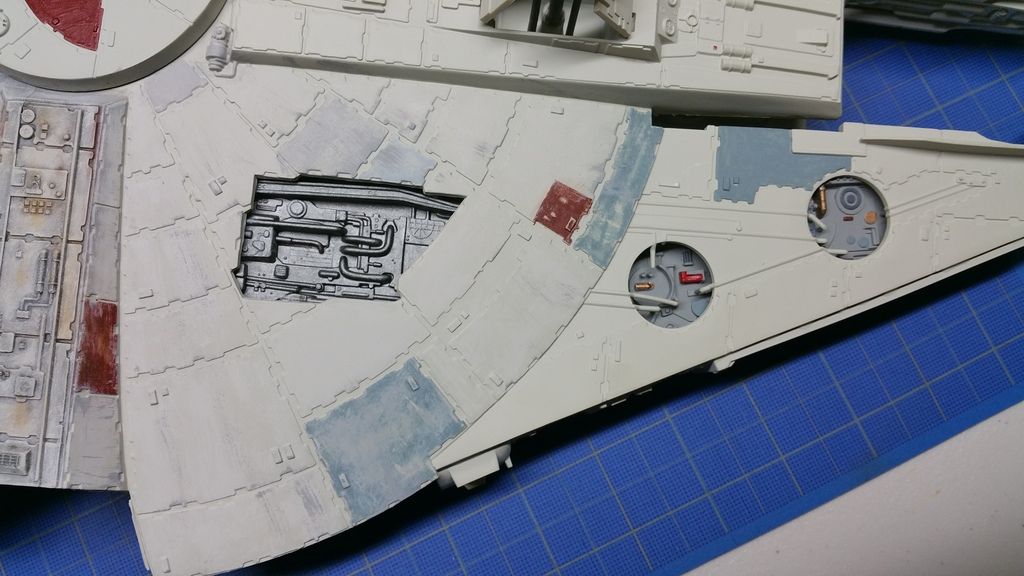 Added a wash using Nuln Oil and did a pass on more dry-brushing over it with a base coat color. 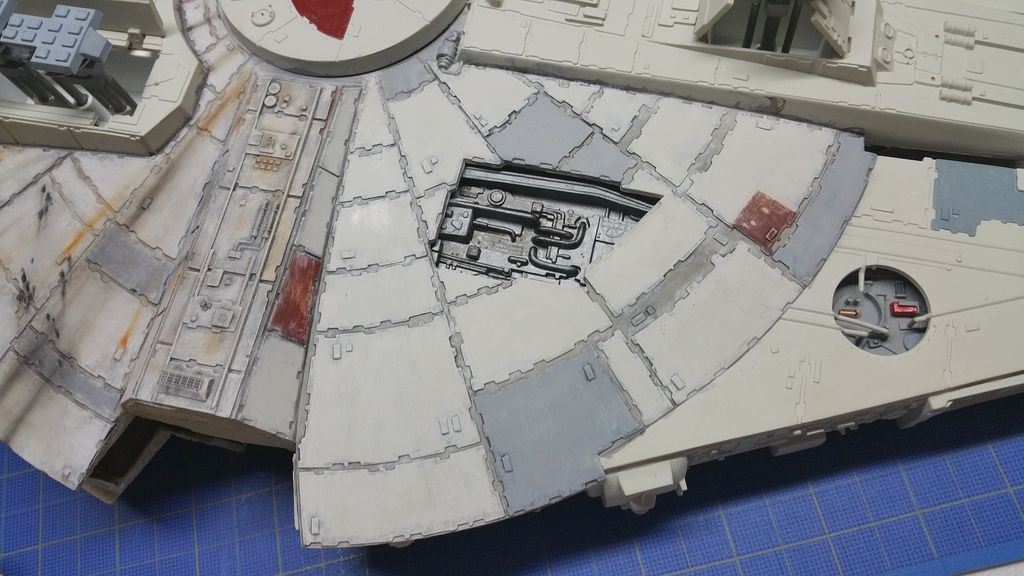 Here's a image of it mostly finished. 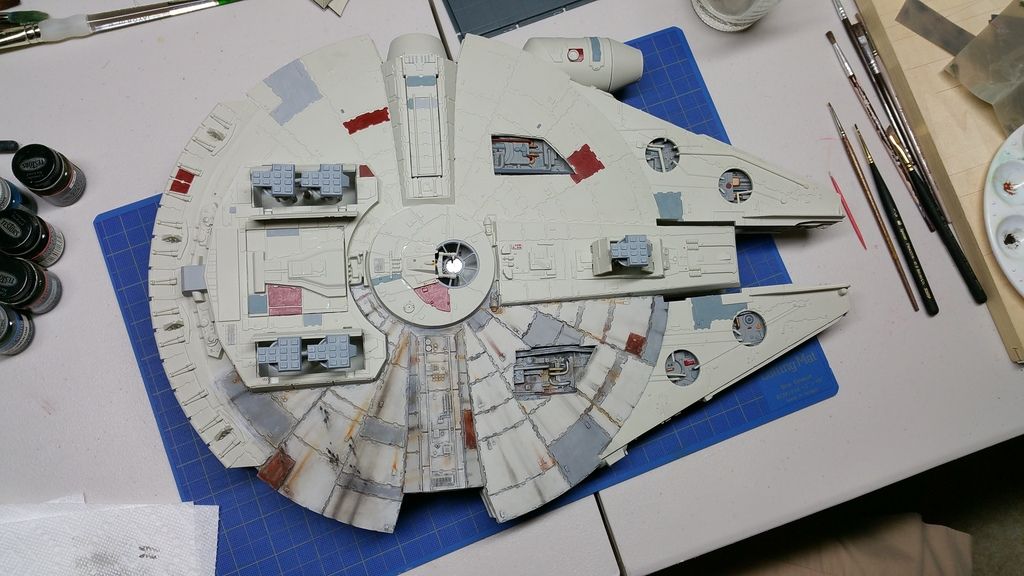 A couple closeups of a few panels I really liked. 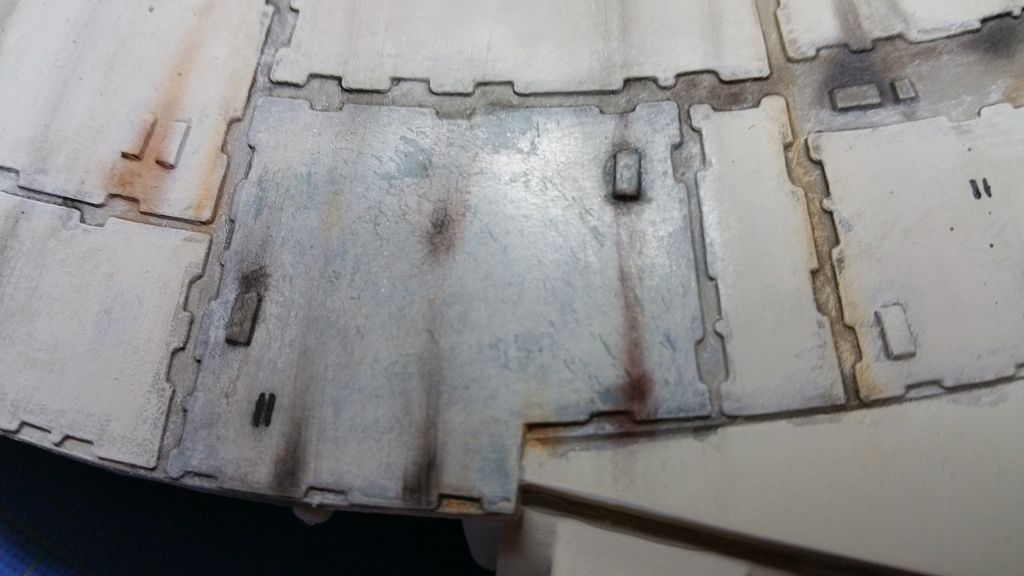 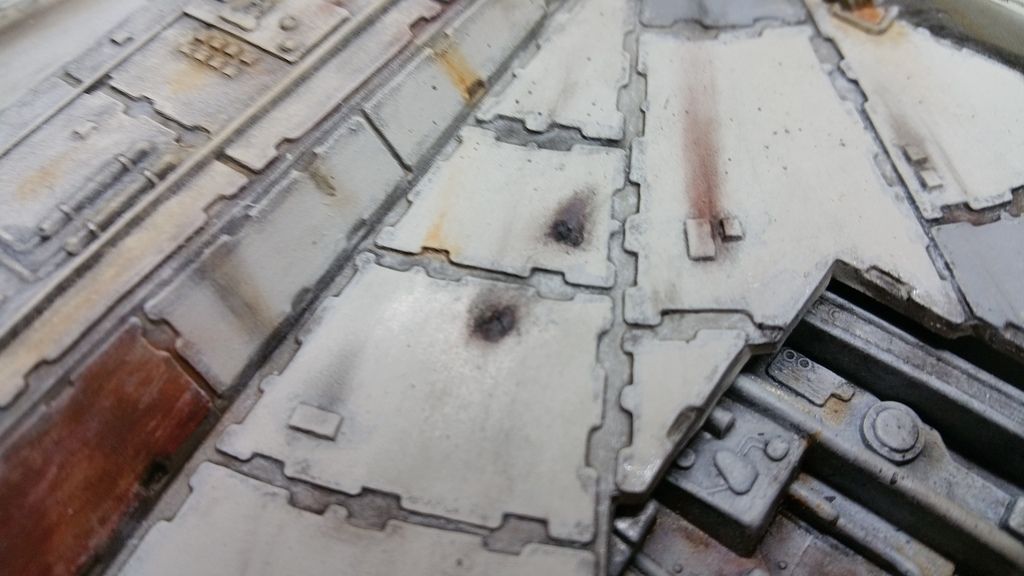 Heres a top down that shows the 2 passes I did side by side. 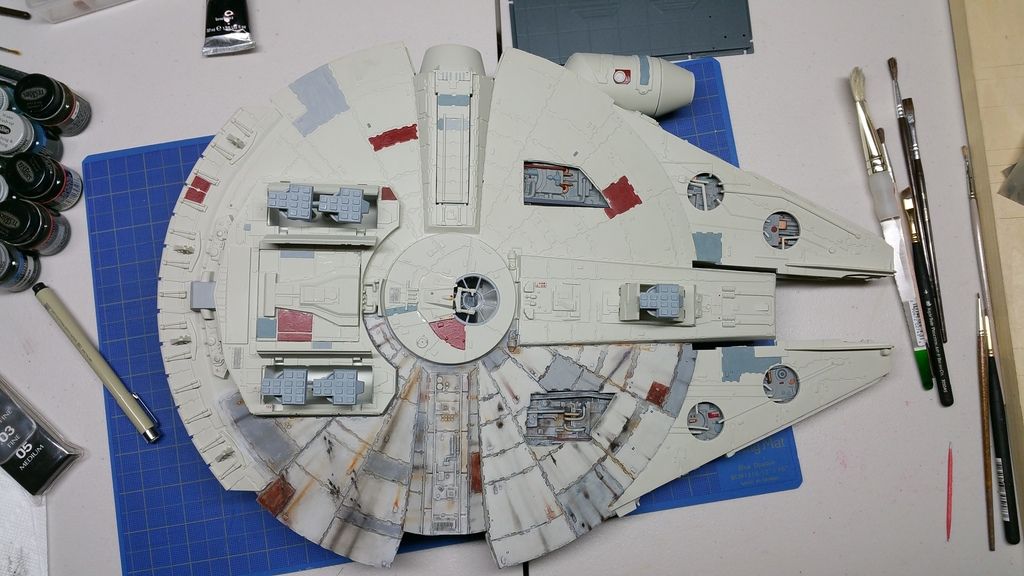 Charles R.
Building: DeAgostini Millennium Falcon...hasn't built a model since 1996...this is gonna be interesting!!
|
|
|
 Rank: Semi-Pro Level 1   Groups: Registered
Joined: 20/05/2015 Posts: 51 Points: 156 Location: Cary, NC
|
Also more updates!! This one is a bit more exciting!! I have an awesome co-worker who has a nice 3d Printer and he has been generous enough to allow me to use it to my bidding!! So since I wanted to do a Hasbro Falcon Conversion as a test bed for learning alot of the tricks I will need for the DeAgo Falcon, I decided to model a few of the parts for the Hasbro Falcon that I will need. And here are the results as they currently stand. This is a kit I made for the exhaust ports on the engine. I wanted to add depth to them so I modeled a vent casing and a vent grate that will sit on top of it. I haven't cut into my Falcon yet to see if it will fit perfectly but all signs are showing that it will. Best part is I can tweak this and export a new one in like 30 min! 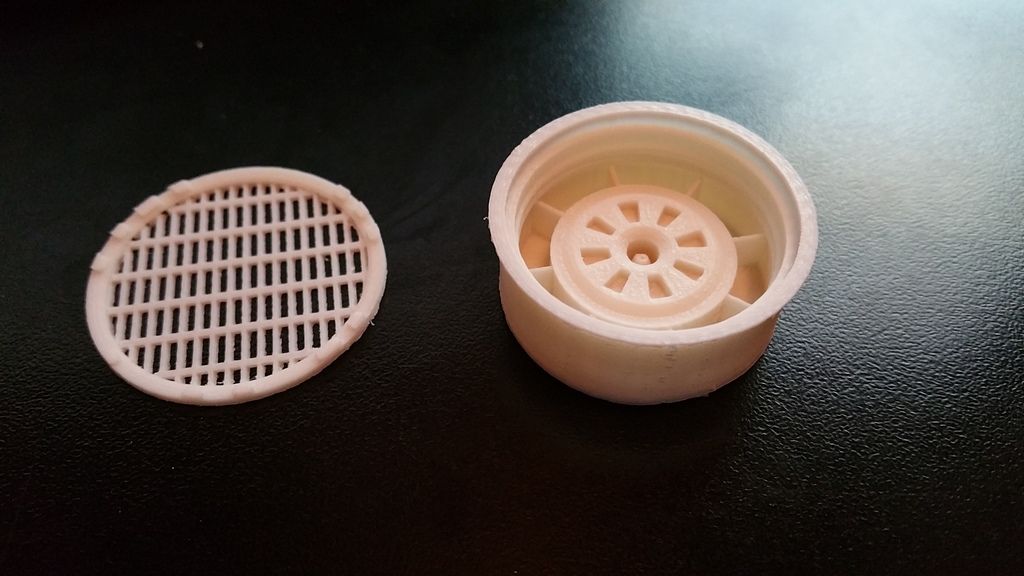 Check out the slants in the vent grate!! 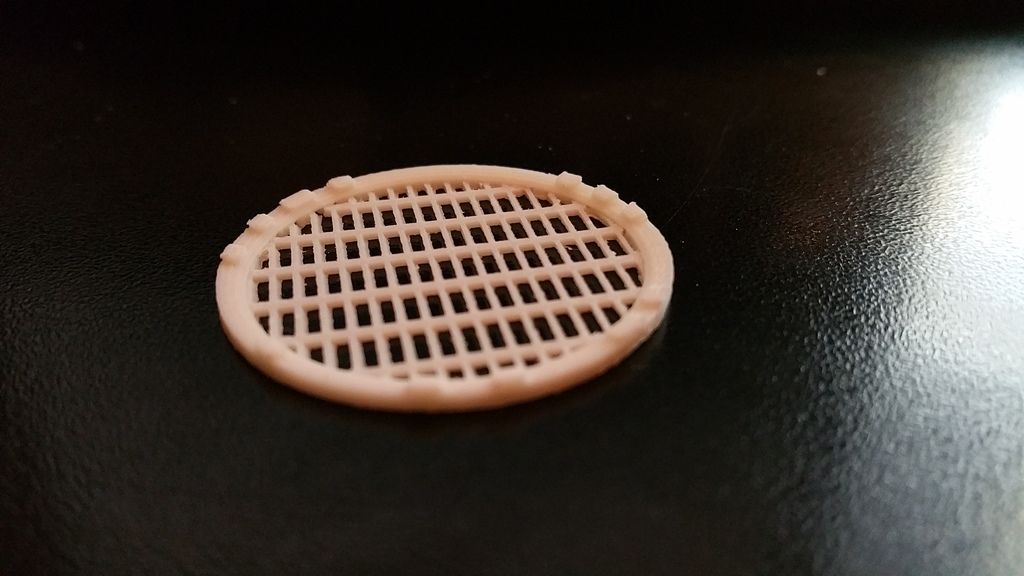 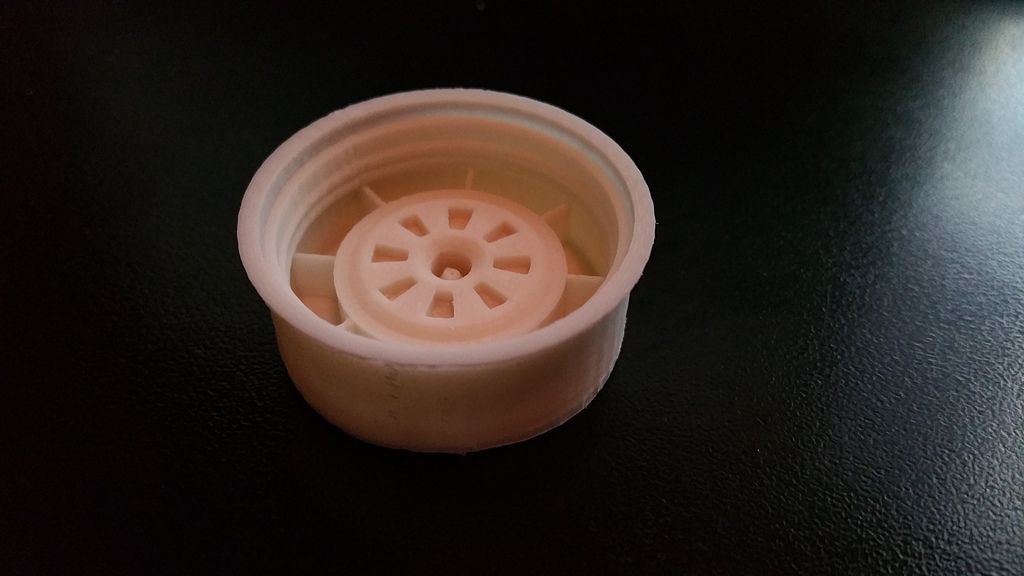 This one is to fill the empty space on the outside of the front left mandible where there is just a sticker in the model. I didn't have it complete when I had access to the printer today so I just printed out what I had. I have finished the rest tonight and plan to print the entire thing tomorrow. Can't wait to see how it turns out!! 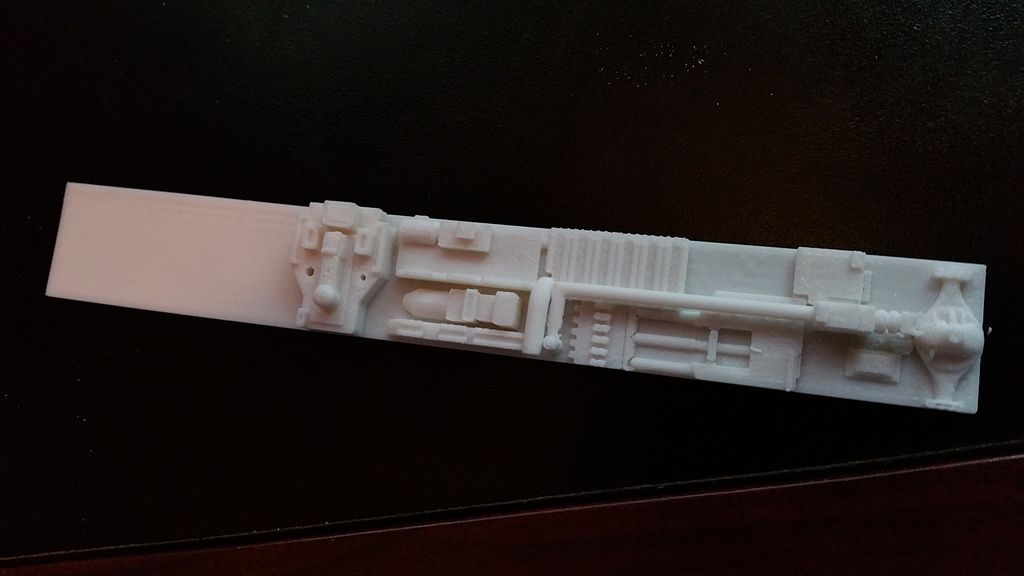 And then just for fun, I printed a DeAgostini Falcon scale (1:43) Han Solo DL-44 Blaster!! Put it by a 1x2 Lego plate for scale. I honestly can't believe it turned out as good as it did! Once I make a proper model for this and not just scaling down the one I have it will work much better! 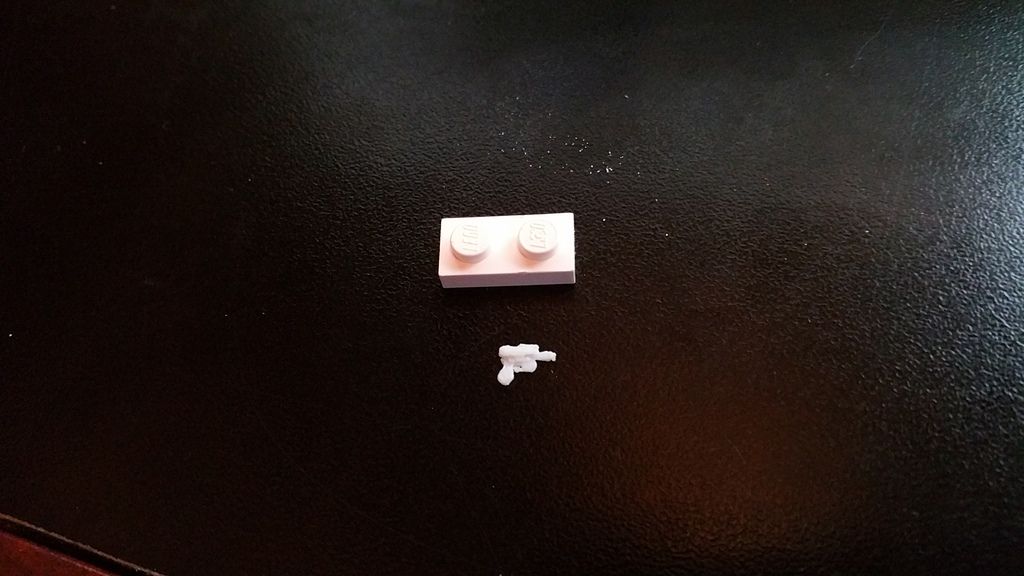 Charles R.
Building: DeAgostini Millennium Falcon...hasn't built a model since 1996...this is gonna be interesting!!
|
|
|
 Rank: Beginner Level 2  Groups: Registered
Joined: 11/07/2015 Posts: 10 Points: 30
|
Love your weathering practice so far! Isn't it amazing what just a little muck does to the model to make it look that much better? Ok spill the beans on the 3D printer! Details please! The print resolution looks very nice! I was thinking of the immortal words of Socrates who said... "I Drank What?!?!"
|
|
|
 Rank: Semi-Pro Level 1   Groups: Registered
Joined: 20/05/2015 Posts: 51 Points: 156 Location: Cary, NC
|
Aegis159 wrote:Love your weathering practice so far! Isn't it amazing what just a little muck does to the model to make it look that much better?
Ok spill the beans on the 3D printer! Details please! The print resolution looks very nice! Thanks I am fairly happy with it also. Need to figure out a few more tricks and how this translates to the DeAgo Falcon but I have time! So the 3d prints are from a guy I work with. He has a printer at his house and he let me borrow it for a few days to try some stuff out. Its pretty amazing! You don't realize how much detail you get until you discover that those horizontal bars on the engine grate are only 0.8mm thick!! Pretty rad! Right now I am designing and printing out all of the missing parts needed to complete the Hasbro Falcon and convert it into a fairly accurate studio replica. As part of that I am also designing and printing out a lighting bay that will fit in the back and allow me to make the engines actually glow. Once I have it functional and printed out I will update with images and details. I am using as much reference as I can find to model the parts that I need so they are as accurate as possible to the 32" model but I am taking a few liberties. Like for example the 32" model doesn't have actual grating on the engine vents or internal components. But the 5" model does. I don't like that the 32" didn't have it so I am bringing some of that detail in from the 5" model to round it out. Charles R.
Building: DeAgostini Millennium Falcon...hasn't built a model since 1996...this is gonna be interesting!!
|
|
|
 Rank: Semi-Pro Level 1  Groups: Registered
Joined: 13/06/2015 Posts: 66 Points: 198 Location: South Dakota, USA
|
I love the idea of adding depth to the exhaust vents at the back. I don't know what those look like on the DiAgo kit, but if they're flat, I'm probably going to have to do something like this. That's going to look so great.
|
|
|
 Rank: Semi-Pro Level 1   Groups: Registered
Joined: 20/05/2015 Posts: 51 Points: 156 Location: Cary, NC
|
Dan Kramer wrote:I love the idea of adding depth to the exhaust vents at the back. I don't know what those look like on the DiAgo kit, but if they're flat, I'm probably going to have to do something like this. That's going to look so great. Just in case anyone is interested, I am considering selling these parts to make some money to maybe buy my own printer so I am not borrowing someone elses. So if anyone is interested I might consider it. If I can find enough interest. Charles R.
Building: DeAgostini Millennium Falcon...hasn't built a model since 1996...this is gonna be interesting!!
|
|
|
|
Guest
|